#Acrylic painting tutorials online
Explore tagged Tumblr posts
Visit Tumblr Blog
Explore Tumblr blogs with no restrictions, modern design and the best experience.
Last Seen Tumblr Blogs


Fun Fact
Total funding amounts to $125.3M.
Text
Website : https://www.sandraboorne.com/
Address : Montreal, Quebec, Canada
Sandra Boorne is a Canadian semi-abstract expressionistic artist based in Montreal, specializing in acrylic, mixed media, and oil paintings. Inspired by nature, her artwork features vibrant colors and unique designs, blending abstract elements with the natural world. Sandra offers original paintings, watercolors, and commissioned art pieces, with free shipping available in Canada. Her art is showcased in exhibitions, available online, and represents a perfect blend of creativity and storytelling for art enthusiasts and collectors.
Pinterest: https://www.pinterest.com/sandraboorne/
Facebook: https://www.facebook.com/artistsandraboorne
Twitter: https://x.com/sboorne
LinkedIn: https://www.linkedin.com/in/sandra-boorne-55a45259/
Instagram: https://www.instagram.com/sandraboorne
Keywords : Abstract floral painting Acrylic paintings for sale Textured oil paintings Large acrylic wall art Original abstract paintings Semi-abstract art Contemporary mixed media painting Contemporary art Montreal Online art store Canada Nature-inspired wall decor Modern oil paintings for sale Modern acrylic artwork Acrylic painting tutorials online Abstract layering techniques Abstract art inspired by nature Online art gallery Canada Canadian abstract artist Textured acrylic wall art Painting workshops for beginners Online watercolor art classes Montreal art workshops Canadian online art courses Affordable original art Canada Mixed media artwork Canada Oil paintings inspired by nature Montreal visual artist Unique art commissions Custom paintings Montreal Vibrant floral paintings Semi-abstract expressionistic art Watercolor art collections Bold colorful paintings Commissioned abstract art Eco-friendly art designs Artistic storytelling in paintings Montreal abstract artist Canadian semi-abstract painter Local art exhibitions Montreal Quebec mixed media art Custom art pieces Canada Fine art Montreal gallery Nature-inspired art Quebec Montreal-based artist portfolio Canadian art for interiors Affordable Canadian art pieces Semi-abstract floral designs Vibrant art for home decor Unique acrylic collages Layered mixed media paintings Art for collectors Canada Giftable art Montreal Vibrant paintings for interiors Commissioned art for offices Custom home art decor Paintings for modern living spaces Art for home staging Montreal Personalized nature-inspired artwork Art for nature lovers Canadian contemporary art buyers Semi-abstract nature paintings Unique mixed media techniques Acrylic and oil painting blends Bold textured art pieces Modern semi-abstract collections Handcrafted abstract art Online commissioned paintings Nature-inspired abstract collections Affordable art shipping Canada Custom art for global buyers Montreal artist studio online Semi-abstract art workshops Decorative art for homes Nature-themed acrylic paintings Canadian art community online Storytelling through abstract art Abstract art lessons Canada Art exhibitions in Quebec Montreal creative art sessions Nature-inspired art workshops Visual art workshops Montreal Vibrant abstract paintings for sale Custom semi-abstract home decor art Canadian mixed media artists online Montreal-based affordable art commissions Nature-themed large wall art decor Unique acrylic abstract paintings Canada Colorful modern oil paintings for collectors Eco-inspired contemporary art collections Affordable Canadian wall art for interiors Montreal art exhibitions and online galleries Sandra Boorne abstract art Sandra Boorne artist Montreal Sandra Boorne mixed media paintings Sandra Boorne nature-inspired art Sandra Boorne original artwork Sandra Boorne Canadian art collections Sandra Boorne acrylic wall art Sandra Boorne commissioned paintings Sandra Boorne semi-abstract style Sandra Boorne online art store
#Abstract floral painting#Acrylic paintings for sale#Textured oil paintings#Large acrylic wall art#Original abstract paintings#Semi-abstract art#Contemporary mixed media painting#Contemporary art Montreal#Online art store Canada#Nature-inspired wall decor#Modern oil paintings for sale#Modern acrylic artwork#Acrylic painting tutorials online#Abstract layering techniques#Abstract art inspired by nature#Online art gallery Canada#Canadian abstract artist#Textured acrylic wall art#Painting workshops for beginners#Online watercolor art classes#Montreal art workshops#Canadian online art courses#Affordable original art Canada
2 notes
·
View notes
Text


#drawing ideas#drawinyourstyle#drawing#painting#clip studio paint#acrylic paint#rock#artists on tumblr#artwork#art#my art#original art#color aesthetic#colorful photography#color photography#view#nice view#beautiful views#diy projects#diy craft#diy#diy ideas#diy tutorial#tutorial#online tutoring#beautiful photos#photooftheday#photoshoot#photoblog#blog
11 notes
·
View notes
Text
hobbies to consider for 2025
・゜゜・.⋆。°✩ ⋆⁺。˚⋆˙‧₊✩₊‧˙⋆˚。⁺⋆ ✩°。⋆.𖥔. ᗢ₊˚✧ ゚.
painting
gouache, watercolor, acrylic… there’s so many things for you to try and it’s super easy to get started!
clay
sculpt rlly cute charms, dishes, and whatever else!!
scrapbooking
great way to look back on memories and lets you get rlly creative with it
journaling
my personal favorite ♡. so many different ways to go about it. you can have a bullet journal, book journal, cooking journal, movie journal. or, simply a diary to write about your thoughts and days. you can decorate your spreads with stickers and washi tape or keep it simple.
crocheting
there are so many things you could make, from tops to plushies. there are a lot of cute tutorials and free designs available online!
baking
this one may or may not be as easy as the other ones I’ve mentioned depending on the recipe but learning how to cook or bake makes for a great New Year’s resolution!
puzzles
there are a ton of different puzzles out there ranging from different skill level, so you can challenge your brain as much as you’d like!
sewing
whether you want to learn how to hand sew or use a sewing machine, to tailor clothes you already have or make your own pieces, sewing can be a fun and impressive skill to have.
playing an instrument
guitar, violin, piano, clarinet, drums— there are a ton of options for you to choose from and plenty of online resources :)
reading
reading can be a great way to learn more or be a better form of entertainment compared to social media and television. whether you want to educate yourself on different topics, discover a new genre of novels, or are interested in comics— reading is one of those hobbies where there’s something in it for everyone, regardless of what they’re looking for.
jewelry making
bracelets or necklaces, whatever it is you want to make the materials are easy to find, as well as tutorials and references.
bicycling
having an outside hobby is very important imo, and bicycling is one of those hobbies that lets you be as relaxed or intense as you’d like.
yoga
I think this is a great one, with yoga the focus doesn’t have to be looking a certain way or going super hard— it’s just about relaxing. there’s no pressure.
#it girl#self improvement#wonyoungism#that girl#pink#pink pilates princess#dream girl life#dream girl#becoming her#it girl lifestyle#wonyoung motivation#the wizard liz#wellness girl#health and wellness#healing girl era#hyper feminine#self help#self care#self improvement tips#clean girl#motivation#hobbies#new year#becoming that girl#dream life#productivity#pinterest girl#self confidence#glow up#leveling up
703 notes
·
View notes
Text
Tutorial on how to make patches, because DIY should be accessible and inexpensive, and u shouldn't have to turn to fast fashion websites
Materials Required:
An idea
Fabric
Paint
Needle and thread
How do I procure these items?
Idea
You're in luck, ideas are very easy to have, at no monetary expense. If you don't know exactly what you want to put on a patch, you can type "punk patches" into tumblr/pinterest/google/etc and note down anything you like
Fabric
This is where most people start to worry - most of us don't sew and don't have an arsenal of fabric at our fingertips. But fear not! There are 2 options here
If you have money, you can buy squares of fabric from a craft store. Joanns Fabrics has bundles of quarter-yards for $10. Just one quarter yard can yield you dozens of patches
If you don't have money, don't be discouraged! You don't need to spend anything if you don't want to. Do you have an old shirt you don't wear? Pants? Bandana? Underwear? Bedsheets? That's usable fabric right there!!
Paint
The real bust of the list. Unfortunately, getting paint isn't as easy as fabric can be. You don't need anything fancy, mind you, any type of fabric or acrylic paint will work.
Small tubes of paint and paint pens can fit in your pockets. I bring this up for no reason at all...
Alternatively, if you go to school, consider asking an art teacher if you can borrow some. You could also ask friends and family who may paint.
Needle and thread
Once you make a patch, you need something to attach it with. Really, you can use anything -- glue, safety pins, etc -- but if you're attaching it to clothing, sewing is your best bet. Consider these methods of getting the needed items
Go to a craft store. Small starter sewing kits, packs of needles, or spools of thread are typically pretty cheap. If you can't spend money, though, consider that these items are also small, and can fit easily in pockets
Ask a grandma or other family member who may sew to borrow some supplies. Grandmas love it when younger people sew
Again, if you go to school, ask an art or theater teacher if you can borrow supplies
You can also use dental floss instead of thread, and it's actually recommended by some punks due to it being more durable than thread.
If you don't know how to sew, there are lots of online tutorials on how to do simple stitches!
But what if I'm not good at DIY?
Ever heard the phrase "practice makes perfect"? No one is good at anything the first time they try it. Don't let amateur-looking attempts stop you from trying.
Additionally, DIY isn't a contest. If you go to shows or alternative spaces irl, no one will care if you're obviously new to it.
Now go make patches and have fun!!!
#punk#diy#baby punk#punk patches#punk tips#diy or die#made this on a whim cuz ive been thinking about it
138 notes
·
View notes
Text

Hello! I wanted to share my process of how I made my Easter Pony! She is my second ever custom and she made all the trouble I had with the first one seem like a walk in the park in comparison ಥ_ಥ Let's begin!
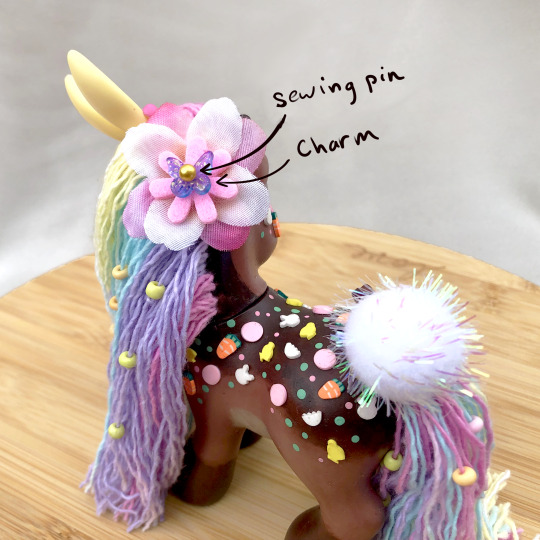
DISCLAIMER: Custom ponies like this one are not to be played with by children nor made by children. This pony was made with the use of nail polish remover (acetone) which is toxic. You need to wash your hands throughly after use and use in a well ventilated area. This pony was also made with sharp tools such as an xacto knife, sewing pins, rehairing needles, and an awl.

First, the concept art! Trial and error caused her to look a little different than the concept art but I still love the end result!
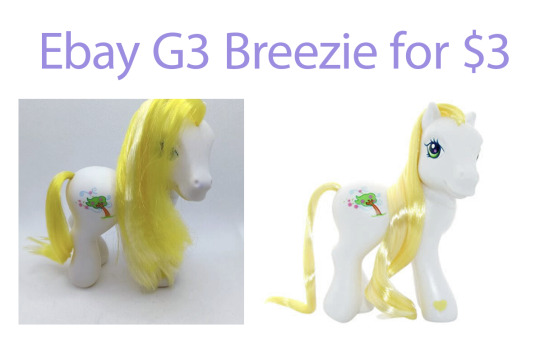
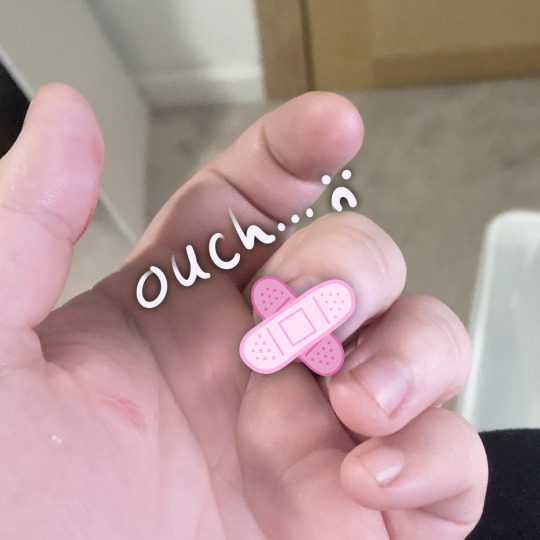
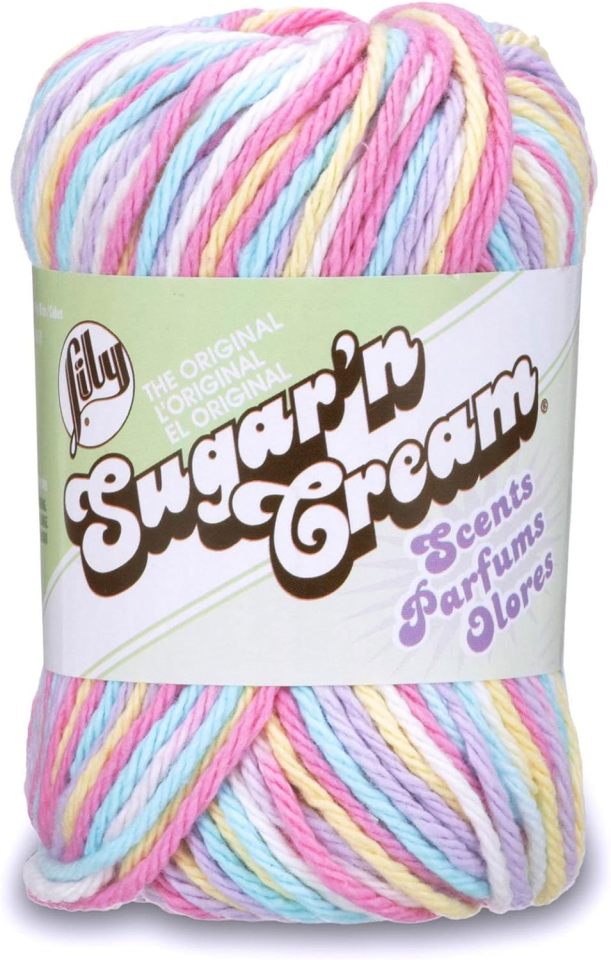
I wanted to start with a white base to give myself a clean canvas for dyeing so I got this G3 Breezie off Ebay for only $3. I decided to first remove her mane and tail which requires removing the head. If you know anything about G3 pony customzing, you know their heads are difficult to get back on once they come off. Even when you run them under warm/hot water. So to get it back on for dyeing, I tried trimming a little excess of vinyl off the neck ring with my xacto knife. It slipped and got me right under my nail! Bad omen for what's to come!
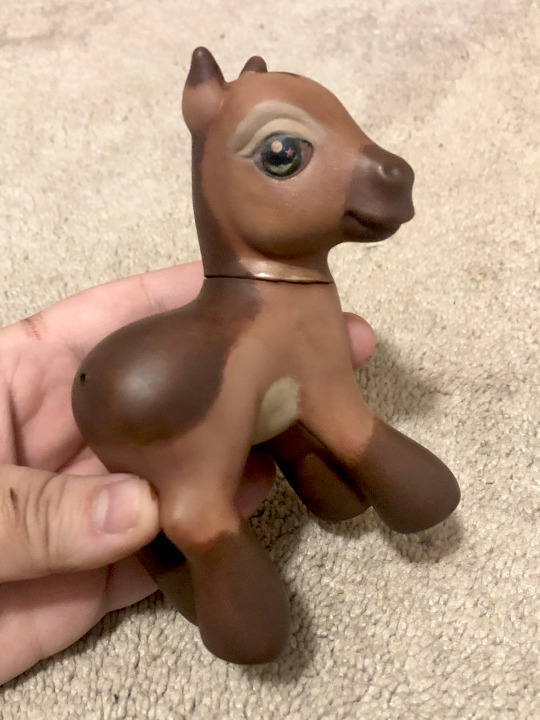
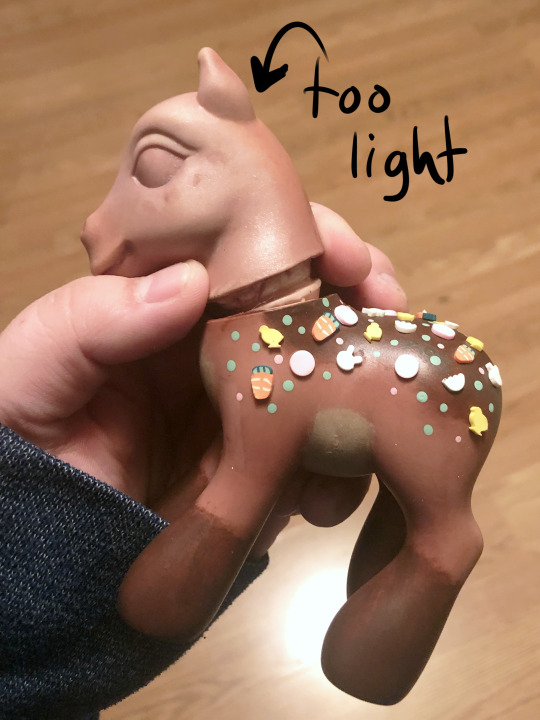
After getting her prepped (removing her mane and tail, cleaning her, using acetone (nail polish remover) to remove her cutie mark) she was ready for a dye bath! I used Rit DyeMore as regular Rit Dye won't dye the vinyl material that ponies are made of. This was my first ever time dyeing anything that wasn't fabric so I was thrilled when she came out this warm rich brown! So pretty!

I read online that dyed ponies will leach dye onto other ponies if they touch, so I wanted to try and prevent this as much as possible with some matte sealer. Lesson #1: Even though she was dry, the matte sealer reactivated the dye! The smallest touch left a print! :(

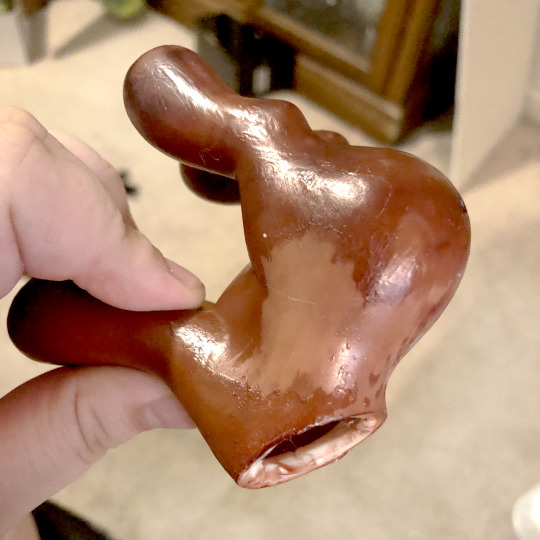
I pushed forward! And tripped immediately after! I thought, "Surely matte Modge Podge will seal her just that much more" and to my dismay, the Modge Podge kept every brush stroke I made when it dried!! She looked like a leather hand bag! ˚‧º·(˚ ˃̣̣̥᷄⌓˂̣̣̥᷅ )‧º·˚ I learned later you can buy matte Modge Podge spray online but all I had was the type you brush on to your surface.
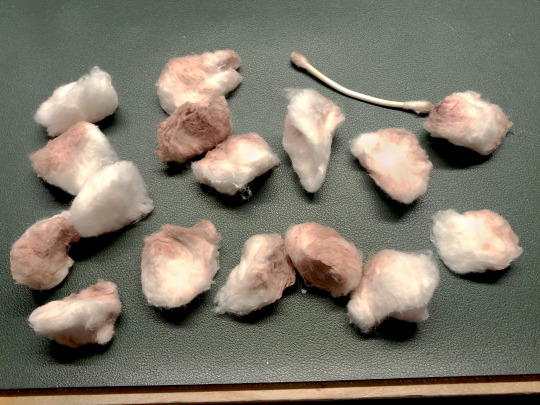
Thankfully, with the help of sixteen cotton balls and a q-tip with acetone, I managed to remove all the sealer but she was no longer that nice rich brown. Oh well I still loved her!
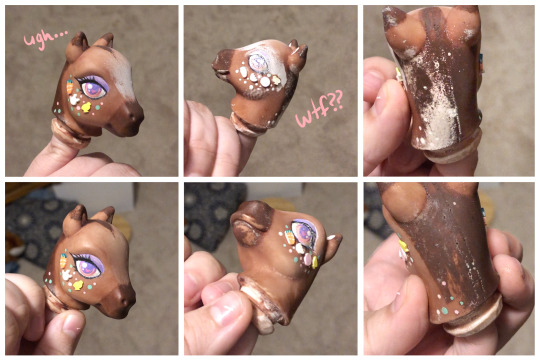
And whoever said the paint will protect the eyes from the dye has clearly never dyed a dark pony! Her eyes were so brown after this lol


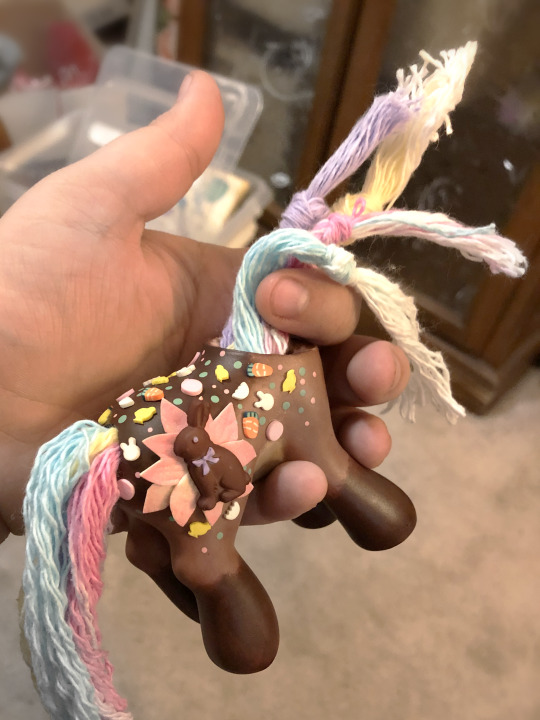
Painting, adding of polymer clay easter themed confetti, and adding her 3D chocolate bunny cutie mark went great! It was all going well until the eyes.
I had never fully painted pony eyes before so the first attempt was pretty bad. Not even my multiple attempts at glitter and using clear nail polish as a cheap gloss on the eyes could save them.
It was so bad that I almost didn't take any pictures but when I went to seal her head, this weird white powder covered half of her face?? I had never seen this before and it freaked me out thinking I just ruined her. I managed to get it off with a cotton ball and some acetone but her paint was fully damaged.
Turns out this was caused because I didn't shake the can of sealer well enough. I needed a break....
While I took a break for a few days, I decided to watch tutorials on how to paint doll eyes and learned that it's actually pretty common to use high quality watercolor pencils; either Faber Castell or Derwent (which is what I ended up buying).
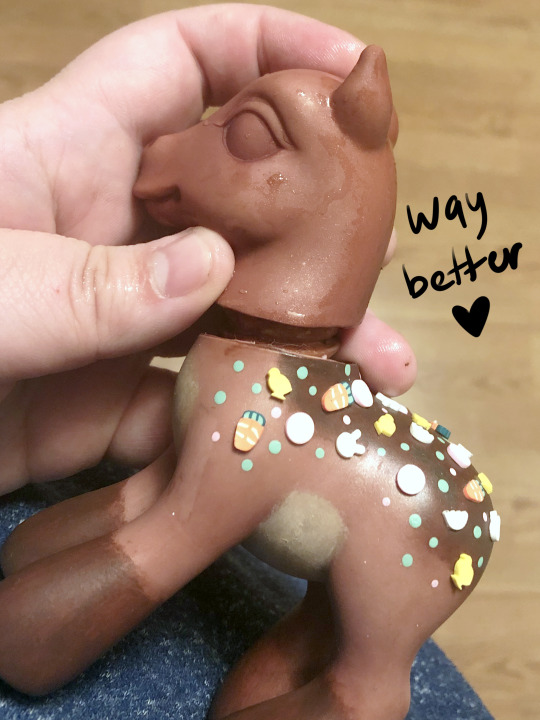
When I came back, I made the hard decision of removing all the paint and decorations from the head and starting over. Hours of work gone but it was so worth it! 🩷 Removing the paint with acetone ended up making her head lighter than her body so I had to redye her head lol. This time I mixed Derwent pencils with acrylic paints for her eyes.


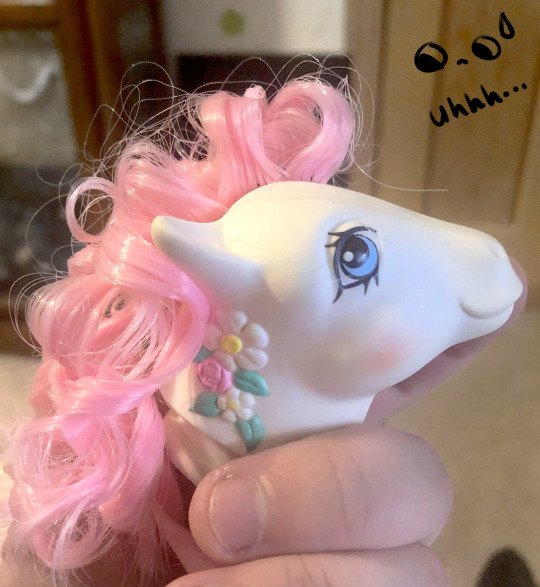
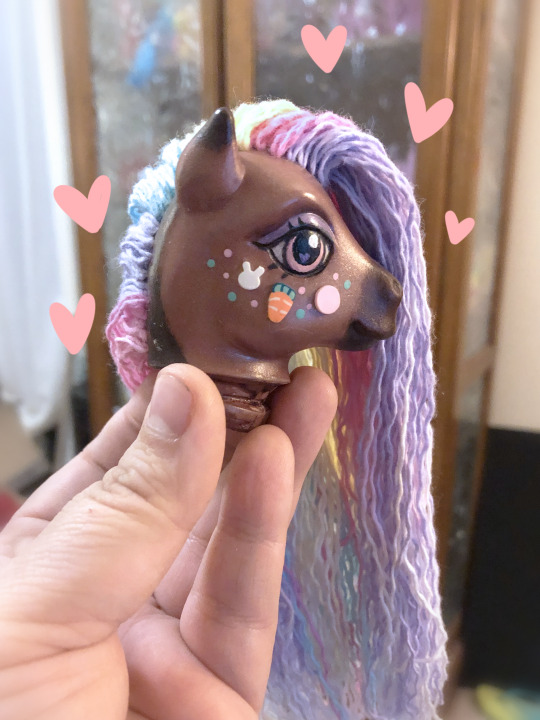
Time for the hair! I've never done curls before and my original plan was to buy curly hair online but it's so hard to find in the color and curl size I wanted.
So my second idea was to buy small curlers to use on regular nylon doll hair bought from ShimmerLocks on Etsy. But when I tested them out on poor Flower Bouquet it looked so bad ಥ_ಥ
I discovered a Youtube channel you may know called Dollightful where in one of her Stock Box videos she used yarn that she unraveled to make super cute tight wavy hair for a doll. It was a perfect solution! It looks so good but omg it was tedious haha! I used it for her tail too; sectioning off the colors hoping they'd stay separated (they didn't lol).
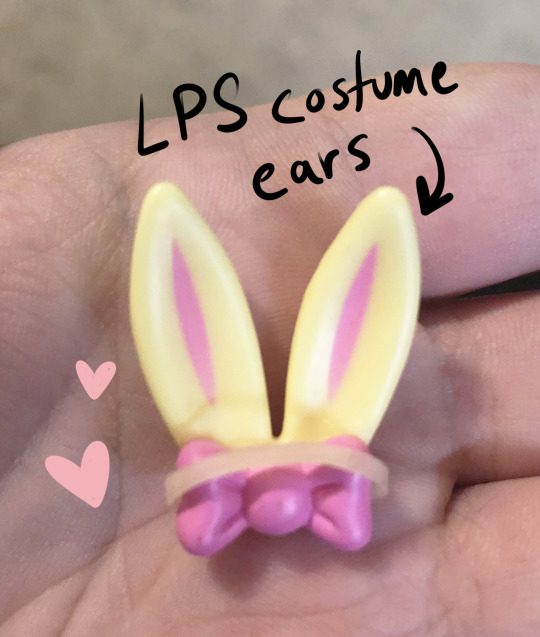
She's nearly complete! Time for small decorations! I tried so many different ears from air dry clay to stealing some from bunny decorations I bought at the store and nothing was working! But I had one last idea...
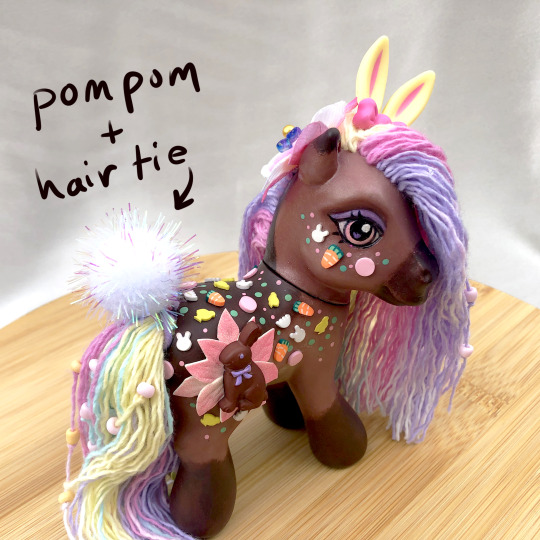
I gave these old Littlest Pet Shop costume bunny ears some use with a flat top sewing pin and some glue so now my pony has bunny ears! Yay!
I forgot it in the concept art, but I originally wanted to add flowers to her mane but I couldn't figure out how to do that without glue which I didn't want to do, too permanent, so I opted for some beads I had on hand. I didn't have any light blue so I made some with the use of acetone (nail polish remover in my case) and boom! Light blue beads! Then I washed them off so the acetone wouldn't damage anything :)
I used a gold topped sewing pin, a butterfly charm, a felt flower and two faux flowers to create a cute hair accessory!
Finally I sewed a hair tie to a puffball to give her a removable cottontail if I ever wanted to take it off.

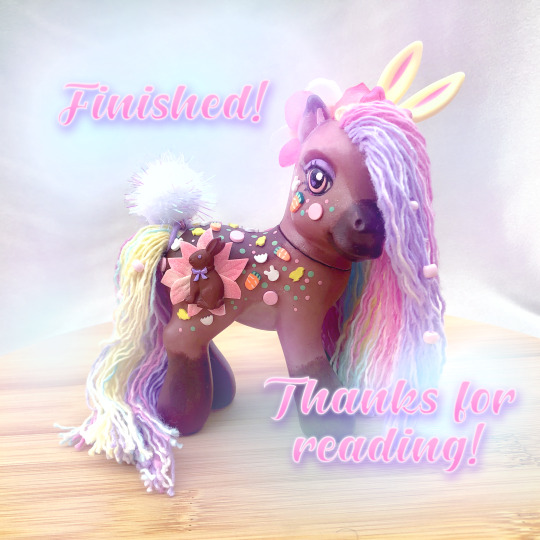
And DONE! She looks so good after so much time and effort! I worked on this girly for two weeks I think? She actually had a partner I designed but I've run out of time to make her :') Maybe next year? 👀 🩷🩷
#my art#art#horse#pony#equine#equine art#artist on tumblr#mlp#mlp art#mlp g3#my little pony g3#g3 mlp#custom pony#ooak#ooak doll#ooak mlp#ooak my little pony#custom mlp#my little pony#my custom ponies#easter#bunny#pastels#pastel rainbow#walkthrough#custom
209 notes
·
View notes
Text
Love at First Paint: A Beginner's Guide to Painting

"Almond Blossom" by Vincent van Gogh (1853 - 1890), Saint-Rémy-de-Provence, February 1890
Have you ever dreamed of being like Picasso or Vincent Van Gogh? If you do, you are looking at the wrong blog because I am far from them. But hey there! I'm Eden Amor, a freshman student and a self-taught artist who just loves to paint.
Art has been my passion since I was a kid, and as I grew older, I fell even more in love with it and started trying out different mediums and styles. But there's just something about painting that really excites me! I started with graphite, then moved on to colored pencils, and even dabbled in charcoal (although I never got around to using those charcoal pencils I ordered online). Finally, I found my true love in watercolors, and I've been obsessed with working with wet mediums ever since!
If you are a beginner in painting (like me, have been a skill of a beginner for years), you can enjoy my blog and get some tips that I learned from my starting journey. But if you are just interested in painting or in art generally, you can still read this blog.
Just a disclaimer: I am no expert and just a self-taught artist. Some things might work for me and not for you, and vice versa, so take this blog with a grain of salt.
LEARN ABOUT PAINTING
Since I am a self-taught artist myself, I never applied for workshops in drawing or painting. But most of my art knowledge is from YouTube tutorials, shorts, and IG reels (I have no TikTok, I don’t know why). I suggest learning about the basics before painting whatever you want because you’ll get disappointed after the result or wondering why everything is not working the way you wanted.
But before anything else, find the medium that you want. Mediums like acrylic, oil, gouache, and watercolor. There might be more but these four are some of the common wet mediums. One thing to address about these mediums is that they all have different properties and the techniques you’ll approach, the materials you’ll use, and the finish or outcome of the painting will depend on the medium.
MEDIUMS
Watercolor
My recommendation for anyone wanting to start painting with no experience is to use watercolors. The only things you need are watercolor paint and water. Unlike acrylic paint, which, although water-based, can get pretty messy and dries quickly, giving you little time to blend and touch up unless you use an acrylic medium called Retarder, which is a medium that you mix with the paint to slow its drying time, but will cost you more. So, as simple as watercolor can be, it's a great starting point for a beginner in painting.
However, watercolor painting can be tricky when it comes to water manipulation. The amount of water your brush holds affects in creating an even layer of paint. The drying time takes hours, especially if you are working in layers, if you paint the still-damp surface too early, you will ruin everything and you cannot cover it up since watercolor is transparent. That is why watercolor painting is done light-to-dark because dark colors cannot be covered by light colors. So planning ahead of time is suggested and should not paint with watercolor impulsively.
Acrylic
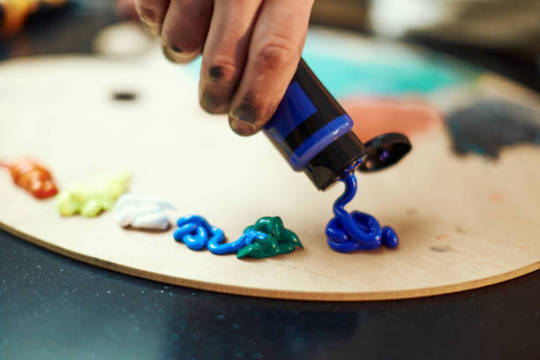
If you want to take the next level or just explore other mediums, acrylic painting is great for high coverage and textures. What watercolor doesn’t have but acrylic has is the ability to cover mistakes. In acrylic painting, you can paint on top of a painting, which is great especially if you change your mind or decide to start all over again, as long you coat more than one layer of white paint then you have a blank canvas again.
However acrylic paint, as said earlier, dries quickly which can be a disadvantage if you are a slow painter (like me) and especially if you are making a seamless gradient, which is very difficult to achieve and not as easy as you think. Since acrylic is water-based, cleaning is very easy with just water as long as the paint is still wet. Hardened paints can be peeled off easily but only on smooth surfaces, but if you got it on something like fabric, it will be forever on it.
Gouache

I describe gouache (pronounced as ‘goo-aash’) as a combination of watercolor and acrylic. Because like watercolor, gouache is water-activated paint, which means that dried paints can be revived and used the paint again when wet. And just like acrylic, gouache has high coverage and a thick consistency which is great for texture. But unlike acrylic, which has a glossy finish, the gouache creates a matte finish once the paint is dry and it also dries fast giving you no more time for creating flawless gradients.
I use gouache for mini projects, or creating art trends I saw online, but I don’t recommend it for painting a big major project since it can be smudge once wet, and as of now, I don’t know if there’s an appropriate varnish for gouache so if you have any idea please let me know in the comment section.
Oil
The most expensive of the four mentioned paint mediums is oil paint. However, oil paint creates the most realistic paintings. Despite its high cost, what makes me love oil paint is how smoothly the paintbrush glides, like butter. Blending oil paint is very easy, and you can create flawless gradients between colors. Oil paint has a very slow drying time. For small projects, such as those the size of half a sheet of bond paper, it can take days to weeks to fully dry and be ready for varnish. This slow drying time can be both an advantage and a disadvantage, depending on the complexity of your painting. It allows you to fix mistakes or make adjustments even the next day. Additionally, a small amount of oil paint goes a long way.
Oil painting can be hazardous because it involves flammable oil-based paints, as well as mediums like thinner and linseed oil. While water is used to dilute watercolor, gouache, and acrylic paints, oil paint requires the use of thinner. It's important to avoid washing oil paintbrushes with water, as it can damage the brushes and won't effectively remove the paint. Additionally, it's crucial to store oil paints, thinner, and linseed oil away from sources of heat and fire.
Since I am only new to oil painting, I cannot give much in-depth information about it and if you do please I beg for some advice and tips in oil painting.
Materials in Painting
Painting can be an expensive hobby given that the materials used (especially the branded ones) are not really as cheap as a pencil and a piece of paper. But aside from being a painter, I am also a cheapskate.
I will never buy an art supply that is as expensive as my kidney, UNLESS if it is worth it or I can make money out of it. I don’t really have all the money to buy all the art supplies I want, I am still dependent on my parents and have no job yet (currently at college, 18, and an irresponsible young adult).
That is why I chose to buy art supplies online instead from the art stores near my place. And I think as a beginner, expensive materials are unnecessary because for me an artist should be able to make a masterpiece with his/her skill and not the tools. But that doesn’t mean the quality of materials will not make a difference. So if you are the same as me, you can use my tips.
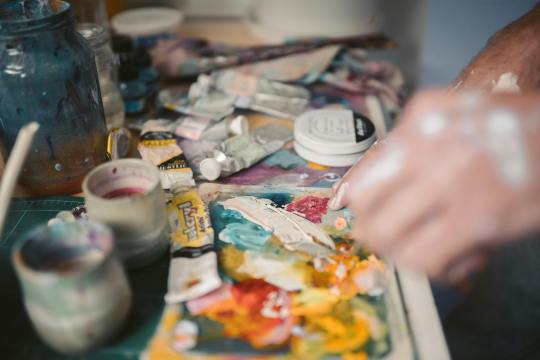
Paint
The paints I use are not of great quality, but they are good enough. I honestly thought that some of the paints I bought were much better than the pricier ones.
In watercolor, there are two common types: in the tubes and in the pans. The tubed paints have a consistency of acrylic, unlike the ones in the pans, which are hardened. What I have is the Superior Watercolor in pans set. I bought them online for less than $10, and it is a set of 18 colors with a brush pen and sponge included. The quality is great, it is not chalky, and it doesn’t smudge once dried. I spent my money wisely, and I do not regret buying it even though $10 is already a lot to me.
When it comes to acrylic and oil paint, I suggest buying the primary colors (ultramarine blue, crimson red, cadmium yellow), titanium white, black, and magenta only. I highly suggest buying a large amount of white because you’ll need it most of the time. Buying a set is very costly, but with these 6 colors, you can create any color, save money, and at the same time improve color-matching skills, which is an essential skill as a painter. If you wonder why I added magenta, it is because the combination of red and white is not bright enough to be pink or it is just different from the color magenta, and I think having magenta in the collection is a good addition. I used the Mont Marte brand in acrylic and Marie’s for oil paint.
Paintbrush
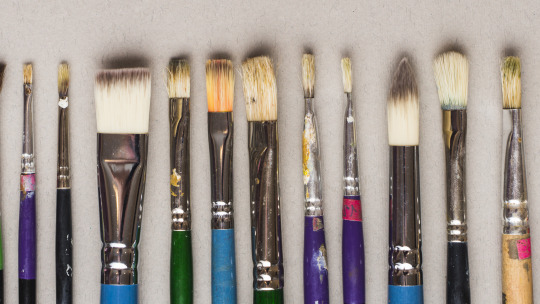
There are different shapes of brushes: flat, round, filbert, and detail are the commonly used shapes, and it depends on the medium you are using. For watercolor, a round brush is recommended, and a flat brush is recommended for thick paints like acrylic and oil paint. A filbert brush is also a flat brush, but the trim is round, and it is good for painting clouds. A detailed brush is used for small details like painting dots and thin lines or for small paintings. There are more shapes of brushes out there, but having a variety of brushes can be overwhelming. Get only the brushes you need and have them in sizes small, medium, and large. The size of the brush will depend on how small or big your painting is. Using the appropriate shape and size of the brush will lessen your expenses and you’ll learn to depend more on your skills than the tools.
There are cheap but not too cheap brushes available online. They are not branded, but the quality is good enough (like the ones I use), and the bristles don’t come off easily.
Paper

We can paint on anything, but nothing beats paper. However, the paper used in painting is not just an ordinary paper. The thickness of the paper used in painting, particularly watercolor paper, is important so that the paint would not easily destroy it.
Watercolor paper is usually combined with cotton, making it more durable than regular paper or cardstock. The percentage of cotton in the paper varies as the price varies. It is recommended to use 200 gsm paper, which is what I have because it is affordable and good enough to hold a few layers of paint.
However, I highly recommend using 300 gsm paper because the 200 gsm papers I use still curl up or bend and get wavy, which is a hassle when painting. The higher quality, 300gsm paper or paper containing 100% cotton is easier to work with, as I have observed online, even without taping the paper down, it doesn’t curl up. But of course, high-quality paper costs more, so 200 gsm paper is good enough.
If you are wondering why I called the paper used in painting "watercolor paper," it's because you can also use watercolor paper for acrylic, gouache, and oil painting.
There are two types of watercolor paper:
Cold Press - Cold-pressed watercolor paper has a rough texture, which is great for watercolor painting because it gives more depth to the flat painting (water is water, they can't have shapes and textures like acrylic).
Hot Press - The hot-pressed one is recommended for thick paints because it has a fine, smooth surface, which is great for blending smoothly.
Aside from paper, you can also use canvas paper, stretched canvas, or a canvas panel for thick paints. However, since you are only starting in painting, paper is recommended for practice and is much cheaper than the canvas mentioned above.
OTHERS
Masking Tape
Why masking tape? It is used for tapping down the edges of the watercolor paper so it stays put and flat on the surface which makes painting much easier, and also it creates a clean border. You may see other artists use washi tape because they are less sticky and won't damage the paper once it is peeled off, but I think using washi tape costs more, instead, stick first the ordinary masking tape onto your clothes until it becomes less sticky, and then you are good to go.
Mixing Palette
Usually in watercolor paint sets, the lid of the container serves as the palette. However, when using thick paints like acrylic or oil, a better alternative to a traditional paint palette is a picture frame. Mixing paint on a glass surface is convenient for two reasons: (a) it is smooth and does not absorb the paint, and (b) it is easy to clean. Dried acrylic or oil paint can be easily peeled off the glass or scraped with a blade or glass scraper, leaving a fresh and clean surface for mixing. Additionally, the wood or plastic frame around the glass provides protection against breakage and sharp edges.
Towel/Tissue
A used towel or tissue is not only used for cleaning; it is also mainly used for soaking up the excess water on a brush or for wiping off the excess paint. It is very handy, so you should always have it by your side while painting.
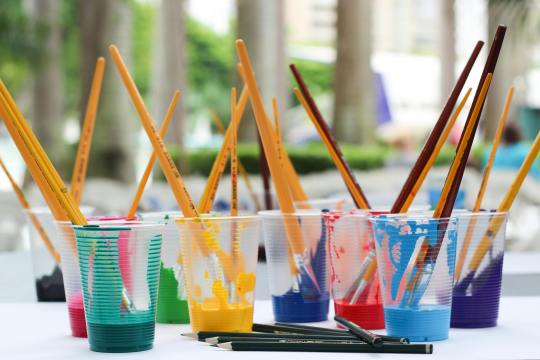
Jar
A brush washer is a must-have for painting. This is where you wash off the paint with water from the brush. You can use an old cup or jar as a brush washer instead of buying the fancy ones which is unnecessary. I prefer using a jar because it is heavier than a regular plastic cup, which prevents it from tumbling or spilling.
Here's a tip I learned from YouTube: use two brush washers. When you wash your brush once in a single container, the water gets muddy. This can make your fresh paint muddy when you switch colors. To prevent this, wash your brush twice: once in the first container and then again in the second container. This ensures that the water picked up by your brush is clean and not muddy.
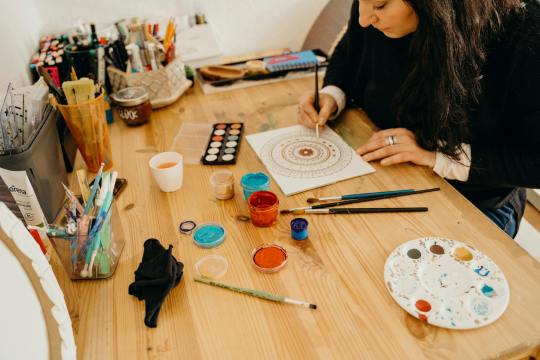
ART STYLE
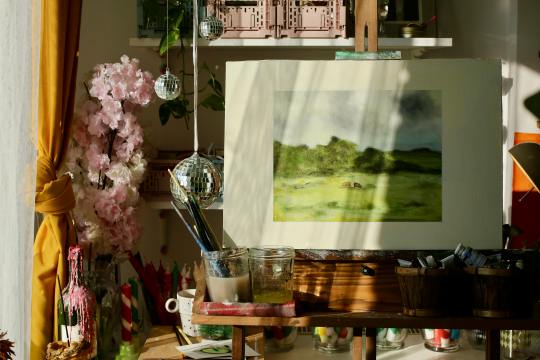
Early in my painting journey, I started practicing by painting scenic landscapes because they seemed easy to me. Of course, I overestimated myself. So I continued practicing more. Painting nature has grown on me, and I realized that my genre is landscape painting. The good thing about it is there is less structure unlike a portrait of a person, and shapes are organic so I will have no problem with imperfections.
However, I still don’t have the ability to create my own work. I still have to watch tutorials online to have a guide. Most of my artworks were tutored by the artists I follow. Once I start painting with just a reference from Pinterest, I tend to get lost and suddenly don’t know what to do. I end up not continuing the work, which is a waste of time, energy, and material.
Lately, I returned to working with watercolor, but instead of nature, I used a reference photo of a person as a subject. Sketching the face first is my least favorite part, because if I mess up sketching the face, the whole painting is also a mess. Most of my subjects are K-pop idols, especially BTS, because I am also an ARMY! Working with faces is difficult but once you succeed, it is all worth it.
Social media has highly influenced my art style. The fact that I get envious whenever I see new art trends gives me a push and inspires me to continue doing my art and explore more.
Check Out These Artists I Follow
Correa Art
Youtube: https://www.youtube.com/@CorreaArt
Instagram: instagram.com/correaart_
Jess Chung
Youtube: https://www.youtube.com/@JessChungArt
Instagram: instagram.com/jesschungart
Emily Mackey Art
Youtube: https://www.youtube.com/@EmilyMackeyArt
Instagram: instagram.com/emilymackeyar
Genelyn Sandaga
Youtube: https://www.youtube.com/@GenelynSandaga
Instagram: instagram.com/genelyn_sandaga
Socials
If you want to know more about my art, you can visit and support my two Instagram accounts:
@ChiliCheeseLover
@paintwith_amore
💜💜💜
If you have feedback to share, please do! I am eager to hear your thoughts. If not, kindly give this blog a heart; it is greatly appreciated!
💜💜💜
49 notes
·
View notes
Note
beauty on a budget for someone new to the lifestyle?
since you’re only starting out, you’ll probably want to focus on affordable products and diy and at home beauty treatments.
you can get affordable skin care products from brands like cerave, cetaphil, and the ordinary. you’ll find all your essential cleansers, serums, exfoliators and moisturizers. you can order facial sheet masks in bulk cheap from amazon. you can also use aztec secret healing clay as a clay masque. skip the guasha altogether and follow a youtube tutorial for face sculpting massages instead.
good quality affordable makeup brands I used when I was nearly broke included e.l.f., nyx, wet n’ wild, maybelline, and makeup revolution. look into some other drug store brands within your budget and check reviews before you buy anything so you don’t waste your money. get generic beauty blenders and powder puffs, you’ll be replacing them often anyway so it’s best to get them cheap. you can buy cheap big makeup brush sets on amazon that’ll last a long time if you clean them regularly and take care of them.
press on nails and home manicures / pedicures will save you a ton of money and time. find a good manicure kit and pumice stone. buy a dollar store basin and some epsom salts to soak your feet. for press on nails I usually get mine from temu or brands like kiss and impress. if you just want to paint your natural nails, get a gel polish like l.a. colors color craze gel or sally hansen miracle gel. if you want to go the extra mile, invest in the supplies and learn how to do your own acrylics or gel manicures.
learn how to wax, shape, and tint your own eyebrows. you can buy an affordable diy wax kit like this one and use youtube tutorials on how to find the most flattering brow shape. (as a bonus, the hard waxing kit can also be used to remove unwanted hair on the rest of your body.) you can also find cheap brow tinting kits that usually last up to five uses at sally’s beauty supply and various other stores online.
if you want your lashes done, you can either get really, really good at applying a strip lash – my go to affordable brands are ardell and kiss – or you can invest in some bulk lash clusters and the falscara diy eyelash extension kit. figure out what lash placement will best compliment your features, then watch lots and lots of youtube tutorials on how to use it and practice, practice, practice. they take some getting used to.
when it comes to hair care, the very first thing you want to do is figure out your hair type with a quiz like this one and find what it needs to look and feel healthy. I have 2A hair, so I would pretty much always spring for nexxus for something moisturizing and lightweight, but I’ve heard great things about ogx, shea moisture, not your mother’s, maui moisture, l’oreal elvive, and garnier whole blends which are great for other hair types, densities, and textures. all these brands carry a wide variety of products from shampoo, to leave in treatments, to hair masques, to curl cream — you get it. again, read reviews. you can also use a cotton t-shirt to dry and plop your hair instead of spending money on a microfiber towel, and a satin scarf wrapped around your head to protect your hair while sleeping instead of a silk bonnet and pillow case.
if you’re into styling your hair, two of my favorite methods are heatless styling and blowouts. for heatless styling, you may not even need to purchase any new styling tools. I started out using this heatless robe curl method and eventually started doing other heatless styling methods like the ones on this playlist once I started buying more tools, and did styles like these when I didn’t feel like setting my hair at all. for styles that require heat, a highly suggest investing in a dyson airwrap – which can do pretty much everything – so you don’t end up spending even more on an arsenal of hot styling tools.
good luck, sugar
xoxo
#luxury#luxury aesthetic#money#sugar dating#sugar lifestyle#hypergamous#hypergamous woman#hypergamy#hypergamyblr#coquette#beauty#budget beauty#beauty on a budget#rich bf#rich husband#rich aesthetic#rich boyfriend#rich wife#rich gf#rich girl#rich girlfriend#spoiled wife#spoiled gf#spoiled girlfriend#spoiled#sugar sponsors#sugar parent#sugar life#sugar bby#sugaring
41 notes
·
View notes
Text
Factor Builds a Poltergust!
Part One
Poltergust?! In my kitchen?! At this time of year?!!
More probable than you might think.
For those who didn't see this post a few days ago, I've been building a prop Poltergust. I've got a costume to go along with it, and both are at the point where I can step out to an event right now and feel proud of myself.
After I find fingerless gloves and give the vacuum tube a couple more coats of paint, of course.
So, how did I do it? Why should you care about a ghost vacuum that can't actually suck things up? Well, I'm about to tell you the process I've gone through this week to get this bad boy ready, because I did a decent job documenting my steps and I wasn't just about to not share something like this.
Ready?
Here we go!
Disclaimer
This is not a tutorial. I am not in the business of giving Poltergust workshops. This is just me documenting my process, which you're free to riff off of for your own uses, but this is in no way a step-by-step instructional. This is what I got after gleaning two walkthroughs online and distilling them into something my artsy ass can manage. If I tried to pass this off as a tutorial in real life, I'd probably get fired.
If you do reference this for your own purposes, make sure to wear gloves, put down cardboard and other protective coverings, and do your work in a well-ventilated area. It should go without saying, but do not let your pets into this shit.
With that being said, let's get into the base of this whole thing.
The Base
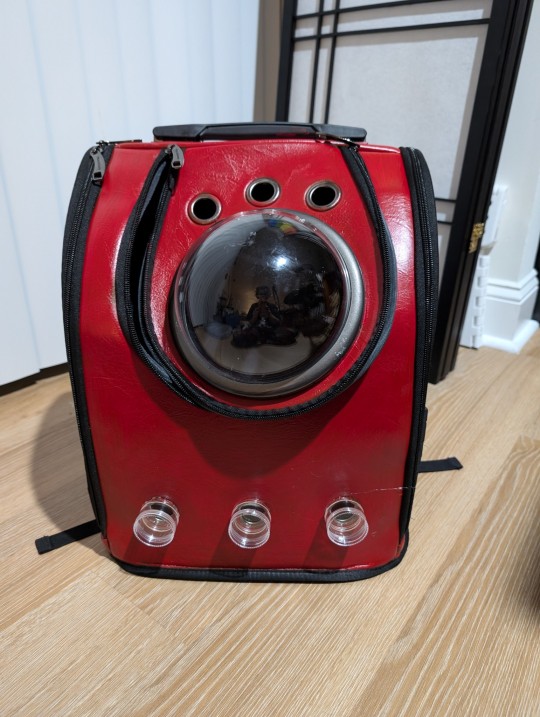
Not gonna lie, this whole idea started with a cat carrier. It's been with me for several moves now, and neither of my cats have taken to it. Needless to say, I was ready to give this thing purpose.
The carrier I have has a bubble in the front, several panels to zip and unzip, and appears to be made of some kind of leather. With this in mind, I prepared the surface for painting by using a deglazer. If you can't find any (or you run out early like I did), some strong isopropyl alcohol and a bit more elbow grease will also do the trick.
Next, I went with some leather acrylic paint. It went on nicely and dried quickly, so I did a couple of coats.
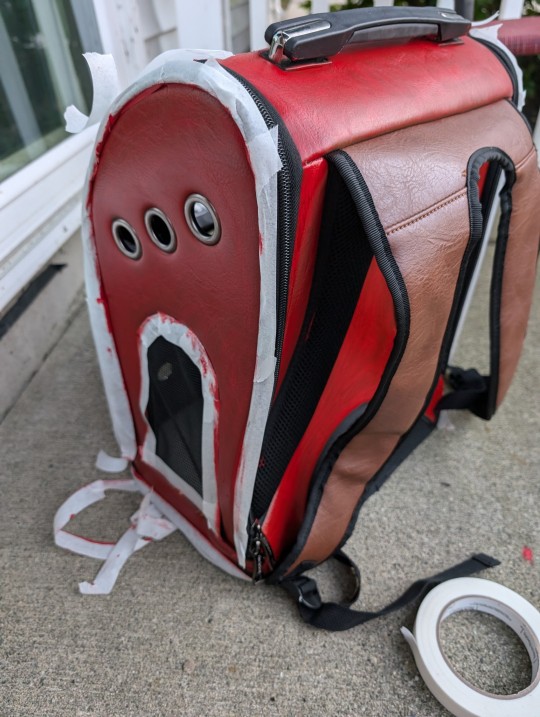
As you can see in the picture above, this carrier had a nice black trim to it that I wanted to preserve as much as possible—hence, drafter's tape. I also left the straps as is, since E. Gadd has a thing for leather straps on his devices.
After the paint was good and dry, I sprayed the whole thing a couple times over with a clear topcoat. I might've picked something semi-glossy (I really don't remember), but so long as it's clear and sprayable, it'll work.
I did get a little bit of topcoat on the bubble, but this really won't matter in the long run.
Panels and Wheels
Each Poltergust I've come across has a set of wheels or cylinders on the sides. Seeing as this was a consistent choice, I figured I'd cook something up to cover the side panels of my base.
Each wheel piece is based on a wooden circle (mine are about 6.5" in diameter). From there, I glued a smaller foam disc onto the center, and then covered each disc in gray foam for a smooth look.
While waiting for that to dry, I then took a triangular dowel of EVA foam and painted that black. One calculation for the circumference of the inner circle later, and I had the outer rims for these pieces. For error's sake, I rounded up.
End result?

Snazzy. Now to apply this and the other panels onto the base. I chose a thicker piece of black foam for the accent paneling, which also went under these circles. However, I didn't immediately glue all this on.
Instead, I went to work on some other doodads.
Doodads, part one
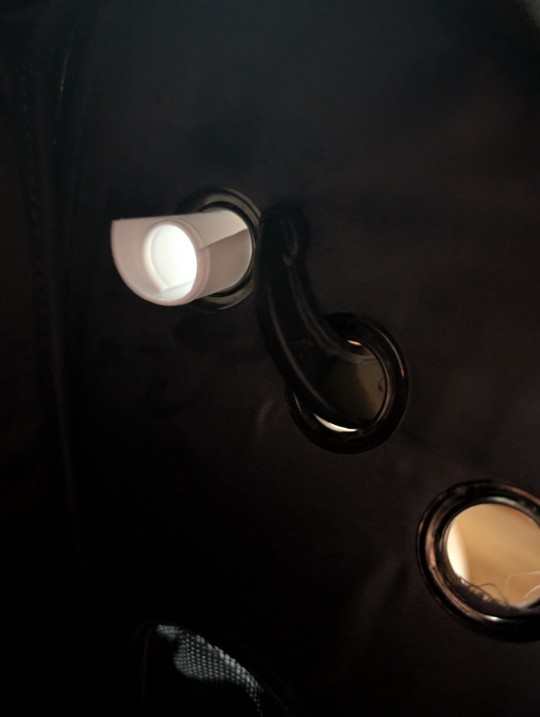
There are a number of holes on the cat carrier. They come in sets of three, are ringed with metal, and were probably intended to provide airflow to my spoiled little fur babies. For the Poltergust, though, these holes provided opportunities for additional decorations.
All of these holes were 1" in diameter, which made some of my choices awfully convenient.
First off: bottom three. These are the reason I held off on gluing the panels. I wanted to cap them and put some lights behind them. Some little jewelry organizers did the trick, and provided a nice serrated edge that I used many times in this build.
Now, this photo is a bit out of order. I got a bit impatient and glued the side panels and these things on before I did the topcoat. As a result, I sprayed them a bit. Again, I like to think this works out in the end.
At this point, I was ready to take my foam and do all sorts of measurements and shit to get it all to perfectly align. And then I realized...
Foam is impressionable, and these suckers are serrated.
With that, I pressed my front panel into the circles, carved out the holes, and was able to slide it on just like that.

From there, I eyeballed and trimmed it down before gluing. And I got the circles hooked up as well.
Doodads, part 2
I came across some black desk feet that, with some nuts and a piece of foam glued in for good measure, made for some nice button-looking things on the side panels. Because I needed to work on the tube, though, this won't get applied until closer to the end.
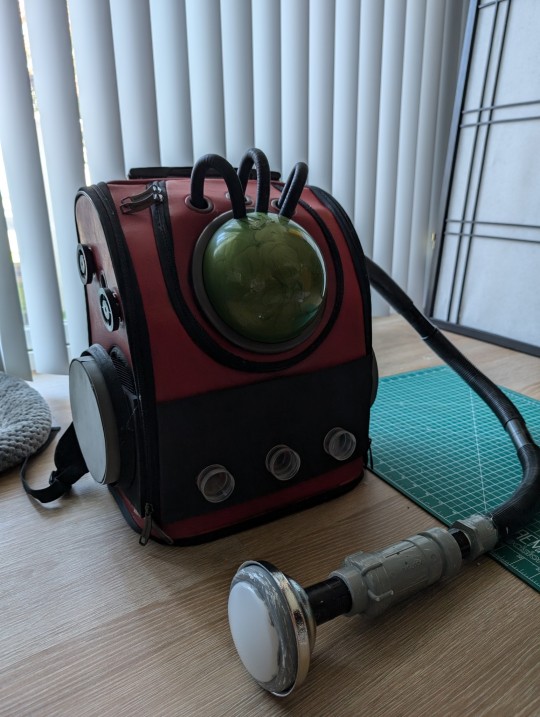
The Tube and the Tools
The bones are good, but what about the tube? The means by which a ghost goes from outside to within?
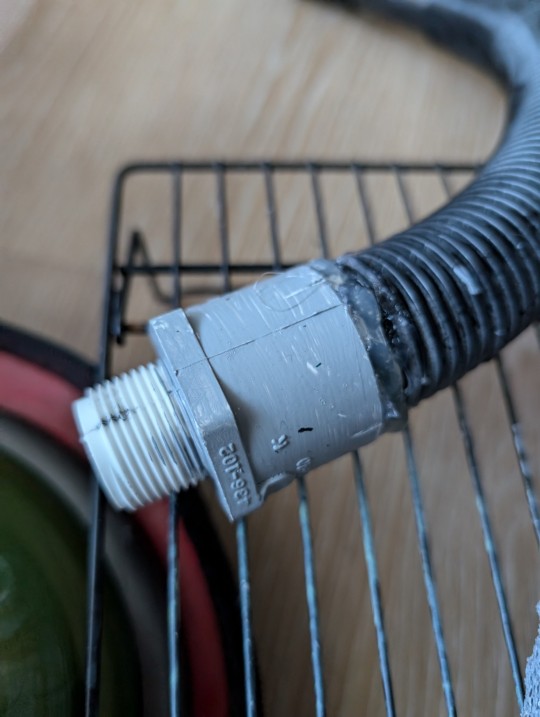
This, along with lights and other device pieces, required a trip to the hardware store. Believe it or not, I spent quite a bit of time in the plumbing section for this stuff. Kinda funny when you think about it.
Anyway, tube. I went with a drain and bilge tube/pipe thing because it was long and flexible—not to mention easily cuttable with a hacksaw. It's attached to the Poltergust with a metal closet rod support, which again, was about the diameter I needed.
All good, right? Wrong!
That tube wasn't just gonna go into the hole nice and neat. After getting the metal circle around the tube, I cut some slits into it to cheat my constraint, further forcing it in by applying sealant to the circle and clamping that shit down.
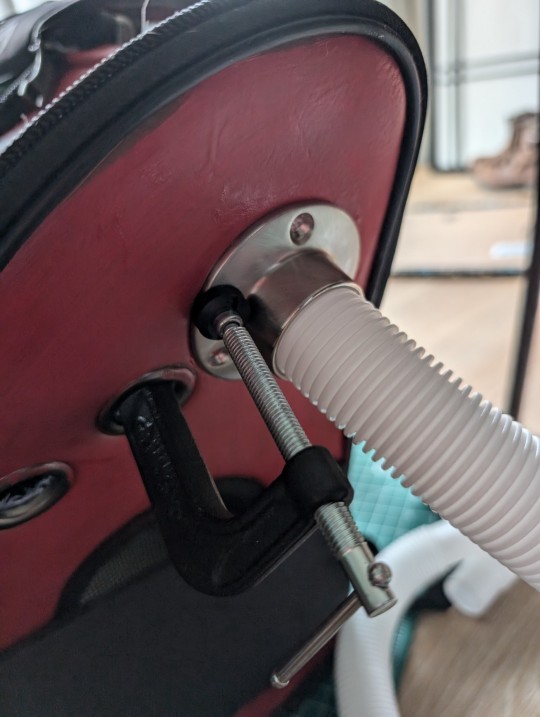
Hot glue is nowhere near strong enough for this part. Given that it's metal, on the most vertical slope, and is gonna get tugged around a bit, I opted for sealant. Please keep in mind this shit is strong, so let it cure outside.
Since the sealant takes a while to cure, we can pretend I got everything in one trip and get started on the flashlight attachment. I found this PVC pipe thing that had a slideout bit of pipe, and something about the way it felt in my hand screamed "comically big flashlight". With that, a bell drain cap thingie, a puck light, and some paint later, I had Luigi's flashlight, ready to screw in or change out with a nozzle (which isn't built as of posting. I'm tired and it's daunting and I want to go back to writing.)
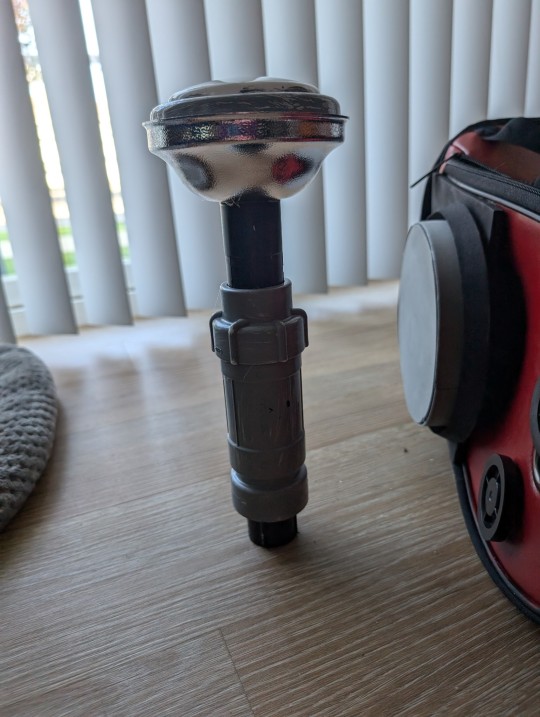
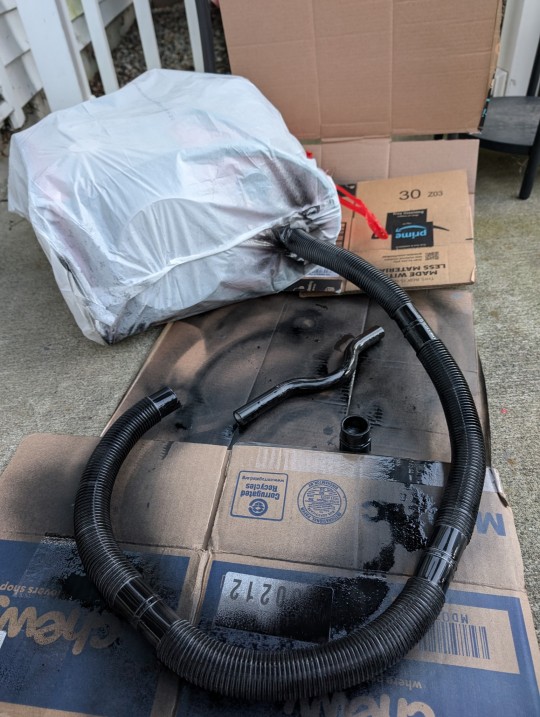
But like, wow. I'm a bit screwed when the batteries die, but for this? This is beautiful. See that black bit at the bottom? That's meant to screw into the thing pictured below.
Which, fine, there is a bit of a time skip with this top. But the whole idea is to stuff it with sealant, follow up with hot glue, and put it on the end of a trimmed down, painted bilge tube. To paint the tube, stick the whole Poltergust in a trash bag, poke a hole in it, and feed the tube through. Tape up anything loose, get that spray paint, and spray.
Rule of thumb: do not assume any of my steps are chronological. I'm going off of categories to make a bit of sense out of my madness. A lot of parts were painted in batches because I was waiting on something else and I wanted to save time.
But, once things are painted, glued, and sealed, the worst of the work is over.
That being said, we are far from over. I'd keep going, but Tumblr on mobile won't let me do more than ten pictures, so keep an eye out for the inevitable reblog featuring part two!
#super mario bros#smb#luigis mansion#poltergust#e gadd#cosplay props#cosplay#diy craft#converting stuff around my house#luigi#trust the process#hey guess what Nintendo#i have a poltergust now#luigis mansion dark moon#luigis mansion 3#factor makes
21 notes
·
View notes
Note
Found your work through desperate searches for sylvanian family customisation or recolour resources and WOW your art/characters/worldbuilding are also astoundingly good... gonna be scrolling here a while. Out of curiosity do you do custom/commissioned sylvanian figures or do you have a tutorial/materials list someplace? Thanks for reading!!
Aw gosh, thank you, Anon!
I did one custom commission as an experiment (which I'm sure you've seen if you looked through the tag) and it was pretty fun, but man are these things a time suck! I tried to do too many dolls in too short of a time, got kind of burned out on them, and haven't touched them in months... I'm currently trying to work up motivation to get back into it and finish the projects I have materials for. If I do, I'll take pictures this time and put together a proper tutorial.
Unfortunately I can't take any commissions right now, but I'd be happy to share a materials list! It's under the cut:
The paint used is basic acrylic paint, like the kind you can get from Walmart or craft stores for under two bucks. There's a bit of a trick to painting them without making the fur clumpy, I described the painting process here!
For the hair, you'll want doll hair ("My Little Pony" size is way more than sufficient), a hair rooting tool/kit, and either a heat gun or blow dryer. I wrote some notes on hair rooting Sylvanian Family dolls here.
For the clothes, you can use a number of different fabrics, but you want it to be very, very thin. That super cheap, thin cotton fabric you can find at Joann Fabrics is pretty perfect and comes in a wide variety of colors and patterns, though some stuff like doll-sized flannel you might have to look online for (or DIY--you can use acrylic paint on fabric, it just makes it stiffer). I use ribbon for trim. Other accessories like jewelry, buttons, chains, crystals, and belts can be sourced from craft stores, too... I usually just bring my WIP doll with me in my pocket and hold it up next to anything I'm interested in buying to check if the sizing is right (the lady at the fabric cutting station was incredibly charmed by them, hah). For more specialty items, like tiny hats and replica firearms, you will probably need to look online.
If you can't find a specific accessory, or need to sculpt something like armor, you can try making it out of epoxy clay and painting it with the same acrylic paint you used for the figure. Mod Podge will help seal it and give it a nice glossy finish. (Do not use Mod Podge on Sculpey--it makes it sticky!)
Tails are generally pipe cleaners or occasionally pom poms. Cut the original tail off with wire cutters, digging out as much of it as you can, and super glue the new tail in the hole.
Horns are done with epoxy clay. For big horns on the head, I use wire cutters to cut the pointy part off a pin, embed that in the clay horn, and then stick the end of the pin into the plastic head to more securely anchor it.
Bat and dragon wings are done with leather sheets you can buy from a craft store.
Other essentials: Super glue, sewing kit, Dritz fray check. Super glue is essential for both tails/horns/etc and clothing (it's often better for ultra-fine detail than sewing). Sewing kit is needed for clothing. You will not have much success with clothing without Dritz fray check. It keeps the edges of the fabric from disintegrating, which is a major concern when working on such a tiny scale.
Also this isn't a material so much as a tip: I often use the pointy end of a pin to do fine detail painting. It's also useful for sculpting miniatures.
Hope that helps! Good luck on your customization ventures, and feel free to ask if you have any more questions!
#sylvanian families#calico critters#doll custom#doll customization#anon#ask#not an art post#ALSO THANK YOU FOR THE KIND WORDS ON MY WORLDBUILDING AND CHARACTER STUFF... it is what I live for
22 notes
·
View notes
Text
Cosplay Process Part 2!
Hello again! I'm posting this the same day as part 1 cuz yall have waited enough lmao
If you haven't seen part one you can find it here!
If you want, please check out the masterpost to see the full timeline! It will be linked at the bottom. Ty!
Alright so after I had the shell done, I covered the entire thing in paper mache! For this I used a mod podge and water solution, first soaking ripped (not cut) pieces of all different random types of paper until I was satisfied with it. The tutorial used like 4 layers, but I only had time for 2 and it still worked great!
This blob is from when it was still drying and I had finished my layers.

The next day after the paper mache dried I coated both the inside and outside of the shell in 2 coats of primer, then 2 coats of white acrylic paint before adding color.

After all that dried I painted it with a mixture of gray and purple to get that muted mycelium kind of color to fit mother spore. In the end it turned out a bit brighter than I thought it would, but I still think it's a lovely color. It's not in this picture, but I ended up adding a lighter shade of purple at the top and a gradient of darker gray/purple at the bottom to add depth.

Okay...then came the MOST PAINFUL AND TIME CONSUMING PART OF THE WHOLE THING. I burned myself about 5 times over 2 hours of straight hot gluing, but it was SO worth it, it turned out really good and it's honestly one of my favorite parts of the hat. I finished the hat at 11 pm the night before Halloween.
To make the gills I cut strips of lace I bought online in varying sizes and lengths. I tried to mostly stake true to the pattern of the lace itself. The hardest part was actually attaching it, having to hold the thin little things in their hopefully correct places while my cats batted and chewed on the other parts of the hat while I was working.

After that I was basically done! All I had left to do was the cherry on top, my very favorite part of the hat, the little veil of chandelier crystals hanging around the rim of the hat.

The best ones were the jewels that hung from key ring looking things. They were super easy to glue and never fell out. They also looked the best, but I didn't use all of them because I wanted variation.

And with that, I was done!! Thanks for sticking with me throughout this VERY long process :D You can find the masterpost at the bottom along with part 1!


------------------------------------------------------------------------------
Cosplay Masterpost!
THE REVEAL!
Process Part 1!
#hermitcraft cosplay#halloween cosplay#cosplay project#hermitcraft#ddvau mother spore#mother spore cosplay#mother spore#ddvau#ddvau cosplay#trust the process
14 notes
·
View notes
Note
Are there any arts and crafts that you recommend?
It's all up to personal taste but here's some off the top of my head.
You probably have the means to do this at home rn
Drawing, just grab a pencil or pen and a piece of paper and doodle, draw shapes! You can do abstract stuff or geometric patterns or stuff like mandalas that you can color later, it doesn't have to be a masterpiece.
Paper crafts in general. Collage. Scrapbooks. Greeting/birthday cards. Origami - I personally really like folding birds and cranes.
Inexpensive/not too expensive (to my knowledge)
Coloring books, I don't personally like coloring but I follow people who enjoy this and I've seen really cute coloring from them. You can color with crayons, markers, pencils. Whatever you like.
Sewing* (beginner :tm:) learn stitches to fix your clothes and things. It's really rewarding long term. Once you know your stitches you can learn to make lil things like simple plushies with scrap fabric.
Embroidery*. Well, if you start sewing you got needles now! congrats, you can try embroidering. I absolutely recommend an embroidery hoop because it will make things a lot easier, it can also help with mending clothes. You'll need some scrap fabric that's fit for the job but when it comes to threads, to start, you can pretty much use whatever - I've used all sorts of yarn and sewing threads.
Jewelry making. There's different materials both for the beads and the thread so prices vary but it's nice and it's something you can do for yourself or for gifting.
*by hand.
You really gotta buy stuff for this (but maybe someone you know can lend you some of it to practice and see if you like it? or they could be down to teach you, who knows.)
Crochet.** You need yarn and the correct crochet needle/hook to crochet. There's a lot of begginer friendly tutorials so the learning process isn't too terrible. I've made amigurumis and coasters. Lots of people make blankets out of granny squares (and there's tons of free patterns online!)
Knitting.** I haven't personally tried this one but same as above. And again, tons of free patterns online.
Sewing (machine :tm:). My sister has a sewing machine and she's done tons of things. It's a more expensive hobby though since you have to invest more and learn how to properly use the machine but you can make stuff faster than you can by hand. It really makes sewing clothes together a lot easier.
**you will def find blogs and videos with tutorials but I also recommend ravelry because it let's you filter results and people sometimes rate how easy/hard patterns are.
Other stuff that I've done once or twice: paper mache, sculpting, stamps! and stamp making, mosaics, flower pressing, stencils, watercolors, acrylics, canvas painting, embossing... and I'm probably forgetting some.
#anon#ask#reply#sorry this got long but my family has had lots of arts and crafts phases so ive tried tons of things / have supplies for many available
7 notes
·
View notes
Note
hi! first of all thank you so much for keeping my chemical dependency (cough silco cough) always watered and fertilized and properly sunlit and pollinized <3<3<3
but anyway, can I ask you about your art journey? Like how long you've been drawing, if you have a set routine or learning methods? books or videos or whatever you'd recommend?
I'm looking at the journeys of artists I love to see if I there's anything I can apply to my own learning process!
Waaa thank you anon, appreciate that! Silco has reawakened my muse and I’m always so grateful that there seems to be a little community who feels the same way. Very interesting question, glad to share! Sorry if this is long and convoluted, I’m a professional yapper:
I’ve been drawing forever but I started taking it seriously maybe 5 or 6 years ago. I went to an arts college for two years which helped me brush up on my fundamentals (figure drawing, observational sketching, traditional painting techniques with acrylic and oils etc.) and then I took a year out of full time education and employment to work on building up a portfolio of artwork, and now I tattoo full time for a living. Tattooing is obviously a very VERY different medium and style to what I post on here, however it does mean I’m drawing for at LEAST 3-4 hours quite literally every single day of the week; and all practice is good practice.
I will say, starting out at college, the figure drawing was probably what helped me progress the most in a short amount of time. If you can master the human form then you can master anything. (To be clear, I don’t think I’ve mastered the human form AT ALL, lol, but I certainly try my best). Live drawing is the absolute best and there are usually classes you can sign up to join in most cities, but if that’s not a possibility then the website line of action is the next best thing. I like to try and do a couple of gestural sketches a day just to keep myself sharp. This YouTube video is a good start guide on how to approach gesture drawing.
General observation sketches are great too: buy a little sketchbook and a mechanical pencil and take them everywhere, and draw everything you see. Don’t be afraid to draw badly, or to draw things that don’t seem “artistic.” I have genuinely hundreds of pages of the most awful, shitty, unintelligible sketches you’ve ever seen but it’s alllll part of learning. Every morning on my commute I’ll sit at the train station and sketch the people on the platform, or the pigeons, or the trains. Just draw, draw, draw, draw, draw as much as you can.
Arcane has actually improved my art a lot, too. I really recommend either buying the art book or finding the pdf online (it’s pretty easy to find, but drop me a dm if you want the direct link) because there’s loads of great concept art in there and it’s genuinely a fantastic resource for anyone wanting to learn how to illustrate in a slightly more cartoonish, stylised timbre. REALLY sit down and analyse every single little frame- take note of the way the animators and artists at fortiche render and use colour, perspective and form. It’s super unique and has massively changed the way I render!
That’s pretty much all I’ve got, I think? Gonna link some more resources here but hopefully you find something useful buried in here lolol.
• A MASSIVE Reddit post with a fuck ton of resources
• A really great YouTube channel with a bunch of art tutorials / starting points / resources
• Subreddit with daily drawing prompts to get the creative juices flowing
• An excellent tutorial blog post that covers painting and concept art.
12 notes
·
View notes
Note
Im an aspiring punk here ive wanting to start making my own stuff maby start a batle jacket or patch pants or somthing but those projects sound a bit intimidating. Do you have any recmondations on a good place to start?
hey ey!
to begin sorry for the late reply, i got a lot going on currently
to begin id advise collecting inspo for what kinda jackets/pants you want first. i use pinterest, tumblr and etsy to find inspo for my diy stuff. i like to sketch out different designs for my projects before making them, so i can try out what fits and what doesnt.
to practice id say starting by making patches and sewing them (use dental floss, its cheap and incredibly strong and durable) on for example a bag is the simplest way to introduce urself to patchmaking and sewing. i advise using the whip stitch to sew them on. when youre a bit more confident in ur skill level one of the easiest projects to start is a battlevest, since its mostly flat and straight fabric its easy to sew on and modify. most people find denim more difficult to sew on cause of its sturdiness but i prefer it for exactly that quality, it prevents the fabric from moving/stretching too much
you dont need expensive supplies, even stuff that might be seen as trash is very useful for punk diys, some old cloths and acrylic/fabric paint will already be enough for patches. i got a tutorial on my blog for stenciling them (let me know if you want me to link it). soda tabs can be used to make buttons/pins, chainmail, chains, and so much more. bottlecaps can also be made into different types of buttons/pins and chains (and more stuff i cant think of rn). you can get chains for cheap from hardware stores, id also keep an eye out for those chain dog collars in yardsales and such, theyre often very good quality (i got 3 all secondhand).
on that note, where can you find ur stuff for projects?? i get almost all my stuff secondhand. ive got at least 4 thriftstores nearby, and there are often fleamarkets around my area, which i always try to go to when i have the chance. fleamarkets are often announced in local newspapers or on posters around town. you might also find em by googling ur towns name and then "fleamarket" or "yardsale". if you live in a remote area where these things just dont exist i advise asking family/friends if they got old stuff they wanna get rid off. or to use online secondhand stores like vinted or depop (altho depop sellers often overprice, keep an eye out for cheap deals) for stuff you really cant get secondhand like spikes etc. i advise etsy. also if youre US based studsandspikes.com has tons of different spikes for cheap.
an important thing to remember is that your stuff wont and doesnt have to look perfect. your stuff will be messy and sometimes a project totally doesnt end up how you want and thats okay. fuck around and find out!
66 notes
·
View notes
Text
Doing your hobby wrong
This is a reminder that the only wrong way to do your hobby is the way you do not enjoy.
Take for example miniature painting: there are a thousand tutorials online, a plethora of techniques with bombastic names (slapchop, blending, speedpainting) and sometimes it seems as if you have to learn it all and apply it all.
I started painting minis without primers, without varnish, using craft-store acrylics and awful brushes. And I was happy with it. I got into more expensive paints thinking my limitation was the paint and not the painter.

Fifteen years later, I've come to the point in which I follow more or less the same strategy: primer, base coat, speed/contrast paint, highlights. And that's it. I never paint eyes, because I suck at eyes. I never blend, I've never used a kolinsky sable brush; I'm vaguely aware what feathering is, I never do glazes except with contrast paints. Heck, I never MIX COLORS. I've STOPPED using a wet pallete, because that implied more time to set-up.
And I take 5 or more hours per mini, or as long as I need so long as I enjoy it. And when I get tired of it, I consider it done and that's it. It's not like the police is coming to my house to fine me because my paintjobs are lacking. And the best thing is, I'm even proud of what I do. I'll never win any prizes, but turns out that just painting at a small scale is a feat by itself!
#miniature painting#painting miniatures#mini painting#hobbies#hobby#my hobby#i was about to put the tag my hot wife instead of my hobby lol
12 notes
·
View notes
Text
Tired of people going 'all goth fashion is super easy to diy and everyone should do that instead' because like... yes a lot of it is but some very much not. So some thoughts on how much I'd recommend diying various goth fashion stuff as someone who does a lot of it:
Simple jewellery is definitely much better to diy and particularly chains and stuff. I remember going to dangerfield one time and they had a chain with a bat ornament on in for 20 dollars 🤣 ... you can get a bunch of chain from the hardware store pretty cheaply and the exact same bat pendant on it I had got like 20 off etsy for 5 dollars. It usually doesn't take that long and extra tools e.g. pliers are helpful but not necessary - 10/10 absolutely recommend for all goths or other people interested in gothic fashion
Same thing goes for distressed clothing/fishnet shirts there are tons of tutorials for that kind of stuff, and it generally doesn't require that much time, experience or materials 10/10
Minor clothing modifications e.g. some tailoring, adding/removing parts, mending damaged old clothing, changing buttons - this is something that is really useful in everyday life, usually doesn't take that long and is very useful for turning normal clothing into more spooky stuff 9/10
Designs on clothes or patches: if you get some fabric paint, screen printing ink, bleach or even acrylic you can paint designs onto clothing pretty easily. Personally I like dilute screen printing ink as it gives the nicest surface, but it can be a bit of a pain to use as you have to do a lot of layers, and it doesn't colour the fabric intuitively in the way that fabric paint or acrylic do 8/10 - would recommend very strongly to anyone who enjoys art, and recommend trying at least once to people who don't enjoy art as much (you can always make stencils), but it does take a long time and you need some materials. Also, for patches particularly for small bands it can be better to order them from the band to support the artist, but also lots of bands don't have patches or merch or international shipping to some countries makes it not accessible
Embroidery: often looks really good and professional in a way that painted designs don't, takes absolutely ages. 7/10 - would recommend very highly for people who enjoy textile stuff and maybe trying a bit for everyone but yeah if you don't enjoy it it's a pain
Smaller articles of clothing: I've made some waistcoats and shirts and stuff which have been pretty fun and it's really good to be able to do specific designs you wouldn't be able to buy (e.g. my skeleton one) and get stuff to fit right. They were all hand sewn and took a pretty long time (however you can also do it while listening to online classes or whatever), + a bit of time to learn techniques and stuff. Definitely a cheaper than buying them 6.5/10 - do it if you enjoy textile art stuff but will probably be a really painful experience if you don't and you're hand sewing. Also useful if you've got sizing or dimensions that mean you just... can't buy stuff that'll fit which is how I got into sewing
More complex sewing: I've made 2 (well, finished one and 98% of the way through another) long spooky coats and one cape with really complicated edges and embroidery and stuff. Coat 1 was entirely by hand out of not great fabric and took absolutely ages but was definitely vastly cheaper than buying it from the store, and it fit well and everything. With the cape, I got repetitive strain injury in my thumb that still is a bit of a problem 3 years later! With the final coat it was mostly by machine and then touching some stuff up by hand e.g. edges of the lining, making the eyelets and stuff, but it still took ages. Also, something I never see people talking about with diy goth clothing is how hard it is to get the materials - there were only 3 black brocade fabrics available in my city - One was really bad quality and I tried to make a shirt out of it, but it kept falling apart. One was 150 dollars a meter. The one I ended up using was really nice and reasonably priced, but I got the last 2.5 meters of it so it almost wasn't an option. So when people talk about diying clothing being cheaper it can actually not be that much because a clothing business can get fabrics in bulk + unless your city is really big there are probably not many options, so there's also shipping costs if you then need to order fabric. Out of curiosity I compared how much the coat cost in terms of materials to the price of a similar looking coat off dracula clothing which is a pretty well known and apparently quality materials and ethically made goth fashion shop and it came out a bit cheaper but not massively so (not counting shipping...) so 3.5/10 - fun to do if you enjoy textile art as a hobby, not even vaguely a practical alternative to buying a coat
And then there's other stuff like more complicated jewellery making and leather work which idk much about
47 notes
·
View notes
Note
omg pls spill ur secrets, where did you learn to draw so good, especially realism, like what books or channels or lessons did you use/learn to become so good at what you do
what did you study in the fields of art I guess I can word it better, idk how to really put it😅
Hello anonnn💕
I'm not very good at explaining but i will try xD I honestly just randomly watch some digital art tutorials online especially on YouTube on my free time( i highly recommend sinix design https://youtube.com/@sinixdesign?si=vIHAtAj3MZnIU21o). I tend to often find myself analysing how other artists draw on those like speedpaint videos and apply it once i draw too.
My art style varies 😭 but when it comes to realism, what contributed to me getting good at that would probably be because I was a traditional artist before i transitioned to digital, i do those oil and acrylic painting portaits as well as charcoal portaits before so i just applied the stuff i used to do there into the digital format.
Additionally i am currently an art student and studying at an art school which helped me be more efficient with it.
I really advise it to study the basic fundamentals like anatomy and perspective and utilize it. When it comes to color theory I did learned the basic of it tho i just mostly go with the vibes depending on the art i create 😭 the placing of the lightning and shadows are also something i would keep in mind.
I hope this helps🥹 <333
12 notes
·
View notes