#Smart Slider
Explore tagged Tumblr posts
Visit Tumblr Blog
Explore Tumblr blogs with no restrictions, modern design and the best experience.
Last Seen Tumblr Blogs


Fun Fact
Tumblr was attacked by a cross-site scripting worm deployed by the Internet troll group GNAA on Dec 3, 2012.
Text
https://rigvedaadds.com/blogs/
About WordPress
Rigveda Ads Agency | Astrologers Marketi…
Customize
44 updates available
00 Comments in moderation
New
Edit Page
Edit with Elementor
Smart Slider
Site Kit
PA Assets
WPCode
WPForms 2
Search
Howdy, rigvedaadds
Skip to content
+91-7840000618
Digital Marketing Agency For Astrologers
Services
Astrology Digital Marketing
Blogs
All Blogs
Samajwadi Party: Analyzing Recent Election Results and Advertising Strategies (Election Result 2024)
How does keyword advertising work? ( Updated 2024 )
How to Use Google Search Console to Boost Your Website’s Ranking ( Updated 2024 )
Understanding Google Search Console: An Essential Tool for SEO Success ( Updated 2024 )
Best Social Media Marketing Agencies in India 2024 ( Updated 2024 )
How does keyword advertising work? ( Updated 2024 )
Top Seo Company for Buisness Growth ( Updated 2024 )
How does Google Advertising Work ? ( Updated 2024 )
How Astrologers Benefit from Marketing ? ( Updated 2024 )
Boost Your Chartered Accountant Business with Rigveda Digital Marketing Agency | PPC & Seo for CA ( Updated 2024 )
Is Rigveda Adds Agency Genuine ? ( Updated 2024 )
How the Top Digital Marketing Agency in Delhi, India Can Boost Your Business ( Updated 2024 )
Why Rigvedaadds is the Top Choice for Advertising Your Astrology Services ( Updated 2024 )
Maximizing Your Astrology Business : How to Get the Most Out of Google Ads ( Updated 2024 )
Maximize Your Reach: How Google Ads Can Help Grow Your Astrology Business ( Updated 2024 )
Rigvedaadds
Mail- [email protected]
Contact - +91-7840000618
Main Pages
Digital Marketing Agency For Astrologers
Services
Website Development For Astrology
SEO(Search Engine Optimization) For Astrology
Pay Per Click (PPC) Management For Astrology
Social Media Marketing For Astrology
Astrology Digital Marketing
Blogs
Terms
Digital Marketing Agency For Astrologers
Services
Website Development For Astrology
SEO(Search Engine Optimization) For Astrology
Pay Per Click (PPC) Management For Astrology
Social Media Marketing For Astrology
Astrology Digital Marketing
Blogs
Services
Social Media Marketing
Pay Per Click (PPC) Management
SEO(Search Engine Optimization
Website Development
Support
Digital Marketing Agency For Astrologers
Services
Website Development For Astrology
SEO(Search Engine Optimization) For Astrology
Pay Per Click (PPC) Management For Astrology
Social Media Marketing For Astrology
Astrology Digital Marketing
Blogs
© 2024 Rigvedaads. Developed by Proshala.
Powered by
Hello How can we help you?
#About WordPress#Rigveda Ads Agency | Astrologers Marketi…#Customize#44 updates available#00 Comments in moderation#New#Edit Page#Edit with Elementor#Smart Slider#Site Kit#PA Assets#WPCode#WPForms 2#Search#Howdy#rigvedaadds#Skip to content#+91-7840000618#rigveda ads agency astrologer#Digital Marketing Agency For Astrologers#Services#Astrology Digital Marketing#Blogs#All Blogs#Samajwadi Party: Analyzing Recent Election Results and Advertising Strategies#Introduction The Samajwadi Party (SP)#a key player in Indian politics#has made significant strides in the recent elections. This blog provides an overview of the election results and explores the advertising s#Election Results Overview The recent election results have marked a notable achievement for the Samajwadi Party. Here are some key points:#securing numerous seats and reinforcing its influence in key regions. - **Vote Share**: The party has seen a rise in its vote share
0 notes
Text
Mav: I once had a crush on someone and I didn't know how to handle it so I filled their car with heart-shaped confetti.
Slider: ...
Ice: That’s so funny! I went to my car once and found it filled with heart-shaped confetti.
Mav: How fun! I have to go water my dog now.
#ice didnt put it all together until much later#he asked slider if mav had a crush on him#slider was crying on the floor over how blind his pilot was#how can ice be so smart and yet so dumb#mav is ice's blind spot#incorrect quotes#top gun#icemav#tom iceman kazansky#pete maverick mitchell#ron slider kerner#i always make slider suffer dealing with icemav shenanigans#im so sorry slider my beloved#and no mav doesnt even have a dog#he's just an idiot#who comes up with bad excuses to run away from ice#because he's blushing and embarrassed
455 notes
·
View notes
Text
you know what though
Another way to say this is "about half the people who take the test get the same results every time" and "It's controversial" and "It can be reductive for some people" and "it shouldn't be used for hiring decisions" and "the monetary for-profit corporation that charges money to administer the test has a vested interest in promoting it as a miracle elixir"
and I'm actually sick to fucking death of "it works quite well for about half the people who take it and at the same time it's overhyped" turning into "This is total nonsense that never ever works for anyone in any situation ever, it's complete and utter bunk, and the 50% of test-takers who say it's not always total bunk are just idiots lying to themselves"
I bet you 500$ USD that OP can't actually define introversion as used by MBTI. Spoiler: it's actually not a binary one-or-nothing "horrible misanthrope who hates everyone" or "Bubbly cheerleader who loves running parties every single day".
(also the fact that they don't know there are sixteen types*, not twelve, says to me that they completely turned their brain off as soon as someone said "It's like secular astrology!!!!" which is only true if you do it wrong and assign types by birthday, which is not how this works.)
Sorry, but MBTI is not in the same fucking category as astrology, IQ, Love Languages or whatever the fuck other pop psychology thing that makes you mad.
*Type. Pay attention to that word. Type doesn't mean "exact, photographically detailed picture of every single thought, decision and emotion that this person has throughout their entire life from birth to death with absolutely no variation". It's a type. A subgroup. Tendencies. Likelihoods. Patterns.
It doesn't work for you. That doesn't mean I'm lying to myself because I can tell where you're jumping to conclusions about why it doesn't work for you.
#typically misunderstandings come from people unfamiliar with the concept of 'percentages'#it's not an on off switch it's a radio slider#it's also people assuming that it's trying to be much more definitive than it is#it's also people refusing to engage with the meanings of words in the context of mbti#introversion is a specific thing it's not just 'likes alone time sometimes'#and there are eight!!! Different types of introvert#and that's not even fucking getting into the concept of a fucking ambivert which is a thing#I'm sorry but it just drives me batshit bananapants when people decide MBTI doesn't work#so they refuse to even double check and see if their basic understanding of what it is is correct#and it's not correct#but they take every 'hey you're wildly misunderstanding like#the whole system on a fundamental level' as a sign they're super smart and superior#like no dumbass I'm saying you're wrong lmao#saying you're wrong when you're wrong is not a sign that you're secretly right#you're being a smug jackass about this specific subject because you don't understand how little you understand it
14 notes
·
View notes
Text
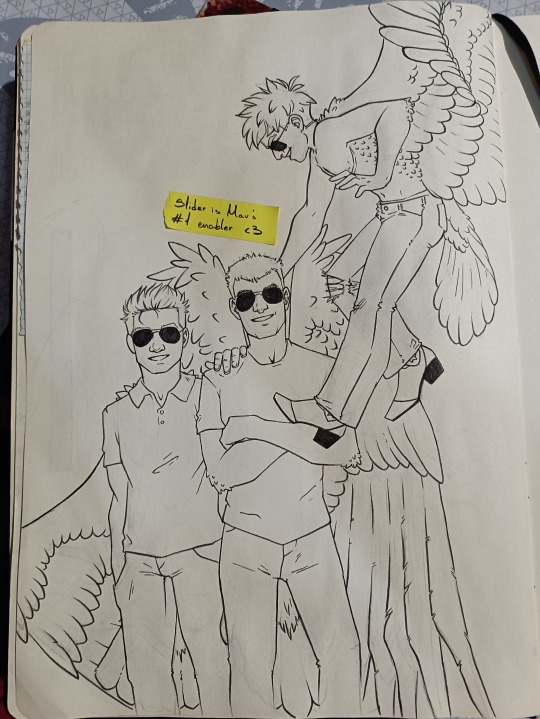
It's all lined 👍🏼
Now, I will be ✨suffering✨ because coloring is the fuckin worst.
#Do I draw glasses bigger than they are?#Yes#Do i care?#Absolutely not because that's how mine are#Comically large#Slider is very nice to draw I need more fanart of that hunk#He's not a himbo bc he's smart#Slider is Mav's n°1 enabler#He'll literally pick him up and yeet him up to boost him#Ice and Goose just laugh because it's a daily occurrence for them#but still confuses other people#*looking at Viper and Jester*#to Mav's delight Slider can do it even almost 40 years later#the dagger ducklings freak out when they first see it#Mav perches on everyone's shoulders#bc he's smol#tgm#tg#top gun#top gun maverick#pete maverick mitchell#top gun fanart#icemav#slicemav#slimav#wings au#HelloI'mHayden#Air Gays™#ron slider kerner#tom iceman kazansky
29 notes
·
View notes
Text

Socks and sandals when everyone else is in trainers is so Swiss of him and I desire him carnally
#I didnt look close enough at first and thought hed rocked up in sliders and was about to be disappointed#most of the time he comes across as so fashionable and smart#and then once in a while he serves theres no such thing as bad weather nur schlechte kleidung#and i love it#fabian schär#nufc#im coming home newcastle#I wonder if the same fashion trends were in switzerland like they were in germany when I was a teen#was 16yr old fabi incomplete without his timberlands#football
3 notes
·
View notes
Text
Eighteen and just a couple of months away from the beginning of the academy, Ron wakes up in a hospital bedroom, his knee broken in enough places to make it impossible for him to be ready to go on his big adventure.
(That summer and most of the autumn that followed are still lost in Ron's memory because of the medications and the endless physiotherapy he had to do.)
Then it's college, his grandma kissing his cheek every morning before class, and falling in love with math and physics while having his brace always in his backpack because of bad days, good days, and rainy days. It's too easy to fall in bed with the cute guy in his lit class and then the girl in advanced calculus. It's easy too, to never taking anybody home if not with good grades and stellar recommendations from his professors. And then it's naval school: he's not a cadet like he dreamt he would be, but he's still there, still studying with them, and still moving to achieve a common result. Ron watches jets take off and get back, calculates trajectories, and helps out some random guy during a simulation for a new kind of study on something-something.
He graduates a year ahead of his peers, and his grandma makes him a whole suit to wear that night, and they treat themselves to some fine dining. He knows they don't really have the money to pay for it, but apparently, the woman who raised him has more ace in her sleeves than he knows about.
After it's one experimental project after another, his backpack gets a little bigger and a little heavier, but his knee brace is always there because the "pain is as much physical as in your head, but we're going to work on that, okay?" The doctor says, almost four years after the surgery.
He finds in Tom - "or Ice, as you prefer" - a reluctant ally and a great friend. They find each other in the afternoon when Ice is searching for a quiet place to study and Ron is so tired and in pain that he could lay down and not move anymore. Ice sits on one of the chairs at the only table in the room, and Ron continues to try to sleep on the other side of it. He wakes up half an hour later with a cup of tea in front of him and a sweater on his shoulder.
"You looked cold, and tea solves more problems than you could think about."
(They don't know yet because it's too early, but that's just the first of thousands of occasions where they're going to sit down, share a cup of tea, and let the whole world go on without them for a little while.)
Nick, or Goose, kind of follows him around in a very non-stalker way after class just to use him as a shield against some angry classmates. Ron enjoys scaring the hell out of them, and the way Nick laughs makes it even better. He doesn't introduce himself that day because he's in a hurry, and there's a calculation that's not as right as it should be, so he kind of just slips away, and, for some reason, that move earns him the callsign of Slider.
(Goose finds him a week later and invites him out for a date. Ron answers that he isn't very interested in dating, but they could grab a bit and see where it goes from there. Nick's smiles are so bright and big that Ron ends up smiling with him.)
(They end up sharing fries with their hamburgers and kissing over the table. Ron isn't interested in dating, but he likes kissing Goose, and he likes waking up next to him. He likes Goose, and he likes where they could go.)
Life and work move him around one project after another, in the same way deployments move Goose and Ice around, but they both find times to call him, and Ron is always there to pick Goose up when he's back in the USA. Sometimes he has a board with glitter and cheeky sentences to welcome home, and sometimes his body decides to fuck with him to the point he can barely stand. But he's there because he wants to hug and kiss Goose. After all, he knows it's going to be a little better after.
-
Ice takes back from a secret post a cream that should work miracles for his pain and works for exactly three weeks before he's back to put his brace in his bag, move around, and focus on math. They share tea on the fourth week, and Ice hugs him against his chest until the pain seems to be less. It takes hours, but Ice doesn't move. Doesn't let him go.
-
It's not eighteen or even twenty the first time he puts a foot on a jet, and he's not piloting it,- neither is Goose -, who kissed the hell out of him in front of everyone and the American flag before helping him with his helmet, but Ice is, and it's beautiful being up there, in the middle of the same clouds he used to doodle while trying to follow the discussion in his philosophy class.
#random pieces of a ff that's not very coherent yet#ron slider kerner#tom iceman kazansky#nick goose bradshaw#platonic slice#sloose#au ron doesn't get to the academy as pilot bc of an incident but it gets there bc there bc he's hella smart#slider's granma>>>>>>#a little love in different forms
13 notes
·
View notes
Text
ok forget everything i said about setting up for a playthrough. im making a new slider now.
#and by 'new slider' i mean im remaking a slider i used to have in my game and cant find anymore#and by 'cant find' i mean 'am too lazy to look for'#i am so smarts ♥#simoleon
3 notes
·
View notes
Text
I am BACK from my visual novel era. Back to Dragon Age grind.
Desperately trying to remember how I made my Hawke.
#kiddiiiing#past me was smart enough to screenshot the sliders#I'll probably mix this playthrough's screenshots with my old ones#if bg3's patch will release before I finish the run I'll have to put it on hold tho
1 note
·
View note
Text
De vendedor de peluches a líder en suscripciones musicales: la historia de Nicolás Fernández
El empresario argentino lidera Be Smart, una empresa que conecta a artistas con sus seguidores, generando millones en ingresos y ofreciendo experiencias exclusivas.
CIUDAD DE MÉICO.- Con 45 años, el empresario argentino Nicolás Fernández ha recorrido un camino singular. Desde vender osos peluches en trenes hasta liderar actualmente un equipo de 50 personas que están transformando la industria del modelo de suscripciones de los artistas más grandes de la música. Nicolás comenzó su formación en Publicidad, en la Universidad de Morón (Buenos Aires), pero no…
#**Etiquetas:** Nicolás Fernández#artistas y fans#Be Smart#emprendedor argentino#industria musical#innovación tecnológica#monetización de fans#plataformas de suscripción#Slider#suscripciones musicales#Transformación digital
0 notes
Text
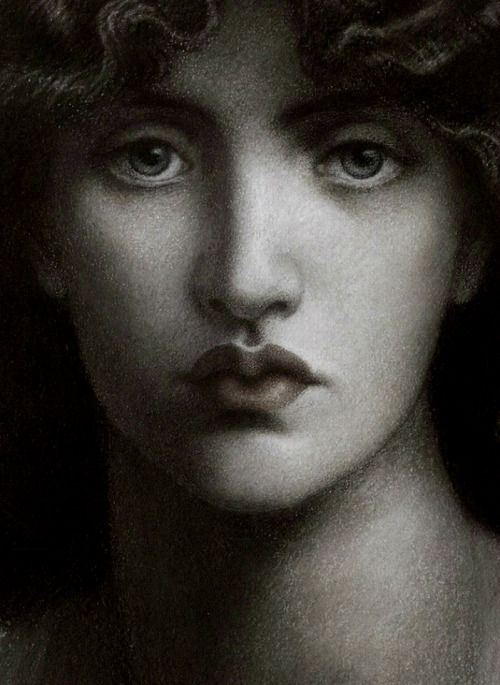
This is Confessor Siwan as I created her in the character creator vs the painting of Jane Burden Morris I used as a reference:

Pre-canon she is just a Confessor who requires tincture of Trina's Lily to cope with the horrors that come with doing her job. That she only took because she promised to always be by her childhood sweetheart/soulmate's side and she keeps her promises.
By the time canon rolls around she’s got a nasty case of Chronic Hero Syndrome, is trying to keep to the only way of life she knows, and is grabbing Great Runes because, like, no one else is doing anything to unfuck the Lands Between.
Infiltrating Volcano Manor is going to do wonders for her mental health I'm sure
The moral of the story is: Don't join the fantasy CIA for a man! Even if he is your soulmate.
i know its kinda late but does anyone got any Elden Ring ocs to show?? Feel free to babble about them to meeeee
#confessor siwan#my tarnished#tarnished oc#she is so smart and so dumb at the same time#i hate her (affectionate)#give us more sliders michael zaki
49 notes
·
View notes
Text
Cliff notes on the new info on Dragon Age: The Veilguard in today’s issue of Game Informer (magazine hub link):
Edit/update: I tidied up this post. ^^
---
In CC you can customize things like shoulder width, chest size, glute size, hip width, how bloodshot your eyes are, nose crookedness, and more
There are hundreds of sliders for body proportions
CC detail: “Features like skin hue, tone, melanin”
There is nudity in DA:TV, “which I learned firsthand while customizing my Rook” in CC
Rook’s backstory also affects “reputation standing”, along with the other previously-known things like in-game dialogue etc
Lords of Fortune are pirate-themed, “piratic”
Rook ascends because of competency, not because of a magical McGuffin, contrasting with the 'destiny-has-chosen you’ angle DA:I has for the Inquisitor
Rook is here because they chose to be, “and that speaks to the kind of character that we’ve built. Someone needs to stop this, and Rook says, ‘I guess that’s me'”
The 4 voices we can choose for Rook each have a pitch shifter in CC
The game starts inside the bar (as previously detailed in other coverage)
In some dialogue wheels there is a “romantically inclined ‘emotional’ response” option. These are the replies that will build relationships with characters, romantic and platonic alike, but you can ignore them if you want to. Giving a companion the cold shoulder might nudge them into another companion’s embrace however
Bellara’s surname is Lutara
In the streets of Minrathous (in the opening segment of the game), there is a wide, winding pathway with a pub which has a dozen NPCs in it (is this The Swan tavern?)
The devs used the DA:TV CC to make each in-world NPC, except for specific characters like companions
There is smart use of verticality, scaling and wayfinding in the gameplay
If you play as e.g. a qunari Rook, the camera adjusts to ensure larger characters like them loom over those below. The camera also adjusts appropriately for dwarves to demonstrate their smaller stature
Neve Gallus is described as being capable
The Venatori Cultists we fight in the opening segment of the game are seizing the chaos caused by the demons unleashed by Solas’ ritual to try and take the opportunity to take over the city
As you traverse deeper and deeper into Solas’ hideout, more of his murals appear on the walls, and things 'get more elven'. Rhodes says “this is because you’re symbolically going back in time, as Minrathous is a city built by mages on the bones of what was originally the home of the elves”
At the heart of Solas’ hideout is his personal eluvian
Demons are fully redesigned in this game, on their original premise as creatures of feeling that live and die off the emotions around them. “As such, they are just a floating nervous system, pushed into this world from the Fade, rapidly assembled into bodies out of whatever scraps they find”
In the opening, we stop Solas’ ritual and save the world. “For now” anyways. Rook passes out moments later and wakes up in a dream-like landscape to the voice of Solas. He explains that a few drops of Rook’s blood interacted with the ritual, connecting them to the Fade forever. (I guess this is why they said in the Discord Q&A on June 14th that Rook has good reasons to want to avoid blood magic)
He also says that he was attempting to move Elgar’nan and Ghilan’nain (confirming who the two Evil Gods are) to a new prison, because the one he had previously constructed was failing. Unfortunately, Solas is trapped in the Fade by our doing, and the two gods are now free. “It’s up to Rook to stop them”, thus setting the stage for our adventure
Rook wakes up after this with Harding and Neve “in the lair of the Dread Wolf himself”, a special magical realm in the Fade called The Lighthouse. It’s a towering structure centered amongst various floating islands. This is where the team bonds, grows, and prepares for its adventures. It becomes more functional and homier as you do. “Already, though, it’s a beautifully distraught headquarters for the Veilguard, although they aren’t quite referring to themselves as that just yet”.
Because it was Solas’ home base, it's gaudy, with his fresco murals adorning various walls, greenery hanging from above, and hues of purple and touches of gold everywhere. Since it’s in the Fade, which is a realm of dreams that responds to your world state and emotion, the Lighthouse “reflects the chaos and disrepair of the Thedas you were in moments ago”
Clock symbols over dialogue icons signal optional dialogue options
At this point you can head over to Neve, engage in dialogue, and try and flirt with her
There is a dining hall in the Lighthouse. A plate, cutlery and a drinking chalice are at the end of a massive table. Matt Rhodes says that this is a funny and sad look at Solas’ isolated existence, and an example of the detail BioWare’s art team has put into DA:TV. “It’s like when you go to a friend’s house and see their bedroom for the first time; you get to learn more about them”
There is also a library, which is the central area of the The Lighthouse. It’s here that the party will often regroup and prepare for what’s next
The team decides that it must reach the ritual site back in Arlathan Forest. Corinne Busche said that the writer was "missing unique dialogue options here because I’m qunari; an elf would have more to say about the Fade due to their connection to it. The same goes for my backstory earlier in Minrathous. If I had picked the Shadow Dragons background, Neve would have recognized me immediately, with unique dialogue”
The team decide their next move. They go to Solas’ eluvian and back through to the ritual site in Arlathan Forest. However, it’s not fully functional without Solas, and while it returns them to the Forest, it’s not exactly where they want to go. Then a demon-infested suit of mechanized armor known as a Sentinel attacks them, and two NPCs appear to save you: the Veil Jumpers Strife and Irelin. Harding recognizes them, which you would expect if you read the comic Dragon Age: The Missing. They are experts in ancient elven magic. A cutscene ensues and we learn that Strife and Irelin need help finding Bellara Lutara. This cutscene is long and has multiple dialogue options.
“There’s a heavy emphasis on storytelling and dialogue, and it feels deep and meaty, like a good fantasy novel. BioWare doesn’t shy away from minutes-long cutscenes”
For Rook, this story is about what does it mean to be a leader? We define their leadership style with our choices. “From the sound of it, my team will react to my chosen leadership style in how my relationships play out.” This is demonstrated within the game’s dialogue and a special relationship meter on each character’s companion screen
Bellara is deep within Arlathan Forest, and following the events of the prologue, something is up here. Three rings of massive rocks fly through the air, protecting what appears to be a central fortress. Demon Sentinels plague the surrounding lands.
In gameplay/combat, players complete every swing in real time. Special care was taken in development for animation swing-through and cancelling. We can dash, parry, charge moves, and a completely revamped healing system that allows us to use potions at our discretion by hitting right on the d-pad. You can combo attacks and even ‘bookmark’ combos with a quick dash, which means that you can pause a combo’s status with a dash to safety and continue the rest of the combo afterward
Abilities can be used to customize your kit. They can be used on the fly as long as you account for cooldowns
When you pause and pull up the ability Wheel, it highlights you and your companions’ skills. There you can choose abilities, queue them, target specific enemies, and strategize with synergies and combos
Each character plays the same in that you execute light and heavy attacks with the same buttons, use abilities with the same buttons, and interact with the combo wheel in the same way, regardless of which class you select
Sword and shield warriors can hip-fire or aim their shield and throw it like Captain America
Warriors can parry incoming attacks which can stagger enemies. Rogues have a larger parry window. The mage the writer played couldn’t parry at all. Instead they throw up a shield that blocks incoming attacks automatically, so long as you have the mana to maintain it
On the start/pause screen: it has the map, journal, character sheets, skill tree, and a library for lore information. You can use it to cross-compare equipment and equip new gear for Rook and their companions, build weapon loadouts for quick change-ups mid-combat, and customize you and your party’s abilities and builds via an easy-to-understand skill tree. There aren’t in-depth minutiae, just "real numbers". For example, an unlocked trait might increase damage by 25 percent against armor, but that’s as in-depth as the numbers get. Passive abilities unlock jump attacks and guarantee critical hit opportunities, while abilities add moves like a Wall of Fire to your arsenal if you’re a mage. As you spec out this skill tree, which is 100 percent bespoke to each class, you’ll work closer to unlocking a spec, complete with a unique ultimate ability
“Sentinels and legions of darkspawn”
Combat is flashy and quick, with different types of health bars. Greenish-blue represents a barrier, which is taken down most effectively with ranged attacks
The game is gorgeous, with sprinkles, droplets, and splashes of magic in each attack a mage unleashes
The game looks amazing on consoles both in fidelity and performance modes
The mission to find Bellara is called “In Entropy’s Grasp”. You find her. She is the first companion you recruit (as Neve auto-joins). If your background is Veil Jumper, you get unique dialogue here with Bellara. She explains that everyone there is all trapped in a Veil Bubble, and there’s no way out once you pass through it. Despite the dire situation, she is bubbly, witty, and charming. She is spunky and effervescent
Companions are the faces of their factions, and in this case with Bellara, their entire area of the world. She is our window into Arlathan Forest. She is described as a sweetheart and a nerd for ancient elven artifacts, which is why she’s dressed more like an academic than a combatant. Her special arm gauntlet is useful both for tinkering with her environment and taking down enemies. While Neve uses ice magic and can slow time with a special ability, Bellara specializes in electricity, and she can also use magic to heal you. Her electric magic is effective against Sentinels. “However, without Bellara, we could also equip a rune that converts my ice magic, for a brief duration, into electricity to counter the Sentinels”
If you don’t direct your companions in combat, they are fully independent and will attack on their own
You progress at this point through the Forest, encountering more and more darkspawn. Bellara says that they have never been this far before because the underground Deep Roads, which they usually escape from, aren’t nearby. However, with “blighted” (BLIGHTED!) elven gods roaming the world, and thanks to the Blight’s radiation-like spread, it’s a much bigger threat in DA:TV than any prior DA game
The Forest has elven ruins, dense greenery and disgusting Blight tentacles and pustules
The style of the game is more high fantasy than anything in the series thus far and almost reminiscent of the whimsy of Fable. Matt Rhodes says that this is the result of the game’s newfound dose of magic: “The use of magic has been an evolution as the series has gone on. It’s something we’ve been planning for a while because Solas has been planning all this for a while. In the past, you could hint at cooler magical things in the corner because you couldn’t actually go there, but now we actually can, and it’s fun to showcase that.” The Forest’s whimsy will starkly contrast to the game’s other areas. The devs promise some grim locations and even grimmer story moments because, without that contrast, everything falls flat. Corinne says it’s like a “thread of optimism” pulled through otherworldly chaos ravaging Thedas. At this point in the game, Bellara’s personality is that thread
We can advance our bonds with our companions on their own personal quests and by including them in our party on main quests. Every Relationship Level you rank up, shown on their character sheet, nets you a skill point to spend on them. “The choices you make, what you say to companions, how you help them, and more all matter to their development as characters and party members”. Each companion has access to 5 abilities.
Each companion has issues, problems, and personal quests to complete. “Bellara has her own story arc that runs parallel to and informs the story path you’re on” (They’ve said that all of the companions have this too in previous promo material)
You progress deeper into the forest and Bellara spots a floating fortress and thinks that the artifact needed to destroy the Veil Bubble is in there. To reach it, we must remove the floating rock rings, and Bellara’s unique ability, Tinker, can do just that by interacting with a piece of ancient elven technology nearby. Rook can acquire abilities like Tinker later to complete such tasks in instances where Bellara, for example, isn’t in the party
Bellara has to activate three of these in the Forest to reach the castle. Each one you activate brings forth a bunch of Sentinels, demons, and darkspawn to defeat
You can create Arcane Bombs on enemies. It does high damage after being hit by a heavy attack
It sounds like mage characters can charge heavy attacks on their magical staffs. “then switch to magical daggers in a second loadout accessed with a quick tap of down on the d-pad to unleash some quick attacks”
Some enemies are “Frenzied”, meaning that they hit harder, move faster, and have more health
After a few more combat sections, including against a Frenzied sentinel, we reach the center of the temple. In there is an artifact called the Nadas Dirthalen. Bellara knows that this means “the inevitability of knowledge”. Before we can progress, a darkspawn ogre boss attacks, hitting hard with unblockable, red-coded attacks and a massive shield that you need to take down first. It is weak to fire
After defeating it (it’s a climactic arena fight), Bellara uses a special crystal to power the artifact and remove it from the pedestal, which destroys the Veil Bubble. Then, the Nadas Dirthalen comes alive as an Archive Spirit, but because the crystal used to power it breaks, we learn little about this spirit before it disappears. Bellara thinks that she can fix it (fixing broken stuff is her thing), so the group heads back to the Veil Jumper camp. The writer’s demo then ended.
The design of the game is not open world. The devs describe it as a “hub-and-spoke” design where the needs of the story are served by the level design. A version of DA:I’s Crossroads return (the network of teleporting eluvians) and this is how players will traverse across northern Thedas. “Instead of a connected open world, players will travel from eluvian to eluvian to different stretches of this part of the continent”. e.g. Minrathous, tropical beaches, Arlathan Forest, “to grim and gothic areas and elsewhere”. Some of these areas are large and full of secrets and treasures. Others are smaller and more focused on linear storytelling. Arlathan Forest is an example of this, but it still has optional paths and offshoots to explore for loot, healing potion refreshes, and other things.
Each location has a minimap, though linear levels like In Entropy’s Grasp won’t have the 'fog of war' that disappears as you explore like in some of the game’s bigger locations
The game has the largest number of diverse biomes in DA history
The Thedas of DA:TV “lives in the uncertainty”. “the mystery of its narrative”, “the implications of its lore”
The writer is surprised by BioWare’s command over the notoriously difficult Frostbite engine, and by how much narrative thought the dev team poured into these characters, even for BioWare.
---
[source: the Game Informer pages from Issue 367 - the cover story from June 18th (link), two]
#dragon age the veilguard spoilers#dragon age: the veilguard#dragon age: dreadwolf#dragon age 4#the dread wolf rises#da4#dragon age#bioware#video games#long post#longpost#solas#feels#strife#blood cw#gonna tidy and typo check these notes in a moment#edit/update: i've tidied up this post now#dragon age: the missing#dragon age: the missing spoilers
661 notes
·
View notes
Text
TILE TRANSITION TUTORIAL

a couple of people have asked me for a tutorial on how I did the penultimate gif in this set, so here goes! this is my first tutorial, so please feel free to reach out with further questions if anything's unclear.
note: this tutorial assumes you know the basics of gifmaking, can create the base gifs, and are familiar with timeline mode.
STEP ONE: create the base gifs! I'd recommend staying between 25-40 frames for each gif, since the transitions we'll use later tend to increase gif sizes. these are the ones I'll be using for this tutorial:


STEP TWO: create the guide layouts for both base gifs. for this panel, I chose a 4x4 grid — I would recommend keeping the number of "tiles" low because it can get tedious, but have a minimum of 9 (3x3 grid).


now your canvas should look like this:

STEP THREE: create the tiles. this is where the going gets rough; there might be easier ways to do this that I couldn't think of 😭 if there are any please send me an ask!
essentially, in this step we'll cut up the base gifs into smaller squares so that each tile can be manipulated separately when we put both gifs together. to do this, first create a square using the rectangle tool and the guides. then duplicate the base gif, move it above the square, apply a clipping mask, and then convert the clipped gif and square (selected in the image below) into one smart object.


ALTERNATELY: you could duplicate the original base gif and use layer masks to isolate tiles. create a layer mask for the duplicated gif layer and, with the layer mask selected, drag your mouse over a square (using the guide layout) and press delete. then press ctrl/cmd + i to invert the layer mask so that the gif only shows in the square of your choosing.
now repeat until you've got the entire gif in tiles, and do the same for the other gif!
since the transition effect is achieved by staggering the crossfades for each tile of the final gif, you can cheat by having multiple tiles "flip" at a time, ideally no more than four. this means you need to cut the base gif up into fewer pieces. to do this, simply draw multiple squares instead of one and then merge the shapes, before duplicating and clipping the gif onto them.


if you do this, it's essential to remember that you have to divide both gifs up in the exact same way. each piece of the b/w gif has to correspond to a piece of the purple gif!
this is what the layers look like for each gif once I'm done:


I have them lettered so that it'll be easier to match them up in the next step.
STEP FOUR: this is the complicated bit that took me two days to figure out. I'll do my best to explain but don't hesitate to reach out if something isn't clear!
to begin, open up a new psd and import both base gifs into it. (remember to click "create video timeline" and ensure that your gifs are all in order before proceeding.)
now, the trickiest part about this transition is ensuring that all the little tiles sync up so that the larger gif is coherent. so first we'll create some markers (just empty layers) to ensure that everything lines up as it should. — marker 1: at about halfway through the first gif (b/w in this case) — marker 2: at about a quarter of the gif length — marker 3: close to the end of the gifs

at this point we're ready to start bringing in the tiles. I'm going to delete the base gifs from this new psd just to keep things cleaner!
first thing to do is import my b/w tile. move the timeline slider over to marker 1 and split the first gif. (if it helps, rename the split gifs and add (start) and (end) to the two halves.) then, move the (end) half to the beginning of the timeline, and the (start) half to line up with marker 3.
the purple tile is easier to manage. simply import it into the psd and line it up with marker 2.
your timeline should now look like this:

notice the overlap between the gifs at their beginnings and ends — this is where you'll be able to cascade the tiles flipping, so it helps to have a significant amount of overlap.
crop the three gifs for this tile as you see fit! since this is the first tile I want to flip from b/w to purple, I'll crop gif 1a (end) all the way to the current position of the timeline slider (red line with blue tip) and leave the beginning of gif 2a uncropped. for the flip from purple to b/w, I'll crop both gifs a bit.
once that's done, drag all three gifs onto the same level in timeline so they form a video group. your timeline should look something like this:

now you just repeat the process for all the other tiles! as long as you made sure that all the tiles in one gif correspond with tiles in the other gif in step three, this should be a fairly painless process. make sure to crop the starts/ends of the gifs separately so that they don't all flip together.
this is what my layers look once I've done all the tiles:

and the gif!

STEP FIVE: transitions! click on the half-white square (top right of the left column in the timeline, beside the scissors) and select the crossfade transition, then drag it between two gifs in a video group. it should create a two-triangle symbol and shorten the overall length of the video group.


apply the transition to all the tile flips, ensuring that the duration of all transitions is constant. this can sometimes be tricky because ps likes to change the duration of each transition, so right click on the transition symbol and manually change all your transition durations to be the same.
your layers should now look something like this:

STEP SIX: draw the grid. bring back the guide layout from step two and using the line tool (I like 2px thickness), trace the grid. adjust opacity as you see fit (50-80% is usually a good idea), so that the canvas looks like this:

STEP SEVEN: export and celebrate! you're done!
I hope this tutorial made sense and was easy to follow, and happy giffing! my inbox is always open for any questions <3
#tutorial#ps help#ps tutorial#userace#alielook#userabs#usercats#userhella#userfaiths#tuserabbie#usershreyu#usertreena#tuserlucie#uservivaldi#usertj#usergiu#userroza
800 notes
·
View notes
Text


Neural Filters Tutorial for Gifmakers by @antoniosvivaldi
Hi everyone! In light of my blog’s 10th birthday, I’m delighted to reveal my highly anticipated gifmaking tutorial using Neural Filters - a very powerful collection of filters that really broadened my scope in gifmaking over the past 12 months.
Before I get into this tutorial, I want to thank @laurabenanti, @maines , @cobbbvanth, and @cal-kestis for their unconditional support over the course of my journey of investigating the Neural Filters & their valuable inputs on the rendering performance!
In this tutorial, I will outline what the Photoshop Neural Filters do and how I use them in my workflow - multiple examples will be provided for better clarity. Finally, I will talk about some known performance issues with the filters & some feasible workarounds.
Tutorial Structure:
Meet the Neural Filters: What they are and what they do
Why I use Neural Filters? How I use Neural Filters in my giffing workflow
Getting started: The giffing workflow in a nutshell and installing the Neural Filters
Applying Neural Filters onto your gif: Making use of the Neural Filters settings; with multiple examples
Testing your system: recommended if you’re using Neural Filters for the first time
Rendering performance: Common Neural Filters performance issues & workarounds
For quick reference, here are the examples that I will show in this tutorial:
Example 1: Image Enhancement | improving the image quality of gifs prepared from highly compressed video files
Example 2: Facial Enhancement | enhancing an individual's facial features
Example 3: Colour Manipulation | colourising B&W gifs for a colourful gifset
Example 4: Artistic effects | transforming landscapes & adding artistic effects onto your gifs
Example 5: Putting it all together | my usual giffing workflow using Neural Filters
What you need & need to know:
Software: Photoshop 2021 or later (recommended: 2023 or later)*
Hardware: 8GB of RAM; having a supported GPU is highly recommended*
Difficulty: Advanced (requires a lot of patience); knowledge in gifmaking and using video timeline assumed
Key concepts: Smart Layer / Smart Filters
Benchmarking your system: Neural Filters test files**
Supplementary materials: Tutorial Resources / Detailed findings on rendering gifs with Neural Filters + known issues***
*I primarily gif on an M2 Max MacBook Pro that's running Photoshop 2024, but I also have experiences gifmaking on few other Mac models from 2012 ~ 2023.
**Using Neural Filters can be resource intensive, so it’s helpful to run the test files yourself. I’ll outline some known performance issues with Neural Filters and workarounds later in the tutorial.
***This supplementary page contains additional Neural Filters benchmark tests and instructions, as well as more information on the rendering performance (for Apple Silicon-based devices) when subject to heavy Neural Filters gifmaking workflows
Tutorial under the cut. Like / Reblog this post if you find this tutorial helpful. Linking this post as an inspo link will also be greatly appreciated!
1. Meet the Neural Filters!
Neural Filters are powered by Adobe's machine learning engine known as Adobe Sensei. It is a non-destructive method to help streamline workflows that would've been difficult and/or tedious to do manually.
Here are the Neural Filters available in Photoshop 2024:


Skin Smoothing: Removes blemishes on the skin
Smart Portrait: This a cloud-based filter that allows you to change the mood, facial age, hair, etc using the sliders+
Makeup Transfer: Applies the makeup (from a reference image) to the eyes & mouth area of your image
Landscape Mixer: Transforms the landscape of your image (e.g. seasons & time of the day, etc), based on the landscape features of a reference image
Style Transfer: Applies artistic styles e.g. texturings (from a reference image) onto your image
Harmonisation: Applies the colour balance of your image based on the lighting of the background image+
Colour Transfer: Applies the colour scheme (of a reference image) onto your image
Colourise: Adds colours onto a B&W image
Super Zoom: Zoom / crop an image without losing resolution+
Depth Blur: Blurs the background of the image
JPEG Artefacts Removal: Removes artefacts caused by JPEG compression
Photo Restoration: Enhances image quality & facial details
+These three filters aren't used in my giffing workflow. The cloud-based nature of Smart Portrait leads to disjointed looking frames. For Harmonisation, applying this on a gif causes Neural Filter timeout error. Finally, Super Zoom does not currently support output as a Smart Filter
If you're running Photoshop 2021 or earlier version of Photoshop 2022, you will see a smaller selection of Neural Filters:


Things to be aware of:
You can apply up to six Neural Filters at the same time
Filters where you can use your own reference images: Makeup Transfer (portraits only), Landscape Mixer, Style Transfer (not available in Photoshop 2021), and Colour Transfer
Later iterations of Photoshop 2023 & newer: The first three default presets for Landscape Mixer and Colour Transfer are currently broken.
2. Why I use Neural Filters?
Here are my four main Neural Filters use cases in my gifmaking process. In each use case I'll list out the filters that I use:

Enhancing Image Quality:
Common wisdom is to find the highest quality video to gif from for a media release & avoid YouTube whenever possible. However for smaller / niche media (e.g. new & upcoming musical artists), prepping gifs from highly compressed YouTube videos is inevitable.
So how do I get around with this? I have found Neural Filters pretty handy when it comes to both correcting issues from video compression & enhancing details in gifs prepared from these highly compressed video files.
Filters used: JPEG Artefacts Removal / Photo Restoration
Facial Enhancement:
When I prepare gifs from highly compressed videos, something I like to do is to enhance the facial features. This is again useful when I make gifsets from compressed videos & want to fill up my final panel with a close-up shot.
Filters used: Skin Smoothing / Makeup Transfer / Photo Restoration (Facial Enhancement slider)
Colour Manipulation:
Neural Filters is a powerful way to do advanced colour manipulation - whether I want to quickly transform the colour scheme of a gif or transform a B&W clip into something colourful.
Filters used: Colourise / Colour Transfer
Artistic Effects:
This is one of my favourite things to do with Neural Filters! I enjoy using the filters to create artistic effects by feeding textures that I've downloaded as reference images. I also enjoy using these filters to transform the overall the atmosphere of my composite gifs. The gifsets where I've leveraged Neural Filters for artistic effects could be found under this tag on usergif.
Filters used: Landscape Mixer / Style Transfer / Depth Blur
How I use Neural Filters over different stages of my gifmaking workflow:
I want to outline how I use different Neural Filters throughout my gifmaking process. This can be roughly divided into two stages:
Stage I: Enhancement and/or Colourising | Takes place early in my gifmaking process. I process a large amount of component gifs by applying Neural Filters for enhancement purposes and adding some base colourings.++
Stage II: Artistic Effects & more Colour Manipulation | Takes place when I'm assembling my component gifs in the big PSD / PSB composition file that will be my final gif panel.
I will walk through this in more detail later in the tutorial.
++I personally like to keep the size of the component gifs in their original resolution (a mixture of 1080p & 4K), to get best possible results from the Neural Filters and have more flexibility later on in my workflow. I resize & sharpen these gifs after they're placed into my final PSD composition files in Tumblr dimensions.
3. Getting started
The essence is to output Neural Filters as a Smart Filter on the smart object when working with the Video Timeline interface. Your workflow will contain the following steps:
Prepare your gif
In the frame animation interface, set the frame delay to 0.03s and convert your gif to the Video Timeline
In the Video Timeline interface, go to Filter > Neural Filters and output to a Smart Filter
Flatten or render your gif (either approach is fine). To flatten your gif, play the "flatten" action from the gif prep action pack. To render your gif as a .mov file, go to File > Export > Render Video & use the following settings.

Setting up:
o.) To get started, prepare your gifs the usual way - whether you screencap or clip videos. You should see your prepared gif in the frame animation interface as follows:

Note: As mentioned earlier, I keep the gifs in their original resolution right now because working with a larger dimension document allows more flexibility later on in my workflow. I have also found that I get higher quality results working with more pixels. I eventually do my final sharpening & resizing when I fit all of my component gifs to a main PSD composition file (that's of Tumblr dimension).
i.) To use Smart Filters, convert your gif to a Smart Video Layer.
As an aside, I like to work with everything in 0.03s until I finish everything (then correct the frame delay to 0.05s when I upload my panels onto Tumblr).
For convenience, I use my own action pack to first set the frame delay to 0.03s (highlighted in yellow) and then convert to timeline (highlighted in red) to access the Video Timeline interface. To play an action, press the play button highlighted in green.

Once you've converted this gif to a Smart Video Layer, you'll see the Video Timeline interface as follows:

ii.) Select your gif (now as a Smart Layer) and go to Filter > Neural Filters

Installing Neural Filters:
Install the individual Neural Filters that you want to use. If the filter isn't installed, it will show a cloud symbol (highlighted in yellow). If the filter is already installed, it will show a toggle button (highlighted in green)

When you toggle this button, the Neural Filters preview window will look like this (where the toggle button next to the filter that you use turns blue)

4. Using Neural Filters
Once you have installed the Neural Filters that you want to use in your gif, you can toggle on a filter and play around with the sliders until you're satisfied. Here I'll walkthrough multiple concrete examples of how I use Neural Filters in my giffing process.
Example 1: Image enhancement | sample gifset
This is my typical Stage I Neural Filters gifmaking workflow. When giffing older or more niche media releases, my main concern is the video compression that leads to a lot of artefacts in the screencapped / video clipped gifs.
To fix the artefacts from compression, I go to Filter > Neural Filters, and toggle JPEG Artefacts Removal filter. Then I choose the strength of the filter (boxed in green), output this as a Smart Filter (boxed in yellow), and press OK (boxed in red).
Note: The filter has to be fully processed before you could press the OK button!

After applying the Neural Filters, you'll see "Neural Filters" under the Smart Filters property of the smart layer

Flatten / render your gif
Example 2: Facial enhancement | sample gifset
This is my routine use case during my Stage I Neural Filters gifmaking workflow. For musical artists (e.g. Maisie Peters), YouTube is often the only place where I'm able to find some videos to prepare gifs from. However even the highest resolution video available on YouTube is highly compressed.
Go to Filter > Neural Filters and toggle on Photo Restoration. If Photoshop recognises faces in the image, there will be a "Facial Enhancement" slider under the filter settings.

Play around with the Photo Enhancement & Facial Enhancement sliders. You can also expand the "Adjustment" menu make additional adjustments e.g. remove noises and reducing different types of artefacts.

Once you're happy with the results, press OK and then flatten / render your gif.
Example 3: Colour Manipulation | sample gifset
Want to make a colourful gifset but the source video is in B&W? This is where Colourise from Neural Filters comes in handy! This same colourising approach is also very helpful for colouring poor-lit scenes as detailed in this tutorial.
Here's a B&W gif that we want to colourise:

Highly recommended: add some adjustment layers onto the B&W gif to improve the contrast & depth. This will give you higher quality results when you colourise your gif.
Go to Filter > Neural Filters and toggle on Colourise.

Make sure "Auto colour image" is enabled.
Play around with further adjustments e.g. colour balance, until you're satisfied then press OK.
Important: When you colourise a gif, you need to double check that the resulting skin tone is accurate to real life. I personally go to Google Images and search up photoshoots of the individual / character that I'm giffing for quick reference.
Add additional adjustment layers until you're happy with the colouring of the skin tone.

Once you're happy with the additional adjustments, flatten / render your gif. And voila!

Note: For Colour Manipulation, I use Colourise in my Stage I workflow and Colour Transfer in my Stage II workflow to do other types of colour manipulations (e.g. transforming the colour scheme of the component gifs)
Example 4: Artistic Effects | sample gifset
This is where I use Neural Filters for the bulk of my Stage II workflow: the most enjoyable stage in my editing process!
Normally I would be working with my big composition files with multiple component gifs inside it. To begin the fun, drag a component gif (in PSD file) to the main PSD composition file.
Resize this gif in the composition file until you're happy with the placement

Duplicate this gif. Sharpen the bottom layer (highlighted in yellow), and then select the top layer (highlighted in green) & go to Filter > Neural Filters

I like to use Style Transfer and Landscape Mixer to create artistic effects from Neural Filters. In this particular example, I've chosen Landscape Mixer
Select a preset or feed a custom image to the filter (here I chose a texture that I've on my computer)

Play around with the different sliders e.g. time of the day / seasons
Important: uncheck "Harmonise Subject" & "Preserve Subject" - these two settings are known to cause performance issues when you render a multiframe smart object (e.g. for a gif)

Once you're happy with the artistic effect, press OK
To ensure you preserve the actual subject you want to gif (bc Preserve Subject is unchecked), add a layer mask onto the top layer (with Neural Filters) and mask out the facial region. You might need to play around with the Layer Mask Position keyframes or Rotoscope your subject in the process.
After you're happy with the masking, flatten / render this composition file and voila!

Example 5: Putting it all together | sample gifset
Let's recap on the Neural Filters gifmaking workflow and where Stage I and Stage II fit in my gifmaking process:
i. Preparing & enhancing the component gifs
Prepare all component gifs and convert them to smart layers
Stage I: Add base colourings & apply Photo Restoration / JPEG Artefacts Removal to enhance the gif's image quality
Flatten all of these component gifs and convert them back to Smart Video Layers (this process can take a lot of time)
Some of these enhanced gifs will be Rotoscoped so this is done before adding the gifs to the big PSD composition file
ii. Setting up the big PSD composition file
Make a separate PSD composition file (Ctrl / Cmmd + N) that's of Tumblr dimension (e.g. 540px in width)
Drag all of the component gifs used into this PSD composition file
Enable Video Timeline and trim the work area
In the composition file, resize / move the component gifs until you're happy with the placement & sharpen these gifs if you haven't already done so
Duplicate the layers that you want to use Neural Filters on
iii. Working with Neural Filters in the PSD composition file
Stage II: Neural Filters to create artistic effects / more colour manipulations!
Mask the smart layers with Neural Filters to both preserve the subject and avoid colouring issues from the filters
Flatten / render the PSD composition file: the more component gifs in your composition file, the longer the exporting will take. (I prefer to render the composition file into a .mov clip to prevent overriding a file that I've spent effort putting together.)
Note: In some of my layout gifsets (where I've heavily used Neural Filters in Stage II), the rendering time for the panel took more than 20 minutes. This is one of the rare instances where I was maxing out my computer's memory.
Useful things to take note of:
Important: If you're using Neural Filters for Colour Manipulation or Artistic Effects, you need to take a lot of care ensuring that the skin tone of nonwhite characters / individuals is accurately coloured
Use the Facial Enhancement slider from Photo Restoration in moderation, if you max out the slider value you risk oversharpening your gif later on in your gifmaking workflow
You will get higher quality results from Neural Filters by working with larger image dimensions: This gives Neural Filters more pixels to work with. You also get better quality results by feeding higher resolution reference images to the Neural Filters.
Makeup Transfer is more stable when the person / character has minimal motion in your gif
You might get unexpected results from Landscape Mixer if you feed a reference image that don't feature a distinctive landscape. This is not always a bad thing: for instance, I have used this texture as a reference image for Landscape Mixer, to create the shimmery effects as seen in this gifset
5. Testing your system
If this is the first time you're applying Neural Filters directly onto a gif, it will be helpful to test out your system yourself. This will help:
Gauge the expected rendering time that you'll need to wait for your gif to export, given specific Neural Filters that you've used
Identify potential performance issues when you render the gif: this is important and will determine whether you will need to fully playback your gif before flattening / rendering the file.
Understand how your system's resources are being utilised: Inputs from Windows PC users & Mac users alike are welcome!
About the Neural Filters test files:
Contains six distinct files, each using different Neural Filters
Two sizes of test files: one copy in full HD (1080p) and another copy downsized to 540px
One folder containing the flattened / rendered test files
How to use the Neural Filters test files:
What you need:
Photoshop 2022 or newer (recommended: 2023 or later)
Install the following Neural Filters: Landscape Mixer / Style Transfer / Colour Transfer / Colourise / Photo Restoration / Depth Blur
Recommended for some Apple Silicon-based MacBook Pro models: Enable High Power Mode
How to use the test files:
For optimal performance, close all background apps
Open a test file
Flatten the test file into frames (load this action pack & play the “flatten” action)
Take note of the time it takes until you’re directed to the frame animation interface
Compare the rendered frames to the expected results in this folder: check that all of the frames look the same. If they don't, you will need to fully playback the test file in full before flattening the file.†
Re-run the test file without the Neural Filters and take note of how long it takes before you're directed to the frame animation interface
Recommended: Take note of how your system is utilised during the rendering process (more info here for MacOS users)
†This is a performance issue known as flickering that I will discuss in the next section. If you come across this, you'll have to playback a gif where you've used Neural Filters (on the video timeline) in full, prior to flattening / rendering it.
Factors that could affect the rendering performance / time (more info):
The number of frames, dimension, and colour bit depth of your gif
If you use Neural Filters with facial recognition features, the rendering time will be affected by the number of characters / individuals in your gif
Most resource intensive filters (powered by largest machine learning models): Landscape Mixer / Photo Restoration (with Facial Enhancement) / and JPEG Artefacts Removal
Least resource intensive filters (smallest machine learning models): Colour Transfer / Colourise
The number of Neural Filters that you apply at once / The number of component gifs with Neural Filters in your PSD file
Your system: system memory, the GPU, and the architecture of the system's CPU+++
+++ Rendering a gif with Neural Filters demands a lot of system memory & GPU horsepower. Rendering will be faster & more reliable on newer computers, as these systems have CPU & GPU with more modern instruction sets that are geared towards machine learning-based tasks.
Additionally, the unified memory architecture of Apple Silicon M-series chips are found to be quite efficient at processing Neural Filters.
6. Performance issues & workarounds
Common Performance issues:
I will discuss several common issues related to rendering or exporting a multi-frame smart object (e.g. your composite gif) that uses Neural Filters below. This is commonly caused by insufficient system memory and/or the GPU.
Flickering frames: in the flattened / rendered file, Neural Filters aren't applied to some of the frames+-+
Scrambled frames: the frames in the flattened / rendered file isn't in order
Neural Filters exceeded the timeout limit error: this is normally a software related issue
Long export / rendering time: long rendering time is expected in heavy workflows
Laggy Photoshop / system interface: having to wait quite a long time to preview the next frame on the timeline
Issues with Landscape Mixer: Using the filter gives ill-defined defined results (Common in older systems)--
Workarounds:
Workarounds that could reduce unreliable rendering performance & long rendering time:
Close other apps running in the background
Work with smaller colour bit depth (i.e. 8-bit rather than 16-bit)
Downsize your gif before converting to the video timeline-+-
Try to keep the number of frames as low as possible
Avoid stacking multiple Neural Filters at once. Try applying & rendering the filters that you want one by one
Specific workarounds for specific issues:
How to resolve flickering frames: If you come across flickering, you will need to playback your gif on the video timeline in full to find the frames where the filter isn't applied. You will need to select all of the frames to allow Photoshop to reprocess these, before you render your gif.+-+
What to do if you come across Neural Filters timeout error? This is caused by several incompatible Neural Filters e.g. Harmonisation (both the filter itself and as a setting in Landscape Mixer), Scratch Reduction in Photo Restoration, and trying to stack multiple Neural Filters with facial recognition features.
If the timeout error is caused by stacking multiple filters, a feasible workaround is to apply the Neural Filters that you want to use one by one over multiple rendering sessions, rather all of them in one go.
+-+This is a very common issue for Apple Silicon-based Macs. Flickering happens when a gif with Neural Filters is rendered without being previously played back in the timeline.
This issue is likely related to the memory bandwidth & the GPU cores of the chips, because not all Apple Silicon-based Macs exhibit this behaviour (i.e. devices equipped with Max / Ultra M-series chips are mostly unaffected).
-- As mentioned in the supplementary page, Landscape Mixer requires a lot of GPU horsepower to be fully rendered. For older systems (pre-2017 builds), there are no workarounds other than to avoid using this filter.
-+- For smaller dimensions, the size of the machine learning models powering the filters play an outsized role in the rendering time (i.e. marginal reduction in rendering time when downsizing 1080p file to Tumblr dimensions). If you use filters powered by larger models e.g. Landscape Mixer and Photo Restoration, you will need to be very patient when exporting your gif.
7. More useful resources on using Neural Filters
Creating animations with Neural Filters effects | Max Novak
Using Neural Filters to colour correct by @edteachs
I hope this is helpful! If you have any questions or need any help related to the tutorial, feel free to send me an ask 💖
#photoshop tutorial#gif tutorial#dearindies#usernik#useryoshi#usershreyu#userisaiah#userroza#userrobin#userraffa#usercats#userriel#useralien#userjoeys#usertj#alielook#swearphil#*#my resources#my tutorials
509 notes
·
View notes
Text

I like when people make the most of a small house and these owners did their best to make this little 1946 Cape in Cleveland, OH, colorful and interesting. 3bds, 2ba, 1,131 sq ft, $285,089. (One of my favorite series of children's books to read in story time is the classic "The Stupids," by Harry Allard. The Stupid family lives in Cleveland and the funniest book is "The Stupids Die." Somehow, the Stupid family thinks they died and marvel at how Heaven looks just like Cleveland. Their dog is smart, he always comes to their rescue.)


Enter directly into the living room. The floor is perfect and look at how neatly they did the designs on the walls and ceiling. I would remove the curtains, though


Cute 3pc. bath in the hall.


Not sure which bedroom is the primary. This one is smallish and has mirrored walls to give the illusion of more space.


This bedroom looks larger. There they go again, people removing the closet doors. Don't care too much for the wallpaper.


Pink & green kitchen. Nice white Shaker cabinets, but who laid the floor? Is it supposed to be in square sheets like that? I don't know why they didn't cover the whole backsplash with tile, either. Sliders open to a nice deck, though.


The large finished attic is the 3rd bd. I don't know if someone painted the clouds or if it's wallpaper, but they're beautifully done.


Finished basement. There's a bedroom area down here in the corner.

And, this is where the 2nd bath is located.

The laundry room has a nice new aluminum sink.

Very large covered deck on the back of the house.

Plus a patio with a little garden.

Interesting yard with a trampoline that looks like it conveys.


This yard could be lovely.


Path to a very large driveway and 3 car garage, plus a nice shed. I bet a pool would fit in the back yard. I think that this house is a good value for the price. 9,374 sq ft lot
https://www.zillow.com/homedetails/15722-Lydian-Ave-Cleveland-OH-44111/33374920_zpid/
120 notes
·
View notes
Text
A New World: part 6
Bayverse!Leonardo x reader

Part 1 Part 2 Part 3 Part 4 Part 5 / Part 7 Part 8

A/N: The continuation is here! Enjoooooooyyyyyy!💙
Leo is 25, reader is 22 - 23.
Warnings: None so far💙
With the Chinese takeout half eaten still on the table, Leo and (Y/N) had gotten back to trying out portal ideas. Leo found himself with his katana in hand once again, trying to mimic this so-called Rise version of himself, swinging the katana above his head, saying the same words. And for yet another time, it didn’t work. No big surprise there. But that was not really what the blue turtle was focusing on at that point. Leo could not lie to himself, he found himself more focused on this different version of himself, instead of his task at hand. Was that really how other people saw him? And was that how (Y/N) saw him? A flamboyant, annoying, know it all, smart ass, who didn’t seem to care for much more than himself and his face. But then he was shown this 2003 version, who seemed closer to how he saw himself. Level headed, quick thinking, respectful, a leader. Was that also how people saw him? According to (Y/N), those was just the ones that he had seen by now. Leo wouldn’t help but wonder how many different versions of him was out there. It was disheartening, yet it made Leo curious. One question popped up in his head after another, all while he stood with the katana in head or sat in front of the markings on (Y/N)’s wall. At one point (Y/N) had even tried to speak into the walkie talkie on his shoulder strap. Leo found himself listening in anticipation, but they got nothing. Only static sound from a dead end.
The sun was ever so slightly, casting a pinkish color over the blue sky outside of the window. (Y/N) was getting tired and Leo was getting frustrated. If he had to listen to Rise Leo saying “Hachi machi” one more time, he would probably have a Raph-like outburst, or maybe even smash a window with his fist, not caring one bit if anybody saw or heard. That would be a first for Leo - not caring about human reactions to him, his form and his actions. It must be this world. It was messing him up. The most frustrated he had ever been, and it wouldn’t surprise Leo if it was just the nature of this world. Or the human in the living room with him, who encouraged him over and over again to swing his swords and hips like an idiot.
(Y/N) seemed to sense Leo’s frustration, and decided it was more than enough for one day. She probably should have stopped suggesting doing like Rise Leo, after the mutant in front of her rolled his eyes the first time around. At this point he was even struggling to keep his annoyed sounds to himself.
“We won’t get anything done without some rest”, she said, stretching with a yawn as she rose from the sofa. As much as Leo hated to admit it to himself, she was right, so right that Leo placed his katanas back on his shell without a word.
“I got work tomorrow, but on my way home I can stop by the comic store. Maybe they got something in there that can help us, or at least give us ideas”, (Y/N) said as she started walking towards her bedroom.
“I hope so”, Leo said, feeling a pit form in his stomach, linked to a possible truth he did not yet dare tell himself. Once again (Y/N) seemed to sense his feelings, yet she did not know what to tell the gigantic slider. Normally she would like to mentally boast about her knowledge of the leader in blue, but at that moment she had no idea how to help him. Whenever he was like this, it was usually his brothers or master Splinter that would talk him back to normal. (Y/N) had no idea what to say, so she said the only thing that seemed to fit the moment.
“Good night Leo. Sleep well”.
“Night”, Leo said, giving her a small node, before making his way to the guest room, thoughts and feelings seeming to weigh him down.
(Y/N) laid in her bed with the same feeling Leo had in his stomach. Leo was not exactly as (Y/N) had thought he would be. Yet again, he was stock in a different world to his own, separated from his brothers, with seemingly no way of getting home. It made sense why he was like this. Short tempered, agitated and of course frustrated. She would probably feel the same if she was stock in an alternative dimension. Yet (Y/N) had thought Leonardo would be more… level headed, calm, maybe even understanding of the world around him. Seeing it as a new opportunity to learn.
Turning onto her side, (Y/N) stared at the wall that separated her room from the guest room. Maybe Leonardo wasn’t exactly as she had thought he would be, yet she knew him enough to know what was going on. He was losing hope, and with that came anger and frustration. Therefore it didn’t surprise her when she heard him move around in the guest room.
Leo had a hard time sleeping. He just laid in bed, unable to sleep, with these pictures of these different versions in his head taking over his thoughts. It felt… strange. He felt strange. He was used to his brother talking about the possibilities of other dimensions, but he had never really given it much thought. Donnie had mainly talked about it in theoretical terms, doing his usual scientist thing, while Raph and Mikey had been all over it like comic book nerds. Two different approaches, yet they still talked about it.
But as Leo laid there, sleepless in the bed, he couldn’t stop his mind from thinking back to all the different versions of him that he had seen. He had many questions. So many more questions than he thought you would be able to answer. It probably wasn’t a good idea, but he was so curious. So therefore he soon found himself walking down the hallway, making his way to your living room.
All videos and DVDs were still laying out in the open, ready for you and him to watch them through again the next day. It was so easy for Leo to just grab one of them and put them on, before sitting back on your couch, watching them through one by one, letting the light from the TV screen being the only light lighting up the room.
Putting on the 2012 version, Leo sat back down on the couch, leaning his elbows onto his knees, taking in what he saw before him. Now, this Leonardo was also something he could recognize. A boy that really just wanted to prove how good of a leader he was, even with his insecurities in his way. He did all he could to- does that Leo have a crush on Karai?! No way! Leo had never had a crush, at least not this version of him… Mikey on the other hand, had the biggest crush on April- but it seemed like in this 2012 version, it was Donnie with the crush… And did Raph have a lizard girlfriend? Narh, this was too much. If Leo really wanted to watch other versions of himself, he shouldn’t watch this one. It was stupid! But, he never turned it off, watching in confusion as he saw another version of himself fall head over heels for a girl that wasn’t good for him. Leonardo couldn’t blame that guy too much. He understood where he was coming from. Being a mutant turtle, living in the sewers, knowing that he would probably never get accepted by the humans on the surface, given his form. He and his brothers had accepted at a young age that no one outside of the sewers would ever love them. They only had each other and master Splinter. But even after the NYPD had accepted them, there was still this strange feeling of never being loveable. Was that why he and his brothers sometimes would lash out at each other? Disappointment, frustration and loneliness? Maybe.
Leo found himself staring at the screen, when Karai came close to this other version of Leo, standing just above him. Was she going to kiss him? Someone would actually kiss him in a different universe? But no, it was another trap, and Karai left him on the floor.
“Don’t sweat it”, sounded a voice by the door. (Y/N) stood in the doorway, arms crossed and a little smile on her lips. Of course Leo had turned the TV up so loud that she had been able to her it from her bedroom. Leo jumped in embarrassment, grabbing for the remote to turn off the TV.
“It’s not what it looks like!”, Leo promptly said, fighting the hot feeling in his cheeks.
“I hope not”, (Y/N) said still with a smile. “Because that version of Karai turns out to be Splinter's daughter, there by your half sister”.
“And that’s why I don’t do girlfriends”, Leo sighed, rubbing the bridge of his nose.
“Yeah, that’s the reason”, she mumbled sarcastically, causing Leo to shoot her a glance. She was better not start acting funny. Leo was not in the mood for that, making it clear with the sting of his eyes. But as soon as Leo’s eyes met (Y/N)’s, it almost felt too much, causing the two of them to look away instantly, like negatively charged batteries that could not be next to each other. Unwelcome for both of them. As if neither of them was ready to be that direct.
Silence fell over the two of them as they tried avoiding looking each other into the eyes, thinking of what words would be best in this situation. (Y/N)’s eyes focusing on the floor she stood on, Leo’s on his forearm as his other hand ran along it, as if he was checking to see if something new was there.
“I’ve been thinking”, (Y/N) started, drawing Leo’s attention to her once more. “I have tomorrow off as well, so I was thinking I will go to the comic store and see if I can figure anything out”.
“What would that help?”, Leo asked, almost exhausted already.
Boy, this man was way more annoying than she had ever imagined he would be. So much for somehow getting to meet her favorite ninja turtles.
“You seem to forget that in this world you are the product of a comic book”, she said, trying her best not to sound too snappy. “Maybe the comic book store has a few ideas we haven’t tried out”.
Leo sat for a moment, thinking about her words. Though it was hard to admit, (Y/N) logic might be the best shot he got at this moment. Maybe the comic book store was his only hope.
“Okay”, Leo sighed, his throat feeling dry and thin. “Sounds like a plan”.
(Y/N) gave him a sympathetic nod, biting the inside of her lip. She hoped that her plan would work, because seeing her childhood hero sitting slumped over on her couch like that, made a pit grow in her stomach. It had to work.
And it was that plan in mind that (Y/N) and Leonardo went back to their respective rooms, hoping to get some sleep. But this time, as Leo tried to fall asleep, he had something different on his mind. This time it was the scene of the other version of him and Karai, almost about to kiss. That was a strange situation to see himself in. So strange he couldn’t tell how he felt about it. Almost unsettling. God, how he hoped (Y/N)’s plan was going to work. The faster he could get home and forget all about what he had seen.
—
Dr. Lilja took off his glasses and rubbed his tired eyes. The wires before him had started to cross before his eyes and change colors every second. Probably a good sign to take a break from the wiring and take a look at programming. And so Lilja put his glasses back on and stood up, before making his way over to his desk with his large computer, tapping on the old computer keys.
Lilja had been working all day, with a constant flow of coffee at his side. But the coffee in the mug on his desk was now cold. Lilja took the cup in his hand, smiling down at the purple dressed turtle on it, with the words “#1 scientist” on it. It had been a gift from Agent Bishop’s son, after he had learned about Lilja’s long forgotten birthday. That sweet boy. It was a shame he wasn’t allowed in the lab anymore. Dr. Lilja really enjoyed having him around, bringing some much needed joy to his work. And even if he rambled on and on about ninja turtles, Lilja could never get mad at him. Not even when he accidently pushed one of the machine buttons with his Leonardo action figure, causing the machine to break down with a boom. Bishop’s son never intended to do anything wrong. The poor boy was so upset, fearing that Lilja had somehow been hurt. He did not care that his action figure was gone in the explosion. He only cared for dr. Lilja’s safety. It had been a long time ago since another person had cared for him like that. That boy truly had a heart of gold.
Lilja poured the cold coffee out in the nearby sink, before putting the mug under the coffee machine, pressing a button for another round. The machine started humming, while Lilja went back to the desk, taking a look at his computer program, measuring the thinning of air and atmosphere in the past 12 hours. Looking over the numbers, dr. Lilja starred in shock. Had he been drinking his coffee, he would have spit it out straight on the spot.
There had been a momentarily thinning in the air and atmosphere.
No way.
Lilja started tapping frantically at the keyboard, looking for time. Did it match up? How could it be possible? There was no way it could be possible…
The time matched up…
Dr. Lilja’s mouth stod open. Excitement and shock rushed through him, yet he sat frozen, staring at the screen.
He had to contact Agent Bishop.
#tmnt#teenage mutant ninja turtles#tmnt leonardo#tmnt leo#tmnt x reader#tmnt leo x reader#tmnt leonardo x reader#tmnt bayverse#tmnt bayverse x reader#tmnt bayverse leo#tmnt bayverse leo x reader#tmnt bayverse leonardo#tmnt bayverse leonardo x reader#bayverse tmnt#bayverse tmnt x reader#bayverse leo#bayverse leo x reader#bayverse leonardo#bayverse leonardo x reader
81 notes
·
View notes
Text


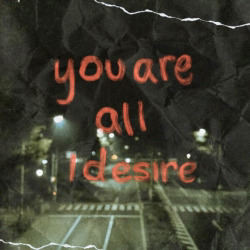
BLOOD ORANGE.
— challengers.
summary : after winning a tennis tournament, you meet two guys at your after-party. they invite you back to their hotel room for some beers. who knows what could happen?
note : not smut at all but like verrrrryy suggestive and a little crazy like wow reader i didn't know you were like that ALSO heavily inspired by a bot i have on cai because i knew the idea of wally and dick being patrick and art would eat tf up so i basically reconstructed a convo i had with them 🙈🙈
knock, knock.
ear pressed against the door, you could hear a rummaging around from inside the motel room, located right down the end of the hall. it was dingier than what you were used to, coming with your parents who paid for nice hotels and nice rooms, but for two college-age guys? better than one would expect.
feet padded closer, and you pulled away from the door just in time for it to open and you not fall in, which revealed the two boys you'd met at your party earlier.
wally west, red hair like fire, and a personality to match it. his smile seemed plastered to the corner of his mouth, and his eyes were wandering like he wanted you to see it; not in a way that made you feel like a piece of meat, but definitely enough for you to realise he was into you.
dick grayson — ice. more cooled with his words, as well as better under the pressure of the play you'd watched, where they won the duos tournament going on. he seemed to let wally do more of the talking at the party, but was the one to invite you here; whilst wally was rambling on about how well you'd played, also trying to compliment your appearance at the same time, dick cut him off with a, "he's trying to ask you to come over tonight."
and, well, here you are.
"hey," you said lightly, looking between the two boys. their hair was both a mess, sticking out at the edges, and wally's t-shirt was on backwards. a distinct haze seemed to hang through the room, the smell of cigarette smoke now drifting out through the door.
"hey yourself," dick smiled, stepping back slightly to allow you some space to walk through. "make yourself at home. you drink, right? we have beer."
stepping into their little motel room was like walking into a time capsule; yellow wallpaper, peeling at the edges, a sqeaky-looking double bed with a ghastly grandma-floral duvet. the source of the cigarette smell seemed to be gone, but you spotted a plastic shower cap stuck with an elastic band over the smoke detector. smart kids, or bad kids?
you left your sports sliders by the door, where two pairs of tennis shoes had been strewn.
"nice place you've got here," you said with a soft laugh, drifting your hand along the tv stand, narrowly avoiding a stray polo shirt you recognised from the tournament earlier that day.
when you spotted the little paper waste bin nudged beneath the desk, it made sense how they'd managed to make the place a little cleaner — and the sound of rushing around from before. crumpled beer cans and empty cigarette packets lay at the bottom, some tissues balled up and placed over them.
wally was the one to chuckle, finding home on the bed, assumably same as before. "hey, we know it's not the four seasons," he laughed in response, causing you to look up and meet his glinting green eyes. "but i'd say it's pretty nice. you should see what some of the other tourny people are staying in."
unsure if he meant better or worse conditions, you simply offered back a smile to show you'd appreciated his input, as well as the four seasons joke. not that you'd stayed there, but you could imagine it'd be ten times more lavish than your hotel.
although they were trying to make you comfortable, there still seemed to be some tension in the air. "so, you said you have beer?" you prompted with a soft laugh.
"right," dick said, springing up from his place still at the door, which he'd closed behind you. he travelled a short way across the room, passing you in the process, to a small handheld cooler beside one of their duffle bags. he lifted the lid and dug around for three bottles. "hope you don't mind, they're not exactly good. trying to save some money, so we've only got these shitty brands."
"it's alright," you grinned in return as dick passed you a cold, dripping bottle. "the shitty ones are always the best."
this seemed to ease dick a little out of his fear of judgement, and so he reciprocated the smile as he walked round to rest on what seemed to be his side of the bed.
dick was just passing a bottle to wally when you spoke the latter's name, causing his grip on the bottle to falter slightly. "think you could crack this open for me?" you asked, and wally's smile immediately brightened.
he grabbed a lighter from the bedstand beside him and notched it at an angle beneath the lid. adding a little strength, the lid came flying off with a fizz, and you and dick gave a cheer.
"all in a day's work," wally grinned as he carefully passed you back your beer.
judging by the small ghost of a smirk on those lips of his, the brush of his fingers against yours was purposeful. "so where you from, anyway?" he asked, unable to tear his eyes away from your first cheap sip, and the way your tongue slipped out from behind your lips to dab at a stray droplet.
"oh, i'm local; malibu area," you responded with a small nod. "and you guys? you not from california?"
they seemed to share a laugh at this, although somewhat sheepish and not the type that guys share to make someone feel stupid. dick leaned back against the headboard, bringing an arm to rest behind his neck. "no, this is actually our first time in cali."
"oh? then where's home for you?"
"well, i'm from gotham," dick began, gesturing to himself with his bottle, and then redirected it towards wally. "and this guy's from blue valley but lives in central."
your eyebrows rose as you brought your beer back up to your lips for another sip, the rim pausing just for a moment. "holy— so you're eastern boys. long way to come for a tournament, isn't it?"
"i mean, we won something," wally piped up, nodding to the trophy sitting on the desk. "so i'd say it's worth it."
wally was mimicking dick, stretching his legs out along the length of the bed, still not having noticed the tag sticking out at the front of his neck, and you'd set yourself down at the foot of the bed, positioned around their ankles; just enough space for a first meeting, but just close enough to get them curious.
"so, if you're from gotham, and you're from central, how do you know each other?"
once again the two boys share a knowing look, eyes blazing as they glanced at one another — there's something going on here, but you not quite sure what it is, you're not even sure if they know it's there.
after a few moments, dick turned back to you with a smile. he lets out an uncertain laugh. "well, we've been rooming together since we were eleven. we went to a tennis academy boarding school, and... well, let's just say we've been through everything together."
before you could stop yourself, you quickly pushed down the swig of beer you took, burning your throat, and asked, "like what? you both shared your first fuck?"
truly you'd been expecting to get a rise out of them, red faces and uneasy laughs. but, instead, they just shared another knowing look, the corners of their mouths perking up.
wally was the first to look away, chuckling to himself. "i wouldn't say that exactly, no."
"then what?"
you took this gap in the conversation to crawl forward so you were laying on your stomach, a little bit higher now up the bed. there wasn't a huge amount of space, and you were just barely grazing what was exposed of their toned thighs peeking out from beneath their tennis shorts they'd worn at the tournament.
with thicker thighs, dick's shorts were riding up, and you noticed he tensed slightly from beside you, but your eyes weren't on him.
a few beats passed before wally could respond, his lips parted slightly as he watched you, a glazed-over look in his eye like he hadn't been really in the moment. "uh..." he glanced up at dick, who didn't meet his eyes this time. "there may have been a few times we... uh... did stuff in the same room."
"that's only natural," you shrugged. then you glanced between them. "but i could tell there was something going on with you guys. you can always tell when two guys have shared intimacy like that. and you have it written all over your faces."
this time dick was the first one to look at wally, his teeth showing slightly from behind his smile, a rosy tint to his cheeks you're sure isn't the product of california summer nights; they have the window half-open, after all. he didn't speak, but you could tell you'd hit the nail on the head.
deciding the pull back a bit, you took another gulp of beer and asked a different question. "any stories to share? nothing weird, just fun."
dick let out a laugh now, a proper one. "oh, god, this guy when we were younger? such a fuckin' brat." his chest bubbled with laughter, and his blue eyes sparkled with amusement as he turned again to look at wally.
eyes always on the other.
at this, wally just huffed in a fake annoyance. "me? i could be bad, okay, everyone knew that, but dick acts like he's not, but he could be so much worse than me."
a laugh followed you now, enjoying their back-and-forth banter. "if you can't decide who's the bigger brat it's got to be both of you, then, just at the same amount."
dick gave another laugh, bottle stopping halfway to his lips just to let it out. "i like the sentiment, but it's definitely wally. everyone knows i'm an angel."
"angel with a big head," wally teased, leaning over to poke his friend in the ear with what might've been a wet finger, but was swatted eagerly away before it landed anywhere dire.
"oh, come on," you joked, nudging wally's knee lightly with your bottle. "you don't seem like such the angel yourself."
once the bottle was back up to your lips, wally poked his knee into your shoulder. "damn straight," he grinned, swigging from his own beer now.
"hey now," dick butted in, seemingly eager to have your attention back on him again. "don't let those freckles distract you. he's a cocky little bullshitter who thinks he's invincible."
turning your gaze back on him, you noted the twitch of his lips as you met eyes. "invincible? you don't think you're invincible, too? i caught a glimpse of your doubles game this morning and i'd say you're just about as much a risk-taker as he is."
dick's eyes narrowed slightly, zeroing in on you like a predator with its prey, but that small smile was still evident on his lips. "i'm calculated. i make sure of it. i don't do anything without weighing out the risks."
"what would you say the risks are now?" you asked coyly, bringing the rim of your beer bottle to your lips, where the residue of your drink glistened along your flesh. his eyes glanced down just where you wanted them to look, like he was calculating this risk.
the air was left heavy without a reply, but the intention and risk is definitely hanging down on your shoulders. the corner of your mouth twitched, and you tore your eyes away from him, finally letting the beer run down your throat as you tipped up the bottle.
from your other side, wally let out a laugh, a new red sheen to his freckled cheeks. when you moved your eyes to meet his, his efforts to avoid them became obvious, especially by the way he turned his head to the wall as he sipped at his beer.
don't say you were making him nervous.
"come on, don't say you guys can't dish it out," you laughed, watching hungrily as both boys seemed to twitch sheepishly in response. "what? have you never shared someone before?"
slowly the smiles on their faces seemed to face, but not in a way that ruined the mood — more so that something in their eyes changed, morphing into a vibrant butterfly of fire deep in the blacks of their pupils.
there it was.
the animal in their eyes boys like them get from behind a low net on a tennis court, rackets in their hands clawing at the neon green bird soaring back and forth between them and the other predators on the other side, unable to escape, for the entire forest is watching, waiting to see who reigns.
they think this is a game.
in a way, it is.
maybe here you're the tennis ball, trying to bounce off of them, waiting for someone to take your bait. or else you could trot off again back to your hotel and get your head in the game for your match tomorrow.
it all depends on them.
#aangelinakii#dc#dc comics#dc imagines#dc reactions#dc headcanons#dc universe#nightwing#nightwing imagines#nightwing x reader#wally west#dick grayson#dick grayson imagines#dick grayson x reader#wally west imagines#wally west x reader#Spotify#birdflash#birdflash x reader#birdflash imagine
75 notes
·
View notes