#sewing zippers
Explore tagged Tumblr posts
Text
I will never sew anything, I know this...
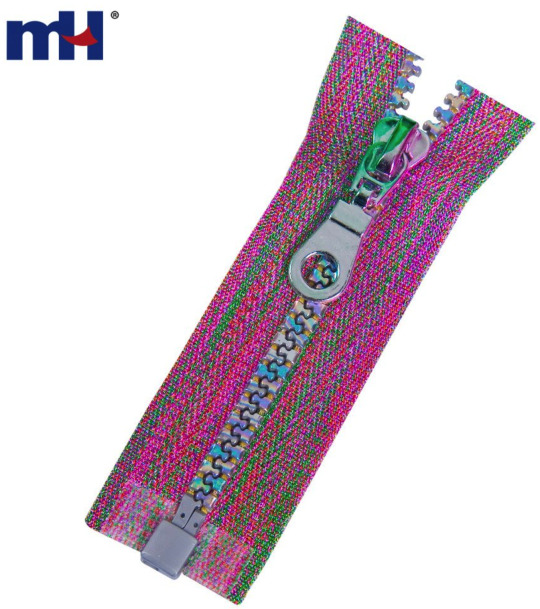
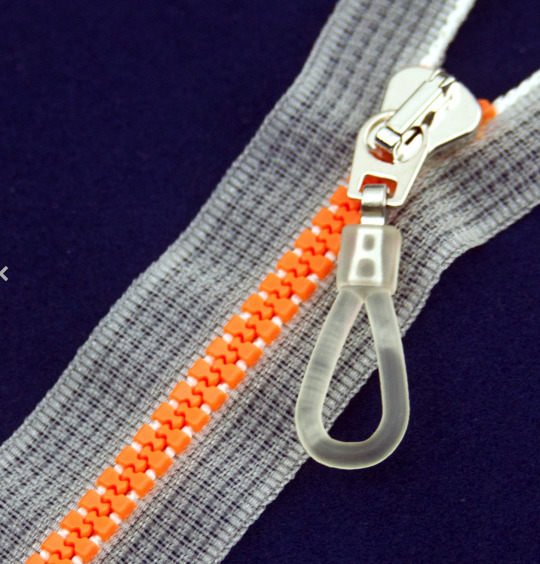
And yet I can't stop looking at zipper designs. There are so many unique and cool options available. From waterproof zippers with vanishing seams, to zippers of unusual size. Different shapes and colors for the teeth-- so many textures.
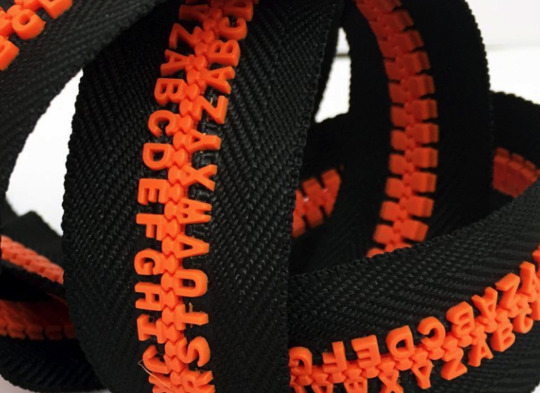
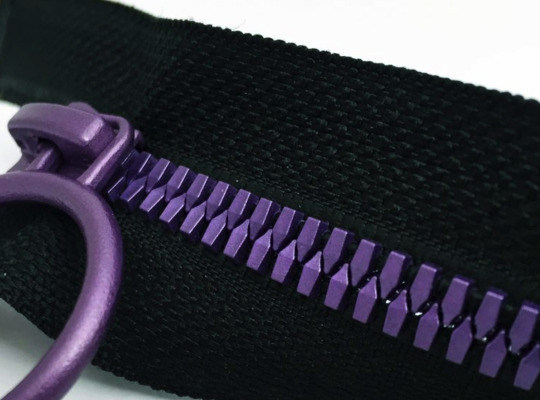
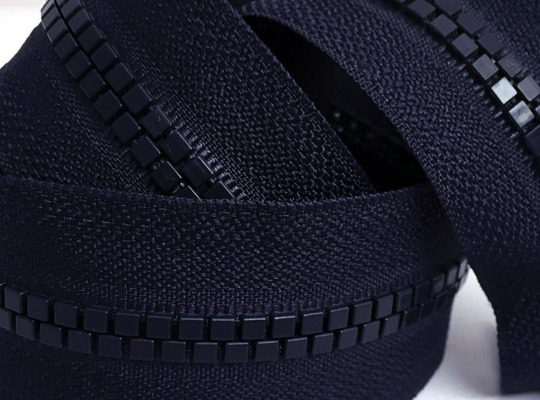
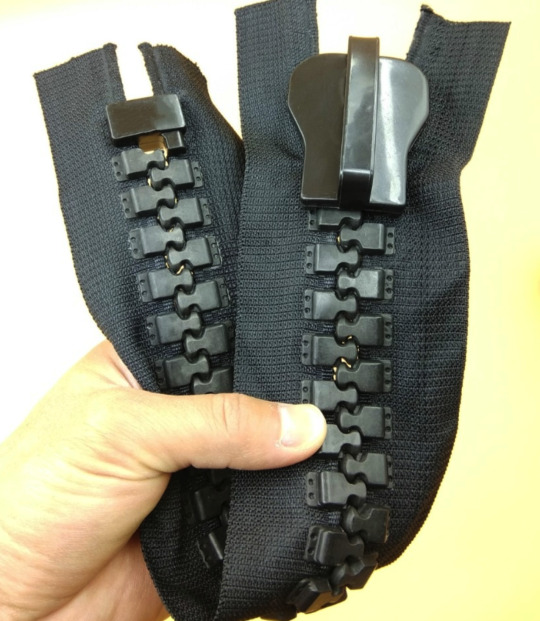
I think "This cool zipper inspires me to make something-- then remember that if I buy a zipper and don't use it? It will just be a source a guilt one more unfinished project-- but I still can't stop looking around at all the cool zippers.
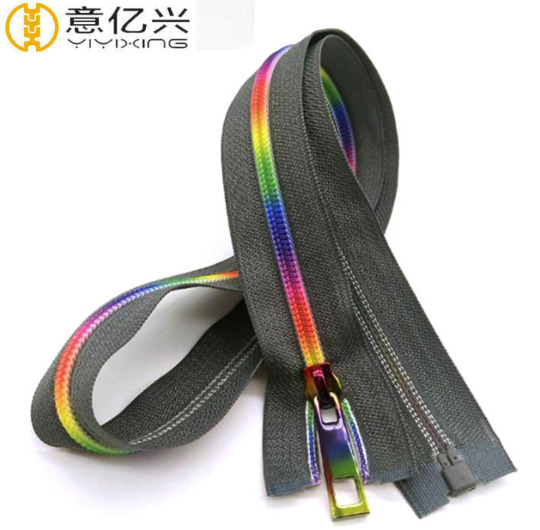
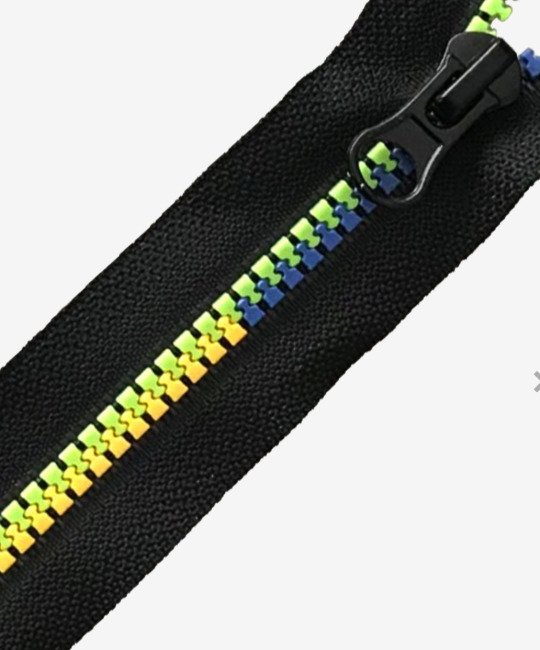
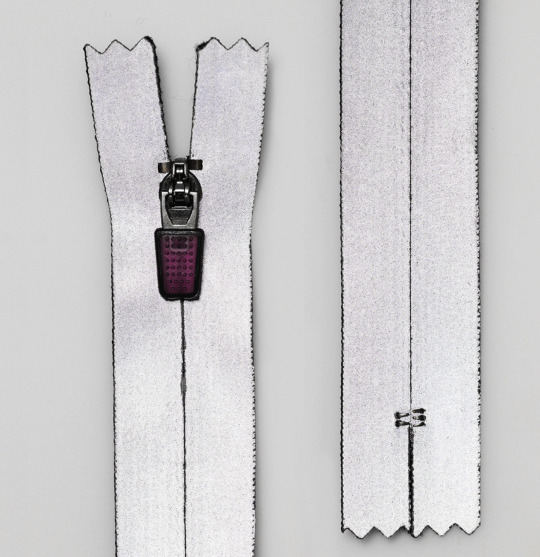
If you do know how to sew and make projects, why not use the coolest zippers you can find? A unique zipper can be a feature! Why go with anything boring-- just look at these lovely zippers!
39 notes
·
View notes
Text
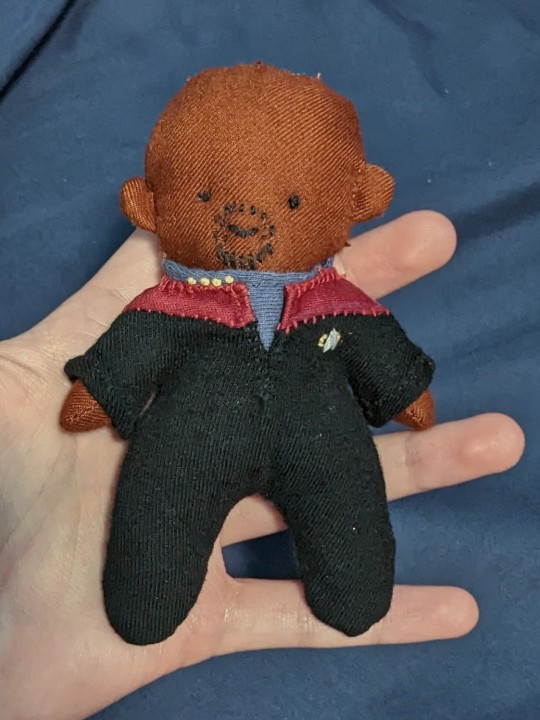
experimenting w making little trek dolls for the STLV craft swap :))
#sisko first bc idk how I'm gonna make hair LMAO but isn't he so cute??#made the doll a while ago but I just made his little outfit today and yesterday :))#hopefully giving them away for free means no one will mind the shoddy craftsmanship lmao#I think I've set a new record for terrible hand sewing. and there's raw edges on the inside. and none of the thread is the right color#but WHO CARES HES SO CUTE!!!!#it's the early ds9 uniform bc I've been watching voy and I'm sooo enamored with their uniforms ugh I need to make an actual life size one#watching voyager will have u saying things like. surely it can't be that hard to sew an invisible zipper??#anyways. need to figure out how to make hair so I can make characters other than him and picard 💀💀#ds9#star trek#benjamin sisko#deep space nine#captain sisko#narcissus's echoes#narcissus plays dress up#(?)
1K notes
·
View notes
Text
Quick guide to inserting zippers into garments without hand-basting.
Because I know that no matter how many times I tell y'all that you need to hand-baste, you're not going to do it.
Quick note: zippers are ALWAYS easier to put in when the zipper is several inches longer than your seam. This lets you put the slide out of the way when you sew. When you're done, you can pull the slide back down and then cut the excess tape. For every zipper where it's even vaguely possible, I get a long zipper, center the bottom of the tape at the place where you want the zipper to end, and leave extra tape hanging at the top. I don't know why zippers tell you to shorten them at the bottom. It's lies. Don't believe it.
Centered zipper:
You'll use the centered zipper application when you're putting a zipper in the center back or center front of a piece. There's a different application method for side seam zippers, which we'll go into later.

I start all zippers by machine-basting the seam closed. This is especially important on dresses, where you need the seam between the bodice and the skirt to match up. If your seam looks good basted shut, it will look good when a zipper is in there. So set your seam length to the longest, and baste the seam shut.
A note on seam allowances: You need your seam allowances to be big enough for the zipper to fit on. If your garment was made by someone insane and deranged who put a 1/4" seam allowance in a zipper seam, and you're only just not realizing it, you're going to need to sew twill tape or seam binding onto your seam allowance to make it big enough.
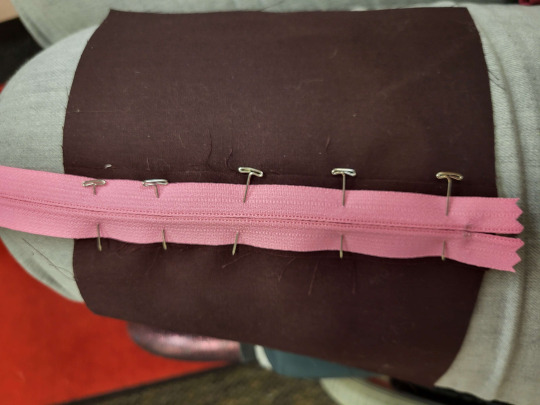
Put the zipper tape onto that seam. You want the center of the teeth to line up with the center of the seam. It's called the centered application for a reason.
When you're pinning from this viewpoint, you're best equipped to make sure that the teeth are perfectly centered. I'm going to recommend pinning with the pins perpendicular to the zipper teeth. You'll see why.
However, you can't actually sew the zipper from this side, with any kind of precision, so you'll need to do the flip.

So, go ahead and flip your garment so that you can access the right side. Next to each pin that you have on the wrong side, put a pin next to it on the right side. You can then remove the wrong-side pin.
And yes, you do need to do it like this and not just pinning from the front. It won't be centered. Trust me. It won't be centered.
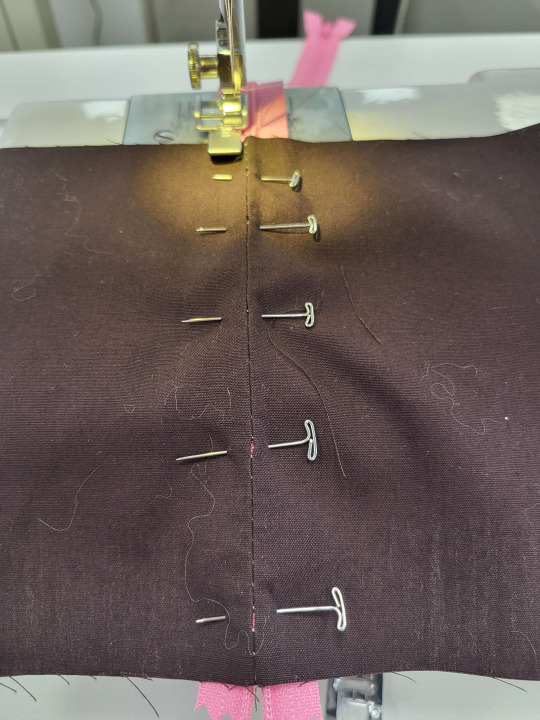
Zipper foot time. When you're sewing a zipper, you will ALWAYS sew from the top to the bottom. Put your zipper on the side of the tape where the points of your pins are.
Quick note: is your machine still set to a basting stitch? Now's the time to change it, and not after you did 13" of sewing. Ask me how I know.
Here's where you're going to decide how wide you want the lap (the fabric flaps that cover the zipper) to be. For a lot of people, this is a style choice. I like mine more narrow, and I like to just eyeball them. As long as it's straight and not stuck in the teeth, all options are fine.
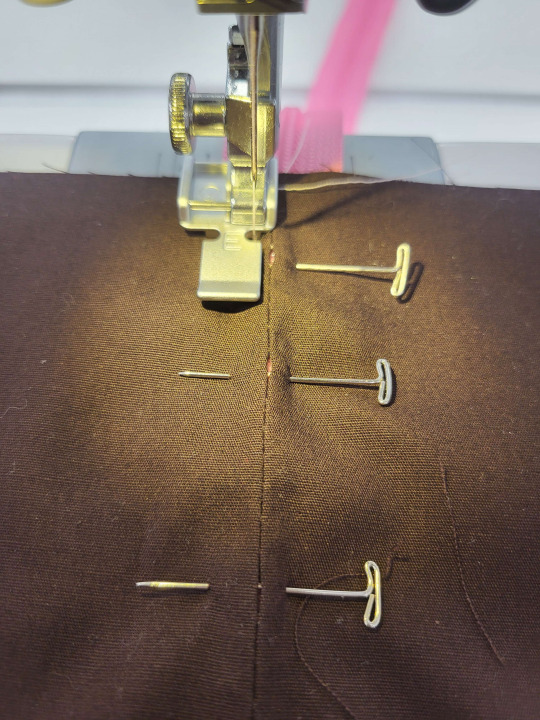
The reason that we're starting on the side with the points of the pins is that you can slide the point of the pin out of the way to sew over them, and then slide them back into place so that they hold the zipper in place for the other side.
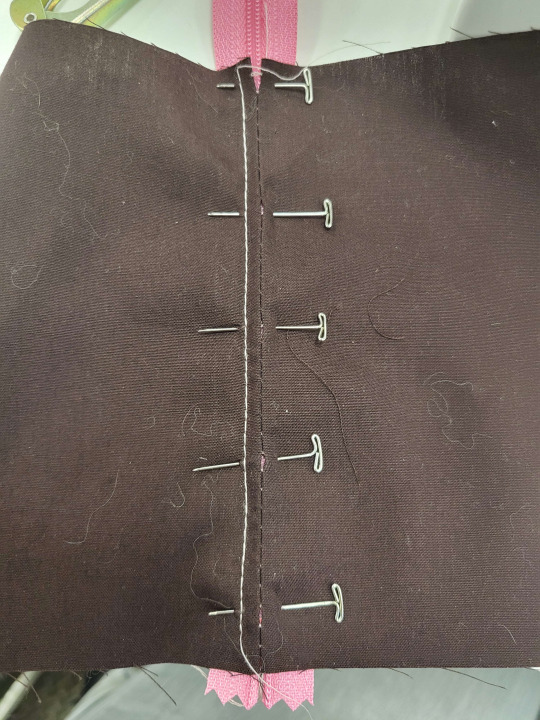
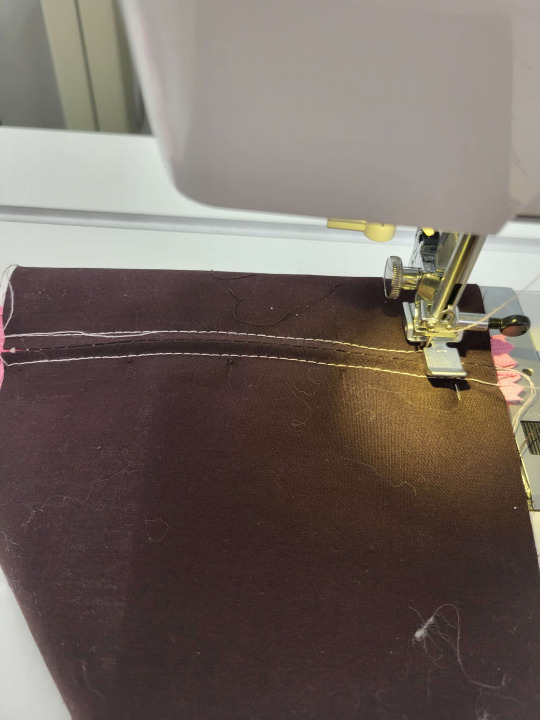
Once you've sewn down one side, cut your thread, bring your foot back to the top, and sew down the other side. (If you keep sewing and go up, your lapping will be wrinkled when you're done).
Once you hit the bottom of your zipper, sew a couple of stitches across the bottom, connecting the two lines of stitching. If you're using a nylon coil zipper, you can just sew straight through it. If your zipper has metal teeth or big plastic ones, sew this connecting stitch just below where the teeth end.
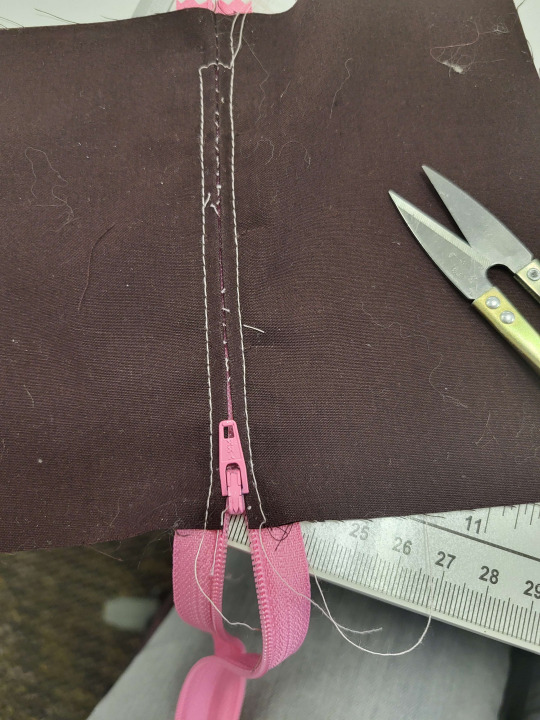
Now you just take your seam ripper and take out the basting stitches, and you're done!
What about that extra zipper tape at the top? Well, if you're putting the zipper in a seam where there will be a top facing, top hem, application of lace, or anything else, you can trim the tape and the hide it in that facing/hem/lace/etc. If there's absolutely no way to hide the top of the tape, you can stitch around the top of the teeth on each side, so that the slide doesn't come off, and then trim the excess tape off.
Side application:
If you're putting a zipper in a side seam, you don't want to center it. I mean, you can if you want to, and it'll probably look fine, but it's not the technically correct application.
In a centered application, both seam allowances cover the zipper tape and hide it from view. In a side application, the front seam allowance is longer, and covers the zipper tape. The back seam allowance is just along for the ride.
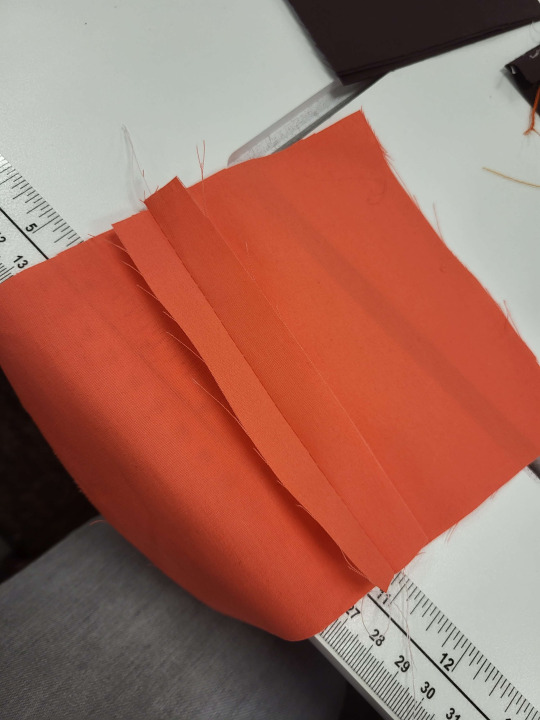
Like the centered zipper, this one starts by machine basting the seam shut.
Not everyone starts their side zippers like this, but I think that it's important because it keeps the waist seam even on both sides. People who don't like this method are going to point out that my method here does make your seam allowance 1/8" smaller than what you baste. If you think this will really mess your work up, remember to sew this seam at 1/16th" smaller than you would normally sew it. I don't ever bother with that and it never has made a difference to me. If you don't want to do it like that, you can just hand-baste this in. This is a no-hand-baste tutorial, so you're on your own for that.
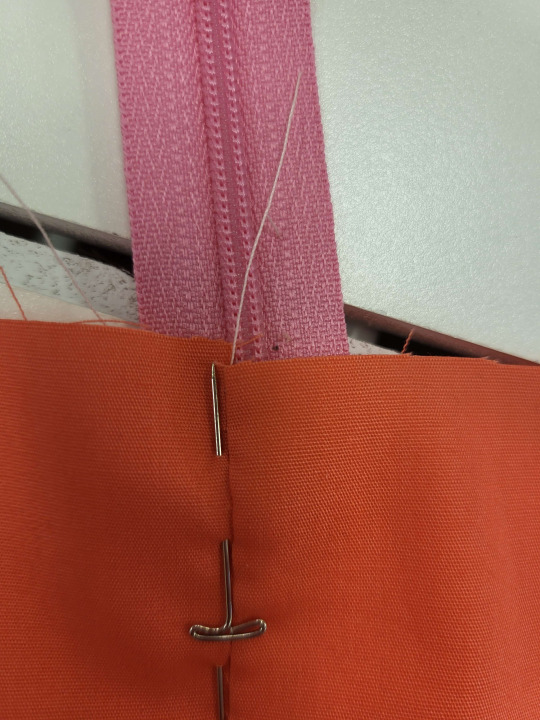
You're going to pin this in a different place. On the centered zipper, you wanted the seam to be in the middle of the teeth. In the side application, you want the seam to be right along the edge of the teeth.
You'll also note that I'm pinning differently from how I did the centered version. Here, I have the pins with the points facing the top of the zipper.

So, always sewing top to bottom, we're going to sew down the side seam. We pointed all the pins at the top of the seam because now you can pull them out as you go.
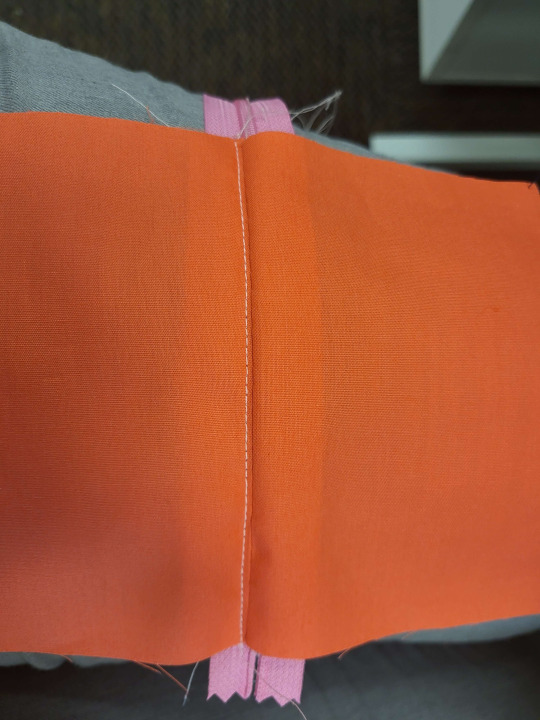
It's hard to tell when you're just doing a sample like this, but we're going down the seam attached to the back of the dress.
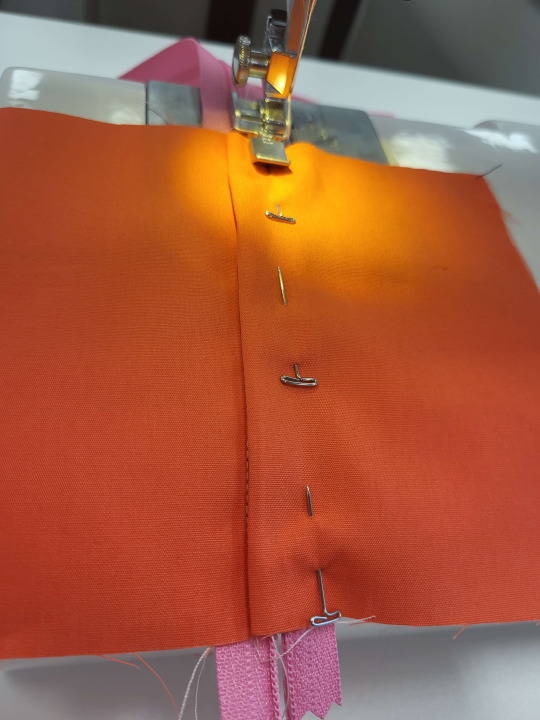
Remember that "it takes 1/8" off the side seam" statement? Here's where it happens. We're going to take the front seam allowance, and just sneak it a little bit more over the edge. You're just going to roll it so that it covers that previous line of stitching. Then you're going to pin in place and sew down the other side. At the bottom, just like you did with the centered zip, you're going to turn a right angle and sew along the bottom, closing off the lapping.
I find that my favorite width of this is to sew where the fold of the lap to the line of stitching measures at about 1/2". If you're not good at eyeballing this, some people like to use tape as a topstitching guide.

Just like with the last one, time to take out the basting stitches that hold the seam shut, and there's your zipper.
Invisible zipper application:
NO.
148 notes
·
View notes
Text
from this concept:
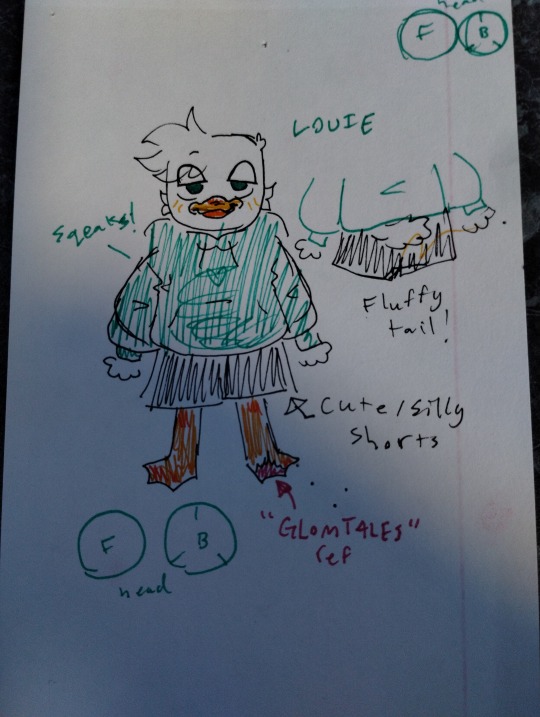
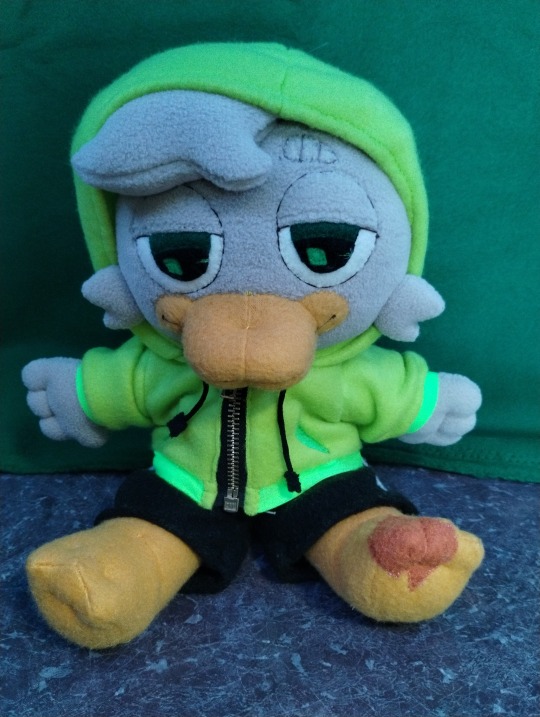
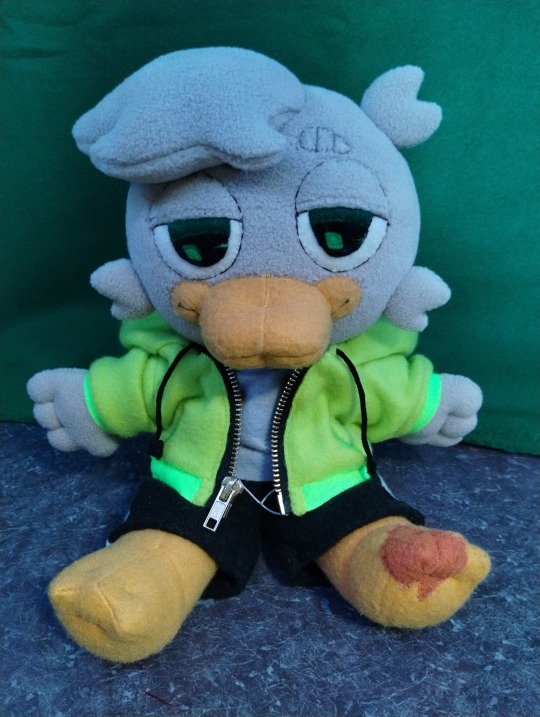
I now have a very cool, very soft, and entirely hand-made 2017 Louie plush !!!!!!

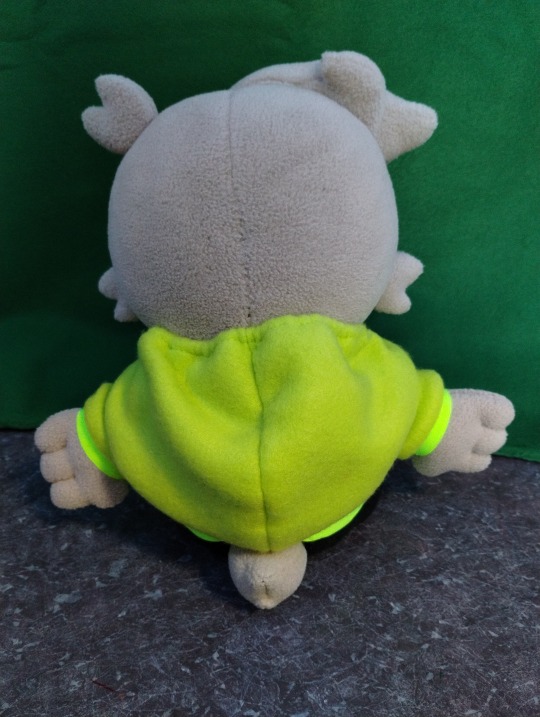
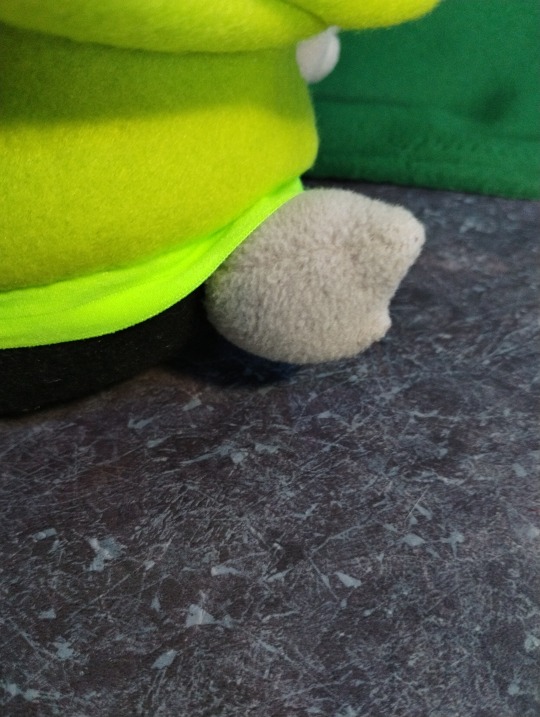
Very silly tail ⬇️
He has a completely functional pull-apart jacket zipper !!!
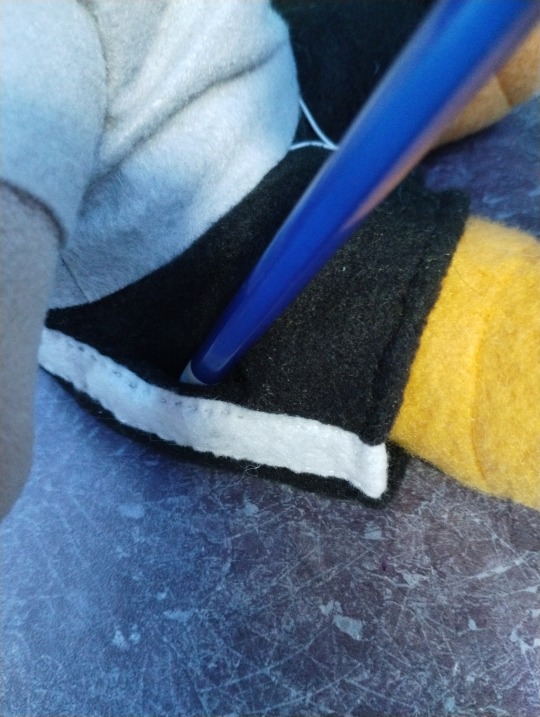
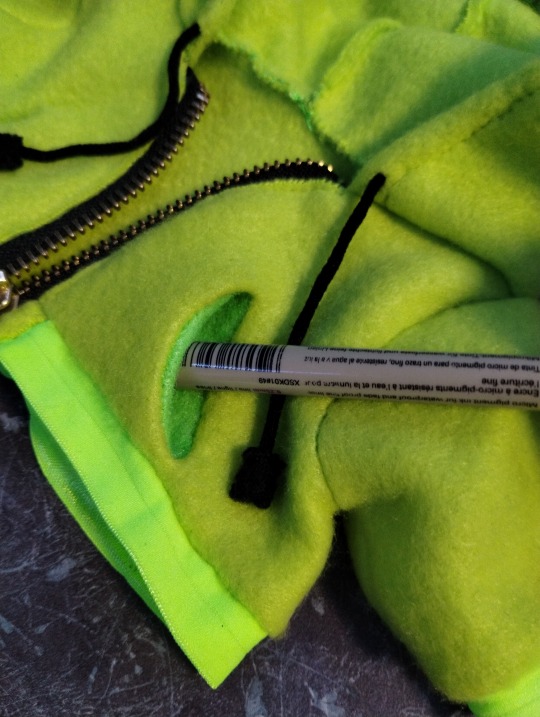
Also completely functional: the pockets 😼
And here is also a closeup on the little phone
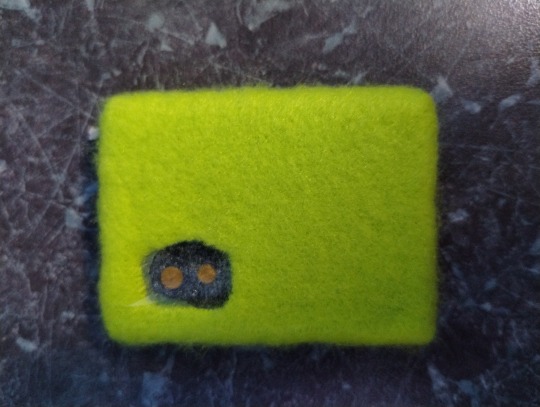
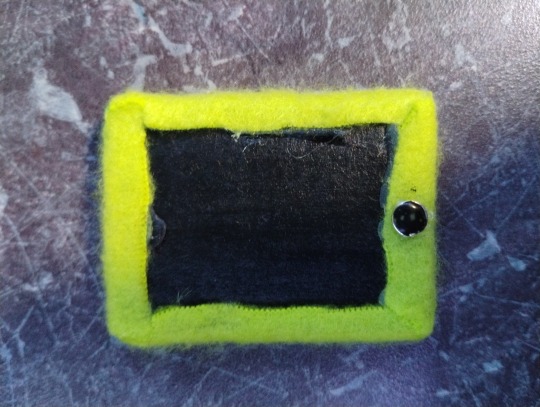
He is made up almost entirely of fleece, all hand-sewn. His shirt and some of his eyes are felt (also the scar on his foot). He's stuffed with polyfill . He's weighed down with lentils 😭 His pattern is made custom by me :) I'm not sure exactly how long he took, but I'd guess some amount of months. Maybe 2, but maybe only a few weeks of collective actual work days
He does also have a dog toy type squeaker in him
#DuckTales#DuckTales 2017#Dt17#Does this count as fanart#DuckTales fanart#Dt17 fanart#Louie duck#Dt17 Louie#Errrrrmmm#Sewing#Hand sewing#Plushies#Guys idk how to tag sewing projects#His beak was genuinely a NIGHTMARE to pattern. It took like 4 collective days of trying#It is also sewn on like. Crooked. So so sorry#Scar on his foot (as mentioned in the concept) is a reference to glomtales#Specifically the scene where he's trying to climb out of the window and dt87 bot shoots him w a laser#Absurd decision. Anyway I just think it's sort of fun to include things like that#I would've given him little freckles but I don't have a thread that'd make them subtle enough and I hate drawing details on#Btw I originally had a cute golden zipper w green fabric around it. It was closed-bottomed but I still wanted to use it bc it was all I had#Then I sewed it on and cut it too short. Had to make a surprise trip to joann's to get a new one#I love fabric stores they're so interesting 2 me#He's like 10 inches tall btw. Give or take a little#I DO PLAN TO MAKE DEWEY AND HUEY probably soon if I don't have any more fun projects to get to
74 notes
·
View notes
Text


I just started going to the gym so of course I had to make myself a gym bag. It turned out bigger than I planned but that way I can also easily use it for travelling ^^
It was my first time making a quilted bag and I really like the result.
#the flower zipper is my favourite part#of course#my posts#my handmade#my projects#sewing#handmade bag#handmade#mine#diy bag
28 notes
·
View notes
Text
sometimes it's more effort to get the sewing machine out and be done in an hour than to handsew everything for 8 hours
#im making a patchwork pencil case and its going so slow#in my defense i'm not doing invisible stitching so you can tell it's handmade and there's a certain charm to it#i'll post pics when i'm done i only have to join three rows and add a zipper#i'm doing the lining with a machine tho#chat tag#sewing
20 notes
·
View notes
Text
Me: Hey, I finished that dress I've been planning to make since last May.
My mother, silently grateful my first summer dress of the year is not covered in manic cartoon animals: Oh that looks lovely... Though don't you think you put a bit much fabric into your skirt? You could have used half and had enough left for a second dress.
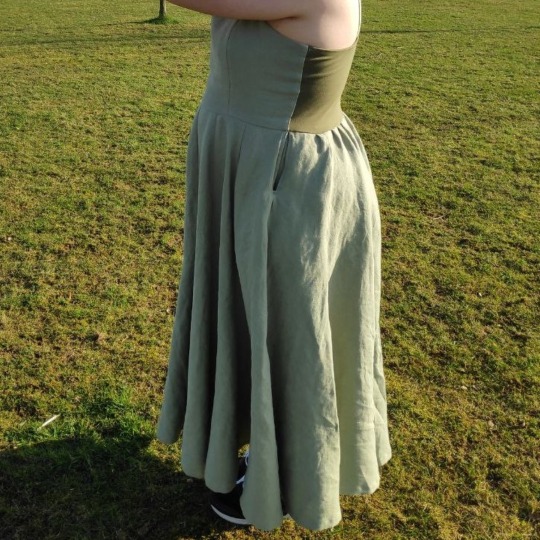
Me: It's more comfortable this way. Not as clingy. And it's cut to be low waste, so you get a lot of bang for your buck.
Mom: ... How much is in there?
Me: Only like 4 meters.
Mom: Of a low waste pattern.
Me: Yup.
Mom: Give me one reason you need that much "bang for your buck".
Me:
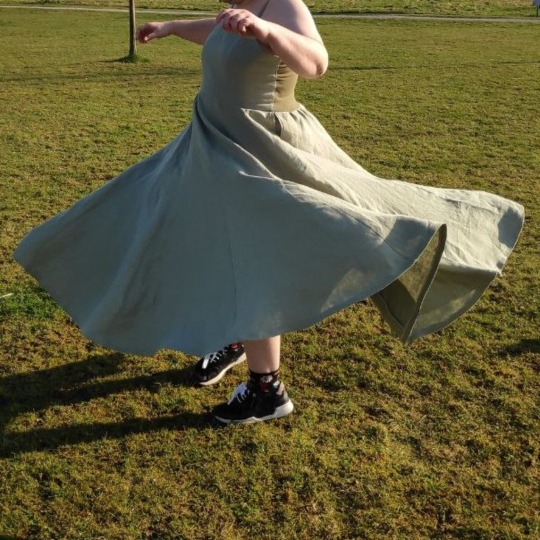

#sewing#skirt is Salix by Unendlich Schön#lengthened by a full 30 cm#because yolo#bodice is from the Riviera dress by Lotte & Ludwig#straight neckline and no fake button placket#fabric is Aina from IKEA#and a lil square of jersey in the back#you're supposed to not wash the linen on normal#and don't put it in the dryer#whoops#it's now soft as a cloud#skirt go spinny#I might need to get more of this fabric#also 10/10 would recommend just straight up replacing a back panel with jersey instead of putting in a zipper#you do have to gather (part of) your skirt onto elastic but that's still more idiot proof to sew or wear than an elastic#and yes#there's pockets#smaller than intended#but still plenty big for my phone and wallet#i then showed my creation to a sewing friend who loves skirts that are knee length or higher#she said she would immediately wear that dress if it were half as long#GOOD NEWS#it's supposed to be#and you can even make it a patchwork pattern#we're not gonna talk about how long this took to hem#pictures taken outside because it was the first warm day of the year#and also because I can't spin it safely while indoors#i could remake it in manic cartoon but it would cost at least twice as much
62 notes
·
View notes
Text
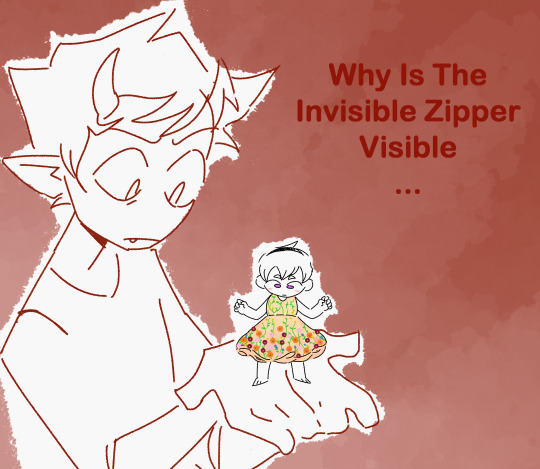
small life update but while i was on leave i sewed my fiancee a dress
#homestuck#kanaya maryam#rosemary#rose lalonde#so i can kind of sew now? it was fun i want to do it more#the dress was pretty but can't be looked at too closely#and yeah the invisible zipper umm about her
295 notes
·
View notes
Text
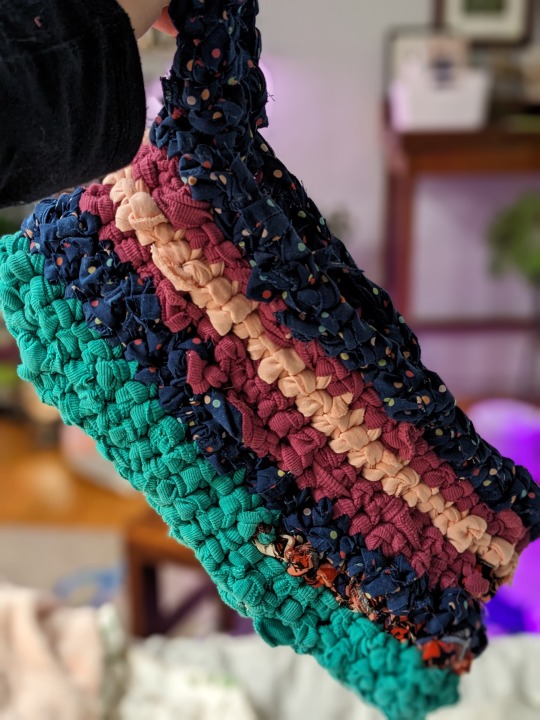

at midnight last night i finished this bag because i decided i hated the colors too much to continue even for practice and then i discovered it kinda looks like a vagina inside. slay
#blizzards are the ultimate excuse to stay inside and do fuck all#i already started the next one which is only neutral colors and it'll be tote sized#these are sturdy as FUCK#and i'll sew a lining into the real bag#i even have an extra zipper i can make an inner pocket with#i'm kinda obsessed with these right now#next after this i'll make some white baskets from old bedsheets and i'm gonna use them as plant pot covers :)#nonsims
61 notes
·
View notes
Text
Mending a bag with a broken zipper
So if you've never replaced a broken zipper, it might seem like a daunting task, but it's actually very easy. I've only done it once, on a jacket, with no tutorial, and it worked perfectly, and looked awesome. So I am very confident I can do it right.
The scariest part is just removing the old zipper. It feels wrong to rip your garment or bag apart, especially if you don't feel like you're capable of putting it back together, but one needs to keep in mind that the garment can't be used unless you do it, and this is for the best.

(My gardening bag, made out of canvas, has 7 pockets, but the main zipper stopped working.)
First thing to do is to see if you have a good zipper to use as a replacement. Zippers are actually expensive to buy, but you can easily accumulate tons of them by simply removing the zippers from old pieces of clothing you no longer want. I also get clothing from other people who don't want it, and if it's completely ungiftable and useless, I will cut out all of the zippers, elastics, buttons and any decorative stuff that could potentially be used elsewhere. That's why I have a good collection of free zippers! Here's what I found I could use:
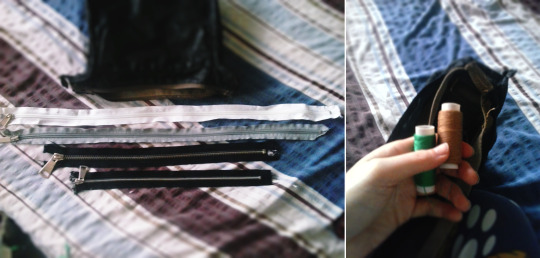
I've decided on the lowest, black zipper, just because it was the smallest and I wouldn't have to cut much off, I can use the bigger zippers for bigger projects. I don't care what color it is, as long as it works. I was also contemplating using a fun green color for the project, to highlight that it was a mend and to make the bag more colorful, but the brown thread was so perfectly suited for the bag, I ended up going with the more boring option.
Now how to get the zipper off? I turned the bag inside out to see better how it's connected. I needed to find the thread that connects it to the outside of the bag, and you see that light thread at the edge between the bag and the zipper?
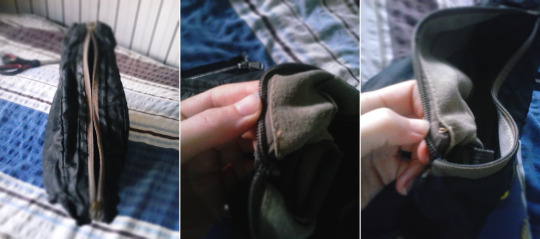
That's whats holding it together. So I cut that thread and started picking it off, and once you manage to rip a few seams, the zipper starts to separate and come off. Sometimes violence can work in this situation, if you have a very sturdy fabric, you can just pull them apart. But in my case, the inner lining is pretty fragile and was starting to tear when I pulled hard, so I just patiently cut it off little by little. Seam ripper would work great in this situation, but I don't have one so I just made it work with scissors.

And the zipper came out! Here's a comparison from old zipper to new, new is slightly bigger but it won't be a problem, bigger zippers can always be trimmed. You can also see how the zipper was connected to the canvas fabric on the outer side, and there's also lining fabric on the inside that's now loose. So far so good!
Now is the part where potential mistakes are possible; I need to remember that the bag is inside out, so the opening part of the zipper needs to be facing inwards, and it also needs to go the direction all other zippers on the bag are going (I later realized I messed this up, oops.)

I'm now lining it up with the bag, and even though usually I'm too impatient to pin stuff, I yield and acknowledge that in this situation, the zipper needs pins in order to be sewn on evenly. This is actually the part where some choices can be made; you can decide how much of the zipper will be shown outside! You can sew it on so that only the zipping part is visible from the outside, or give it a wider margin so you can see the zipper fabric too. If you're sewing with a flimsy fabric, it's best to give it a wide margin, because soft and flimsy fabrics can often get stuck in a zipper if they're sewn on too close. My canvas fabric cannot get stuck, so I'm pinning it pretty close, but later in the process I did give it a bit more of a margin, because it 'felt right'.
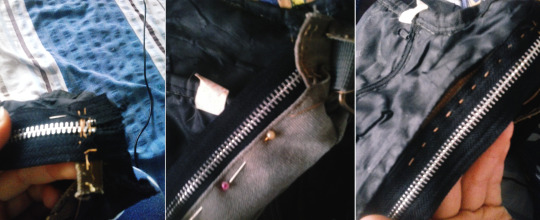
I've started sewing it on!
So about the edges, if your zipper doesn't have a stopper there, or if it's too long and you've cut the edge off, you need to sew the both sides together, so that the zip cannot zoom over the edge and fall out. This is something I've done on both sides, to make sure it's secure, and it doesn't need to be tidy, only very firm and impossible to break apart. I'm hand-sewing it with a continuous stitch, which is very easy and it looks nice enough. At this point I completely neglected the lining and I'm just sewing it onto the outer fabric, but this is okay, I decided it was easier to ignore the lining for now, and just focus on making sure it looks nice from the outside.

Here you can see me stitching all the way to the other side, and again firmly stitching the both sides of the zipper together, so they can't break apart. Then I turned the bag back from inside out, to see how it looked on the outer side, and it looks good, this isn't professionally made, but it looks well done! I decided to then pin and stitch the other part while having the bag turned correctly, so I could see exactly what I was doing from the outside, while again, ignoring the lining.

And now the outside part is completely done! It looks so good, partly because the bag is a little faded, but the zipper looks new and well preserved, so this is like an upgrade for her. Here I'm now turning it again inside out, to fix what I've ignored before; the length of the zipper, and the inner lining.
I finally cut off the extra length, it's already sewn up and I'm happy with it, so I'm sure I can safely cut off the extra. On the second to last picture you can see the lining is all over the place and not even reaching the zipper, that's completely fine because I can easily stitch it to the zipper in about 3 minutes. It would have been a nightmare trying to stitch it all in one go and constantly worrying if both the lining and the outer canvas are in the correct position, this way I had an easy time stitching it to the canvas, and only a few minutes of easy extra stitching to make sure lining is all connected. I only pierced the zipper with this stitch, not all the way to the canvas, so this little fix is completely invisible and it doesn't matter if it's not the neatest.
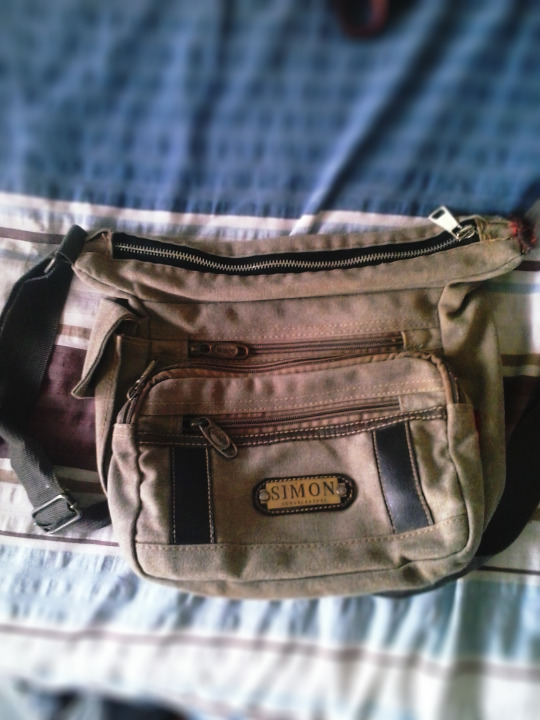
And here we go! The bag is fully functional, completely ready to be used and enjoyed again, with her new flawless zipper, and I think this was a great way to spend an hour of my time.
63 notes
·
View notes
Text
[Infomercial voice]
You there! Human owner of clothing!
Do you have a zipper that simply won't stay up? Are your pants unwearable because of this twist of fate?
Worry no more! A simple ring of metal is all you need! Put the zip back in your zipper and keep the barn door closed with this ingenious invention.
First, affix the ring of metal to the zipper pull. Next, place yourself in the pants and pull the zipper up. Then loop the ring of metal over the button of your pants. Finally, button your pants.
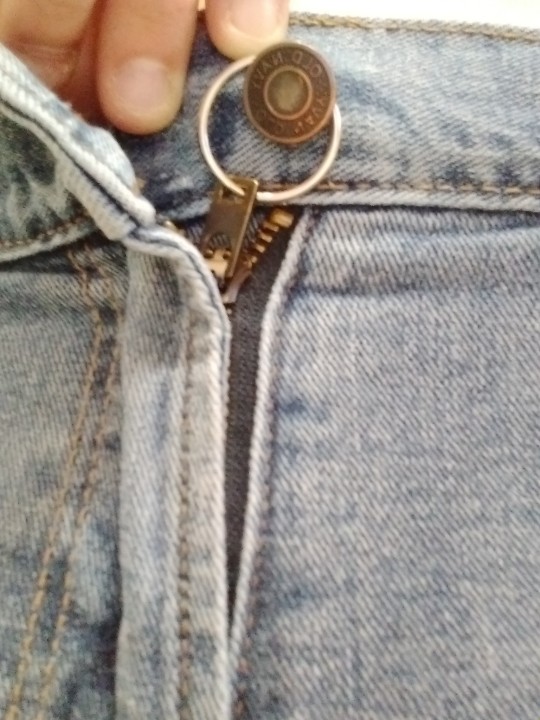
Potential alternatives to the ring of metal are notecard clip rings, D-rings, a bit of chain, any wire available, hair ties, ribbon, twine, yarn, embroidery thread, or anything else imaginable.
Go forth! Be free! And wear those pants!
#mending#life hack#diy#zipper#solarpunk#sewing#it's not waste until you waste it#thrifting#crafts#fixing#repair
97 notes
·
View notes
Text

can’t wait to reattach these to my ass
388 notes
·
View notes
Text


i altered my first homecoming dress! it hasn’t fit me in years so i had to kinda tailor it and add a corset back alongside the decorative changes
i love it so much hgabhdkgkf
#i didn’t make the sleeves tho that’s just a shrug i own#but i am particularly proud of the heart detail#freehanded that bitch and it turned out so good#also added a side zipper to make it easier to take on and off#sewing#sewing beginner#clothing alterations#sustainable clothing
36 notes
·
View notes
Text
FINALLY tackling my fear of sewing pants and making some fun funky APPLE PANTS!!!!!

Found a pants pattern with a good tutorial video recently so i decided to start a fun project :) Hopefully the silliness of it all will keep me motivated! :D Gonna try going for option 2 if I have enough time and leftover fabric!


Here’s the two fabrics on their own! Bought 1 1/2 yards of the red and 2 yards of the green, came out to about $28 i think? Good pants price imo. They’re both medium-weight (i think?) cotton flannel, very warm and comfy!
I’ll be posting progress pics, so stay tuned!✨
#apple pants#yippee!!!#very excited to get started on this project#even if sewing pants zippers and the pants crotch are scary#tbh the video actually made sewing the crotch waaay less scary#still boggles my mind tho#this is my first time sewing appliqué so that’ll be fun#also I’m disregarding the weird back pocket inserts.#I’m slapping on apple shaped pockets on top like God intended#apple bottom jeans…#mossy’s sewing adventures#mossy talks#art#fashion design#apple
8 notes
·
View notes
Text
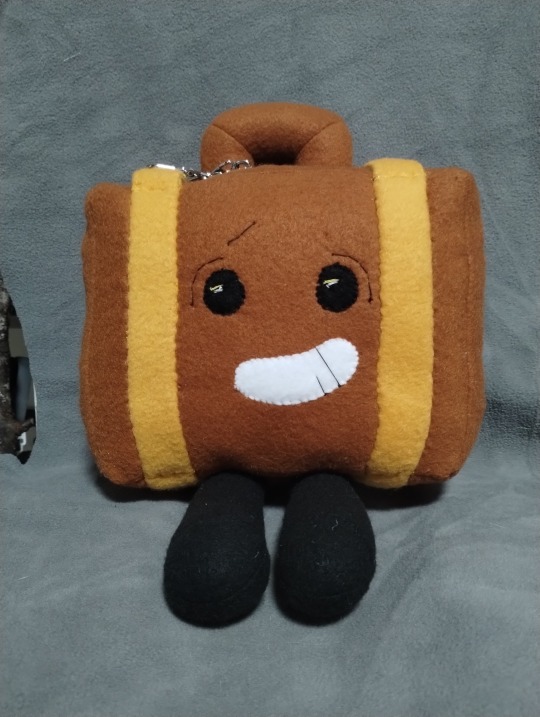
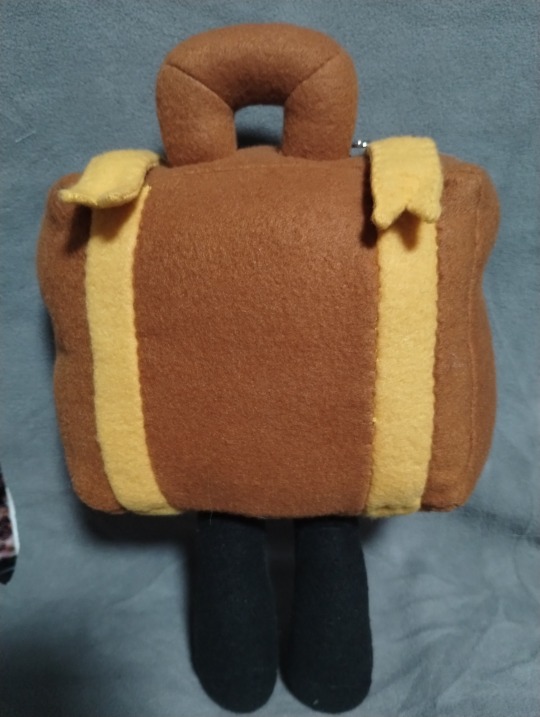
hi guys i finished my suitcase plush :3 shes about 12.5 inches tall and made of fleece with a felt lining. she also has a functional zipper and snaps to hold the ends of the straps down !! shes filled with stuffing rn but she is an actual bag teehee

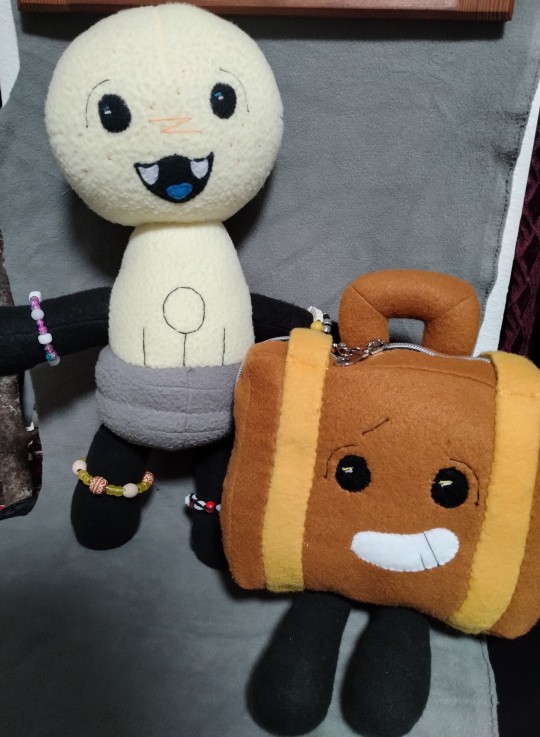
her and the lb .. so silly.. #teamsuitcase btw shes so peak
#inanimate insanity#ii suitcase#suitcase ii#lightbulb ii#she is here too !#hand sewing#plushies#sewing#zippers r so cool.. wowsers..#the straps took 4EVER!!!! but shes cute its ok#hype asf for act 1 tmrw watching the title be revealed on twt was so fun and silly#the stream today was SO SILLY !!!!!!!!!!! testy is so so so cute.. and i love cheesy now i think. what a goober. also bball ofc#theyre all so funnyyyy#might make suitcase some bracelets or the handle equivelent later idk. but thats her !!!!!
50 notes
·
View notes
Text
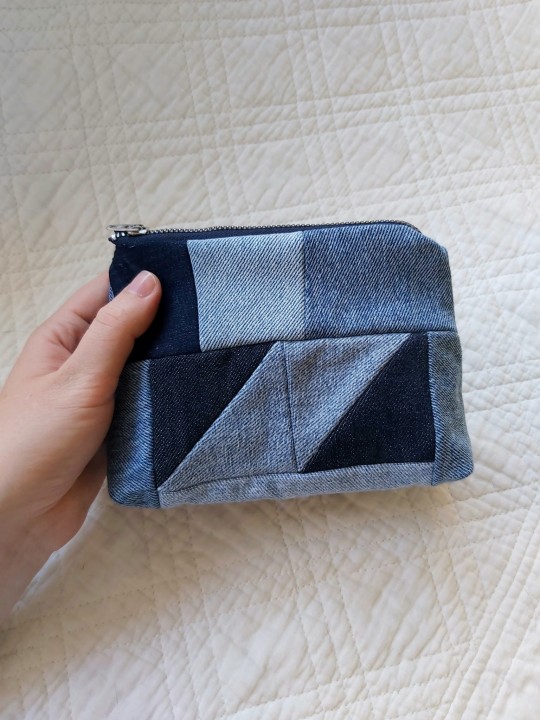

made a little lined patchwork make-up bag from denim scraps as a gift for my friend's bachelorette party :–)
#i also re-used the zipper from an old pair of jeans#i did basically every step of the process wrong and had to take out and redo a lot of it#my first time inserting a zipper and the bulky denim was difficult to work with... i even broke a needle on it...#but LOOK how incredibly cute it turned out!!!#sewing#patchwork#denim#stuff i make
92 notes
·
View notes