#Hand sewing
Explore tagged Tumblr posts
Text

These are actually pretty old, i believe i made them almost a year and a half ago, buuut still like them, so pls check out my Sanrio crossover :з
#my crafts#disco elysium#kim kitsuragi#jean vicquemare#sanrio#hand sewing#sewblr#okay now I spotted Chocokim’s ear being not really symmetrical#still love them#You can't see it in the photo#but I've embroidered Jean with potholes on his cheeks :ззззз
76 notes
·
View notes
Text
I've been thinking about this amazing pattern for days....

BEHOLD

rainbow croak army

there is a black one that looks like an orca and one color of leather bag

5K notes
·
View notes
Text


My second ever quilt is complete and finally on my bed. Took 138 days. All done by hand. I'm really happy with it and so glad I got to show it to my grandmother for Christmas (as she's the one who inspired me to get into quilts). Some of the embroidery on the back doesn't show up great in the photo but I'm really proud of that too.
#hand quilting#quilting#fiber art#fiber crafts#star quilt#hand sewing#art#embroidery#hand embroidery
2K notes
·
View notes
Text


Spamton Ball-Jointed Doll - hand sculpted, painted, sewn, and strung
#traditional art#polymer clay#paper mache#acrylic paint#custom doll#hand sewing#doll#ball jointed doll#ooak doll#bjd#cheesycatz art posts#spamton#spamton g spamton#spamton fanart#deltarune#deltarune fanart#deltarune chapter 2#spamton deltarune#yippee!
931 notes
·
View notes
Text
I am quite proud of this stitching line.

I wish they all looked this nice, but in the end they won't even be seen. I will just enjoy the pretty ones while I can.
#crafts#quilting#sewing#english paper piecing#epp#bee quilt#crafty#honeycomb#hexies#honeycomb quilt#epp quilt#stitching#hand sewing#handsewn#handmade quilt#hand stitching#needle and thread#fiber art#pretty stitching#satisfying#satisfying stitches
1K notes
·
View notes
Text


🫛 🥕 I will never stop loving making these whimsy needle books.
I enjoy every bit of them, especially how tactile they are. They take forever and a day to embroider, crochet and needle felt.
I have a desire to make an A5 book cover, but I fear it's going to be way too expensive for me to be able to sell it.
[purchase here]
#ferntales#cottagecore#australia#grandma vibes#etsy#grandmacore#cottage aesthetic#cottage#felt#diy#gardening#garden#horticulture#plants#root vegetable#greenhouse#seeds#sewing#crafting#crafts#fabric#textile arts#textiles#textile art#sewist#sewblr#sewing project#hand sewing#sewing patterns#slow stitching
815 notes
·
View notes
Text


some recent happenings from the studio
linocut prints on various textiles + some stitchin’
#really grateful that being Booked and Busy for me enables excessive amounts of hand stitching#it’s such a balm to my nervous system to be encouraged to respond to external demands by sitting down and sewing#blanket stitch is my constant companion#linoprint#printmaker#printmaking#block printing#salted snail studio#relief print#reliefprint#block print#relief printmaking#fabric printing#upcycled textiles#creative reuse#linocut#Linocut printmaker#linoleum printmaking#linocut fabric#textile arts#relief printed textiles#blanket stitch#hand sewing#embroidery
420 notes
·
View notes
Text


Clown giraffe
434 notes
·
View notes
Text
yk when you see someone share a finished handmade item that they clearly spent a lot of time and money on and it's just. The absolute tackiest thing you have seen in your life. And then you ask yourself why someone would waste all those resources on such an eyesore.
(no, of course you can't relate to that because you're a much nicer person than me)
In any case.
BEHOLD!
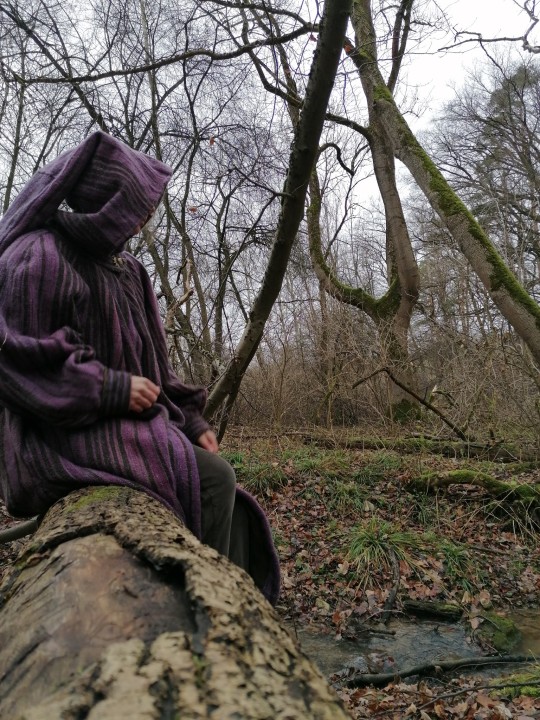
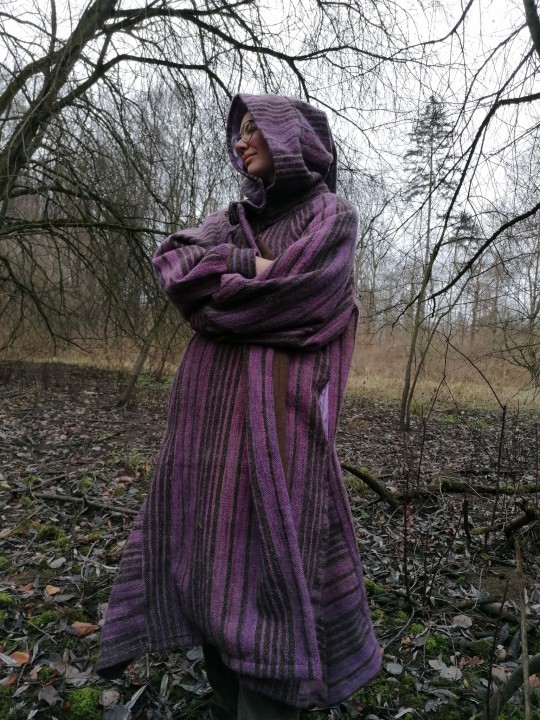
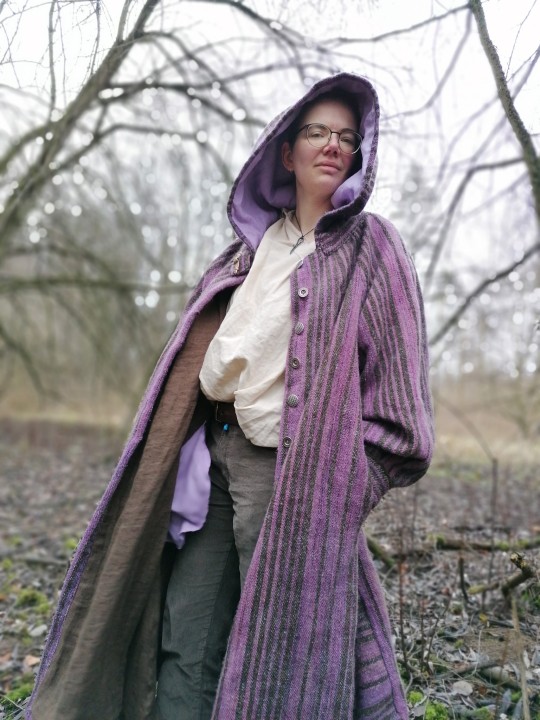
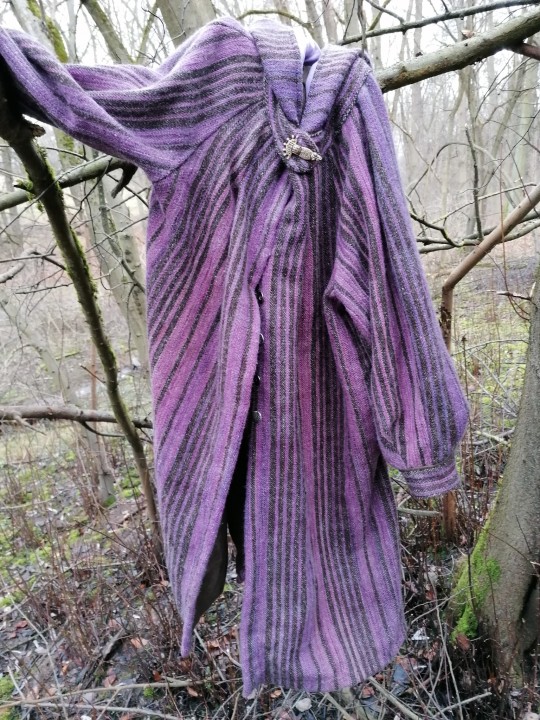
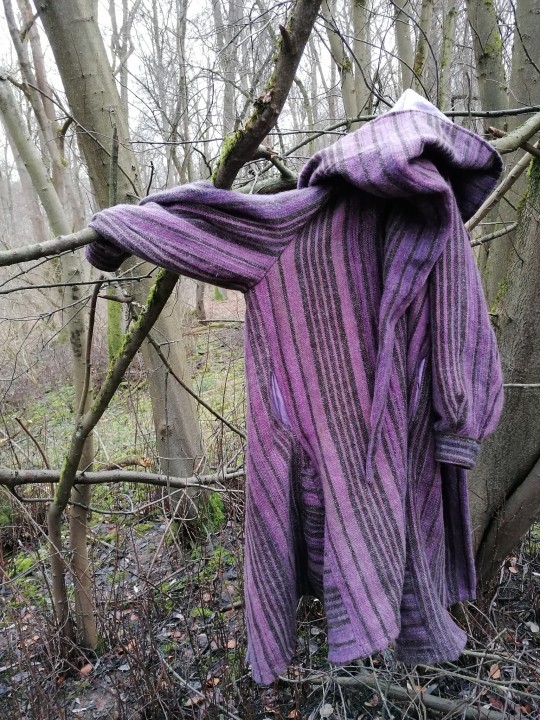
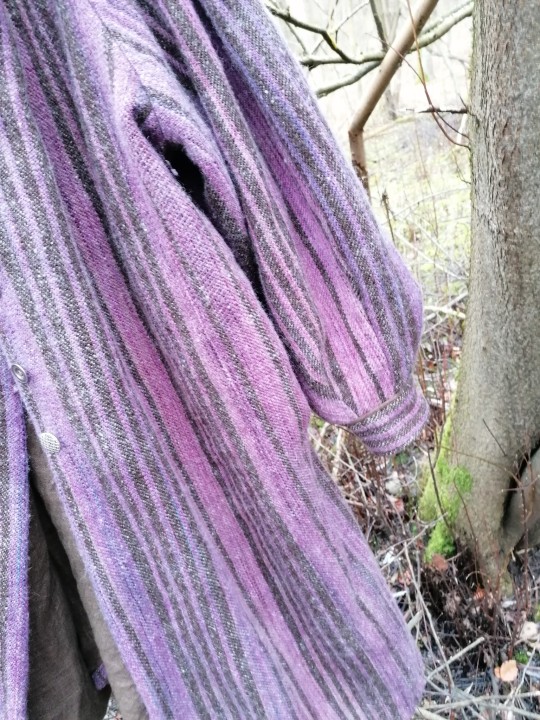
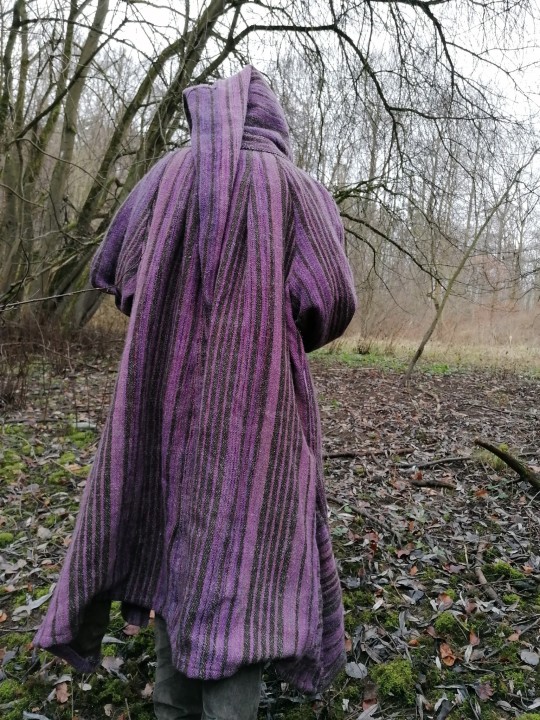
A wool coat!
The top fabric is handwoven and handspun, the whole thing is sewn by hand, too.
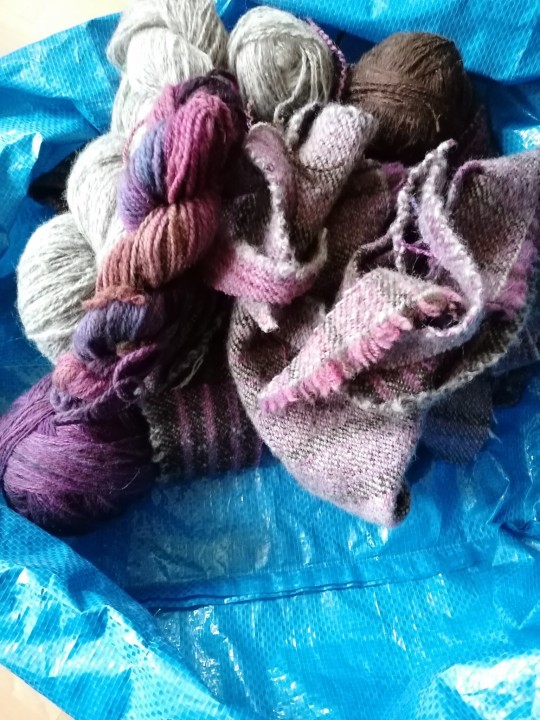
Leftovers. Barely anything, all things considered, which is very satisfying.
This thing took me well over 3 years to make, on and off. And now I'm done.
Thank you for your attention.
#carry on XD#i hope y'all realize that when I say tacky it's with nothing but love in my heart#yes it's ugly. that's the whole point.#everyone should have an item in their wardrobe that will get Looks and raised eyebrows#it's good for you#anyway can't believe I'm done! this is a huge boost to my crafting hubris I CAN DO ANYTHING#wizard bathrobe adventures#handweaving#handspinning#hand sewing#look what i made#crafts#overall I'm happy with it even though there's. things that aren't ideal#the pockets are set a bit too low#and i should have made it a tiny bit longer not much but maybe like 5cm#anyway#overall it's a nice coat i think#Now That's What I Call Slow Fashion
4K notes
·
View notes
Text
I found an old plush rat in my shed (on the right) that I sewed about 7 years ago and WANTED TO MAKE IT AGAIN

behold
thick good nutritious


I made one green.
as if creativity dump was born from normal parents


🐀🐀🐀

2K notes
·
View notes
Text
First sewing project of 2025 completed!

It's a Vicwardian shirtdress that kind of straddles the lines between historybounding and historical costuming and cosplay.
See, I have made 3-4 blouses/shirtwaists in this style now, and the most irritating thing about them is that they gradually get more and more untucked throughout the day until I'm left with a muffin top spilling over my skirts. So I figured, why not make one that's the bodice of a dress? That way, I can anchor the blouse part down to the waistband so it can't ride up and come untucked, and I can control how much it's allowed to blouse and keep it that way 24/7 since it's stitched down.


^See? Now I won't have to constantly adjust and re-adjust the gathering and pleating into the waistband or tug my shirttails down because I can feel the back of the blouse ballooning out again.
(Almost forgot to mention: yes, the skirt has giant Victorian-style pockets in the side seams. The dress was 99% hand sewn, mostly because I was working on it while out of town without access to my machine, but also because when I got home and tried to attach a facing to the pockets, my machine decided 3 layers of this shirting-weight cotton twill fabric was too much to handle and broke down. So thanks for that, pockets. Now I have to find a repair shop or replacement machine.)
And bonus: the skirt can be worn as is, or it can function as a petticoat under a separate skirt I can wear over the dress. If I make a floor-length walking skirt to wear over this shirtdress, and maybe a waistcoat and/or an Eton jacket, then I'll have a convincing enough 1890s-1900s ensemble for historical costuming purposes.

Oh, and in case you can't tell, the bodice design with the diagonal pintucks in the yoke is inspired by the outfit that Elphaba wears in her "The Wizard and I" sequence from the new movie. She wears this gauzy, crinkle chiffon-looking blouse under a black jumper dress, and the visible parts of the blouse look like they're bias cut, with some kind of pintucked or micro-pleated texture.
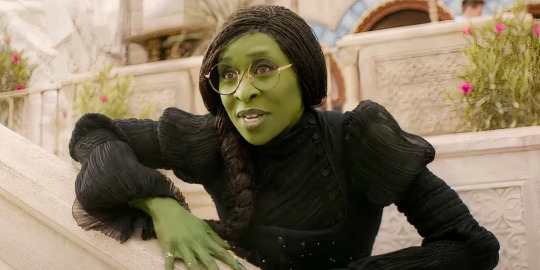
I basically spent the last month and change drooling over the costuming and wanting Elphaba's entire wardrobe. I don't think I'll be accurately recreating any of her actual costumes, but I like to think that my new shirtdress *could* potentially be something she'd wear.

Oh, and here's a detail of the lower sleeves on my dress. Elphaba's usually wearing all black, so the movie costumers played a lot with the texture of the fabrics on her clothing. They were inspired by mushrooms and other earthy textures, so her dresses have a more organic look than what I have going on here. I didn't have enough fabric to play around with, so I figured I'd just give honeycomb smocking a try, and I'm shocked at how well these sleeves preserve body heat in the winter.
Now all I need to do is make her hat and maybe sew a cloth facemask from green fabric and my 2025 office-appropriate Halloween costume will be good to go.
EDIT: link to the pattern I made for this dress here
And here's the dress worn under the corresponding skirt and waistcoat, and Eton jacket.
#sewing#hand sewing#historybounding#historical costuming#cosplay#wicked#tricia sews (kind of)#i'm calling this my first project of 2025 but it's actually my last project of 2024. i just didn't finish in time for the new year
796 notes
·
View notes
Text

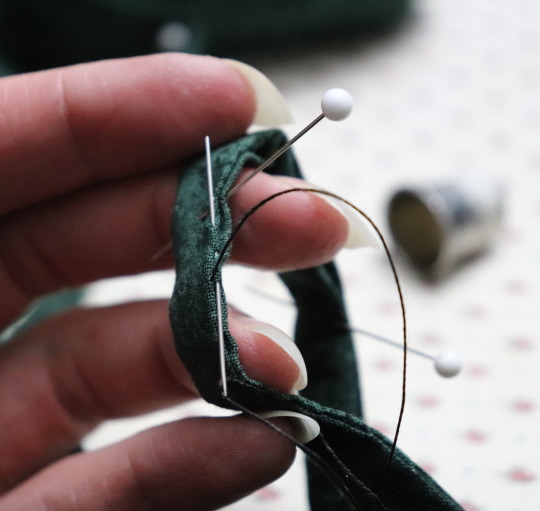

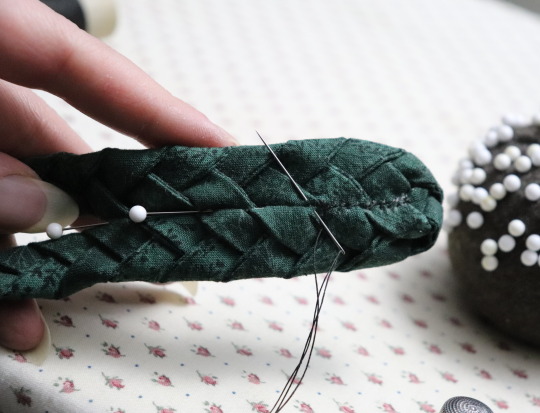
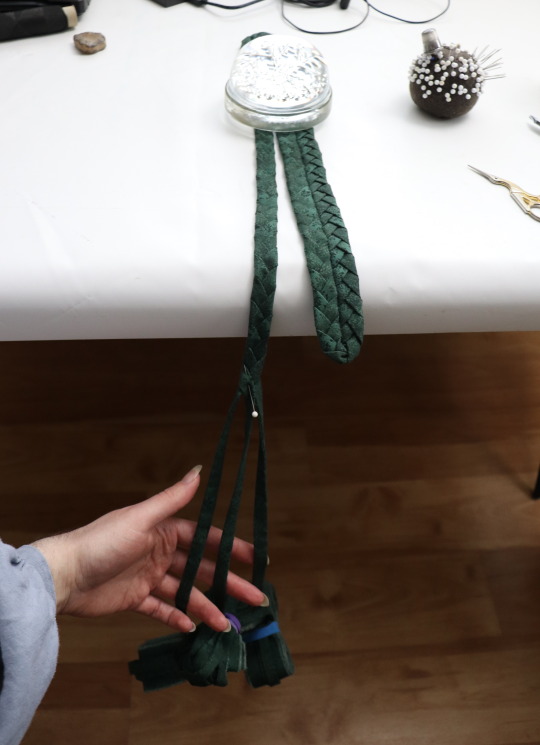

I started working on a braided rug earlier this month, using some of the quilting cotton that I have too much of. It's inspired by some very old rugs that my grandparents had. I'm tearing the fabric into 4 cm wide strips, double folding it and slipstitching the edges together, then braiding it and whipstitching the edges of the braid together, around and around. I also pressed the fabric strips carefully after tearing them, and have been pressing the rug every time I go around the ends to prevent it from warping. It's coming along slowly and is currently 16 cm wide. I've used up almost one metre of fabric so far, and am about to switch to a different piece of green cotton.
7K notes
·
View notes
Text


ziggy zaggy doodley embroiderbuddy!
#handmade plush#embroidery#kidcore#artists on tumblr#cat art#doodle#rainbowcore#handmade stuffed animals#plants#stationery#primary colors#cozy vibes#art business#hand sewing#colorful#8irdies
1K notes
·
View notes
Text
there is something very beautiful about the irresistible human desire to create
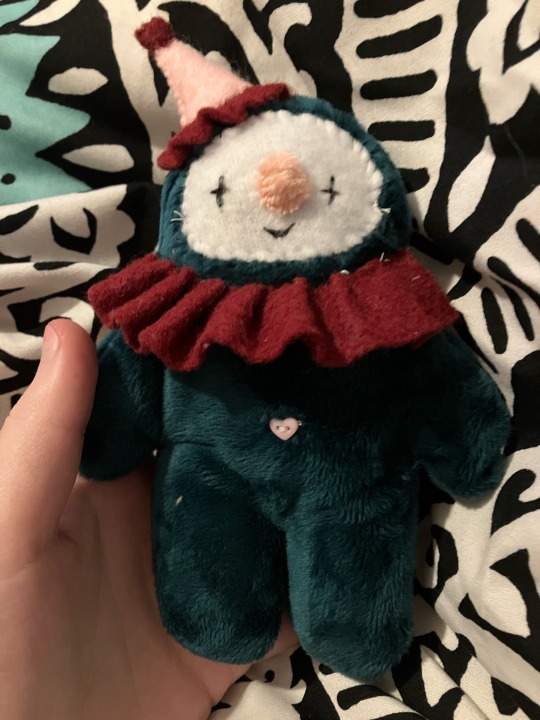
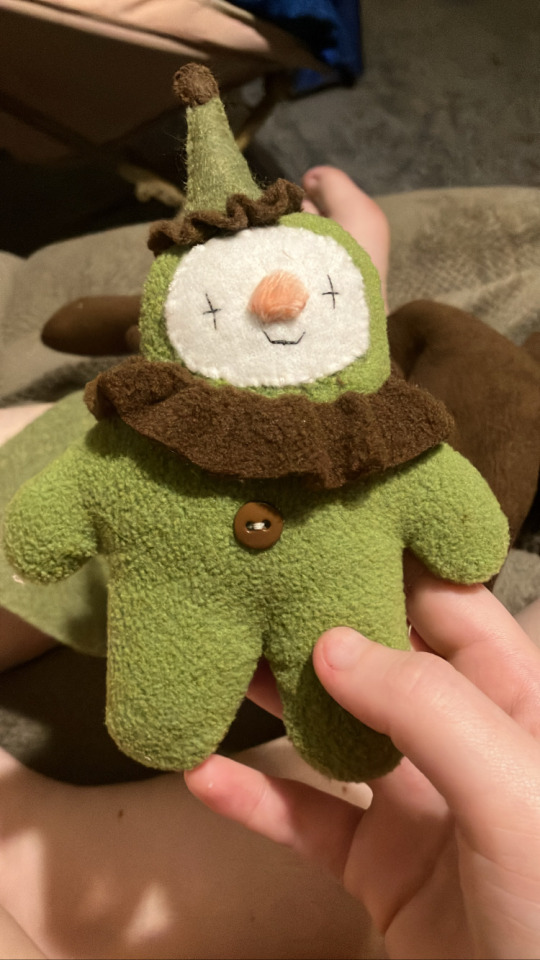
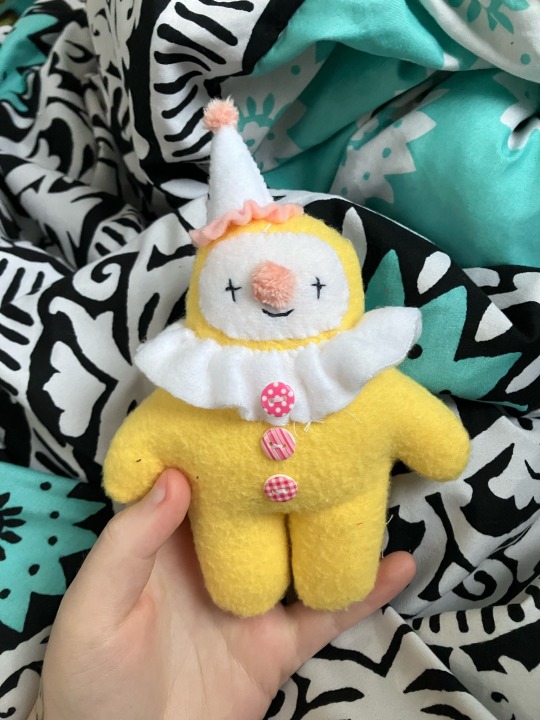
clowns like these will be on etsy very soon <3
UPDATE: etsy fucking banned me lol. currently selling these via cashapp within the united states only
#clowns#clown#clown plush#clown posting#plushies#sewing#hand sewing#they have names#because there is also something beautiful about#the human desire to name and pack bond with anything and everything
4K notes
·
View notes
Text


finished the roly poly for my friend i cant wait to give it to herrrrrr
593 notes
·
View notes