#drawing hair
Explore tagged Tumblr posts
Text
How to think when drawing hair
Here's a very rough five minute, uh, not really a tutorial, but a principle on how to draw hair that I did for a friend who voiced some struggles with drawing hair.
I promised to upload it here for safekeeping, maybe it'll be useful for some of you, too! It's not a full process but it shows how you can overcome the overwhelm that comes with drawing something detailed such as hair.
So first here's the drawing with some flat colors. The arrows are there to just point out the general direction of light. The key thing to drawing hair is to think of it as a 3D form and then imply detail which is what I'm showing here.

Now you gotta be bold and pick a big brush. Make it so big that it's almost clumsy so that you don't start noodling right at the get go. Lay down some very rough light areas.

When you have the light areas down you can push and pull the lighter and darker colours to fine tune the shape of the areas and also imply detail in certain areas. Remember to not make things too monotonous! If you have the same level of detail everywhere you will lose the sense of the form and also overwhelm the viewer with too much detail.
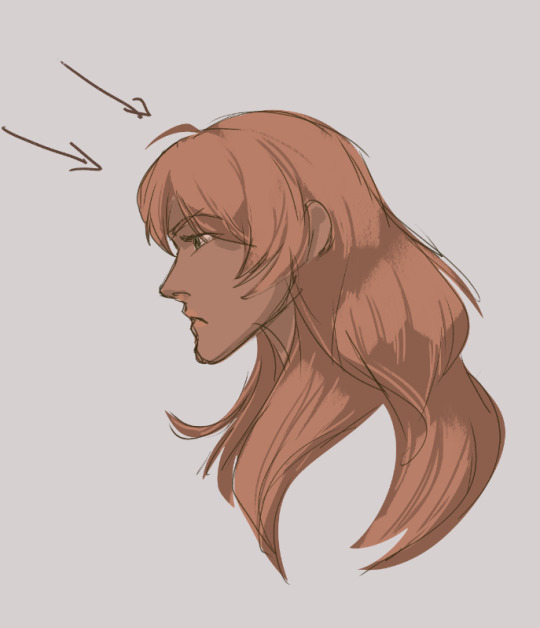
Then I just popped on some highlights to make it slightly less flat and to illustrate that you can use the highest highlights very sparingly and it still does the job of both implying form and keeping the overall image readable.

You can use whatever technique you fancy - erase light areas from the shadow layer, paint the light colour on top, paint the shadow colour on top - whatever works for you! The principle is the same. You can also add in darkest darks in the same fashion as the brightest highlights - sparingly but to give the hair a bit more oomph.
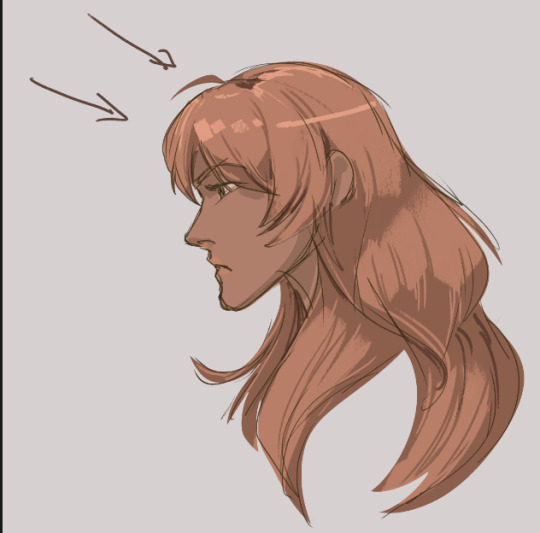
Hope this helps!
#digital art#drawing#tutorial#art tutorial#hair tutorial#hair#drawing hair#how to draw#art#drawing tutorial#artists on tumblr
393 notes
·
View notes
Text
HOW DO I DRAW LONG HAIR
I just wanna have a Siffrin with long hair…
#to be fair#i’m not good at drawing any hair#so it’s not like this is a unique struggle#cb writing stuff#art stuff#art struggles#artist stuff#artist struggles#help#please help#isat#in stars and time#siffrin#isat siffrin#in stars and time siffrin#siffrin isat#siffrin in stars and time#hair drawing#drawing hair#help artists#help an artist#please help me#isat fanart#isat art#in stars and time fanart#in stars and time art
29 notes
·
View notes
Note
How do you do hair so well? (specifically Raph’s hair in your mutation situation comic)
Hair, okay. I guess I don’t really think about it much, but I think I can make a little tutorial.
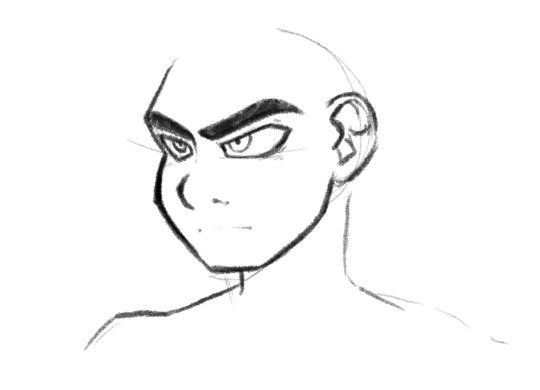
Alright, here’s a sketch. I’ve got a clear picture of where the most important points are, his forehead, his ear, and the crown of his head.
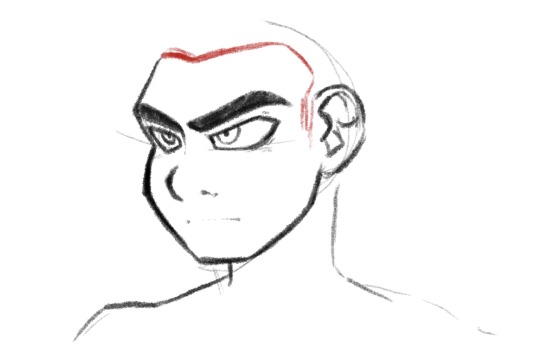
For me, I don’t have to do this step because I’ve drawn hair so many times, I just know where the hairline is, but for the sake of seeing what I see, I’ve drawn the hairline in red.
Pretty rough honestly, if the character had a buzz cut, I’d probably tweak a few things, but it’s just a rough outline. Anyway, it’s important to use the important points I mentioned above to not only draw the hairline, but also for the next step.
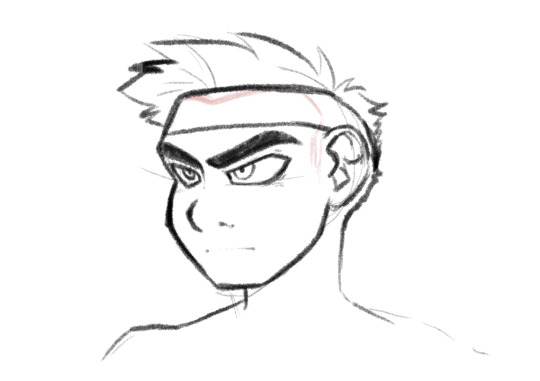
Now that I know where his hair is going to be, I can draw it. Raph would have bangs like his brothers, but his headband presses them up into spikes. I usually just make the spikes in a general randomized size, though a pattern I tend to follow starting at the origin point on the side of the character’s head is:
little, big, big, little, medium, little, little
Idk why, I guess I just gravitate towards that pattern.
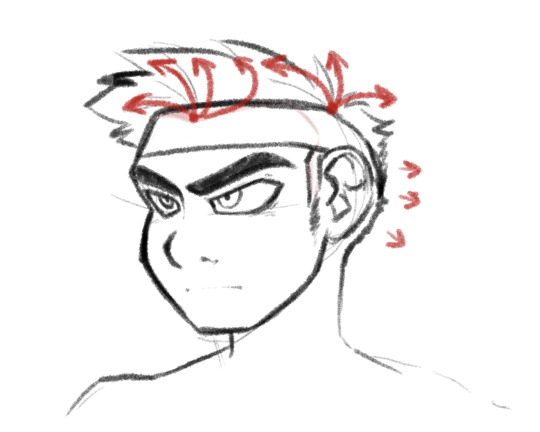
Something important to keep in mind when drawing hair is the direction in which it will naturally want to flow. I think at first this is tricky to understand and predict, kinda like a water splat, but the more you draw hair, the more you start to see the patterns.
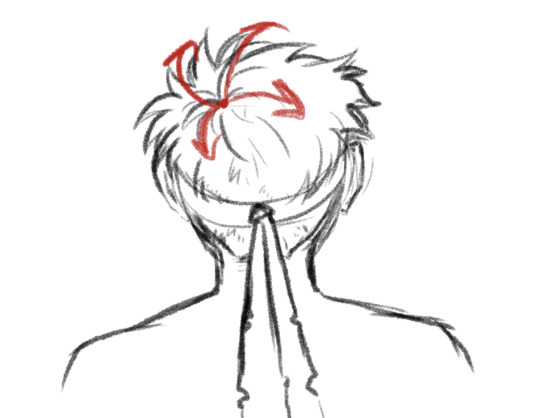
Some basic rules about the flow of hair are that everyone has one or two “origin points.” My mom calls them swirlies. These are the little spots on the back/side of your head that is where the hair spikes out. Girls probably never knew about these or had to deal with them unless you’ve had really short hair before. For boys, this is the spot where they get the most annoying cowlicks. Keep in mind that hair spirals out from this point. However where this point is changes on every person, some people (like my brother) have two.
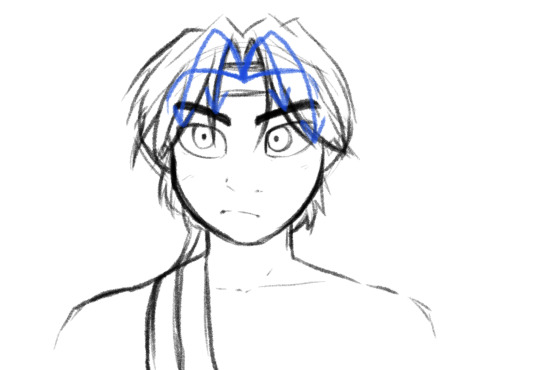
Another rule is that if someone has what’s called a “widow’s peak” then their hair will always part in the center and have puff a bit, I know because I have this 😭. People with a widow’s peak in their hair can’t have bangs that don’t part down the middle, naturally anyway. Their hair flows out from the center point as well as from the back. Not everyone has this, but it’s something to keep in mind :]
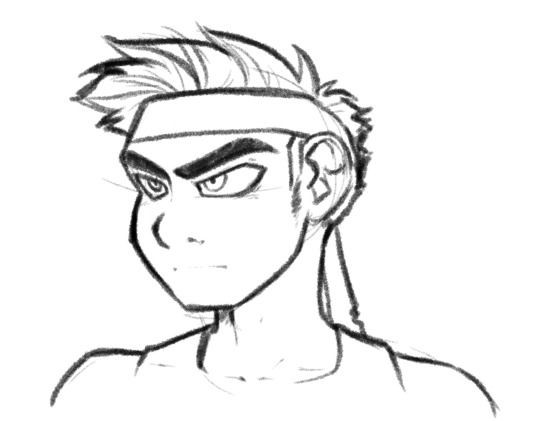
Knowing these points of flow, I can now refine the rough drawing into something pretty. The lines I put in show the origins of the hair an the direction of flow.
I hope this was helpful! I don’t really think about this kind of thing a lot since for me, I’ve had almost every length of hair, so drawing this is more intuitive. I tried to explain the best I could what goes through my mind, so hopefully this helps you with your drawings!
Good question! :]
#tmnt#q&a#the mutation situation#art#art stuff#art tips#drawing stuff#drawing tips#hair#drawing hair#tmnt 2012#teenage mutant ninja turtles 2012
289 notes
·
View notes
Text
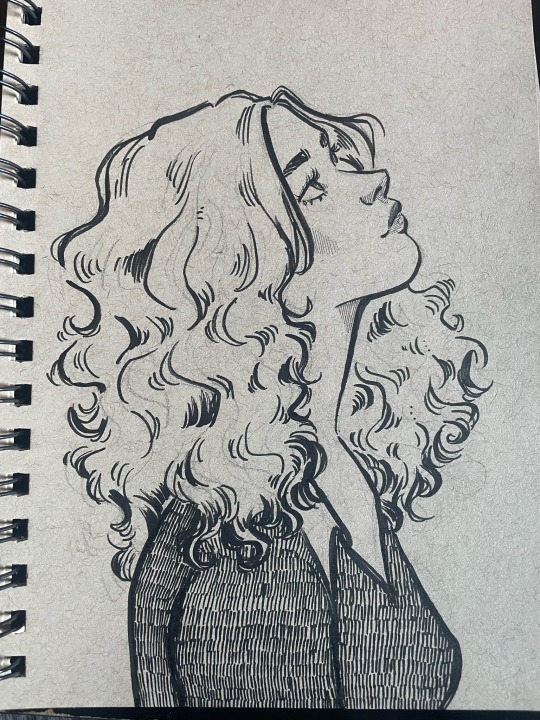
drawing so I can feel something other than the horrors for a minute
18 notes
·
View notes
Text
Hair tutorial… kinda?I think it turned out alright.
Building my [Patreon] now, it’s cheap because I’m still figuring things out❤️ But if you get in early, you’ll get it for cheap forever.
#aziraphale art#azicrow#aziracrow#Aziraphale#good omens fanwork#good omens fan work#good omens fan art#good omens#drawing#drawing hair#drawing tutorial#digital painting#procreate#ineffable husbands#good omens fandom#ineffable spouses#good omens au
27 notes
·
View notes
Text
Hair
Again
BECAUSE WHY NOT
I'm just learning to draw
Here's the curly one
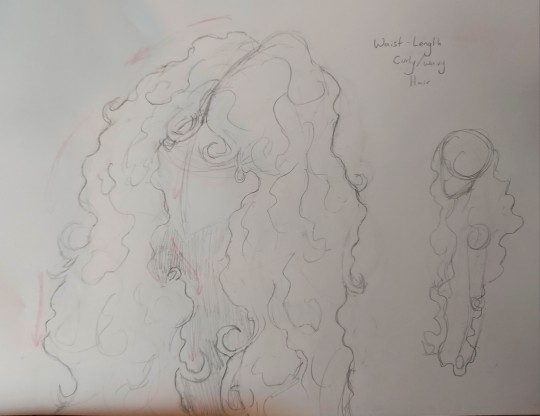
(Shyre and Jakkon have this hair, though Jak's is more coily/frizzy and wild)
Then there's Wavy
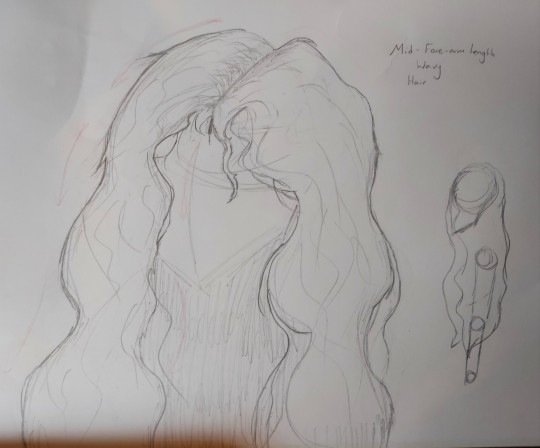
(Alkain and Marril have this, though Alkain's is a bit fluffier)
#artists on tumblr#my art#artwork#art#art process#drawing#character design#illustration#learning to draw#learning art#long hair#drawing hair#drawings#sketch#pencil art#pencil and paper#traditional art#traditional drawing#traditional sketch#pencil#ellia draws
34 notes
·
View notes
Text
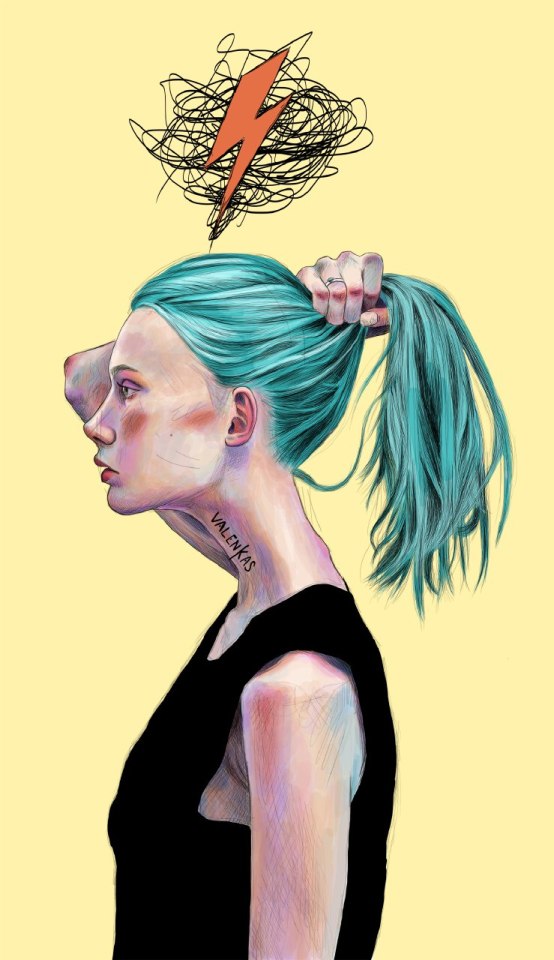
Ponytail ⚡ Digital illustration
////
Coleta⚡ Ilustración digital
#illustration#ilustracion#drawing#artists on tumblr#illustrators on tumblr#female illustrators#ilustradores en tumblr#ilustradoresespañoles#wacomillustration#wacomtablet#ponytail#drawing hair#dibujante#dibujando#ilustraciones
32 notes
·
View notes
Note
hi how would I draw a variety of hairstyles? Specifically Braids and Ringlets
33 notes
·
View notes
Text
answering the many mysteries of amada's hair

do i have permission to yap about how her hair reflects the progression of her character arc
16 notes
·
View notes
Text
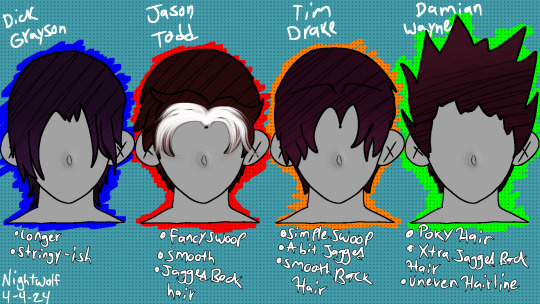
This is hair practice because all of my designs had Same Hair Syndrome
#it's not my fault they all look so similar#How people so easily tell Dick & Tim/Dick Tim & Jason in Robin costume apart is beyond me#dick grayson#richard grayson#jason todd#tim drake#damian wayne#drawing practice#drawing hair
50 notes
·
View notes
Text


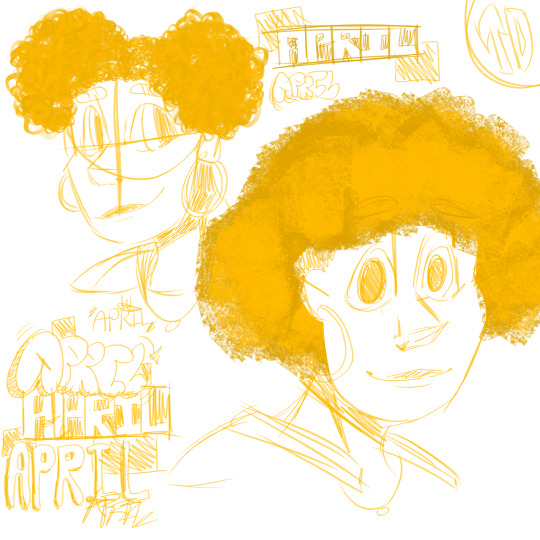
Little hair sketches for future!GTROTM (TDcreates on Ao3)
#tmnt#art#rottmnt#rise of the tmnt#fanart#rise leo#rise donnie#tmnt donatello#rottmnt leonardo#rottmnt leo#rottmnt raph#rise raph#rottmnt raphael#rottmnt april#rise april#April O'neil#teenage mutant ninja turtles#leonardo#drawing hair#hair brushes#ibis#ibis paint x#ibispaintx#ibispaint art#ibispaintdrawing#sketch#sketches#drawing#GTROTM
26 notes
·
View notes
Text
youtube
#portrait#drawing#imagination#hair#eyes#lips#nose#shading#art#technique#digital art#how to draw#real time drawing#perspective drawing#drawing the head#human#shadows#drawing hair#how to portrait#makeup#Youtube
8 notes
·
View notes
Text
despite drawing for decades, im still a beginner due to the lack of practice
all that being said, i've started digital recently. and today, i've drawn my first afro/coily hair.
and i'm honestly saying this:
stop making excuses for not drawing afro hair.
it took me to read a very short and simple tutorial on a blog and then a couple minutes and i was able to end up with something very decent.
if, as a beginner artist, i was able to do it, so can any artist. you're not even trying. I dread drawing hair and this was legit the easiest i've had drawing hair
(tutorial here: very simple, but as a beginner, that's all i needed. And if you're an intermediate or advanced artist, you should be able to take it and make it more detailed/to you art style)
8 notes
·
View notes
Text
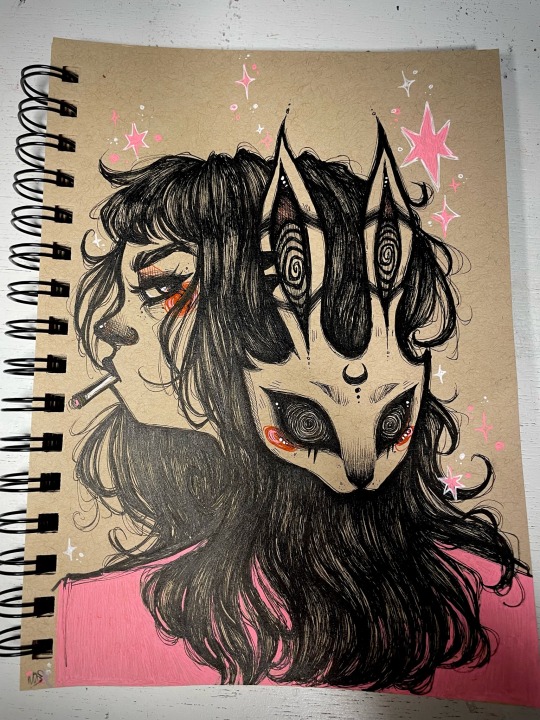
🚬🐇
#drawing#sketchbook#artists on tumblr#illustration#mask#rabbit#bunny#sketchbook art#pen art#my art#pink art#drawdrawdraw#drawing hair#ink drawing
6 notes
·
View notes
Text
How did I do? I'm working on drawing more hair styles.
Only black people comment please I want your honest opinions.
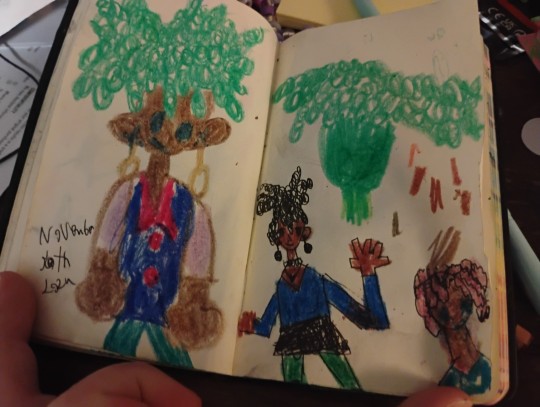
Ignore the green one I made a mistake on the eyes and had to cover that up.
2 notes
·
View notes
Text
Drawing a goth girl and omfg let me NEVER complain about shading curly hair again batsnest is INFINITELY harder 😫
#goth#goth girl#new wave#batsnest#drawing#shading#artblr#tumblr art#artists on tumblr#digital art#drawing hair#goth art#gothic art
2 notes
·
View notes