#Status Ailment Defense Down Active
Explore tagged Tumblr posts
Visit Tumblr Blog
Explore Tumblr blogs with no restrictions, modern design and the best experience.
Last Seen Tumblr Blogs


Fun Fact
After the announcement of the deal with Yahoo!, there were 170K signatures of unhappy Tumblr users petitioning to prevent the sale in 2013.
Text
Debunk of the "fetus is a parasite" argument
bad pro-abort argument: "prenatal humans are in a parasitic relationship to their pregnant host so abortion is self-defense"
This ideological framework for pregnancy requires sooo much equivocation it's unbearable.
*exasperated sigh* but let's break it down:
1) let's start by acknowledging how dehumanizing it is to posit that pregnant people/mothers are just hosts to parasites. And the sheer misogyny of framing a healthy, ordinary function of the fertile female body as a medical ailment. Females are not inherently diseased! The fuck!
2) the parastic posit assumes that the female body does not want to be pregnant and actively fights pregnancy, but that makes no sense considering the mechanisms that female bodies have deliberately evolved to encourage, stabilize, and sustain reproduction. That is not parasitic.
3a) the self-defense posit implies that the prenate is an aggressor that uses force to violate their mother. But this requires that the prenate have power over the situation. A prenate has no volition & also isn't an agent in pregnancy. A baby shouldn't be held to adult standards.
3b) I've recently seen a the rebuttal that "a sleepwalker also doesn't have volition", and that is true, but a sleepwalker is an agent who exerts power if they actively commit assault. Again, false equivalence. A baby's existence is passive, not an aggression, and not a threat.
4a) another implication of these posits is that the prenate is invasive. This is predicated upon that the location of a human (in this case, the womb — where else does a prenate belong?) has an impact on their moral status, meanwhile dismissing place of origin and safe shelter.
4b) The complaint is then that female bodies are not merely "locations" or "shelters"; this is an oversimplistic extrapolation. The pregnant female body is an individual person & home to another person simultaneously. That is dynamic self-other transcendence, not objectification!
5) "the fetus is a parasite" is a thinly-veiled dehumanization strategy as outlined in stage 4 of The Ten Stages of Genocide. By equating prenatal humans to vermin & disease, such as parasitic infections, the normal revulsion against the "eradication" of human beings is overcome.
6a) the parasitic pregnancy framework is a fetal non-personhood argument pretending to be a bodily autonomy argument. On a gut level we know it's cruel injustice to deliberately harm a helpless child, so we must construe either "child", "helpless", or "harm" as false in abortion.
The parasitic frame does all 3. If the prenate is a parasite, then she is not a child, she is not helpess, & she can't be harmed. The argument is that something about being a fetus justifies her extermination; that autonomy takes precedence over dependence is just pretense.
6b) This logic often reduces down to "the fetus is a parasite so it's parasitic; the fetus is parasitic so it's a parasite", which is invalid circular reasoning AND founded in unsound premises. It's discrimination against an entire class of human beings for their age & ability.
Fetuses are not parasitic. Fetuses are not potential people. Fetuses are existing people. Preborn humans are powerless people. Elective abortion is abuse of power. Abortion is predatory. Abortion is a human rights violation. Abortion is mass genocide.
Abortion is literal murder.
Deconstruction of the bodily autonomy argument. Refutation of the right to refuse argument. Construction of fetal personhood.
225 notes
·
View notes
Text
Just watched the gameplay trailer and...
Well, it's a lot like Path to Nowhere. Can't say I'm surprised, considering the unit placement and map layouts from all the trailers we've seen.
(More under the cut because we all know I'm the bitch who's more interested in the gameplay compared to other things-)
Some corrections regarding the symbols:
Angel wings are enemies remaining, paw prints are movement opportunities remaining.
Whatever that last icon is, it's supposed to be is your HP.
Two tilesets is real, but it's only used to indicate pathing.
There doesn't seem to be a distinction between low ground and high ground tiles - it's just the lighter tiles are the enemy paths, and you place units on lighter tiles if you want to block enemies.
The limits of the battlefield are the black picket fences along the edges!
But holy shit some of these abilities sound so fucking broken on paper, but the applications...
Marbas's skill, if handled properly, can act like Bard Supporters in Arknights. However, the healing seems to be very limited, at 1 HP per tick? How would it scale based on skill level and stats? Is 1 HP a lot for friendlies? At least it seems to be an infinite duration skill, so...
Paimon's slow is manual targeting. Personally I'm not a fan, or maybe it's because I think in the realm of tower defense, Suzuran is a slower done right. Or Snow Peas. These sorts of units, in essence, slow enemies down so our units can burst them down easily. Which might be uh...let's just say, underutilized based on the DPS options we have down the line.
At this point, Paimon seems to play a lot like May, and even then May is more effective in slowing down enemies with her first skill.
Anyways, what in the fuck is going on here?
That 'Miss' in blue text. Is that a damage instance miss, an ailment miss, or something else? If it's a damage instance miss (which is what I think it is) then mygod I think I'm actually going to rage while playing this game. That is, unless it's due to a unit's passive - then for my own sanity I won't be using them, ever. Because hey, fellow Arknights players, remember these fuckers?
Yeah. Silence and freeze came in clutch, honestly. There's a reason why a lot of players would rather not deal with dodge enemies and just want to nuke them out of existence with true damage and status effects. Though to be fair it's the Nethersea Brand that makes Stultifera Navis a hard event/Intermezzi...
ANYWAYS! The next skill I'll be looking at is Eligos's skill.
That's a unique skill, honestly! Mechanically, it's most similar to Mlynar's second talent, which gives him innate Taunt (makes enemy ranged attacks target him when he's in their range) - except Mlynar is Broken Like That and has damage reflect while maintaining that the Talent is always active, all with respectable defenses and a sizable HP pool. Like Mlynar, depending on how much damage the enemy does on average and how strong Eligos's shield is, the skill can easily turn into a double-edged sword, however - in a much more dangerous way compared to Mlynar.
Think of it this way. It doesn't seem like WHB has a redeployment mechanic, as a similar "style" of tower defense with Path to Nowhere. Which means, if an ally is dead, then they stay dead for the entirety of the stage.
Compare that with Arknights, which allows retreating and redeployment.
Losing Texas the Omertosa on the battlefield wouldn't matter as much as losing Eligos, because I know I can still use Texas down the line. Plus, the Executor subclass is built around redeployment, making that mechanic necessary to use her properly. Same thing with me retreating Chen - her positioning wasn't the most optimal after clearing the treasure chest, and if the stage went on any longer I'd redeploy her in a more strategic position/direction. But I know this stage's mobs aren't particularly tanky, and Mountain with Sweeping Stance (S2) would be more than enough to hold that lane, with his 2-block + DPS + self-sustain.
These are the words of a chronic IS player.
Meanwhile, if I lost Eligos, then I'd lose a valuable blocker unit. He's a defender in WHB, and he definitely has more tanking capabilities. But that means you'll have to consider adding either a healer to keep him healed up or more DPS to kill off enemies before you lose said defender to continuous attacks.
The final three skills shown in the trailer all fall under the same category: burst damage over an area.

This is where I can say slowers might eventually be underutilized in WHB on launch. They work the best with consistent, large damage sources over a period of time. What do I mean by that? Well, let's take a look at Suzuran - specifically, her second passive.
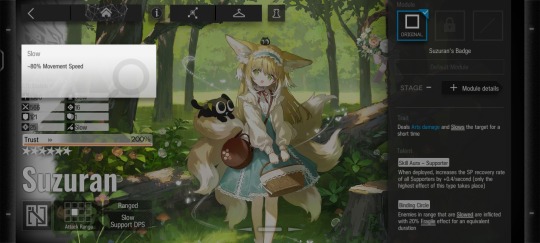
Suzuran, in my opinion, reflects the most effective way a slower is used in tower defense. Not only does she slow enemies down, she inflicts them with a debuff that makes them take more damage (Fragile). This effect is doubled with her third skill Foxfire Haze, where she stops attacking - but her slow turns into an area of effect deal, heals allies, and has an increased range. She is oftentimes used in conjunction with damage dealers and an extra debuffer (optional, but typically Saria S3) with steady burst damage over a set period of time - SilverAsh, Surtr, Mlynar, Eyjafjalla, Mostima, and Exusiai, just to name a few.
Granted, she is a 6* unit (L rarity in WHB terms would likely be the closest approximation), but even then other Decel Binders (slowers like Suzuran) without the debuff application still has the 80% Slow on all enemies they attack, and has ways to increase their slowing and damage capabilities.
It's hard to see with how the battle is presented, but if Paimon's slow is only on skill proc, then him in conjunction with these DPS options would be the equivalent of using Decel Binders with Chiave/Pinecone - which isn't bad per se (unless you managed to stack charges - then it becomes good) but less effective compared to using, say, Pozëmka/Schwarz. And let's not forget that some of these characters have huge attack ranges (Satan and Gabriel specifically) - making the entire point of slowers more or less moot.
Also, it would seem that skills may inflict status ailments! Stun seems to work like in Arknights (enemy stops attacking and moving for a set period of time), but Bleed I will assume is a damage over time deal. Kinda like Blue Poison and Thorns's passives.
The final and arguably biggest gripe I have with what I see in the trailer, though?
Little to no potential for AFK gaming- //SHOT
#what in hell is bad#whb#what in “hell” is bad#rimei rambles#whb analysis#the chronic arknights player in me emerges yet again#and yes the afk gaming matters#chongyue s3 asmr being the only exception i will take over afk gaming#placing mountain s2 to lanehold is cathartic and i need that shit in whb
23 notes
·
View notes
Text

Mysterious Dinner Table
Obtainability: This is a personal memoria for Mitsuru Inami. It is obtainable through completing the third episode of her Magical Girl Story and through the Support Gacha.
Single Effect: Charge Draw
MLB Effect: Charge Draw
Effect Definitions:
Charge Draw will replace that turns’ current discs with Charge discs.
TLDR: "Mysterious Dinner Table" is an important part of Mitsuru Inami's kit. If you have the character and plan on using her during Ranked, it will be worth it to invest in and max-awaken this personal memoria.
Review: This memoria is an important part of Mitsuru's kit, but first we need to talk about Mitsuru herself in order to talk about why this memo is good.
Mitsuru Inami is good for ranked mirrors and little else. Her stats are terrible-- she has very little ATK with most of the bulk of her stats being in HP and DEF. Her magia and doppel purposely deal very little damage and put her on par with the amount of damage that Sudachi will deal (aka, nearly next to nothing). Her magia and doppel themselves will give Attack Down, Accele MP Gain Down, MP Gain Down, MP Damage, Negate Status Ailments (for your team) and then HP Restore for your team-- all things that aren't useful in regular PVE.
But where is stuff like this useful? Ranked.
Her dealing very little damage makes her ideal in Ranked, because it means that you use her magia repeatedly without killing your opponents, ideal for racking up points to get a high score. Her charge conservation connect means that you won't lose your charge bonus if worse comes to worse and you're forced to use noncharge discs. Her magia will prevent the enemy from gaining MP so that they can't use a magia, and it will heal your team-- and having high team HP is another way to score points.
So, how does the personal fit in? Generally you aren't going to be using personals in mirrors, right? Well, as mentioned above, you want to have a high charge combo for your ranked mirrors points. Usually this means you'll want a team with a charge draw character so that you can easily draw the needed discs-- maybe even two characters with charge draw. That way both characters can charge draw and even puella connect with each other as needed.
Some characters, like Kaoru Maki, Swimsuit Madoka, Sae Kirino, and Tanabata Yachiyo will have charge draw as part of their Spirit Enhancement active. This makes them easy staples for Ranked Mirrors.
However, Mitsuru Inami instead has a Spirit Enhancement active of "Magia Damage Down, Magia Damage Down Further, and MP Gain Down" which is arguably just as if not more important than a charge draw. Why is this? Why not have her personal and SE active swap places?
This is because turn one is the most important time for that kind of Spirit Enhancement active to be used. You don't want to wait for turn two to use MP Gain Down, you want to use that shit ASAP.
Additionally, you aren't typically going to use Mitsuru Inami by herself as the sole charge unit. You're probably going to field her with another girl who has charge draw, as mentioned above.

That character will be able to charge draw right away if you need her to, so having two readily available charge draws on turn one isn't going to be necessary.
Lastly, Mitsuru Inami's Spirit Enhancement includes a turn one Skill Quicken. That means that you'll be able to use her personal memoria (or any other memoria with a low enough cooldown) by turn two.

Lastly, the stats on this memoria are low but actually play into Mitsuru Inami's kit well. With her passive MP Gain Up when damaged, you're going to want her to be taking hits-- and that means you probably want her to have a lower DEF than your other girls, as the Mirrors AI will prioritize units with the lowest defense to attack. By using memoria like this, you can keep Mitsuru's DEF low to help encourage her to take the hits needed to earn a Magia, but her high HP also means that she probably won't die to any of the attacks.
Overall she's a smartly made niche character who is very good at one specific mode in the game to the exclusion of any other, and her personal memoria is an excellent continuation of her kit.
You'll want to max awaken the memoria if you get it.
#Magia Record#Mitsuru Inami Wants to Be Normal#Personal Memoria#Charge Draw#Mitsuru Inami#Charge Draw Active
8 notes
·
View notes
Text
Abel, The Pious Adventurer
Hmmm...so you guys picked thr most plot important character who I can't say much about due to spoilers.
Spoilers that I...will probably never show because...he's not really going to be in any official material of mine.
...eh.

Basics
Abel is a mysterious person who seems to have some sort of connection with the world of shadows, as well as the personas that the party wields. They claim to have been "reborn" a few years ago, which aligns with a devastating event that created the shadow world, The Dark Garden.
He wants to understand and support humanity and seems to not understand the new modern world. Still, he makes extreme efforts to fit in with the other people around him.
While he does not like violence and actively seems to want to stop you from committing acts of violence, he eventually decides to fight with you in order to defeat the shadows.
Outside of The Dark Garden, he can still use his abilities, which is something no other character can do.
Personality
Abel is a very kind, curious, and trusting person, believing in the power of humanity and peace. He loves everything about the new world (except the bad stuff) and is extremely empathetic and compassionate, almost to a fault.
He is very emotional. That combined with his compassion, trusting nature (which to many is seen as gullibility) and curiosity tend to lead hik down odd paths. He may not know a lot about this new world, or himself, but he's determined to help others.
Combat
His persona doesn't exactly take shape early on into the story, but eventually it does.
I'm not entirely sure what to make his persona yet.
I was thinking either Baldur from Norse Methology or John the Savage from the Brave New World.
Baldur was an Aesir and the son of Frigg. She dreamed that he would die, and to avoid this, made every object swear to not hurt Baldur. Except mistletoe, which Loki used to kill him by crafting a spear(or arrow) out of it. He is prophesied to return someday after Ragnarok.
John is a character from Brave New World. He is a part of a group of people living in a place known as The Savage Reservation, where people who do are jot a part of the titular new world are from.He is taken to the new world by the main character Bernand. Unfortunately, he rejects society's values and prefers to live as people did in older times, which eventually leads him to be both shunned and dehumanizing, leading to his suicide.
As a party member, he specializes in
High speed and endurance, with lower strike damage from fists/gauntlets.
Wind spells.
Recovery magic, including healing and status recovery.
Confusion and Forget status ailments
Defense debuffs.
Good almighty damage??
He is strong against wind, ice and light attacks. He is the only member of the party to be weak to a physical element, that being strike damage.
Arcana and Story Arc
Abel is the Star. He is wandering through a world that is unfamiliar to him, a world that is dangerous and often threatening, with hope. He is constantly being treated as a nuisance and a fool by those who don't know him, but his positivity and faith never wavers.
He eventually decides to attend a church, has a pleasant enough time, and wishes to be as kind and caring as the good people in the Bible were... but suddenly stopped going after getting to a certain section. Plus, the people have been using the holy word for somewhat nefarious purposes; to put fear into the hearts of the people and to shun others, which he dislikes.
#persona#persona 3#persona 4#persona 5#persona oc#you picked the most plot important guy. immediately
4 notes
·
View notes
Text
Exploring the Uses and Benefits of Rhus Tox 200
Rhus Tox 200, a homeopathic remedy derived from the poison ivy plant, has gained popularity for its diverse therapeutic applications. Used for centuries in traditional medicine, Rhus Tox 200 is renowned for its ability to address a wide range of ailments, from musculoskeletal conditions to skin disorders. In this comprehensive guide, we delve into the uses, benefits, and considerations surrounding Rhus Tox 200.

Understanding Rhus Tox 200:
Rhus Tox 200 is a highly diluted homeopathic preparation of the plant Rhus toxicodendron, commonly known as poison ivy. Despite its toxic nature in its raw form, when properly prepared according to homeopathic principles, Rhus Tox 200 is rendered safe for therapeutic use. This remedy is prepared through a process of successive dilution and succussion, which enhances its healing properties while minimizing toxicity.
Benefits and Uses of Rhus Tox 200:
1. Relief from Joint and Muscle Pain:
One of the most well-known uses of Rhus Tox 200 is in the management of joint and muscle pain. It is particularly beneficial for conditions characterized by stiffness, soreness, and aggravation from initial movement, but improvement with continued motion. Conditions such as rheumatoid arthritis, osteoarthritis, sprains, strains, and fibromyalgia may respond positively to treatment with Rhus Tox 200.
2. Alleviation of Back Pain:
Back pain, whether due to overexertion, injury, or chronic conditions, can be debilitating and affect daily functioning. Rhus Tox 200 is often recommended for individuals experiencing back pain that is worse upon initial movement but improves with continued activity or gentle stretching. It may also be beneficial for addressing stiffness and discomfort associated with prolonged sitting or lying down.
3. Treatment of Skin Conditions:
Rhus Tox 200 has a long history of use in treating various skin ailments. It is commonly indicated for conditions such as eczema, dermatitis, hives, and allergic reactions characterized by itching, burning, and inflammation. When applied topically or taken orally as directed by a homeopathic practitioner, Rhus Tox 200 may help alleviate itching, reduce redness, and promote healing of the skin.
4. Management of Acute Illnesses:
In addition to chronic conditions, Rhus Tox 200 is also used to address acute illnesses, such as colds, flu, and viral infections. It is often recommended for individuals experiencing symptoms such as fever, body aches, restlessness, and general malaise. Rhus Tox 200 may help boost the body's natural defenses and facilitate a speedier recovery from acute illnesses.
5. Relief from Allergic Reactions:
Allergic reactions, whether triggered by environmental allergens or certain foods, can manifest as a range of symptoms, including itching, swelling, hives, and respiratory distress. Rhus Tox 200 may be beneficial for individuals experiencing allergic reactions characterized by these symptoms, particularly when there is an accompanying sensation of restlessness or aggravation from rest.
How to Use Rhus Tox 200:
Rhus Tox 200 is typically available in the form of small pellets or liquid dilutions. The dosage and frequency of administration may vary depending on the individual's age, health status, and specific symptoms. It is essential to consult with a qualified homeopathic practitioner for personalized guidance on dosage and usage instructions.
Considerations and Precautions:
While Rhus Tox 200 is generally considered safe when used as directed, certain precautions should be observed:
It is important to disclose any pre-existing medical conditions, ongoing medications, or allergies to your homeopathic practitioner before initiating treatment with Rhus Tox 200.
Pregnant and breastfeeding women should consult with a healthcare professional before using Rhus Tox 200 to ensure its safety during pregnancy and lactation.
Individuals with severe or persistent symptoms should seek medical attention and may require additional evaluation and treatment beyond homeopathic remedies.
Conclusion:
Rhus Tox 200 offers a natural and holistic approach to addressing a variety of health concerns, ranging from musculoskeletal conditions to skin disorders and acute illnesses. With its long history of use in traditional medicine and its gentle yet effective mode of action, Rhus Tox 200 remains a popular choice among practitioners of homeopathy and individuals seeking alternative remedies for their health needs.
Whether you're seeking relief from joint pain, backache, skin irritation, or acute illness, Rhus Tox 200 may offer a safe and effective solution. As with any homeopathic remedy, it's essential to consult with a qualified practitioner to determine the appropriate dosage and usage regimen for your specific symptoms and health status.
If you are Hindi reader, then here in Hindi - "Rhus Tox 200 Uses In Hindi
" इस प्रकार।"
Incorporating Rhus Tox 200 into your holistic healthcare routine may provide you with the relief and support you need to thrive and maintain optimal well-being.
0 notes
Text
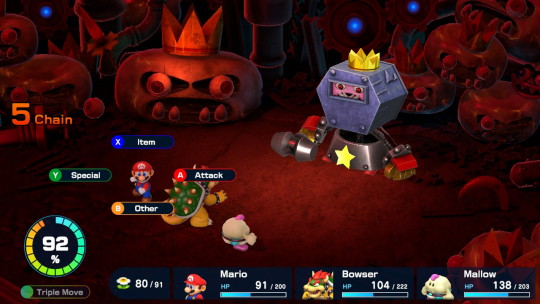
Super Mario RPG playthrough diary - 40
Below here be spoilers!

Alright, 5 against 1 - a plumber, a cloudbaby prince, a light-mote possessing a doll, a princess, and a king v.s some hairy tyrant with a hammer.
It's a decisive battle and indeed a war between wishes and weapons. Bitchin' music, too!

This guy's a tough nut to crack. And his Smelter, too!
Throughout the fight he'll create random helpers with AOEs to fit their motif. ...Should I say just Shypers.
Destroy that first, and you're Gucci-golden!
...Op, Mario's down.
Anyway, I healed a bunch - now I won against good old Smithy!

At this point the foundation falls and we're thrust into phase 2, where the music becomes crazy and chaotic and he unleashes his true form after we were only shown the earlier form for like 2 minutes.
"Meanwhile, the fight is not over." "What!?" "True form activate."

...Well, his head changed. In fact, that's the name of the game here. His head will periodically cycle through a few forms - a tank for physical attack, a coffin containing the late Pink Panther for defense, a penis wizard man for magic, and a treasure box for status ailments up the wazoo.
Princess Peach is your best bet.
Oh God, tank mode.

His body works more like Exor's eyes - if you damage it enough it'll temporarily be unable to attack.
Next up he changed to penis-wizard mode.

No Magnum yet - just a bunch of Bullet Bills and stuff.
Apparently it's not a weird mouth under the hood - it's his little crown!
Next form! It's... This.
This mode is dedicated to defense - or defence, if you're British. It's immune to magic, so you'll be sorry if you wasted your Ultra Flame on that.
Oh God no, tank again. OH SHIT THERE'S MAGNUM AND IT KILLED GENO BECAUSE I DIDN'T REACT FAST ENOUGH
Penis wizard man again. Mario's down. So's Mallow.
Everyone keeps dying - time to send in tanky old Bowser.
Not the tank again!!! I wanna see the treasure box!!!
I blocked the Magnum!
Anyway, here's the last form - the treasure box full of status ailments.

I was meaning to save those Rock Candies during the Smithy fight, and look where I am!
Whew. Only ~1,300 HP to go. And they kept the status screens as eyestrain as ever.
Finally got that Healing Rainbow up and running.
And there! The last hit! I did it! FINALLY!

He's finished! Done for! Kaput! Over the hill! Shalom!

Now that Geno's left his host body and returned to space, let's gather'round and find out what became of everyone.
Todovsky has an orchestra.
Gaz and Geno reunited.
Croco joins the Mushroom Derby.
Valentina is trying to marry Booster.
The Starslap serenades everyone.
Johnny's just there. Who is he, Proto Man?
Mallow's on stage as the rightful heir to the Nimbus throne. I like to think that afterwards, Nimbus Land and Tadpole Pond form an alliance.
Bowser's fixing up the castle.
Plus, Punchinello showed up at the end! Proving that he's alive and not dead!
Also, the credits have gone all retro. This is either cute or lazy, depending on your sliding scale of idealism v.s cynicism.
Right around Johnny's section they've spiced up at night with parade lights.
0 notes
Text
Recently played through Final Fantasy 9, and it was pretty fun and cool, but the final boss was odd. It had an attack that applied every debuff randomly and dropped everyone's HP into the single digits. It basically forces you to hit recovery strats constantly and equip your party to resist as many debuffs as possible. Unfortunately, KO (instant death), Doom (delayed death) and Zombie (healing hurts) aren't defendable, meanign it's entirly possible for the final boss to go "lol I win" and you really can't do much other than have a character be too up to get hit. It made me realize that the game seemed to focus a lot on recovering your momentum.
This became very apparent when I was watching a casual playthrough where Mustard Bomb and Frost (two spells that inflict a debuff that can kill) always worked when the enemies used them, forcing the player to just equip an ability to immunize their party to those two debuffs. Mind you, you can learn Mustard Bomb and Frost, but you'll never use them in any meaningful manner because their accuracy is 20%. It sure doesn't feel like 20% when enemies use those spells since they always succeed, but it feels far worse when you try to cause 20% would be an improvement in some cases. I mention these two specific spells cause there was a dungeon the player hit that had a lot of enemies use these spells sorta frequently, slamming the brakes on any damage output possible.
Another time I watched someone speedrun the HD version with all of the boosters on. It was a silly category by nature, since you one shot everything, but the speedrunner didn't activate god mode since that put everyone in trance, thus wasting time. However the third to last boss almost killed the run immediately, and second to last boss wiped her Game Shark leveled party down rather quickly with a few abilities, making me realize that the game really leaned hard on status ailments and defense ignoring damage at the end, which feels a little cheap at times.
I'm not saying Final Fantasy 9 is bad, far from it, but the design choices the dev team made culminated in a game where eventually you always felt like something was gonna go wrong at some point.
0 notes
Photo

The Sky with Seven Stars
Obtainability: You can get one copy from completing all three of the unit’s MSS, and the rest can be rolled from the Support Fate Weave. Usable by Umika Misaki only.
Effect: Defense Down [50%] / Status Ailment Defense Down [25%] (Target for one turn)
#Magia Record#Personal Memoria#Defense Down#Defense Down Active#Status Ailment Defense Down#Status Ailment Defense Down Active
3 notes
·
View notes
Text
One Hundred Evils and You: Stall Teams (for the F2P Player)
Introduction:
Here is a guide on how to defeat the Hundred Evils/Hundred Calamities with easy-to-acquire units and easy-to-aquire memoria!
Please note that this is not the only approach to the Hundred Evils, and it might not even be the best approach for you personally. However, it is the most generic approach that is made with Free-to-Play Players in mind. Stall teams are easier and more accessible to make than most Charge or Magia teams. Blast teams can work in the Hundred Evils (I’ve done them before) but it’s tricky and they’re not always applicable, depending greatly on who you fight. In the end a Stall team might be your best option!
This is an extremely long guide. I wanted to be thorough, but I might have overdone it. Still, I hope this is helpful! Some of these hints might be a little obvious, but I wanted to make sure that even new players could get some practical advice.
What is the Hundred Evils?
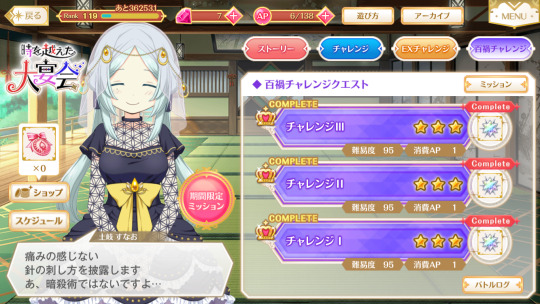
The Hundred Evils is located on the far right tab where you have three different battles to fight that only cost a reasonable 1AP each. Inside, you’ll battle against several different waves of Magical Girls (and only Magical Girls-- no Witches, Uwasa, Kimochi, or other kinds of minions will be found inside).
What is a Stall Team?
A Stall team is a team that
Uses Magia to protect its team + deal out damage
Uses memoria to protect its team and debuff enemy
Uses specific characters for buffing, debuffing, healing, ect
This is not a team that will kill fast, but is one that can take some serious hits and stick around.
Preparing Your Team
Like many strategies, most of the difficulty is in the planning. But before we talk about the characters themselves, let’s take a quick moment to talk about the preparation needed to make them excel at their work. Unfortunately this will require investment in both their Spirit Enhancement and in their Magia (you’ll want several of them to have Doppels).
More importantly, you’ll also want these characters to have multiple slots-- the worse your memoria are, the more slots you’ll want. Essentially, you really need each character to have four of them.
For more established players, it’s very possible that you’ll have several of these girls kitted out already with their required slots, but for very new players, it might take a few events to finally get them fully slotted. Luckily you can do this easily with Magia Chips and Destiny Bottles, unlike with natural four-stars, but this still might take time to build up.
As for Spirit Enhancement, it depends-- some characters you’ll really want that Active (for example, Kako’s party-wide HP Regen heal) and some characters... eh. It’s not as important.
But it’s still a good idea to grab as much as you can. Some characters, like Kako again, have SE that gives them more MP at the start of the battle or HP Regen. This is inconsequential for high-end content, but vital for a FTP Magia Stall strategy team. You want everything that will make a character live longer, heal themselves on their own, get them to Magia faster, ect. You don’t need to get them to 60/60 SE, but it’d be good to aim for them to have all their Passives and Active.
Who to Use:
Let me introduce you to a F2P’s saviors:
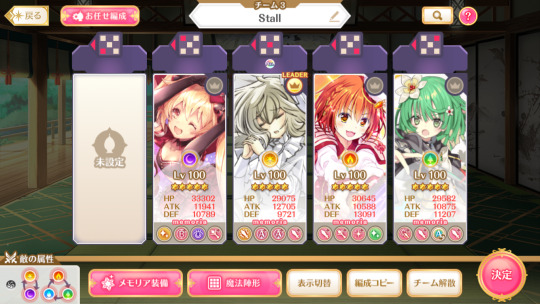
Let’s go through them and analyze why these girls in particular are so good for Stall teams.
Oriko Mikuni: Oriko is the team leader of this bunch. Why is that? She’s your go-to Magia damage dealer. She’s a Magia type, she deals a decent amount of damage for an uncapped girl, her Magia is an AOE, and her typing (Light) means that she should be able to deal decent damage against anything you throw at her. Her Spirit Enhancement is full of increased Magia Damage Up, and she also has the passive 15% chance to inflict Skill Seal on her enemies-- it’s not enough to be reliable, but I find that it’s still really useful when it pops off unexpectedly. The focus on Evade can be useful in some circumstances-- she’s fragile, and it’s an easy way to protect her. Lastly, her connect gives Accele MP Gain Up, which lets her help your team gain more MP.
Kako Natsume: The GOAT for F2P, Kako Natsume is pretty mighty. Her Accele Draw personal memoria is great for getting things set up, she offers good heals through her connect, her Magia/Doppel, and even through her Active SE, and her SE is also pretty decent with giving her lots of stuff that helps her survive. Her damage isn’t the best as a Healer, but her single-target Magia/Doppel can kill troublesome Aqua-types when needed. Her Magia/Doppel/Connect also gives “Remove Status Ailments” which can be extremely helpful. Lastly, her Doppel will provide “Remove Buffs” towards the target which can help with increasing damage potential.
Emiri Kisaki: Don’t let Emiri fool you into thinking she’s all giggles-- she's fearsome! She’s excellent as a Debuffer and will protect your team through inflicting Dazzle onto the enemies. Not only does Dazzle make them more liable to miss, but it also means the enemy takes increased damage from their weak element, so she can also help increase damage done. Additionally, her Magia/Doppel gives all enemies Damage Down for three turns, making her Magia even more protective. Lastly, she has Skill Quicken as part of her Spirit Enhancement, meaning it’s an excellent idea to equip memoria on her that you want to use more often than the cooldown let’s you.
Manaka Kurumi: Manaka is fucking incredible. Like Kako she’s a heal-type, but don’t be tricked into thinking that’s all she can do. She has one of the highest Attack Up connects in the game and her Magia/Doppel offers an excellent amount of Attack Up to all allies for three turns. This gives her the role of being the buffer-- if you’re facing a tough enemy, use Manaka’s Magia/Doppel first and then use the other Magia after. She has two Accele MP Gain Up passive nodes and an active that gives her more Accele MP Gain Up, so don’t be afraid to use her Magia/Doppel often.
Other Good F2P-Friendly Units
Now, you’ll probably notice that I only included four up there, but that you can use five in total for your team. If you need to use a Magia Stall Team, then I recommend using all five spaces so that you have more room for potential Magia/Doppels. The fifth slot can be swapped for anyone in particular, but if you’re looking for a F2P-friendly character then I’d recommend one of these girls.
Umika Misaki: Personally this would be my most recommended option. Umika is another healer, which makes your team even more protective than before, and she can fill a very protective role. First, her connect won’t just heal someone but it’ll also give them Damage Cut and almost 100% Defense Up-- making her excellent at protecting someone. Her Magia/Doppel act similarly to Kako’s, restoring health to all allies and also removing Status Ailments. Her SE is similarly useful-- like Emiri, she has passive 15% Skill Quicken, so she’s a good choice to equip active memoria you want to use often on. Like Oriko, she has a chance to Skill Seal on attack-- not enough to be reliable, but enough that it should still be good. Her SE active is MP Damage for 30MP-- situational, but it can be extremely helpful if you’re not able to kill an enemy before they can Magia you. Her DEF and HP make her solid, not as much as a proper tank, but as someone who can stand in for one.
Hotaru Yura: A bit of a bold choice, but Hotaru can be good. She’s another healer, but she has some excellent supportive capabilities. First, you don’t need to worry about her dying, unless she can’t Regen HP-- her SE Active gives her 100% HP Restore (with the cost of Attack down on self, but no one is using Hotaru for damage). She has passive HP Regen, Defense Up, and Status Ailment Resistance so she can take a bit of punishment. Her connect is a generic heal, and her Magia has a generic HP Regen, but what makes her really shine is the MP Regen from her Magia-- this means you can use her to keep your party having topped off MP gauges.
Haruka Kanade: If you have Haruka, she can be a good choice as a tank. Despite being a Support, she has a ton of tanking capabilities, and she can protect your team through a variety of methods. She has passive Provoke chance, meaning she can draw aggro away, Skill Quicken (you want to probably use her active slots for taunt memoria and for defense up/damage cut memoria though), and HP Regen. Her active lets her taunt the enemies while also inflicting a 52% chance of Charm onto them-- it’s a long cooldown, but can serve as a panic button when things are going wrong. Her connect gives Charm as well, meaning you can protect the party from hits. Her Magia/Doppel is also a good defensive panic button of sorts-- the target will deal less damage, Haruka gains Provoke and Damage Cut (and hp regen), and she can protect your team for that turn.
Sana Futaba: Sana has decent DEF and HP stats, so she will do well as a tank. She has a passive Provoke and a passive Endure-- meaning that she can draw hits and also stay alive past one potentially fatal one. Her SE gives her Accele MP Gain Up and MP Gain Up nodes, so it shouldn’t be too difficult to get her to Magia/Doppel. Her Anti-Debuff SE active is situationally useful. Her connect gives 100% Damage Cut, making it a good way to protect the user, and her Magia gives Damage Cut/Defense Up to all allies, again making her a good way to defend her team. Her Doppel has a chance of being very defensive or of inflicting Status Ailments (Burn, Darkness, Bind). This does make her more tricky to use if she gets to 150 MP as opposed to 100-- you can’t guarantee if she’ll protect your team or inflict ailments on the enemy.
Good Four-Star Units to Use
There are too many good units to list here-- believe me, I tried to actually do that and after the first twenty characters I realized I’d have to tackle this in a different way. However, here are some extremely notable characters, who you should bring even if they only have one slot:
Madoka & Iroha
Madoka Kaname
Mikage Yakumo
Outside of that, if you have someone with a few slots and you’re wondering if they’re good to bring, ask yourself these questions:
Do they have good disks? Characters with two or more Accele disks are better than ones with only one.
Do they help with MP generation in any sort of form? It’s not a must-have, but it’s a plus.
What do they provide to the party-- do they have a protective role, a defensive one, an offensive one? For example, you can swap out Emiri for a slotted Mifuyu since they share similar roles, or a Sayuki for a Manaka.
Last Notes on Choosing Characters
Here are a few last things to consider when choosing some characters.
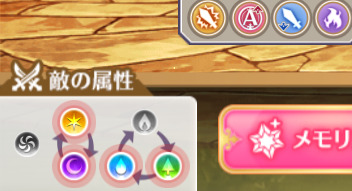
First off, you don’t always fight every element. You might not know who you’re fighting, but you can know what element they’ll be-- you can then use your characters accordingly. For example, it might not be worth it to bring an Aqua-element if you could use another Forest type here. Just make sure that you don’t miss important team roles!
You can always try to use memoria to fill in missing character gaps. For example, some fights might have you face teams that build up MP to use on deadly Magia. You could try to get your one-slot Touka to work... or you could just use Magia Damage Down or MP Gain Down memoria instead.
Tanks can be really helpful here but also sometimes not. A tank really needs 3+ slots to work properly so that they can have enough defensive passives plus an active that grabs aggro. However, you don’t need to choose a proper tank-- any character with a passive Provoke or Guardian can work if they have the right memoria for it. Just make sure you keep them alive.
Three healers on a team might seem excessive, but personally I find it to help cover bases. This way you don’t run into a situation where your healer needs help but no one can help them, and you also are able to use Magia more strategically-- Manaka can heal, sure, but you don’t need to waste her Magia on someone when you don’t need the Attack Buff right then as long as Kako has her Magia up still. This is also really helpful if you don’t have any tanks on your team.
When it comes to filling in the fifth member of the F2P team (Oriko, Manaka, Kako, Emiri), I prefer aqua types so that you can fill in all elemental slots. Again though, make sure you check what elements you’re fighting first!

The formation you use can be important too. This one for example gives increased Status Ailment Resistance and HP Regen. Additionally, make sure you place your characters with consideration. Characters closer to the front will be targeted more than characters towards the behind. If you have a tank with Provoke memoria, then make sure whoever is horizontal and vertical with them can also take some hits when the enemy uses a blast attack.
Equipping Your Team: What Memoria to Choose?
Okay, so you’ve chosen your characters. What about memoria? Do you need top of the line stuff here?
Nah. You can do this with event rewards easily!

Going through a list of everything that could potentially be helpful would be extremely long, so the above provides some examples. Let’s go over some notes:
For passive memoria, I prefer to do one Accele MP Gain Up/MP Gain Up memoria paired with one Attack Up/Damage Up/Damage Increase memoria. That way your units can get to Magia easily and still deal decent damage when they get there. If your characters are fragile, then using memoria with Defense Up/Damage Cut are good ideas too. Memoria with passive HP Regen aren’t a bad idea-- you probably have a lot of good healers on your team, but a character who can passively heal themselves means you can use those Magia for more offensive purposes.
As for Actives, your choices are expanded. I mentioned above that memoria can fill in missing gaps that you couldn’t fit characters in for. Actives are part of that. Accele Draw memoria are always a must, and memoria that help increase your MP Gain is always a plus. The biggest key though will be Attack Down / Damage Down memoria. Memoria like Mito Rain are the best thing possible for a F2P-- it has a low cooldown, effects everyone, gives a ton of its percentage, ect. You’re actually better off keeping five separate copies of Mito Rain instead of max awakening it to one, because then you can give each character one copy-- this means you can use a Mito Rain on every turn. This will protect your units and keep them safe in addition to all the healing you can do, and it also will help you deal increased damage thanks to its Defense Down.
One memoria that can inflict MP Gain Down is generally a good idea.
Characters with passive Skill Quicken should be given memoria that you want to use more often-- Mito Rain is a good idea on them of course, but so are other debuffers.
Tailor your memoria to your needs. If you find that all your characters are constantly at 150 MP but you’re never in a good place to use it, try decreasing the amount of MP Regen memoria you’ve got going on and replace them with more damaging effects.
DON’T OVERLOOK THREE STAR MEMORIA. They can be extremely helpful and even better than some four-star ones! For example, Leila Rain is an overlooked hero and definitely worth considering! Three-star memoria are easier to max awaken too, so in some cases, a max awakened three-star memoria is going to be better than a single copy of a four-star one!
If you’re a newer player, then chances are you’ll struggle with having good memoria along with having good units. Memoria can be just as much an investment as characters can be-- so make sure you’re getting 3* Over Limiters from your events and spend them wisely.
Don’t forget you can negate Evade through Status Ailments-- memoria can be extremely helpful with that.
Actually Fighting
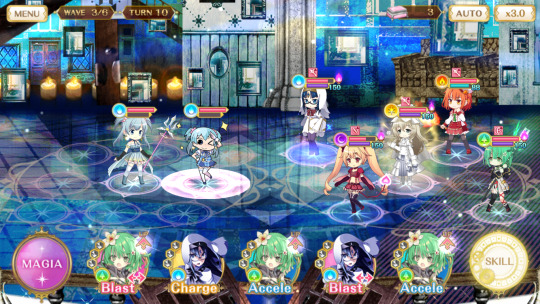
So now you’re fighting. Cool! What now?

First you want to build up your MP for everyone. If you have an Accele combo without needing to use an Accele draw memoria, take it!

For your first wave, try to build up MP slowly across everyone. Use your Accele Draw(s) here and prioritize Accele combos-- even if it means using an Accele disc for someone who already has max MP. For example, if I got an acele disc option from Umika, Manka, and Oriko, I’d still use Umika’s to get all of that MP.
Remember that the order the Accele disc goes in determines how much MP they get! The first character gets the least amount of MP with the last one getting the most. Using the previous example, I’d use Umika’s disc, Oriko’s disc, and then Manaka’s disc. Don’t forget that the characters get a flat +20 MP boost too.
Choose your target enemy wisely. For example, you can generally count on Touka featuring some sort of anti-MP gain/MP Gain on self, and Nemu to inflict a status ailment onto your team. Here, the Rena hits harder than her Rena-chan self. You can’t always predict who is going to use what, but general familiarity with the characters helps.
Some enemies are better for generating MP against than others. You can’t always predict who you’ll get and what they’ll do, but if you come across easy enemies, take advantage of the situation to farm some MP.
There are lots of tricks to getting more MP out of situations. For example, all characters will gain more MP after they hit 100MP than before they do-- so using an Accele disc before a Magia is an easy way of regaining your losses.
Using an Accele disc before any others will increase the MP gained by each subsequent disc, even for Blast. If your disc selection is bad, try to make the most of it with squeezing out what you can.
Additionally, if you’re confident a Magia will kill a target, use the Magia last. You can put two potential accele discs in front of it to get even more MP out of the thing.
This line of thinking can go with charging up connects. You don’t actually need to use the disc (if the enemy dies) to get the + for it, so if you’re confident a Magia will kill a target, pick discs that will give you a connect on your next turn.
This is a little overkill, but personally I like to go into the last wave with as many Doppels and Memoria up as possible. Don’t stay on any character too long-- you can only use three doppel a turn after all, and using one of your five to finish someone off isn’t a bad idea-- but also don’t be afraid to sit for a bit either. Just make sure you’re under the 40 turn time limit. It’s possible that whatever you face in the final wave will need more than three doppels to die.

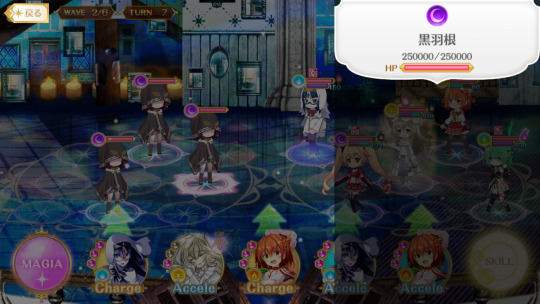
It’s time. It’s the final, toughest wave. You’re here! You’ve got all the Doppels ready and a bunch of memoria ready too. So what order do you do this in?
In general a safe bet is to go Manaka > Emiri > Oriko. This is so that Manaka will buff the entire team, making each Doppel hit harder, Emiri can inflict Bewitch (possibly making Oriko hit harder if she counters the element, though it doesn’t work in this scenario) and use your main damage dealer (Oriko) last.
If your characters have some lingering status ailments, or if the enemy has an annoying buff, Kako’s doppel might be a good idea to go first instead. It’s not a bad idea to save your defensive doppels/healing doppels for a potential second round though.
And that’s it! You did it! Congratulations!
Other Advice that I Don’t Have Screenshots For
You’ve got at least two healers who can heal through connects, magia/doppel, and one through her SE Active. Don’t blow a Doppel when a connect will do just as well.
If you don’t have enough debuff memoria to “blanket” the enemy every turn, then use Emiri’s connect to try and blanket them with Bewitch instead.
Connects in general are a tricky thing to use. You want to save them for times when their effects are needed, but sometimes you also want to give someone an Accele disk to get their MP up. Don’t get too greedy, but conversely don’t hoard them.
If you mess up and want to redo a wave, forcefully exit the game. When you bring it back up, you’ll have an option to go right back to the beginning of that wave (the answer “yes” is the right button).
Try not to overcap on effects. For example, don’t use two active Attack Up effects Oriko, have Manaka use her Doppel, then have Manaka connect to Oriko. Attack Up has a cap of 100%, and anything over that is completely wasted. Space stuff out over turns, or use a variety of different memoria to provide different buffs.
Conclusion
I hope this helps! I think I covered everything...? You might notice that some of these screenshots come from different events because I was lazy because this took a little while to write.
There are lots of strategies you can use for this challenge. But this one is for new players/F2P players who don’t have a lot of good units/memoria yet. Eventually you’ll outgrow this team and have better characters to use. There are all sorts of cool strategies one can employ with the right characters; lots of people will try to finish the Hundred Evil fights with as few turns as possible using Charge strategies for example.
But, if you need a tried-and-true method of defeating the Hundred Evils with easy-to-aquire characters, then the above method is for you. Good luck out there, you can do it!
23 notes
·
View notes
Text
Rockman Characters as Magireco Units Part 3: Kodama Drift
I jokingly mentioned in last year's Magitober that, since I'd done Magireco builds for the main Fusion trio from Exe, that I would also do one for Starforce's Subaru eventually. Well, a buddy and I were chatting away on Discord a few days ago, and I got inspired to do that now. So I present to you, Exe Rockman characters as Magireco Units Part 3: Starforce Edition!
Staring with the main protagonist again, Subaru. Now, unlike with the Fusion trio, the Starforce characters kinda don't work together often in-series until game three, which I'm handily ignoring on account of... not having actually finished it yet. Whoops. I'm only covering Ryuusei (Subaru) and Harp Note (Misora, AKA the First Hibiki) here, though I might do something with Rogue eventually, because he's fun. (Also anime version Cancer Bubble just screams 'Magirepo unit'.)
Onto stats! First up, Subaru:
Ryuusei no Rockman Element: Light Type: Balance Growth Pattern: Attack/HP Disks: AABBC, one vertical blast and one horizontal
Compared to our previous Rockman, the Hikari twins, Ryuusei's got a bit more armor, and a lot more HP. He's got more of a focus on blocking attacks versus evading them. I've loosely based some of his build here on Yachiyo's, partially since Yachiyo's the default 'does it all' veteran (tanky, high damage, good HP pool, and inherited protection to top it off,) and partially because Yachiyo gives me similar vibes to Subaru's character. For some reason. Depressed and cynical grump who learns to be friendly again through the power of found family, I guess.
Connect: If There's Even a Sliver of a Chance... Attack Up, Blast Up, Damage Cut. A reference to this line Subaru says in game 1.
Magia: Star Fall Damage All Enemies, Attack Up (Allies/2t), Light Attack Up (Allies/2t), Remove Status Ailments (Allies)
So I couldn't think of an actual attack to reference here, so I made one up. I imagine the animation looking similar to Momoko's magia 'Edge of Universe,' and maybe utilizing one of the sword cards. Alternatively, maybe it could look similar to Tanabachi's Doppel?
(Also a very obtuse pun on the 'Heaven's Fall' catastrophe in Aldnoah.Zero because I keep rewatching it I regret nothing)
Second Magia: Star Break
Now, there's actually three Star Force forms (which are activated by the Star Break move in the anime, for those uninitiated,) so I could just pick one like the games did, or... we could use all three. So! Like Theresia, Sana's Doppel, has 2 forms, this one's gonna have one for each Star Force form. Fun!
1st pattern: Atomic Blazer (Fire Leo) Damage All Enemies, Attack Up (Allies/3t), Defense Up (Allies/3t), Chance to Burn (Enemies/2t) 2nd pattern: Magician's Freeze (Ice Pegasus) Damage All Enemies, Attack Up (Allies/3t), Damage Cut (Allies/3t), Chance to Skill Seal (Enemies/2t) 3rd pattern: Elemental Cyclone (Green Dragon) Damage All Enemies, Damage Inflicted Up (Allies/3t), Variable (Self/1t)
I nerfed the last one to allow for Variable. Now, this doesn't really track to the actual in-series attack, but 'elemental' immediately made me think 'variable!' so here we are. Also possibly an homage to Aniyachi.
Once again, I'll deal with SE later. Onto Misora! That's right, I'm doing both of them.
Harp Note Element: Flame Type: Attack Growth Pattern: Attack/Defense Disks: ABBCC, both blasts are vertical
Not quite an honorary Chargius, I've mostly just riffed off of Aimi here. Misora's an attack type here, because she takes No Shit™.
Connect: Raise Your Voice! Damage Up, Chance to Stun, Endure
In the first game, Misora gives the link skill 'Undershirt,' which is effectively Endure. I figure this would track to anybody else she formed a Brotherband with, and what are connects but temporary Brotherbands? (Except I've already made that joke about Soul Unison, crap.) In addition, her 'Pulse Song' attack in-game stuns.
Magia: Shock note Damage Enemies in a Horizontal Line, Damage Up (Allies/2t), Chance to Stun (Enemies/1t), Defense Down (Enemies/2t)
Second Magia: Machine Gun String Damage Enemies in a Horizontal Line, Damage Up (Allies/3t), Chance to Stun (Enemies/1t), Defense Down (Enemies/2t)
I've got some ideas for card art and personal memos and whatnot, but it's late and I'm tired. It'll be tackled later.
#unlike the trio i really wanna do card art and personals and stuff for these two#i love them#if i haven't made it clear enough already subaru's literally my favourite character evr#i love the kiddo#also to said buddy on discord: i wrote them! your turn for vanguard builds >:)#magia record#ryuusei no rockman#megaman starforce#hoshikawa subaru#hibiki misora#harp note#i've made enough bad puns for the day#magireco builds
5 notes
·
View notes
Photo


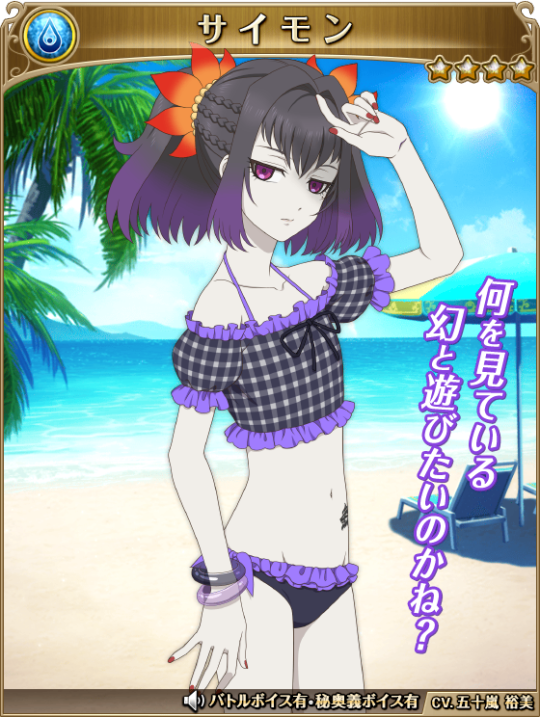
[Special Gacha] Swimsuit 2021, part2 Duration: 7/30 (Fri) 16:00 ~ 8/18 (Wed) 15:59
Chance to get Bond Awakening enabled 5☆ Lailah [Swimsuit], Farah [Swimsuit], Veigue [Swimsuit] and 4☆ Symonne [Swimsuit].
The already-running awakening partners Sorey, Reid and Tytree can be used to awaken Lailah, Farah and Veigue respectively.
✶ This gacha features a Step Up gacha, where you pay a discounted rate to draw 10 characters and continuously raise your chances of pulling a 5☆. Each time you get a featured character, the steps will be resetted.
In this gacha will also reappear other Bond Awakening enabled 5☆ characters. The rates of this gacha’s featured characters will be higher than other 5☆.
A special pick up event will be held, where one of the featured characters will have the summon rate higher than the others on certain days:
Lailah: from 8/3 (Tue) 16:00 to 8/6 (Fri) 15:59
Farah: from 8/6 (Fri) 16:00 to 8/9 (Mon) 15:59
Veigue: from 8/9 (Mon) 16:00 to 8/12 (Thu) 15:59
For the event, the single daily pull will cost 3 Asteria Stones instead of 5.
There’s also the paid option to get a 5☆ character with a multi-roll.
(More on Awakening here, and on Bond Awakening here)
Characters artes and skills details under the cut.
Wind 5☆ Lailah
Stats at LV80 HP: 23,600 | Power: 1,950 | Defense: 2,230
Mystic Arte: プライマリィ・インブレイス Primal Embrace Power: 310% (Target: All) | Hits: 74 | OL: 45 (high hit type)
Arte1 - バーンストライク Burning Strike Power: 200% (Target: Single) | Hits: 10 | Activation: 50%
Arte2 - トルネードファイア Flare Vortex Power: 200% (Target: All) | Hits: 11 | Activation: 35%
Arte3 - ライトニングブラスター Lightning Blast Power: 260% (Target: Single) | Hits: 16 | Activation: 15%
Co-op skill: Appeal Target 7 (defense type) Increases the chances to be targeted by the enemy. (wait time 00:55)
Wind 6☆ Lailah
Stats at LV80 HP: 27,400 | Power: 2,200 | Defense: 2,600
EX Skill: At the beginning of the turn, adds 5 points to the wind members' OL gauge if their HP are at 100%
Mystic Arte (OverLimit gauge at MAX): プライマリィ・インブレイス Primal Embrace Power: 310% (Target: All) | Hits: 74 | OL: 45 (high hit type) Bond Awakening Bonus: Shield damage +100%
Mystic Arte (Awakened Mode OverLimit): プライマリィ・インブレイス Primal Embrace Power: 310% (Target: All) | Hits: 134 | OL: 90 (45+45) (high hit type) Bond Awakening Bonus: Wind members' attack +100% (activated turn)
Arte effects added by Bond Awakening:
Arte1 - バーンストライク Burning Strike Wind members' attack +15% (3 turns)
Arte2 - トルネードファイア Flare Vortex Heals the wind members by 20%
Arte3 - ライトニングブラスター Lightning Blast Wind members' attack +60% (1 turn)
(Co-op skill is the same as the 5☆)
Dark 5☆ Farah Oersted
Stats at LV80 HP: 22,100 | Power: 2,160 | Defense: 2,170
Mystic Arte: 獅吼爆砕陣 Maximum Burst Power: 400% (Target: Single) | Hits: 60 | OL: 44 (high hit type)
Arte1 - 飛燕連天脚 Super Swallow Dance Power: 240% (Target: All) | Hits: 7 | Activation: 50%
Arte2 - 殺劇舞荒拳 Fatal Fury Power: 340% (Target: Single) | Hits: 12 | Activation: 25%
Arte3 - 治癒功 Healer Recovers all members from ailments and heals all by 30% | Activation: 25%
Co-op skill: Dark Attack 7 + Chain Plus (attack type) Performs a dark physical attack with 210% of power. Also, the chain counter number will increase by 5 (only if the chain is active). (wait time 00:55)
Dark 6☆ Farah Oersted
Stats at LV80 HP: 25,300 | Power: 2,500 | Defense: 2,510
EX Skill: At the end of every turn, the dark party members that received damage in that turn will have their attack power increased by 10%
Mystic Arte (OverLimit gauge at MAX): 獅吼爆砕陣 Maximum Burst Power: 400% (Target: Single) | Hits: 60 | OL: 44 (high hit type) Bond Awakening Bonus: Heals the dark members by 30%
Mystic Arte (Awakened Mode OverLimit): 獅吼爆砕陣 Maximum Burst Power: 700% (Target: Single) | Hits: 110 | OL: 77 (44+33) (finish & high hit type) Bond Awakening Bonus: Dark members' attack +40% (4 turns)
Arte effects added by Bond Awakening:
Arte1 - 飛燕連天脚 Super Swallow Dance Heals the dark members by 15%
Arte2 - 殺劇舞荒拳 Fatal Fury Dark members' attack +15% (5 turns)
Arte3 - 治癒功 Healer Dark members' defense +15% (5 turns)
(Co-op skill is the same as the 5☆)
Light 5☆ Veigue Lungberg
Stats at LV80 HP: 20,700 | Power: 2,300 | Defense: 2,170
Mystic Arte: セルシウスキャリバー Celsius Calibur Power: 500% (Target: All) | Hits: 50 | OL: 40 (high hit type)
Arte1 - 凍牙衝裂破 Touga Shoureppa Power: 210% (Target: All) | Hits: 6 | Activation: 45%
Arte2 - 閃光衝 Senkoushou Power: 340% (Target: Single) | Hits: 4 | Activation: 35%
Arte3 - 絶空龍影刃 Zekkuu Ryuueijin Power: 410% (Target: All) | Hits: 13 | Activation: 20%
Co-op skill: Fast Shine Attack 7 + Chain Plus (attack type) Performs a light physical attack with 90% of power. Also, the chain counter number will increase by 5 (only if the chain is active). (wait time 00:55) (wait time 00:15)
Light 6☆ Veigue Lungberg
Stats at LV80 HP: 23,300 | Power: 2,710 | Defense: 2,500
EX Skill: The light members' attack and defense will be increased by 20% for each enemy
Mystic Arte (OverLimit gauge at MAX): セルシウスキャリバー Celsius Calibur Power: 500% (Target: All) | Hits: 50 | OL: 40 (high hit type) Bond Awakening Bonus: Break gauge damage +50%
Mystic Arte (Awakened Mode OverLimit): セルシウスキャリバー Celsius Calibur Power: 700% (Target: All) | Hits: 70 | OL: 60 (40+20) (finish & high hit & fast OL charge type) Bond Awakening Bonus: Break gauge damage +50%
Arte effects added by Bond Awakening:
Arte1 - 凍牙衝裂破 Touga Shoureppa Light members' attack +20% (2 turns)
Arte2 - 閃光衝 Senkoushou Critical rate +50%
Arte3 - 絶空龍影刃 Zekkuu Ryuueijin Recovers the light members from the “defense down” status
(Co-op skill is the same as the 5☆)
Water 4☆ Symonne
Stats at LV70 HP: 16,700 | Power: 1,500 | Defense: 1,920
Mystic Arte: メテムサイコシス Metempsychosis Power: 270% (Target: Single) | Hits: 70 | OL: 35 (high hit type)
Arte1 - 刹那 Transience Power: 170% (Target: Single) | Hits: 7 | Activation: 30%
Arte2 - マインドスレイブ Mindflayer Targeted enemy's attack -10% (Target: Single) | Activation: 20%
Co-op skill: Magic Defense Boost 4 (defense type) Increases magic defense by 50% for 180 seconds. (wait time 06:00)
#tales of asteria#tales of zestiria#tales of eternia#tales of rebirth#Lailah#farah oersted#veigue lungberg#symonne#gacha#special gacha#mod: neylakiiroisenkou
34 notes
·
View notes
Text
Time for another uncap review, lets go! We´ve been blessed with a surprise uncap and its gonna be Sasara Minagi!

(Credits to the news translations channel on the big discord server) What´s new:
- Endure on connect - Damage Cut on Magia - Damage Cut, Provoke & Endure to self will be extended to three turns on doppel
QoL Changes:
- Her active skill was changed and can now be used outside of quests
Stats:
- roughly 8.000 hp - (just barely) over 3.000 defense - roughly 1.000 attack
Just like Konomi Haruna, our dear Sasara will recieve a generous amount of stats with her 5* uncap. Her hp will reach 29.000 and her defense will reach over 10.000 without any investment into SE. Her Attack will reach ~6.600 which is fairly low but still higher than the likes of Manaka and Iroha. In order to judge her new stats effectively, I´ll compare her to two other fairly tanky light girls. Haruka Kanade (3*) and Kokoro Awane (4*).
While Kanade might not be a defense type character, her uncap and SE pushed her into the role as an off-tank with damage cut. Sasara´s defensive stats are higher than Haruka´s even if she had 100/100 SE. (25.000 hp and 7.600 def without SE/ ~29.000 hp and ~10.000 def with full SE). On the flipside, she does provide way more damage and even status ailments /debuffs (charm and attack down).
Kokoro on the other hand is a full blown tank and Sasara´s biggest competition. When it comes to uninvested stats Sasara and Kokoro are on the same footing, with the only main difference being Kokoro having roughly 1.000 more attack. Once you start applying SE she will have superior stats as her SE simply provides more bonus stats. Does that mean Kokoro is the superior option? Not really! Let me explain why! Comparing connects:
Sasara will provide 105% Defense up, 70% Damage Cut and Endure for 1 turn. Kokoro will provide 70% Damage Cut and 100% Chance to counter. In terms of providing defense Sasara´s connect is clearly superior as she will not only massively reduce incoming damage but also potentially block a killing blow with endure. Kokoro on the other hand provides counter, which will give her connect a bit of an offensive edge as it will punish the enemy for attacking the target of her connect. If you would rather minimize enemy damage or sneak in some nice counter damage is up to you, but if your main goal is to keep someone alive by using tanks and dealing damage is not a big concern, Sasara wins out.
Comparing Magia and Doppel:
Sasara will deal AOE Damage while Kokoro goes for single target Damage. Kokoro will provide her team with Damage Cut (All/3 turns) and 20/25% Chance to Counter (All/3 turns). With 25% being absurdly low, her Magia/Doppel only reliable provides Damage Cut for her entire team. Sasara will provide Defense Up (All/3 Turns), Damage Cut (Self/1 Turn), 100% Provoke (Self/1 Turn) and Endure (Self/1 Turn). Her Doppel will extend her self-buffs to three turns. In terms of direct buffs to their teams, both Sasara and Kokoro provide one big boost (Damage Cut vs Defense Up). But where Kokoro tries to apply counter to her team, Sasara buffs herself with Damage Cut, Endure and Provoke to actively draw damage away from her team. A tank is supposed to absorb damage and protect it´s team which Sasara´s magia will easily do (sorry Kokoro). Spirit Enhancement:
This one is mixed bag for both of them. Kokoro´s active is simply better than Sasara´s active. She will provide more Damage Cut that is not tied to Dark Damage. Kokoro also has Chance to Stun on Attack (15%/1 Turn) and Chance to Counter (20%). Sasara on the other hand enjoys Regenerate HP (4%) and an additional 10% Damage Cut against Dark Units. Both of them are not good at building MP since they are defense types and aside from the typical MP over 100 up nodes there is nothing that helps them get to Magia faster. Well almost nothing, Sasara gets bonus MP when she gets hit by dark types but that´s not really game changing. In terms of SE and the stats it brings Kokoro got the better deal.
Summary aka when to pick Sasara:
First off, tanks are rarely needed and most supports will keep the team alive just fine. But if you really need a defensive powerhouse and are willing to sacrifice offensive power and momentum to turn enemy attacks into wet blankets you should pick Sasara. If you need just a bit of defense you might wanna consider Off-Tank Haruka or Kokoro if you need someone with better stats to just sponge hits. But don´t forget unlike Kokoro Sasara is really easy to slot and will outperform her until they are even in slots.
7 notes
·
View notes
Photo
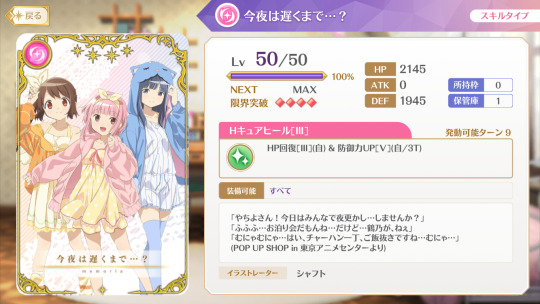
Until Late Tonight...?
Obtainability: This is a limited memoria that can be purchased during the “2000 Days Since Release” Campaign.
MLB Effect: HP Restore [35%] (Self) & Defense Up [37.5%] (Self / 3 Turns)
Effect Definitions:
HP Restore will instantly restore health to the character upon activating the effect.
Defense Up increases the target’s base defense stats. Defense Up is generally worse than Damage Cut.
TLDR: This memoria is Enhancement Fodder for most players. It can see use in Magia Stall strategies but otherwise is outclassed by more offensive gameplay.
Review: “Until Late Tonight” has a few possible uses but is largely forgettable. It’s a defensive memoria in a game that doesn’t reward defensive strategies-- you are almost always better off going with more offense than defense in this game.
With that said, it gives a high amount of Defense up for three turns. This actually puts it in the same range as several limited and unlimited memoria:
(3*) “The Strongest, Even at Basketball” Defense Up [60%] & Status Ailment Resistance Up [50%] (Self / 1 Turn)
(Limited Gacha 4*) “Equal Destruction to All” Defense Up [52.5%] & Attack Up [35%] & Provoke [100%] (Self / 1 Turn)
(Limited Gacha 4*) “Even Games Are Serious” Defense Up [52.5%] (Self / 1 Turn) & Attack Down [65%] (One / 1 Turn)
(3*) “She'll Definitely Be Happy” Defense Up [52.5%] & Attack Up [40%] (Self / 1 Turn)
(Limited Gacha 3*) “Unexpected Real Intentions” Defense Up [45%] (Self / 1 Turn) & Attack Up [30%]
(2*) “Closely Watched Heart” Defense Up [45%] (Self / 1 Turn)
(Limited Welfare 4*) “Until Late Tonight” Defense Up [37.5%] (Self / 3 Turns) & HP Restore [35%] (Self)
(Limited Gacha 4*) “The Wind Rising Before The Resolve” Defense Up [37.5%] & Attack Up [30%] & Critical Hit [30%] (Self / 3 Turns)
(4*) “I Won't Stray From This Path” Defense Up [37.5%] & Attack Up [30%] (Self / 3 Turns)
(4*) “Survival Date on a Deserted Island” Defense Up [37.5%] & Anti-Debuff [2 Debuffs] & Attack Up [30%] (Self / 3 Turns)
You’ll note that the only memoria that have higher Defense Up all last for one turn or have some features that make them less desirable to use outside of special circumstances. This makes this memoria useful at least for purely defensive purposes-- you don’t need to worry about lower stats like you would with the three-star options and the fact that it will last for three turns means your equipped unit can stay safer for longer.
When comparing effects, Defense Up isn’t generally as good as Damage Cut for a character’s protection, but still-- 37.% Defense Up can still help a character survive and it’s better than nothing.
The HP Restore on this memoria is useful, but note that it is different from something like Regenerate HP. The HP Restore will apply to your character right away, while Regenerate HP will apply after the enemy’s turn is over. This can be good or wasteful. It means that this is a good “oh-shit” memoria to press if a character is in danger of dying, but it also means that you’ll waste the HP Restore if you’re trying to take preventative measures.
Because of how defensive this memoria is, it’s best used on Tanks and in Magia Stall Teams. It’s cooldown is too long to be of use in areas like Mirrors or Ranking and it offers nothing helpful for places like Kimochi.
The last thing to note would be that there is another memoria in the game that is exactly the same as this one:
(Limited Welfare 4*) “Holding Hands to Tomorrow” Defense Up [37.5%] (Self / 3 Turns) & HP Restore [35%] (Self)
“Holding Hands to Tomorrow” is another welfare memoria given to the playerbase for Madoka’s Birthday October 2022, meaning players who have “Until Late Tonight” are also going to have that one as well. What this means for new players and some free-to-play players is that they now have two options for a defensive memoria to use, but for everyone else it means they have two next-to-worthless memoria that do the same thing.
If you already have a lot of really good memoria and don’t need to rely on defensive strategies such as Magia Stall, you can treat “Until Late Tonight” as Enhancement Fodder. However if you do struggle or if you’re just starting out, keep this memoria around.
#Magia Record#Yachiyo Nanami#Tsuruno Yui#Iroha Tamaki#Four Star Memoria#2000 Days Since Release Campaign#HP Restore#HP Restore Active#Defense Up#Defense Up Active#Welfare Memoria#Enhancement Fodder#Defensive Memoria#Magia Stall Team Memoria
13 notes
·
View notes
Text
Because @hasbedidoneanythingbad inspired me to do so, I am going to have a go at my take for the Lady of the Lake as a Fanservant. While most servants are pretty accurate representations of their mythological or historical self (or whatever their source might be, who am I to discriminate?), I tend to take it more easy and consider the source a kind of inspiration, at best. That said.... eat up the mess I made!!!
༶ ═════════════
Fanservant #1:
Caster - Vivian
Vivian, the Lady of the Lake of Arthurian legends, was an important benefactor to King Arthur of Britain, granting him the legendary sword Excalibur after the Sword of Selection Caliburn was damaged in combat. She is also known under the names of Nimuë and Ninianne. Once the unfortunate lover and pupil of the great Merlin, she became the one to seal him away for all eternity, after they parted their ways in an event that is still shrouded in mystery. For her to become an independent entity that is inscribed as a spirit in the Throne of Heroes, the circumstances about her disappearance short after imprisoning Merlin on Avalon must be solved first.
Appearance:
Though obviously not a human herself, she appears as a humanoid entity, but seems to be at least partially made out of clear and self-illuminating water. Sometimes she‘s completely made out of water, sometimes she does have a normal body, this woman can‘t make up her mind. At least not when it‘s about appearances. No matter what her body consists of, Vivian is a rather shy and petite appearing woman with sky-blue hair that covers her whole back and even the ground behind her, as well as almost emotionless grey eyes. Her mature and pure body is concealed by a shroud of pale light and a waterlike veil, that she wears like a dress. Even though she appears kinda on the revealing side, she has in now way on Earth a revealing personality.
Personality:
As a fairy born on the Reverse Side of the World from the soul of the World itself, possessing divinity as a Divided Spirit, Vivian embodies pure and undisrupted kindness and appears as the mother figure of many heroes throughout history. Those include King Arthur, whom she was the selfproclaimed protector of after deeming him worthy to receive Excalibur, the divine sword she was tasked to protect. She did also raise Lancelot as her son after the death of his father and prepared him to be a knight on the Kings side. But even though she has a kind and forgiving nature, a troublesome past with a certain Flower Mage has left her cautious of her surroundings. She tends to keep to herself, even after being summoned, and doesn‘t engage in conversation much, but answers to those who seem troubled by consoling them thorougly and providing advise and wisdom. While doing her best to avert the lustful eyes directed at her body, sometimes her past self takes over her kind soul, punishing indecent behavior with motherly force. This turns into extreme overprotective and somewhat aggressive motherly love, especially for the Child Servants and everyone she claims as her family. Which wouldn‘t be too many. In short, she has a very calming presence, that radiates peace and serenity, as long as it is certain she does not need to punish anyone for their horny thoughts.
FGO Skillset:
Active Skills:
Skill 1 – Kindhearted Charisma A+
Just another Charisma skill, buffing all allies attack by 20% for three turns and applying an one-time evade status on everyone. This one does not expire until it‘s used up.
Skill 2 – Llyn Ogwen Sealing Technique A
A special and unique sealing method incapable to hold anyone hostage but the strongest of mages. Vivian developed this spell out of spite and fear to imprison Merlin on Avalon for all eternity, until one day she may forgive him and release him from the hell of eternal life. If only she hadn't disappeared before his salvation.
Used in combat this skill heals the party for up to 3000 HP and seals the enemies NP for one turn.
Skill 3 – Lake of Chalk and Legends EX
Once born in the warm embrace of the World itself, Vivian found herself burdened. Fate ruled her as the one carrying Excalibur to the godless side of the World in order to choose who would be worthy enough to change history, only for her to hide behind the illusion of a lake as white as chalk, waiting for the worthy hero to appear.
This skill grants the party a 50% damage resist status for three turns, as well as applying a three turn 20% defense buff on Servants that are hit by enemy attacks. These defense buffs can stack up indefinitely, theoretically.
Passive Skills:
Territory Creation B+
Item Construction EX
Divinity C
Fae Eyes EX
Noble Phantasm:
Protected from Gods and Demons alike by the True Pillar of Light - Brocéliande Rhongomyniad
„Stranded between the border of worlds, chosen by fate to be envied by heaven and hell alike. Light and dark reunited, for a moment in eternity. Listen to my voice, as it is the voice of the World, and thou shall bear witness to the birth of a new hero. Tonight, the moon will shine upon us from the sky above and the ocean hidden on the far end of the world.“
Born from within the Soul of the World and tasked to witness both Humanity and the mysterious Reverse Side of the World, Vivian draws her power directly from the authority over Rhongomyniad, the pillar of light that seperates both sides to keep the world stable. While being able to harness this authority to not only grant the destructive power of the nearly indestructible anchor of the planet in form of the Holy Lance, by using her Noble Phantasm she decides to use the immense powerhouse of an overpowered Deus Ex Machina weapon directly from the tower between worlds itself. By concentrating her magical circuits to open a gateway between worlds, she summons a fraction of Rhongomyniad's power as a blinding image of the pillar itself to cast a protective veil as some kind of blessing over herself and her allies. Makes you wonder if a Divine Construct is needed to break through a veil created by a Divine Construct...
Using the Noble Phantasm grants her allies debuff immunity and buff removal immunity for three turns, as well as immunity to all incoming damage from three enemy attacks except for enemies with the Threat to Humanity trait. It also removes all debuffs and status ailments, and with each removed debuff/ailment the corresponding ally receives 50% NP generation, 100% star generation, 1000 max HP and 1000 additional flat damage for three turns, as well as 20% NP gauge.
Sword of Promised Victory - Excalibur
„Awaken again and rain down light from far beyond eternity. My heart beats together with the world.“
Just like Arturia, Vivian is able to harness the power of the Sword of Promised Victory by channeling a fraction of the power imbued in the Pillar of Light into the sword and the beam it produces from its tip, cutting through everything in its way in the process. If she were to use this Noble Phantasm, it would be much stronger and more destructive as when it is used by Arturia. Luckily she is not in possession of the sword right now, so no firing her laser anytime soon.
But if she would, it would have the exact same effect and strength as Arturias Noble Phantasm in FGO, just to balance things out. In another context than FGO it would be even more devastating than we‘re used to.
༶ ═════════════
Tags:
@justchibistuff @hasbedidoneanythingbad @has-gilgamesh-doneanythingwrong @hasquetzdoneanythingwrong @hasishtardoneanythingwrong
#fgo#fate series#fate grand order#fanservant#arthurian fantasy#arthurian literature#matter of britain#fate#lady of the lake#nimue#oc#my ocs#fan servant#servant#ocs on tumblr#original character#my writing#vivian
22 notes
·
View notes
Text
I figured they were gonna do this when the latest magirepo comic came out. Well I ain’t goin’ for it, ya hear!
My translator app really didn’t want to translate her, but here’s what I managed to get!
Connect: Damage Up, Accel MP Up, and HP Recovery
Magia: Damage to all, Defense Down (All), Chance to Skill Seal (All/ 3 Turns), and Remove Granted Effects (All)
Her SE passives are:
Light Damage Cut (Self/ 15%/ 5 Turns at the start of battle)
Status Ailment Resistance Up (All/ 20%/ 5 Turns at the start of battle)
Anti Bind
Her active is:
Dark Attribute Resistance Down (All/ 15%/ 5 Turns)
(At least I’m pretty sure these are the percentages going off past figures!)
We will also get a 1400 days since launch celebration that’ll have paid bags! I’m probably going for these!
It’ll have the 500 paid gem bag that has an Innocent Gem that will unlock a slot for any girl and a 300 paid bag that’ll have a 4* girl selection ticket! I’m going for Mikage since she’s only one slot from being done (and probably Isabeau)!
It’s a bit strange we’re not getting a swimsuit event, I would’ve thought we’d have one by now!
#lotsa things happening#I guess we’ll be getting some folklore stuff now huh?#looking forward to that#although I won’t know until people translate it#nayuta satomi#magia record
16 notes
·
View notes
Link
Square Enix has released new information and screenshots for Bravely Default II introducing the game’s countries of Savalon and Wisland, special moves, field actions, eight additional jobs, and more.
Get the details below.
■ World
An orthodox evolution of the Bravely series. The warm, miniature garden-esque world is depicted even more beautifully in Bravely Default II.
The Continent of Excillant
Various worlds fill out the continent of Excillant, where our story is set. What awaits our heroes before they set out to accomplish their goals…?


Savalon, The Drought Kingdom
A country turned into a desert by the lumbering and wars by the dynasty of 200 years prior. Although underground water veins were discovered, the town is beginning to submerge as a result. It is also known for its luxurious casino hall.
—Savalon during the day.
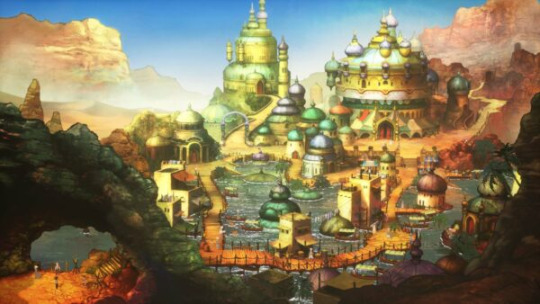
—Savalon at night.
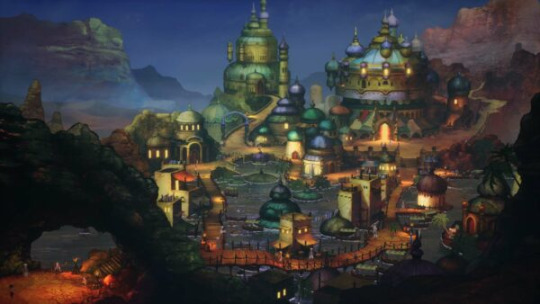
Wiswald, The Magic Kingdom
A country established by mages with Emma Odilia at the helm nearly 50 years prior. Mages have been dedicating themselves to their studies at the Magic Research Institute, which also serves as a government body, but now the town is overgrown with vegetation and in disorder.
—Wiswald during the day.

—Wiswald at night.

■ Characters: Savalon
First Prince Castor (voiced by Satoshi Hino)
The first prince of Savalon, prominent in the literary and military arts.
Although he participates on the council on behalf of King Leon, he is worried about its current state under the control of wealthy merchants who prioritize profits over national politics and the people’s happiness.
Second Prince Boor (voiced by Shougo Sakata)
Prince Castor’s younger brother. He is a kind prince who cares for and worries about his brother, who tends to be reckless. He is currently away from Savalon, studying abroad to expand his horizons.
Chief Archivist Andro (voiced by Shozo Sasaki)
A man who works as the Chief Archivist of Savalon. The Chief Archivist records the events that occur in the kingdom, comparing them to those of the past, and assists the king.

Olfa Dragordia (voiced by Nobuo Tobita)
Troubadour Asterisk Holder.

A poet employed by Bernard Alphard, owner of the casino hall.
A man who loves tragic plays and often speaks in a way belittling of others. He was once employed as the court poet of Musa, but was banished from the kingdom.

Shaula Clarence (voiced by Junko Minagawa)
Gambler Asterisk Holder.

A voluptuous gambler who frequents the casino hall.
A wicked woman who challenges the men seduced by her beauty to card games, taking all their money and using them as pawns.

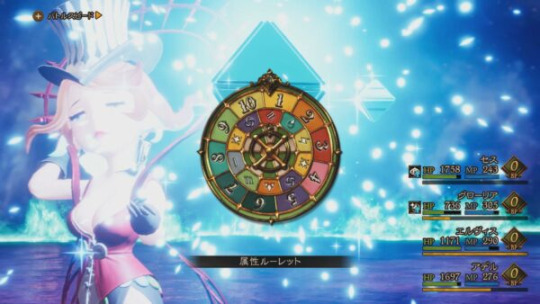
Nihal (voiced by Yukiyo Fujii)
Beastmaster Asterisk Holder.
A reticent woman who puts on beast and animal performances at the casino hall.
She was a member of a traveling acrobatics troupe, but was picked up by Bernard Alphard after a monster attack left her alone.

Bernard Alphard (voiced by Takaya Kuroda)
Thief Asterisk Holder.

Owner of Savalon’s famous casino hall.
A man who built the casino hall of a lifetime and is now a member of the council. He is the one who discovered the underground water veins and brought an influx of water to Savalon.

■ Characters: Wiswald
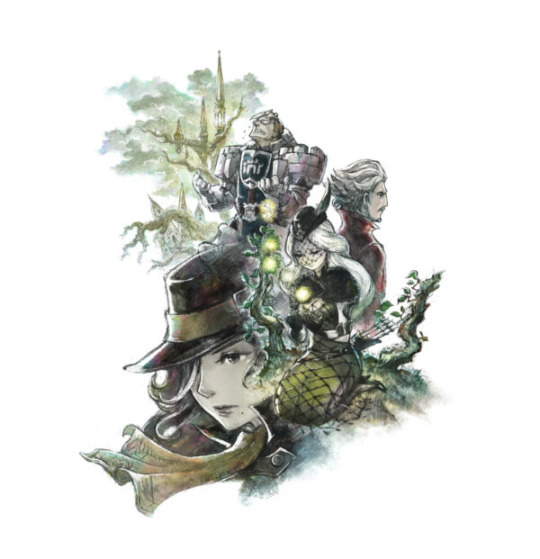
Emma Odilia (voiced by Masako Katsuki)
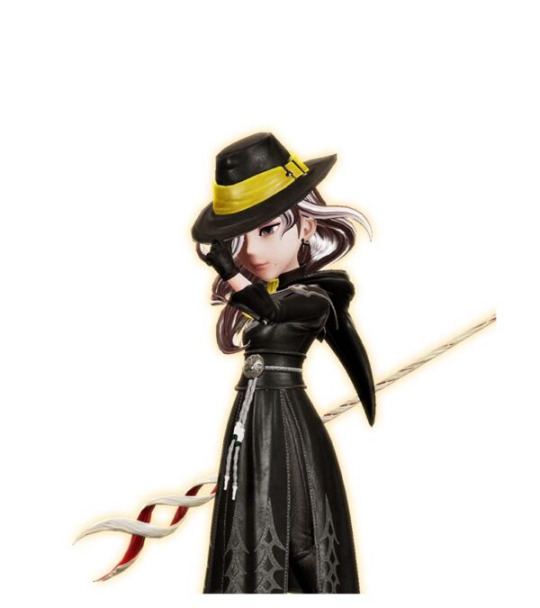
Elvis and Rody’s late master. As the central figure in the founding of Wiswald, she was a just and impartial mage.

Rody Grenadine (voiced by Yasunori Matsumoto)
Red Mage Asterisk Holder.

Head of the Magic Research Institute, as well as the leader of Wiswald.
Elvis’ senior pupil, together they studied magic under the guidance of Emma Odilia. Since losing his daughter in an accident, he has holed himself up in the Magic Research Institute devoted to some sort of research.

Lily Grenadine (voiced by Miki Narahashi)
Hunter Asterisk Holder.
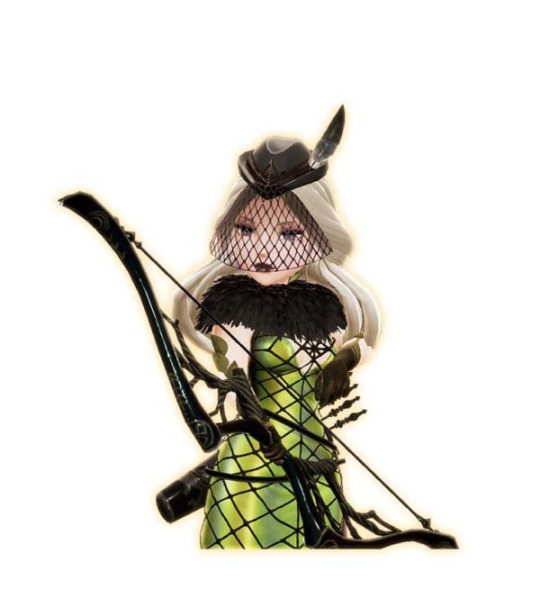
Rody Grenadine’s wife, and the woman who supports him behind the scenes.
Since losing her daughter, she has holed herself up in the forest near the town. However, she is said to be living there with her daughter who died…
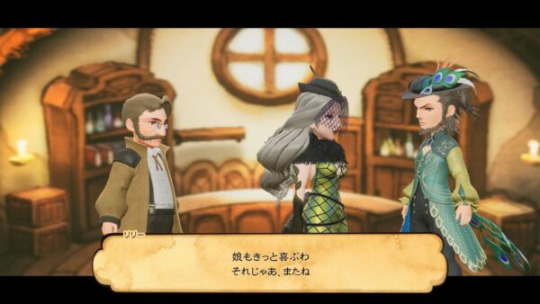
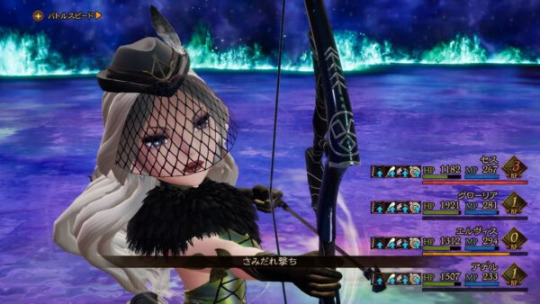
Galahad Kelly (voiced by Hiroki Yasumoto)
Shield Master Asterisk Holder.
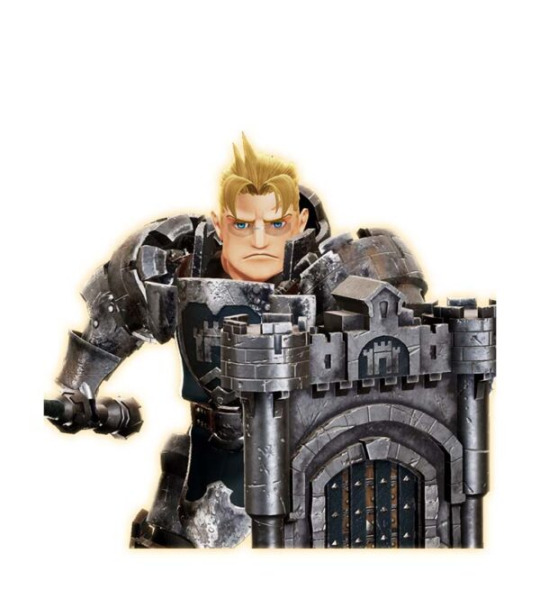
Guardsman of the Magic Research Institute. Although born in Rimedahl, he was taken in by a distant relative living in Wiswald after the death of his parents. He blames himself for the death of Rody and Lily’s daughter.
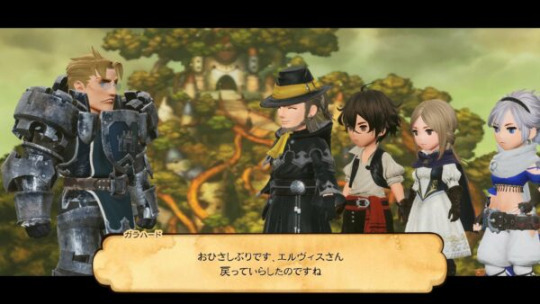

■ Systems
In addition to a traditional, turn-based battle system, you can enjoy innovative and strategic battles unique to the Bravely series with elements such as “special attacks” that buff your party in real-time, and “support abilities” that can be combined with multiple jobs.
Special Moves
In addition to powerful “special moves” that can be activated under certain conditions in battle, dedicated special move background music buffs the entire party. The buff remains for long as the music continues to play after activation, giving you the opportunity to quickly wipe out your enemies.
—Beastmaster Special Move: “Let’s Do Our Best Together!”
Summons a large number of monsters and unleashes a powerful physical attack on all enemies. Increases the entire party’s physical attack and magic attack power.
—White Mage Special Move: “Sacred Light”
Recovers a large portion of all allies’ HP, as well as cures all status ailments. Increases the entire party’s physical defense and magic defense power.
Use special moves to wipe out enemies in real-time.
Support Abilities
By mastering a job, in addition to command abilities you can use in battle, you can also equip and learn support abilities that buff your character. Learned support abilities can be equipped even if you change jobs, allowing you to combine them with other jobs.

—“Empty Handed” (Monk)
When both hands are free of equipment, physical attack power and accuracy rate significantly increase.

—“Aspir Attack” (Black Mage)
Restores MP based on the damage dealt by the “Attack” command.
Field Actions
By slashing your sword at monsters wandering the field, you can start the battle with Brave Attack activated to gain an additional Brave Point (BP). You can also use your sword to cut the grass on the field to find items.
—The situation at the start of the battle changes depending on whether you approach the enemy from behind, get snuck up on by the enemy yourself, or strike them with your sword.
—If your Brave Attack is a success, you will start the battle with an additional Brave Point.
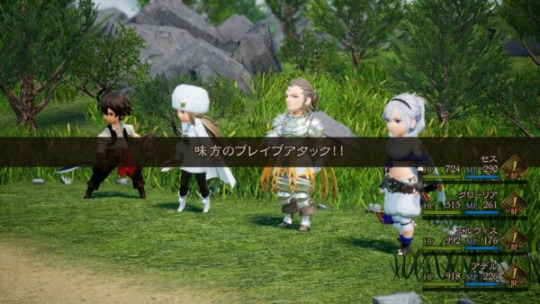
—If you cut down grass, you may find an item.
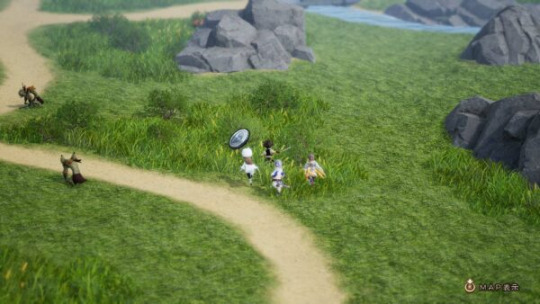
■ Jobs
Troubadour

Supports the party through the power of poetry.
An assist job that protects the party’s status. With a number of total effect skills on hand, the Troubadour is a reliable ally against strong enemies.


Beastmaster
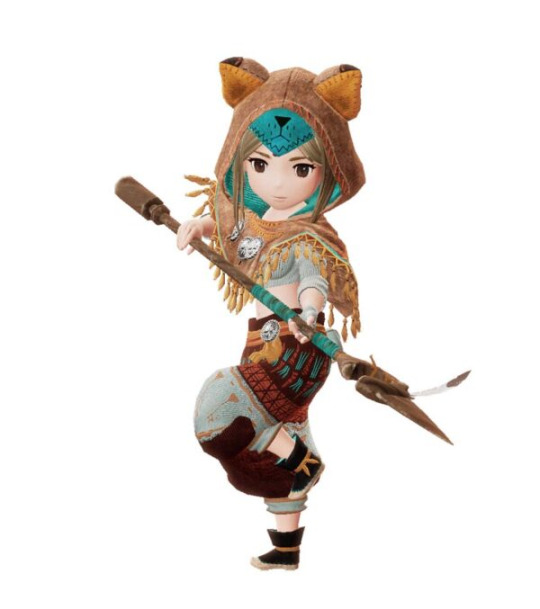
A shortstop that employs various monsters.
The Beastmaster captures and employs its prey. From offense to relief, it can fight flexibly according to the situation.

Gambler

Leaves it to luck to turn the tables.
A gambling job unafraid to take a risk. With luck on its side, the Gambler aims for a big return.
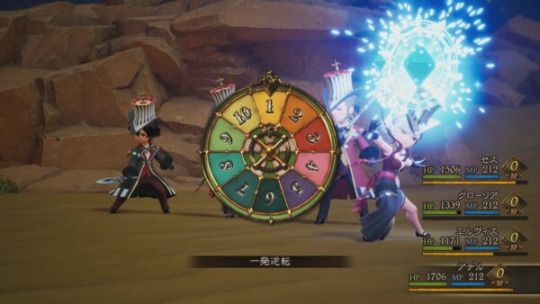
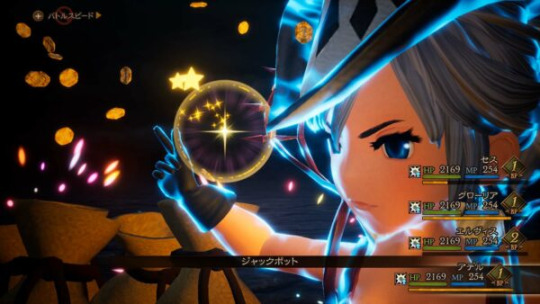
Berserker
Pulverizes enemies with its trusty axe.
An attacker that wields an axe with high attack power to demolish its enemies.
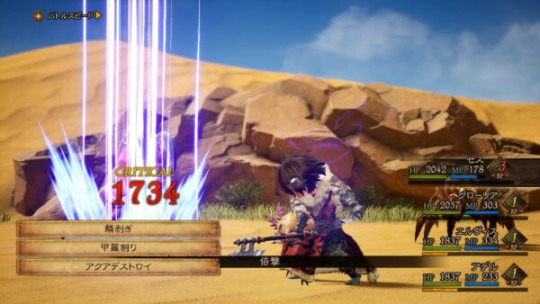
Red Mage

An all-purpose mage prominent in both offense and defense.
This universal mage job can use both attack magic and recovery magic.

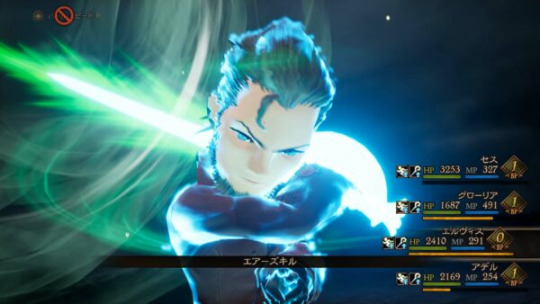
Hunter

Analyzes the enemy to pierce their weak point.
A master of the bow, the Hunter unleashes powerful blows that pierce the enemy’s weak point.

Shield Master

The party’s iron fortress that stands on the front line.
A defense-specialized job that wards off attacks and protects its allies with high defense power and a large shield.


Pictomancer
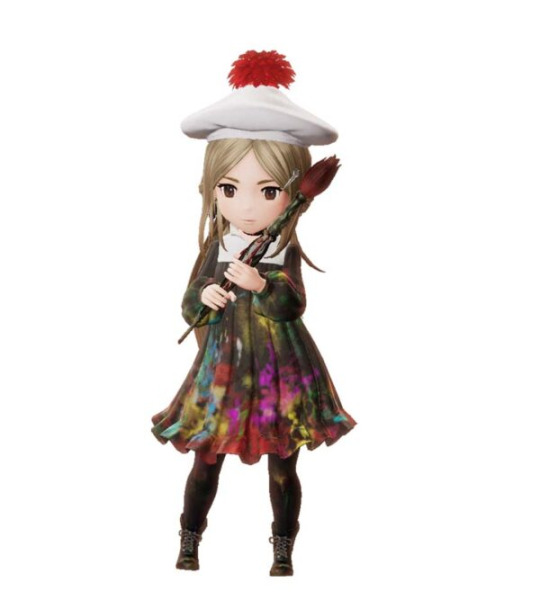
An artist that repaints the battle.
A job that debuffs the enemy through by utilizing various colors.
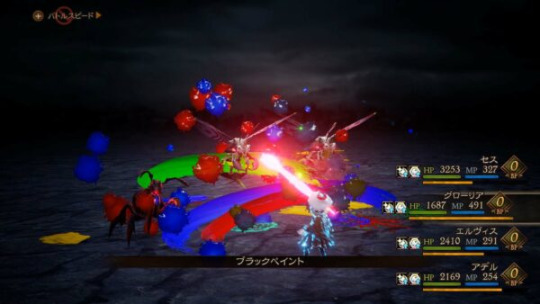

■ Network
The Bravely series’ familiar “Single-Player RPG You Can Play With Everyone” element returns. In Bravely Default II, you can utilize the time the game is in sleep mode to help grow your characters.
“Search”: Take Advantage of the Time You Are Unable to Play
“Search” mode, in which you rent a boat to explore the seas, is a handy feature that allows you to earn rewards based on the amount of time your game is in sleep mode. By “searching” when you are unable to play, you can obtain items that assist your growth, including experience points and job points. While you can use this feature offline, if you are connected to the internet, players from other worlds will help you and further increase your rewards.
—You can start “Search” mode by visiting the elderly woman who rents boats in the starting country.

—Your rewards will increase based on the amount of time your game is asleep. You can continue to “search” for up to 12 hours, so make the most of your time when you go to bed or go out.

Bravely Default II is due out for Switch on February 26, 2021 worldwide. Read more about the game here.
View the screenshots at the gallery.
#Bravely Default II#Bravely Default 2#Bravely Default#Bravely Series#Square Enix#Gematsu#long post#very long post
36 notes
·
View notes