#Advice drawing
Explore tagged Tumblr posts
Text
When you have imagination, that you have a lot of drawing ideas, but you can't draw and none of the tutos you're watching are helping you
(it's my life rn)

#drawing#digital drawing#paper drawing#need help please#Any advices please ??#Advice drawing#Please#I beg you#Raccoon is trying to draw#But fail#Raccoon is chatting
5 notes
·
View notes
Text
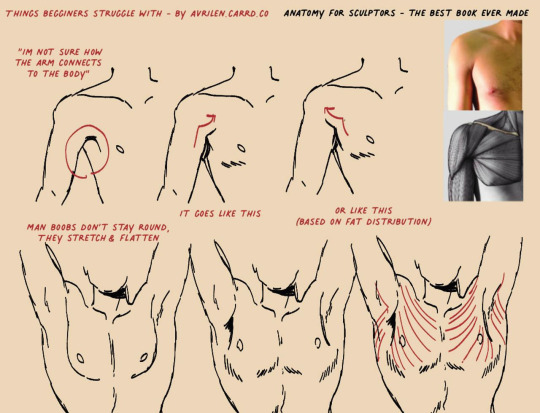
A small guide for people who struggle with this area
23K notes
·
View notes
Text
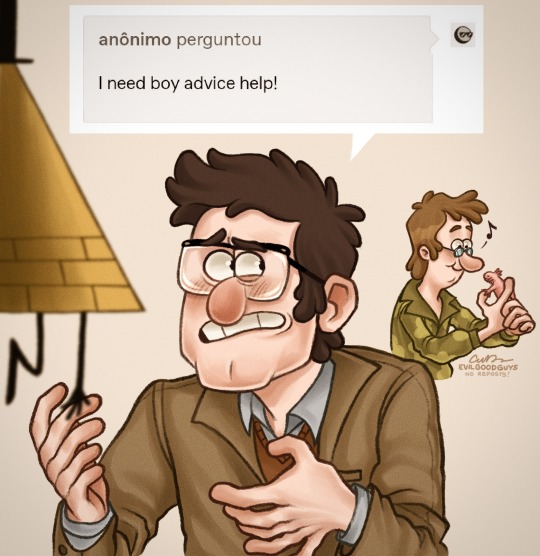
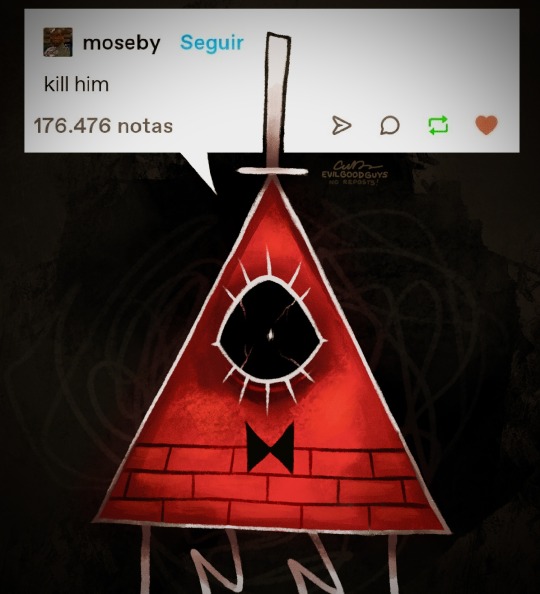
...clearly, he's not jealous.
#pro tip: don’t take dating advice from a demon in a situationship#the book of bill#gravity falls#billford#Art Of The Sun Chip#gravity falls fanart#stanford pines#bill cipher#fiddleford mcgucket#fiddauthor#artists on tumblr#ford pines#art#drawing#fanart#my art#doodle#illustration#procreate#comic#please don't repost my artwork onto other sites thank you!
60K notes
·
View notes
Text

asking for help can be done at any time, and it is free. you just have to let yourself accept it.
#wishing i had more energy to draw all of the additions i want to but well. taking my own advice and i am a slug#my art#tatzelworm#tatzelwurm#to the people in my inbox i see you and i love you hiwever if i summon an emotional response rn i will literally fall asleep.#so its gonna be a bit
15K notes
·
View notes
Text
A general cane guide for writers and artists (from a cane user, writer, and artist!)
Disclaimer: Though I have been using a cane for 6 years, I am not a doctor, nor am I by any means an expert. This guide is true to my experience, but there are as many ways to use a cane as there are cane users!
This guide will not include: White canes for blindness, crutches, walkers, or wheelchairs as I have no personal experience with these.
This is meant to be a general guide to get you started and avoid some common mishaps/misconceptions in your writing, but you absolutely should continue to do your own research outside of this guide!
This is NOT a medical resource!!! And never tell a real person you think they're using a cane wrong!
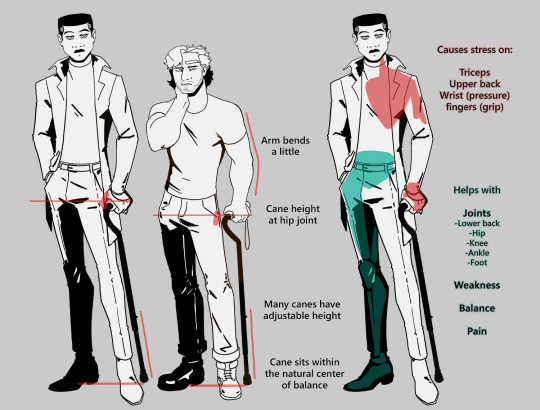
The biggest recurring problem I've seen is using the cane on the wrong side. The cane goes on the opposite side of the pain! If your character has even-sided pain or needs it for balance/weakness, then use the cane in the non-dominant hand to keep the dominant hand free. Some cane users also switch sides to give their arm a rest!
A cane takes about 20% of your weight off the opposite leg. It should fit within your natural gait and become something of an extension of your body. If you need more weight off than 20%, then crutches, a walker, or a wheelchair is needed.
Putting more pressure on the cane, using it on the wrong side, or having it at the wrong height can make it less effective, and can cause long term damage to your body from improper pressure and posture. (Hugh Laurie genuinely hurt his body from years of using a cane wrong on House!)
(some people elect to use a cane wrong for their personal situation despite this, everyone is different!)
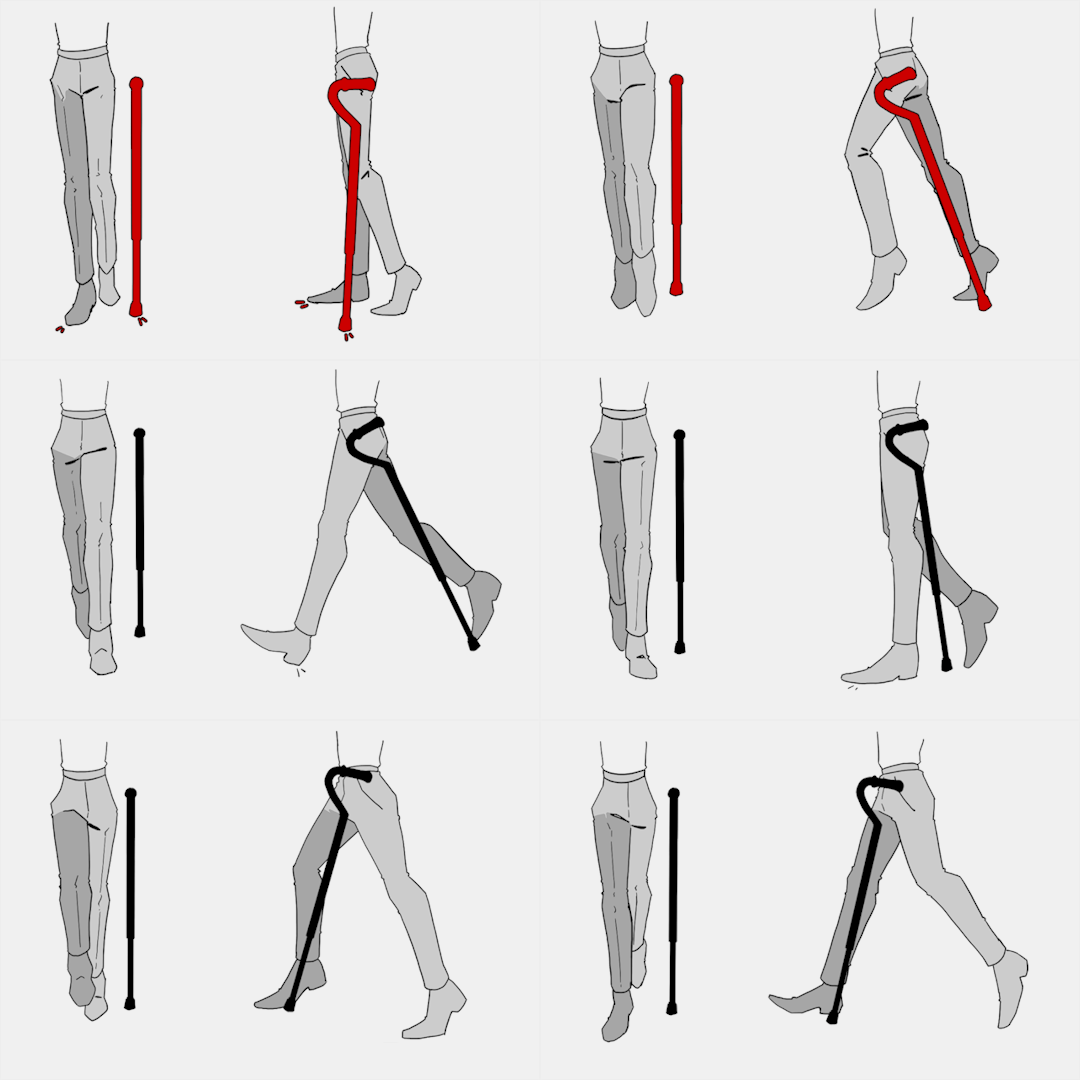
(an animated GIF of a cane matching the natural walking gait. It turns red when pressure is placed on it.)
When going up and down stairs, there is an ideal standard: You want to use the handrail and the cane at the same time, or prioritize the handrail if it's only on one side. When going up stairs you lead with your good leg and follow with the cane and hurt leg together. When going down stairs you lead with the cane and the bad leg and follow with the good leg!
Realistically though, many people don't move out of the way for cane users to access the railing, many stairs don't have railings, and many are wet, rusty, or generally not ideal to grip.
In these cases, if you have a friend nearby, holding on to them is a good idea. Or, take it one step at a time carefully if you're alone.
Now we come to a very common mistake I see... Using fashion canes for medical use!
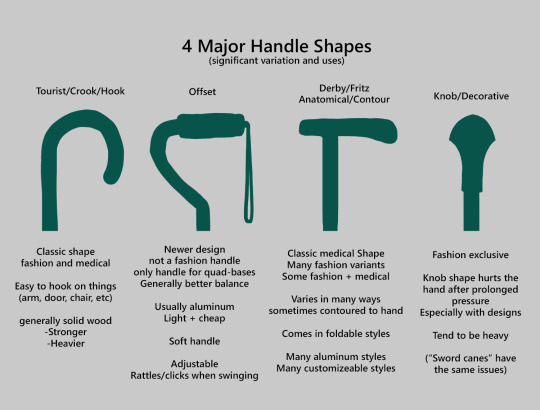
(These are 4 broad shapes, but there is INCREDIBLE variation in cane handles. Research heavily what will be best for your character's specific needs!)
The handle is the contact point for all the weight you're putting on your cane, and that pressure is being put onto your hand, wrist, and shoulder. So the shape is very important for long term use!
Knob handles (and very decorative handles) are not used for medical use for this reason. It adds extra stress to the body and can damage your hand to put constant pressure onto these painful shapes.
The weight of a cane is also incredibly important, as a heavier cane will cause wear on your body much faster. When you're using it all day, it gets heavy fast! If your character struggles with weakness, then they won't want a heavy cane if they can help it!
This is also part of why sword canes aren't usually very viable for medical use (along with them usually being knob handles) is that swords are extra weight!
However, a small knife or perhaps a retractable blade hidden within the base might be viable even for weak characters.
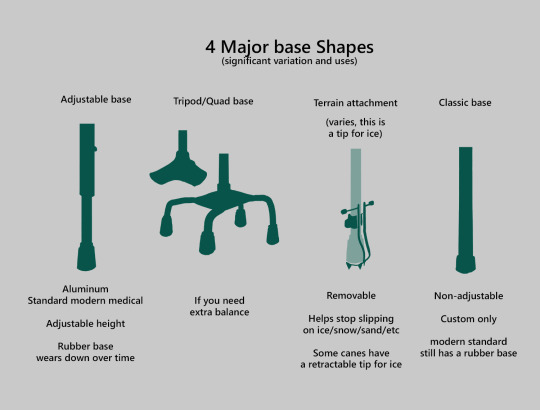
Bases have a lot of variability as well, and the modern standard is generally adjustable bases. Adjustable canes are very handy if your character regularly changes shoe height, for instance (gotta keep the height at your hip!)
Canes help on most terrain with their standard base and structure. But for some terrain, you might want a different base, or to forego the cane entirely! This article covers it pretty well.
Many cane users decorate their canes! Stickers are incredibly common, and painting canes is relatively common as well! You'll also see people replacing the standard wrist strap with a personalized one, or even adding a small charm to the ring the strap connects to. (nothing too large, or it gets annoying as the cane is swinging around everywhere)
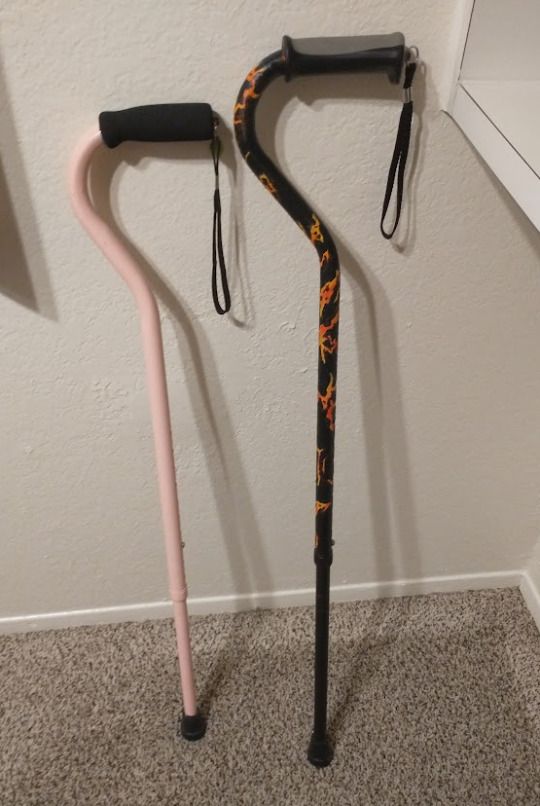
(my canes, for reference)
If your character uses a cane full time, then they might also have multiple canes that look different aesthetically to match their outfits!
When it comes to practical things outside of the cane, you reasonably only have one hand available while it's being used. Many people will hook their cane onto their arm or let it dangle on the strap (if they have one) while using their cane arm, but it's often significantly less convenient than 2 hands. But, if you need 2 hands, then it's either setting the cane down or letting it hang!
For this reason, optimizing one handed use is ideal! Keeping bags/items on the side of your free hand helps keep your items accessible.
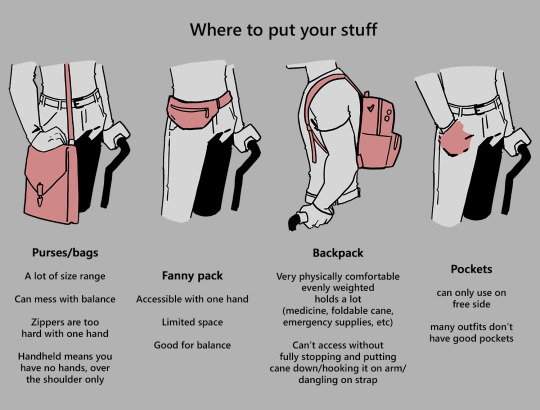
When sitting, the cane either leans against a wall or table, goes under the chair, or hooks onto the back of the chair. (It often falls when hanging off of a chair, in my experience)
When getting up, the user will either use their cane to help them balance/support as they stand, or get up and then grab their cane. This depends on what it's being used for (balance vs pain when walking, for instance!)
That's everything I can think of for now. Thank you for reading my long-but-absolutely-not-comprehensive list of things to keep in mind when writing or drawing a cane user!
Happy disability pride month! Go forth and make more characters use canes!!!
#mobility aid#cane user#writing tips#writing advice#drawing tips#art tutorial#art tips#art reference#art resources#art help#my art#long post
91K notes
·
View notes
Text
like okay if we're talking about this anatomically the ear holes on a human skull and a cat are actually in the same spot it's a difference in the shape of the cranium. you can see what's happening if you look at hairless cats
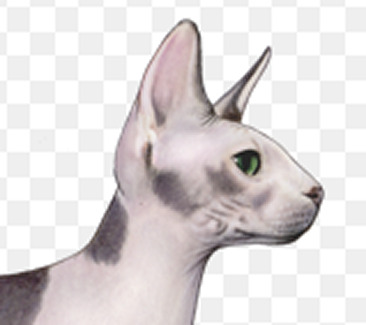
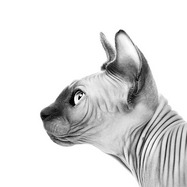
ears is big. so you can put the cat ears wherever you want if you start them at the same point as where the human ears would go.
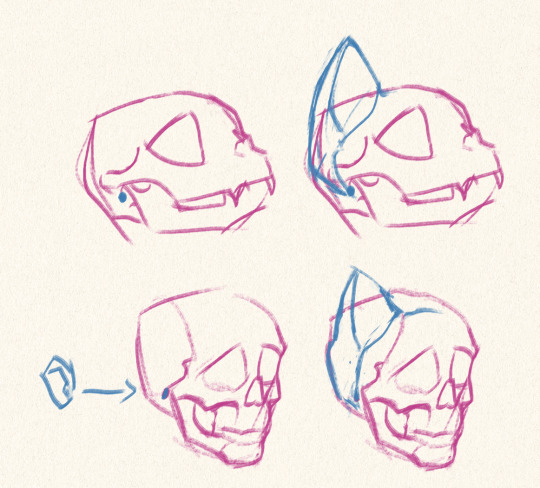
just like. pull the sideburns back a little and it's fine. it's fine.

it's the best way to catify your blorbos with visible human ears. but that's just my........ purrsonal opinion..............
25K notes
·
View notes
Text
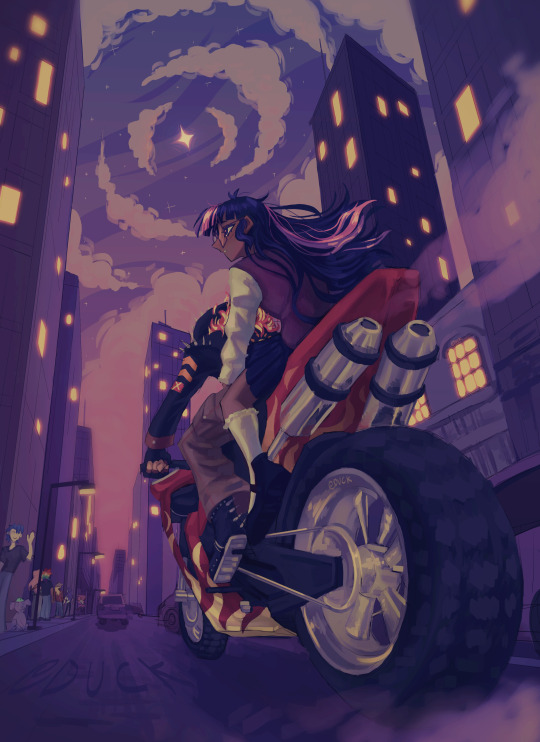
evening drive
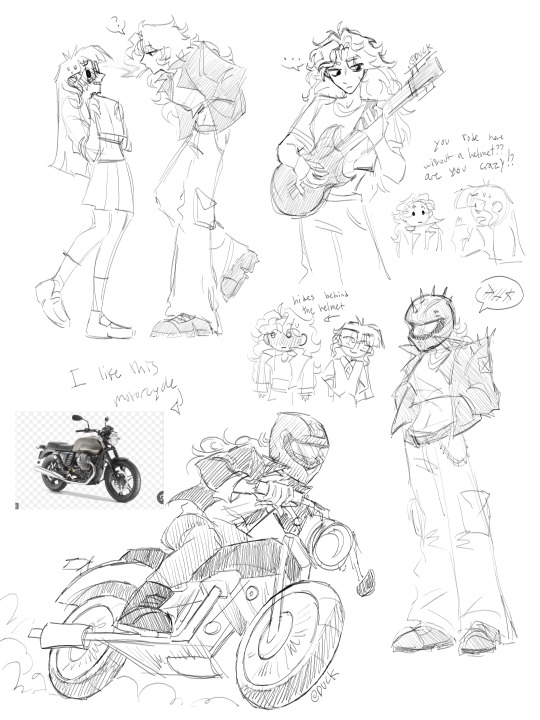
oh yes and some little doodles of them... sunset totally drives a motorcycle right?? been experimenting with how i want to draw her so maybe this'll stick idk.
#i use too much purple dont i#sciset#my art#mlp fim#mlp art#my little pony#mlp#twilight sparkle#eqg#mlp fanart#mlp eqg#equestria girls#scitwi#sci twi#mlp eg fanart#sunsetsparkle#sunset shimmer#ik the motorcycles dont match but i still havent figured out what i want hers to look like#aww lookit them they're both nerd weirdos#also thank you to the 12 different people i asked for advice when i was drawing this#3 point perspective is a pain in the.. back
4K notes
·
View notes
Text
hey guys here's a little reminder to take care of your wrist while you're writing or drawing otherwise you're going to develop carpal tunnel 😭
#I've literally been banned from writing today because I hurt my wrist 😔#erinwantstowrite#writing advice#writing#drawing#artists beware#take care of yourself
3K notes
·
View notes
Text

2K notes
·
View notes
Text


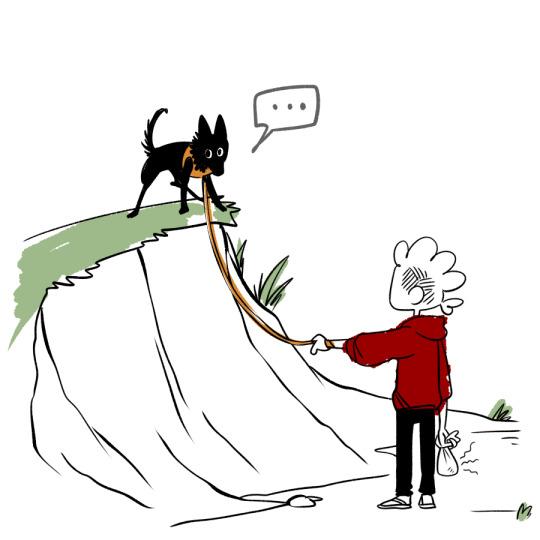
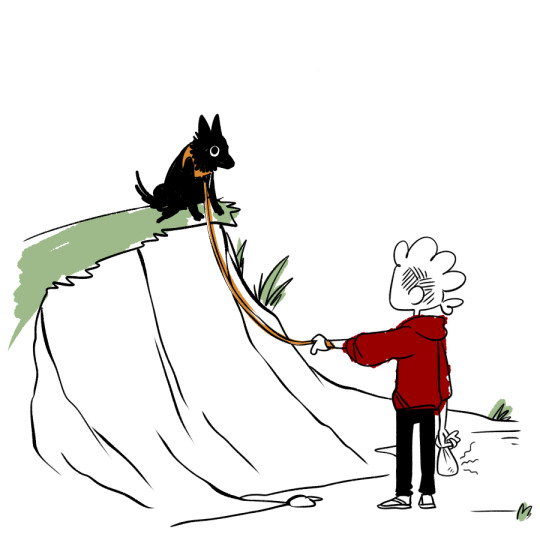
She lives there now.
(Don't make the mistake of thinking she is stuck. She's exactly where she wanted to be. It's my fault for not letting her climb even higher and retreat into the mountain fully, which is her dream.)
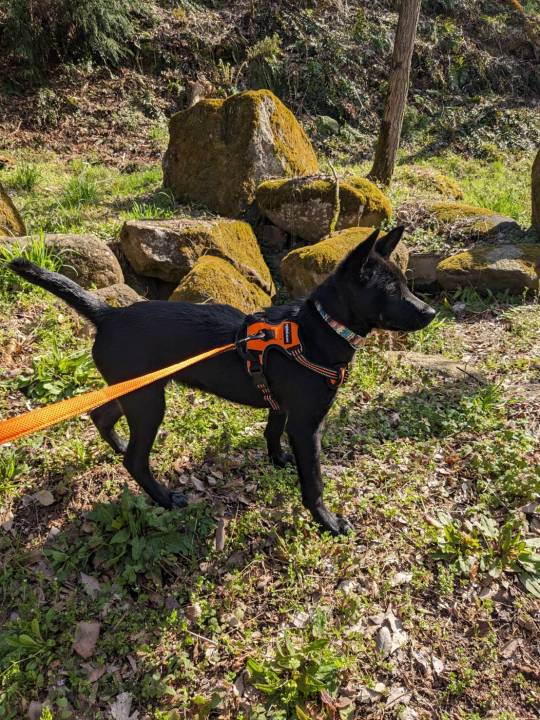
Gaze upon my wild child. She has never met a hill she hasn't wanted to go up.
#daily wednesday#chekhovs wednesday#dog#dogs#dog comics#chekhov draws#if you attempt to give me dog training advice i will put dog hair directly into your mouth myself
3K notes
·
View notes
Note
hi, i ireally love your work and i don't know if you've answered this before but, what kinds of studies do you do or how did you learn color theory? i wanna get better at rendering and anatomy but im having trouble TT TT
Hi! Long answer alert. Once a chatterbox, always a chatterbox.
When I started actively learning how to draw about 10 1/2 years ago, I exclusively did graphite studies in sketchbooks. Here's a few examples—I mostly stuck to doing line drawings to drill basic shapes/contours and proportions into my brain. The more rendered sketches helped me practice edge control & basic values, and they were REALLY good for learning the actual 3D structure behind what I was drawing.

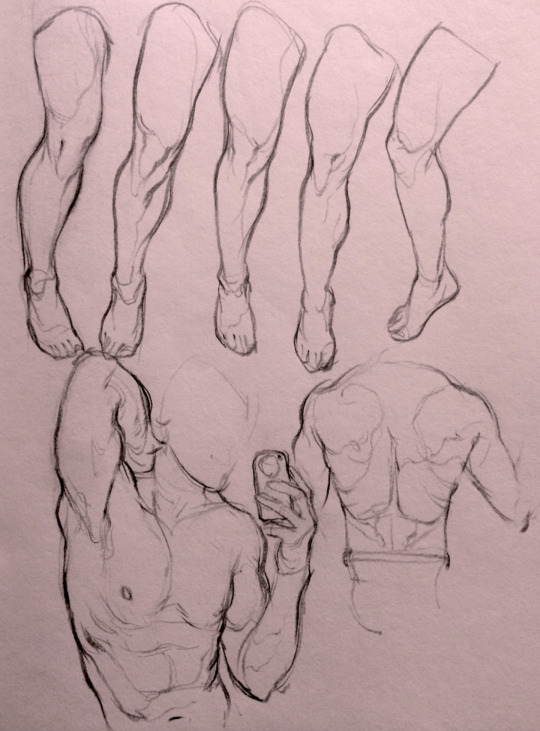

I'd use reference images that I grabbed from fitness forums, Instagram, Tumblr, Pinterest, and some NSFW places, but you could find adequate ref material from figure drawing sites like Line of Action. LoA has refs for people (you can filter by clothed/unclothed, age, & gender), animals, expressions, hands/feet, and a few other useful things as well. Love them.
Learning how to render digitally was a similar story; it helped a lot that I had a pretty strong foundation for value/anatomy going in. I basically didn't touch color at all for ~2 years (except for a few attempts at bad digital or acrylic paint studies), which may not have been the best idea. I learned color from a lot of trial and error, honestly, and I'm pretty sure this process involved a lot of imitation—there were a number of digital/traditional painters whose styles I really wanted to emulate (notably their edge control, color choices, value distributions, and shape design), so I kiiind of did a mixture of that + my own experimentation.
For example, I really found Benjamin Björklund's style appealing, especially his softened/lost edges & vibrant pops of saturated color, so here's a study I did from some photograph that I'm *pretty* sure was painted with him in mind.
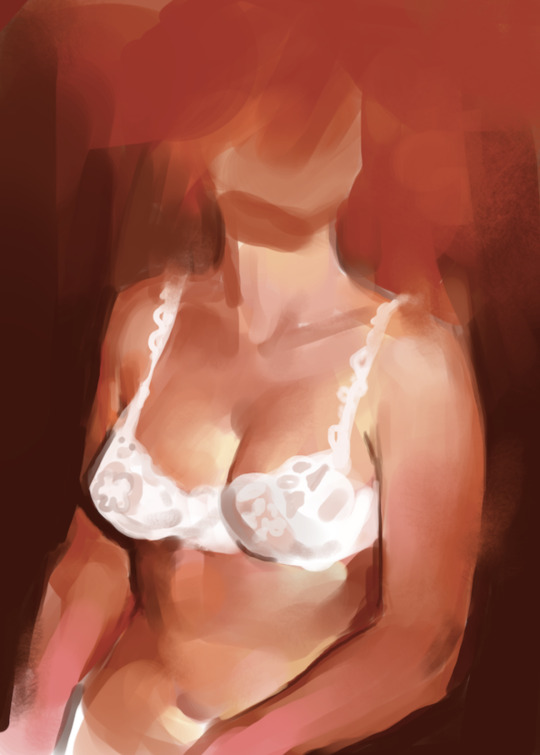
Learning how to detail was definitely a slow process, and like all the aforementioned things (anatomy/color/edge control/values/etc.) I'm still figuring it out. Focusing on edge control first (that is, deciding on where to place hard/soft edges for emphasizing/de-emphasizing certain areas of the image) is super useful, because you can honestly fool a viewer into thinking there's more detail in a piece than there actually is if you're very economical about where you place your hard edges.
The most important part, to me, is probably just doing this stuff over and over again. You're likely not going to see improvement in a few weeks or even a few months, so don't fret about not getting the exact results you want and just keep studying + making art. I like to think about learning art as a process where you *need* to fail and make crappy art/studies—there's literally no way around it—so you might as well fail right now. See, by making bad art you're actually moving forward—isn't that a fun prospect!!
It's useful to have a folder with art you admire, especially if you can dissect the pieces and understand why you like them so much. You can study those aspects (like, you can redraw or repaint that person's work) and break down whether this is art that you just like to look at, or if it's the kind of art that you want to *make.* There's a LOT of art out there that I love looking at, probably tens of thousands of styles/mediums, but there's a very narrow range that I want to make myself.
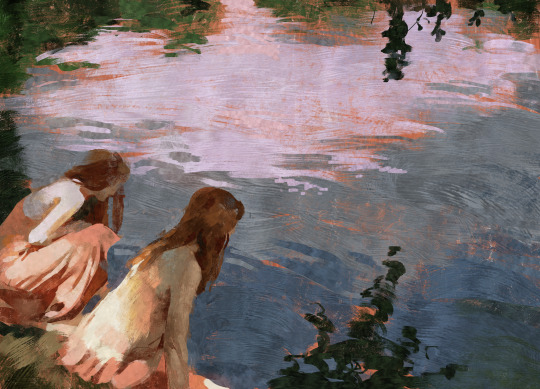
I've mentioned it in some ask reply in the past, but I really do think looking at other artist's work is such a cheat code for improving your own skills—the other artist does the work to filter reality/ideas for you, and this sort of allows you to contact the subject matter more directly. I can think of so many examples where an artist I admired exaggerated, like, the way sunlight rested on a face and created that orange fringe around its edge, or the greys/dull blues in a wheat field, or the bright indigo in a cast shadow, or the red along the outside of a person's eye, and it just clicked for me that this was a very available & observable aspect of reality, which had up until that point gone completely unnoticed! If you're really perceptive about the art you look at, it's shocking how much it can teach you about how to see the world (in this particular case I mean this literally, in that the art I looked at fully changed the way I visually processed the world, but of course it has had a strong effect on my worldviews/relationships/beliefs).
Thanks so much for sending in a question (& for reading, if you got this far)! I read every single ask I receive, including the kind words & compliments, which I genuinely always appreciate. Best of luck with learning, my friend :)
3K notes
·
View notes
Text
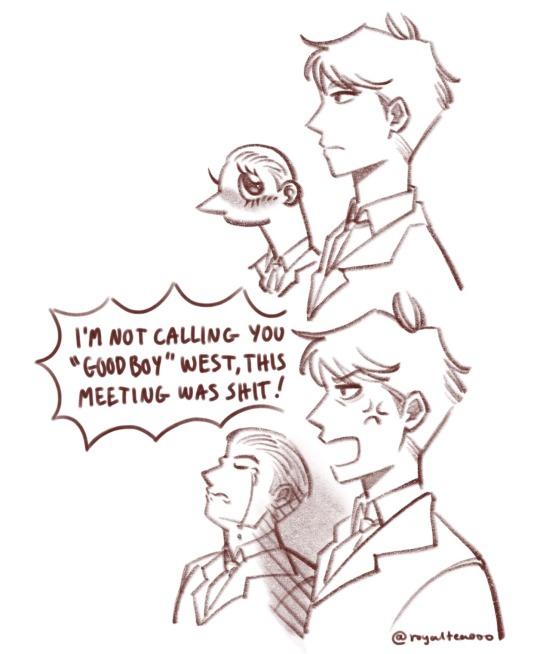
he could not control the class 😔
#tossing my hat into the trend ring#a little sumn in between pieces#got possessed by the silly for a moment#we love an unhealthy codependent sibling relationship#join me on my delusion of every behavior or habit Ludwig has has been ingrained and propagated into him at early childhood by Gilbert#I imagine Ludwig going thru one of his many social interaction debacles and thinking ‘quick Ludwig - what would brother do?!’#and Gil shows up in his head like the laissez faire voice of authority like#burn their fields and salt their crops 👍 [fades away]#do you understand me?#kinda like when mob thinks of Reigen during social anxieties but he comes up with the most useless advice in his head#Gil’s little puppy <3#hetalia#hetalia fanart#hws germany#hws prussia#aph germany#aph prussia#german bros#digital art#my art#drawing meme#Ludwig waiting for his daily chin scratch for being an agreeable young lad 🥺#on second thought maybe I should’ve done this in more historical clothing#like young Lud being put in charge of his first meeting as like training and doing horribly 😭#general Gil is not satisfied with his performance#do you guys think Gil is a boy mom#discuss
2K notes
·
View notes
Text
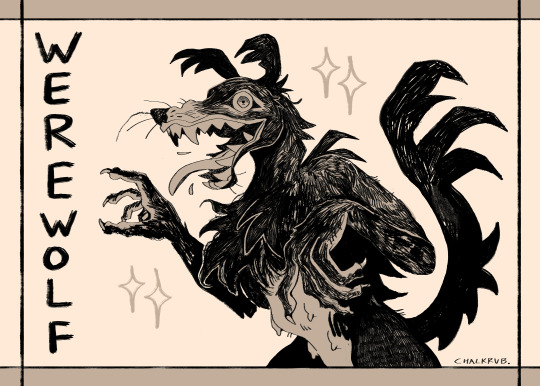
saw some mangy dog on the outskirts of town
#my art#oc#els#werewolf#furry#anthro#illustration#you would not believe the hassle this gave me lmao....i want to do more with it but i have to wipe my hands of it#idk if this looks good but it has to be finished i have to be finished with it#WORD OF ADVICE that allows a small glimpse into the horrible time i've had: PLAN YOUR COMPOSITIONS#GOD. initial drawing of els: 1-2 hours at most. trying to find a composition that doesn't suck: 100000 hours and ongoing#i think my problem is this els looks better zoomed in but finding a way to keep it zoomed in....mission impossible#i love this els face though. i will admit. i had to persevere to get SOMETHING that at least vaguely worked so i could show off this els#okay. okay. anyway it's greengage season again. big ups to greengages for making life just that much brighter#also the owls are goin crazyyy outside my window rn they are speaking and i am listening. in a delirium
1K notes
·
View notes
Text
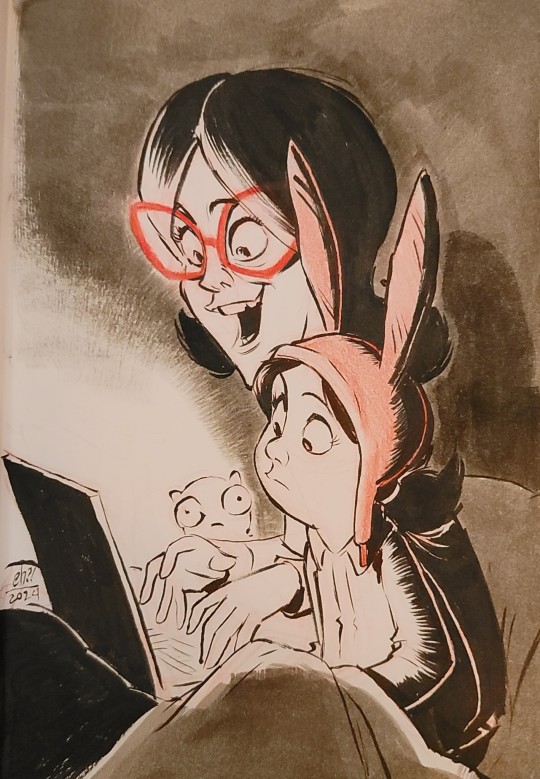
Content Lock art for "Advice Things Are Ad-Nice"
#bob's burgers#advice things are ad-nice#Louise#Louise Belcher#Linda#Linda Belcher#drawing#cartoon#sketch#inking#ink#red pencil#doodle
693 notes
·
View notes
Text

accolade
#WOOOOOO i thought of this quite genuinely uhhhhh 6-7 months ago? ish? then i never drew it. got distracted. thats life babey#silver's the next housewarden. he's gonna get dubbed in and he's going to serve the dorm well and they're all so proud of him#what card was it. azul halloween? the one where hes asking azul for housewarden advice to get ppl to listen to him? its CANON FOLKS#ougugh working in black and white for a change. as a TREAT. different rendering styles keep me fresh keep me happy i love it#i render different ways i draw in different styles but no matter what ill always be drawing silver. static subject. i love him#this composition is also a bit funky for me i kinda dig it. anyways#twst#twstファンアート#twisted wonderland#twst silver#malleus draconia#suntails#if any of u know anything abt harrisburg area PA pls give me tips. just in case
880 notes
·
View notes
Note
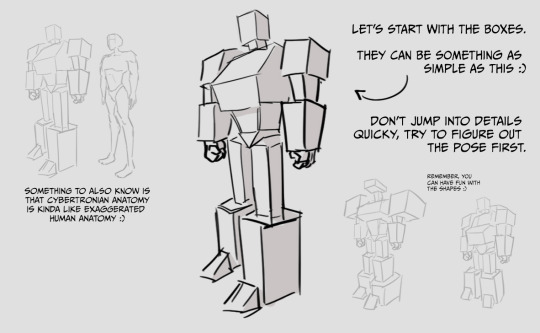
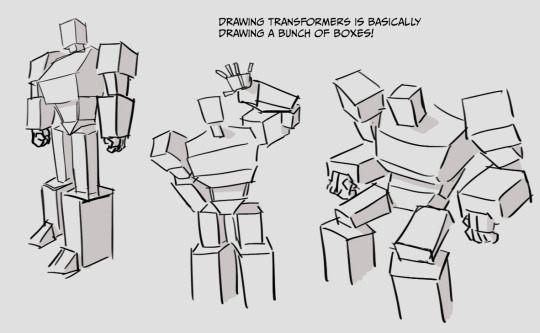
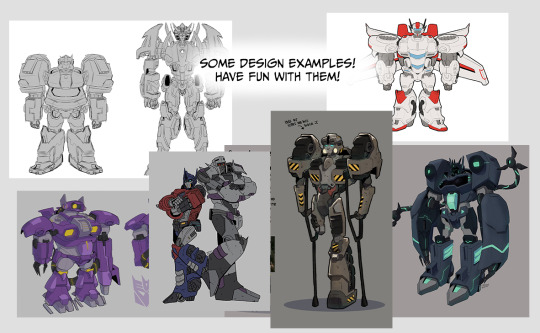
Did u ever make a post of tips on how to draw Transformers? if not could you give us a few?
I'm not really the best to ask for tips, but here's my tips/advice anyways!
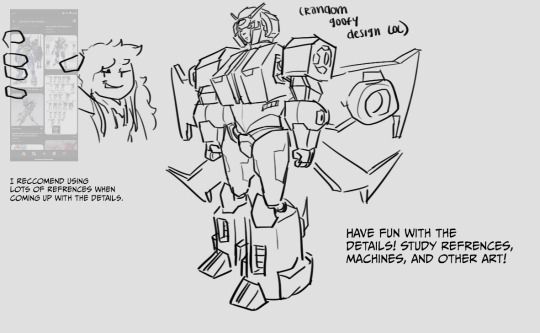
537 notes
·
View notes