#this post is about 3d printers never working right
Explore tagged Tumblr posts
Text
i love 3d printing! would love to do it someday.
#this post is about 3d printers never working right#my ender 3 pro has like a million issues every time i try to use it.#my friend gave me a store brand micro center one that im messing with now and it's printing but the filament is bunching up in a corner
8 notes
·
View notes
Text
Hey chat! I decided that I don't care if you care or not, I'll post it anyway. Because I'm a scientist nerd, and a TF2 fan.
So here you go, my theory on how the respawn machine actually works.
⚠️It'll be a lot of reading and you need half of a braincell to understand it.
The Respawn Machine can recreate a body within minutes, complete with all previous memories and personality, as if the person never died. We all know this, but I doubt many have thought about how it actually works.
Of course, such a thing is impossible in real life (at least for now), but we’re talking about a game where there’s magic and mutant bread, so it’s all good.
But being an autistic dork, I couldn’t help but start searching for logical and scientific explanations for how this machine might work. How the hell does it actually function? So, I spent hours of my life on yet another useless big brain time.
In the context of the Respawn Machine, the idea is that the technology can instantly create a new mercenary body, identical to the original. This body must be ready for use immediately after the previous one’s death. To achieve this, the cloning process, which in real life takes months or even years, would need to be significantly accelerated. This means the machine is probably powered by a freaking nuclear reactor, or maybe even Australium.
My theory is that this machine is essentially a massive 3D printer capable of printing biological tissues. But how? You see, even today, people can (or are trying to) recreate creatures that lived millions of years ago using DNA. By using the mercenary’s DNA, which was previously loaded into the system, the machine could recreate a perfect copy.
However, this method likely wouldn’t be able to perfectly recreate the exact personality and all the memories from the previous body. I believe the answer lies in neuroscience.
For the Respawn Machine to restore the mercenary’s consciousness and memories, it would need to be capable of recording and preserving the complete structure of the brain, including all neural connections, synapses, and activity that encode personality and memory. This process is known as brain mapping. After creating a brain map, this data could be stored digitally and then transferred to the new body.
“Okay, but how would you transfer memories that are dated right up until the moment of death? The mercenaries clearly remember everything about their previous death.”
Well, I have a theory about that too!
Neural interfaces! Inside each mercenary’s head could be an implant (a nanodevice) that reads brain activity before death and updates a digital copy of the memories. This system operates at the synaptic level, recording changes in the structure of neurons that occur as memories are formed. After death, this data could be instantly transferred to the new body via a quantum network.
Once the data is uploaded and the brain is synchronized with the new body, the mercenary’s consciousness "awakens." Ideally, the mercenary wouldn’t notice any break in consciousness and would remember everything that happened right up to the moment of death.
However… there are also questions regarding potential negative consequences.
Can the transfer of consciousness really preserve all aspects of personality, or is something inevitably lost in the process?
Unfortunately, nothing is perfect, and there’s a chance that some small memories might be lost—like those buried in the subconscious. Or the person’s personality might become distorted. Maybe that’s why they’re all crazy?
How far does the implant’s range extend? Does the distance between the mercenary and the machine affect the accuracy of data transfer?
My theory is that yes, it does. The greater the distance, the fewer memories are retained.
Could there be deviations in the creation of the body itself?
Yes, there could be. We saw this in "Emesis Blue," which led to a complete disaster. But let’s assume everything is fine, and the only deviations are at most an extra finger (or organ—not critical, Medic would only be happy about that).
Well, these are just my theories and nothing more. I’m not a scientist; I’m an amateur enthusiast with a lot of time on my hands. My theories have many holes that I can’t yet fill due to a lack of information.
#tf2#team fortress 2#canis says#respawn machine#i got nothing better to do sorry#i like brainstorming
105 notes
·
View notes
Text
I had a message the other day asking (among other things) what kind of tools and equipment I use in making books, and as it's something I like to go into detail on, I realized I couldn't fit everything I had to say in a message so it's getting its own post. With photos!
Disclaimer that I'm not a professional bookbinder, I'm entirely self-taught and probably have habits and practices that would drive a pro nuts. I'm no authority, but these are the things that have worked for me, and maybe you can adapt them to work for you too.
This post will not cover: storage options, materials like board and glue, or equipment specific to one narrower aspect of the hobby like embossing or gilding. It is also not a tutorial on how to make a book, though I am covering things in more-or-less the order I use them in during the book-making process.
This post will cover: What I've found useful, what I've regretted buying, and some things you can co-opt from other, more common hobbies. A lot of it you may already have in your house. Some of it is for beginners, some is nicer equipment you might want as you get further into making books. They are not separated, it's just a list and some description.
Keep reading below the cut; this is gonna be a very long one and there are a lot of photos of everything.
If you want to make books you will need access to a printer. I'm not going to go into detail on this part and I didn't take a photo of my HP (not the best brand, but that's a long discussion in and of itself). Once you've got your pages printed and it's time to fold it into signatures, it helps to have a folding tool like these:
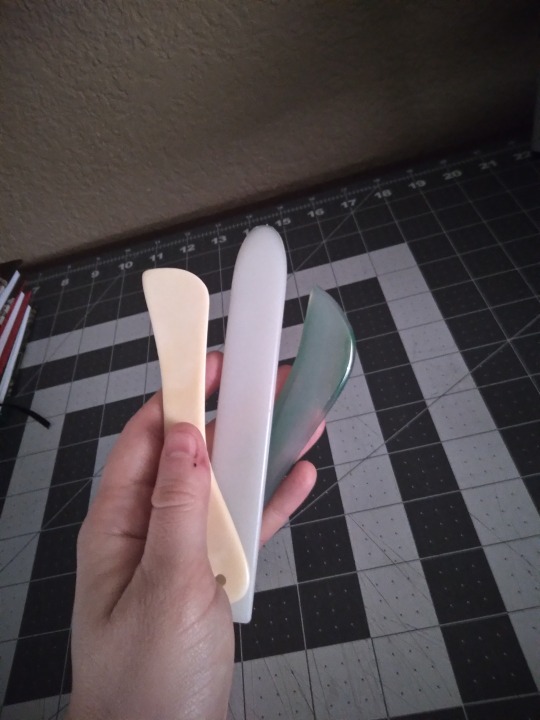
Folding tools can be anything as long as they're smooth and flat. The one on the left here is an actual bone folder from an art supply shop, but the center one is a plastic leatherworking tool that I got at Hobby Lobby, and the one on the right is an agate burnisher that I got from Amazon. None of these cost more than $10, and you can also use the edge of a pen (as long as it has no rubber grip or cap/clip) or the back of a spoon. Or your fingers, but the tools make it faster and the folds are more precise. I once worked a job where I had to fold maps, and all my coworkers were wondering how I did them so much faster and why mine were flatter than everyone else's, and it was because I'd grabbed a sharpie and started using the back end like a bone folder.
Once it's folded, you'll need to poke holes for sewing. I use one of these:
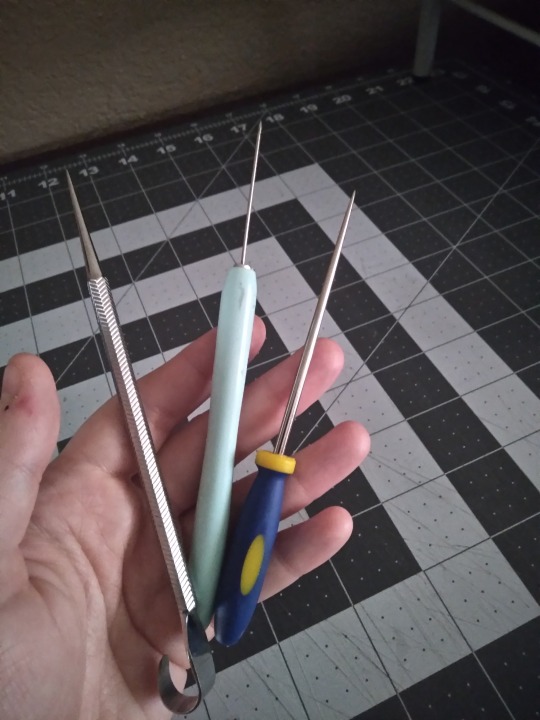
Left is, again, an actual bookbinding awl from an art supply store, while the center one is a paper quilling tool and the right one is a beadwork awl, both of which came from a big chain craft store. The bead one is my favorite; it's a good size and very stable. The quilling thing has too long and thin of a blade and it's wobbly, and I don't like the tapering on the bookbinding awl. It tends to make the holes in the middle page too big, and the outer ones too small. Again, these were cheap, about $10 each, but you can also use a sewing needle stuck in a cork, or a thumbtack or pushpin. If it's pointy and rigid, it'll work.

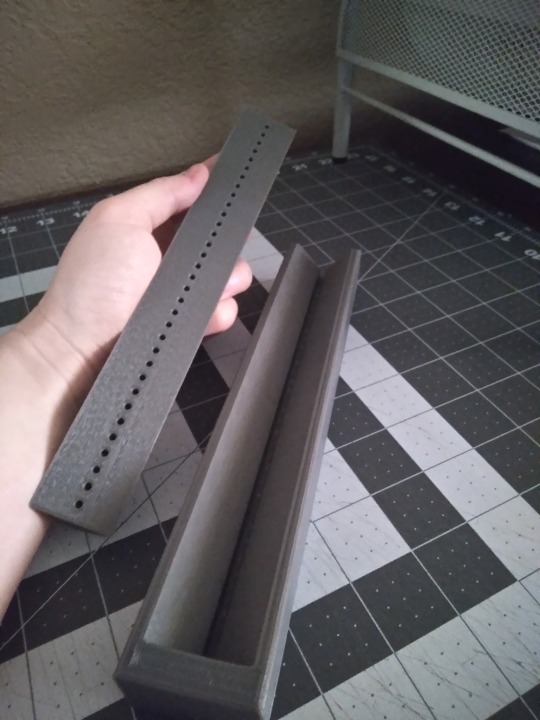
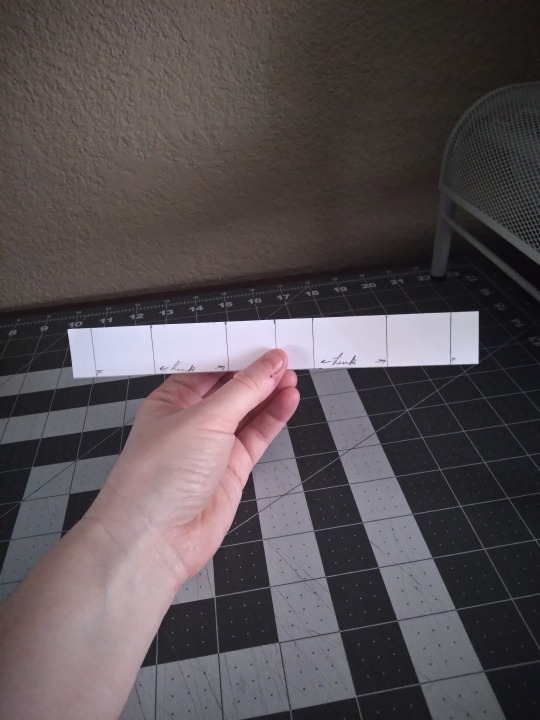
This isn't a requirement by any means, but I've found I like having a punching cradle for the hole-poking step. I got this 3d printed one from a fellow bookbinder, who was designing their own and made this one as a prototype. There are a lot of tutorials on how to make a punching cradle, or you can buy them online from several different vendors. They don's all look like this, and you can make them from wood or cardboard (though those don't usually have guide holes). If you're just starting out or this doesn't appeal, you can just use a paper template like the one on the far right. The cradle helps get the holes lined up and evenly spaced, and I've never liked this step so anything that makes it faster and less fussy is a win. If you use this kind, check that your hole-poking tool fits in the guide holes--the binding awl pictured above doesn't, but the other two do.
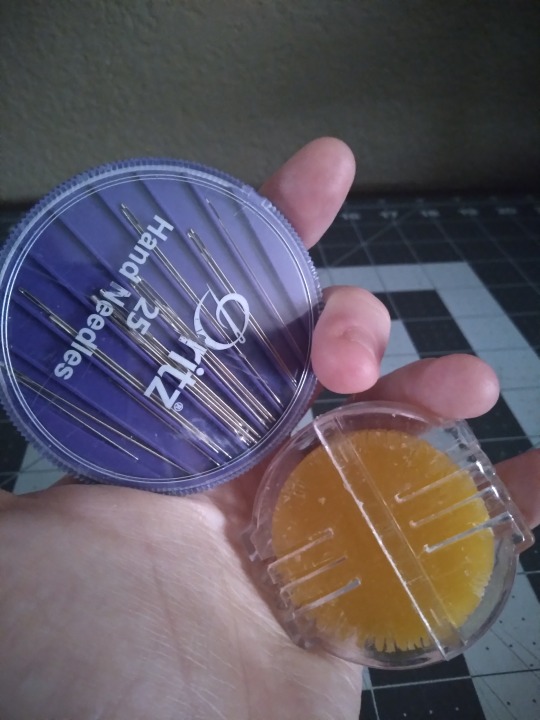
We've made holes, so let's stitch them up. These are just regular sewing needles and beeswax, to make your thread less prone to tangling. You can get both of them in any store that has a sewing department. There are dedicated bookbinding needles, like curved needles, and some binders like them, but I've never gotten the hang of the curved ones and they aren't necessary, especially when you're just starting out. If it fits through the holes you made, it will work.
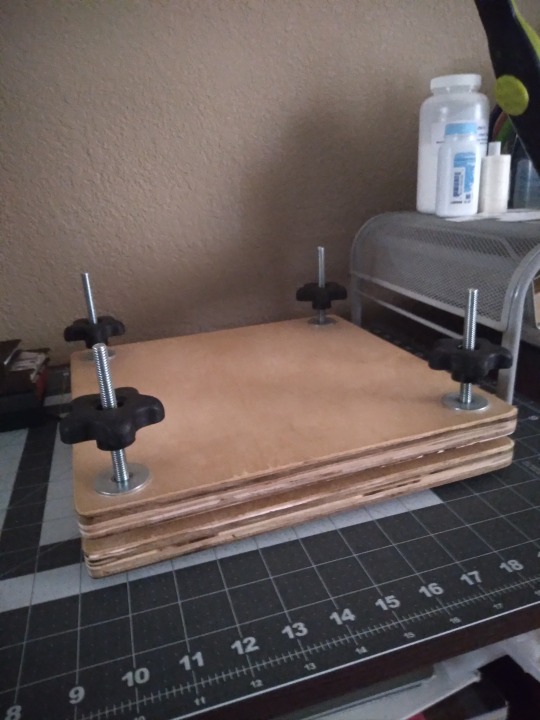
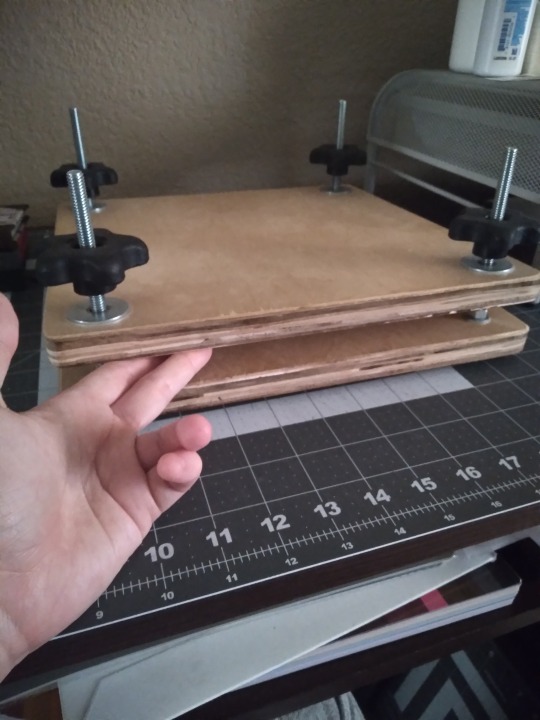
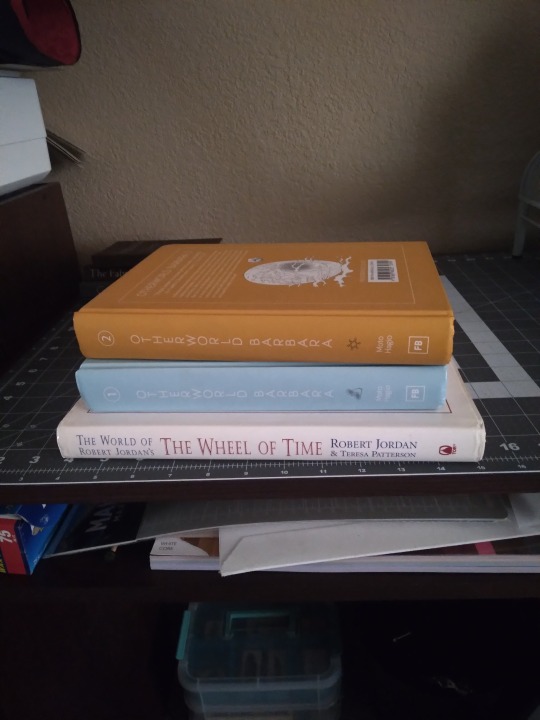
Once it's sewn, you probably want to squish your new text block so it's flat. I've got a laying press that I bought a couple of years ago when I was first getting started. It was marketed as a book and flower press, and it's honestly not the best. I would probably not have bought it if I had known that it wasn't essential to the process, and I mainly use it now when I'm squishing a text block and still want to use my work space, because once it's tight I can move it somewhere else. You can really use almost anything for squishing as long as it's heavy and flat and rigid on one side, like the stack of books in the right-hand photo. Textbooks, encyclopedias, art and photo books, and comic book omnibuses are all great. I've seen people use all kinds of things, like paper-wrapped bricks and doorstops, and there are tutorials out there to make your own press out of cutting boards if you do want one.
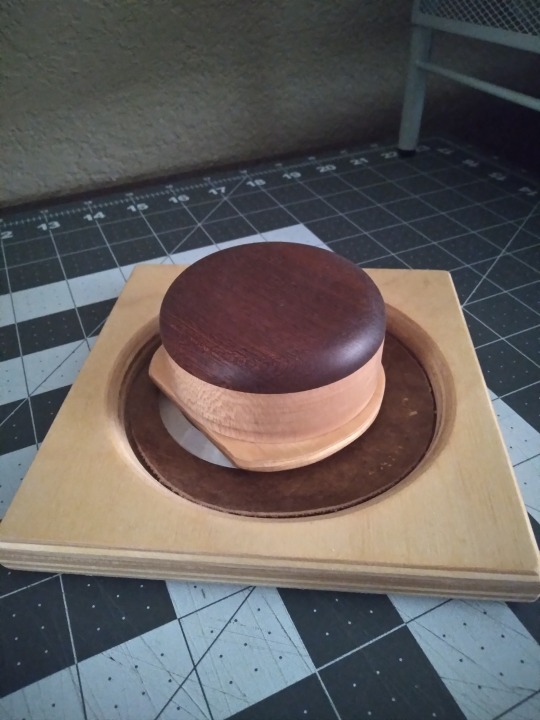
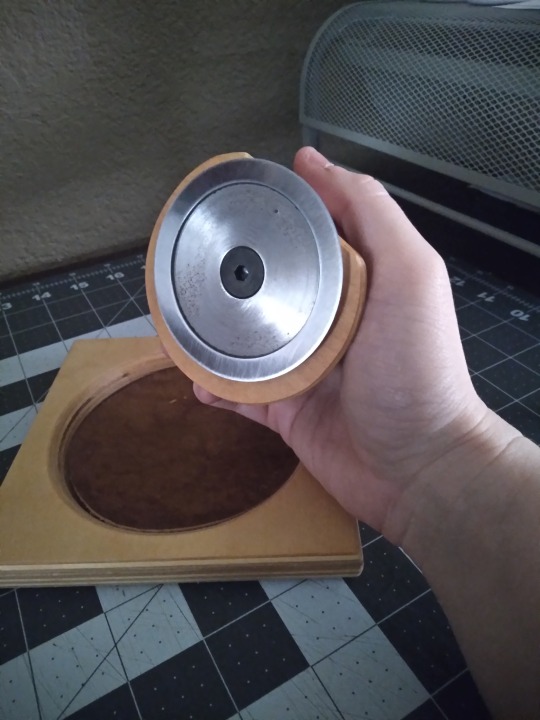
If you like your books to have smooth, flat page edges you're going to have to trim them. This is a book plow from Affordable Binding Equipment, and it was the first piece of actual expensive equipment that I bought. Not all plows look like this; I think the design is unique to ABE, but I've never used the traditional kind. In the interest of full disclosure, you can also trim edges with a sharpened chisel, which is much cheaper and can be bought at any hardware store, and some binders love this method. I do not love this method and have had zero regrets about caving and getting the plow. Very easy to use but does require some grip strength. Not pictured: the setup for sharpening the blade, which isn't hard but requires a bit of space and a small sheet of plate glass that you have to source yourself. Even with that, I still prefer it to the chisel. That said, this is not an essential step and you can leave your books with a "sawtooth" or deckled edge. Most of my early books have them, and some people just like them better than the flat ones and never learn to trim them. As another side note, some tutorials will say that you can trim your edges flat with a knife. You can't. Maybe on a pamphlet you can, but if it's more than 10 or 20 pages you just can't. It will look terrible.
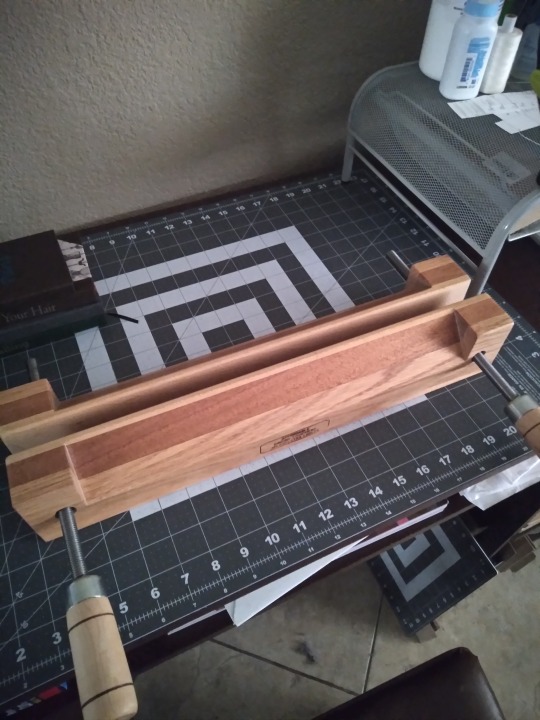
If you're going to use a plow, you've got to have the right kind of press. The one I talked about further up the thread is the wrong kind (full disclosure: I did use it with that press turned on its side, before I bought this one. But it's harder, more time-consuming, less comfortable, and less safe. Don't be like me). So here's a photo of my finishing press (also from Affordable Binding Equipment). I bought it so I could make backed books, but I use it for trimming too. The top part here has a narrow tapered section for backing, but if you flip it over it's totally flat, which is what you need for trimming. Not pictured: the stand that it came with for backing, or the c-clamps that I use to attach it to the desk for trimming. Again, though--this isn't a requirement for bookbinding. This is a later stage that's entirely optional. On the subject of backing, though:
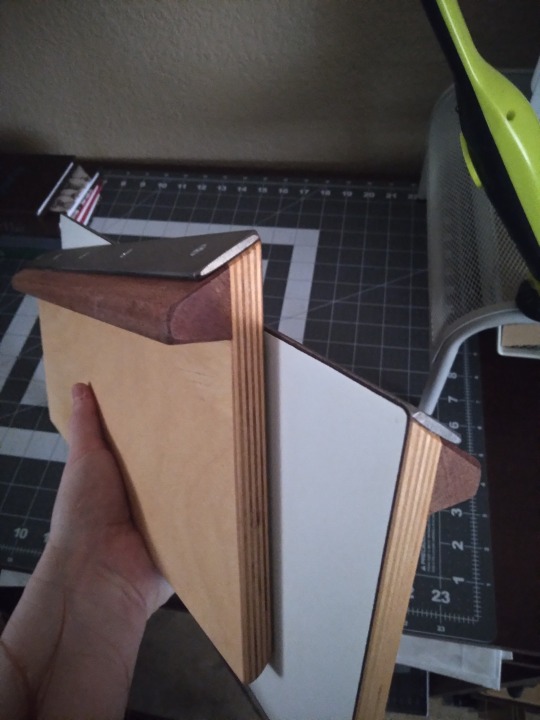
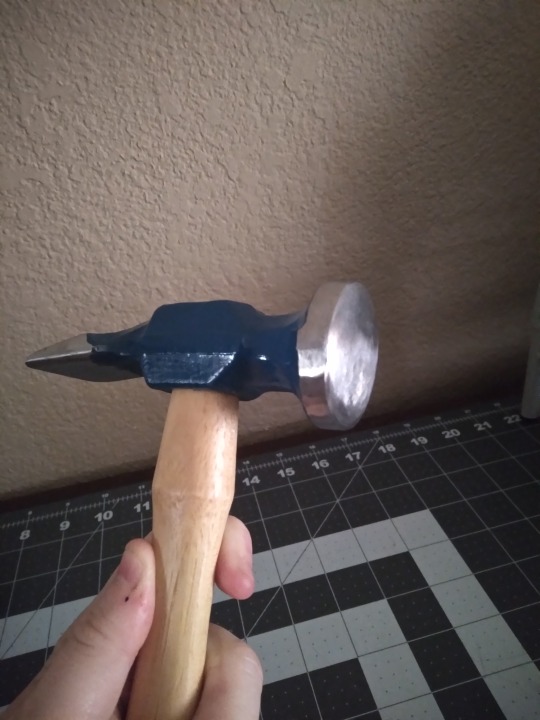
You don't need special equipment to round the spines of your books, but you do for backing. Left image is the set of backing boards I got from, once again, Affordable Binding Equipment, and on the right is a backing hammer from Hollander's. Neither of these are essential. Even if you get the boards (which have to be used in a press with a tapered edge, like the one directly above) you can actually use a regular hammer as long as the front part has no scratches or gouges. This one is a backing hammer, the primary difference being that it has a wider, convex head than a regular household hammer, to make the kind of glancing blows needed for backing a little easier. Honestly, I'm still learning how to use these and I'm not very good with them yet. Comes of being self-taught, probably. I don't think youtube is the best vehicle for learning this part, but it's what I have and I'm making do. Not every book is going to benefit from backing, either; it's primarily for helping mitigate spine swell.
Okay, time for my favorite repurposed equipment hack.
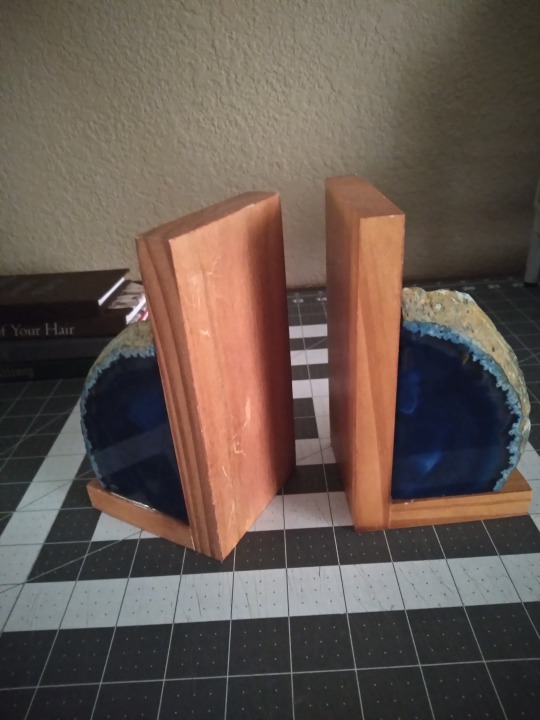
It's bookends. Regular bookends that I've had for ages and that probably came from Ross or some other place that doesn't even sell craft supplies.
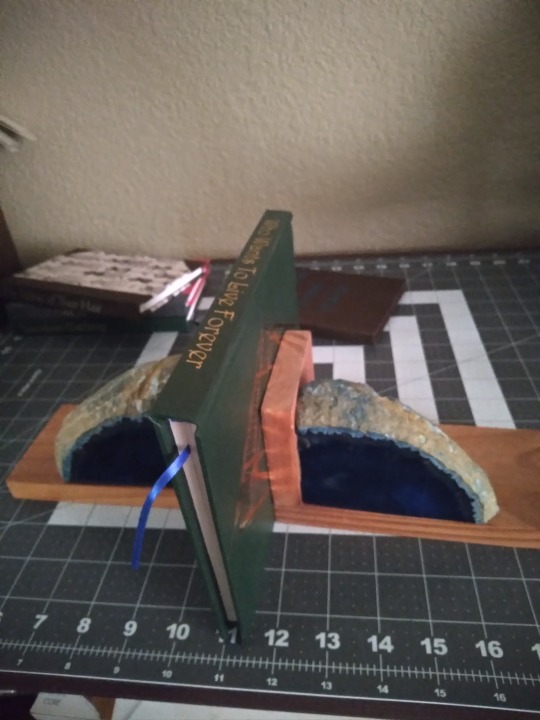
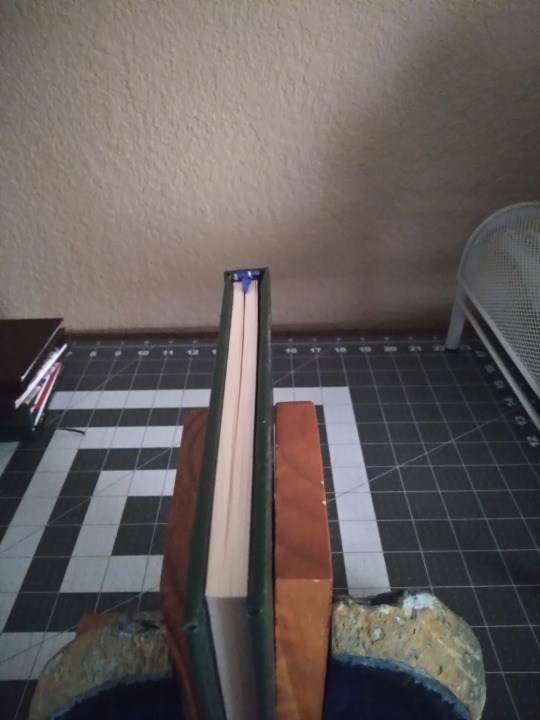
Want to keep the text block upright while you glue it? Bookends. Want to sew some custom end bands but your text block keeps falling over? Bookends. They won't provide pressure for squishing, but if you just need to hold something upright while you work on it, bookends are the answer. They hold up books, it's right there in the name. Having said that, you want some with a little weight to them, like these agate slices, so they won't slide around. And you want something with a smooth finished edge like these, so they won't scratch up your text block or leave dents. I have other sets but these are the only ones I use for this purpose, and they're better for it than anything else I've got.
Moving on from making the text block, let's look at what I use to make covers.
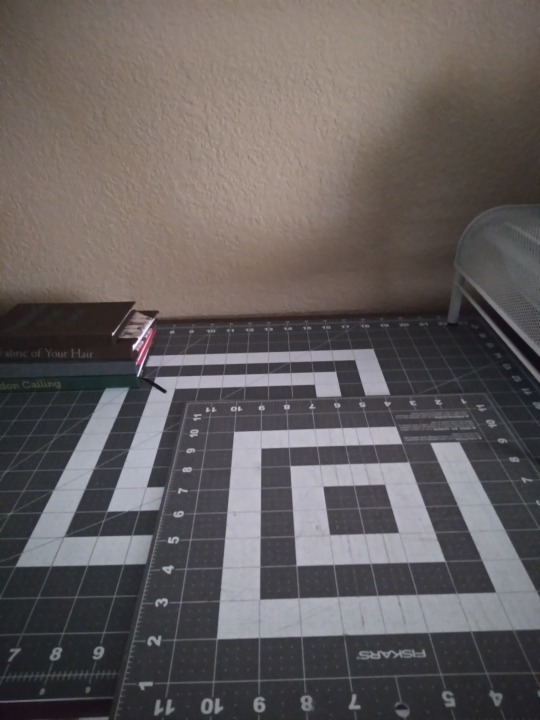
It's appeared in the background of most of the other photos, but here's a photo of just the desk surface covered in cutting mats. I really recommend a mat to protect the surface of your furniture and keep your knives from going immediately dull. I've got a big one that covers almost the full surface, and a small one for when I want to be more mobile. I started with just the small one and it was good until I started working with larger sheets of paper. The big one was bought largely for convenience but I have no regrets about it. They're self-healing, non-slip, and you can get them in the sewing section of any big craft store.
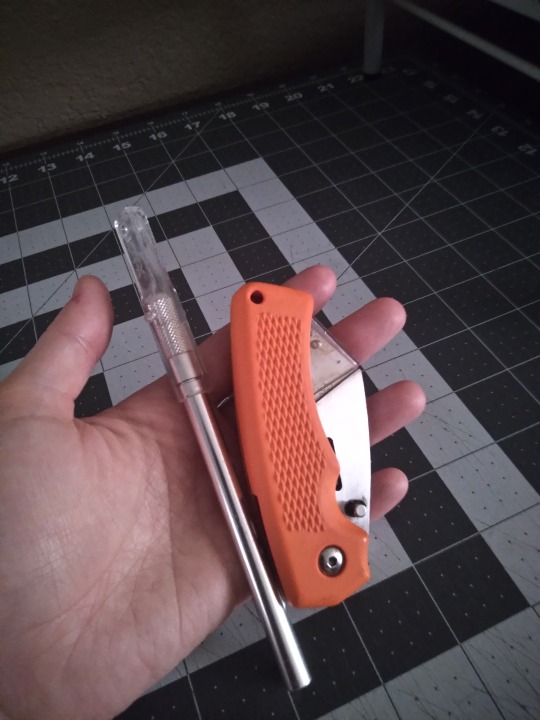
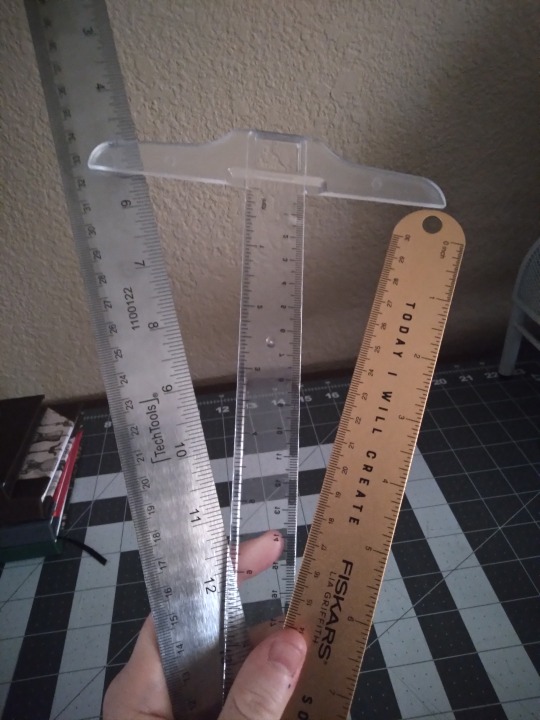
I'll be honest, I am not big on knives. I've got a regular box cutter for trimming board, and a razor knife for paper and cloth, and that's it. There are a lot of kinds and really all you need is one sharp blade for board. Paper and cloth can be cut with scissors if you want, though I find I get more consistently straight lines with the knives. Also pictured: Metal rulers and a T-square. You want a metal ruler for this. Plastic will flex and wood won't lay flat. Ideally you want one without a cork backing (my 18" one has this problem) and with the tick marks etched in rather than printed (my 12" one has this problem). For larger sheets of paper and cloth, the 18" one is great, but you can get by with the smaller one. The T-square is for making right angles; mine is plastic and only 12", and I really wish I had a longer one that was metal. These are drafting tools and you'll find them in the section of the craft store that has easels and sketch pads and they're usually pretty cheap.
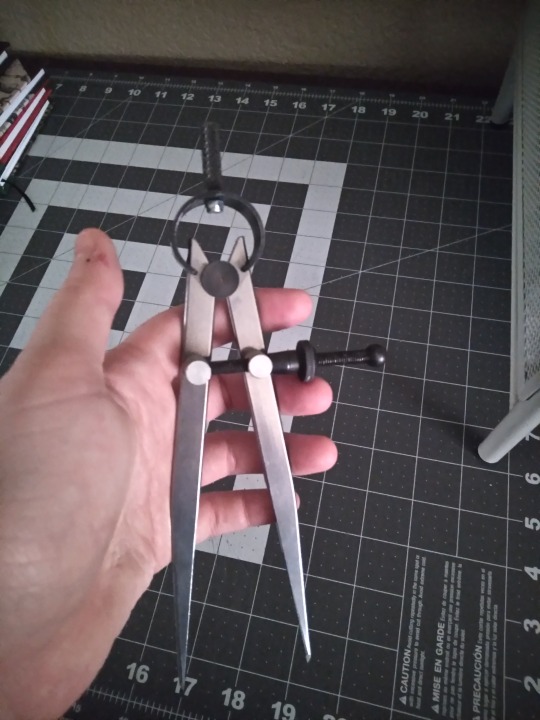
This is an adjustable compass. You can probably get these at craft stores but I got mine on Amazon. It's for measuring hinge gaps and the width of spines, both essential for making sure your cover fits your text block and your hinges open the way they should. Both of those are incredibly frustrating situations, and this thing makes it so much easier to avoid them.
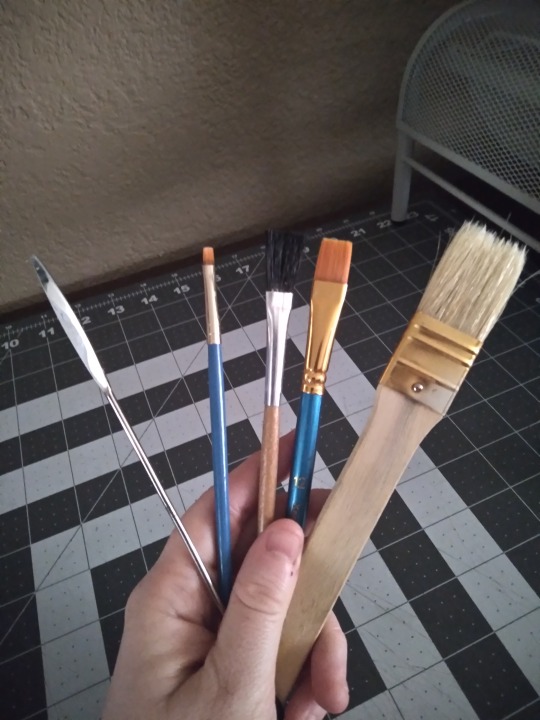
Things to spread glue with! Any old paintbrush will do, though I like to have a few different sizes and textures on hand to choose from. I like the big one for cover boards and casing in, the mid-size ones for doing turn-ins, and the little fellow for details and touch-ups. I don't care for foam brushes because I find them hard to clean when glue is involved, but if you like you can use those. The metal thing on the left is a micro-spatula, and I did have to special order it from an art supply place but it was cheap and it's very helpful to have on hand for when the brushes are too thick, for doing turn-ins on rounded spines, and for separating pages if you decide to learn edge foiling. Not essential, but recommended.
One thing I neglected to take a photo of is my crepe eraser. Despite the best intentions, no matter how careful you are, you will at some point get glue where you don't want it, where it will be visible on the finished book. This is where the crepe eraser comes in; you can use it to remove dried glue from cloth or (to a lesser extent) paper. Very annoyingly, none of the craft or art supply places I went to had even heard of these and I had to get mine from Amazon. It was cheap (under $10) and I strongly recommend getting one.
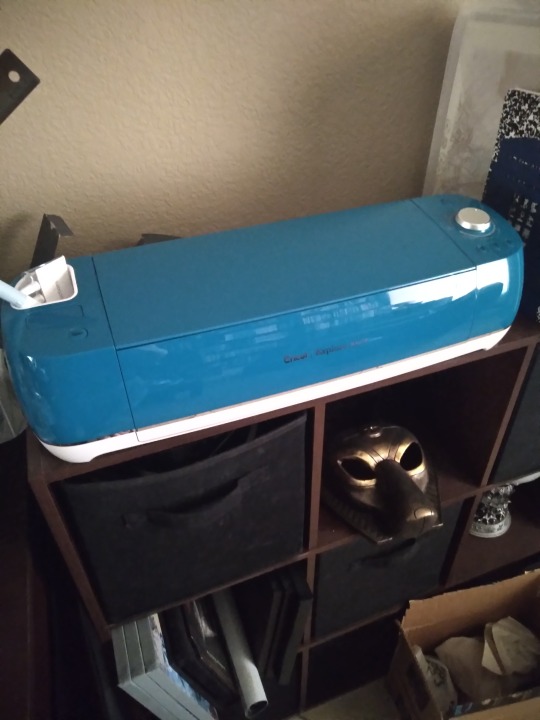
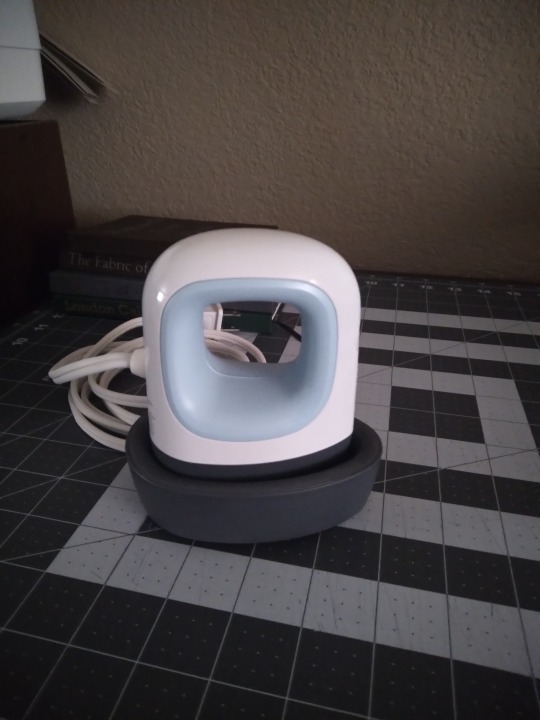
Once your cover is made, you have some options. You can leave it blank, hand-letter or draw an image, stamp it with ink or embossing powder, use a stencil, or do what I usually do these days and make a cover graphic from HTV. I've got a cricut for this (though they're not the only kind of cutting machine; it pays to research other brands) and a mini heat press (I want a bigger one, but I got this one cheap because the box is messed up). A lot of libraries have cricuts you can use, and you can use a regular iron to apply the HTV. Getting it to stick is a bit tricky, but that's true no matter which tools you use. Not pictured: a cutting mat, different than the kind shown above, necessary with most materials you can cut (mine came with one, they're about $20 at most craft stores, and they're lightly sticky to keep your materials in place while it's being cut). I don't know if other brands require them, but cricut does unless you're using their Smart Materials (I have never used these). If your library has a cutting machine, they will also have the appropriate cutting mats. Also not pictured: weeding tools. Weeding is when you remove the bits of HTV that you don't want in the final image, usually the spaces between letters and such. The negative space, if you want to get artsy. The special tools cricut sells aren't necessary, you can use an awl or needle and the dull edge of your knife blade, but I have a set of theirs and I like mine.
I didn't take a photo of it, but sometimes I use embossing inks and powder to make cover designs and text. You only need a heat gun for embossing powder, it takes up way less space than the cricut does, and it's cheaper. I got mine free from a family member so I don't know what it cost initially, but cutting machines are a really big expense; the cricut is my third most expensive piece of equipment, after the finishing press and the plow.
Good god I think that's everything. It sounds intimidating, I know. And it sounds like it takes up tons of space in your home, and to be honest it can, but it doesn't have to. The first dozen or so books I made, I made completely to my satisfaction with tools and materials that fit in one 12x16" moving box. If you love the hobby and can make the space, the bulkier items might be worth it down the line, but especially when you're first getting started it's smart to keep things low-cost and compact. Most of the basics are simple and your fellow bookbinders are delighted to share their shortcuts and substitutions if you ask.
The end! I hope it was helpful, @cardassianexpats! I did warn you it would be wordy, lol.
#bookbinding#fanbinding#long post#like ridiculously long post omg#my own verbosity will be my downfall#if anything is unclear please tell me#i can't always tell when i'm over-explaining#or when i think i've given enough info but my audience thinks i haven't#snek makes books#but sometimes she just talks about them
26 notes
·
View notes
Text
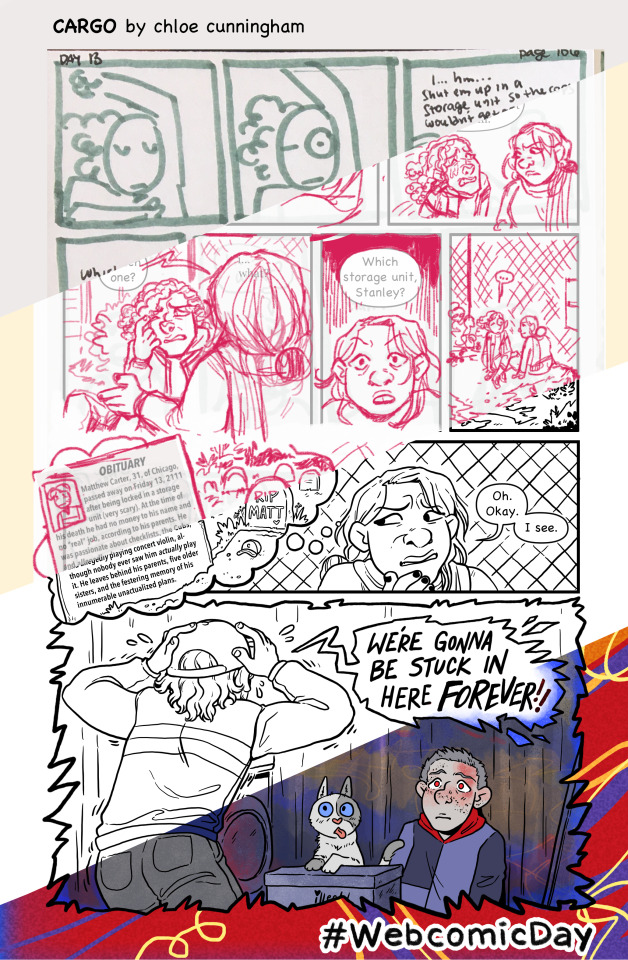
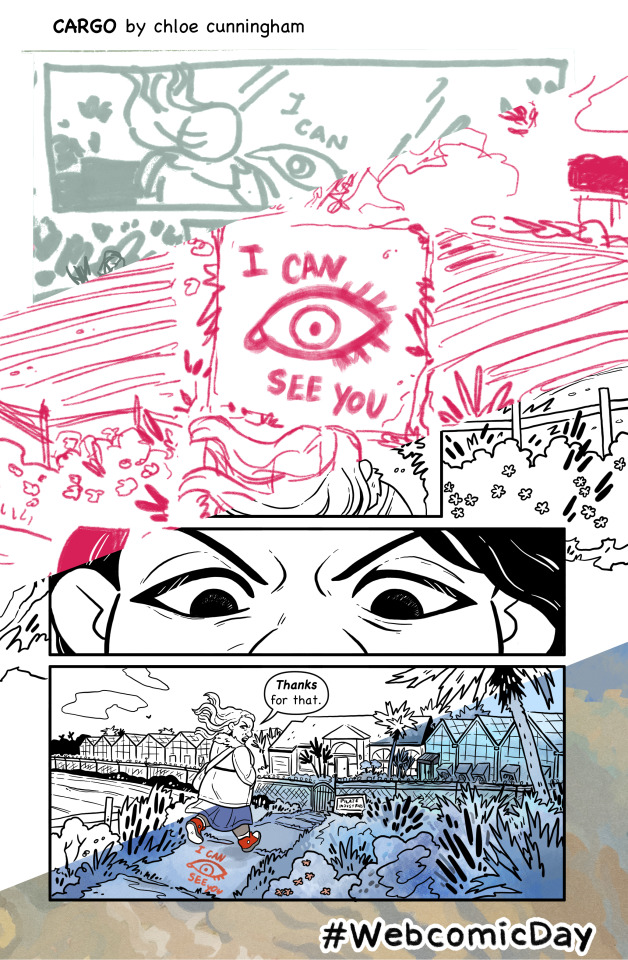
Happy #WebcomicDay!! :D
This year we're celebrating the process of making pages... so below the cut I've got a bunch of pictures sharing how I go about making pages of my evil post-apocalyptic workplace sitcom, Cargo!! :D
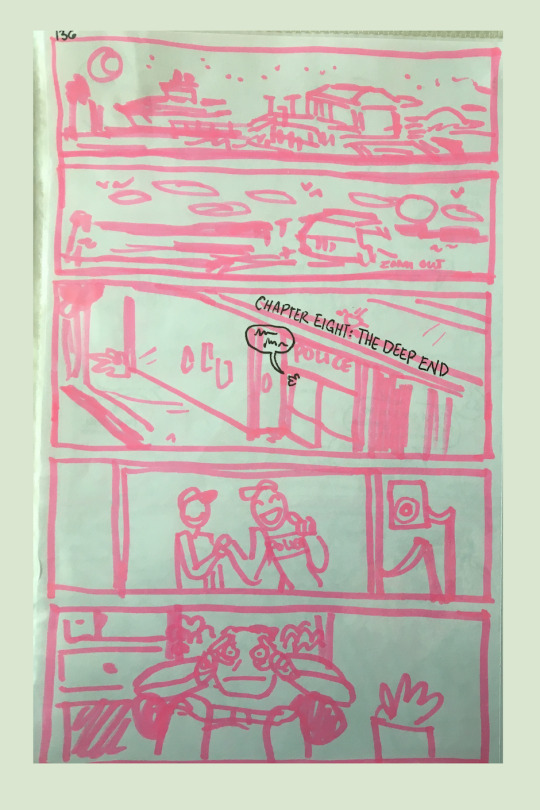
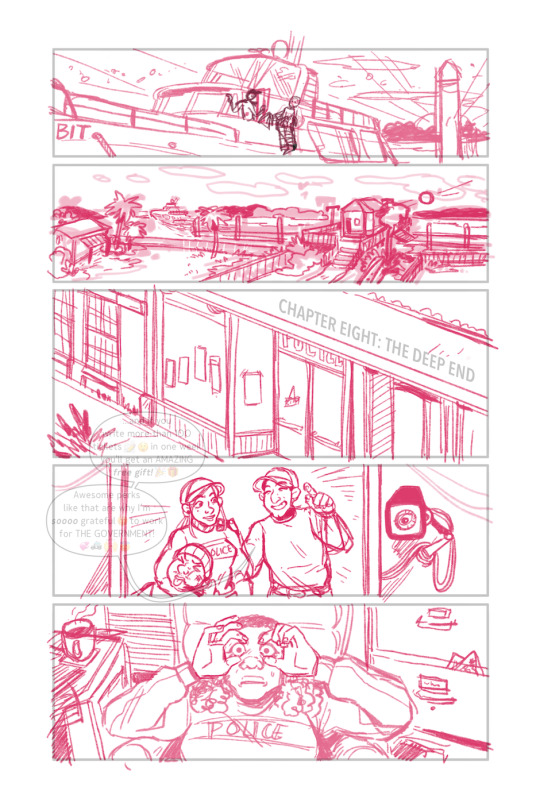
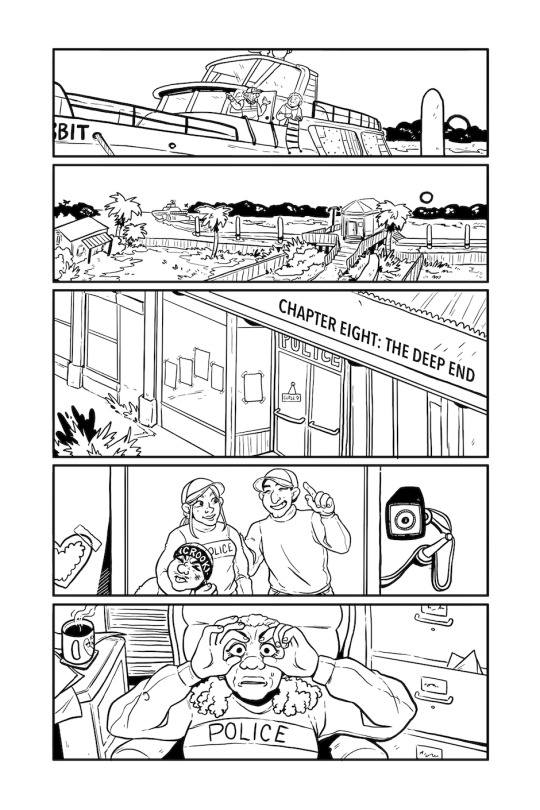
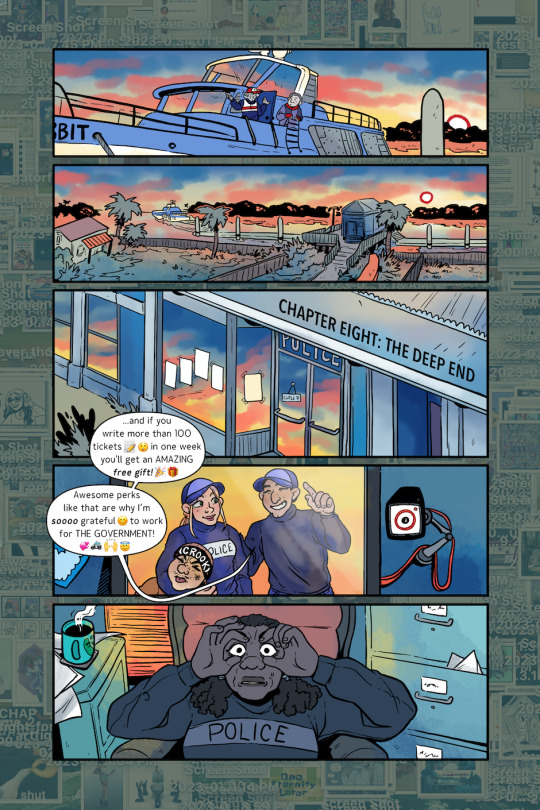
So! My process!!
Writing-> I think sometimes there's pressure to "write" your comic a certain way, I see people talking about script format and stuff a lot. That really doesn't work for me, though! I write my "first draft" script in short scenes on scrap paper, in whatever order they come to me. Sometimes a scene will just be one or two lines, and then a little description of what I want to happen in the rest of the scene.

Later I type the scene up, and write the "connective tissue" that fits between the disjointed scenes so they all flow together like they ought. I don't do page breaks or even character tag or action notes hahahaha I like it to be as BASIC as POSSIBLE so it's easy to edit. And since I'm the person drawing it I can almost always remember who's supposed to be saying what lmao
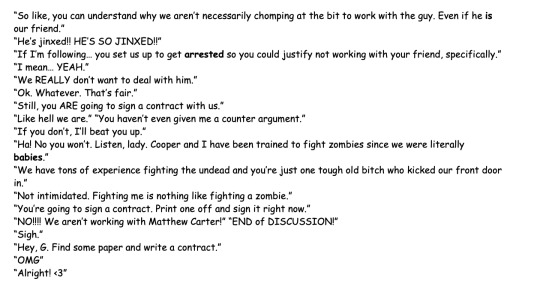
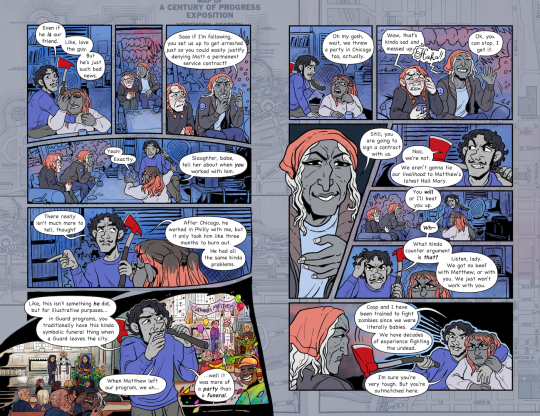
I edit a lot, but the most major editing is also probably the last bit... when I letter my pages usually I realize "they would never say that" and so I end up rephrasing everything. My art brain is sometimes waaaaay better at phrasing hahaha. Like you can see in the finished page for this script I rewrote like basically all of it, and actually went back to the original "sketch" script in a lot of places.
Thumbnailing-> my thumbs are really big, I draw them with markers on printer paper and keep them in a binder!! I like to thumb scenes in batches and I also usually write my dialogue on them, just so I can read through them before (and while) I draw to get a feel for how the pacing works. :)
youtube
Sketching-> OH sketching is also really hard for me! I don't have a good visual imagination so it's really important for me to make sure I have good references. Last year I was especially focusing on setting.
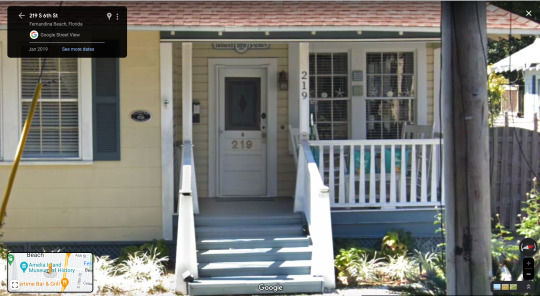
My comic is set in Florida. I'm lucky in that I used to live there and still go back to visit sometimes, so sometimes I can gather my own reference images! But more often I start on Google Maps or Zillow, trying to find buildings that have interesting features or the right kind of "look" for what I want. I'll also look up other interesting elements, my comic is set in a post-apocalypse and I'll research home gardening and things like that which people would probably have.
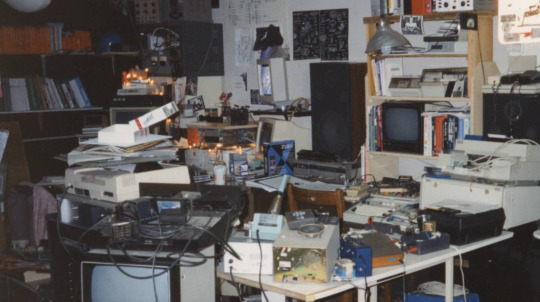
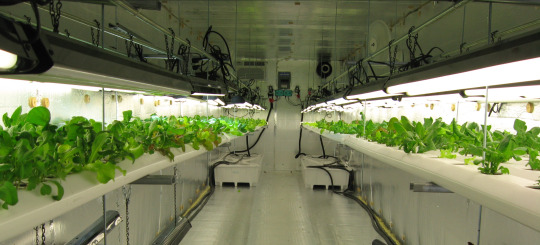
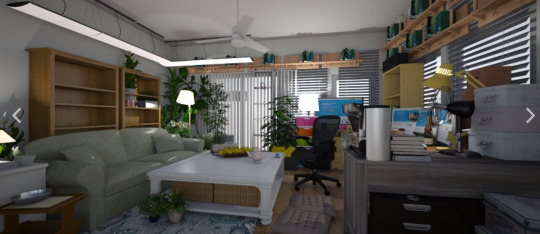
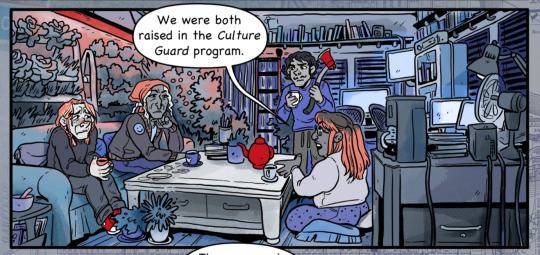
For example, in this set in chapter 7, I used Google Maps images, photo references of indoor hydroponic gardening, and like, 90's-00's hacker computer setups haha. Also my BFF Roomstyler.com, where you can make 3d house interiors haha!!
Lineart-> I LOVE lineart it is my favorite!!!! I sketch and ink two pages at a time, and it usually takes somewhere between 10-12 hours to do both steps.
I actually think my art looks best when it's just lineart... but I think my STORY is better with color, like it makes it clearer and easier to read and it has a better atmosphere HAHA.
Colors-> I think it usually takes me 4-6 hours to do 2 pages (I haven't timed myself as consistently as I time my lineart and sketching). I have a big file with small copies of my previous pages that I color drop from, and my characters are all flats only. The limited palette that I use is also really handy, it streamlines coloring a LOT.
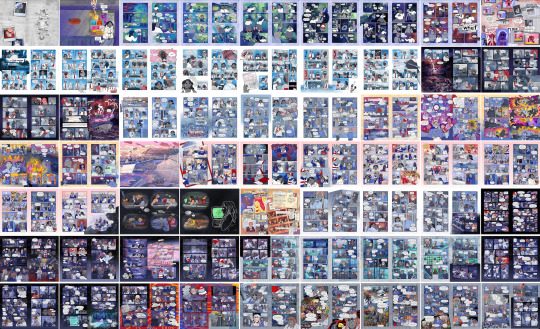
Finishing Touches-> aka I steal mercilessly from my one true love, my internet home, the beautiful and blessed Wikimedia Commons
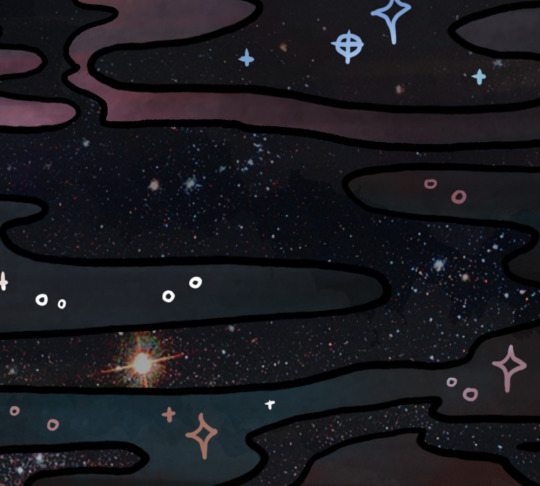
I put lots of overlay layers on my art! I like textures so having some strange little textures or pictures on things makes my art feel a lot more finished to me.
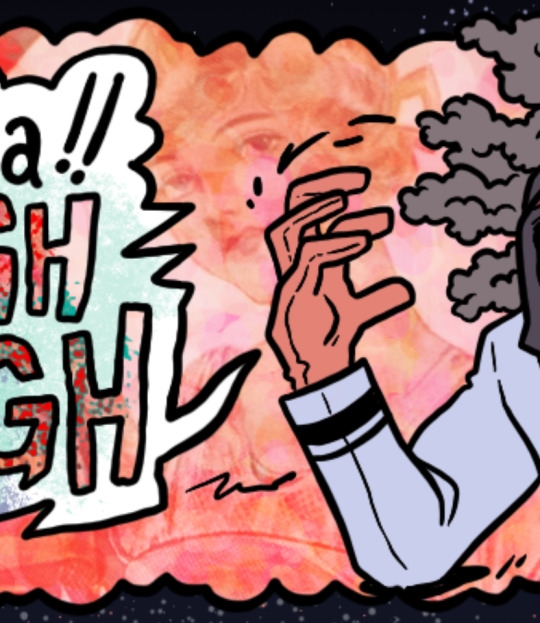
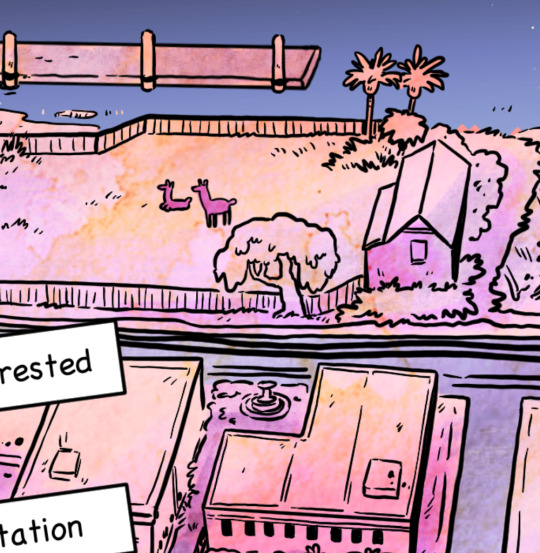
And finally my very most favorite ✨finishing touch✨ is the bright colored/patterned gutters that I use. Here are some of my favorites that I've made and used in the past!

And that's all!! I hope you guys have a very happy Webcomics Day and find lots and lots of wonderful new things to read!!!
40 notes
·
View notes
Text
Lazy Days Info Dump pt. 2
You read the title. Let's do this.
SO. I've been brainstorming ideas for the others characters within this AU, as in, the other Robinsons. These will just be little character bios, and these were made recently. So everything you see here is subject to change!
Lucille Still as lively as ever! When she's not baking or sewing, she's swimming in her family's pool. She tries to stay positive after the death of her husband, Bud... and that meant going to grief counseling.
Gaston A streamer/online personality. He started off by playing FPS games, but nowadays he's interested in the likes of indie games, especially indie horror. Yes... the other Robinsons have appeared in his videos on occasion. Like that one time Neil and Gaston made a "gingerbread house."
Art An intergalactic bounty hunter alah Celeste from HuniePop. It's from this job he met Lefty, and rescued her from danger. He's often away from the family for weeks at a time, but he makes sure to bring home cool alien artifacts for the kiddos for when he returns.
Fritz He makes OOAKs with old play line fashion dolls. He has the whole shebang... the 3D printer for more complex projects, the matte varnish, the sewing patterns, clumps of doll hair, a rooting tool, etc. He posts his creations online.
Petunia Not a puppet! She is still very much alive. Her first husband wound up in prison. He can rot in there for all she cares, because Fritz is a better man. He supported her dream of becoming a lawyer.
Tallulah A world famous model for a high end lounge, lingerie, and sleepwear brand. Her personality is inspired by Ashley's from HuniePop 2. Very chill and laid-back. Also the type to ask fucked up questions.
Laszlo Due to trauma from his past he'd rather not talk about, he's very intertwined with the internet aesthetic known as "Traumacore." This reflects in his digital art, using pastels and cute character designs mixed with dark and disturbing imagery. It's a coping/comfort mechanism for him. He's working on a graphic novel with this style.
Joe After undergoing bariactric surgery, he's taking his personal health a lot more seriously. His positive attitude online and drive to become a better him has landed him multiple brand deals.
Billie The hands on type. The type of girl to get her hands dirty building and painting model trains. She collects vintage and newer toy trains and displays them proudly on her shelf. Well, multiple shelves, actually.
Carl Built with a more cozy, humanoid appearance, he's the family's right hand robot. He's programmed with thousands of ways to enhance the family's daily lives, as well as advanced hardware to make him a truly intelligent AI.
Lefty The maid of the household. Her home planet was a desolate ocean, where a rogue group reined supreme. Now that she's on this exciting, new environment, she eagerly looks at everything with an intense curiosity.
Doris The butler. She's got some sass to her, I'll say that... She's got the same hardware that Carl has, so her developing her own personality was nothing to write about for Neil.
Spike and Dmitri Alien twins who were also rescued from one of Art's missions. They were never given names on their home planet, so the family gave them names. For some reason, they spend most of their day in the garden... sitting in flower pots. Maybe it's because their home planet was very lush? Who knows...
For more info about the AU in general and bios for the other characters, refer to this post -> Lazy Days Info Dump. For busts of the other members of the family, refer to this post -> Lazy Days Character Busts. Still wanna know more? Ask box is always open.
#rosey rambles#meet the robinsons#meet the robinsons au#lucille robinson#gaston framagucci#art framagucci#fritz robinson#petunia robinson#tallulah robinson#laszlo robinson#joe robinson#billie robinson#c4r1#lefty#dor-15#spike and dmitri#lazy days
8 notes
·
View notes
Text
Lecture Diary 2
So for this week, we talked about different ways people have reinvented old tech to make better and more sustainable tech. From using VR to create 3D Models to Hydroelectric power reinventing already existing tech is one of the best ways for us to progress while also reducing and recycling products so we can use less and be better for our planet. Something we talked about was 3D printers and the filaments that are used for them now there’s no sure-fire way to deal with the the plastic issue since once you make something with a 3D printer you really can’t recycle it at all after that. But, there is a way to turn bottles marked with a 1; PET bottles (Polyethylene Terephthalate plastic bottles) into 3D printer Filament. It’s one of the best materials for 3D prints that you need to be really strong. How the process works is that you first need to find PET plastic, It’s the one that’s marked with the number one and it’s also one of the most recyclable plastics out there. Then you cut it into a strip now first you want to start with scissors but then you can put it through a special type of cutting tool that will cut the bottle for you as you simply pull it through and wind it onto a spool.
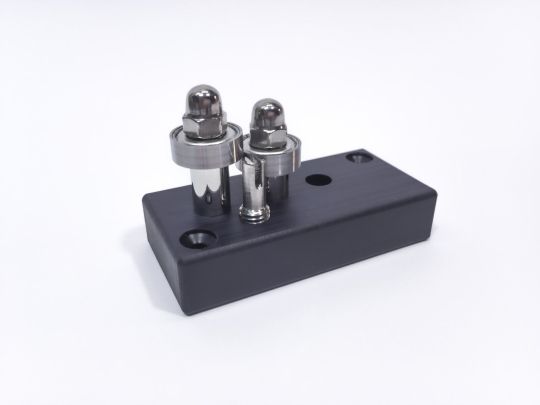
After you have it on a spool you can start pulling it through the filament machine with pliers till it is long enough to reach the larger filament spool. Then you simply attach it to the spool and let the machine run.
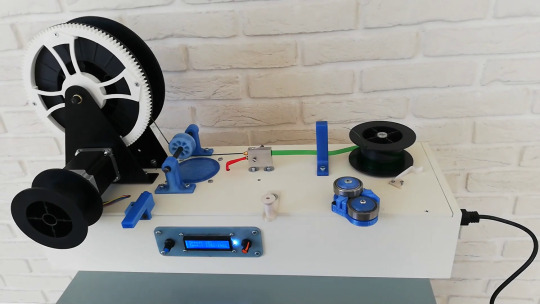
I really like the thought of reusing plastic since it is one of the main contributors to the pollution problem facing our world. It’s in our best interest to try and reduce the amount of plastics used and to recycle the ones currently being used. And I think this is a step in the right direction!
Also, one other thing we talked about in class that I wanna go off on before the other parts of this post, Kniterate; is a machine that you can use to make your own fabrics. I would love to use this machine and get to know its full potential.
BUT AIN’T NO WAY I AM GONNA PAY £15,999.00 FOR SOMETHING LIKE THIS.
It’s a great product but, I am a poor college student T^T so no experimenting with fabric printers and PET bottles in the near future that’s for sure.
In other news
We also had homework to read and take notes on an essay called “Anatomy of AI System”. I think this was an interesting read and that it was a bit eye-opening on the process of how things like Alexa’s and Google Home systems are made. I also really like that it mentioned the folk tales of the place of origin for Lithium that was pretty cool. Something else of note is that in the essay it is pointed out that we are still training AI with stereotypical actions such as men kicking and being violent and women caring for children. So it’s safe to say that AI is still pretty biased in its view of the world but that’s only because we as humans and creators have yet to teach the opposite of that.
I think when it comes down to it my argument on AI is this, as it stands AI is a tool that we as humans can use to better not only our understanding of the world but of ourselves. We can sit there and get mad about AI all we want.
I have heard people say time and time again tirelessly that AI is going to take over creative jobs and ruin the art world. And while yes things are going to change and the art world will never be the same now that AI is around we aren’t going to lose our jobs to it. If anything AI can be used to make our jobs simpler and faster. The thing that I think of constantly is just how long it takes for me to get a reference image for a position I am trying to draw a character in. By myself with my talent, years of practice, years of studying human anatomy/forms, a four-year art degree under my belt, and the understanding of proper sketching techniques; all of this and I still at times just can’t get the pose the way I see it in my mind. So I use the other tools at my disposal, I try to mimic the pose myself, I go online for hours and try to find a reference image of a pose that is even slightly similar, and I even commission models hoping they can give me the reference that I need. But that’s if you can commission people that’s IF they can even produce the pose you’re looking for. Sometimes you’re S.O.L. and have no other choice at your disposal. Do you know what would have helped from the very beginning? Having a reference image
Close enough to the pose and an AI to make the person slightly in whatever direction you need to get exactly what you’re looking for. Yes AI is very good at making its OWN art and YES people are going to use it for nefarious reasons but, it will be much more useful to us if we let it progress with our art forms. I think AI is going to be a very useful thing as we continue on. I mean it’s already here after all… what other choice do we have other than complain about it?
0 notes
Text
The Future of Home Cooking: How Technology is Changing Our Kitchens - Technology Org
New Post has been published on https://thedigitalinsider.com/the-future-of-home-cooking-how-technology-is-changing-our-kitchens-technology-org/
The Future of Home Cooking: How Technology is Changing Our Kitchens - Technology Org
Kitchen appliances are becoming more intelligent than ever. Take the Thermomix, for example – it transforms home cooking by combining several tools into one compact device.
Using its touchscreen, you can weigh ingredients, chop veggies, mix batters, and cook meals. Best of all, it connects to Wi-Fi, giving you access to thousands of recipes from its large memory bank.
The recipes can also be customized right on the Thermomix based on your specific dietary needs or what ingredients you already have. Now, creating restaurant-worthy dishes is a breeze, even for novice cooks. With this website innovation, like an all-in-one cooker, cooking has never been more fun or easy.
Cooking – illustrative photo.
The Impact of Technology on the Way We Cook and Eat
Technology is totally transforming how we cook and think about food. Appliances like Instant Pots and air fryers let home chefs skip some steps and speed up dinner.
Online recipes and meal kits have also made cooking more approachable for busy people. Now connected devices can monitor what’s in the fridge and pantry to help reduce food waste. Smart appliances keep track of our ingredients to suggest recipes based on what we already have.
Meal planning apps take all the hassle out of eating healthy, too. Cooking becomes personalized and fun as kitchen tools become more competent with voice assistants and 3D food printers.
All these innovations empower us to feed our families better and make mealtimes enjoyable. Technology is changing our whole relationship with food.
Smart Kitchen Appliances
Smart appliances are bringing connectivity right into our kitchens. From smart fridges to ovens, these high-tech helpers have convenient features.
You can start or check on your cooking from anywhere using your phone. Alexa does a lot of work to cook hands-free just with your voice. Things like ultrasonic dishwashers use less water and power, making smarter kitchens more eco-friendly.
Connectivity lets you automatically reorder grocery items right from the fridge, too. Smart cooking also helps reduce food waste since appliances learn your habits to optimize temps and storage. Today’s kitchen tech is making mealtimes way more efficient and easy – pretty cool what our appliances can do now!
Connected Kitchen Devices
Our kitchens are getting super smart! Connected devices are popping up everywhere to improve cooking.
Smart scales let recipes automatically adjust to exact amounts, which prevents food waste. Bluetooth thermometers monitor doneness from your phone so you never over or undercook. Apps like SideChef provide step-by-step video instructions to help anyone follow complicated recipes.
Websites connect appliance data, too, like your fridge keeping track of what’s inside so meal kits deliver the ingredients you need. Technology makes home cooking easier and helps us save money and food simultaneously. Our kitchen assistants are here to help!
AI and Machine Learning in Cooking
Kitchen appliances are getting super smart thanks to artificial intelligence! AI allows them to learn from your habits. Ovens and microwaves can now cook whole meals with just the press of a button using automated programs.
Fridges understand what you eat and suggest new recipes based on your tastes and ingredients. Apps take it a step further – they analyze nutrition to build custom meal plans for your health goals, like losing weight or managing diabetes.
With machine learning, devices get to know you better over time. Soon, cooking will be more accessible than ever, and we’ll all eat healthier with help from our high-tech assistants!
Food Delivery and Meal Kits
Meal planning allows people to think about healthy choices for breakfast, lunch, dinner, and snacks. Planning meals for the whole week can help save time and support nutritional goals.
Many meal kit services now provide balanced recipes with nutrition facts like calories, fat, protein, carbs, and vitamins/minerals. Customers can view this info online to help track their diet and make informed selections that meet their daily needs.
Taking a few minutes to plan carefully can lead to positive diet results long-term.
Sustainability and Smart Food Management
New technologies aim to make cooking greener and reduce wasted food. Smart fridge scanners and apps can track items and send alerts when foods near their expiration.
Meal planning features suggest recipes based on what you already have. Devices measure portion sizes to help control calories and costs. When creating weekly plans, some systems will notice if you have half a veggie left and propose a recipe that uses just that amount.
These smart tools help families be more sustainable in the kitchen and lessen the impact of expired or thrown-away meals.
Cooking Assistance and Virtual Chefs
New interactive devices are providing virtual help in the kitchen. Cooking assistants and virtual chefs offer step-by-step audio and video guidance through entire recipes. Users can start cooking by asking a smart speaker or home appliance for help.
Devices listen for instructions and give the next steps at just the right time without the need for reading. Some learn users’ preferences and stocked ingredients to offer tailored suggestions.
With built-in cameras and thermostat connections, virtual helpers can monitor progress and ensure safety. Their hands-free operation leaves cooks able to focus on food preparation fully. This emerging technology aims to take the stress out of cooking.
Challenges and Considerations
While innovative devices offer conveniences, some challenges exist. Smart kitchen appliances collect usage data, leaving customers to weigh privacy risks.
Not all have access either, due to cost or digital literacy. This can worsen inequality issues for low-income families. Maintaining traditional cooking skills remains crucial, too. Technology should enhance rather than replace fundamental techniques.
Many still find satisfaction in following recipes by hand and spending time with food. A balanced approach is essential so technology strengthens social and cultural aspects of sharing meals, not hinders them.
Manufacturers must consider inclusiveness, data protection, and allowing choice in integrating tech into home-cooked experiences.
Conclusion
The kitchens of tomorrow will likely blend clever inventions with tried and true cooking methods.
Devices that help plan meals, chop veggies, and take the guesswork out of recipes can help people cook more. But technology should never replace learning kitchen skills or sharing food with others.
Machines that understand what we have on hand and give simple instructions could inspire families to cook together again. As home appliances get smarter, cooking may feel less stressful and more fun.
As long as new tools preserve cooking’s heart, bringing people to the table, the future looks bright. With care taken, kitchen tech might make home cooking easier for more to enjoy.
#3d#ai#air#alerts#alexa#approach#apps#artificial#Artificial Intelligence#audio#Best Of#bluetooth#Cameras#connected devices#connectivity#cooking#data#data protection#devices#diabetes#diet#digital literacy#easy#Emerging Technology#Facts#Features#Food#food waste#Fundamental#Future
0 notes
Note
I have a genuine question: wouldn't it be better to practice creating your own art, rather than using these image generators? to each their own, but considering how many people struggle creating their own art because of depression following this "ai" boom, I know I personally would not want to contribute to something that makes other people feel bad about creating things by hand.
Hey, thanks for the questions and the chance to dive into these overdue thoughts from a personal angle, because you phrased them so well :)
The straightforward reason I don't practice drawing and create things with my own hands is that I simply don't have enough time to learn a new skill while working a 9-to-5 job while taking care of the family. Fandom is my escape, and there's only so much I can dedicate to it. Learning to paint demands significant effort, time, and talent, and unfortunately, I don't possess those gifts at the moment.
Let me be clear: "AI-generated imagery" can't replace traditionally painted arts, whether on canvas or through digital tools like Wacom or Procreate. They're not even in the same ballpark. Fun fact, I wanted to be a painter as a kid because my mom was one, but she shunned it because it didn't work out well for her. In the game industry I'm in now, Art directors and artists are still highly sought after and are crucial to any successful project. At the moment, AI generation can't precisely interpret what we envision or tell a client that, no, black is too dark for a 70 pt bold logo in a children's game with predominantly pastel colors. It can't even add weight to a line or create a simple walking animation. Returning to the point, we live in a time where both Photoshop skills and traditional oil painting are appreciated, where calligraphy and typewriting are both practiced, and where sculpture and 3D printer skills are both taught in schools. I hope for a future where AI imagery and the drawing community are not at odds but appreciated in their own ways.
For aspiring artists struggling, I can't comment directly as I'm navigating the same path. But I know the struggle is real, justified, and will pay off in the end. If you ask me to feel bad for them, it's like asking a working person if they feel guilty towards Uber drivers. The analogy falls apart because AI and creative artists aren't competing for the same limited real-life resources right now. If someone felt guilty for being able to do something others can't, they'd be living with guilt every moment.
If I sound a bit defensive, I hope for your understanding. I have imposter syndromes (deserved or not), being a woman in tech and an AI image generator (let's not stretch for the word AI artist). This blog goes on hiatus when I'm so depressed that I can't even open the page. I'm enraptured in the R&D process, but there's no one I can talk to about it. It's a different struggle, but I have terabytes of failed models, wasted hours, and spreadsheets documenting what might have gone wrong before the model reaches its best likeness. What's worse, there's little community for us. AI imagery gets a bad rep because there are mountains of perverts doing unspeakable things I witness every day on forums and servers while looking for the newest style or training method. I'm scared to tell people this is what I (can) do. Perhaps in the '90s, people denied going on the internet because it automatically equated them with being a porn-watcher. That'd be funny.
If there's anything to feel bad about, it's the copyright issue in the AI community. I try my best to use models trained over "ethically" obtained images, but one can never be sure. None of my work has ever been used commercially either.
This response has probably gone on a tangent for too long, and I'd like to appreciate your attention if you've reached this far. Fandom is my escapism, and I have so many headcanons that would otherwise be fleeting posts that vanish in a second. Now, I'm gifted with this new tool to indulge in them, and I feel truly lucky.
1 note
·
View note
Note
Hi! Anon from before who asked about fluidity and such, I have another question: How do you learn to angle heads / do different perspectives?
Did you take classes, use 3D models, or something else?
So sorry for all the questions, I really want to get better at angles and posing and such - facial expressions are a breeze for me, but I just can't keep proportions, anatomy, or poses right in my head.
TL,dr, how did you learn about all this stuff?
Don't be sorry! Asking questions is how u learn! Lil disclaimer that i'm sorry in advance if this answer seems kinda vapid and lackadaisical :")
I've never taken art classes of any kind in my life. A lot of what I know is from observing how other artists draw and tweaking their processes to something that'll suit my workflow and style better. I admittedly don't use 3D models as often as I should, but they speed up the process IMMENSELY. Sometimes i'll load up a model posing program and use it for just the hands/fingers LOL. It's actually helped me be more aware of how to segment parts of the body so I can "memorize" them a bit better. I actually cannot picture most things in my head properly, so I struggle with keeping tabs on proportions and angles of shapes and poses mentally too 😭
A fun lil trick I do to help with head angles tho that might help is i'll draw a "sheet" of paper over my main head form:

For some reason, i've found that this helps me visualize where the face goes and where it fits within a 3D space. As long as i know the general direction the oc is facing, I can bend and stretch stuff to fit as need be. IDK it's a simple way for me to keep track while drawing, and pretty effective too! 👇🏽
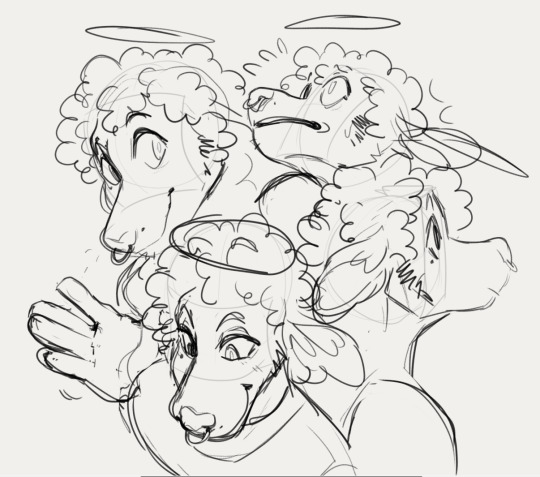
ok these are sloppy n off model a bit, but hopefully you can see what i'm getting at ghjsdfg. I've found making the "sheet" bigger/smaller to suit whatever you're drawing can help narrow down the angle better if you're struggling. Thinking of the construction of shapes and how they sit in a 3D space is helpful too. Most art programs have perspective rulers that you can use to keep a kind of guide of where your drawing is sitting on a perspective plane/grid. I use them when trying to do more dynamic postures!
Other than that, I literally just google/youtube whatever it is i'm trying to work on and click through as many resources as I can. Make notes of what works for me, what doesnt, what I can pick apart and reconstruct. I got my start in art by tracing other people's art onto printer paper when i was younger (never shared 'em, obvs) before learning people posted step-by-step processes of how they draw on dA (it's how I learned what "guidelines" where and how to use them in sketching) and using those. I spent a lot of my more formative years just mimicking other people's drawing habits and quirks until I found a set that worked for me, and expanded on that with just messing around in my spare time. Sometimes the only thing that helps is working through it until I get a result I like.
If you are looking for a more technical approach and wouldn't mind some critique on your stuff, I recommend a site called Drawabox.com ! I've never personally used it, but I have artist friends who have, and while it does cost a fee to access some of the video lessons, there are still a bit of free resources you can take a peek on that might help!!
SORRY FOR THIS LAME ANSWER HFGSHDF I have a very flippant approach to my art. Work smart, not hard as I always say 👌🏽👏🏽
Good luck!!
47 notes
·
View notes
Text
123d design 3d print

#123d design 3d print software
Now, attached to the nozzle, this blob mess gets stuck the good part next to it. If just one part doesn't stick to the bed surface, the material that should be used on the missing part bundles up. The good thing about regular old school washable gluestick is it helps the part stick to the surface while making it easier to remove. 3D Print Settings: Layer Height: 0.200mmīed Temperature: 50*C/122*F Blue painter's tape was used on the printing bed, and a thin layer of Gluestick was added to make sure the whole batch of x4 parts survived the entire print process. A bigger build platform can help you make lots of parts quickly. Just to give you a comparison - on my RigidBot Big, I could have printed the entire chess set in one 3dprint. This worked out in the long run since most of the pieces were in batches of (x4) anyway. Anymore and there were difficulties getting them to stay remain stuck to the build plate throughout the entire print-process. It turned out, (x4) parts at a time was the magic number. I filled my print bed with (x8) Pokeball Pawns to see if I make the whole batch at the same time. But how many at a time? I'd never done more than 3 of the same part at the same time before. Now, it was time to start 3D Printing these parts in batches. Those are necessary.for now.ģD PRINTING: With our previous R&D, we made sure the pieces could be 3dprinted in high quality. This will eliminate almost any post-processing, other than removing supports for the character on top. The bases of the pieces can be designed specifically for 3Dprinting. The supports on the base of the piece are unnecessary. REVISION: After making these, there are a few changes I will make to the models on GrabCAD & Thingiverse. Again, probably would make a great SLA part. I will test it again with the Prusa i3 MK2. I built a support column to hold the tail, but in the end, the piece was too small and intricate for that 3D printer. The tail was the biggest hurtle though, seeing as it hangs so far away from the part. His feet were not flat on the ground, and scaling was troublesome. The Mew piece was easy - just scale the model to the right size and put it in place. Once I had removed the top from the King piece, I needed to make a new base for the Kings to stand on. I wanted to match the chess piece from the original set so I used the King piece from OpenSCAD Chess by TimEdwards. Luckily, I found a Low poly Mew model from hairold on Thingiverse, and a Mewtwo V.2 model from Tan_Tata_Chan. Cool, but anyone could do this IF they have models to work with. Now remember, all I did here was manipulate models someone else already made. Note that Tinkercad does not have options like orthographic view or a proper text tool compared to 123D.This, of course, meant I had to create new Mew and Mewtwo pieces from scratch. I recommend it for beginners who want to try out Tinkercad but may not be ready to commit. When creating complex designs, 123D can sometimes run very slowly and Iâve often experienced crashes.
#123d design 3d print software
123D vs Other Platformsġ23D is a free software mainly targeted towards beginners or users with some basic CAD experience. Simply enter the dimensions of your 3D printerâs plate and youâre good to go. However, before exporting, remember to convert it back to millimeters! Edit gridĮdit Grid allows you to set the grid size to match your 3D printer. If you want to use inches, you can by adjusting the unit. Otherwise, you could end up making a huge error. Knowing this, be careful when drawing custom designs. UnitsģD printers use millimeters as the default unit for measurements. If required, the user can turn it off and drag the object randomly around the grid. Snap decides the intervals that an object can be moved/rotated on the grid. After selecting the primitive from the menu, you much first input the dimensions of the object and then the object can be dropped on the grid. One cool aspect of primitives is that users can adjust their size. Primitives are pre-made 3D models that users can start a design with, but they are limited. Meshmixer and 123D Make are both handy tools I use to check my model before exporting it to my 3D printer. I only work with STL but highly recommended that users figure out their 3D printerâs requirements and choose the appropriate format based on that. With Import, users can import a 3D model or a sketch/2D image in SVG format and then extrude this sketch to 3D.Įxporting as a 3D model provides four format options: STL, SAT, X3D, and VRML. 123Dx extension, which means these files can only open in 123D. Note: Files saved to your computer are saved with a. The tabs shown by the green arrow are Undo (ctrl+Z) and Redo (ctrl+Y) and come in very handy when designing a model.

2 notes
·
View notes
Text
Mr. Sandman pt. 2 (Miss Venable x reader)
After one month I finally finished the second pt, whooho :) Well i guess its a bit different, than the first chapter, but i hope yall like it- I can imagine making a third pt of this, but it would be much more fucked up and weird, than this chapter..lol I wanted to say thank you for your nice comments under the first chapter, they made me really happy :3
summary: three weeks have passed and you are trying to understand everything
warnings: depression (idk if a robot can have depression-), uhm bruises,..
And if ur name is Laura, don't hate me! yikes hahah
here is the first pt. :
https://littlejeaniehugsbumblebees.tumblr.com/post/639876084639334400/mr-sandman-ms-venable-x-reader
hello google translate:3

Mr. Sandman, bring me a dream Make her the cutest that I've ever seen Give her two lips like roses and clover And tell her that her lonely nights are over
It had been 3 weeks since the thing with the letter. 3 fucking weeks since you found out you were nothing more than a programmed machine.
And everything had gotten weird.
Ordinarily, you might call your behavior depression, but you were a goddamn robot and couldn't actually feel anything.
Sometimes you would spend hours in front of the mirror looking at your strange body. No.. to look at her body. You were just an image of her and your body was just a thing made of metal, tied through with cables and covered with a skin-colored rubber.
It all made no sense, all your memories of your family, your friends and your meeting with Mina (your first meeting in your bookstore, your first date, the first kiss, ..) all of this had to be real. But as Mutt had explained to you, your brain was just a hard drive with a stored script in which Mina had invested a lot of time to make your "memories" as detailed as possible. After all, she wanted you to be perfect.
To be honest, you had no idea how to act towards Mina. She was right somewhere, without her, you wouldn't exist. Maybe you should be grateful or happy that she created you. And on top of that, you really thought you loved her, needed her, or wanted her. But inside you knew that you only did all of these things because she programmed you to do so. Nothing you ever did was really your own excuse. You were just what she wanted you to be and in addition to that, you weren't even unique anymore. Mina had just copied you and used you for her own purposes.
Inwardly, you tried to fight the urge to kiss her, sit on her lap, or even smile at her, simply because you knew it wasn't what you wanted, but what she wanted. She wanted you to kiss her, wanted you to sit on her lap and wanted you to smile at her.
And all these feelings that cooked in you at the same time, the forced love for Mina and at the same time the hate because she was so selfish, let you get tired and pulled you down into a deep hole.
But you were a robot, you couldn't feel anything.
------------------------
"You should fucking stop coking while you're working on her", hissed Mina, staring into the stupid faces of Jeff and Mutt.
"She should be perfect, do you understand that?"
"Calm down", Mutt mutturd, raising both hands as Jeff swept the rest of the cocaine off the table. The fine powder fell like snow on the floor and the fact that these drugs were now on the white floor made Mina even more angry.
"We're the best at this and we know that if she doesn't turn out perfect, you'll probably kill us," Jeff explained with a smug grin on his ugly face.
"It's better for you if you know," Mina growled, pinching the bridge of her nose.
"How far are you?"
"So," Jeff got up bored to go to his project.
"All we have to do is insert her face and load your script from her hard drive and then we're done."
Mina's gaze wandered to the 3D printer Jeff was pointing to. Inside was the mask of a face ... your face. It was her eyes staring at some point, the same blush of her cheeks on yours, as was the gentle curve of your lips as hers.
"May I ..?" Mina asked and held out her hand for the mask. Jeff shrugged.
"Do what you want, but then bring the mask with you to her body, then we can finish it off."
The man turned to go to the computer next to the body on the table.
"Meanwhile I'll be loading your script on her hard drive", he called afterwards, but Miss Venable no longer listened to him. Her attention was fully focused on the mask, which she had carefully removed from the printer.
The face looked almost dead in her hands as not a single facial muscle was tense and yet Miss Venable could already tell that you were exactly as she had imagined. Just like she remembered Y / N.
Miss Venable stepped away from the 3D printer to walk past Jeff to your body.
She took off her leather gloves before running her fingers over the exposed skin of your arm. It was fascinating how much the rubber felt like real skin. It wasn't the first time, that she saw the result of your body, but it always fascinated her.
Her gaze wandered to your head and she was startled, when she saw directly in your head on the hard drive, that was connected to Jeff's computer by a black cable.
"And she won't ask any questions?" She asked, turning to Jeff.
"Nope," said Mutt, who stood with his arms folded next to his colleague to stare at the computer.
"I took the liberty of reading your script and apart from all the crazy sex you wrote down there, it seems to be very verbose."
Mina's eyes narrowed at Mutt's words and she bit the inside of her cheek to swallow all the insults that came into her mind. This script had been private.
On the other hand, she was tired of waiting for you and just wanted it to be over as soon as possible and that she could finally have you after waiting so many years.
"Okay, this is what we got," Jeff began as he got up from the computer and walked over to your body to pull the cable out of your head.
"Y / N will think, she was here to pick you up from work and then she would have passed out for whatever reason. So she won't wonder why she is here. Well, you know, she thinks that you've been together for a few years, so you have to play along right away. "
"I've spent so many years preparing for this moment," Mina hissed as she watched Jeff insert the face into your body.
And she was right, for years she had lived in her house like a second person was living with her. She had bought Y / N's size clothes, her make-up, her perfume, the books she liked ... Someone would have called it madness, but to her it was confidence. Just because she knew she'd have you one day. And today she could finally take you home with her.
"We're ready," Jeff said, turning to Mutt.
"You can power her up."
"Wait," Mina interrupted while she stared down into your blank face. Your eyes were closed and now it almost looked like you were sleeping.
"I want to be alone with her, when she wakes up."
"B-but what if something doesn't work?"
"It will work."
"Your decision", Jeff mumbled and went to Mutt to leave the room with him.
"Oh and Miss Venable, you know, that telling her about your her identity wouldn't be the best idea."
"She will never know, I'll make sure", Mina replied and went to the computer to switch you on. As quickly as she could, she came back to the table you were lying on, staring expectantly into your face.
And then you came to life.
First your eyes opened and Mina saw you blink a few times confused at the bright ceiling lamp.
"What's up, honey?" You asked her with a frown, but Mina couldn't answer. You looked so damn real, just like her.
"Are you okay?", You grinned crookedly while you sat up.
Your smile, the slightly curved eyebrows and your lively eyes, it was perfect.
"I- I am just happy that you're awake again," Mina finally managed to stutter.
"Naww you were worried about me? You're cute," you muttered, reaching for her hands.
"Can we go home now?"
Mina nodded slowly while she stared into the loving glitter eyes.
You were perfect
Wilhemina opened her eyes. The image of your sparkling eyes was still buzzing around in her head while she stared at the ceiling of your bedroom. Damn it, how many weeks had you not looked at her like that?
Miss Venable was usually not one to wake up at night, but since you knew what you really were, she slept badly and at night dreamed of the time when you didn't know and you were both happy. In addition, the weight of your head was missing on her chest..Your arm wrapped around her waist and the locks of hair that usually tickled her face.
It was almost impossible to sleep like this. She just needed to feel like you belonged to her. How many times had Miss Venable dreamed of Y/N in Jonathan's arms one night and then woke up only to see, that you were as close to her as you could possibly be?
And since you knew it, you just lay next to her in bed, curled up in yourself and felt worlds away from Mina. She was sure you were toying with the idea of sleeping in the guest room. But you could never do that, because that's how she programmed you. You wanted to be with her.
Mina turned her head to the side to see you. You lay on your back next to her and stared out the window with glassy eyes. Lost, thought Miss Venable.
"Why are you awake?" She asked softly and grabbed your hand, which was on your chest.
"I can't sleep"you replied dryly without looking at her.
I don't need to sleep, I'm a fucking robot Wilhemina.
"Do you want to read? Uhm- We haven't read together in ages," she asked and began to run her thumb over the back of your hand.
You just shook your head before turning to her and looking at her with such a pain in your eyes, that she wanted to cry.
"I'm not real, Mina," you said in a thick voice as tears came out of your eyes. You reached your other hand to your face to wipe away the tears.
"These tears are not real."
"That is not true." Mina whispered and took your other hand as well.
"You are here and you are real."
"I'm not even alive. I'm just a dead thing made of cables, I live as much as your computer does."
"Don't say something like that.", Mina mumbled reaching behind her to turn on the bedside lamp. She actually wanted to say something, but when she turned back to you, her eyes fell on the small bruises on your arm.
"What the hell, Y / N", she scolded in horror and ran her fingers over the dark spots.
"Oh, it's not that bad," you said quickly as you pulled your arm away.
"It's actually quite interesting, you know, when we were in the office to fix my hand, Mutt explained to me that I have certain sensors under this rubber layer, that make me think I'm feeling pain. And how my skin changes color when I injure myself..you know, its really cool"
Mina looked at you disturbed, while you explained to her factually how interesting you found that.
"Mutt sent me the plans for my body too," you continued, staring thoughtfully at your forearm.
"It's so fascinating to see how my body digests food or how my emotions work."
"Why are you in contact with this idiot?", Mina frowned.
"Because I wanted to know how I work..I also noticed that I can't get any older and it's kind of funny."
"Funny", Mina repeated, planning a thousand ways in her head, how she would kill Mutt.
----------------
"You fucking idiot," she hissed the next day as she hobbled into Jeff and Mutt's office.
"How dare you even think you have the right to clear Y / N?"
"I thought, it would be good, after she found out everything," Mutt muttered without looking up from his computer.
"Oh yeah?", Mina's eyes sparkled with anger.
"And I thought, we said, it would be best if she didn't know."
"I understand why he gave her the plans," Jeff interjected.
"Who the hell asked you ??", Mina spat and Jeff shrugged.
"I'm just saying, that I think it's better for her. You want her to be happy and I think that's only possible, if she knows who she is."
"Oh no," Mina shook her head. "I want her to be like Y / N again and unfortunately that won't work if you explain how her robot body works. You could have sent her the script right away."
"Who knows, maybe I'll do that too," Mutt mumbled and looked enviously at Jeff, who was already coking again. "She deserves to know everything."
"You won't do anything like that," Mina growled dangerously.
"You both still work for me and what I do with my girlfriend is my decision".
With that she turned to walk out of the office and eventually out of the building. She just wanted to go home, but at the same time she knew that you and not Y / N would be waiting for her there.
"I'm home princess", she called out loud as she always did when she came home and like the weeks before she got no answer from you. Mina sighed as she hung her jacket on the stand. She hobbled into the bedroom and saw you the night before, just lying there and staring out the window. You hadn't gone to work in the past few weeks, it felt kind of pointless.
"How was your day, princess?" Asked your girlfriend, who was lost in the doorway and tried to get you to talk somehow.
"Good," you said curtly. "You didn't want to tell me how long I've been around, but I think I figured it out today."
Mina's breath caught.
"Did Mutt tell you that too?"
"Nope," you mumbled. "It was me alone. Well, I noticed that based on what I thought I knew, we've been living together for 4 years, but there are only pictures of the last two years, so I think, I'm 2 years old. Somehow that sounds funny, doesn't it? You're dating a two year old. "
For a few seconds, Mina just stared at you. You were right, you were two years old.
"When will you finally get back to normal," she finally mumbled and stepped outthe door frame to sit on the bed. You snorted in annoyance and shook your head as you sat up.
"Define normal, Mina."
"When will you talk to me again? When will you kiss me again? Will you sit on my lap or at least smile at me?" She screamed, making you wince at her volume.
"You treat me like I did something wrong."
"Sorry, but do you find it normal to live with someone, who is actually dead and looks like your 'big love'?" You yelled back.
"It was normal until you knew it and now you pretend there was something wrong with it," Mina stared at you in disbelief, as if she didn't understand how fucked up these facts actually were.
"You could at least have made me unique with a will of my own .. I could have loved you anyway and if I had decided it myself, that's actually how it works," you spat as you leaned against the headboard.
"Then you wouldn't have been like her," Mina replied dryly and you just rolled your eyes.
"So what?".
"So what ?!", Mina repeated angrily.
"Maybe because the only person I love is her and not you?"
Your eyes widened at her words.
"You- you are insane, Mina," you stuttered and got up to walk out of the room. And you would have loved to leave, but you were a human boomerang, no matter how far away you went, you would keep coming back to her. Because that's how she programmed you.
----------------------
A few days went by and you thought a lot about the fact, that she had told you in the face, that she didn't love you but this woman. And you started to hate it all. You hated Mina for her incredible selfishness. You hated yourself for being completely at the mercy of her because she programmed you that way and you hated Y / N (although you were actually Y / N, only in lesbian and metal) because Mina loved her and not you.
You knew, that Mina regretted telling you that, at least she tried to apologize to you later, but you ignored her.
In your eyes, what Mina felt was no longer love, but madness. And if you hadn't hated Y / N, you would probably have prayed for her, that Mina wouldn't have the idea of kidnapping her. Probably the next step on the insane scale. First Y / N had decided on Jonathan and then the stupid robot broke, so Mina was only left with kidnapping as a way out.
You really did your best to understand her behavior, but you just couldn't. Okay, well ... you were just a stupid robot and you only knew empathy from Mina's script.
"Well," you began when you came into her working space on Wednesday afternoon and sat across from her at the desk.
"I've thought of something."
That was the first time in days that you spoke to her without being asked.
You had actually decided to ignore her, until it was enough for her and she decided to leave you. However, the human part of you (Mina's ugly script) thought it would be fair to at least give her the opportunity to explain to you why she was the way she was.
Mina looked up from her laptop and smiled gently at you.
"Anything you want, princess".
You could hear the relief in her voice and you knew she was probably glad you spoke to her again.
And to be honest, you liked that situation. The fact, that she was so eager to talk to you again gave you an incredible feeling of power.
Usually you played by her rules and now you had the reins in hand.
You crossed your arms over your chest and looked at her for a few seconds with narrowed eyes. Despair literally glittered in her eyes and you couldn't help but enjoy this moment.
"I want to get to know Y / N", you finally said and watched as her brown eyes widened.
"You can't be serious," she whispered in disbelief.
"I am absolutely serious."
You shrugged your shoulders.
"You want me to get 'normal' again, but for that to happen, I have to understand you first, and here we are."
"But- ..", Mina started and then broke off herself. This stunned look sparked another war in you.
One side wanted to love her and tell her the idea was stupid, while the other side of you hated her profoundly.
"I hope you are aware, that this is not possible," she said quietly.
"And why not? Because then she finds out that you are a psychopath? This is your problem and not mine."
"Y / N, I can't do this," she mumbled, always seeing youstill horrified.
"I can dress up or something," you replied and immediately hated yourself for your willingness to compromise.
Mina shook her head.
"That's impossible Y / N ... your voice even sounds like hers."
"Nobody pays attention to the voice."
"Jonathan would notice," Mina said, pressing her lips together.
"Jonathan?" You repeated, confused, and raised an eyebrow.
"Her Husband," she mumbled softly.
"And why should your husband come with her, when I just want to see her?"
"He does not like me."
"And why should you come with me, when I want to see her?"
"Oh Y / N, come on", Mina rolled her eyes. "Do you really think, I'm so stupid and leave you alone with her? No way."
You snorted in annoyance and shook your head as you stood up.
"It was clear that you wanted to be in control of that too," you muttered, turning to walk out of the room.
"I'll leave the decision to you, Mina, but don't expect me to come back to you if you don't even give me the opportunity to understand you."
----------------------
And Mina actually didn't seem to have given up hope, when she told you on the same day, ,that she would agree to your request.
It was maybe a bit ridiculous to dress up because of the whole thing, but otherwise Mina would not have agreed and you also wanted to spare Y / N, what had happened to you the last few weeks. By being basically Y / N, you knew exactly what it would feel like for her to find out the truth about you.
"So .. what do you think?" You asked when you walked into the hallway to Mina, who was already waiting.
Mina looked you up and down critically.
You had to do your best not to look like yourself, or rather not to look like her.
Dyed hair, different make-up, more conspicuous clothing and jewelry.
"I don't like it," Mina muttered and you rolled your eyes.
"It's not about whether you like it, it's about whether I look like her."
Mina shook her head.
"You definitely don't do that and I still think it's ugly."
"Well, maybe I should always dress like this now," you muttered as you stepped forward to leave the house.
During the drive to the café, Mina explained her rules to you and that she would interrupt the whole thing immediately if you didn't follow them.
But you didn't listen to her at all. In your mind you were with Y / N and the life that was actually intended for you and it annoyed you, that Mina was so addicted to control.
"So, behave, understand?" She finished her sermon as she parked the car.
"Do I have any other choice? Otherwise you would probably take me to the junkyard," you joked and climbed out of the car, only for Mina to come to you and take her hand in yours. You wanted to push her away, her behavior was disgusting, but instead you gave her a warm smile and pressed a quick kiss on her cheek.
You knew exactly how much that would hurt her.
Mina pulled you into the overcrowded café and despite the many people you immediately discovered the young couple, who were sitting at one of the back tables.
Y / N, who had a child on her lap and her husband Jonathan.
Shit, shot through your head. They look so happy ..
You felt Mina's grip on your hand tighten a little, and if your bones weren't made of steel, you would have been afraid, Mina would break your hand. As you both approached the table, your eyes were glued to Y / N. In fact, she looked exactly like you, the only difference being that her hair was a little longer than yours. She moved like you, had the same posture as you and wore the same innocent smile on her face as you always did.
And as much as you loathe Mina, you had to give her one thing: she had done an excellent job designing you and you finally understood, what she always meant when she told you, that you were perfect.
She could have shown you a photo of Y / N and you would have been 100% sure that it was you.
"Oh Mina, hi", Y / N squeaked excitedly and got up from her seat when she saw Mina and you and you couldn't help but grin. Stupid thing.
"Hello Y / N," Mina mumbled when Y / N came and hugged her.
"I'm Y / N," Y / N said to you with a polite smile after letting go of Mina.
"And this is my husband Jonathan and our daughter Emily."
Your gaze wandered to the child who paid you no attention and to Jonathan who smiled crookedly.
"Uhm Y / N, that's my girlfriend Laura", Mina stammered and you looked at her confused. Laura?
"Hi," you mumbled tersely, trying to bring a smile to your face.
You watched Y / N turn away from you againe to sit next to your husband and put the child back on your lap.
"God, I'm so glad, that we can meet," Y / N said excitedly as Mina and you sat down (Mina across from Y / N while you sat down across from her annoyed husband).
"You know, I was really sad when you said a few weeks ago you weren't going to our college meeting .. I missed you, Mina."
You knew how much Y / N's words would hurt Mina and suddenly you found the fact, that you were sitting with her in this cafe with the real Y / N and her great life more than just amazing. And you knew that Mina made herself very vulnerable at that moment, which was actually a rarity.
"You know, Mina, I was really happy for you when you told me that you had a girlfriend," Y / N said while she stared at you curiously. Holy shit.
"How did you meet?"
"Uhm she-" Mina began, but you interrupted her.
"Let me tell her, honey."
You grabbed Mina's hand, that was on the table and crossed her fingers with yours.
"Well, as you know, Mina works in this robot company. And because Mina is not stupid, she had the great idea to create a human robot that exactly meets her ideas, who wouldn't do that if you were CEO of this company? And unfortunately her ideas looked exactly like me and in front of you sits the end result of her experiment and thats our lovestory. "
Y / N and Jonathan stared at you in confusion and you could hear Mina holding her breath. You held this tension for a few seconds before you laughed out loud.
"Oh my god, guys..that was a joke", you laughed and immediately the looks of the others relaxed again. Mina cleared her throat only to growl a quiet "not funny".
"So you know, I work in a bookstore and she was my customer back then. Love at first sight and that shit. And then we started dating," you explained and looked at Mina lovingly from the side. Disgusting.
You heard Y / N squeak softly next to Jonathan and you wondered if you were as annoying as she was.
"Thats so cute," she said. "And how long have you been together?"
"4 years", Mina muttered and you hummed in agreement.
"I'm happy for you," said Y / N and looked back and forth between you and Mina, smiling.
"Jonathan and I have known each other since college, as Mina must have told you."
"Oh yeah," you said, staring at the child playing in Y / N's lap. It looked just like her, and who knows, maybe it was just a robot?
"Mina told me a lot about you, unfortunately a little late. Well, whatever, what are you two doing?"
"We're both mechanics and work in rocket construction," Y / N explained and Jonathan just nodded.
"You know, Jonathan is currently working with other mechanics on a rocket that will go to Mars."
Y / N gave Jonathan a proud look.
"Oh wow, that's so cool," you said with mock admiration as you stared at Jonathan with bright eyes.
"You know, Mina's work is really boring, but rocket building? That is so interesting, tell me more about your work, jonathan."
The man in front of you looked at you confused as you cocked your head and smiled sweetly at him.
"Uhm, so I work in a team with 14 other mechanics," he explained bored and crossed his arms over his chest. "And we plan to finish the whole project within the next two years."
"And should the rocket be for humans?" You asked as you put your hand on his arm to remove a lint that didn't exist. Beside you, you could feel Mina squeeze your hand tight and you knew, that she hated to see you obviously flirting with the man.
Jonathan cleared his throat and pulled his arms apart again so that you had to remove your hand again.
"This rocket is supposed to be for robots," he muttered, looking at his wife, who was sitting next to him, smiling gently.
"Oh, did you hear Mina? Robots?" You said as you turned to Mina to look at her with shining eyes.
"Maybe I should report to NASA, I would be the perfect astronaut for this mission".
You looked back at Y / N and Jonathan, who obviously didn't know what to make of your statement again. You grinned cheekily when you put your hand on Jonathans again.
"I understand, that all of the robot comments might sound a bit confusing, but you have to know, that Mina has some really weird fetishes."
------------
"What the hell was that supposed to be?" Scolded Mina after the two of you had reentered your house. You turned to her and shrugged your shoulders.
"I don't know what you mean, honey," you said with an innocent smile on your face as you approached her passed to enter the living room. Mina watched you angrily as you let yourself fall on the sofa to stare indifferently out of the window.
"Those stupid robot comments?" She hissed angrily.
"And then the disgusting way you stared at Jonathan with .."
You snorted in annoyance.
"Of course it is that thing that bothers you".
"Yes, it bothers me because you know that I hate him", Mina hissed and hobbled into the room to stand in front of you.
"You fucking belong to me Y / N .."
"Of course I'm yours," you mumbled sadly and while you were still looking out the window, you could feel her angry eyes digging into your skin. You thought back to the previous afternoon. Y / N had started talking about their perfect life in response to your questions. Her and Jonathan's career, and then cute Emily, who had been sitting at the table the whole time playing with a teddy bear. You noticed, that as a stupid robot you could probably never have children and you couldn't help but feel envy for this woman and again there was this hate for Mina.
"Okay, take that off," Mina suddenly said in a sharp voice. You looked at her confused and blinked a few times.
"Please what-?"
"Take. That. Off.", She repeated, growling, while her eyes wandered over your body. "This makeup, the jewelry and these clothes, that's not you. And I want you .. now"
"Oh no ... I definitely won't do that," you breathed as you stood up.
"I told you, I didn't want anything physical from you until things were cleared up."
"I waited a long time Y / N and nothing happened, so take this shit off," Mina spat, staring at you impatiently.
"Leave me alone, Wilhemina," you muttered as you stepped past her to leave the room.
"You will come back immediately, Y / N", Mina suddenly shouted in a tone that was strange to you and immediately made you jump. Her voice suddenly sounded so shrill that it gave goose bumps over your body.
You turned around automatically to go back to the living room, where Mina was still angry and looking at you expectantly.
"I want you to take your clothes off," she said sharply, and you just couldn't argue. There was that sound in her voice that she had never yelled at you with, even though you had argued a lot in the past few weeks.
"Now, Y / N," she hissed loudly before she hit the floor with her stick and you immediately began to take off all the jewelry, that you had only been wearing to not look like Y / N. You grabbed an unused kleenex, that was lying on the living room table to wipe the lipstick off your lips. Your fingers carefully removed the lashes, that you had placed on your eyelashes. Your eyes were still on Mina, who had meanwhile sat down on the sofa and watched your every move. You stood in front of her, undecided after throwing the handkerchief with your lipstick and lashes on the table.
"I want you to sit on my lap," said Mina and suddenly you understood why you were actually doing what she wanted.
“I want.”
Damn robot.
You carefully climbed onto her lap and stared sadly into her brown eyes, which were dark with lust.
"Good girl," she hummed, sending warmth through your whole body.
"Its that what you want, isn't it? Be my good girl?"
You looked down at her with glassy eyes before you nodded.
Immediately her hands began to wander over your body and you knew that you had failed.
You had never hated yourself and your stupid body as much as you had for the next few hours. As warm tears of frustration ran down your face, you moaned her name like a whore. It was fascinating how your body reacted to her touch, you wanted her so bad, simply because she programmed you that way.
With that she had won.
You had fought her for 3 weeks, only to end up in bed with her again. You hated her for it and you hated yourself and still you let her fuck you so senselessly.
When you found yourself in your bed a few hours later and felt her naked body pressed against yours, you felt more terrible than ever. Mina had her arms wrapped tightly around you and you could feel her breath on your neck. It was all disgusting and you noticed how it got too much.
You carefully freed yourself from her iron grip to go quietly from your bedroom into the bathroom. You turn on the light and stand in front of the mirror to examine your naked body. Disgusting.
Your face looked completely tearful, with a swollen lower lip that she had a few hours agohad eyes.
Your body was covered with small bruises and the prints of her fingernails and suddenly you could feel her hands running over your body again. It was electrifying.
You hated this picture in front of you. You were only there to be hers. To do what she wanted. And there was nothing you could do about it.
Your fingers carefully traced her markings. None of this was real. Your skin was some kind of rubber that only discolored. An illusion to hide your cables. And you've had enough of this human shell, this illusion. You were a robot and you looked like a human, you acted like a human and that didn't make any sense. You finally wanted to know who or rather what you were. Your eyes wandered from your reflection in the mirror to the sink and the small nail scissors stabbed your eyes.
The whole thing was idiotic, but you couldn't help but hold out your trembling hand for it.
----------------
A few minutes after you got out of bed, Mina woke up too. The lack of warmth in your body was missing, as was your weight in her arms. For a brief moment she was afraid, that you would finally have run away, but then it occurred to her, that you couldn't run away, that's how she had programmed you. Still, she had the feeling that something was wrong.
Mina sat up to grab her dressing gown, which she pulled over her naked body, and then hobbled out of the bedroom into the hallway to look for you. She didn't have to look far as the light shone from the open bathroom and she saw you leaning over the sink.
"Princess?" She asked softly and put a hand on your bare shoulder. You winced at her touch as you turned and revealed to Mina what you had done. Mina let out a shocked scream and stared in horror at your slashed arm, which revealed all the cables and your metal bones.
"What the fuck are you doing ?!", She screamed angrily as she grabbed your arm.
"I- I just wanted to see my real body," you stuttered and hid the nail scissors behind your back.
"Don't you see that you are destroying everything?", Mina spat and looked at you hurt.
"You're the one who breaks everything."
"Mina, please," you mumbled and pulled your open arm back again.
"I just want you to be normal again," she breathed and felt tears come out of her eyes. You shook your head slowly.
"We already had this conversation, I'm not going back to normal, you have to understand."
"Oh I understand it now".
Mina looked at you thoughtfully for a moment before continuing.
"Get dressed."
"It's 5 am," you said and watched in confusion as Mina turned around to go back to your bedroom from the bathroom.
"You understood me, Y / N", Mina mumbled and heard how you ran after her angrily.
"Make up your mind Mina," you hissed as you walked past her to your closet. "Before you wanted me to take my clothes off, just so you would tell me now to get dressed again."
"You can also accompany me to my office naked," Mina hummed, who started to get dressed. You spun around and stared at her in confusion.
"You want us to go to your office?"
"Exactly".
"Forget it," you snorted and shook your head.
"I won't do that shit. You can't-"
"Shut the fuck up!" Shouted Mina.
"I want us to go to my office and you will come with me, do you understand me?"
She glared at you and you nodded quickly.
"Good," she hissed. "Now damn it, get dressed and shut up."
----------
Mina was incredibly nervous when she drove to her office. She didn't really know what she wanted there herself.
She wanted you to go back to normal, but you didn't go back to normal. She wanted you to be Y / N again, but you weren't. Mina could feel that you were scared when you sat silently next to her in the car without moving. But she didn't care, earlier she might have calmed you down, but earlier you were still like Y / N.
Mina parked the car in the company's parking lot before opening the door for you to get out. Without a word, she ran through the building, clutching your wrist with her free hand. What hadn't been cut open. She stomped angrily into the office of Jeff and Mutt, who were bent over the table again to coke.
"Look Mutt, Venny joins the chatroom," grinned Mutt as he lifted his head from the table and recognized Miss Venable.
"What gives us the honor?"
Mina put her hand on your back and pushed you forward.
"She is broken," she croaked. "She doesn't work anymore .."
"So what should we do now?" Asked Jeff, as he got up and walked over to you to look at your cut arm.
"I want you to fix her, she should be normal," Mina hissed and felt tears sting in her eyes again.
"Otherwise replace her if you have to, I don't want her if she is like that."
Mina looked sadly into your fearful eyes. There was nothing left of the loving glint she'd seen when you smiled at her the first time. You weren't like Y / N and as long as you weren't like her, she didn't want you. Damn robot.
Sandman, I'm so alone Don't have nobody to call my own Please turn on your magic beam Mr. Sandman, bring me a dream
#wilhemina venable x reader#wilhemina venable imagine#sarah paulson x reader#sarah paulson imagine#american horror story
114 notes
·
View notes
Text
today -
D day is approaching - i agreed to go and visit my parents next weekend :/ my sister is coming as well bc she wants to see me which is v nice but honestly i just ... bleugh, i cba to spend a weekend with an anorexic, with our mother silently comparing our bodies, knowing that i dont measure up to her standards, knowing that despite the fact my sister would never SAY it that i must be her worst nightmare and a walking trigger: a recovered anorexic, with her face copy-and-pasted onto my body, who actually became chubby rather than staying instagram thin my mum also wants me to visit my granddad who has dementia - and i feel fine about it in terms of emotion - we aren’t close or anything and i don’t anticipate it being hard in that way, but i do anticipate it being somewhat of a waste of time given that i am sure he will not have any idea who i am, given that the last time i saw him must have been in like 2018 at least. so ben is driving us both down to the care home, gonna spend a few hours w/ me / my mum / my granddad (thanks ben lol sincerely) then drive back home (as in home where we live) and i’ll go back to my parents’ house w/ my mum for the weekend, my dad will drive me back on monday evening bc he has to take my sister back to the hospital on sunday. lotta driving for him. i should learn to drive at some point but it’s not usually a problem - but i still dont feel right taking public transport. idk if i ever will again tbh anyway. that’ll be a fun weekend lol :| must remember that everything that happens there doesn’t matter anymore bc i live here now w/ people who actually love me regardless of what i look like i already started weighing myself again lol
our 3d printer came. that was real nice
i buzzed ben’s hair for the first time (usually ana does it) and it was a weirdly intmate experience and i enjoyed myself :D i kept thinking, ok, maybe you can’t look after him while he’s ill, but you can make sure that all his hairs are exactly equal in length. and i was deeply impressed with my own work by the end of it. id post a pic here but im not sure he would want that lol
i watched the power of the dog tonight while brushing out alpaca + it was really good!
3 notes
·
View notes
Note
Could you do a story where Thirteen bumps into the tenth doctor and Donna and thirteen pretends that she's not the doctor but then post-library river comes along and causes mischief please? Also I REALLY love your fics, especially The Oncoming Storm! Yours were the first fanfics I read and they're one of the few I like (I'm picky) so thanks for doing such brilliant stories!
Aww thank you so much, that’s very kind of you to say!! Sorry this took a little while longer, hope the wait was worth it! Turned out a bit longer than expected. Hope it sort of fits the brief lol! Really hope you like it!
Rating: G
Ship: Ten/River, Thirteen/River
Word count: 2400
Read on AO3 or below
River Song Has Been Saved
“Hang on a minute, Doctor.“ Donna walked back over to the TARDIS doors after the Doctor had closed them with a snap of his fingers. She thought she’d seen something, just as the doors had closed.
“What’s wrong?“ The Doctor frowned and followed her, both sticking their heads out.
“Oi, lady!“ Donna called stopping a young woman that had just strolled past the TARDIS and was heading back deeper into the Library. Everyone was supposed to be evacuated by now.
“Sorry?“ The woman looked around, blonde hair framing soft features and big eyes. She looked to them as if she hadn’t expected them to be there.
“You can’t go in there.“ The Doctor gestured to the door that lead further into the Library as they stepped out of the TARDIS again. Only a moment longer and they would have taken off and missed her sneaking in here.
“Ahh… so close. Just a bit too early, wasn’t I, hate it when I do that…“ The blonde said to herself more than anything else.
“Did you just come here? The planet has been sealed off for a hundred years, how did you…“ The Doctor frowned, confused as to how she’d got in.
“Yeah, been meaning to check it out.“ The woman grinned. “The hair is magnificent, isn’t it.“ She eyed the Doctor up who looked back at her utterly bewildered. There was something familiar about her.
“Do I know you?“ He asked.
“No absolutely not, never mind me, I’m sure you got important things to do, so.“ She gave a little wave, intend on heading off.
“You can’t go in there, we’re evacuating the planet.“ Donna backed up the Doctor.
“I know, you have a nice day now.“ The woman grinned.
“Sorry, I can’t let you do that.“ The Doctor was quick to overtake her and step in her way. “This place is gonna get swallowed up by flesh eating darkness soon, you might want to head out not in?“
“I got to check something out of the library, I’ll only be a minute.“ She waved off his warning and tried to push past him. “And like you say, the window of opportunity is closing, so, you should probably leave this place yourselves…“
“And you can’t find your book any other place?“ Donna asked dumbfounded.
“One of a kind, sorry, got to run.“ The blonde replied with a grin pushing past him.
“Alright, have a nice day as well.“ The Doctor let her pass.
“Thanks!“ She grinned and sprinted off.
“Doctor, you're not just gonna let her go, are you?“ Donna asked thoroughly confused watching her leave.
“Not a chance. Just giving her a head start.“ The Doctor winked and they headed after her, careful not to be spotted. They took cover behind some tables in the main area as the blonde headed straight for a computer terminal.
“That was close, stupid box, always with the timing…“ She was mumbling to herself. “Couldn’t have hung on two minutes…“ Without further ado, she started pulling some sort of electrical equipment from the pockets of her impressive coat. There were a lot of parts to it and Donna couldn’t believe it all somehow fit into her pockets. They watched her as she hooked up the equipment to the computer.
“What is she doing?“ Donna whispered to the Doctor who shrugged.
“I’m more concerned with who she is… whatever she is doing, that’s complicated tech…“ He mused, watching in fascination as she continued her work.
“Ouch… alright then.“ The blonde pulled her hands away as she seemed to have gotten an electric shock. She stood and engaged the computer terminal. “CAL, hi, sorry, I know, bit confusing, different face.“ She started talking to the computer and the Doctor and Donna exchanged concerned looks. How did she know about CAL? What she was saying was making very little sense to them without the second half of the conversation. They couldn’t make out what CAL responded. “Just popping in to get what’s mine, alright? Don’t freak out, it’s really me. Can you put her on?“ There was a moment of silence. Neither Donna nor the Doctor said anything but there were only very few people she should be looking to talk to on that computer. This was about to get even more investing than the whole experience had been already. “Hello Sweetie. Surprise! This is gonna be great, you’re gonna love this, had Dorium track it down for me, took a while but here we are.“ The woman sounded thoroughly excited. “Get you coat, honey, let’s see if it works.“ She took a step backwards and pulled something from her coat pocket, pointing it at the computer. Sparks flew and the mechanism engaged.
“Can’t have come cheap, that.“
“Dorium Maldovar is known drive a hard bargain, she must be a hacker or criminal of some kind to have those kinds of ties.“ The Doctor mused, trying to make sense of what they were picking up.
“Perhaps Dorium just owes her a favour…“
“Dorium doesn’t do favours.“ He huffed. It was a ridiculous notion.
“He will.“
“Doctor.“ Donna touched her hand to his arm.
“Shush, Donna, I don’t want to lose the element of surprise.“ He kept his eyes firmly on the woman in the middle of the room who was looking around now, apparently waiting to see if whatever she had tried to do had worked.
“Doctor.“ Donna repeated.
“How much longer until he notices, you think?“
“Doctor?!“ Donna grabbed the Doctor by the shoulder and pulled him around.
“Donna, what?!“ He growled but stopped dead in his tacks when he found River Song standing behind them. He had been having a conversation with her without even realising it. She was dressed in a white flowing dress, a stark contrast to the environmental suit he’d only seen her in, and a grinned spread across her beautiful features.
“Hello, Sweetie.“ She chuckled.
“Oh my God, River, what, how…“ The Doctor couldn’t find words.
“Well, Sweetie, what do you think?“ River grinned at the Doctor.
“Of what?“ He was still in shock. He had watched her die only hours ago, he had managed to somehow, miraculously save her consciousness and now suddenly she was here again? “How did you get out of the computer? What did she do?“
“Some sort of teleport I believe, but like a really clever 3D printer, materialise the body, download the consciousness, boom, brand new wife.“ River explained, enjoying the dumbfound expression on both their faces.
“River!!“ The blonde had finally spotted her and River waved to her.
“Speaking of wife…“ River smirked and the Doctor exclaimed:
“Wife?! I thought you and me, we…“ He looked around to the woman heading straight for them, feeling a wave of jealousy. He knew he’d technically only met River today but he knew how important she would become to him.
“We are.“ River chuckled giving his an amused smirk: “But you know, you can’t talk, all I’m gonna say is: Elizabeth I… so…“ She couldn’t carry on as the blonde rushed around the counter and threw herself at River who pulled her close and twirled her around.
“River.“ The mystery woman took her face in her hands, tears welling up in her eyes, clearly overcome with emotion.
“Hello, Sweetie.“ River smiled the softest of smiles and leaned in to kiss her.
“Sooo… how do you feel about this?“ Donna looked to the Doctor, feeling like they were intruding on a private moment. “You think we should go, or…“ She could tell from the annoyed expression on the Doctor’s face, however, that he had no intention of just leaving it be. He pulled himself up to full height and cleared his throat.
“Okay, so thank you for saving my future…“
“Wife.“ River helpfully supplied the word as they stopped kissing and just held each other close.
“Whatever she is. But who are you?“ He jabbed his finger at the blonde.
“You haven’t figured it out yet?“ The woman let go of River, seemingly reluctantly, and turned to face him. She kept her hand intertwined with River’s.
“Don’t get me wrong, I’m really happy River isn’t dead but my future self spent a lot of time thinking about how to save her and then you just waltz in here having to do one better?“ The Doctor crossed his arms in front of his chest.
“Well, sadly, you’ll not remember that I came here.“ The woman replied.
“What?“ Donna was utterly confused now.
“Why not?“ The Doctor demanded to know, unsure whether or not that was supposed to be a threat.
“God, you’re slow. Did I give you a concussion when I knocked you out?“ River raised her eyebrows playfully.
“Maybe it’s cause of the hair spray…“ The blonde mused.
“I don’t use…“ The Doctor was going to protest but River had already changed directions:
“Don’t tell me you’re not using hairspray now.“ She ran her hand through the other woman’s blonde bob.
“Naturally falls like that, thank you very much.“ She huffed in response. “Regeneration is a lottery as you should know by now.“
“Are you a timelord?!“ The Doctor exclaimed, not sure how to interpret the statement.
“Yes.“ The blonde replied in amusement.
“But I thought I was the last…“ The Doctor stared back at her in shock.
“Yes, which makes me…“
“You can’t be.“ He shook his head.
“Yes I am the…“ The blonde started but the didn’t allow her to finish.
“You can’t be the Master, he…“
“So close.“ The mystery woman sighed hanging her head theatrically.
“It’s like watching one of those dumb and dumber movies, isn’t it.“ River chuckled to Donna who had long given up trying to follow.
“Hang on!“ The Doctor exclaimed as the penny dropped.
“Yes, crossing time streams, you won’t remember this because you are crossing your own time stream right now! I am you.“ The blonde Doctor sighed, she couldn’t believe she had to spell it out for him like that.
“Pretty boy and pretty girl.“ Donna found herself chuckling almost involuntarily.
“Aren’t they?“ River agreed with a smirk. “The mind races.“
“River. Shut up!“ The Doctor chanted in unison.
“But you’re short!“ The younger Doctor groaned in annoyance as he looked her up and down.
“I am actually rather average height, as it happens! Why does everyone call me small?!“ The older Doctor huffed. “Did I really use to be so obsessed with my height?!“
“Size isn’t everything, darling.“ River pipped up.
“Still not ginger then.“ The younger Doctor carried on.
“None of the next four, no.“ She replied with a shrug.
“Four more regenerations and only now did you work out how to save her?“ He exclaimed looking to River.
“I actually gave her the screwdriver last time we met, thank you very much. One step at a time.“ The older Doctor huffed and turned to her wife: “I booked that suite on Darillium again, by the way, for a few nights, just, you know, if you haven’t got any other plans.“
“Well, this is going to be a whole new experience.“ River smirked looking her up and down. This was the first she was seeing of her spouse’s most recent regeneration and she was beyond intrigued.
“Like it?“ The blonde Doctor asked with a little smirk and River grinned:
“Love it.“
“I don’t like her. Do you like her?“ The younger Doctor turned to Donna, just as his future self pulled their wife in for another kiss.
“Are you jealous of yourself?“ Donna teased and he gave her a playful shove.
“So you’re really him? Just older?“ Donna turned to the future Doctor, still struggling to believe that they were the same person. She knew what regeneration meant but it wasn’t like she’d ever seen the result of one.
“Different face, same dumbass.“ The Doctor retorted with a grin.
“Well done for saving her, Doctor.“ Donna smiled as they looked to River who said her goodbyes to the younger Doctor at present. “She really needed you, this version of you.“ Donna thought back to how devastated River had been at the total lack of recognition on the Doctor’s part. She had missed her Doctor so very much.
“I know. I remember.“ The Doctor gave a sad sort of smile as she thought back to when she had first met River, remembering the pain and sorrow in her eyes. “Donna, I can’t know, you know. You can’t tell me, else I might not get here, details my change and a paradox will be created if I know River lived.“ The Doctor turned to her to explain and Donna nodded slowly, they had mentioned it on the way back to the TARDIS already. This Doctor’s TARDIS was parked right behind their’s where they hadn’t been able to spot it as they got out. “Just be there for him. He’s already struggling, even if he doesn’t show it, even if he doesn’t know her yet, he still knows what and who he’s lost.“ The Doctor tried her best to explain to her what was going on in her younger self’s head.
“How long as it been for you? Since she died. How long have had to carry that with you?“ Donna asked taking her hand comfortingly.
“Some questions are better left unanswered.“ The Doctor shook her head and smiled. “It was good to see you, Donna.“ She pulled her into a hug.
“It was good to meet you, this version of you.“ Donna smiled and let her go, just as River and the other Doctor joined them.
“Well done, Doctor.“ The younger Doctor smiled and extended his hand to her.
“You too, Doctor.“ The blonde smile in return and shook his hand.
“You sure you don’t want to come in for a cup of tea, or…“ River suggested pointing to the TARDIS:
“Down, girl.“ The older Doctor smirked and took her hand in hers.
“You’ll be seeing me again soon, Doctor.“ River smiled at the younger Doctor who grinned:
“I look forward to it.“
“No telling.“ The older Doctor reminded Donna who nodded and smiled:
“My lips are sealed.“
“Now about that suite.“ River smirked at her wife as they turned to their TARDIS.
“Think the TARDIS bedroom will do for now, don’t you?“ The Doctor chuckled as she unlocked the door.
“Bedroom, kitchen, console room, wardrobe hall…“ River smirked and pulled her inside.
“Good for you, Doctor, so you’re not an eternal virgin then.“ Donna teased pulling her Doctor along to their TARDIS before he could get any more jealous.
#Doctor who#River song#river song x thirteen#fanfiction#thirteenth doctor#river x thirteen#space wives#thirteen#river x the doctor#femslash#Ten#tenth doctor#Donna nobel#River x ten#Prompt#Fluff#Library fix it#Fix it#Humour
57 notes
·
View notes
Text
Stark Spangled Banner
Ch56: Worthy
Intro: A few weeks post the Time Heist the team are finally ready to reverse the snap. The only problem is, when you mess with time it tends to mess back…
Warnings: “Language!”
Pairing: Steve Rogers x OFC Katie Stark
A/N: Another huge thanks to @angrybirdcr for her edits…
Disclaimer: This is a pure work of fiction and classified as 18+. Please respect this and do not read if you are underage. I do not own any characters in this series bar Katie Stark and the other OCs. By reading beyond this point you understand and accept the terms of this disclaimer.
Chapter 55
Stark Spangled Banner Masterlist // Main Masterlist

October 2023
Katie walked over to the dresser in Nat’s room and smiled at the photos that stood on the shiny, dark wood surface. There were a few shots that stood in frames, one of Nat with Clint, Laura and the Kids, one of her, Katie and Pepper at Tony’s wedding, but it was the biggest one that she reached out to pick up. It was a photo that Katie had taken in her and Steve’s back garden a few months before on Jamie’s third birthday. Nat had Jamie balanced on her hip and Emmy to her other side, arm round the teens shoulder. She was smiling, happily at the camera, almost like she had no care in the world.
“Hey.” A soft voice spoke behind her and she turned to look at Steve, already dressed in his Captain America suit. “I’m not even gonna ask how you got in here.” “I already had access.” Katie shrugged, replacing the photo back down. “She had access to ours as well, although she never used it much, especially not after that time she walked in on us on the couch and got an eyeful of your ass going ten to the-“ “Yeah, yeah, I remember.” Steve snorted, leaning on the doorframe, the pink tinge spreading up his neck to his cheeks as he recalled the incident. They’d been going at it pretty furiously when Nat had walked in. There had been a lot of yelling, shrieks, giggles and one strategically placed throw cushion as he had stood up and reversed hastily to the bedroom out of view. “She told me she needed four bottles of bleach for her eyeballs.”
Katie sniggered before she sighed. “I miss her, Steve.”
“I know.” He said gently, walking into the room and she melted into his arms. “I wish I could tell you it goes away but it doesn’t. You just learn to live with it. I promise it will get easier though.” Katie smiled at his words. She knew full well what living with grief was like, they’d done it enough over the past five years but he wasn’t trying to be patronising, merely trying to lend her some comfort and she loved him for that.
“Given that Halloween isn’t for another two weeks I take it you’re dressed in your Spangles for a reason?” She pulled back and Steve nodded.
“We’re ready.” He gave her a significant look.
Katie let out a breath. They’d been working on the gauntlet now for the past few weeks. Thor, Rocket, Tony and Banner all spending hours at a time in the lab. Given that the Time and Soul stones were the only ones they had in their true gem form the first challenge get the others into the same state. For the most, all that meant was smashing open the various items they were contained within- namely the Tesseract, Sceptre and Orb. But even that had to be done in a controlled way so no stone was damaged or disturbed. Then, a slightly trickier task, they’d had to figure out how to solidify the Aether. Thor had been extremely nervous about this given his history with it and how it was able to “consume” people it decided to use as hosts. After days of brainstorming and various ideas they dismissed, Tony had come up with the idea of using the 3D printer to create a vessel, using a scan of one of the other stones.
“So, err…it’s time?” Steve nodded. “Everyone’s meeting in the lab.” He nodded to the photos on the side. “Time to make her sacrifice worthwhile.”
Katie followed his eye line and nodded. “Yeah,” she turned back to him, “I’ll go grab my suit.” He bent down to give her a soft peck on the lips and watched her go before he cast a cursory glance around the room. It was a little untidy, but that had been Nat all over. ‘Organised chaos’ she had described her nature as.
“You weren’t wrong, Widow.” Steve smiled gently, before he turned and shut the door behind him, striding back to the lab.
He arrived just in time to see Tony stood by the glass case housing the Gauntlet, his hand carefully manipulating the machines to cautiously place all six stones in their respective places within the glove.
“Boom!” Rocket let out a yell and both Tony and Bruce jumped a little. Tony turned to glare at the raccoon who was sniggering at his joke.
Steve rolled his eyes, he still wasn’t sure about the animal but he couldn’t deny he’d been useful, his knowledge filling in a lot of gaps they had.
“Asshole.” Tony grumbled as Steve crossed the room to pick up his helmet which was lying on a desk. Tony looked up at him. “You find Kiddo?” “Exactly where I thought she’d be.” Steve nodded. “She’s gone to suit up.” It wasn’t long before she returned with Clint and Scott. Scott was already in his Ant-Man suit, Clint in his Hawkeye get up and Katie in her leathers, the bangle that contained her Supernova suit gleaming on her wrist. Steve’s eyes travelled over everyone as they checked their various bits of equipment, and he took a deep breath, nervous excitement coursing through his veins.
Everything they had been through over the past five years and, more recently, the sacrifice their best friend had made all came down to this. A literal snap of the fingers.
Eventually, a silence fell over the room as everyone crowded round the gauntlet. A quick headcount told Steve they were one short, and he didn’t mean Natasha either. Nebula was absent but he assumed she was elsewhere at the request of Tony for some reason, maybe doing some checks in other areas. He was about to ask when Rocket spoke up.
“All right. The glove’s ready.” His arms folded across his chest. “Question is, who’s gonna snap their freaking fingers?”
“I’ll do it.” Thor spoke immediately and they all turned to face him, Lang speaking the words at the forefront of Steve’s mind.
“Excuse me?”
“It’s okay.” Thor nodded, heading towards the gauntlet where he was immediately met with a barrage of protests from around the room.
“No, no, no, whoa.”
“Stop. Stop.”
“Wait a sec. Hey, hey!”
“Wait, wait, Thor, just wait.” Steve shook his head gently, his arm reaching out to stop the God before he put his arm in the glove. “We haven’t decided who’s gonna put that on yet.”
“I’m sorry. What, we’re just sitting around waiting for the right opportunity?” Thor snapped back.
“We should at least discuss it.” Katie nodded, trying to appease him.
“No, no, sitting here staring at that thing is not gonna bring everybody back.” Thor looked at her, shaking his head. “I’m the strongest Avenger, okay? So this responsibility falls upon me. It’s my duty.”
“It’s not about–“
“It’s not that– Stop it! Just let me!” Thor pleaded as he started to get teary eyed. Katie took a breath as she could almost feel the guilt that was radiating off him in waves. “Just let me do it. Just let me do something good. Something right.”
“Look, it’s not just the fact that that glove is channelling enough energy to light up a continent, I’m telling you, you’re in no condition.” Tony shook his head.
“He’s right, Thor.” Katie looked at him. “Let’s just think about it, please?”
“What do you-“ Thor shook his head as he looked at Katie, his blue eyes then flicking to Tony “What do you think is coursing through my veins right now?”
Katie took a deep breath and crossed her arms in front of her chest, looking at Steve who mimicked her action subconsciously, shaking his head slightly.
“Cheez Whiz?” Rhodey supplied from the side of the room. Thor pointed at him, shooting him a glare but all Rhodey did was shrug.
“Lightning.” He stated simply.
“Lightning won’t help you, pal.” Banner spoke softly, as everyone turned to look at him “It’s gotta be me.”
Katie glanced at Steve who was frowning a little, his attention completely on the large hulk of a man who gave a small shrug.
“You saw what those stones did to Thanos. It almost killed him. None of you could survive.” Banner’s eyes were focussed on the red gauntlet as he walked towards it.
“How do we know you will?” Steve questioned as Banner passed him by.
“We don’t. But the radiation’s mostly gamma,” he stated, in a matter of fact way, his eyes still on the gauntlet, as he clearly contemplated. With a smile he turned to look at Katie, then Tony as he spoke again. “It’s like….uh…I was made for this.”
Katie’s head whipped round to look at Tony, before they both glanced back at Banner who smiled at them again, the siblings instantly understanding what he was referring to.
“You know, I’ve got a cluster of shrapnel, trying every second to crawl its way into my heart.” Tony said, pointing at the Arc-Reactor in his chest as he walked towards Bruce “But this- this stops it. This little circle of light”
“Because that’s the same…” Katie said sarcastically rolling my eyes.
“The point is its part of me now, not just armor.” Tony ignored her as he stood opposite Banner, looking at him through you clear screen as lines of data swam across it. “It’s a… terrible privilege.
“But you can control it.” Bruce pointed out.
“Because I learned how”
“It’s different.” Bruce returned back to the computer screen but Tony slid the data aside with his fingers so the two could see face-to-face without interruption.
“Hey, I’ve read all about your accident. That much gamma exposure should have killed you.”
“That’s true…” Katie said, watching the exchange.
“So you’re saying that the Hulk…” he paused, smiling sadly as he correcting himself whilst Tony raised his eyebrows “The other guy saved my life?”
Katie looked at Tony. His eyes were flashing bright as Bruce looked back at him. Tony gave him a significant look.
“That’s nice, it’s a nice sentiment.” Bruce said as Tony moved back to his computer. “Saved it for what?”
Tony hesitated and looked up, “I guess we’ll find out.
And it seemed they just had.
Unlike Steve, Katie did believe in fate and destiny, certainly to an extent anyway. After everything she had seen and experienced over the past twelve years or so she couldn’t help but consider there was an element of truth in the fact that they were all pawns in a bigger game.
She glanced at Steve who was studying Banner, but made no move to stop him. He couldn’t argue with the man’s logic. So, as no one else protested, Tony moved to remove the gauntlet from the casing before he handed it to the Doctor.
“Good to go, yeah?” Tony asked.
Bruce nodded. “Let’s do it,”
“You remember. Everyone Thanos snapped away five years ago and just bring them back to now.” Tony reminded Bruce. “Don’t change anything from the last five years,”
Bruce nodded again. “Got it.”
“Good luck.” Katie encouraged before she twisted the star on her bangle causing her suit to flow over her body, Tony doing the same with his chest piece whilst Steve gripped his shield on his arm. Katie’s own shield beamed out of the suit and she held it in front of her, glancing to Steve where he stood to her left. He flashed her a small smile which she returned before her helmet slid round her head.
“FRIDAY do me a favour and activate Barn Door Protocol” Tony announced as he stepped in line with Clint, a shield springing from his suit. Thor stepped in front of Rocket whilst Rhodey and Scott also fully engaged their suits.
“Yes boss,” she replied and around them all the facility went into lock down as shutters closed over the doors, windows and roof.
Katie engaged her scanners, checking the heads up display which was monitoring the energy levels on the stones and she moved her feet slightly apart, adopting an almost identical stance to Steve, their defences raised in front of them.
Bruce looked at the gauntlet in his hand for a second. “Everybody comes home,” and with that he slid his fingers into the glove which nanobotically expanded to fit his hand. There was a sudden whoosh, and as they watched, the stones lit up in different colours, tendrils of bright light spreading up Bruce’s arm as their power surged up towards his shoulder and neck. He cried out in pain, almost falling and Katie watched worriedly as the man continued to shout and groan, his teeth grit together.
“Bruce?” She asked as Steve shifted besides her, his legs apart ready to dive in if he had to. Bruce then crashed down to his knees, his face contorted in pain.
“Take it off. Take it off!” Thor cried out, starting towards him.
“No, wait!” Steve urged, holding his hand up. They knew something like this was going to happen, they’d seen the mess left of Thanos’ arm. But they couldn’t quit, not now. “Bruce, are you okay?“
“Talk to me, Banner.” Tony demanded.
“I’m okay, I’m okay!” Bruce grit out through his teeth, giving a jerky nod as Thor gave him two thumbs.
After what felt like hours, Bruce slowly raised his arm. With a final grit of his teeth, he moved his fingers and everyone braced themselves. Steve moved himself in front of his wife with his shield raised, even though she was probably more protected than he was, such was his force of habit. With a loud yell, and a laboured effort, Bruce snapped his fingers. Steve’s shield raised automatically over his face in an attempt to shield himself and Katie form the blinding white light that pulsed out from the Gauntlet, filling the room.
But it was gone as soon as it had appeared.
Steve had to admit he had expected more, but his concern at the moment was Bruce who collapsed backwards to the floor and the gauntlet slid off his hand dropping to the tiles with a clang.
“Bruce!” He called, kneeling down beside him as Clint booted the gauntlet across the room away from them all.
“Don’t move him.” Tony instructed as he dropped to his knees besides Bruce who was gripping onto Steve’s arm with his left hand, blinking in pain. Tony opened his palm, spraying Bruce’s right arm with foam to cool him off.
“Did it work?” Bruce breathed out, blinking slightly.
Katie glanced around, her helmet retracting as she did so. “I don’t know.” As she continued to look around for a clue, anything that would indicate if they’d been successful, she spotted Scott walking towards the windows of the facility, the blinds sliding back as the lock down reversed.
“Worth a shot.” Thor sighed, clearly having already decided it hadn’t. He knelt down besides Banner “It’s okay…”
As Steve, Tony and Thor tended to Bruce, Katie continued to watch Scott who stood by the window, his mouth forming a little O of surprise. She squinted, wondering what it was he had seen, and then she spotted a few birds in the tree on the patio area. She swallowed slightly, whilst birds hadn’t been uncommon in the five years, they had certainly been down in numbers, and it was unusual for four of them at once to be in a tree that small.
She was then distracted by Clint who had given a sharp intake of breath and she spun to watch him as he picked up his phone from one of the desks with a shaking hand.
“Honey?” He croaked, and Katie watched as his face contorted into raw emotion, his words failing to form out of the sheer emotion he was clearly feeling. “Honey?”
There was only one person that could be, and if it was her then…
“Guys, I think it worked,” Scott spoke from his spot and Katie took a deep breath as her own tears threatened to overwhelm her. She locked eyes with Steve, who glanced up at her, his own eyes shining as he smiled.
“We did it.” Katie breathed out, looking round as she gave a watery laugh, wiping away her tears. “Son of a bitch, we actually-“
But she didn’t get chance to finish her sentence as suddenly there was a huge explosion, and the ground fell open beneath her.
*****
Smoke. Fire. Ash. Gushing Water.
That was all Katie could see, hear and feel. She was vaguely aware that FRIDAY was yelling something in her ear. As she shook her head slightly, she groaned, waiting for her senses to catch up with the rest of her.
Then, she heard Tony, and as she moved to get up, she realised she couldn’t. There was something crushing her into the ground, something ridiculously heavy which was pressing on her back. She tried to push herself up, but the weight was too much.
And then it was gone, and a strong arm was hoisting her to her feet.
“Little Stark?” Thor asked as Katie gave another groan, retracting her helmet. “Are you okay?”
“No serious injuries detected.” FRIDAY informed her, and she nodded to the God.
“Yeah, yeah, I’m good.” She blinked, looking around as she tried to figure out what the fuck had just happened. “Where’s…”
“I take it that wasn’t the snap.” Tony mumbled, distracting her as she glanced down to her left as he blasted away a piece of concrete that had been pinning his legs down. He stood up, and the three of them took a moment to look around where they were stood in the ruins of the compound, before Thor gave a lowly growl and walked to the edge of the blown apart building, looking down into the huge crater.
“No, it was him.” He nodded. Katie and Tony both walked towards him, drawing up on either side, and Katie gave a sharp gasp as she saw Thanos in a distance, sat on a rock.
“Where’s Steve?” Katie’s brain suddenly remembered who it was she’d been looking for earlier, and she, glancing round furiously. She engaged her helmet again and FRIDAY scanned the piles of rubble but she needn’t have bothered, she spotted him almost immediately. She quickly moved towards him, kicking some more rubble and wreckage out of the way before she dropped gently to Steve’s side where he lay unconscious, FRIDAY informing her that his life signs were fine.
“Stevie?” She he said gently, shaking his shoulder. “Come on honey, wake up.” With a sharp intake of breath, Steve’s eyes flew open and Katie let out a sigh of relief, as she looked up to see Tony smiling, Steve’s shield on his arm.
“That’s my man.” Tony nodded, leaning down towards Steve who glanced up, his breathing evening out. “Lose this again,” Tony held out the shield, “I’m keeping it.”
Steve grimaced and turned to look at his wife. “You okay?” “Yeah.” She nodded, “turns out Tony’s suits are pretty good, who knew huh?” Tony scoffed as Steve blinked, getting his bearings, taking in the debris and rubble of the compound. “What happened?”
“You mess with time it tends to mess back,” Tony spoke gently, glancing at Katie sniffed a little, wiping at her nose, fear flickering across her face. “You’ll see.”
“Thanos?” Steve swallowed, and Katie nodded. Steve exhaled again as Tony helped him to his feet and the three of them walked over to Thor, who was stood exactly where Katie and Tony had left him earlier.
“What’s he been doing?” Tony asked, standing to Thor’s left as Katie stood to the God’s right in between him and her husband as the four of them glanced down at the Titan.
“Absolutely nothing.” Thor’s voice was low.
Steve had no idea how the Titan was there, but he didn’t really give a shit either. There was one thing they had to do, and that was all that mattered.
“Where are the stones?” He asked.
“Somewhere under all this,” Katie gestured to pile of ruins under their feet. “All we know is that he doesn’t have them.”
“So we keep it that way.” Steve spoke simply, steely determination lacing his voice, his eyes not moving from the Titan.
“You know this is a trap, right?” Thor asked, his gaze also locked on the large warrior.
“Yeah. I don’t much, care.” Tony replied with a shrug.
“Good. Just as long as we’re all in agreement.” Thor nodded, and with that there was a large crack of thunder. Bright beams and shards of lightning surround the God as he stretched out both his hands to summon Stormbreaker and Mjolnir. His casual clothes transformed into his armour and cape, his beard flowing into a braid, giving him a distinctive Viking Warrior look as his eyes glowed bright white, every inch of his face lined with fury.
“Good to have you back, Thunder God.” Katie smiled at him as he took a deep breath, the lightning dying down as he looked over her shoulder at Steve, who nodded at him.
“Let’s kill him properly this time.” Thor’s voice was a low growl as he jumped off the edge of the ruins they were stood on, landing with a loud crash on the ground. Katie moved to one side of Steve, wrapping her arm around his as Tony did the same, the three of them flying forward and landing with a little more grace than Thor had done.
Once more the four of them exchanged looks before the started to walk cautiously towards Thanos, but Katie stopped as Steve pulled on her arm.
“You need to promise me.” He looked at her as her. “If this starts to go sideways…” “I think we’re a bit past that.” She breathed out and Steve shook his head, looking down.
“Baby, the kids. I need you to promise me that if it looks like, well, you need to go back for them.” “Steve.” Katie took a shaky breath, her eyes filling with tears. “There’s no point making me promise anything like that, because if we don’t get rid of him, then there might not be anything to go back for.”
Her words hit him harder than any punch could, and Steve felt his chest contract, painfully. He tore his eyes off her which were now full of tears as he looked up at Tony and Thor who continued to advance ahead of them, his hand running down his face.
She was right and whilst he wanted her as far away as possible, with their kids, safe, he knew it was futile because nothing was safe now. He could send her away, get her out of the fight, but if they failed then she was as good as dead anyway, they all were.
Because Steve didn’t believe for a second that Thanos would make the mistake of leaving who died this time round down to chance.
“If we go, we go.” Katie’s voice ripped him from his thoughts as he turned back to her, the tears in her eyes dancing with the flames that reflected from the various fires dotted around. “We have to try or they don’t stand a chance. Whatever it takes.”
Steve couldn’t bring himself to reply. Instead he gave her a curt nod and the two of them strode forward to confront the man who had haunted their dreams for the past five years.
“You could not live with your own failure,” Thanos spoke for the first time as they drew closer. “Where did that bring you? Back to me. I thought by eliminating half of life the other half would thrive. But you’ve shown me that’s impossible.”
The four of them split up, as they began to surround Thanos, circling him, whilst he spoke.
“As long as there are those that remembered what was, there are always those that are unable to accept what can be. They will resist.”
“Yeah, we’re all kinds of stubborn.” Tony continued his pacing to stand behind the Titan.
“I’m thankful, because now I know what I must do,” Thanos stood up, “I will shred this universe down to its last atom.” He reached for his helmet which had been propped up on the edge of his double edged blade where it was stuck into the ground in front of him. “And then with the stones that you’ve collected for me,” he placed the helmet on top of his head, “I’ll create a new one, teeming with life,” he pulled his weapon from the ground, twirling it in his large hand, “that knows not what is lost, only what has been given,”
There was a rush and a flash as the lighting flew round Thor’s axe and hammer, his eyes flashing as he stood to Thanos’ left, Katie now to his right.
“A grateful universe.” Thanos concluded.
“Born out of blood,” Steve glared up at the man, anger lancing through every cell in his body.
“They’ll never know it,” Thanos cocked his head to the right, “because you won’t be alive to tell them.”
At that, having heard enough, Thor gave a loud cry as he surged forward, beginning the fight. Tony and Katie both launched into the air and Steve threw himself in, shield first, as the four of them began to work in tandem.
Lightning flashed, shots fired, metal clanged on metal as they all deployed their various weapons. It was brutal, hard, just as Steve had remembered from Wakanda, only this time they were engaged directly with the Titan, and it was fast becoming apparent that this Thanos was equally as vicious an opponent than his future self had been.
“Okay, Thor. Hit me.” Tony’s voice rang over Steve’s comms as Katie flew up out of the way of the Titan’s sword as he swung it at her, deflecting the shot she’d taken at him from her repulsors.
As Steve launched his shield again, Thor banged his axe and hammer together, charging Tony’s suit with lightening. Tony then shot the extra energy out using his hands and body, Katie joining him as she hovered off to the left. Thanos twirled his blade in front of him, diverting the energy and Steve gave a yell as it rebounded back to Katie, her suit taking a full shot causing her to fly off to the side, colliding harshly with a huge piece of the compound structure, falling to the floor.
With a roar of rage, Thor grabbed Stormbreaker and used it to bat his hammer to hit Thanos, who used Tony as a shield, casting the man aside where he too landed harshly, remaining motionless on the ground.
Steve launched forward but was flung away, landing and taking a heavy thump to the head. With a groan, he blinked away the spots of light that had formed in front of his eyes from the impact of the blow, and glanced around, giving a sigh of relieve as he saw Katie was pushing herself up on her hands, rising to all fours. With the ringing still in his ears, he then saw Thanos pounding down on Thor, Tony still motionless in the background.
With a loud grunt, Steve ground his teeth together in stubborn determination and reached out to push himself up, but he paused when a sudden shock of warmth vibrated up his arm. He instantly glanced down at his hand and realised he’d flattened his palm against Thor’s hammer, not the ground. He frowned for a moment, as the vibrations continued. It felt like the throb of his motorbike engine, a warm purr. The last time he had tried to move, sure, it had given a little, but he hadn’t felt anything like that…
Could he? Was it possible?
With an automatic movement, one that seemed completely out of his control, Steve rose to his feet and reached out, gripping the handle. He sucked in a breath and as he pulled up his arm, the hammer came with him.
**** With a groan, Katie blinked, shaking off the daze that had descended over her thanks to the heavy blow she’d taken from Tony’s deflected fire. She looked around, the ringing loud in her ears as she saw Thanos flip Thor to the floor, pressing him back up against a rock. Thor reached for his axe, and as the pair of them grappled, Thanos gained the upper hand and began to attempt to push Stombreaker through Thor’s chest.
Immediately, Katie took off and began to fly towards Thor, raising her palms to shoot a beam at Thanos, but as she neared something whizzed straight across her path and she stopped dead in the air, her sight focussed on Mjolnir as it soared towards Thanos, where it whacked him harshly in the side of the head, sending him flying away. It carried on for a while before it stopped, and boomeranged back right round but it didn’t stop at Thor.
Instead it continued, and Katie felt her mouth drop open as she followed it with her eyes as it flew into Steve’s waiting hand, his fingers curling round the handle as he caught it.
“Holy shit…” She spluttered at the same time as Thor breathed a little smugly into the comms.
“I knew it!”
Steve was wielding the hammer. Steve Rogers, the kid from Brooklyn that was too dumb to run away from a fight was worthy.
But then, as Katie watched him turn to look at Thanos, hammer in hand, that determined expression on his face as he sized up his opponent, she realised there was no one else more worthy than the man who had done nothing but continually put his life on the line for others.
Thanos kicked Thor harshly in the chest sending him straight through the rock he was up against and then Steve proceeded to charge at Thanos, swinging Mjolnir. He caught Thanos perfectly on the chin with an upper cut from the hammer, which sent him flying through the air, where he landed, and jumped up.
Katie took off towards the two, as Steve launched his shield, but Thanos deflected it easily. As it swung back towards him, Steve threw the hammer straight at it, creating a shockwave which knocked Thanos back off his feet.

Then, the Captain went completely on the offensive, shield and hammer flying through the air again and again before he lined his arm back up and summonsed the lighting. Shooting a shock at Thanos he blasted the Titan off his feet before Katie landed in front of him giving a yell. Just as Thor had done before to Tony, he charged up her suit and she powered everything she had into the Titan as he lay on the floor.
Steve drew to her side as she unloaded, but before she could say or do anything else Thanos’ sword flew back at her and she dodged out of the way, but wasn’t quite quick enough. It hit her hard in the chest and sent her skidding backwards against the floor where she collided with a metal pipe.
Thanos advanced on Steve, menacingly swinging his weapon and, one on one, Steve was no match for him. He lost the hammer and, after receiving a nasty stab to the leg and gash to his arm, he could do nothing but hold his shield up to deflect the blow that was coming his way.
Only it didn’t. Thanos’ double edged weapon sank straight into the Vibranium like it was butter.
Steve looked at it in shock and horror, never once had anything ever penetrated the metal, but he didn’t have chance to think about it as the blows continued. Pieces of his shield were shearing away left, right and centre and then Thanos picked him up by the front of his suit and tossed him aside like he was a rag doll.
He landed harshly a few feet away from Katie and rolled onto his back, his eyes closing and his chest heaving with exertion. He gave a little gulp, a low gasp that was almost a cry flew from his mouth as he felt sheer desperation flood his system, the faces of his kids and his wife flashing through his mind.
Steve Rogers might be worthy, but he was beat.
**** Chapter 57
**Original Posting**
#stark spangled banner#steve rogers#steve rogers fanfiction#steve rogers fic#Katie Stark#steve rogers x ofc#steve rogers x original female character#mcu#mcu fanfic#chris evans#chris evans characters
47 notes
·
View notes
Text
Lopez’s 8 Ch.4 | Brittana
Thank you all for the luv last chapter and for those who stopped by here for a chat too! Still getting used to writing for such a big 'cast' so hopefully that's translating alright.
Also available on ff.net (x) ao3 (x) & below the cut!
With everyone moved into the loft and somewhat acquainted with one another, Santana feels like she can breathe a little easier. Keyword: a little. The team is aware of what they need to do and set off on their tasks, even Quinn’s orders are already starting to arrive at the loft. You think you’re addicted to online shopping? Well, you’ve never met someone like Quinn Fabray.
“What is all this?” Santana asks as she comes round. She’s eyeing all the empty packaging and bubble wrap then steps out of the way just in time as a hulking man rolls a large box through her path. She knew she should’ve given Quinn some ground rules when she told her to make sure they had the necessary equipment needed.
Who the hell knows what she considers necessary.
“Don’t worry, you’ll like them,” Quinn chuckles then gives the guy’s shoulder a pat, “Thank you, Hank. You can set it down by that wall over there.”
“Yes, Miss Fabray,” He nods and wheels off the box.
Santana quirks a brow, “You’re on a first name basis with the delivery guy?”
“We’ve been in business together for awhile,” Quinn nods and waves for her to come closer. “Two things first,” Quinn points to the giant box being wheeled away, “That’s a 3D Printer – which we’re going to have so much fun with once it’s installed – and these.”
Santana looks down at pair of the most dorkiest glasses she’s ever seen being handed to her.
“Try them on,” Quinn says.
Santana snorts and backs away with a chuckle, “I’m not wearing those.”
Quinn rolls her eyes, “Just do it.”
“So you can snap an embarrassing pic of me to post everywhere?” Santana waves off, “Nope. I wear contacts for a reason.”
Quinn just gives her a stern look until Santana finally relents and snatches them from her hand.
She slides them on and is immediately surprised by the graphics that pop up. These aren’t your normal pair of dork glasses, they’re super high tech dork glasses! She looks around at the various boxes and equipment surrounding before looking back to Quinn who has this proud smile on her face.
“Cool right?” She asks while Santana continues to look around.
“This is awesome,” Santana mumbles in awe. She sees an icon that kind of look like a camera and asks, “Can this thing take freaking pictures?”
“Even better,” Quinn answers, “They can capture scans which can be sent to Mercedes’ laptop or directly to the 3D printer. Once it’s up and running, we can replicate pretty much anything!”
“Like the necklace?” Santana smirks.
“Like the necklace,” Quinn confirms.
Santana’s just about to praise her for nabbing such a handy find when the door leading to the garage slides open and in comes Brittany, clad in her leather jacket and Ray Bans.
“Someone’s parked in the loading zone. I think you’re about to get towed,” Brittany calls out as she chucks her helmet on the counter and slides off her sunglasses.
“Crap!” Tina curses from her desk set up across the room and quickly bolts outside.
Quinn chuckles at the pair but Santana continues to watch as Brittany grabs a bottle of water from the fridge. Her cheeks look a little flushed as she tips the bottle back for a long drink and Santana stares the whole time, wondering why Brittany doesn’t wear this leather jacket more often. That paired with Brittany’s tight blue jeans and white t-shirt is a look Santana won’t ever get tired of.
When Brittany pulls away from the bottle, she notices Santana and Quinn and starts to make her way over to them. Now with her coming their way head on, Santana can’t help but admire the view. It seems like Brittany knows Santana’s caught in a trance again because she reaches up and rakes her fingers through her hair, attempting to bring some life into it after being constrained by her helmet.
As Santana’s eyes slowly drag up Brittany’s slim frame, her mouth goes dry.
“Jesus, give me those!” Quinn snaps when she notices Santana’s leering.
“What?” Santana sputters out.
“You’re ridiculous. That’s what,” Quinn shakes her head just as Brittany approaches them.
“Shut up,” Santana hisses just before Brittany greets them.
“Hey, finally invest in a pair of x-ray glasses?” Brittany asks but it’s directed at Santana. She’s wearing this smug grin as she adds, “Although, you don’t need them if wanted to see me naked.”
“Here we go,” Quinn groans as she face palms while Santana shakes her head.
“They’re not x-ray glasses,” Santana corrects her.
“Just for looks then?” Brittany asks, “Do we all get a pair?”
“No, we’ll just share this one,” Quinn says as Santana hands them over to her, “I already know what Santana would use them for anyway and I don’t think anyone needs that.”
Brittany frowns at Quinn, “You don’t want Santana to see? That’s kind of rude.”
“They’re not for seeing,” Santana clarifies with a chuckle, “They can take pictures.”
“Oh! Wow, really? That’s like some super secret spy stuff,” Brittany comments before taking a sip from her bottle.
“Yeah. They’ll be perfect for Emma when she and Tina go to the Cartier vault,” Quinn replies proudly.
Santana nods while Quinn stows away the glasses case for safe keeping. She turns to Brittany, “Nice jacket.”
Brittany looks down at what she’s wearing as if she forgot, “Oh this old thing?”
Santana chuckles, “Did you have a good ride?”
Brittany hops up on a counter and swings her legs, “Yeah, it was nice. Hot out, but nice. You should come with me next time. It’d be perfect for you, maybe you’ll finally find some peace.”
Santana shakes her head, “Peace? That’s the last thing I’d find if I got on that thing with you.”
“See, that’s what I don’t get,” Brittany laughs and waves at all the new equipment, “You can play with all this gear and put yourself in danger with these heists, but you draw the line at riding a motorcycle? Because that’s too risky?”
Santana takes a step closer to Brittany, “Among other things, yes.”
“Other things like what?” Brittany challenges as she sets down her water bottle. Her legs fall open a little wider and Santana nearly slips in to stand right between them without even noticing.
“Well for starters,” Santana narrows her eyes as she steps like she’s being drawn in, “There’s the helmet hair.” She reaches up and ruffles Brittany’s blonde hair, momentarily reveling in the softness, “Not cute.”
“You don’t think I’m cute?” Brittany asks behind a pout.
Santana almost falls for Brittany’s trap, “I just don’t think I could pull that off as well as you do.”
“I beg to differ,” Brittany grins mischievously and tugs Santana in close by her hips. It catches Santana off guard, but she doesn’t move once she’s there. She’s too caught up in the look Brittany’s giving her, “I’ve had many, many dreams of you doing just that and I can confirm, you looked very sexy. No surprise there though, you make everything look sexy.”
Santana smirks as she lifts a brow, “You having dreams about me now?”
“Yup!” Brittany pops the ‘p’ while her hands slide around to the small of Santana’s back, “Hot ones too. I’m kind of jealous of dreamy me. She has way more fun than I do.”
Santana giggles but it comes out low and husky.
The sound has Brittany licking her lips and the two get so caught up in staring at each other that they completely forget that they aren’t exactly alone. With how wound up they are and so desperate for each other, giving a fuck about being alone has nearly left the building. Brittany’s got Santana trapped between her legs and if Santana’s hands start to trail inward, she’d be right where Brittany wants her.
She thinks back on what Brittany said about changing her mind soon and she finds herself really considering it now.
When has an orgasm ever gotten her into trouble?
Santana thinks of a specific instance actually but chooses to ignore that one because majority of the time it doesn’t.
“Can you two make out somewhere else?” Quinn interrupts with a groan, “Some of us are trying to work here.”
Santana and Brittany both blink out of their daze and pull away from each other.
Thankfully, Quinn and the random delivery guy Hank are the only ones around but Santana doesn’t want to make something like that nearly happening in front of everyone a habit. She doesn’t want to deal with having to explain what’s going on between them; she just wants to steal some expensive shit and get rich, not have a whole existential crisis about whether or not her feelings would be taken seriously.
“I – I’m going to make sure Tina’s alright,” Santana says abruptly and heads outside. The more distance she can put between her and Brittany right now, the better. That was too close of a call for her comfort.
Quinn just eyes Santana leaving and turns back to Brittany with this tired look on her face, “So I see you two are still like this…”
Brittany frowns as Santana disappears out the door, “I guess so.”
\\
As the countdown ticks away, the most important day for Santana arrives. She’s trying hard to seem cool and collected, but on the inside she can’t help but feel a little anxious. Today, Emma and Tina are off to the jewelers to hopefully get a successful scan of the Toussaint so Quinn can begin the printing process and Tina can start crafting the decoy. It’s probably the most important part of the entire heist because without this scan, the whole thing goes to shit.
“Knock knock,” Brittany says softly as she raps her knuckles on Santana’s bedroom door. She’s already poking her head in through the crack, looking for where her partner might be.
“Hey,” Santana greets from the edge of her bed. She’s been sitting there for awhile trying to wrangle her thoughts so she can make it in time for the live feed of Emma and Tina’s trip.
“We’re just about to connect to the feed downstairs. You coming down?” Brittany asks.
Santana just nods, “Yeah. I’ll be there in a sec.”
Brittany frowns a little at the sight of her and the sound of that faraway tone.
“You okay?” She asks in that voice that calms Santana and puts her on edge even more so all at once. The blonde goes to take a seat next to her partner and eyes her warily, “You look stressed.”
“I think I am,” Santana chuckles lightly and turns to Brittany, “It’s an important day.”
Brittany gives her a sympathetic grin and squeezes at Santana’s thigh, “We’re gonna be fine. Everyone knows what they need to do. You know how to get us out if something comes up, right?”
Santana returns the grin, “Right.”
“So there’s nothing to worry about then,” Brittany shrugs, “We’re prepared for whatever happens. You made sure of that.”
“Yeah, you’re right,” Santana nods, already feeling somewhat eased by Brittany’s words, “Just the jitters I guess.”
“We’ll be okay,” Brittany moves to stand and holds out her hand, “Now turn that frown upside down, we’ve got a show to catch.”
Santana smiles at the offered hand.
This is why their dynamic is so perfect;. when one is starting to spin out, the other takes hold of the wheel and gets them back on track. They balance each other out but also always have each other’s backs. It’s something Santana’s never found in anyone else and it’s one of her favorite things about being in this with Brittany.
So Santana takes Brittany’s hand and they head downstairs together.
\\
It’s one of the most nerve-racking thirty minutes of Santana’s life, but just as Brittany predicted everything goes according to plan. They get a perfect scan and start the printing process so that by the time Tina returns to the loft there is a set of zirconia ready for her. While Emma’s across town attending her first session with Rachel Berry in regards to designing the gown she’ll wear for the Gala, Tina gets started on replicating the necklace.
“Wow,” Tina breathes out as she steps forward to get a closer look. The rest of the team minus Emma is huddled around her as she looks in the 3D printer’s case, almost mesmerized by how similar the fake is to the actual necklace.
“Think you can work with this?” Santana smirks, nudging her childhood friend’s arm.
Tina’s smile is big and bright, “Definitely. This’ll be fun!”
Sugar steps up too and her hands itch to make a grab at it, “You guys think I can try it on?”
“No!” Everyone says in unison.
Sugar just pouts and jams her hands into her pockets.
\\
In the following days the team begins to find their grove and go off on their individual missions: Emma deep in designing Rachel Berry’s dress, Tina hard at work on the necklace, and Mercedes hacking away. While Brittany hangs back with her and Sugar, Santana and Quinn head to the Met for their next task: plant a Banksy.
It’s a simple switcheroo, one that’ll cause enough ruckus to grab the security team’s attention which is exactly what they want. Minus the getting caught part, of course.
So once inside the Met, the two split off: Santana gets into position with the painting while Quinn distracts a guard. They’ve done something like this loads of times before, so the switch is smooth and Santana’s out of there in no time. With the Met thinking there’s been a breach of their security system, Mercedes can slip in and do whatever she needs to do to make sure that they can get around undetected.
Once a crowd begins to form, it’s all pretty fast moving and the two slowly make their way back to the car without a second glance.
When Santana and Quinn get inside, Santana pulls out her phone to send a text to Brittany to update her on their progress. She’s surprised to find a new text waiting for her though when she swipes into the conversation. It’s a selfie with Brittany and Sugar making silly faces while Mercedes sits behind them looking as unamused as ever with both of her middle fingers up.
It makes Santana chuckle before she goes to type her text.
Quinn notices and asks, “What’s so funny?”
“Just this picture Britt sent,” Santana shrugs as she types, “It’s kinda cute I guess.”
Quinn watches Santana’s smile grow and quirks her brow, “So…what is it about you and Brittany?”
Santana sends off the text and looks to Quinn questioningly, “What do you mean?”
“I see how you two interact with each other. Neither of you have changed any after all these years,” Quinn explains, “All of the planning and the scheming and the intricacy of it all…it’s like your foreplay or something.”
Santana feels her chest tighten and quickly turns away from Quinn to focus on starting the car. Here she goes again, sticking her nose job in places that she shouldn’t. Santana wished Quinn would just mind her business, but that wouldn’t really be Quinn now would it?
“That’s just how we are,” Santana brushes off as she begins to drive, “We like to have fun.”
“So that’s what you’re calling it?” Quinn smirks.
Santana rolls her eyes, “What else am I supposed to call it, Q?”
Quinn just shrugs and goes to look out the window. The silence doesn’t last long though.
“Fuck,” Santana snaps as they catch up to all the traffic, “We’re going to be here forever!”
Quinn chuckles at her dramatics. Since asking her question, they’ve sat in near silence the entire ride so Quinn jokingly asks, “Trapped in a car with me, isn’t that a dream come true for you?”
“You have no idea,” Santana answers sarcastically then lays on the horn as if it’ll make all the traffic suddenly disappear, “Let’s fucking go people!”
“Stop! What’s that going to do?” Quinn whines and starts swatting at Santana’s hand until she quits it. She gives her an annoyed glare which Santana returns instantly.
“We’re just going to have to wait it out,” Quinn says to which Santana lets out a long sigh. “Don’t be like that. This is good, we can finally catch-up. We haven’t really talked much since you broke into my garage.”
Santana softens at that. At one point in time, she and Quinn were pretty tight. Not in the way that she and Brittany are, but Quinn was around just as much. Also, there was the whole giving birth thing that Santana had to witness and that kind of thing creates a weird bond between people.
“Okay, what do you want to talk about?” Santana relents and puts the car in park since they aren’t moving anytime soon.
Quinn looks pleased with herself, like her mood has instantly lifted at the very idea of some girl talk.
Santana regrets agreeing to this the instant Quinn starts talking about Beth and how much she misses her daughter.
\\
Later that night, Santana’s sitting alone at a diner across from the McCallister Security tower. She’s been sipping coffee while Mercedes and Sugar are off trying to infiltrate the building. They got word that an important meeting regarding the Met’s breach was going down and it was imperative that they listened in.
Right about now, Mercedes should be tapping the room and then on her way to meet Santana at the diner where they could catch all the hot gossip. It takes about ten more minutes of Santana waiting before Mercedes finally joins her.
“Where’s Sugar?” Santana questions as Mercedes pulls out the headphones.
“Went back to the loft already,” Mercedes answers and hands Santana an ear bud, “Said listening to a meeting was even worse than having to sit in one.”
Santana chuckled as she popped the earbud in, “Fair enough. Let’s see what we’re dealing with.”
\\
It’s late by the time Santana and Mercedes return to the loft and almost everyone has gone to bed, everyone but Brittany.
“You’re late,” She points out as Santana and Mercedes enter. Mercedes’ brows rise at the blonde’s tone and quickly disappears to her room without a word.
Santana just strolls over with a sweet smile on her lips, “You keeping tabs on me, Britt-Britt?”
Brittany shrugs, “Maybe. Maybe I kind of missed you? Between Emma’s weird muttering and the constant squeak of rubber gloves and Tina being annoying, it wasn’t much fun here.”
Santana laughs, “What about Quinn?”
“She’s getting into character for tomorrow. Whatever that means…”
“She has her interview with Vogue,” Santana explains as she shrugs out of her jacket, “Sorry you were lonely. Mercedes and I grabbed a bite while we listened to the meeting. She’s actually pretty cool. Oh! I brought you a cannoli. You like those, right?”
Brittany instantly perks up as Santana hands her a small box. She wastes no time in taking a bite and hums happily at the taste, “Thanks San. You bring home the best desserts.”
Santana feels a blush beginning to creep up her cheek, but she does her best to ignore it and takes a seat next to Britt on the couch.
“How’d it all go?” Brittany asks with her mouthful.
“We’re in! It was an interesting meeting but a long one,” Santana smiles proudly before it falls, “These late nights are starting to get to me.”
“That’s because you need to relax,” Brittany tells her before putting on her best flirty smile, “You know, I can help with that. My offer still stands.”
Santana lets out a breathy chuckle, “Cute. I’ll keep that in mind, but I think I know something that might help me even more?”
“What is it?”
“Take the lead on the meeting tomorrow?”
“You giving up control on something?” Brittany fakes a gasp, “Maybe you really are losing steam.”
Santana just rolls her eyes, “You really gonna give me a hard time?”
“Sorry. Yes San,” Brittany nods seriously, “I can run the meeting for you.”
\\
And so she does.
The next day, Brittany gathers the team for an update on the McCallister Security meeting Santana and Mercedes listened in on last night and how that’ll effect what happens at the Met.
Mercedes has the overview of all the Met camera angles projected on the drop down screen while Brittany comes up to the group with a mug in her hand. She ends up handing it to Santana who is curled up the arm chair watching the various camera angles like it’s her favorite show.
“Here. Made this for you,” Brittany says softly as she hands Santana the mug, “It’s herbal. The packet said it’s supposed to help you relax or something.”
Santana takes the offered mug with a surprised smile, “Thanks Britt.”
“You’re welcome,” She winks before turning back to the team to get the meeting started, “Okay! So as you can see, the Met is covered in camera and security will be watching them like hawks. It’s almost impossible to get out of there without being spotted…let alone with a ridiculously expensive necklace at that.”
“Keyword there is almost,” Santana interjects before taking a sip of her tea because she can’t help herself.
“Right. We’re going for a spot security doesn’t even care about: the bathroom,” Upon its mention, Mercedes clicks to the angle, “But once we get going security is going to go over everything with a fine tooth comb, even angles like this. Whoever exits that is going to be a suspect. So what do we do?” Brittany asks and waits for someone to answer. When no one does, she continues, “We get a mule. Not an actual one like I thought, but a figurative one…sort of.”
The group all exchange somewhat confused looks so Santana cuts in, “Someone else is going to move the necklace for us.”
Brittany points to Santana, “Exactly.”
“Sugar, how much room do you need to plan something on someone?” Santana asks.
Sugar ponders a moment, “Like nine feet?”
Santana nods and looks to Mercedes, “And how long will it take to create a nine foot blind spot?”
“Maybe 10 or 12 days if I’m moving the camera bit by bit,” Mercedes responds.
Santana smiles proudly at their answers and looks to Brittany who’s already looking back at her with an equally pleased grin. She loves when things just come together like this.
“Sounds like a solid timeframe to me,” Santana says and turns back to the team, “What do you think?”
“Yeah, I can get to work on that now,” Mercedes replies and everyone else starts to shuffle about to continue their tasks.
“Wait!” Sugar stops them and raises her hand, “Question.”
Santana notes the hand in the air and laughs as she looks to Brittany, “Is she raising her hand right now?”
Brittany just shakes her head and laughs too.
“What is it, Sugar? I already told you I’m not paying for your Metro Card,” Santana says.
“It’s not that,” Sugar waves off as her hand drops to her lap, “I was just wondering…are you two like…a thing?
Santana looks slowly to Brittany.
“I was wondering that as well,” Emma adds, “You don’t really see one of them without the other.”
“Two peas in a pod!” Tina chimes in happily.
“Glad to see I’m not the only one that’s noticed these two fools making googly eyes at each other all the damn time,” Mercedes says next.
Santana catches Quinn’s eye and the blonde just smirks as she adds, “Didn’t I tell you that your subtly needs some work?”
Santana feels her face getting hot so she’s glad that the lights are still off for the projector because she’s sure everyone would see her as this blushing mess and that’s not a good look.
The team is all talking at once, giving their examples and theories, and it’s a lot. Santana doesn’t know how to deal and Brittany’s just kind of watching with her hand covering her mouth, hiding her smile. She thinks it’s all so hilarious and she loves how flustered and riled up Santana gets over the teasing.
The girl can dish it but struggles when it comes to taking it.
Suddenly Sugar has her hand up again and she’s speaking a little louder than everyone else, “Okay, raise your hand if you think Santana and Brittany are banging.”
Everyone raises their hand instantly, even Brittany.
“Oh my God, Britt, put your hand down,” Santana urges looking stressed.
Brittany does as she’s told as a couple giggles escape her.
Santana doesn’t think it’s quite as amusing though, “We aren’t banging. Who even calls it that anymore?”
“That explains everything,” Tina replies knowingly, “It’s probably why this heist is so immaculate, she’s gotta channel all that extra energy somewhere.”
“Preach,” Mercedes nods and goes to bump her fist with Tina.
It’s all playful – at least that’s what it was meant to be – but Santana hates feeling like the butt of a joke. She hates that her thing with Brittany is being analyzed by all these people she barely knows. People that shouldn’t be commenting on whatever goes on with them.
So she snaps and jumps to her feet to address the crowd.
“They’re immaculate because I’m a fucking genius and decided to use my time in solitary confinement wisely, so let’s just be careful here with trying to talk about things you know nothing about,” Santana threatens with her steely gaze, “Don’t forget. I’m a convicted criminal. I’ve been to jail and I will shank one of you if you happen to piss me off. So try me, I dare you.”
“Santana…” Brittany whispers and gives Santana’s arm a gentle tug, “They were just joking.”
“Well this isn’t fucking comedy hour, okay?” Santana growls and Brittany backs off as she turns to the group again, “You’re all here to do a job. Not speculate. There is nothing going on between Brittany and I – not that it’s any of your business – so let’s stay focused on the plan and do what we all came here to do. Get me?”
The group all nod in unison before heading back to their tasks.
Santana turns away from them and hits the lights. She’s still fuming and a little embarrassed but she instantly feels a whole lot better when she spots Brittany staring at her ass.
“That’s not helping,” Santana points out.
Brittany chuckles, “Maybe you should stop wearing those leather pants around me. You know they’re my favorite.”
“I thought you don’t pick favorites?” Santana asks with narrowed eyes.
Brittany lifts her shoulder casually, “Guess I make an exception when it comes to you.”
Santana’s heart skips a beat and it takes everything in her not to swoon. This is Brittany. This is how she talks to everyone. She’s charismatic and flirty and everything good in this miserable stinking world, but she can’t get wrapped up in all of that again.
It didn’t end well before and she doubts it’ll end well now.
23 notes
·
View notes
Text
Stark Spangled Banner Ch 56: Worthy

Intro: A few weeks post the Time Heist the team are finally ready to reverse the snap. The only problem is, when you mess with time it tends to mess back…
Warnings: “Language!”
Pairing: Steve Rogers x OFC Katie Stark
SSB Masterlist

October 2023
Katie walked over to the dresser in Nat’s room and smiled at the photos. There were a few shots, one of her with Clint, Laura and the Kids, one of her, Katie and Pepper at Tony’s wedding, but it was the biggest one that Katie reached out to pick up. It was a photo that Katie had taken in her and Steve’s back garden a few months before on Jamie’s third birthday. Nat had Jamie balanced on her hip and Emmy to her other side, hand round the teens shoulder. She was smiling, happily at the camera, almost like she had no care in the world.
“Hey.” a soft voice spoke behind her and she turned to look at Steve. He was already dressed in his Captain America suit. “I’m not even gonna ask how you got in here.” “I already had access.” Katie shrugged, replacing the photo “She had access to ours as well, although she never used it much, especially not after that time she walked in on us on the couch and got an eyeful of your ass going ten to the-“ “Yeah, yeah, I remember.” he snorted, leaning on the doorframe, the pink tinge spreading up his neck to his cheeks as he recalled the incident. There had been a lot of yelling, shrieks, giggles and one strategically placed throw cushion as he had stood up and reversed hastily to the bedroom out of view. “She told me she needed four bottles of bleach for her eyeballs.”
Katie sniggered before she sighed. “I miss her Steve.”
“I know..” he said gently, walking into the room and she melted into his arms. “I wish I could tell you it goes away but it doesn’t. You just learn to live with it. I promise it will get easier though.” Katie smiled at his words. She knew full well what living with grief was like, they’d done it enough over the past five years but he wasn’t trying to be patronising, merely trying to lend her some comfort and she loved him for that.
“Given that Halloween isn’t for another two weeks I take it you’re dressed in your Spangles for a reason?” she pulled back and he nodded.
“We’re ready.” he gave her a significant look.
Katie let out a breath. They’d been working on the gauntlet now for the past few weeks since their mission to get the stones had been successful. The team of Thor, Rocket, Tony and Banner all spending hours at a time in the lab. Given that the Time and Soul stones were the only ones they had in their true gem form that had been the first challenge. Some had been easy, all they had to do was smash open the various items they were contained within- namely the Tesseract, Sceptre and Orb. But even that had to be done in a controlled way so no stone was damaged or disturbed. Then, a slightly trickier task, they’d had to figure out how to solidify the Aether. Thor had been extremely nervous about this given his history with it and how it was able to “consume” people it decided to use as hosts. After days of brainstorming and various ideas they dismissed, Tony had come up with the idea of using the 3D printer to create a vessel, using a scan of one of the other stones. That had been what they were working on more recently, and had obviously been successful.
“So, err…it’s time?” Steve nodded “Everyone’s meeting in the lab.” he nodded to the photos on the side. “ Then we can make her sacrifice worthwhile.”
Katie followed his eye line and nodded. “Yeah, I’ll go grab my suit.” He bent down to give her a soft peck on the lips and watched her go before he turned back to cast a cursory glance around the room. It was a little untidy, but that had been Nat all over. “Organised chaos” she had described her nature as.
“You weren’t wrong Widow.” Steve said gently, before he turned and shut the door behind him, striding back to the lab.
He arrived just in time to see Tony stood by the glass case housing the gauntlet, his hand carefully manipulating the machines to cautiously place all six stones in their respective places on the Gauntlet.
“Boom!” Rocket let out a yell and both Tony and Bruce jumped a little. Tony turned to glare at the animal who was sniggering at his joke.
Steve rolled his eyes, he still wasn’t sure about the animal but he couldn’t deny he’d been useful, his knowledge filling in a lot of gaps they had.
“Ass hole.” Tony grumbled as Steve crossed the room to pick up his helmet which was lying on a desk. Tony looked up at him. “You find Kiddo?” “Exactly where I thought she’d be.” he nodded “She’s gone to suit up.” It wasn’t long before she returned with Clint and Scott. Scott was already in his Ant-Man suit, Clint in his Hawkeye get up and Katie in her leathers, the bangle that contained her Supernova suit gleaming on her wrist. Steve’s eyes travelled over everyone as they checked their various bits of equipment, and he took a deep breath. He was nervous. Everything they had been through over the past 5 years and more recently the sacrifice their best friend had made all came down to this. A literal snap of the fingers.
Eventually a silence fell over the room as everyone crowded round the gauntlet. A quick headcount told Steve they were one short, and he didn’t mean Natasha either. Nebula was absent but he assumed she was elsewhere at the request of Tony for some reason, maybe doing some checks in other areas. He was about to ask when Rocket spoke up.
“All right. The glove’s ready.” his arms folded. “Question is, who’s gonna snap their freaking fingers?”
“I’ll do it.” Thor said immediately and they all turned to face him, Lang speaking the words that were on everyone’s minds.
“Excuse me?”
“It’s okay.” Thor nodded, heading towards the gauntlet where he was immediately met with a barrage of protests from around the room.
“ No, no, no, whoa.”
“ Stop. Stop.”
“ Wait a sec. Hey, hey..”
“Wait, wait, Thor, just wait.” Steve said gently, his arm reaching out and stopping the God before he put his arm in the glove “We haven’t decided who’s gonna put that on yet.”
“I’m sorry. What, we’re just sitting around waiting for the right opportunity?” He bit back.
“We should at least discuss it.” Katie nodded, trying to appease him.
“No, no, sitting here staring at that thing is not gonna bring everybody back.” he looked at her, shaking his head “I’m the strongest Avenger, okay? So this responsibility falls upon me. It’s my duty.”
“It’s not about–“
“It’s not that– Stop it! Just let me!” Thor pleaded as he started to get teary eyed. Katie took a breath as she could almost feel the guilt that was radiating off him in waves. “Just let me do it. Just let me do something good. Something right…”
“Look– It’s not just the fact that that glove is channeling enough energy to light up a continent, I’m telling you, you’re in no condition.” Tony shook his head.
“He’s right Thor.” Katie looked at him. “Let’s just think about it ok?”
“What do you–“ Thor shook his head as he looked from her back to Tony “What do you think is coursing through my veins right now?”
Katie took a deep breath and crossed her arms in front of her chest, looking at Steve who mimicked her action subconsciously, shaking his head slightly.
“Cheez Whiz?” Rhodey supplied from the side of the room. Thor pointed at him, shooting him a glare but all Rhodey did was shrug.
“Lightning.” he replied.
“Yeah.” Tony placated him slightly, and Steve opened his mouth to tell Thor that regardless of what he wanted, they needed to think about this some more but it was Banner who spoke first.
“Lightning won’t help you, pal. It’s gotta be me.
Thor relaxed his grip on Tony and his arms dropped to his side as he glanced at Banner.
“You saw what those stones did to Thanos. It almost killed him. None of you could survive.” the green man spoke, his eyes focussed on the red gauntlet which sat in its case as he walked towards it.
“How do we know you will?” Steve questioned as Banner passed him by.
“We don’t. But the radiation’s mostly gamma,” he said, his eyes still on the gauntlet, as if he was contemplating something. Then, with a smile he turned to look at Katie, then Tony as he spoke again. “It’s like….uh…I was made for this.”
Katie looked at Tony, before they both glanced back at Banner who smiled at them again, the siblings instantly understanding what he was referring to. Katie was suddenly catapulted back to a Hellicarrier in 2012 when the Avengers had assembled for the first time…
“You know, I’ve got a cluster of shrapnel, trying every second to crawl its way into my heart.” Tony said, pointing at the Arc-Reactor in his chest as he walked towards Bruce “But this- this stops it. This little circle of light”
“Because that’s the same…” Katie said sarcastically rolling my eyes.
“The point is it’s part of me now, not just armor.” Tony ignored her as he stood opposite Banner, looking at him through you clear screen as lines of data swam across it. “It’s a… terrible privilege.
“But you can control it.” Bruce pointed out.
“Because I learned how”
“It’s different.” Bruce returned back to the computer screen but Tony slid the data aside with his fingers so the two could see face-to-face without interruption.
“Hey, I’ve read all about your accident. That much gamma exposure should have killed you.”
“That’s true…” Katie said, watching the exchange.
“So you’re saying that the Hulk…” he paused, smiling sadly as he correcting himself whilst Tony raised his eyebrows “The other guy saved my life?”
Katie looked at Tony. His eyes were flashing bright as Bruce looked back at him. Tony gave him a significant look.
“That’s nice, it’s a nice sentiment.” Bruce said as Tony moved back to his computer. “Saved it for what?”
Tony hesitated and looked up “I guess we’ll find out.
And it seemed they just had. Unlike Steve, Katie did believe in fate and destiny, certainly to an extent anyway. After everything she had seen and experienced over the past twelve years or so since first meeting Thor she couldn’t help but consider there was an element of truth in the fact that they were all pawns in a bigger game.
She glanced at Steve who was studying Banner, but made no move to stop him. He couldn’t argue with the man’s logic. Tony helped Bruce remove the gauntlet from the casing before he handed it to the Doctor.
“Good to go, yeah?” Tony asked.
Bruce nodded. “Let’s do it,”
“You remember. Everyone Thanos snapped away five years ago and just bring them back to now.” Tony reminded Bruce “Don’t change anything from the last five years,”
Bruce nodded again “Got it.”
“Good luck,” Katie encouraged before she twisted the star on her bangle causing her suit to flow over her body, Tony doing the same with his chest piece whilst Steve gripped his shield on his arm. Katie’s own shield appeared in front of her and she looked at Steve where he stood next. He flashed her a small smile which she returned before her helmet slid round her head.
“FRIDAY do me a favour and activate Barn Door Protocol” Tony announced as he stepped in line with Clint, a shield springing from his suit. Thor stepped in front of Rocket whilst Rhodey and Scott also fully engaged their suits.
“Yes boss,” she replied and around them all the facility went into lock down as shutters closed over the doors, windows and roof. Katie she stood with her feet slightly apart, in an almost identical stance to Steve, their defences raised in front of them.
Bruce looked at the gauntlet in his hand for a second. “Everybody comes home,” and with that he slid his fingers into the glove which nanobotically expanded to fit his hand. As they watched the stones lit up in different colours, the lines spreading up Bruce’s arm as their power surged up towards his shoulder and neck. He cried out in pain, almost falling and Katie watched worriedly as the man continued to shout and groan, his teeth grit together.
“Bruce?” Katie asked as Steve shifted besides her, his legs apart ready to dive in if he had to. Bruce then knelt down, face contorted in pain.
“Take it off. Take it off!” Thor cried out, starting towards him.
“No, wait.” Steve urged, holding his hand up. They knew something like this was going to happen, they’d seen the mess left of Thanos’ arm. But they couldn’t quit, not now. “ Bruce, are you okay?“
“Talk to me, Banner,” Tony demanded.
“I’m okay, I’m okay” he repeated as Thor gave him two thumbs.
After what felt like hours, Bruce slowly raised his arm. With a final grit of his teeth, he moved his fingers and everyone braced themselves. Steve moved himself in front of his wife with his shield raised, even though she was probably more protected than he was, such was his force of habit. Bruce let out a yell and his fingers snapped. Everyone shielded their eyes from the blinding white light that filled the room but it was gone as soon as it had appeared.
Steve had to admit he had expected more, but his concern at the moment was Bruce who collapsed backwards to the floor and the gauntlet slid off his hand dropping to the tiles with a clang.
“Bruce!” he called, kneeling down besides him. Clint booted the gauntlet across the room away from Banner as Tony dropped to his knee next to him.
“Don’t move him.” Tony instructed as Bruce gripped onto Steve’s arm with his left h, blinking in pain. Tony sprayed his right arm which had held the gauntlet with foam to cool him off.
“Did it work?” Bruce asked, his breathing deep.
Katie glanced around. They actually had no idea. They’d need to find out somehow. She spotted Scott walking towards the windows of the facility, the blinds sliding back as the lock down reversed.
“Worth a shot.” Thor said, clearly having already decided it hadn’t. He knelt down besides Banner “It’s okay…”
As Steve, Tony and Thor tended to Bruce, Katie stood up and watched Scott who stood by the window. She squinted and could just make out a few birds in the tree on the patio area. She swallowed slightly, whilst birds hadn’t been uncommon in the five years, they had certainly been down in numbers. It was unusual for four to be in a tree that small. She was then distracted by Clint who had given a sharp intake of breath and she spun to watch him as he picked up his phone with a shaking hand.
“Honey.” he croaked, and she watched as his face contorted into raw emotion as he struggled to speak from sheer happiness. “Honey?”
Katie took a deep breath, as her own tears threatened to overwhelm her. There was only one person that could be, and if it was her then…
“Guys, I think it worked,” Scott spoke from his spot and Katie looked at Steve who glanced up at her, his own eyes shining as he smiled.
“We did it.” Katie breathed out, looking round as she gave a watery laugh, wiping away her tears “Son of a bitch, we actually-“
But she didn’t get chance to finish her sentence as suddenly there was a huge explosion, and the ground was falling open beneath them all.
*****
Smoke. Fire. Ash. Gushing Water. That was all Katie could see, hear and feel. She was aware that FRIDAY was yelling in her ear, then she could hear Tony, and there was something crushing her into the ground further, something ridiculously heavy on her back. She tried to push herself up, but the weight was too much.
And then it was gone as fast as it had registered in her mind, and a strong arm was hoisting her to her feet.
“Little Stark?” Thor asked as she gave a groan, retracting her helmet. “Are you ok?”
“No serious injuries detected.” FRIDAY spoke in her ear and she nodded to the God.
“I take it that wasn’t the snap.” Tony mumbled as he blasted away a piece of concrete that had been pinning him down on his back. The three took a moment to look around where they were stood in the ruins of the compound, before Thor gave a lowly growl and walked to the edge of the blown apart building, looking down into the huge crater.
“No, it was him.” he nodded. Katie and Tony both joined him and Katie gave a sharp gasp as she saw Thanos in a distance, sat on a rock.
“Where’s Steve?” Katie suddenly remembered him, glancing round furiously. She engaged her helmet again and FRIDAY scanned the piles of rubble but she needn’t have bothered, she spotted him almost immediately. Her and Tony moved towards him, Tony stooping to grab his shield as Katie gently dropped to Steve’s side where he lay unconscious.
“Stevie?” she said gently, “Come on honey, wake up.” Steve in haled sharply, his eyes flying open and Katie let out a sigh of relief.
“That’s my man,“ Tony smiled, leaning down towards Steve who glanced up, his breathing evening out as he realised where he was. “Loose this again,” Tony held out the shield, “I’m keeping it.”
Steve grimaced and turned to look at his wife. “You okay?” “Yeah.” she nodded “Tony’s suits are pretty good, who knew huh?” Tony scoffed as Steve blinked, getting his bearings, before he looked around, taking in the debris and rubble of the compound “What happened?”
“You mess with time it tends to mess back,” Tony spoke gently, glancing at Katie who turned to look at Steve, her eyes wide with fear. “You’ll see.”
“Thonos?” Steve swallowed, and Katie nodded. Steve exhaled again as Tony helped him to his feet and the three of them walked over to Thor, who was stood observing Thanos from a distance.
“What’s he been doing?” Tony asked, standing to Thor’s left as Katie stood to the God’s right in between him and her husband as the four of them glanced down at the Titan.
“Absolutely nothing,” Thor’s voice was low.
Steve had no idea how the Titan was there, but he didn’t really give a shit either. There was one thing they had to do, and that was all that mattered.
“Where are the stones?” Steve asked.
“Somewhere under all this,” Katie gestured to pile of ruins under their feet. “All we know is that he doesn’t have them.”
“So we keep it that way,” Steve spoke simply, steely determination laced through his voice, his eyes not moving from the Titan.
“You know this is a trap, right?” Thor asked, his gaze also locked on the large warrior.
“Yeah. I don’t much, care,” Tony replied with a shrug.
“Good. Just as long as we’re all in agreement,” Thor nodded, and with that there was a large crack of Thunder and lightning began to surround the God as he stretched out both hands to summon Stormbreaker and Mjolnir. Katie couldn’t help but watch in awe as his casual clothes transformed into his armour and cape, with his beard flowing into a braid, giving him a distinctive Viking Warrior look.
“Good to have you back, Thunder God.” Katie smiled at him as he turned to give her a wink before he looked over her shoulder at Steve, who nodded at him.
“Let’s kill him properly this time,” Thor said.
Thor jumped off the edge of the ruins they were stood on, landing with a loud crash on the ground. Katie moved to one side of Steve, wrapping her arm around his as Tony did the same, the three of them flying forward and landing with a little more grace than Thor had done. The four of them started to walk, but Steve pulled on his wife’s arm.
“You need to promise me.” he looked at her as her helmet flew back “If this starts to go sideways…” “Bit past that.” she looked at him.
He sighed “Baby, the kids.” “Steve.” she sighed, taking a shaky breath “If we don’t get rid of him...”
She trailed off as Steve looked up at Tony and Thor who continued to advance ahead of them. He ran his hand down his face. She was right. He wanted her as far away as possible, with their kids, safe, but nothing was safe now. And if she left, and they failed she was as good as dead anyway, they all were.
“If we go, we go.” she looked at him, the tears in her eyes “We have to try or they don’t stand a chance. Whatever it takes.”
Steve couldn’t bring himself to reply. Instead he gave her a curt nod and the two of them strode forward to confront the man who had haunted their dreams for the past five years.
“You could not live with your own failure,” Thanos said as they drew closer. “Where did that bring you? Back to me. I thought by eliminating half of life, the other half would thrive. But you’ve shown me that’s impossible.”
The four of them split up, as they began to surround Thanos, circling him, whilst he spoke.
“As long as there are those that remembered what was, there are always those that are unable to accept what can be. They will resist.”
“Yeah, we’re all kinds of stubborn,” Tony continued his pacing to stand behind the Titan.
“I’m thankful, because now I know what I must do,” Thanos stood up. “I will shred this universe down to its last atom.” He reached for his helmet which had been propped up on the edge of his sword. “And then with the stones that you’ve collected for me,” he placed the helmet on top of his head, “I’ll create a new one, teeming with life,” he pulled his sword from the ground, “that knows not what is lost, only what has been given,”
There was a rush and a flash as the lighting flew round Thor’s axe and hammer, his eyes flashing as he stood to Thanos’ left as Katie placed herself to his right.
“A grateful universe,” Thanos concluded.
“Born out of blood,” Steve glared up at the man.
“They’ll never know it,” Thanos cocked his head to the right. “Because you won’t be alive to tell them.”
Thor gave out a loud cry as he surged forward, Tony and Katie both shooting into the air whilst Steve threw himself in, shield first, as the four of them worked in tandem.
It was brutal, hard, just as Steve had remembered from Wakanda only this time they were engaged directly with him, and it was fast becoming apparent that this Thanos was equally as vicious an opponent than his future self had been.
“Okay, Thor. Hit me.” Tony’s voice rang over Steve’s comms as Katie flew up out of the way of the Titan’s sword as he swung it at her, deflecting the blow from her repulsors.
As Steve launched his shield again, Thor banged his axe and hammer together, shooting Tony’s suit with lightening. Tony then shot the extra energy out using his hands and body, Katie joining him. Thanos twirled his blade in front of him, diverting the energy and Steve gave a yell as it rebounded back to Katie, her suit taking a full shot causing her to fly off to the side, colliding harshly with a huge piece of the compound structure.
With a roar of rage, Thor grabbed Stormbreaker and used it to bat his hammer to hit Thanos, who used Tony as a shield, casting the man aside. He lay motionless on the ground.
Steve launched forward but was flung away, landing with a heavy thump to the head. Jesus, he was seeing stars, but he had to get up. He glanced around and saw Katie was pushing herself up on her hands, so she was on all fours. With the ringing still in his ears he saw Thanos pounding down on Thor, Tony motionless in the background. With a loud grunt and his teeth gritting together Steve reached out to push himself up, but he paused when a sudden shock of warmth vibrated up his arm. He instantly glanced down at his hand and realised he’d flattened his palm against Thor’s hammer, not the ground. He frowned for a moment, the last time he had tried to move it, it had given a little, but he hadn’t felt anything like that. With an automatic movement, one that seemed completely out of his control, he reached out and gripped the handle, and sucked in a breath as he pulled up, and the hammer came with him.
Katie got to her feet and spun round right in time to see Mjolnir flying towards Thanos who was currently trying to push Stombreaker through Thor’s chest.
But if Thor was there then who…
The hammer whacked Thanos harshly in the side of the head, sending him flying away. It carried on for a while before it stopped, and boomeranged back right round and she followed it with her eyes as it flew into Steve’s waiting hand.
“Holy shit...” she spluttered at the same time as Thor breathed a little smugly into the comms.
“I knew it!”
Steve was wielding the hammer. Steve Rogers, the kid from Brooklyn that was too dumb to run away from a fight was worthy. But then, as Katie watched him turn to look at Thanos, hammer in hand, that determined expression on his face as he sized up his opponent, she realised there was no one else more worthy than the man who had done nothing but continually put his life on the line for others.
Thanos kicked Thor harshly in the chest sending him straight through the rock he was up against and then Steve proceeded to charge at Thanos, swinging Mjolnir and hitting him in the face knocking him down. Katie took off towards the two, as Steve launched his shield, but Thanos deflected it easily. Katie shot at him again as Steve threw the hammer into to his shield creating a shockwave and knocking Thanos back off his feet before the Captain went on the offensive, shield and hammer flying through the air again and again before he lined his arm back up and summonsed the lighting. Shooting a shock at Thanos he blasted the Titan off his feet before Katie landed in front of him giving a yell. Just as Thor had done before to Tony, he charged up her suit and she powered everything she had into the Titan as he lay on the floor.
Steve drew to her side as she unloaded but before she could say or do anything else Thanos’ sword flew back at her and she dodged out of the way, but wasn’t quite quick enough. It hit her hard in the chest and sent her skidding backwards against the floor where she collided with a metal piping, and everything went dark.
Thanos advanced on Steve, menacingly swinging his weapon and one on one, even with the hammer Steve was no match for him. He lost the hammer and after receiving a nasty stab to the leg, and gash to his arm, he could do nothing but hold his shield up to deflect the blow that was coming his way.
Only it didn’t.
Thanos’ double edged weapon sank straight into the Vibranium. Steve looked at it in shock and horror, never once had anything ever penetrated the metal, but he didn’t have chance to think about it as the blows continued. Pieces of his shield were shearing away left right and centre and then Thanos tossed him aside like he was a rag doll.
He landed harshly a few feet away from Katie and rolled onto his back, his eyes closing and his chest heaving with exertion as he felt a desperation flood his system as the faces of his kids and his wife flashed through his mind.
Steve Rogers might be worthy, but he was beat.

Tags
@the-omni-princess @momobaby227 @geekofmanythings16 @angelofhell-666 @thewackywriter @marvelfansworld @cobalt-gear @asgardlover75 @jennmurawski13 @jtargaryen18 @saiyanprincessswanie @navispalace @patzammit @joannaliceevans-fanficblog @icanfeelastormbrewing @djeniiscorner @ayamenimthiriel @coldmuffinbanditshoe @disneylovingal @madzmilllz @sgtjaamesbaarnes
#stark spangled banner#steve rogers x original female character#steve rogers x oc#steve rogers#captain america#tony stark#iron man#bruce banner#hulk#clint barton#hawkeye#thor#scott lang#ant-man#rocket raccoon#james rhodes#war machine#mcu#mcu fanfiction#marvel#marvel fanfiction#avengers#avengers fanfiction
54 notes
·
View notes