#homemade print
Explore tagged Tumblr posts
Text
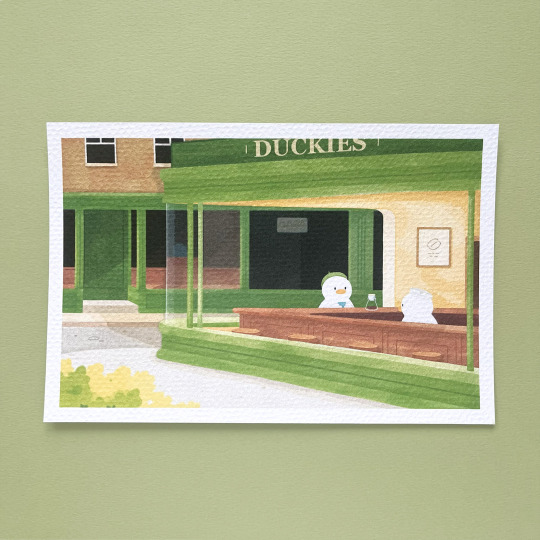

"Early birds" textured art print is now live on the shop! 💛
#my art#shop update#look at all that yummy texture#probably my favorite art print done yet!#will be hanging one of these on my own wall lmao#art print#print#art#illustraton#drawing#paitning#homemade print#small buisness#etsy shop#artists on tumblr#artist on tumblr#edward hopper#the nighthawks#coffee shop#duck#duck art#jeeklaart
106 notes
·
View notes
Text

Ramoscello《ちいさな枝》
Lithograph, ed.5, 22cm X 13cm, 2022
Naomi HASHIMOTO
#printmaking#lithograph#lithography#color lithograph#art#artwork#fantafonte#homemade print#Naomi Hashimoto#橋本尚美#リトグラフ#版画
1 note
·
View note
Text


some of my fave a1/a2 drawings from 2024 🪽
#vati draws#look homeward#a1/a2#ocs#really glad i got to make so much original art this year#thank u guys for sticking w me and listening to me yap about them#i love them so so much and its so cool to see other people becoming fond of them#homemade fandom my beloved#hopefully 2025 will be the year look homeward volume 1 gets a print run
318 notes
·
View notes
Text
November 17th is National Homemade Bread Day, a day dedicated to baking bread at home. Well, since we have a large bread advertisement, we thought this cut would suffice!
For today, Jared letterpress printed a large electrotype of an advertisement for the Old Home Bread Company. This cut is from 1936, based on the print, and it is one of the largest cuts we have in our print shop exhibit. This was likely used to print a double sided sign for grocery stores. This was printed with black rubber base ink using our Washington hand press, which was made in 1852.
131 notes
·
View notes
Text

My teeth jewelry collection <3
#Necklace is a real tooth I put on a chain#Middle are 3D printed and homemade#The silver ones someone gave me as a gift#Teeth#vulture culture#oddities#my crafts
70 notes
·
View notes
Text

Going for an oddly vintage vibe today
#ootd#homemade clothes#i am aware of how the print on this fabric is always lewdly placed on my chest no matter which part of the print it is#it's fine
42 notes
·
View notes
Text
researching bookbinding... this is the year i finally bind a smutfic for my bestie. the one i was reading out loud to her and my partner when a deer hit our car in the national forest. and another deer almost hit the ranger car that came to pick us up. the three of us had to stay in a shady forest hotel but at least we got to read about bisexual threeways together. and eat soup out of a tupperware <3
#i will not drop the fic title <3 bc it's problematic soz#but it is very horny. the deer might have been a sign from god but who can say#anyway this is an accountability post. i am going to fucking Do It. somehow#currently learning about how to print a cover on homemade bookcloth. and i'm going to commission an artist (who has also resd the fic lmao)#to design the cover art... much to think about#abbey.txt
18 notes
·
View notes
Text
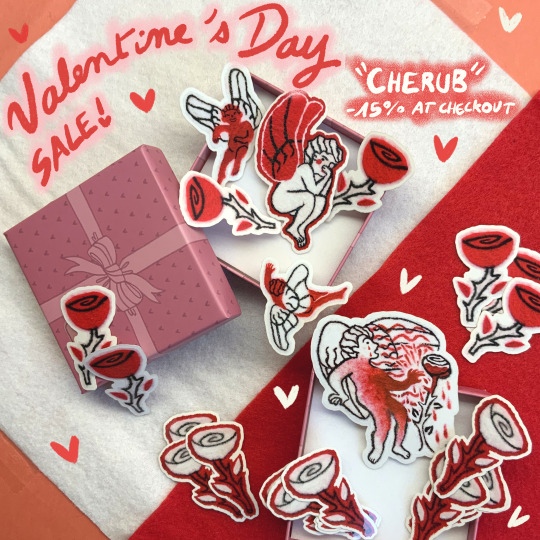
since valentine's day is in two weeks, i'm hosting a sale on my shop until feb 14th!! use code "CHERUB" at check0ut if you're interested in things like cute angels, birds and/or wax seals 👼💌
#french art#french artist#french artwork#french art student#french illustrator#french illustration#small business#stickers#prints#homemade stickers#homemade prints#online shop#cherub sticker#cherub print#bird sticker#bird print#wax seal sticker#wax seal print
452 notes
·
View notes
Text
How to Make a Printing Screen from Home
I wanted to share a quick cute little tutorial for how I made my own screen for making patches (and other things that don't require exact measurements). Cute lil how-to under the cut >:)
Disclaimer: I have absolutely no idea what I'm doing at any given moment. There could be a better tutorial out there for you. I'm just guessing for a lot of the things I do and this is no exception. With that out of the way:
THE SUPPLIES YOU DEFINITELY ABSOLUTELY NEED:
a small/medium canvas (depending on what you have and how big your design will be)
paintbrushes
a tight-woven sheer fabric (preferably not stretchy and STRONG)
a fine-tip pen
water-resistant gloss of some kind (mod podge works, but make sure it's a waterproof kind if you want to make more than one print)
paint that won't come off in the wash (acrylic/spray paint work)
good strong tape
a good sturdy card-like thingy
an easy/cool design for your print :)
THE SUPPLIES THAT ARE RECCOMENDED BUT NOT NECESSARY (aka things I like to use):
a good canvas fabric/thick cotton for printing on
fabric paint (will stay on the fabric best duh)
a 1/2in, 1/3in, and fine tip paintbrush for details (depending on your design)
some company for fun :)
Alright, so first you'll want to figure out the design you want to print out and get a good sketch over it. I'm a detail freak so I like sketching out my design then going over it in a black pen. The ideal is hard contrast and clear and discernable lines/fill-in spots, like pictured below:
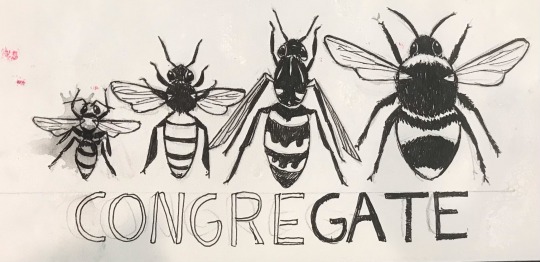
(Note how I emphasized which spots were to have thicker lines, which parts of the stripes were to be printed, etc. I tried to think a lot about which portions I wanted to show up on the finished design and how they would look on the fabric as a whole.)
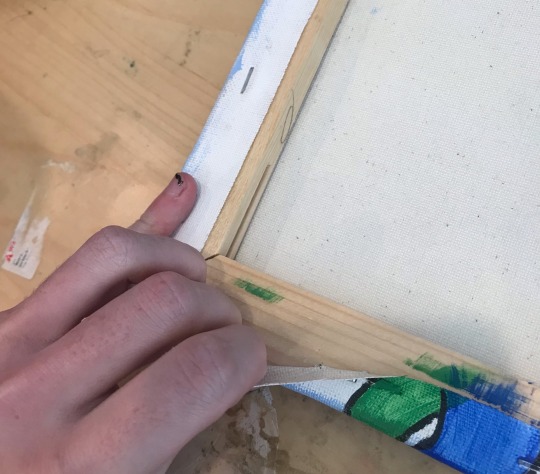
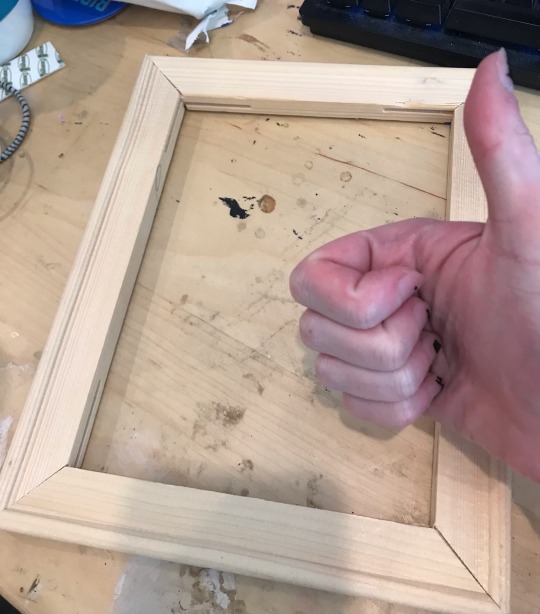
So you've got your design. Great! Next step is a fun one: Grab a canvas you are willing to part with (this one was a painting I made when I was 16. I hate it), and rip all the fabric off of that fucker!! If you pull off some staples in the process, don't worry. Just make sure you can retain the shape of the frame, since that's the part you'll need to keep. You don't need to take off every single bit of the fabric, but as previously stated, I'm a freak, so I did. You'll come out with something like this:
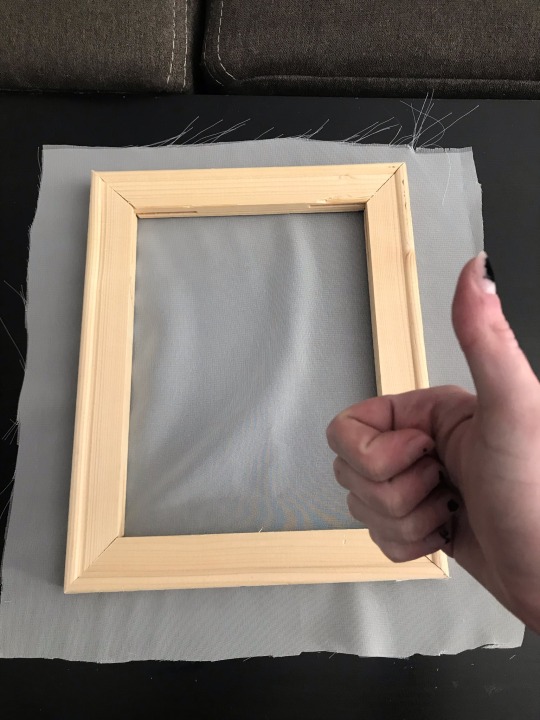
For the next steps you'll need a good pair of scissors as well as your pen and your sheer fabric. You're going to want to set the frame on your fabric and cut about an inch and a half around it so there's extra to wrap around the frame and tape down. You can draw a guideline for where to cut if you want, but once again, I'm a freak:
Now lay the front of the canvas frame (the part without staples on it) face down on the fabric and grab your tape! Now we're going to tape down each end of the frame so the sheer lays taut on the frame. I like to put one or two strips of tape on the ends parallel to each other and pull them tight, then do the same with the other side, then continue adding tape until the whole outside of the frame is covered. See below:
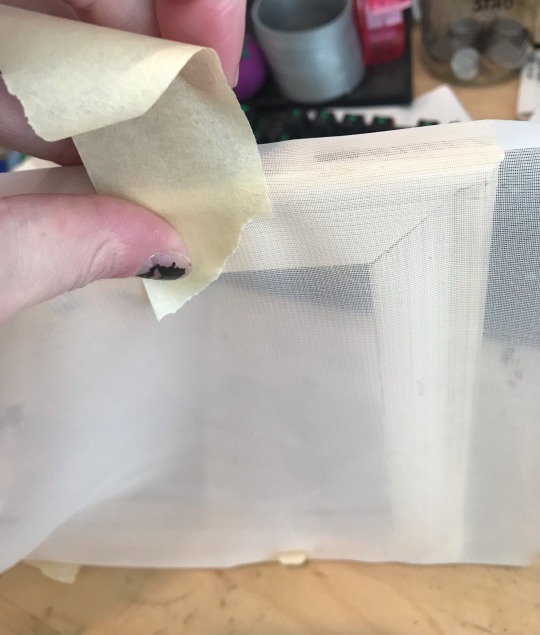
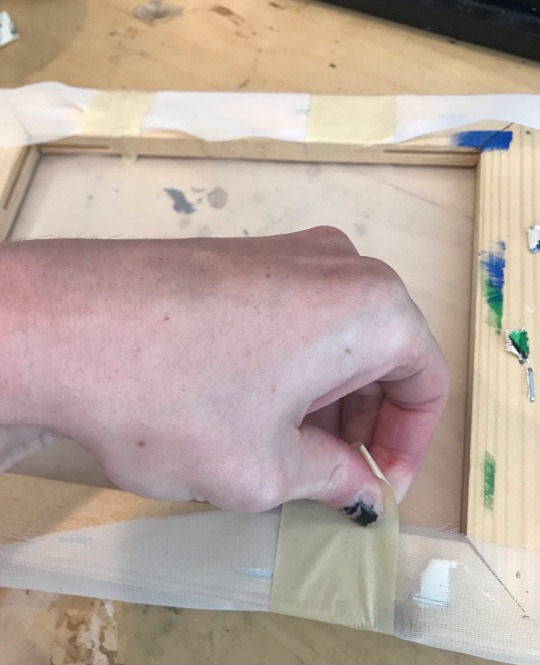
(Note: your goal in this step is to stretch the sheer as tight as it can comfortably go so there are no wrinkles or depressions in the fabric.)
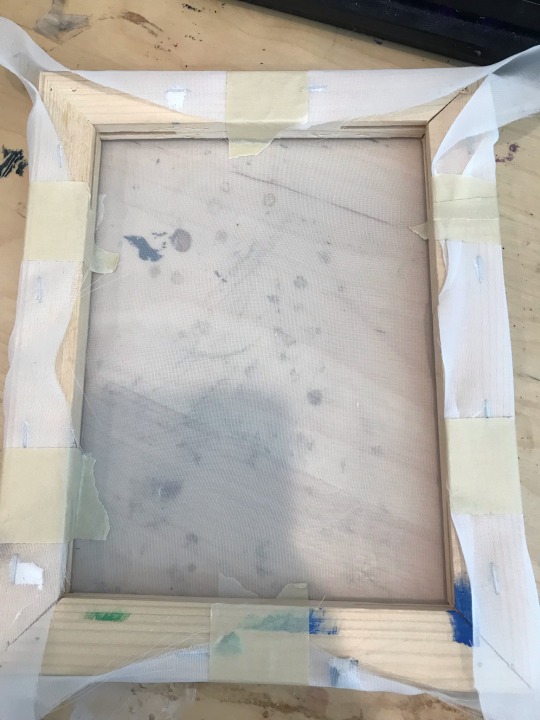
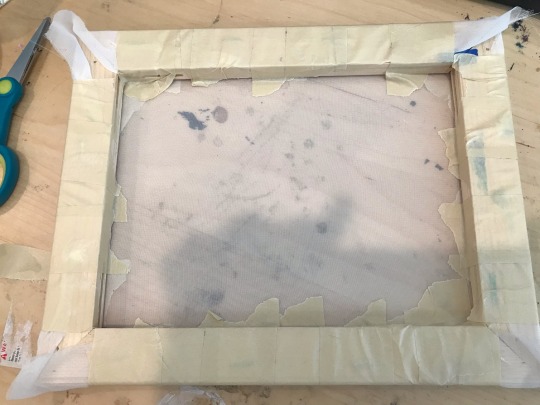
So now you have you're frame. Fuck yes!!! Go ahead and grab the design you came up with as well as your pen (you can use a pencil too, but the pen shows up much better through the fabric so I definitely prefer it), and put the frame front side down onto the sketch.
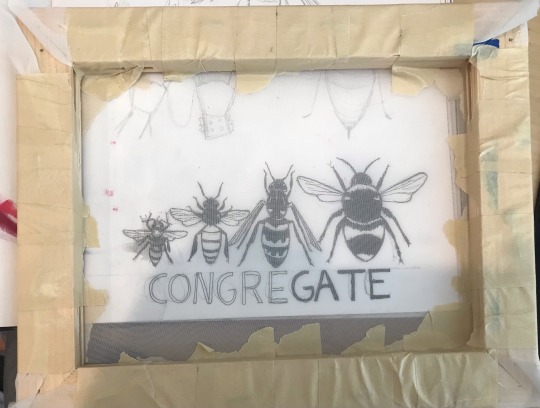
If you're worried about keeping the frame steady, feel free to tape the frame down and go ahead and trace over the design with your pen. Make sure to fill in all the dark parts enough that you can differentiate them from the light parts.
Once you have your sketch copied to the frame, now you can grab your gloss!!! Hurry!!! You're almost done!!!!
With this step I like to start big and go into the details once all the larger portions of the sheer are covered. Pretty much you're going to paint over every part that isn't the black of the pen with your waterproof gloss. This ensures that once you start printing, the only parts that are going to bleed through the fabric will be the black parts that weren't painted over with gloss/varnish/mod podge/whatever you used as long as it's waterproof!!! Take all the time you need, it's not a race. Once you're done and the gloss has dried, your screen is going to look something like this when put up to a light:
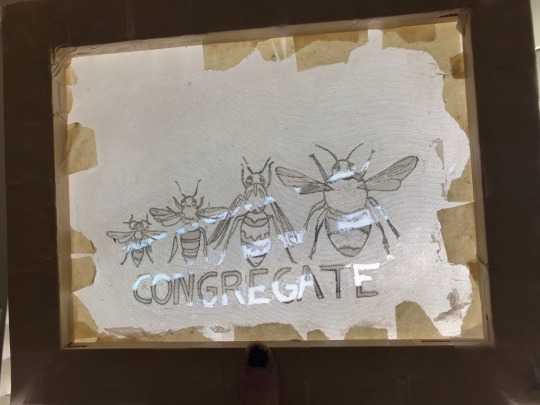
Now that this step is over with, congratulations - you have just made a mesh screen!!! Keep reading to learn how to use it lol
So for the patches that I make I just went with black and white paint, and black and white fabric to keep it traditional, but you can use any colors of paint and fabric you want, truly! The world is your oyster! I do not care! That being said, we're keeping it simple today.
Grab your screen, a piece of fabric that can cover the design and leave at least an inch of space around it, and a surface you won't mid getting paint on on accident. You'll also want to grab that card-like thingy for this as well. It can really be anything that can provide a sturdy, even pressure across the screen consistently. Go ahead and pick up that fabric paint too, I guess. We'll probably need that.
At this point, this is what your workspace might look like:

Next up you are going to center your design onto your piece of fabric-

-and grab your fabric paint. put a thin little stripe over the top (start slow and add more - as you can see I added a little too much and kinda fucked up my design) then grab your card thingy. Make sure you have even pressure on it and swipe it down at a medium speed so you're dragging the paint down the screen:

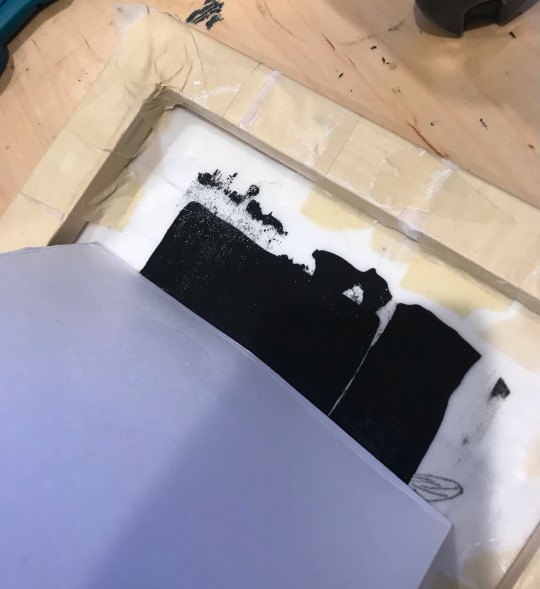

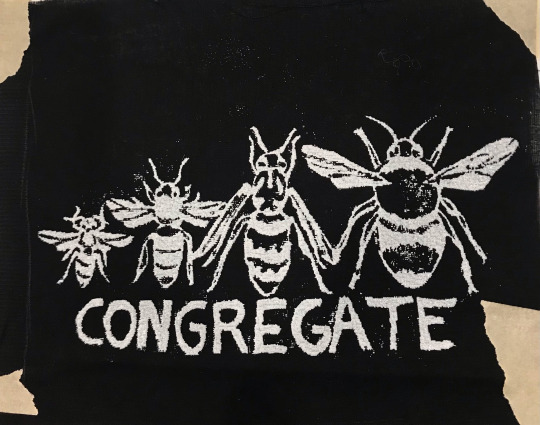
Once you've got everything covered I like to go over it a few more times for even coverage. Then you pull it up from the screen (which you might want to rinse off so no paint sticks to it!!!), wait for that bitch to dry, and you're done!! Congratulations, you have your very own fun silly patch! Go sew it on something! Or not! I do really do not care!!!!!!

#blog post#cant-shake-it#patches#homemade#punk#punk diy#punk patches#tutorial#how to#screen printing#diy#fashion#if i get hate for this im prepared bc i ride life on the seat of my pants#there are no rules and i am so inefficient
160 notes
·
View notes
Text

So for a friend's birthday a while back I made her an uh.. ethically sourced home movie.. of this show that got cancelled that she was absolutely obsessed with, and I thought I'd share the dvd cover I made for it.
#willow series#willow 2022#artemisposting#the white circle on the spine was so I could put the DVD number cause all the episodes weren't going to fit on one disk#I printed out the base I made and washi taped all the characters I badly on purpose cut out then scanned it back into my computer to add...#...the text#I wanted it to look really homemade#but yeah anyway go pirate your favourite shows and make DVD covers for them its really fun
27 notes
·
View notes
Text

Wear A Mask, and Enjoy! 《マスクの着用をおねがいします》 Lithograph, ed.5, 25 X 20 cm, 2022
Naomi HASHIMOTO
#printmaking#lithograph#lithography#color lithograph#art#artwork#fantafonte#homemade print#Naomi Hashimoto#橋本尚美#リトグラフ#版画#mask
0 notes
Text
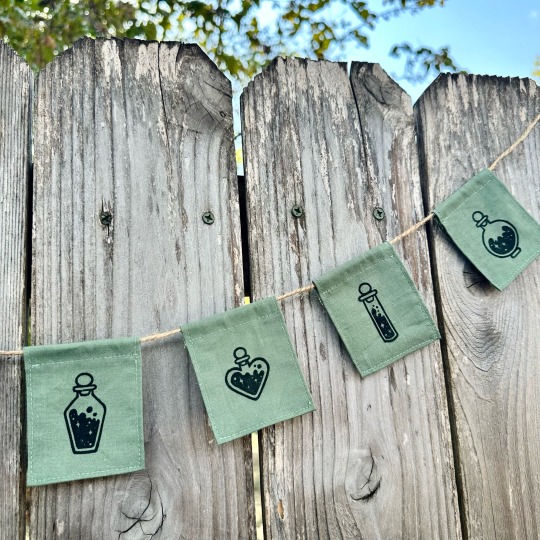


potion bottle bunting,
linocut prints on fabric
#linoprint#printmaker#block printing#printmaking#relief print#bunting#sewing#homemade bunting#reliefprint#block print#salted snail studio#handmade#potion bottles#potions#relief printed fabric#relief printmaking
114 notes
·
View notes
Text

Wolpertinger but like really cute!! soft like marshmallow maybe... don't eat em they are like baby angels to me
I made them into little sticker packs ! Find them on my ko-fi : 3


#milla's art#wolpertinger#jackalope#stickers#sticker pack#cryptid#im sorry the shipping fee is more expensive than the actual stickers...yea it cost less to produce than to send it worldwide...#homemade#in the sense that i print and hand cut them#little creature#cute
17 notes
·
View notes
Text
How the vegan and natural sticker glue adventure is going:


Pretty well! I can stick to multiple surfaces successfully! I think I'm going to try making it again once I run out and then I'll post it! I just don't want it to be a fluke lol But if you're itching for a sticker glue recipe feel free to message me or shoot a message through my website: https://polar-arts.com/
7 notes
·
View notes
Text
speaking of Eras (lol) I think my first homemade diy photo book attempt is going to be a book of my own show photos
#it could go along with the official book whenever i get my hands on it lol#I'm making a giant whole trip photo book for Christmas (through a print service)#because it's going to be huge lol so that's too much effort for a homemade variety#but i went down the youtube rabbit hole the other day and this seems like it would be a manageable scale!
10 notes
·
View notes
Text
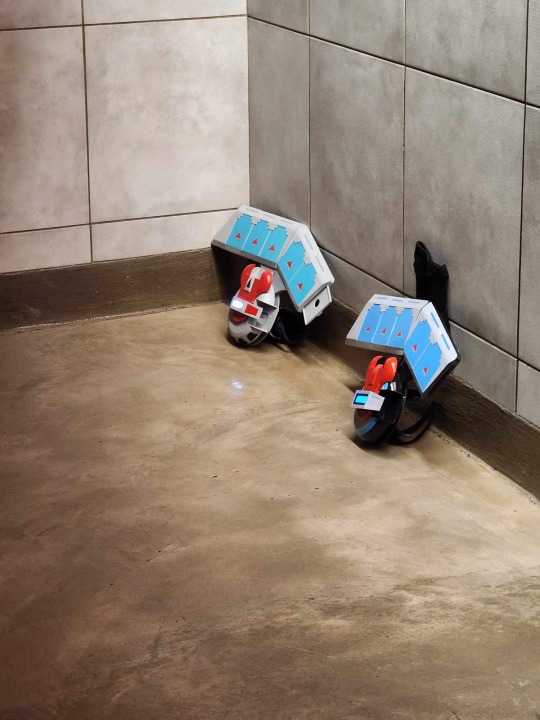
Yugi and Kaiba taking the duel disks off so they can hold hands at the urinals
(duel disks made by me and @omezoku)
#yugioh#ygo#seto kaiba#yugi mutou#yugi x kaiba#yugioh meme#homemade duel disks#duel disk#3d printing#cosplay#yugioh cosplay#Halloween 2023#just two silly guys
46 notes
·
View notes