#food photography tips
Text
Master the Art of Food Photography: Captivate with Every Click
1. The Delight of Culinary Imagery: A World of Food Photography
Step into the mesmerizing realm of food photography, where culinary creations become stunning visual masterpieces. Uncover the secrets to capturing the essence of dishes, from mouthwatering meals to delectable desserts.
2. Lighting Magic: Illuminate Your Culinary Creations
Learn how to play with natural and artificial light to enhance the textures and colors of your food. Discover the perfect angles and setups that illuminate your subject and bring out its delicious details.
3. Styling Elegance: Transforming Dishes into Art
Elevate your food presentation with expert styling techniques. Explore the art of arranging ingredients, adding props, and creating backgrounds that complement and enhance the aesthetic appeal of your dishes.
4. Composition Mastery: Framing Your Culinary Story
Compose your shots like a seasoned photographer. Uncover the rules of the golden ratio, rule of thirds, and leading lines to craft visually engaging photographs that tell a captivating culinary story.
5. Capturing Freshness: Freeze the Moment of Temptation
Discover the tips and tricks to capture the freshness and textures of ingredients. From steam rising from a warm dish to the vibrant colors of fresh produce, learn how to evoke taste and aroma through visuals.
6. Details in Focus: The Art of Selective Focus
Master the technique of selective focus to draw the viewer's attention to the most enticing aspects of your dish. Create depth and dimension by blurring the background while keeping the subject sharp and alluring.
7. Post-Processing Magic: Polishing Your Culinary Creations
Unlock the potential of post-processing tools to enhance your food photos. Learn how to adjust colors, sharpness, and exposure to achieve the desired look and evoke the desired emotions.
8. Storytelling Through Images: Conveying Culinary Narratives
Turn your food photos into compelling narratives. Showcase the journey of preparation, the cultural context, and the emotions associated with the dish, adding depth and meaning to your visuals.
9. Culinary Adventures: Exploring Diverse Cuisines
Capture the essence of different cuisines through your lens. Learn about cultural nuances, traditions, and plating styles that allow you to authentically represent the diversity of global culinary delights.
10. Professional Presentation: Sharing Your Culinary Art
Transform your passion into a profession by showcasing your food photography portfolio. Explore avenues for collaboration, exhibitions, and even turning your skills into a lucrative career.
Reference: Wikipedia - Food Photography
Unleash your creativity and tantalize taste buds through the captivating art of food photography. Elevate your culinary imagery to new heights, whether you're a home cook, aspiring chef, or a photography enthusiast. Explore the tips, techniques, and secrets that bring dishes to life and turn your lens into a magical window to gastronomic delights.
"Stay connected with us on our website social media channels for the latest updates."
0 notes
Text
Capture Culinary Magic: Elevate Your Food Photography with Pro Tips
Lens to Gastronomy: The Essence of Food Photography Tips
Imagine a world where your culinary creations are immortalized in stunning visuals, where every dish becomes a work of art. Food Photography Tips offer you the key to unlocking the secrets of capturing the flavors, textures, and essence of your dishes through the lens. It's a journey that invites you to infuse your passion for cooking with the art of photography, creating images that tantalize the taste buds and ignite the imagination.
1. Lighting Brilliance: Paint with Natural Light
Picture dishes bathed in soft, natural light that accentuates their beauty. Food Photography Tips guide you in harnessing the power of natural sunlight to create captivating visuals. Imagine the play of light and shadows that bring out the best in every dish.
2. Composition Mastery: Design Your Visual Feast
What if you could arrange ingredients and dishes in ways that tell a story? Food Photography Tips introduce you to composition principles that transform your photos into compelling narratives, guiding the viewer's eye and evoking emotions. Picture the artistry of composing a visual symphony.
3. Styling Elegance: Elevate Presentation
Imagine adorning your dishes with thoughtful props and garnishes that enhance their allure. Food Photography Tips offer insights into styling techniques that add layers of elegance and intrigue to your images. Imagine the satisfaction of crafting a visual feast.
4. Technique and Timing: Capture Culinary Moments
What if you could freeze moments that capture the essence of cooking and dining? Food Photography Tips encompass techniques to capture steam, sizzle, and pour, adding authenticity and dynamism to your photos. Picture the joy of immortalizing culinary moments.
5. Post-Processing Magic: Edit Like a Pro
Imagine enhancing your photos to achieve the perfect balance of colors, contrast, and mood. Food Photography Tips guide you in post-processing techniques that transform your images into polished masterpieces. Picture the final touch that elevates your visuals.
6. Explore Food Photography: Master the Art
Are you ready to embark on a journey of merging culinary art with visual creativity? Dive into our curated resources, a treasure trove of Food Photography Tips, tutorials, and inspiration. Experience the joy of capturing the essence of your dishes in images that evoke emotions, tantalize the senses, and celebrate the culinary magic.
Reference: Wikipedia - Food Photography
"Visit our website to discover how our products can transform your Physique."
0 notes
Text

#etherealarte#etherealuploads#summer#photography#love#cocktail#tequila#drinks#food and drink#beverage#bar#cocktails#liquor#rum#summer vibes#summertime#summer aesthetic#summer drinks#manicure#french manicure#french tips#spring#saint tropez#st tropez#france#europe#paris#mixology#alcohol#fashion
888 notes
·
View notes
Text
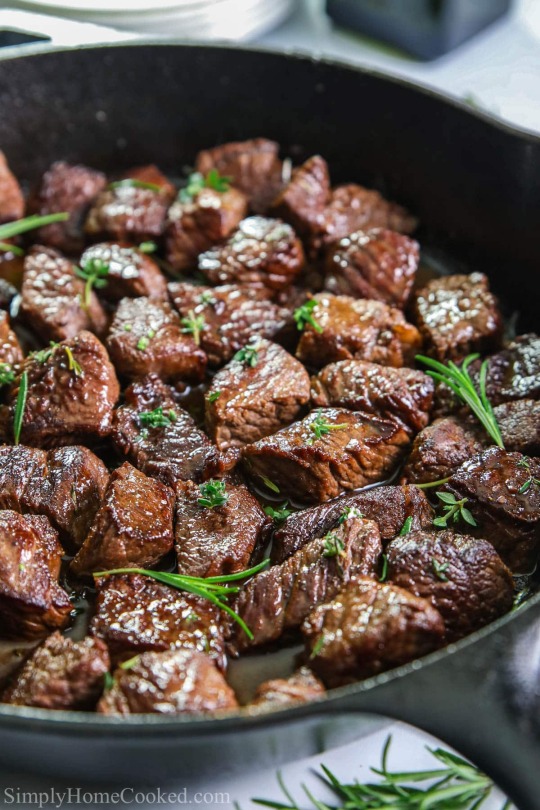
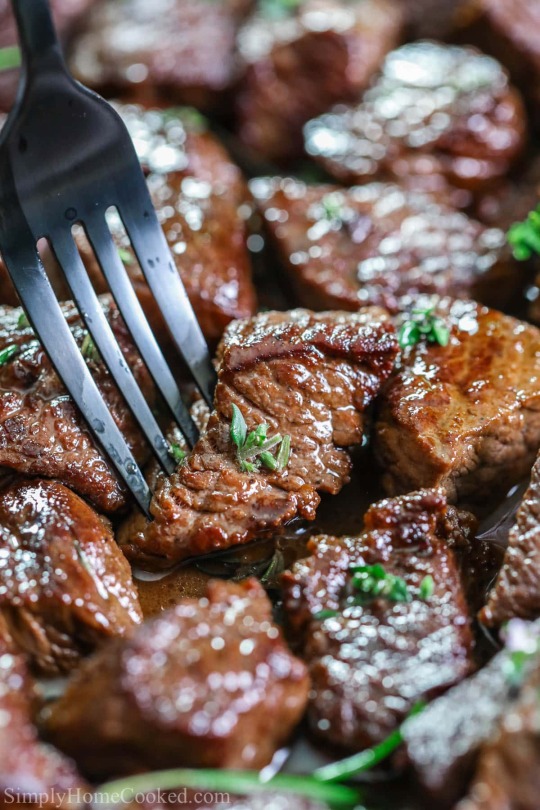
Garlic butter steak bites
#steak#steak bites#beef#dinner#food#meal#main dishes#garlic butter#garlic#steak tips#low carb#meat#steak recipe#tasty#foodporn#delicious#cooking#food photography#foodgasm#recipe
3K notes
·
View notes
Text

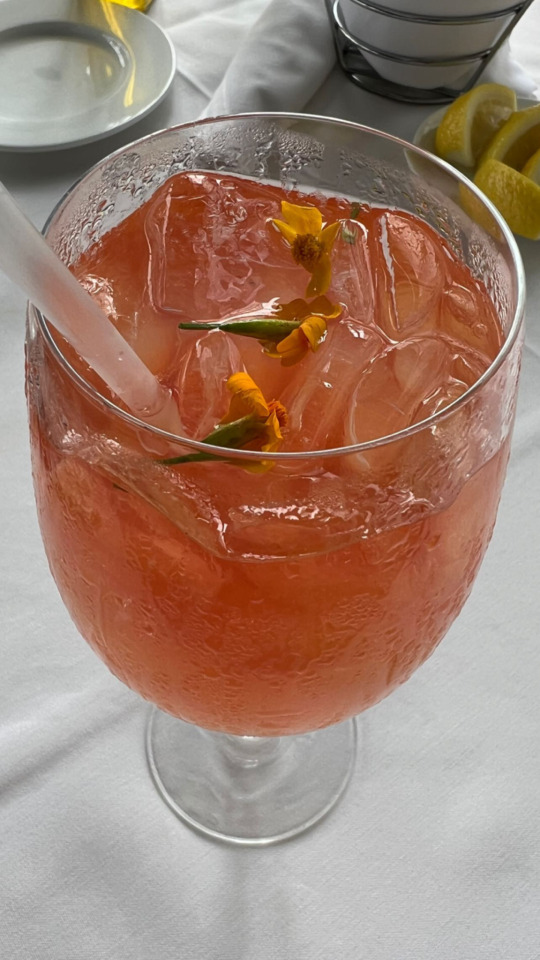
BlackBerry + cucumbers + fresh mint leaves infused soda water for the hot sumner days, don’t forget the ice cubes 🧊
#fresh drinks#summer ideas#summer coolers#refreshing#hydrating#street food#tips#ideas#food photography
133 notes
·
View notes
Text

#might post less today#migraine#my photos#picture#photograph#photooftheday#photoshoot#photo#photographer#photoshop#photography#nature art#nature photography#nature aesthetic#nature lovers#nature hikes#nature images#plant#plants#garden#gardening tips#plantblr#my garden#plantlife#blueberry#blueberries#blueberry aesthetic#foraging#food
23 notes
·
View notes
Text


#barcelona spain#girly stuff#just girly things#food photography#coquette#cosy#cottage aesthetic#nails#pink blog#soft aesthetic#vanilla girl#girlhood#girlblogging#soft girl#it girl#girl blogger#just girly posts#dream girl tips#glow up#girl blogging#girly tumblr#pink pilates princess#pink aesthetic#pink pilates girl#dream girl#girlblogger#girly#girly aesthetic#artists on tumblr#hell is a teenage girl
27 notes
·
View notes
Text
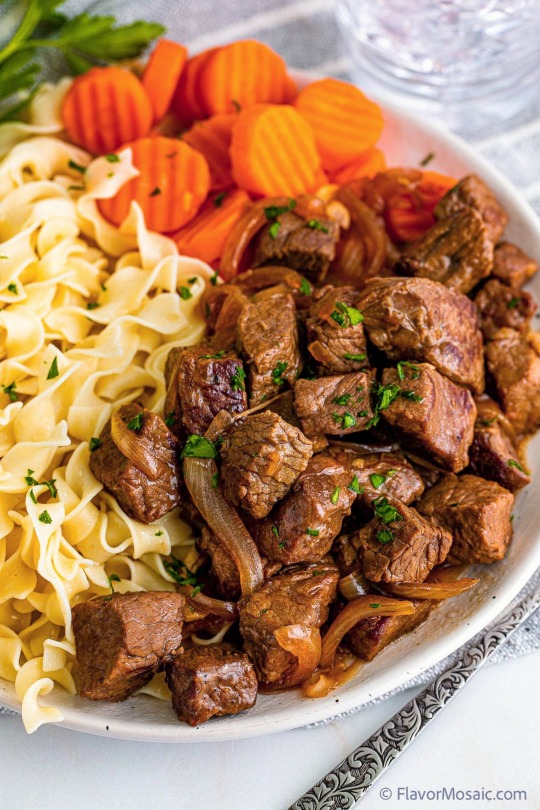
Beef Tips and Gravy
#beef tips#beef recipes#beef roast#gravy#main course#entree#dinner recipes#dinner table#dinner time#dinner#lunch#lunchbox#lunch recipes#lunchtime#heartydinner#heartymeal#comfort food#toya's tales#style#toyastales#toyas tales#september#fall aesthetic#fall vibes#fall#food#foodie#foodporn#food pics#food photography
15 notes
·
View notes
Text

breakfast
all calories: 235
protein: 6 g
#mealspo#ednotedsheeran#low cal food#food#foodpics#food photography#low cal ideas#low cal recipes#low calorie meals#low cal restriction#low cal diet#low cal meal#calories#low calorie diet#breakfast#low cal breakfast#tw ana bløg#tw ed ana#anadiet#tw ana rant#kcal counting#low kcal#tw kcal#protein#a4a meal#meal$p0#th1n$pø#ed diet tips#weight loss diet#diet
11 notes
·
View notes
Text

Nutrition & Wellness
#beauty#self care#biophilia#skin care#biophilia nutrition#health#wellness#biophilianutrition#nutrition#health and wellness#healthy eating#healthy living#active lifestyle#fruits and vegetables#vegetables#fruits#food photography#healthy food#beauty and wellness#wellness tips#wellbeing#self care routine#self care tips#self care sunday#fitness and exercise#health and fitness#fitness#health is wealth#vogue beauty#vogue
41 notes
·
View notes
Text

Cajun Crispy Tempeh With BBQ Sauce
#dinner#savoury#recipe#recipes#food#vegan#vegetarian#tempeh#cajun#bbq#sweet potato#sweet potatoes#food photography#broccolini#vegetables#nutrition#diet#healthy eating#healthyfood#healthy diet#health tips#healthy living#health and wellness
13 notes
·
View notes
Text


For y’all who like Caviar, try it with French fries!!!
Thank me later🤌🏽🥲
#gentillmatic#treats#foodie#food photography#snack food#beluga caviar#golden life#luxury lifestyle#fine dining#feminine energy#divine masculinity#masculine tips#lifestlye#luxury#high quality#aesthetic#leveling up#high value men#black men in luxury#today on tumblr#french fries#note to self#spoiled heaux#sugarbaby#michelin#hypogamy#hypergamy#pearl#expensive taste#expensive
30 notes
·
View notes
Text


Today I made some cherry cheesecake cookies. The cookie is soft and chewy, the tartness of the cherry topping perfectly balances the sweetness, and the graham cracker coating adds just a bit of crunch. Recipe below!
• 3 ½ cups all-purpose flour
• 2 teaspoons baking powder
• 1 ¼ teaspoons salt
• 2 8oz packages of cream cheese, softened
• 2 ½ sticks of unsalted butter, softened
• 1 ½ cups sugar
• 2 eggs
• 1 tablespoon vanilla
• 1 ½ cups graham cracker crumbs
• 1 24oz can of cherry pie filling, OR follow my second recipe below to make your own
1. Beat the cream cheese, butter, and sugar until smooth and creamy, about 5 minutes. In another bowl, combine the flour, baking powder, and salt.
2. Add the eggs and vanilla to the cream cheese mixture and mix until incorporated. Gradually add the flour mixture until just combined. Refrigerate the dough for at least 45 minutes to prevent spreading.
3. Preheat oven to 350 degrees. Line baking sheets with parchment paper.
4. Roll your dough into 24 1.5-inch balls, then coat them with graham cracker crumbs. Place them about 2 inches apart on prepared baking sheets. Make an indentation in the center of each ball with a spoon or your thumb.
- Make your pie filling [recipe below] or use a can of premade filling. Place 2-3 cherries in each indentation. Bake until golden brown around the edges, 12-15 minutes. Cool for 5 minutes on the sheet and then transfer to a wire rack to cool completely.
To make your own pie filling:
• 6 cups pitted cherries (frozen or fresh)
• ½-¾ cup sugar (start with less and adjust)
• ¼ cup water (double if using fresh cherries)
• ¼ cup cornstarch
• 2 tablespoons lemon juice
• ½ teaspoon vanilla extract
1. Make a slurry by mixing together your cornstarch and water in a small bowl.
2. In a large pot, combine pitted cherries, sugar, lemon juice, and the slurry. Bring to a boil, stirring often to avoid burning.
3. When it begins to reduce and thicken, lower the temperature and taste. Add more sugar or lemon juice as desired. Also add the vanilla at this point.
4. Cool completely and then use as recipe directs. Leftover filling can be stored in an airtight container in the fridge for up to 3 days.
#baking#cookies#cherries#pie filling#baking tips#recipes#cherry pie#emmysbakingadventures#food#food photography#food porn#food pics#dessert#sweets
6 notes
·
View notes
Text

#food diary#food#diet#health & fitness#photography#art#motivating quotes#sunrise#sunset#moon#wicca#pagan wicca#wiccan#health tips#archive of our own#blue archive#architecture#italian food#ice cream#inspiration#illustration#digital art#arte#astrology#animals#black and white#tw ed but not sheeran#nutrients#thigh g4p#anadiet
3 notes
·
View notes
Text
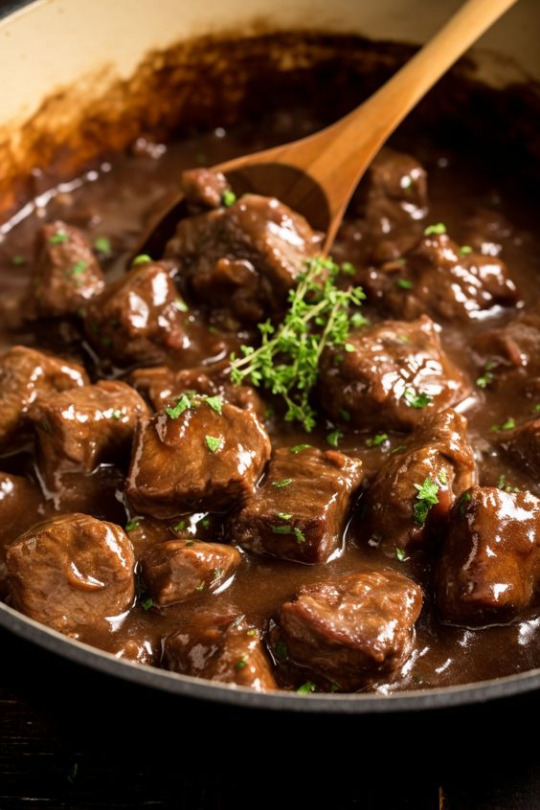
Slow cooker steak bites
#steak#beef#steak bites#dinner#food#main dishes#meal#garlic#onion#gravy#steak tips#au jus#meat#tasty#foodporn#delicious#cooking#food photography#foodgasm#recipe
2K notes
·
View notes
Text
Black Olive Paste: Bold Flavor, Mediterranean Flair!


This intensely savory paste is a taste of the Mediterranean sunshine! ☀️
Uses: Spread on crostini, dollop on salads, toss with pasta, or add depth to sauces and stews. 🫒
Recipe:
Pit black olives.
Blend until smooth (a drizzle of olive oil helps).
Season with herbs like thyme or rosemary, if desired. 🌿
Store in the fridge for up to a week.
Benefits:
Rich in healthy fats ❤️
Source of antioxidants 💪
Adds a gourmet touch to any dish ✨
#food#food blogs#delicious#recipe#food pics#homemade#foodshow#food photography#olive paste#healthy food#home made food#mediterranean#foodie#food porn#tips
47 notes
·
View notes
Last Seen Blogs

yummytummypix
show me the belly

swordscholar
Sword Scholar

shunkawakan-ita
Shunkawakan

mcbongs-blog
제목 없음

arkadymusic
ARKADYMUSIC