#cosplay construction
Explore tagged Tumblr posts
Text


I wanted to sew some more patches I got onto the vest... Monster kitty has other ideas.
25 notes
·
View notes
Text
Purple Cosplay Construction [Part One]
Alright,
I am a VERY indecisive goof.
And decided that in the meantime, while I plan my merc gun and such,
I would get a dream of mine done.
Building myself Purple's Elytra (based on headcanons).
Which is proving difficult because the WINGSPAN of this thing covers MOST OF MY FLOOR.
Here:

This thing is 9 feet and 10 inches long (if my math is correct).
So,
Yay!
Will provide updates every once in a while lolol
This thing is going to take me so long oh god...
2 notes
·
View notes
Text
I finally made my first yarn wig after 10+ years of crocheting my cosplays...
#artist#crochet#crocheting#fiber art#yarn#yarn crafts#cosplay#crochet cosplay#fiber artist#fiber crafts#my crochet#my cosplay#my art#wig#wig making#costume construction#cosplayer#costume#crochet tumblr#crochet wig#marie antoinette#rococo#historical fashion#fibre artist#fibre arts#textile art#textiles#costume design#crochet design#designer
23K notes
·
View notes
Text


Got the screws fixed to the mask today. The strategy that worked was using a hot soldering iron to force a hole through both, and then I pressed the screw through the still cooling plastic.
1 note
·
View note
Text
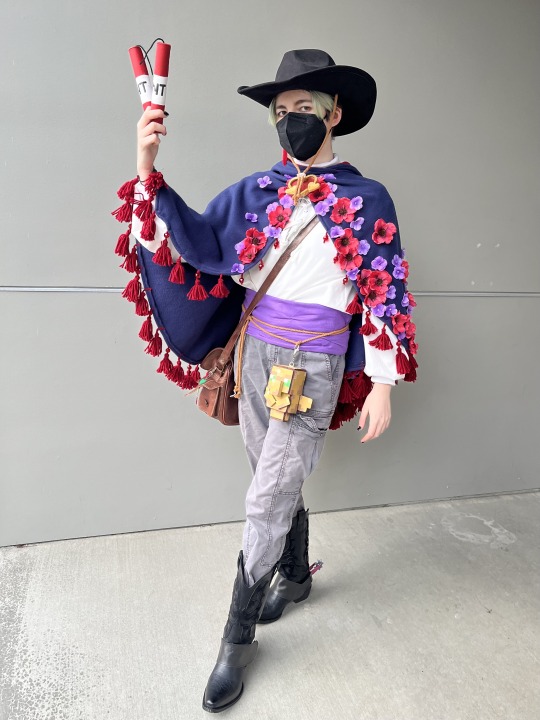
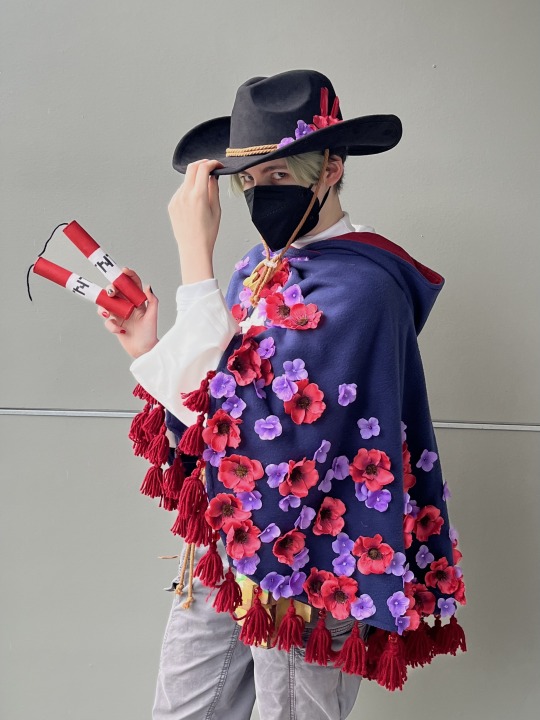
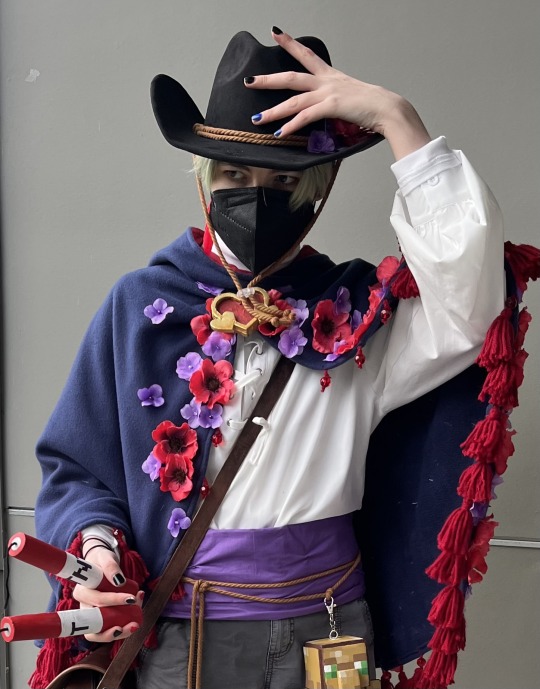
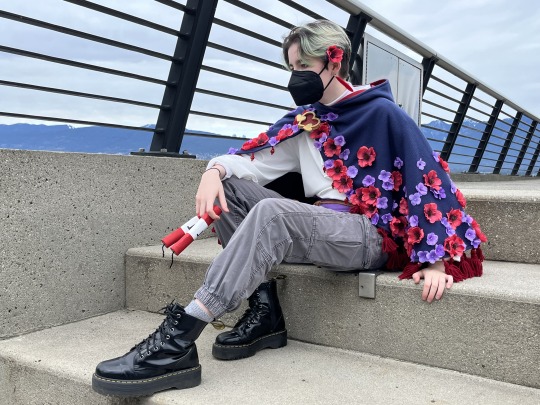
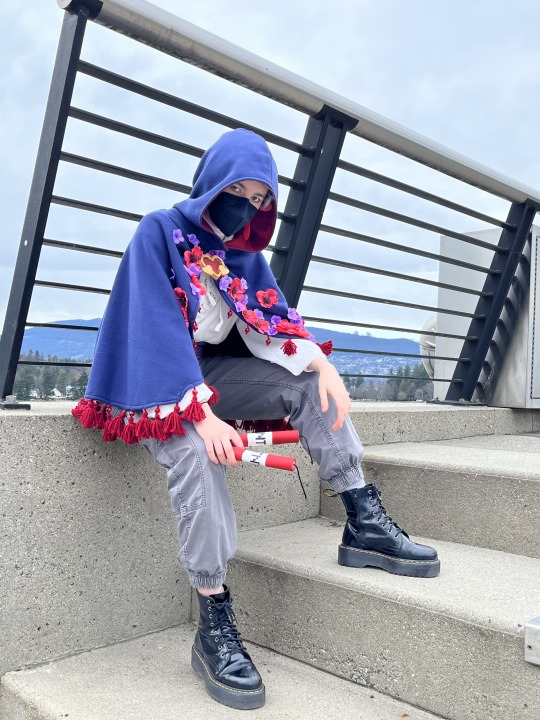
"she's dead scar.... you won."
my cosplay of scar's secret life red life skin!
#goodtimeswithscar#goodtimeswithscar fanart#gtws#goodtimeswithscar cosplay#gtws fanart#secret life#secret life fanart#life series cosplay#secret life smp#the life series#cosplay#seta art :)#if anyones wondering about how many flowers or tassels are on that cape... lets just say a LOT BSDJFHBDS#also!! to all the people i saw at the conventions i hope yall had as great of a time as i did :)#& if anyone has any questions as to how parts of this were constructed i would be happy to answer questions!#(and thank you to hoffen for answering my silly questions about the skin sbdjfhbs)
1K notes
·
View notes
Text


Some ramblings about fitting for cosplay!
#i have Feelings about this#I see folks working with gorgeous expensive materials and then the actual construction work is sub par#and like if that isn’t a priority to them that’s fine#but also#foundations are so so important#you will look 100% better if your costumes fit you properly#cosplay
320 notes
·
View notes
Text

and they were partners
(fanart for tactical breach wizards, one of my very fav games this year)
#tactical breach wizards#jenbanks#dessa banks#jen kellen#my art#(rings bell) yuri enjoyers go eat your meal (play it)#for real though it's such a well-constructed game#so much fun and with so much heart and wit#you are not a cop I promise#pretrans I would've pulled off such a good banks cosplay#could still try and do it i suppose. much to consider
126 notes
·
View notes
Text
These two cosplay wips live in our dining room area and haunt us daily. Now everyone else can stare at them too.

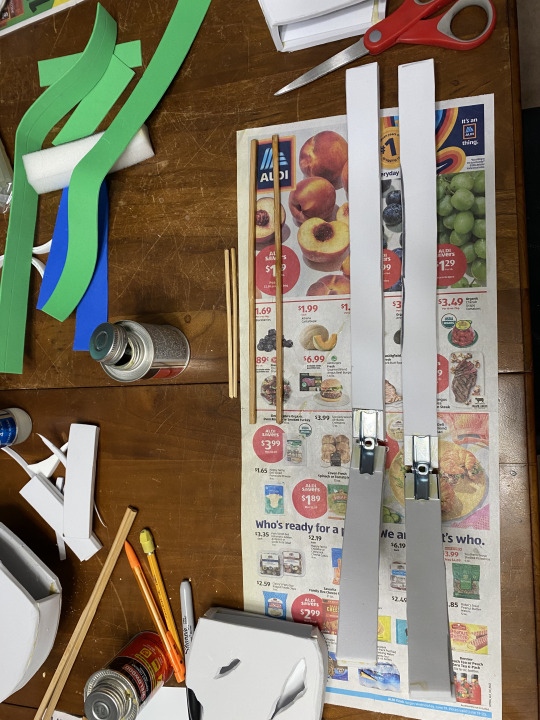

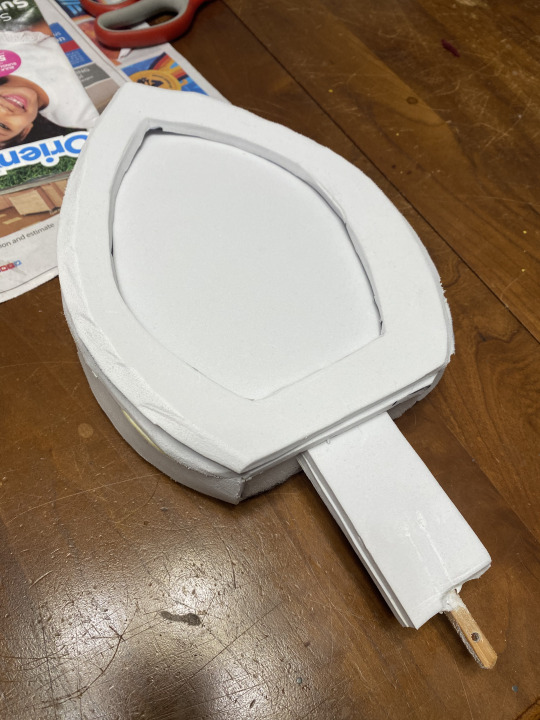


Next we made Springtrap and Foxy's ears. We cut the shapes out of EVA foam and glued them together with contact cement to create an outer shell. Then made pieces for the outer rim of Foxy's ear, the inner ear for Springtrap that actually sits on top, and the "metal" bars. The ear parts were wrapped in fleece and glued on with Fabri-tac. I know a lot of people recommend hot glue, but the Fabri-tac made for a strong flexible hold that took a few minutes to dry so we could still stretch the fabric as we went. For foxy, the foam metal bars were simply inserted along with some leftover soft foam from the bodies to fill the voids. I did forget to paint them before gluing them in, but took care of it later with a creative use of a grocery bag (holes in the bottom for the bars to stick out and bag protects the fabric from paint!). Springtrap's ears slide over the rods and are removable. @8bithellscape wanted the larger ear to bend, so we included a wire, toggle bolt hinges, and some PVC pipes to guide the cable. A servo in the head will pull the wire to create the bend and both heads will have ear wiggle and eye movements.
#five nights at freddys#fnaf#costume#cosplay#foxy#springtrap#animatronics#cosplay wip#cosplay construction#I'm going to get springlocked
16 notes
·
View notes
Text

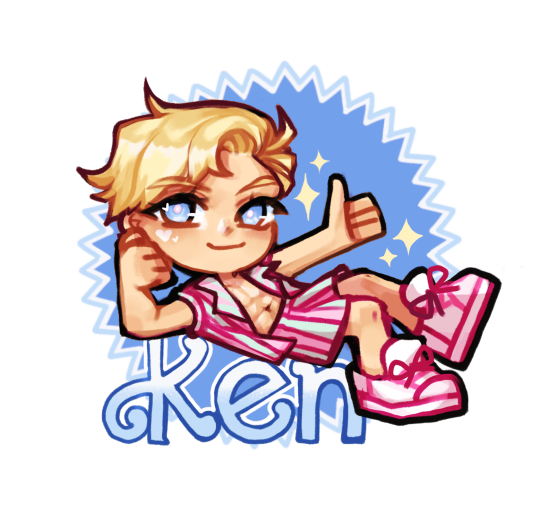
✨ we are all Kenough ✨
#barbie#the barbie movie#ken#fanart#barbie movie#was great actually#fave part was digging through my wardrobe for pink and realizing my Mumbo jumbo cosplay doubled as a Ken fit#can’t believe I’m constructing a hermitcraft Barbie AU now what is this#myart
332 notes
·
View notes
Text

Welp, gunna have to learn how to do some heat set inserts, double sided tape is just not cutting it.
5 notes
·
View notes
Text
Purple's Elytra Construction [Part Two]

OH MY GOD FINALLY.
Anyways!
I have the frame kinda built for the right wing, gonna start the left one tonight. Have an idea for the feathers. (I wanna use thick paper but I need to go to Hobby Lobby or something for that.)
Anyways, that's really it! Update will be posted soon! <3
0 notes
Text
Jumping around from step to step on the Laios cosplay, today I put some time into his gambeson! A gambeson is a padded doublet that goes underneath armor and protects the wearer, or can serve as light protection on its own.
Laios wears this gambeson in some manga panels (I don't actually know the context, I'm functionally anime-only) and it appears to be the same length as his chainmail shirt, so I'm going to make it to go under his mail. The most intriguing part from a costuming perspective is that diagonal texture!
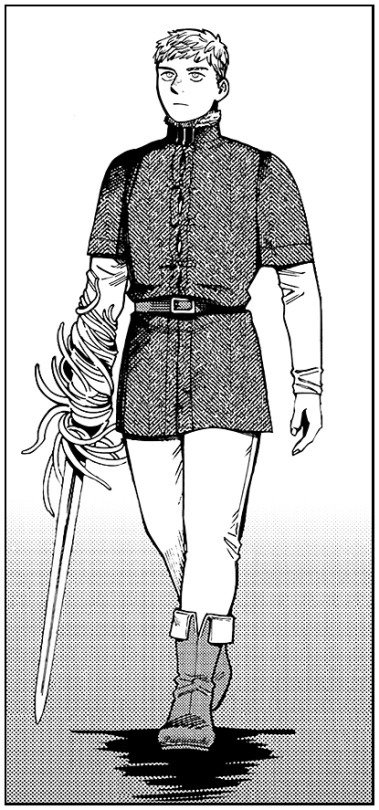
There are a couple of ways I can achieve this. The easiest would be to use something like a herringbone twill, that has a diagonal-looking weave in the fabric when it's cut on the straight grain. But that won't read well from a small distance; it'll look solid-colored once you're a few feet away.
Which brings me to poking at my fabric stash, where I've kept a big ol piece of cotton corduroy. Corduroy has a distinct texture that reads very well at a distance, and this one in particular has some variegated stripes that help that texture stand out even more. Rather than make a simple-shaped garment out of straight-cut fabric, I'm going to get biased.


I divided up my simple shapes into panels and cut each panel on the bias, planning them carefully so that the final garment is symmetrical. When it's assembled, it should have that striking texture variation!
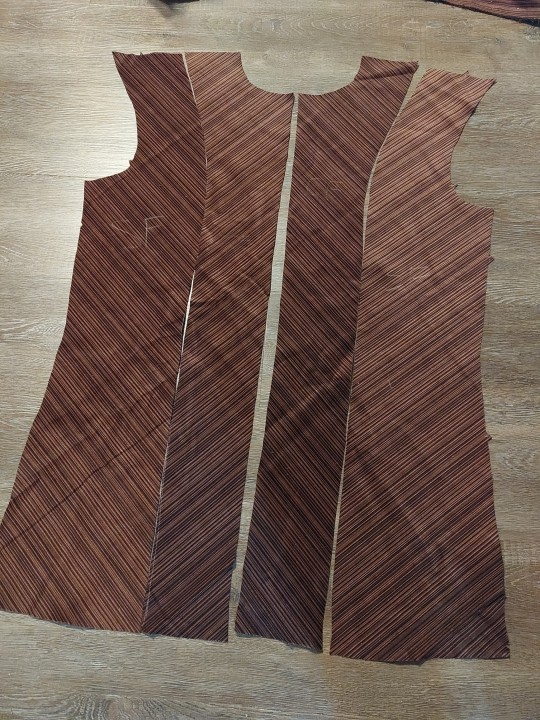
The next step will be to cut out an interlining layer on the straight grain, and fuse each of these biased pieces to that piece, which will hopefully give me the right drape. Rather than add more lining on top of that, I'll make a bias tape from some darker corduroy and use that to finish the hems.
#laios touden#dungeon meshi#delicious in dungeon#laios dungeon meshi#the armor is taking a brief backseat because the more pieces i start the better chance i have of finishing on time#and 'on time' is like July so im making good time#still have to make a ton of stuff but its a start#next might be the undertunic and pants#simple single-fabric constructions without funky alterations#my posts#my cosplays#WIP
110 notes
·
View notes
Text
New post bc I don’t want one super long one tbh
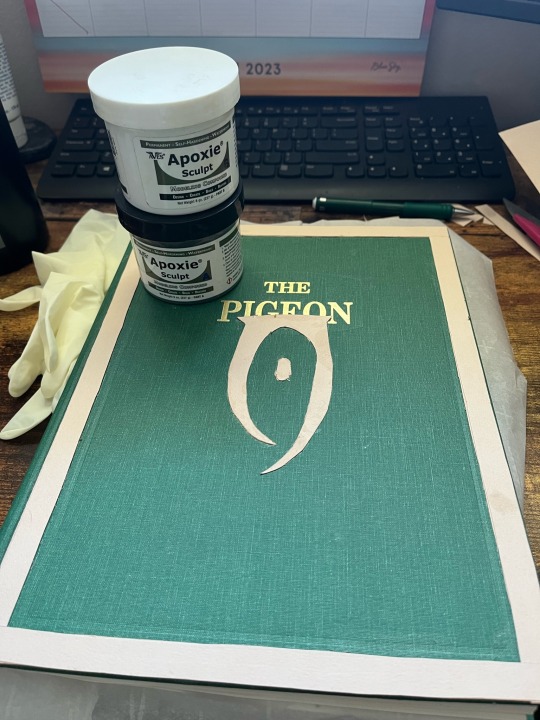

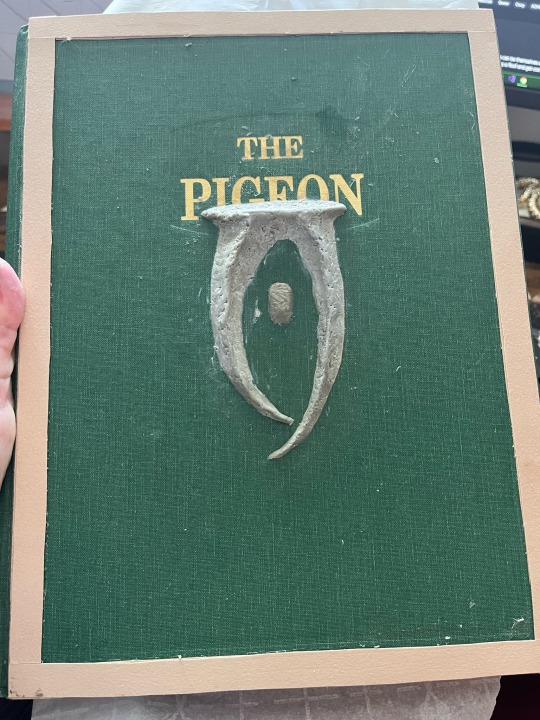
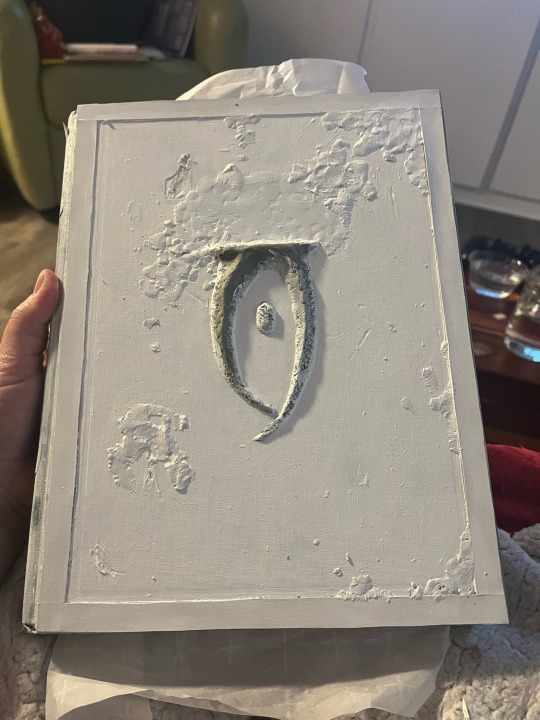
Todays work was sculpting and painting :D I didn’t plan on building up weathering/texture with apoxie but I had to cover the engraved title somehow and this was the only way to make it look natural. The cover still needs additional weathering and aging, and obviously the oht still needs to be painted (very excited to do that part), but I’m really liking the look so far!!
#*mankar cameron voice* this book has absolutely decimated my sanity#xarxes construction#cosplay updates#mysterium xarxes#oblivion#tes
417 notes
·
View notes
Note
Hiii! Currently making Howard's costume, and I'm looking for more info on how the skirt closes AND the skirt pattern. Any help would be SO appreciated!
Hey! I have this post about some of the construction and layers.
As far as the closure goes, it’s basically an extended tab. Here’s Cassie Silva’s both open and closed:

And then the closure method goes on the overlapped section. The closure method has varied between Velcro and snaps, but you could also try magnets. (They also previously had a different closure set up using zippers for a bit, but I would not recommend it)
If you use magnets or Velcro make sure to get a stronger strength, and/or match the strength to the materials and construction you’re using. And snaps will cause stress to the vinyl so if you do use them I’d suggest using the black base as discussed below.
And this isn’t necessary, but for my own cosplay I’m planning to do either Velcro or multiple rows of snaps just to give myself some sizing range which Six has often done as well.
You can see two different placements of snaps used here:

Left is UK make, with a single snap in the middle of the waistband. Right is US make (the early 2022 style) with two black snaps on either side of the trim. This is one way the US has accommodated for potential minor fluctuations in waist measurement, like I mentioned above.
Also, note that while the black trim continues the studs do not - this is so they don’t get in the way of the closure or make things uneven or bumpy.
You also may wonder how Cassie’s skirt is staying up even though it’s not closed - there are snaps on the inside lining of the waistband that correlate and snap into snaps on the back and side of the leotard.
————————
The other things that are worthy of note are exactly where the closure is located and the backing of the closure. Here’s a bunch of examples of how that’s varied:
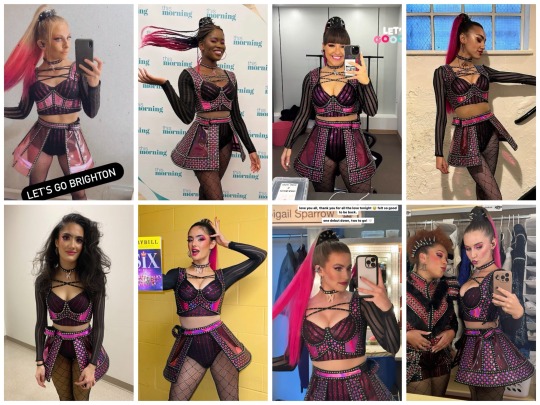
The exact placement of the closure has differed. Early iterations included the mic holster attached on top of the waistband tab (shown on Vicki Manser’s UKT costume, top far left) and the waistband closing in the front (shown on Didi Romero’s ANAT costume, bottom far left). But the current-and-definitely-best way is to have the mic holster on the main case, with the waistband tab attaching over in a way that nestles it right next to the holster. That keeps seams minimal and everything nice and stable. You can see that current system on the three furthest right photos on each row.
Finally, the base color. Originally the tabs on both sides would be a continuation of the rest of the waistband materials, just the same pink vinyl and trim (but again missing the studs as noted above). More recently they have switched to a pure black base on the space where the tab overlaps, most likely to use a more stable/strong material. It’s easiest to see that difference on the bottom row - compare the continuation of pink on both sides of Didi’s closure (far bottom left) versus the black gap that can be seen on Aline Mayagoitia, Abigail Sparrow’s CAN, and Audrey Fisher (2L-R, bottom row).
————————
For patterning I’ll refer you to @lightleckrereins, who has already been working on a post about that after just recently making her own.
Hopefully that’s helpful! If you need any clarification or have further questions, feel free to drop me another ask.
Credits: cassiemsilva, cassiemsilva; jainabrockpatel, cassiemsilva; vicki_manser, thisistsemaye, beccawickes, inezbudd, didiromero_8, alinemayagoitia, abigailsparrowofficial, aujeee
#six the musical#six costumes#katherine howard six#howard 2.0#six musical#six construction#six cosplay#six cosplay refs#greatest hits
60 notes
·
View notes
Text



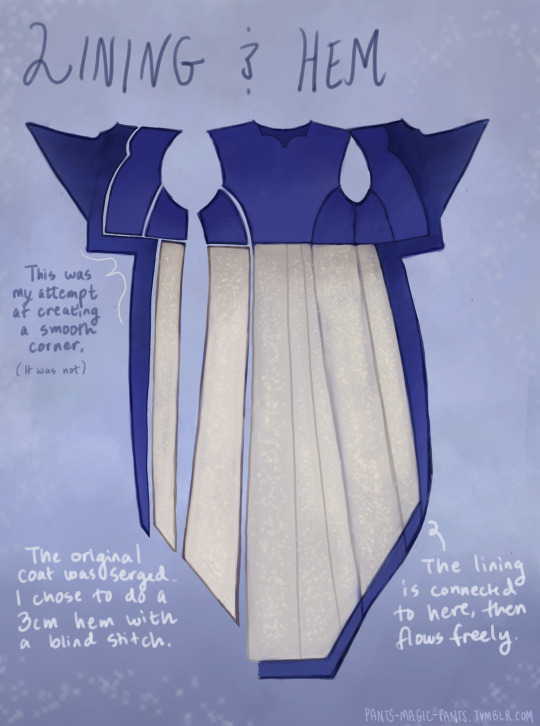
Cheers, loveys!
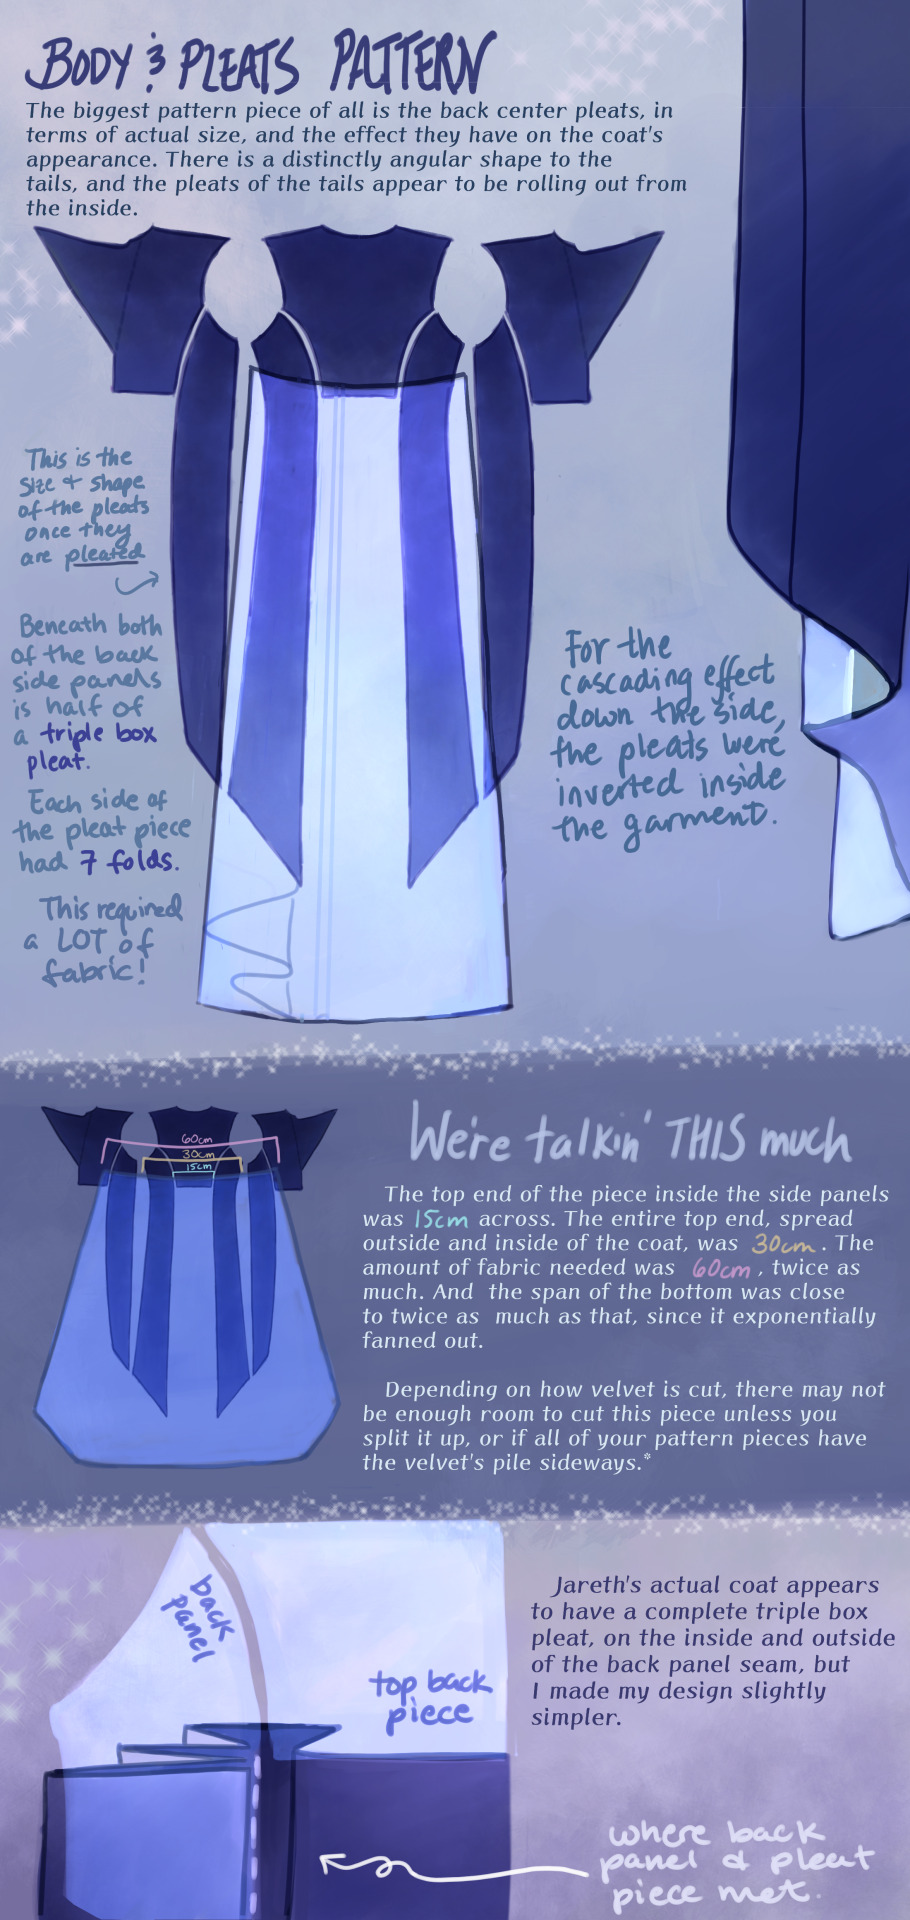
Here is post 1 of 3 about Pattern Construction. I’ll make a diagram post like this and then also take photos of my actual coat and with me in it.
I don’t remember how I started off doing the pattern, but I will guess that I took a tailcoat that I already possess and used it as a base, which in general seems to be a helpful way to start making clothes that fit if you’re not a master pattern maker (which I’m not, and I made plenty of mistakes which we’ll get into.)
There are two people I want to thank, and the first is Aria Couture [X] and their quality photos and observations, vocabulary and groundwork. They are the shoulders I stand on. Their photos were how I made all of the notes discussed in these diagrams, and how I discerned what kind of pattern needed to be made.
So the main changes that needed to happen to my base pattern was 1.) jacking up the shoulders to high heavens, 2.) elongating the side pieces (which I’ve come to call panels so go with me), 3.) adding pleats in that squared off spot in the back between them, 4.) adding a custom collar and cuffs, 5.) designing my own lining.
THE PLEATS were a nightmare. There was a lot of math involved, and math that was not necessary, but the most important thing was creating a shape that would fold together into a straight line on top, look cascading on the sides, and marry the rest of the coat in a reasonable place. After a lot of trial and error, I ended up with this rounded wedge that spreads out on the inside of the coat, but also folds backwards onto itself (like half of a box pleat), to reattach to the back side panels. This is what gives the coat its look of all this shiny velvet blossoming from beneath the back buttons and gushing out the sides.
As to why the pleat piece is rounded, all of the pleat lines were diagonal, so that the coat would flare out. Cutting this piece as a completely straight line on top meant it ran out of fabric in the top corners, and more of it needed to be pulled in, more and more sideways. Adding a sloped height to its corners helped it do what it was supposed to and become a mostly straight line when folded together.
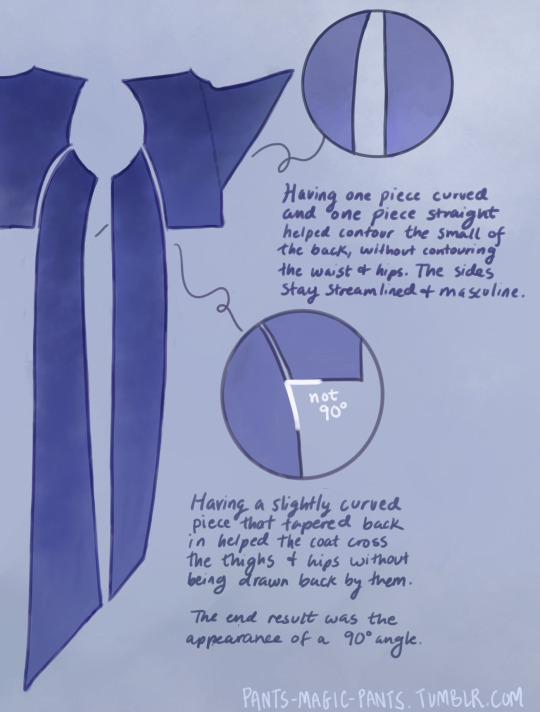
THE PANELS (second image), there are just a few notes about those which I think are important. As I am female cosplaying a male and wish to keep the masculine shape of the garment, some tricks needed to be pulled to hide my waist and hips, so this is what I came up with.
PROPORTIONS MATH. It’s a thing I started doing a couple cosplays ago, to get accurate shapes and lengths of garments, to give me the same silhouette as characters. It’s worked out really well for me. It’s been a real life application of algebra that I wasn’t expecting, as a former student who hated math. Now, I love math! Armed with a ruler and a protractor, I have taken down a lot of notes about such silly things as: what degrees the angles of the lapels are, and how wide are the shoulders compared to the head? (In Jareth’s coat’s case, the ratio of head:shoulders is 1:4.) With that knowledge, I took a photo of myself in the bathroom, measured my own head and shoulders in pixels, wearing a mock-up, and corrected shoulder span measurements to fit this ratio. It was a whooole thing, but I think it was worth it.
And I used proportions math for everything. How much of the arm do the cuffs take up? Where along the legs did the dramatic slope of Jareth’s “fishtail” start? Those things aren’t listed here, but hopefully this post gives you enough tools to figure it out on your own for your specific garment, or any garment you ever want to make.
THE COLLAR. Not much to say about it, but there’s how it looks.
SLEEVES. Dear God. I was stuck on sleeves for months because go ahead and look around online for detailed information about how to add basically football gear sized padding to your shoulders, and all of the intertwined modifications that needs. It isn’t out there.
One thing I can at least say is that it helps to start off with a great base, and the other person I have to thank is a tailor on YT called Chris Sartorial [X]. This guy hasn’t been active for years, but when he was, he was no nonsense, such a professional who knew what he was doing that he couldn’t even take the time to properly light his videos. Such a king. His channel helped me with my dress shirt, and also with making the base sleeves for this coat, which were of the “2 piece” variety. This kind of sleeve is used for blazers and coats so that it appears to fall in a nice boxy shape off the arm, usually from a shoulder pad, and then slightly turn at the elbow. While he doesn’t go into shoulder pads, this still halfway set me up for success, and knowing the relationship between shoulder and sleeve.
However, there are a few things I learned about shoulder+sleeve modification as shown above, and hopefully it’s a good “bouncing off” observation.
THE CUFFS. Again, not much to say, but this is how my pattern came out, to create that nice tear-drop shaped gap, with that sort of blooming and expanding height that his cuffs have, like a vase. The lace trim will be in another post. One thing I should mention is that the lace trim is tall enough that the bottom of the cuff won’t end on your wrist if you want to be able to see your own hands. The cuff needs to be measured so that it will end 2-3 inches up from your wrist.
THE LINING
Dear God, she’s still writing. I am a huge fan of lining even though I’m not good at it, and my actual lining didn’t turn out looking as smooth as my drawings, but this is what I came up with, which in theory should look good. haha Any deviations from the norm that you see are just stylistic choices. I wanted the area in the top back to look sort of dripping like the back lace piece.
Was this interesting? I sure hope so. Please ask me questions if I’ve glossed over something.
68 notes
·
View notes
Photo
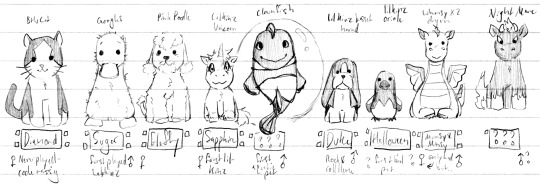


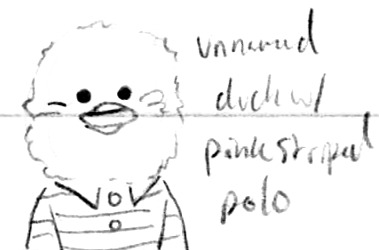


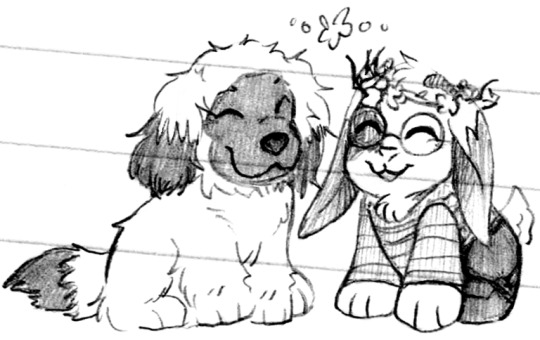

Coming in to play! (Patreon)
#Doodles#Webkinz#Webkinz hours! The cute lads have wedged their way back to the forefront of my mind haha#I'm honestly really glad I kept all my Webkinz plush over time and they've survived all the moves and whatnot#Some are still missing - most notably my horses for some reason - but I have the rest onhand and they're still cute and soft and I love them#Getting the opportunity to name and play with them as a young'un made them stick quite strongly in my mind ♪#And I still find some of my design sensibilities with their roots in the gameplay/game design/UI design/interactivity#I think it inspired some of my Video Game Design brain which is an aspect of myself I'm quite happy with :D#And I /love/ plushies probably now more than ever <3 So I'm doubly glad younger me didn't get rid of them haha#Got my lineup that featured in Tala's Requestober this year ♥ I left out a couple for what are probably obvious reasons ahem ahem#If you haven't seen what the Official design of the clownfish is in Webkinz... The plushy is arguably worse lol why that one of all of them#Hire me to design Webkinz fish I dare you#There are actually several cute fish - and several ugly ones! Lol I don't know why they're so inconsistent#It's not like the differences between Signature and Classic! Most of the fish are Classic or eStore! I don't know what gives lol#Anyway lol the other one I left out was my Night Mare since I couldn't remember his name either - which is a shame! I liked him#I still have some fairly clear memories of playing Webkinz with those lads <3 Of the different rooms and relationships and games#It's nostalgic! It's nice to reminisce on something so cheery and cute and light and fluffy :)#As for the rest hehe - I tend to pick up 'kinz whenever I find them at secondhand shops and the like - much like Lalaloopsies#They're out of production! Harder to find - rare and valuable haha totally#I haven't found any New With Tags so far but I'm on the hunt still!! Someday it'll be my turn...#But I Have found some really adorable fellows for cents on the dollar haha <3 Two Blue Whales and a Sheep and Duck!! So cute#My latest find was a Lil'kinz Lioness Cub and she is - So tiny <3 Really adorably constructed with a fluffy nose ahhh ♪#The Long Eared Bunny is my current Free 'kinz! I unfortunately lost the account with Baaby so I had to start over again but that's alright#This time I've got Embroidery and she's in a closet cosplay of Edgar haha - black-and-grey striped shirt with dark pants and round glasses#And angel wings! I was able to snag those from the Ganz website and they're perfect honestly haha ♥ She won an Open Beauty Pageant with it!#Couple of her with Sugar - my first Webkinz I got to play with since Diamond's tag was thrown away :') Sugar's my oldest 'kinz <3#And of her with smol's Free 'kinz since I convinced her to play with me off and on haha - her Leonberger named Borgus :D#And then one final one of what I'd really like - a Webkinz Spider ;;♥ I /know/ they've made spider objects that are really cute!#And April Fools' fake pets of a spider!! Give me the fluffy spider please Ganz even if there's no plushie I just need to pet the spider
13 notes
·
View notes