#bjdoll
Explore tagged Tumblr posts
Visit Tumblr Blog
Explore Tumblr blogs with no restrictions, modern design and the best experience.
Last Seen Tumblr Blogs


Fun Fact
25% of US internet users with an annual income of $80-100K use Tumblr.
Text
bjd pngs dump


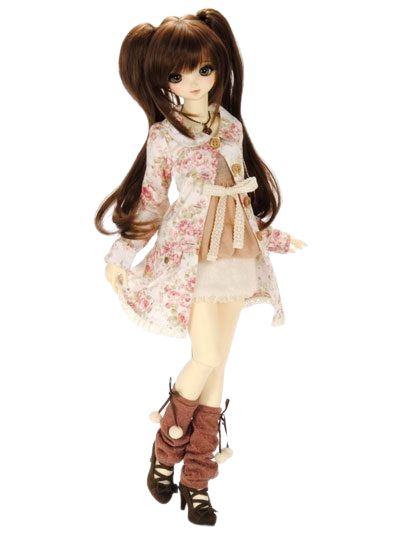


pink & white (+ a little bit of blue) ball jointed doll dump f2u, do NOT credit me i got these from picmix
dm / comment for removal

#luci’s pngs ♡#picmix is my new fav place for pngs#along w picsart and tumblr ofc… and deviantart is there too#rentry#rentry pngs#rentry png#rentry resources#rentry stuff#rentry decor#pngs#transparent png renders#transparent#transparents#doll#dollcore#fashion doll#bjd#bjddoll#ball jointed doll#bjdoll#dolly#dollie#kawaii doll#pink doll
468 notes
·
View notes
Text


#cr in pic#whimsigoth#gothic#whimsicore#whimsical#dollette#coquette#dolls#aesthetic#bjddoll#bjd#bjdphotography#bjdoll#gothic lolita#office siren#lainas circus#archive
309 notes
·
View notes
Text

⋆.˚ ᡣ𐭩 .𖥔˚
341 notes
·
View notes
Text
Shoe Stay Last the Broke Way
Or, you’re a cheap bitch like me and have only basic materials at your disposal.
Hello, beautiful people~
Let’s create a shoe stay together.
(I’ve been corrected in my terms, it’s a shoe last. My bad if I confused any of you!)
Most every crafter has - Glue, water, plastic wrap, paper bags (or whatever you may have on hand,) and hot glue; That’s it, that’s your list of supplies. Perhaps a sharp instrument to cut away the mold carefully.
If you are like me, my crew is chronically shoeless. Shoes are expensive! I consider myself a decent seamstress though, so why not try shoe making? When doing this it’s a good idea to have a shoe “last” or a basic mold to help shape the shoes. I’m not a huge fan of handling my dolls every time I try and make something to fit.
Enter shoe lasts stays, the broke way.
First you need a volunteer. I chose the boy who had the bigger feet to basically provide a mold to all my other boys of similar size. This is Harper. His body is an April Story Senior. He’s got his pantlegs rolled up and he’s ready to go.

Let’s get messy now and act like we are in kindergarten. You want to make sure your doll’s feet are wrapped securely in cling wrap, covering a little above the ankle. We are going to paper mache over his feet. There are many recipes online for a mixture, but I personally use a mix of wood and white PVA mixed with a bit of water.

I alternated thin Kraft paper and paper towel for a couple of layers. Make sure each one is thoroughly dry before applying the next. Try and fill out some of the area above the heel and the arch as we want to keep this basic shape but not totally form fitting.


All dry! Now you need to carefully cut off the paper Mache. This can be tricky. Much like the paper Mache dress form we want to avoid doing damage to the doll during removal. Go slow and separate as necessary. I cut down the back of the leg and heel and about halfway down the foot. I was able to wiggle the mold off at this point.


Yay! Now that it’s off, try and ease the split back into place. I use tape as a temporary closure until I can go back and cover it with a final layer of paper Cache. You don’t have to, but I just like the clean look.
This last part is totally optional but I like to fill the cavity with some sort of firm support just to ensure the longevity of the cast. My doll forms are stuffed firm with yarn scraps and dryer lint. These though, I wanted something more solid. I’m not familiar with expanding foam nor do I have any on hand but what I DO have is hot glue. In the past I’ve made hot glue gems for some kids out of molds, so I know what I’m working with.
I cut the molds to an even height and started filling from the toe up to the arch. I let it cool in that upright tiptoe position for a bit before placing it flat and adding my little handle and filling it up to the top. I tapped them on the desk a few times while doing this just to make sure the glue settled firmly. I added handles just because, but you don’t have to. I used a cheap dowel.
Depending on what kind of shoes you plan to make (either soft formed or modern shoes with a formed toe) you can build up the toe areas to give yourself that sleek shape that modern shoes have.
Credit to @dollsahoy for adding on the buildup tip!


There you have it. Let the glue harden and admire your work. If you are going to use these to shape damp leather, remember to seal them with a water resistant sealant!
I hope this provides inspiration to someone.
Cheers and happy crafting.

#bjd#dragonsdelightstudio#abjd#dolls#bjdoll#legit bjd#doll#bjdphotography#legitbjd#dollstagram#bjd tutorial#bjd shoes#shoemaking#doll shoes#miniature shoes
142 notes
·
View notes
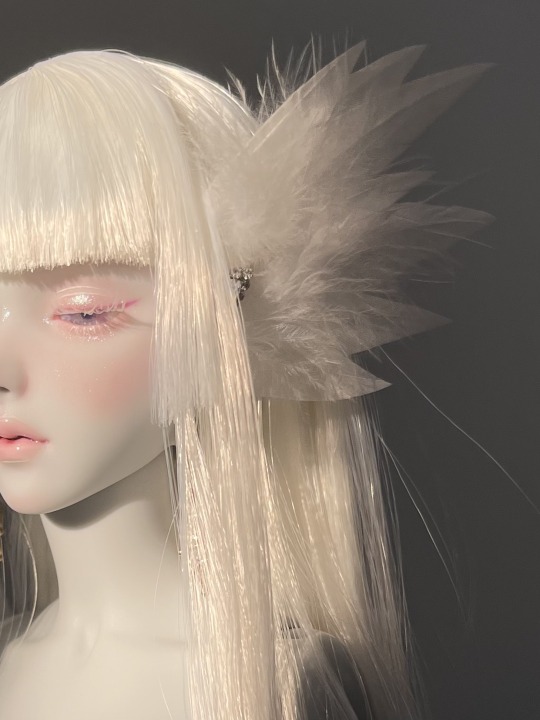
Text

Do you like these wings?
Basically suitable for all 1/4 bjd~
#bjd#bjd fashion#bjddoll#bjdoll#bjd doll#bjdphotography#abjd#bjd photography#bjdaddicted#abjd photography
837 notes
·
View notes
Text
BJD RELEASE!!!
₊✩‧₊˚౨ৎ˚₊✩‧₊
I finally released the dolly eye make ppl were asking for. I also added new contacts and blushes. I won’t be dropping new CC for awhile since I’ll be in Japan for a month.
₊✩‧₊˚౨ৎ˚₊✩‧₊
Dolly Eye Make DL
Galneverdie Monthly Contacts DL
BJD blush DL
#sims 4#sims 4 cc#gaming#ts4 cas#ts4#sims 4 cas#xhs#beauty#cosplay#galneverdie#bjddoll#bjd#bjdoll#ball jointed doll#doll collector#fashion dolls#dollblr#dollcore#douyin makeup#douyin#cutecore#cute
135 notes
·
View notes
Text


917 notes
·
View notes
Text

✫・゚*.2007・゚✫*.
#2007#flickr#digital archiving#digitalmemoriez#nostalgic#2000s nostalgia#image archiving#late 2000s#alt#nostalgia#flickr archive#web archive#flickr finds#cinnamoroll#ugly doll#ugly dolls#bjd#bjdoll#blythe doll#dolls#doll#cute#ichigo heaven#2000s
73 notes
·
View notes
Text
angel


#Bjd#legit bjd#bjdoll#goldeneralloyd#bjdphotography#ball jointed doll#bjddoll#teddy / theodore / luci / lucius how i adore yuo#wig n eyes r temporary#but for now#my dolls
82 notes
·
View notes
Text
As you may know, I'm a former pro bjd faceup artist. I've been painting commissions for eight years of my life, got a disasterous burnout, sold most of my bjds and quit.
But than Arcane hit me like a truck and resurrected my long gone spark.
So here is my humble ode to Viktor. I love the way bjd helps to reveal and put your emotions into something physical, material. It's some sort of magic for me. This doll is a symbol and an idea I appreciate so dearly. Every time I see my bjd Viktor, I remember that even if I am a person with physical limitations, I must not give up on the way to my goals. It really warms me up.
P.S.: It's Dollshe Saint, yep.


85 notes
·
View notes
Text
Self proclaimed professional ball jointed dollie
#୨୧ ꒰ mine ꒱ ୨୧#୨୧ ꒰ My posts ꒱ ୨୧#bjdoll#ball jointed doll#dollkin#coquette dollete#doll aesthetic#dollcore#dollete#doll#dollete aesthetic#dolletecore#dollette#otherkin#otherkin community#object kin#doll kin#objectkin
249 notes
·
View notes
Text


#aesthetic#whimsigoth#gothic#whimsicore#whimsical#dollette#coquette#dolls#doll repaint#creepy dolls#bjddoll#bjdoll#bjd#ball jointed doll#doll#dollcore#creepy aesthetic#creepycore#creepy art#creepy cute#goth lolita#goth#cabaret core#circus goth#cabaret goth#lainas circus#archive
107 notes
·
View notes
Text
(Merch update 3)
hello hello splatbitches, this is the 3rd of this saga that you can see here!!
Finally, After many many years I own, my first doll
after so much surgery I have my son, he looks a bit deform but that gives you humanity,

After some finishing touches you were completely ready!!!! Warabi!!! warabi... it's time to live!


Shot 1,2,3: I made this on my mom's doll house, he's on the living room reading the news


Shoot 4 and 5: Warabi in the bathroom!


Shoot 5,6,7. After shower it's time to bed!
23 notes
·
View notes
Text
So here is a mini breakdown of how I created the BJD eye cups.
First off, you’re going to need some sort of backing to round out the eyeball. I split wooden beads apart and glued them to the backs. This is going to help the eyeball rotate.

Now you are going to need some half spheres. They need to be larger than your eyeball so the can move freely once padding is added. I made these with hot glue and two metal measuring spoons, one inside the other. This created the mold for the sphere. Have ice water handy because a quick cool down makes it easier to peel the glue out. They don’t have to be perfect, you can always trim if need be.
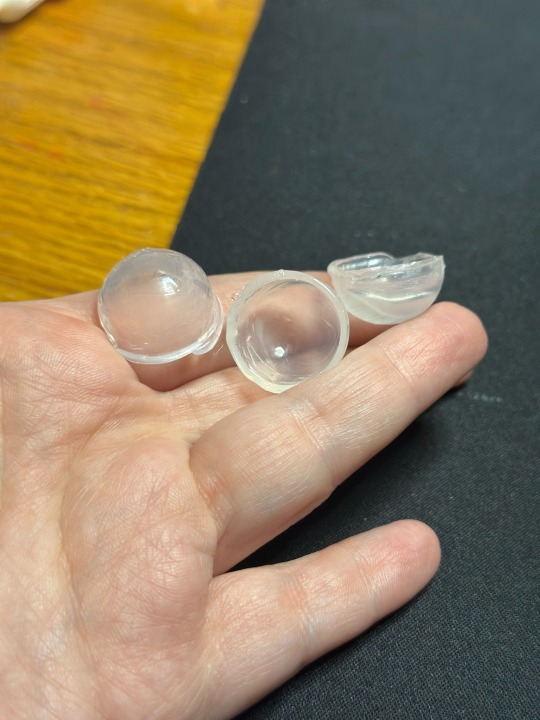
Fluff time. I gently tugged apart a cotton makeup wipe to create the pillow we need. How much you’re going to need will vary and you will need to experiment with how much is going to work for the eyeball. Lots of trial and error here. You want to set it in the half-spheres lightly, do not pack it in.
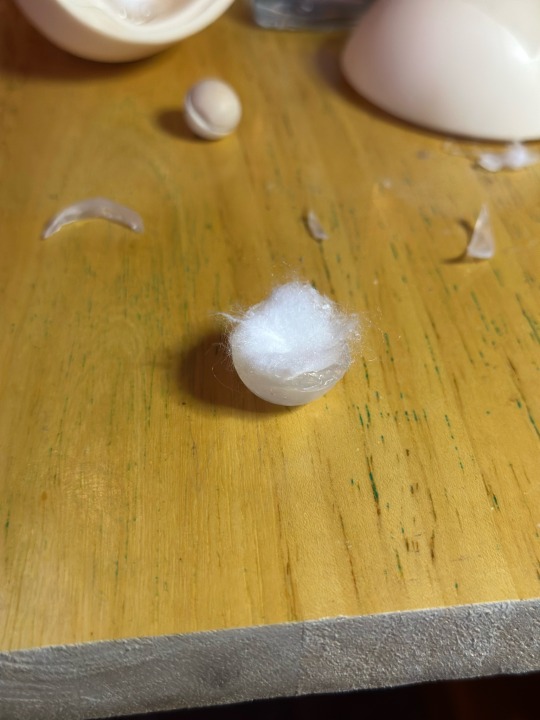

Position your eyeball. This is also trial and error. You want it center with enough room to move. You will have to put the cup on and experiment. Have a toothpick like object and a little bit of tac to do a trial run on the eyeballs movement. Add/remove fluff as needed. You want a semi-firm cushion but not so much to hinder movement. You may need to adjust position of the cup to either side as well for optimal movement.
I very much recommend Faber-Castell blue tac it. It doesn’t leave marks on the pupils as you move the eye around.

Mnnn

Did you find a prime position? Glue the cap in. I know magnets are usually used, but I’m being cheap here. A couple spots of hot glue holds the cup in and is easily pulled out for change and repositioning. Just trim off the excess glue and start again.
Some heads may be more difficult to place the cups side by side. You will have to use your best judgement to trim and move as necessary. For a couple I had to trim some of the side of the cup off because of the angle.

Got them both in? Great! Replace the head and admire your work.
Side note: I did notice some eyewells were deeper than others (looking at you Dante) I did have to do a little bit of pre padding carefully around the eyeball before placing the cap, just to help keep the eye in position. Be sure to check often to make sure there is no stray fluff peeking around the eye.
This was a quick and dirty explanation of how I did this. It isn’t pretty, but it works. Now the dolls have more expression than ever from sultry, to suspicious, to downright deviant.
Feel free to use or make improvements upon this concept. It’s meant to be a cheap and easy project.
#bjd#dragonsdelightstudio#abjd#dolls#bjdoll#legit bjd#doll#bjdphotography#legitbjd#dollstagram#bjd mods#BJD tutorial#BJD eyes
117 notes
·
View notes
Text


Isabella 🧚🏼♀️
#isabella#bjdoll#bjd clothes#bjd doll#bjd photography#bjddoll#bjdphotography#legit bjd#bjd confessions#bjd wig#bjd eyes#bjd tumblr#bjd outfit#bjd props#bjd artists#bjd accessories#bjd sculpts#bjd sewing#bjd diorama#fantasy bjd#bjd furniture#bjd faceup#bjd fashion#bjd girl#bjd hobby#bjd hybrid#bjd collector#bjd comparison#bjd making#bjd
131 notes
·
View notes
Text

Dahlia ❤️
25 notes
·
View notes