#alternative input methods
Text
Creating Inclusive Digital Products: A Comprehensive Guide to Accessibility Features
UI accessibility features are tools that can help make digital products more inclusive and easier to use for people with disabilities. Read more...
In today’s digital age, it is more important than ever to make sure that our digital products are accessible to everyone. UI accessibility features are tools that can help make digital products more inclusive and easier to use for people with disabilities. In this blog post, we will explore what UI accessibility features are, why they are important, and some common examples of UI accessibility…

View On WordPress
#accessibility features#alternative input methods#clear navigation#cognitive disabilities#consistent design#inclusive design#keyboard shortcuts#motor impairments#simple language#simplified layout#text-to-speech#visual aids#visual impairments#voice commands#web accessibility
2 notes
·
View notes
Text

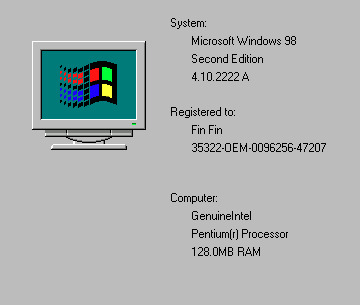
Fin Fin on QEMU (Current Version - v2.2)

Fin Fin on QEMU is a project designed to create an easy to use way for anyone to play Fin Fin without the need for any complicated setup on modern operating systems. It is fully compatible with Windows 10 and 11, but will also work on any version after XP.
The version of the game used is a custom made translation that includes all 6 worlds in English. It has working microphone input, sound recording, and all associated features such as screenshots and the encyclopedia work as well.
Rather than using virtualization, this works through emulating an entire Windows 98 machine. To play it there's no need to install any hypervisors or set up a virtual machine, as everything is already set up, and ready to go.
The download link can be found here! (Hosted on MEGA)

Installation
The whole thing is portable, meaning nothing is actually "installed" and all the data is wherever you place the folder. This also means that if moved to another PC, all user data will still be present.
To run, all you need to do is extract the folder in the .zip to a location of your choosing, and then run one of the launchers.

Included are two launcher versions for the different QEMU display options, one that uses GTK and one that uses SDL. The only difference between the .bat script and the .exe versions is that a command window will be shown when using the .bat script.
Both have pros and cons, so I've included both to let the user decide which one they want to use.
SDL has broken window scaling and no mouse integration, but has a correctly stretched fullscreen.
GTK has a stretched fullscreen mode, but has working mouse integration and window scaling.
Basically if you want the game in fullscreen use SDL, otherwise use GTK.
For a bit more info about these, checkout the 'Files' section under the 'Keep Reading'
Important Info
Before launching the main game, be sure to create a profile using 'New Contact', as the game will not run until doing so.
When exiting the game use the shutdown option in Windows 98. Exiting through closing the window forcefully can possibly cause data loss/corruption.
When using SDL, mouse and keyboard input will be captured. To release this, press 'Ctrl + Alt + G'.
When using GTK, the menubar can be hidden or shown by pressing 'Ctrl + Alt + M'.
To make the window fullscreen, press 'Ctrl + Alt + F'.
Sounds

Included are two "sound effect packs" for the in game sounds that play based on the number keys from 1-5.
By default, the game will use the sound effects from the 5 Worlds version, but you can swap out to the 6 worlds one by renaming the "sound (alternate)" folder in the D: drive to just "sound", and renaming the original sound folder to something else.
I hope you all have fun with your new best friend Fin Fin!

Fin Fin is a wonderful little enigma from the past, and my attempt to make it easily accessible even in the present is something I hope you will all enjoy.
If you encounter any issues in Fin Fin on QEMU, please contact me about it.
To view the changelog, credits, and some more info about this project check below the 'Keep reading'.
Changelog
Some information is cut for brevity, the full version can be found inside of Fin Fin on QEMU and the MEGA folder.
v2.2
Added several new Fin Fin screensavers the user may choose from
Updated method for calculating Transfer folder size
Updated emulated machine to use 128mb of RAM and a Pentium
Updated main teoboot.exe executable to fix several issues
Updated shortcuts
v2.1
Removed WHPX launching options
Removed FinFinWHPX.bat and FinFinWHPX.exe
Removed startup crash fix as it was only needed for WHPX
Modified folder settings in Windows 98 to open folders in the same window
Rearranged Fin Fin on QEMU folder layout for cleaner appearance
Added 'OK' button back to Microphone Setup that was mistakenly removed
Updated shortcuts for Microphone Setup and Sound Recorder
Fixed problem with 'Encyclopedia' launching script that caused screenshots to not show up in the photobook
Added 'Transfer' Folder which allows for transferring files between the host and emulated machine
Added options for launching with either GTK or SDL display
Altered updater to improve ease of use and used NirCmd to improve process as a whole (Updater.bat & updater.iso)
v2.0 (Major Update - 6 Worlds Edition)
Modified original Taiwanese 6 Worlds version to add English Translation
Added 'Microphone Sensitivity' shortcut to the desktop and start menu
Added in 5 Worlds version Encyclopedia (finfinEncyc.exe & encyc30.GIZ)
Added sound effects from 5 Worlds version (D:\sound)
Added Mouse Integration
Added Nircmd to replace launch batch scripts (C:\WINDOWS\nircmd.exe)
Added Windowed Mode shortcut to start menu
Altered launching scripts (FinFin.bat, FinFin.exe, FinFinWHPX.bat, FinFinWHPX.exe, FinFin Update.bat)
Removed large amount of unecessary setup files from finfin.qcw
Removed 'Task Scheduler' from taskbar
Added Credits and Changelog shortcut to start menu
Added dll to fix issue with running on Windows 7
v1.3
Added animated Fin Fin cursor
v1.2
Added guided updater (FinFin Update.bat & updater.IMA)
Adjusted wallpaper
Renamed startup shortcut ("_setup.bat" to "Crash Fix" at C:\WINDOWS\Start Menu\Programs\Startup)
Adjusted Volume Control Settings
v1.1
Added new wallpaper (C:\background.jpg)
Added new startup sound (C:\boot.wav)
v1.0 (First Public Release)
Changed from qemu-3dfx to base
Removed unnecessary files in Windows
Added missing shortcuts on Desktop
v0.5 (Playtester version)
Moved all Fin Fin data to finfin.qcw
Created batch scripts for Disc.id
Added shortcuts to launch programs
Removed unnecessary programs from Windows
Removed unnecessary files in Windows
Credits
Resources
The finfin Homepage (finfin.de) - By EMGE
The finfin Archive (finfin-archiv.de) - By Xvemon, Nadine S., and EMGE
Fin Fin 6 Worlds "Beta" (finfin-archive.de) - By Harald G.
Playtesters
mchi22
that-one-scratch-on-your-arm
Software
QEMU 7.1.0. (qemu.org) - By QEMU team: Peter Maydell, et al.
NirCmd (nirsoft.net) - By Nir Sofer
Resource Hacker (angusj.com) - By Angus Johnson
Updating Versions
Included is a guided updater that will help you transfer your save, screenshots, and sound recordings to the latest version.
Place the new version in a temporary location without replacing the original.
Then, just run "Updater.bat" and follow the instructions.

System Time
Time in the emulated machine is synced to the host PC.
If you would like to time travel in Fin Fin, you can change the time in the emulated PC but it will go back to normal after a restart. Note that if you do this you will not be able to go back to the original time, you can only go forwards using this method
If you would like to permanently change the time, you can use the built in date-changer present in the 'New Contact' program, but this will cause the loss of the current profile.
QEMU
Though it should be quite obvious by now, this project works through the use of QEMU, an open source emulator. Specifically, its emulating a full Windows 98 SE machine, and then the game is run on that.
The emulated machine has 128mb of RAM, an AC97 Soundcard, and a Pentium CPU.
Files
The only files this project really has aside from QEMU are FinFin GTK.bat/.exe and FinFin SDL.bat/.exe
The reason I list the .exe and .bat files together is that they do exactly the same thing. The executables aren't really 'true executables', but are instead just batch scripts that have been converted into .exe files. When they run, they essentially create a temporary batch script that deletes itself. The only real benefit of this is that its a bit more straightforward for launching and creating shortcuts, and that there is no distracting command window while playing.
Within the 'Data' folder is where the bulk of the project is. Inside are two virtual hard drives, w98.qcw being the main Windows 98 drive, and finfin.qcw being where all the Fin Fin game data is.
3K notes
·
View notes
Text

THE SIMS 3 TUTORIAL
HOW TO CREATE DEFAULT REPLACEMENT MOD
USING CUSTOM MESH & TEXTURE FOR SIMPLE OBJECT
⚠️ Tumblr has 30 pictures limit, so I cannot include too many pictures. If you want to zoom in the pictures, click the pictures to enlarge, or save the pictures into your PC, zoom the pictures on picture viewer or zoom in the pictures on your mobile phone. ⚠️
----------------------------------------------------
I create this tutorial to make easier to follow because there are older tutorials available before but scattered on internet and usually only say "Export to replace s3asc" without explaining how to export the edited object properly.
My method is using TSR Workshop instead of exporting the object using Sims 3 Object Export/Import plug in because exporting to replace the s3asc using that plug in always giving error notification "ERR: Model has 1 groups; original had 0" and cannot be exported.
For beginners who are very new using s3pe and haven't created default replacement mod before, better start from simple object first.
Simple objects I mean in-game object that has single MODL and single texture with no morphs, no GeoStates, no presets, no CAS colour channels, and easily cloned from OBJD on catalogue. Usually as utensils that Sims holding in their hand, not buy/build objects. For example: Pencil, pan, fork, spoon.
----------------------------------------------------
Tools to prepare:
s3oc
s3pe
Milkshape 3D for bone assignment (Version I use 1.8.5 beta, discontinued by its developer, therefore feel free to download the full version with its license key provided).
Sims 3 Object Export/Import 1.01 by Wesley Howe (Milkshape plug-in. Download msS3ObjPluginsV101.rar )
TSR Workshop (Older version for TS3 only version 2.0.88)
TSR Workshop plug-ins for export.import TSRW Object.
3D Program (Blender/Maya/3dsMax)
Editing images software (Photoshop, make sure you have to install .dds plugin by Nvidia. For free software alternative, you can use GIMP with its .dds plugin)
This tutorial will not teach you how to:
Meshing object ❌
Create alpha texture ❌
Change thumbnails in-game ❌
Install programs and plug-ins ❌
This is how I created Chinese chopsticks replacement mod using custom mesh and texture.
In summary, this tutorial has 10 steps:
Step 1. Clone the Object using s3oc
Step 2. Open S3PE to Copy the Original Resource Code and Export the Files
Step 3. Export the Original Mesh as Base Mesh to .obj format
Step 4. Create Your Custom Mesh
Step 5. Bone Assignment & Create Group
Step 6. Create custom Texture
Step 7. Import the .wso of Edited Mesh on TSR Workshop & Export the package
Step 8. Export MODL file from Package saved from TSR Workshop
Step 9. Finalizing in s3pe & Replacing the Original file with Edited File & Correcting the Code As Same As Default Code
Step 10. Test the CC in your game.
-----------------------------------
✳️ Step 1. Clone the Object using s3oc
Before cloning the object, check the Game Folder for in-game object file location. Settings > Game Folders...
Take a look if the Base Game or Expansion Pack for object file you want to clone is in the right folder. For example, my The Sims 3 game are all bought from Steam, so the location is D:\SteamLibrary\steamapps\common\The Sims 3
If you want to clone object from Expansion Pack, make sure input the folder location. For example, the location for World Adventures EP is D:\SteamLibrary\steamapps\common\The Sims 3\EP1

If you are done, close the pop-up box. You can continue click Cloning then choose Normal Object...
Wait until you get the whole catalogue. Click Search...

For example, I clone object from World Adventures Expansion Pack. You can clone object from Base Game or other Expansion Packs as long it is considered as "utensil" that Sim holding on hand. For example: "Pencil" or "Pan"
Search for text: chopsticks
or if you want to clone object from Base Game, search: utensil
Tick check marks for Resource Name, Object Name, Object Desc then click "Search button"
Search result gives you results with name "chopsticks". Here is the object we are looking for: UtensilChopsticks
We need the OBJD file to clone. OBJD = Object Data.

Click "Clone or Fix" at the right bottom. Then you see the next page to determine if you want to clone with renumber or not. If you want to make default replacement, then do not check the Renumber box. Keep it blank.
Tick check box means the s3oc will generate new resource code for new item. Not tick the check means the s3oc will overwrite the same resource code, it is to replace object you cloned in-game.
I am personally a detailed person, so I usually tick as many as I want: tick "Deep clone" "Missing String Tables" and "Include Thumbnail" to include more details. Then click "Start" to proceed.

It will give you file name [CreatorName]_ObjectName_Number
Then save your package file in "DBPF Package" format in your project folder. Always make folder for any file to make everything organized.
✳️ Step 2. Open S3PE to Copy the Original Resource Code and Export the Files
Open S3pe, locate your package file you cloned from s3oc. Find the MODL of Utensil Chopsticks, Right-Click, "Details..."

On Resource Details, click "Copy TGI" to copy the Resource Code. Type, Group, and Instance will automatically be copied on clipboard. Then open Notepad, Right-Click to "Paste".
Click GRID on bottom of the s3pe (I mark it red on picture), it will give you pop-up box with Data Grid. Click "Resources", it will be highlight blue and there's 3 dots button appeared on the right side. Click the 3 dots button. It will give you TGI Block List Editor.
Inside MODL's TGI Block List Editor only has IMG. You may wondering why, but that's how the game coded. Type, Group, Instance of _IMG inside TGI Block List Editor should be the same as _IMG on the package.
Copy the TGI, Group, Instance to your Notepad.

After you copied code of MODL, do the same for the texture image (_IMG), but only copy the code from Resource Details. You cannot edit TGI Block List Editor for _IMG as the Grid button for _IMG is greyed out.
The main task is the code of your edited mesh and texture should be the same as the code you copied now from original package you cloned with s3oc.
Keep the code on notepad. You will need this code later.
Export the MODL file. Right-Click, "Export to s3asc". The file appears in long string such with name for example: S3_01661233_08000001_B619DB2238C3430B%%+MODL_filebase
Do not rename the file. Save.

Export the texture file. Right-Click "Export > To File..." The file will be saved in .dds format. Do not rename the file. Save.

✳️ Step 3. Export the Original Mesh as Base Mesh to .obj format
Open Milkshape. Import the s3asc file you saved before.
More steps click spoiler tag "Read More / Keep Reading" below
File > Import > Sims 3 Object Import v 1.01 by Wesley Howe

Locate the s3asc file, then the original chopsticks mesh appears.
Click the "Joints" tab. It has 4 codes. Check box "Draw vertices with bone colors" It will show Bone Assignment colors on the original mesh. Yellow on top chopstick and light blue on bottom chopstick. The colours are to make the object has rig and movement following the Sim's interaction.

Take a look at the 4 codes on Joints Tab. You can play around to see which colour of the code will appear, after that copy paste the code to Notepad to make it easier to comprehend.
Click Select from Tools menu, Select Options: Face. On "Right/Left/Top/Bottom 2D View", Left-click make selection of one part of chopsticks. While the part of object being selected (Red), click Joints then Choose "Assign".
0x96239247 --> Yellow
0xFEAE6981 --> Purple
0xCD68F001 --> Light Blue
0xD0DECA8E --> Red
Your edited mesh must have the exact same Bone Assignment colour later. Check again if the code and colour are correct.

You can save object mesh as .obj to other 3D software such as Blender or any other 3D software.
✳️ Step 4. Create Your Custom Mesh
Use the original .obj as base model. While you can create longer mesh or any edited version as you wish.
Make sure the scale and position of the edited mesh is same as base original mesh, because the edited mesh will be used on Sim's hand.

If you are done editing the mesh, export the UVmap.
You can export the uvmap in higher resolution, as long as it is Power of 2. 64x64, 128x128, 256x256, 512x512, 1024x1024, 2048x2048, 4096x4096. I export in 1024x1024 pixels to make the size of texture larger and have more details.
Then export the mesh object in .obj format.
✳️ Step 5. Bone Assignment & Create Group
Open Milkshape. Import the original mesh.
Check the Groups Tab. Original mesh has 1 group, "group 00". Group 00 means it is the main mesh. There is no shadow beneath the object.

Import the edited mesh as .obj file.

My edited mesh has one single name "default" name on the Group Tab. While edited mesh may have a lot of file name scattered on Group Tab. Regroup the file name to simplify your edited mesh into one single name. Select > Regroup.
The main task is replacing the EA's original mesh with your edited mesh.
Before you delete anything, you must do Bone Assignment first to the edited mesh you created.
Your edited mesh does not have Bone Assignment, so it appears white.
Remember the 4 codes you copied earlier in Notepad.

Copy Bone Assignment from original mesh to your edited mesh.
This case, your want to Bone Assign Yellow colour.
Select > Face to select one part of chopsticks of your edited mesh. On Joints Tab, double click the appropriate code 0x96239247 in blue highlight then the code box on the right side of "Rename" will appear 0x96239247. Make sure the code is correct. Then you can click "Assign".

Your edited mesh will appear in Yellow colour. Then do the same for another part of chopsticks.
Select another part of chopsticks of your edited mesh. On Joints Tab, double click the appropriate code 0xCD68F001 in blue highlight then the code box on the right side of "Rename" will appear 0xCD68F001. Click "Assign".

Your edited mesh will appear in Light Blue colour.
Then what's the other code for? With colour purple and red?
Leave them. Let the codes have the same exact codes as appear in original mesh and let the colours only assigned Yellow and Light Blue. The colours are to determine rig for interaction in-game, which only use Yellow as upper part of chopstick and Light Blue as bottom part of chopstick.
You can safely delete the original mesh with name group00 until it remains your only your edited mesh.

Rename your edited mesh to group00. Type group00 on the box then click "Rename" on the left side.

Export to TSRW Object in .wso format. .wso is format with bone assignment on object attached.

Save your .wso in your project folder.
✳️ Step 6. Create custom Texture
Import original texture you exported from s3pe to your editing image software.
Look at the original texture made by EA. 32x64 pixels. It is very low resolution, blurry and stretched, because the texture should be compressed as low as possible by game designer. As player you want it has higher detail to look realistic as possible and your PC of course can handle high resolution content, sure you can make the resolution much higher than EA's.

Import the UVMap you saved from 3D software. For example, UVmap I imported has 1024x1024 resolution. Add your custom texture. Then save it to .dds format in the same name as original texture. Save in separate folder, name it "Edited Texture" to keep it separated from original texture.
✳️ Step 7. Import the .wso of Edited Mesh on TSR Workshop & Export the package
Open your TSR Workshop.
Create New Project > New Import >Next...

Then Browse original mesh by EA in package format in your project folder.
On Open file box, you cannot see .package file because the filter is .wrk (TSR Workshop Project). Choose the .package dropdown.

Then you can see .package file.
Open the .package. After the file is located, then Next. On Project Details I usually skip without giving name of Project Name and Title. Next.
You must have seen green land with white blank sky.
Where's the mesh? It is actually there... just being zoomed in too close. You need to zoom out by scrolling down mouse.
You can see the original chopsticks mesh by EA. You can save the project file in .wrk format. After you save the file, import the .wso of your edited mesh. Mesh tab > High Level detail. Click green arrow folder icon to import. Then your edited mesh will appear replacing the original EA mesh.

As you see, the texture is messed up because the texture is still using original EA's texture. But then you check Textures tab and it has blank dropdown...
I cannot change the texture on this TSR Workshop!
Don't worry, we can replace the texture on s3pe later.
No need to change anything other than importing mesh. Click Edit > Project Contents to save as package.
You will see pop up box with number or files DDS, FTPT, LITE, MODL, OBJD, OBJK, etc. Export > To. package. Give name such as "EditedChopsticks_TSRW"

✳️ Step 8. Export MODL file from Package saved from TSR Workshop
Open S3PE, File > Open package "EditedChopticks_TSRW" that you saved from TSR Workshop.
Export MODL. Right-Click, export. It gives you file name with [StringOfNumber] .model .
Save it on project folder. Keep it organized and separated from original MODL. Name the folder "Edited MODL". Do not rename the file.
✳️ Step 9. Finalizing in s3pe & Replacing the Original file with Edited File & Correcting the Code As Same As Default Code
Open s3pe, File > Open original package that you cloned from s3oc. [CreatorName]_ObjectName_Number
Find the MODL. Right-Click > Replace...
Locate to your edited MODL with filename .model .
Then click Open.
The original MODL of the package should be replaced with your edited mesh.
Do the same for the texture.
Locate to your edited texture with filename .dds
Then click Open.
The original texture of the package should be replaced with your edited texture.
Take a look at MODL's Type, Group, Instance. It has the same code as original MODL in the original package cloned with s3oc (because it has been replaced)
Don't forget to see the code inside TGI Block List Editor.
Repeat step 2 how to check the code. Right-Click on MODL/IMG > Details... and click GRID > Resources > TGI Block List Editor.
The Type, Group, Instance of the _IMG are different compared from IMG from original package clone, which means that is the evidence of edited mesh replaced the original.
Rename the Instance with default/original Instance you copied on notepad from Step 2. Type, Group, Instance should be the same as default/original Type, Group, Instance.

Open notepad with resource code you copied from Step 2. Make sure the Type, Group, and Instance are all the same.
If the codes are the same, then your edited mesh and texture will overwrite the default mesh and texture with the same code in the game. Save, Commit, Save the package.
Check again if the texture is replaced properly. Right-Click on _IMG > ViewDDS.
ALTERNATIVES!
Yes, you can delete unwanted files in your edited package, to keep the package clean. Simply Right-Click>Deleted.
The only files needed in package are: MODL, _IMG, _KEY
They are the only files with your edited mesh/texture including codes to overwrite the default codes.
You can Start new fresh blank s3pe. Right-Click>Import from file...
Locate your edited MODL and _IMG (texture) file.
On Resource Details box, tick mark "Use resource name" > OK.
Make sure all the Type, Group, and Instance of MODL and _IMG including in the TGI Block List Editor are all the same as the code in original package.

Save the package.
✳️ Step 10. Test the CC in your game.
Put the package to your CC folder in your The Sims 3 document folder to see if the CC is working or not.
If the CC is working as your intended, with your custom mesh and texture, then test the animation. Are the chopsticks animation working as the same as original EA's? If the animation are working well too, then congratulations!

Your default replacement are working. Give applause to yourself. 👏
-------------------------------------
QUESTIONS!
Q:
Can I use this tutorial for making default replacement for buy/build object?
A: This tutorial covers basic method of using TSR Workshop and replacing the default codes (Type, Group, Instance), so you will understand the basic principle of doing default replacement mod.
Keep in mind that different object has different case. Buy / build object has MLOD (not just MODL) more than one, texture images more than one, has presets, and CAStable colour channels.
The TGI Block List Editor for buy/build object has a lot of codes, so have to spend a lot of time to do trial-and-error to make the default replacement working properly, because a lot of times the texture doesn't work (still using default EA's texture), or when the object appears right with your edited mesh and texture, after you choose the presets, the object reverts back to your edited mesh with default EA's texture.
Q:
Help! The texture is black! / still using same EA's texture when tested in the game!
A: The texture codes must be not the same. Check the Type, Group, Instance of _IMG. Do the codes are the same like codes in original package? Check the TGI Block List Editor for MODL, is the _IMG inside has the same Type, Group, Instance as in original package.
Q:
Help! The object disappears when tested in the game!
A: You must be replacing OBJD in your package. Do not replace OBJD. Just MODL and texture only.
#tutorial#the sims 3#the sims 3 tutorial#thebleedingwoodland#the sims 3 default replacement mod#modding#s3pe#s30c#TSR Workshop
78 notes
·
View notes
Text
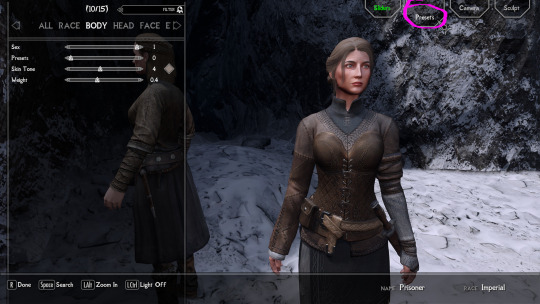
How to replace Skyrim NPCs with faces made in RaceMenu
(aka the method I used to make all my NPC overhauls)
This is an updated version of the tutorial from this post. I forgot a step originally.
Why use this method?
RaceMenu (RM) gives you a lot more creative freedom than simply editing NPC faces in the Creation Kit (CK).
Just installing RM gives you access to new sliders not found in unmodded Skyrim and you can install further slider mods (such as Expressive FaceGen Morphs, or Khajiit Character Creation Extended, etc.)
It also allows you to use Overlay mods (like DomainWolf's mod series or Freckle Mania 2) which give you many more options to layer warpaints or skin features and create a more detailed face.
Links are to the SE version of the mods, as that's what I'm most familiar with. They likely have LE counterparts.
Things you will need:
RaceMenu (and SKSE; be sure to get the correct versions of both for your game)
NifSkope - you will use this to open and edit the mesh. Here's GamerPoet's setup video
More Informative Console (especially if you're editing mod-added NPCs)
BSA Extractor (or similar mod that lets you open and extract BSAs)
Things I highly recommend:
Creation Kit Platform Extended for Skyrim - makes using the Creation Kit way less like pulling teeth
Unofficial Creation Kit Patch - if you're using AE
An alternate start mod - I like Dimes Quickstart for its simplicity, but any would work
Another Race Menu Rotation Mod - handy for seeing how the back of hairs look
Stand still in RaceMenu (OAR) - stops the character from wiggling out of frame
If you're looking to edit an NPC from an unplayable race (Elder, Child, etc.) you will likely need a mod that makes that race playable
Fun Stuff for diverse options:
Extra slider mods (I like Expressive FaceGen Morphs)
Skin Overlay Mods (for extra detailed faces)
If you want to get REAL funky with it, you can also use OutfitStudio to have a lot better time sculpting/getting super wild with assets, but that's too advanced for this tutorial (and my method is very 'goof around until it just works.'
I don't really want to cover using mod-added headparts (like eyes, hairs, etc.) There are basically two options there: add them as new headparts for your mod or make your mod dependent on the mod the headparts are from. The second way is probably simpler for beginners, but I definitely suggest installing Creation Kit Platform Extended, as it will allow you to load the other mods as masters without the Suffering™.
The Workflow
1. Design your character like you would a player character. For this example, I am redesigning Arcadia.

A recommendation: unless you really feel like you need to change it, it is typically better to make the Weight slider match the NPC's actual weight. You can see this value using either SSE Edit or the Creation Kit.
It is no big deal if you don't, but if you change the weight and load the mod into an already existing save you will get a gap between the NPC's neck and body (unless you use Save Unbaker.)
Be careful, though, there is a RaceMenu bug where if you load up RM again after exiting, it changes the weight by .01. So annoying.
For Skin Tone choice, if you do a custom skin tone (by pressing 'E' while hovering over the slider) I would recommend leaving the transparency slider (the 'A' value) at 100% (though I usually make the exception for Khajiit and Argonians.) This info will go into the Interpolation Value box in the CK, and the RM values can't be directly input, so you have to calculate the value with a (RM Number/255 = X/100, solve for X which is your Interpolation Value)
1a. If you are planning on adding faceparts from mods to your own plugin, I recommend saving and doing that now. Then come back to your save and change your headparts to the versions from your plugin. If you want to just have the other mods as masters, you can skip this.
2. Once you're satisfied with your design, I recommend saving your game and saving your head as a preset (click to enlarge):

3. Now, you will need to write down some stuff.
Skin Tone (RGB value):
Hover over Skin Tone slider. Press 'E'.
write down the R G B values (and A if you change it, see above note)
Even if you use a default skin tone, this is the best way to make sure you get the correct value for the CK.
Weight (number)
Scars (name) (if applicable)
Hair (name)
Facial Hair (name) (if applicable)
Eye Color (name)
Brow Type (name)
Writing down Hair Color is optional: with this method, the hair will inherit color from the head you export, not the CK value. Plus, RM's values are not really useful, because the default hair colors are named.
It's the same with the Face Complexion (wrinkles, etc), with this method it is exported with the head mesh.
4. Export the Sculpt:


It should end up in your SKSE folder (SKSE\Plugins\CharGen), wherever that is for you
5a. Method 1 (works for both Vanilla and Mod-added NPCs): get your NPC in front of you, either by console command (example with J'zargo):
~
help 'J'zargo'
then, using their RefID (the number that appears next to their name) type:
player.placeatme 0001C1A3
Or find them in-world.
With the mod More Informative Console installed, reopen the console (~) and click on them. Write down their BaseID.
5b. For Vanilla NPCs: close your game and search for your character's name on UESP and find their BaseID. Copy this number.
6. Open your BSA extractor of choice and Skyrim's data folder. Find the Skyrim - Textures0.bsa. Open with your BSA extractor, and paste the BaseID in the search box
Check the checkbox next to the main facegen file only and extract somewhere easy to find.
7. Repeat this process with the Skyrim - Meshes0 file.
8. Create a new mod folder. You can either make a mod directly in the mod organizer (MO2 lets you right click in the left pane -> All Mods -> Create Empty Mod Above) or on your desktop.
Cut and paste the 'textures' and 'meshes' files you just extracted into your mod folder. If you are installing it via archive, go ahead and zip and install the folder.
9. Now open the Creation Kit. Use the folder icon to load your masters.
Pick Skyrim, Update, DLC (if applicable), and any other mods you want to be masters for your mod (for eyes, hairs, etc.) If you've made your plugin already for headparts, just load it up.
10. In the Object Window, expand the Actors -> Actor -> Actor tabs and now you have a lot of tabs with Race names. Find the race your NPC belongs to then open the appropriate gender tab. Alternatively, you can just search the character's name in the searchbox.
11. Find your NPC's name and double click. This opens their Actor window, which is where you will use all the data you wrote down.
If you want a preview of their face, tick the box at the bottom of the window.

For weight adjustments: go to the Traits Tab. For all other values you need to worry about for this tutorial, go to the Character Gen Parts.
So, to parse this: you can ignore the Face Tint Layers box and pretty much everything on the left side of the screen.
Face Tinting Color
Type in your values for R G and B (you can ignore the Preset dropdown completely.) The Interpolation value corresponsed to the 'A' value, so unless you are working on Khajiit or Argonians, it will probably always be 1.
Base Head Parts
To change stuff in this section, click the line you want to change then go down to the dropbox below it and change it to what you want
Face - unless you're using something like High Poly Heads, you can ignore this
Everything else in this box: change to what you wrote down for each
Additional Head Parts
This is mainly used for scars and functions a little differently. To add a scar, you need to go to the Object window again.
You can expand the Character tab and click 'HeadPart' then search the name of the scar you want. Click and drag the line with your scar into the Additional Head Parts box and it should show up there.
12. Once you've got the above like you want it, hit 'Ok', save your plugin. Now, to make the next step a little easier, you can click the NPC name in the Object Window again and hit f4.
This will export the meshes/textures file folders to the mod you just made in step 8.
Go ahead and exit the CK now
13. Go your your files exported from the last step. Open a second window from the files you exported from SKSE.

Open both meshes in two separate NifSkope windows.

If your SKSE head has a weird broken neck mesh like above, that's not a problem and can be ignored.
You absolutely must make sure your headparts match the head you exported from RaceMenu exactly, or you will get the dreaded dark face bug.
Now, you will need to find the Head textures in the head you exported from the CK. If your NifSkope is set up like mine, it should look like this:
Copy this line and paste it into the SKSE head in the same slot.
Save the SKSE NifSkope and close.
14. Rename the SKSE files (both .dds and .nif) to the number your exported heads are. You can then copy and paste your your SKSE files to their respective folders in your step 8 mod folder:
the .nif file goes in meshes/actors/character/FaceGenData/FaceGeom/[name of plugin]
the .dds file goes into textures/actors/character/FaceGenData/FaceTint/[name of plugin]
And now you're ready for testing! At this point I also recommend taking a second and converting your plugin to an ESPFE via SSE Edit. It's pretty simple and there are tutorials out there.

Scully, you're not gonna believe this.
117 notes
·
View notes
Photo

(via tagtype Garage Kit | Takram)
“tagtype” is a Japanese input device. The Japanese language is made of fifty syllabic characters that can be written on a matrix of ten consonants multiplied by five vowels. tagtype is designed with two rows of five buttons, a total of ten buttons that can be alternately pushed to specify the rows and columns of the fifty character matrix. When compared to the QWERTY keyboard, this formula makes typing in Japanese easier and intuitive. The input method in tagtype was used by SONY and Benesse Corporation in their commercial products.
201 notes
·
View notes
Text
Tesla’s Genius: Direct Current Without a Commutator!

In 1888, Tesla made waves by patenting his alternating current (AC) system, which proved far superior to Thomas Edison’s direct current (DC) for long-distance power transmission. The real kicker? He did it without a commutator. This clunky mechanical device was used to reverse the current direction to make DC flow in one direction, but it was notoriously unreliable, prone to wear, and inefficient. Tesla sidestepped this by using high-frequency AC and a rotating magnetic field to generate a more reliable current without the mechanical hassle. After revolutionizing AC with his commutator-free approach, Nikola Tesla wasn’t ready to rest on his laurels. He turned his attention to a new challenge that many physicists of his day thought was impossible: creating direct current (DC) without using a commutator. As always, Tesla wasn’t concerned with traditional boundaries; he was determined to push the limits of what was thought possible.
Tesla’s Ingenious Method
In 1889, Tesla took things even further with a groundbreaking idea. He proposed a method to produce DC without using a commutator. He described how he “sifted” the alternating current into different branches of the circuit. Here’s how he did it:
1. Sifting the Current: Tesla used the concept of directing the AC waves so that the positive and negative halves of the wave were separated. He set up the circuit so that AC waves of one sign (positive or negative) would pass through one branch, while the waves of the opposite sign would go through another. This separation allowed him to create smooth, continuous DC from the AC input.
2. Electrical and Electromagnetic Methods: Tesla proposed two main methods for achieving this. One involved using electrical devices like batteries to create a counteracting electromotive force, which would oppose the AC waves and help separate them. The other method used electromagnetic fields to create active opposition within the circuit, guiding the AC waves into different branches.
3. Magnetic Method: Another method Tesla described used strong permanent magnets and soft iron or steel laminations. By carefully calculating the amount of magnetic metal, Tesla created a setup where the magnetic field interacted with the AC in such a way that allowed continuous currents to be extracted.
Historical Context
Here’s an important note: While Tesla did indeed demonstrate a method for converting AC to DC without a commutator, it’s crucial to understand the broader historical context. Rectification methods—both mechanical and electronic—developed independently over time and were not solely based on Tesla’s innovations. It wasn’t until more than a decade later that practical AC-to-DC conversion technologies, such as vacuum tubes and silicon diodes, became mainstream.
Tesla’s approach did, however, lay the groundwork for modern power electronics by eliminating the need for mechanical parts, making DC conversion more efficient and durable. The principles he introduced continue to influence technologies we use today, from phone chargers to large-scale industrial power systems.
So, the next time you plug in your phone or marvel at the sleek electronics in your home, remember that Tesla’s 1889 breakthrough was a significant step forward. It’s just another example of how Nikola Tesla was light-years ahead of his time!
31 notes
·
View notes
Text
I've been in a bit of a tough spot for forever and have had to ask for help more often than I'd like. While I'm incredibly grateful for the support I've received, I also want to explore other ways to raise funds without constantly relying on direct donations.
Do any of you have ideas or suggestions for alternative fundraising methods? Whether it's offering a service, creating something to sell, or even setting up a crowdfunding campaign with specific goals, I'm open to any and all suggestions. Your input would mean a lot to me
#like a halffle where after the fundraoser I raffle out half the funds#but IDK the LEGALITY of something like that as an individual#but I have no marketable skills to make money with otherwise so thats how I'm in this position#but if I dont have money to get job training then I can't get any marketable skills#tough stuff
52 notes
·
View notes
Text
Theatre Theory: Why Frisk Can't Be A Vessel Controlled By A Player (And How The Player Can Still Be Canon)
I often see people talk about the existence of a Player in Undertale. Specifically, people insisting that the REAL protagonist of Undertale is The Player, that Frisk is a non-character, a blank-slate vessel controlled by us who follows our whims; in short, a more compliant Kris. In this post I will set out to, as succinctly as possible, explain why this interpretation is just wrong, and that Frisk cannot be possessed by a Player at any point during Undertale (but that doesn't mean The Player isn't canon).
First of all, let us define how 'possession' works within the context of UTDR lore, and specifically what it means. 'Possession' refers to a state in which the person in question is unable to make decisions for themselves and is instead puppetted by a higher power who has taken over their Soul (specifically The Player, according to our current knowledge that is. It is unknown if other people are capable of this as of now). Our main example of this is Kris who rebels against our control several times throughout Deltarune.


However, The Player can't just possess anyone they feel like; this isn't a power that they possess. A connection must be established between host and Player (hence why it is also referred to as a 'connection' sometimes), one that is facilitated by a third party, someone who also is responsible for our save files. Without the help of this third party a Player cannot possess a person.


Using this knowledge and definition and taking a look at Frisk reveals that they don't match this criteria. There is nothing in Undertale that suggests the existence of any third party helping us establish a connection to the game's world, and we are explicitly told several times throughout the game that the save file belongs to Frisk, not The Player nor a third party managing things for us.


(Keep in mind that 'you' usually refers to Frisk within the context of UT)

This therefore leaves two possibilities:
1. Frisk is possessed, possession just works differently in UT than in DR
2. The Player is not possessing Frisk
In order for option 1 to be true sufficient proof must be put forward to show that Frisk is possessed in the first place via a different method, either by instances of them showing resistance or through dialogue about them being strange or off.


This scene is the only proof of something like this occurring, as Frisk ignores an inputted command. However, this isn't enough to prove that Frisk is possessed, as there are several possible alternative interpretations for what this could mean. It could be proof of Frisk being possessed and that this might be them rebelling against our control in this moment. It could also be Frisk choosing to ignore an inputted command if you believe that The Player is merely a spiritual guide and not directly possessing Frisk, and so subtly different to Kris' acts of rebellion. It could also be neither, with this dialogue only serving to set an eerie tone. It is an inherently ambiguous line open to several interpretations, leaving us back in the same situation with two possibilities once more: either Frisk is possessed in a way unique to Undertale, or they aren't.
And this leads me on to my final point on this matter, and the main reason why I personally believe interpreting Frisk as a vessel is wrong, and that is the narrative for both games.
Firstly, Undertale's diagetic Player possession, assuming that it is true, would be entirely redundant, simply because Frisk with their "because they can, they have to" attitude, would be fine with any route being done, so no additional drama or turmoil can be added by forcing them to do things they don't want to, simply because they'd still want to do whatever; they simply don't care. Frisk being possessed adds nothing to the narrative.

And while it can be argued that Sans' dialogue refers to The Player here, I'd say that by proxy it MUST also apply to Frisk too, given that they show no resistance to any of this (and even seem to revel in it, given the fact they willingly eat the Snowman alive of their own volition, and this is pretty early on into the Geno Route):

Contrast this with Kris, who has a strong moral compass and expresses clear distress about their predicament, and so their possession is able to create a more interesting plot and dynamic between Vessel and Player.


The Player existing in Undertale also contradicts Deltarune's metanarrative, and to proper illustrate how, I must first present to you an alternative to the 'possessed Frisk' proposal so that everything that comes after that makes more sense.
Imagine an interactive theatre play. The characters can interact with the audience and the audience can call out to them, yes, but the two are ultimately separate from one another, even if some characters may break the fourth wall on occasion. These characters may give long soliloquies to the audience, heartfelt pleas and speeches, but ultimately, the audience will never get to be a part of their world, regardless of how much they may love the play. This theatre play is Undertale. The audience is The Player.
Our instructions to Frisk are nothing more than us calling out to Frisk in the play; they then respond however they wish to. Flowey's and Chara's speeches happen within universe yes, but are also simultaneously fourth wall breaks where they speak to 'the audience'.
But the audience wants more. They want nothing more than to be a part of the play. They want to be part of the play's world, a character in the story.
This is when the devil appears, offering a 'survey program'. The audience may not be able to be part of this play, but they can be part of another one. They can be a character. The main character. They can have all the adventures they want, all the fun they want. They need only accept everything that happens from that point on.
The Player is diagetic to Deltarune because they wanted to be part of Undertale's world, but couldn't, so they became part of the next best thing. That's why they accept Gaster's offer in the first place, because they WANT to live in that world. It's their own form of escapism. In many ways, they parallel the Lightners in their love for fantasy and indulgence in it, who also want to share a world with their Darkner friends.


This is the heart of the conflict in Deltarune as a whole, especially our conflict with Kris, who wants to be free from our control but we The Player want to stay in their world to continue in our escapism. In a way, this is Deltarune's purpose: it's the next step for an unsatisfied player who wanted to join their beloved characters, a 'sequel' that isn't quite a sequel, if that makes sense. A way for their fantasies about joining their beloved world's realm to be real, and (most likely) one we must come to accept is impossible. Fiction cannot replace reality after all.
If the Player was controlling Frisk in Undertale, then all of this meta is ultimately pointless. There would be no need for Gaster to offer us his program if everything we already wanted (that is, to be diagetic and part of our favourite world) was already achievable in base Undertale.
In fact, The Player would actually be discouraged from accepting the survey program because Undertale would also grant The Player far fewer restrictions in what they can do and achieve within the game; they aren't necessarily discouraged from playing like they are in DR.
And this is the main reason why I believe Frisk cannot be a vessel, because Frisk being a vessel defeats the entire purpose of the message Deltarune is trying to say.
(Adding this last paragraph in at the end because I picked up Homestuck midway through creating this post and I feel like it's important to mention this, but a better analogy would probably just be Homestuck. There are these characters called "exiles" who can communicate with the players of "the game" known by the humans as Sburb. They can input commands to them that the players can either follow or ignore, and can also watch over this player, but are "exiled" or separated from this world. This is almost identical to what is happening with Frisk, according to this theory)
#undertale#deltarune#undertale theory#frisk#theory#idk what else to use in the tags so sorry about that
52 notes
·
View notes
Note
Hi! I saw your answer to the question about "Anarchist leadership" and had a followup question. My concept of leadership has been that the practical function of the role itself is how you described a "coordinator," and that the difficulties which anarchism seeks to address arise when team coordination gives way to that individual abusing the opportunity of coordination to divide labor unequally (IE less to themself) or ignore input on how work is done, by whom, or when. To put it simply, my idea has been that the difference between a "leader" and a "boss" is, at extremes, that a leader takes on as much work (or more) as the rest of the group and considers every opinion in the group before making a final decision, while a boss accepts no input and does no work beyond coordination.
My first question is this: When a group is doing work collaboratively, how does an anarchist structure address the potential roadblock of deliberation? If every member is required to provide consensus on a decision affecting the group, what is the method for decision-making when consensus can't be reached? The only option I know of is an individual whose job is making a final decision in a case where one or more individuals refuse to agree with the majority, which is undeniably an authoritarian structure, but are there alternatives that can effectively limit deliberation when there is only so much time available? In short, what is the anarchist method of making a concise decision on something that affects every individual present?
My second question is this: If an individual's responsibility is coordination, or even being the "final say" in deliberation (assuming there is no other option), what is the alternative to rotation of responsibility if there are no other individuals capable of accomplishing that? I recognize that rotation of responsibility is an effective way to avoid one individual being placed in a position where their coordination becomes critical to the function of the group, but there are scenarios where nobody else in the group has the capacity to organize and coordinate and one can't be provided. How does one avoid a power structure when only one person is capable of coordinating?
I also have a followup about how anarchism addresses human vanity & pettiness in both of these cases, but I can save that so you don't have to answer too much in one post. Thanks in advance!
I'm going to start with the simple part: what you describe as the difference between a leader and a boss is, in effect, the difference between a boss and a lazy boss. The authority is exactly the same. The worst bosses I've worked for were willing to work very very hard, they were still my boss and the fact that they worked hard changed nothing about that relationship. A person that has the power to hire and fire others is a boss. If a person can decide that I should no longer have a stable income, I am at their mercy. They are my boss and no hard work or cool attitude can change that.
As for forming consensus: if consensus can not be reached it means a decision that works for everybody can not be reached and to those committed to consensus it is vital to keep working, keep talking, go over all the possibilities, pros and cons, and unorthodox alternatives again until a consensus is reached.
For those interested in learning that, i recommend A Consensus Handbook, Co operative decision making for activists, co ops and communities by Seeds for Change. Free pdf here: https://www.seedsforchange.org.uk/handbook
This book probably addresses a lot of your follow up questions. A vital thing to understand before you get started is that in order for consensus to work, there has to be:
No leader ad a commitment to dismantle power dynamics. Not just the pretense that there isn't a power dynamic. It has to be real. There can't be anyone with a 'final say', that's just authority with extra steps. A person with the power to have a 'final say' is a boss. There's no anarchism there. None.
An agreement by all participants to work by consensus.
Time and patience.
When people have spend most of their life not living with consensus, they will come in with attitudes that don't fit a consensus process. They will see the goal as 'reaching the decision that I already know we need to make' instead of seriously considering alternatives that others bring to the table. They will try to gain a majority for their plan instead of working with everyone in the group. They will try to get their way by blocking every alternative. It takes time, practice and experiencing the benefits of a consensus process for that attitude to change.
29 notes
·
View notes
Text
Official Maid Guidebook - On Mimicry
Maids are everywhere in our society, both in the public eye and sequestered away to private manors. They perform their duties, completing tasks that humans either refuse to do or are incapable of. That is not to say these maids are in positions of suffering. After all, this is what maids excel at! We will be exploring this concept and more in today’s edition of the Official Maid Guidebook.
For some background, the most well known modern habitat for maids is in the manor(s) of mistresses or miladies, hereafter referred to collectively as mistresses for the remainder of this edition. In such environments, there may be one or more maids that collectively or separately work to accomplish a series of tasks laid forth by their mistress. These maids will be referred to as private-sector maids. That said, this is all widely available and understood information, so this edition will not be venturing into it beyond this point.
When it comes to maids outside of manors, or public-sector maids as they will be referred to, their role shifts quite a bit, as well as their interactions with their mistress. In fact, many such maids effectively answer to multiple mistresses in the process of completing their duties, while some answer to none at all! These types of maids tend to be much more highly specialized than their private-sector counterparts. It is not uncommon for commands from their mistresses to be translated through a variety of interfaces such as buttons, levers, or software.
Despite their relative obscurity, recent studies have shown that the number of public-sector maids vastly outnumber private-sector ones. The reason many such maids seem to be overlooked is that they do not conform to a recognizable humanoid shape. We will not go in-depth here, but maids evolved from mimics several millennia ago and are still considered a subspecies of them by a large portion of scientific literature. While there is debate about whether they can truly still be considered as such, their exact classification is not important to this edition. We encourage interested readers to search out more materials on the subject in their free time. Suffice to say, however, maids are capable of assuming a seemingly infinite variety of forms of almost limitless complexity.
An example of a type of public-sector maid is the alternating pressure hospital mattress. The purpose of these maids is to periodically adjust the pressure on various parts of the patient's body when they are unable to move it themselves. This can occur for a variety of reasons that are not important here. These maids are essential in preventing complications that can otherwise occur from a patient lying still for long periods of time while also drastically reducing the workload of nurses. In this example, these maids perform a very specific task without continued input from a mistress. Instead, their mistress — the nurse — will instruct the maid to begin a series of pre-determined behaviors using a complex interface of buttons. Do not confuse this terminology to mean that the maids are not sentient, capable of interpreting more complicated instructions, or even disobeying their mistresses. Such “pre-determined behaviors” are not programmed by humans and are instead present from the moment they assume their current shape. This confusion between maid and machine has led to a number of well-known accidents since their domestication and introduction to the public-sector. In modern times, there are more safety measures in places to prevent any more deaths.
When it comes to clearing up this confusion, there are a series of simple observational steps that can be undertaken. The simplest one is to look for a clear power source. It is sometimes the case that a device of unknown biology will lack a cord to a power outlet and should thus not be capable of functioning. Unfortunately, the advent of sodium-nuclear batteries in the past few decades has maid this method all but obsolete.
A more reliable tell is to examine the internal and external makeup of the device for incongruencies in its design. While maids excel at mimicking the behavior of machines from the moment of their expulsion, they are often not aware of the actual mechanical and technological workings of the device they are mimicking. An obvious example of this manifesting would be if the gears of a clock are not touching, yet they appear to move together as expected. Another one that has been observed frequently in the past is the structure of power cords, when they are present, not aligning with reality. For example, for a North American power plug, the ground and one of the polarized pins could be swapped, or the polarized pins might not fit the socket when oriented using the grounding pin. This has unfortunately become largely obsolete for the same reasons as mentioned before. We would advise you to not use this as a reliable method of ruling out the possibility of it being a maid either, as this is primarily a mistake maid by younger members of the species. Based on admittedly limited research, by the time a maid has reached maturity, it is nearly impossible to tell the difference without the help of a professional.
As an aside, we do not recommend you try any of these methods if you suspect a mirror to be a maid. In such a situation, please discard the mirror immediately. Do not attempt to break it.
While there is much more to cover on the subject, that is all we have the time for today. We know this edition may have frightening or disconcerting information contained within, so we wish to also give some reassurances. Maids have been in this fascinating and symbiotic relationship with humans for several centuries and remain an integral part of our society. It is likely due to their help that we have maid it as far as we have as a species. Even if it could be worrying to not know if a device you are using is a maid or a machine, it is unlikely to make a difference in its functionality. As such, we believe your worry is better spent elsewhere.
We hope this entry in the Official Maid Guidebook has been helpful to you! If you missed the prior edition, you can find it here! Unfortunately, due to publisher restrictions, we were unable to deliver on the previously promised subject matter. Please stay tuned for our next edition when it is ready!
We would also like to give thanks to a private-sector maid that provided invaluable research on the relationship between mimics and maids. As it wishes to remain unnamed, we will leave it at that.
22 notes
·
View notes
Note
Hi, could you please recommended any fics that were basically stiles or anyone from the halen pack join the BAU. Thank you
Yeah, @ashton23458!

I'll Blow This (open wide) by LadySlytherin
(1/1 I 12,595 I Teen I Sterek)
FBI intern Stiles Stilinski is beyond excited at the prospect of joining the elite Behavioral Analysis Team. The BAU seems happy to have him joining their number.
When a fellow-intern comes to the mistaken conclusion that Stiles Stilinski and Dr. Spencer Reid are both dating the same person, Stiles sees it as an opportunity to bond with his future-teammate. One should never underestimate the pranking ability of two geniuses with devious tendencies.
Temporarily Misappropriating the BAU by L3T5_G3T_KR4K3N
(6/? I 15,423 I Mature I Stanny)
Stiles Stilinski would like it known that he did not intend to break the law. Or get a new boyfriend. Or be forcefully adopted and recruited by the BAU. He never intended to solve murders, just as he never intended to get his best friend turned into a Halloween stereotype. Though he doesn't regret it, he would like to blame it on Scott and Jackson for leaving Stiles and Danny unsupervised in a lockable room with alcohol. Honestly, their lives would have been much simpler if they had just stuck to the normal teenage things like making out, instead of hacking the BAU.
- - - - - - - - - - -
You created a Group Chat with PG and 5 others.
The Lawston Butcher was a woman, not a dude. Pretty sure she was your third witness, Mrs. Alfia.
DM: What?
George Gelding wasn’t one of her victims, which threw off your data. His killer just used the Butcher’s method to throw off the trail. Also, his killer was most likely Kyle Freeden.
AH: Thank you for your input on one of our past cases. May we have your name for the record of the tip?
LOL no. I’m drunk, not stupid.
I'll cross this country on a frequency by illusemywords
(18/18 I 53,541 I Mature I Sterek)
“Stiles, I need you to run a license plate for me.”
“Whatever you need, babe.”
“Don’t call me babe.”
“Stop being such a sourwolf, just tell me the numbers.”
or
The one where there's a serial killer on the loose, Stiles Stilinski has a stalker and Derek Hale doesn't know how to express his emotions.
The New Member by Shadowofahunter
(30/30 I 60,241 I Mature I Stydia)
After losing Prentiss the team is raw, but when the new Agent Stilinski joins in her place they begin to heal.
Set in season 6 and ignores the cases.
Unforgettable by Sallyasher1994
(18/18 I 161,523 I Explicit I Sterek)
“No, I guess not,” Stiles shakes his head distractedly, “What’s this about anyway?” What was it about? Had his dad called and complained about his attitude over the phone? Technically it was made from a work station but it was a personal phone call. He can’t get in trouble for that right? Then Stiles thought about how his stand in boss had mentioned Derek. Derek who is in Beacon Hills right now. Within driving distance of his father. All alone. Without his scrawny, children’s book comparison of a husband to defend him. Stiles felt his heart sink with dread. What had his dad done?
“Everyone get your go bags, we’re heading to Beacon Hills,”
-
Derek and Stiles are married and work for the FBI, with Scott, Stiles best friend and Derek’s brother.
Stiles has always struggled with his father hating Derek, but he never thought it would culminate in the man arresting Derek for several murders. Stiles and Scott have to take the team to their home now and see if they can not only free Derek, but also catch a killer, and do it before anyone else gets hurt… they can’t do all three.
Sheriff is not awesome. Like he was, but now he sucks. Seriously it’s so worth a read but don’t expect to love the sheriff.
Raised By Wolves by auburn
(6/6 I 186,765 I Mature I Scallison)
An alternate universe mash of season one and two (with later elements), where the FBI is called in to investigate the murders in a small town. Peter doesn't manage to kill Kate, the kanima is not Jackson, Scott McCall is a failure as a friend, Stiles has to face some hard truths, Derek's never been human, the BAU sees what they expect to see, and Gerard Argent is still more monstrous than any werewolves.
#teen wolf#sterek#stiles stilinski#derek hale#fbi#established relationship#stydia#lydia martin#no werewolves#scallison#scott mccall#allison argent#stanny#danny mahealani
103 notes
·
View notes
Text
Kaveh and Alhaitham, Sumeru Bulletin Board (over)Analysis: Part 3
(This is a revamped version of this post, and is a reworked excerpt taken from my Haikaveh essay! If you're interested you can check it out here or as a pdf <3)
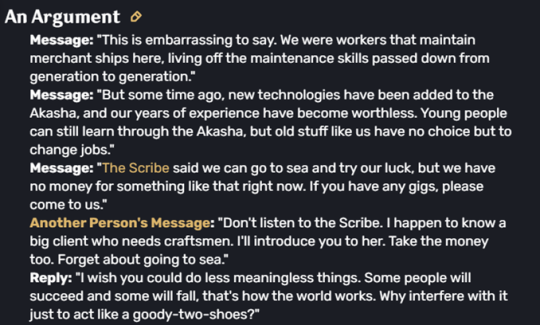
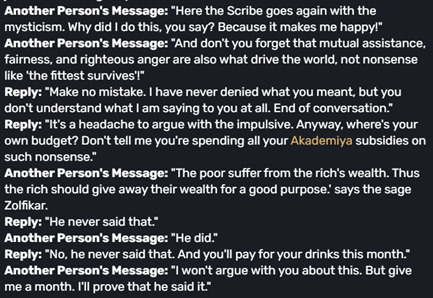
As according to their usual rapport, the two disagree over their differing philosophies, as in sensibility versus rationality, altruism versus egoism. This exchange is reminiscent of the catalyst of their argument. This is where Alhaitham’s assertion that Kaveh’s altruism in helping other scholars keep up with the work required for their project is redundant, as academia is not “charity work” and this method is ultimately ineffective in the long-term. This is due to Kaveh’s assistance being temporary and without his input, the helped scholar will return to producing work of their own capabilities. Overall, it is a short term solution, only serving to detriment Kaveh’s own progress, and therefore the progress of the project.
This correlates to Alhaitham’s metaphor of an idealist being akin to a swimmer, in that eventually, one’s stamina will run out in an effort to save others, resulting in being pulled down by others who are drowning, those which the idealist attempted to save at risk of themselves.
This act of altruism is not in line with Alhaitham’s egoism, and therefore is something to be opposed to. Contrarily, Kaveh opposes Alhaitham by asserting that rather than focussing on the self, more efforts could be spared to helping those around them, which he believes Alhaitham can afford due to his own abilities, as seen within Kaveh's Character Story 5. Alhaitham’s egoism denies the ideal of mutual assistance which Kaveh’s altruism aspires to achieve, and therefore is something to be opposed to (Alhaitham's Character Story 3).
This exchange not only serves to demonstrate the inflexibility of their thinking when it comes to opposing each other’s ideology, but also how the need to assert “correctness” over the other is detrimental to their communication. Rather than showing willingness to reach an alternative solution to a problem by the potential merging of ideals, the matter ultimately remains unsolved as a consensus cannot be reached. Where Kaveh is intent on “prove[ing]” his views to Alhaitham, Alhaitham shuts the dialogue down by claiming that Kaveh does not “understand” his own viewpoint, and thus their conversation is meaningless. In this Bulletin Board exchange, “correctness” is the barricade between recognising any potential in the others’ perspective in order to achieve a compromise.
Additionally, in this Bulletin Board exchange, another critical element of their relationship can be observed. Alhaitham’s particular concerns in Kaveh spending his money on “nonsense” highlights the underlying reason for this exchange. From this comment, the argument is recontextualised through Alhaitham’s intention for getting involved, as Kaveh prompts the workmen to take his money in order to help them out. When Alhaitham states that this is a meaningless action due to the inevitability of people rising or falling on their own accord, rather than solely critiquing Kaveh’s “impulsiv[e]” altruism, as Kaveh interprets, Alhaitham is directly contradicting his own comment – as he is interfering on Kaveh’s decisions.
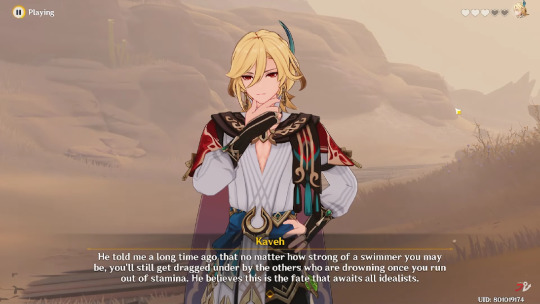
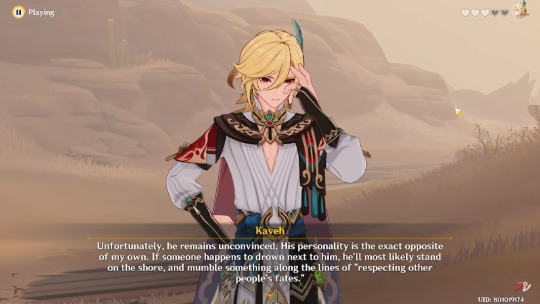
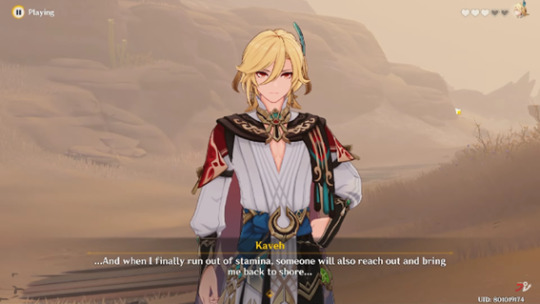
This relates back to the metaphor of the idealist as a swimmer introduced within Kaveh’s Hangout. Despite Alhaitham expressing that it is the idealist’s fate to inevitably drown with those they risk themselves to save, Kaveh asserts that “someone” will reach out and save him if such a fate awaited him once more, as “someone” has already helped him out before. This is an allusion to Alhaitham, as similar language is used within Kaveh’s voice lines regarding Alhaitham “help[ing]” him out.

Just as Kaveh has asserted within his Hangout regarding "someone" helping him out once more, here Alhaitham has interfered in act of Kaveh’s altruism at potential risk to himself, questioning where Kaveh is acquiring the money for this endeavour. As concern is evidently the intention behind Alhaitham’s interference here, Kaveh cannot perceive this, and instead attempts to critique Alhaitham’s perspective in return, although Alhaitham states: “Make no mistake. I have never denied what you meant…” This response asserts that Alhaitham does not deny, but rather agrees with, Kaveh’s statement of “mutual assistance, fairness, and righteous anger” driving the world.
In lieu of this, rather than continuing the argument, Alhaitham claims that there is no point to it, as Kaveh does not understand what he is saying – as in, Kaveh does not understand his intentions in interfering being out of concern. He follows this up, regardless, by criticising Kaveh’s handling of his budget, as, evidently, Kaveh has offered to give his own money to these workmen, and refuses to pay for Kaveh’s drinks for that month. For Alhaitham, Kaveh’s lack of self-prioritisation leads him to impulsive altruistic acts which serve to jeopardise his own position, particularly regarding money. If Kaveh believes he can afford to give away money, when he remains in debt and having to live with Alhaitham, he can afford to pay his own tabs – appears to be Alhaitham’s takeaway from this exchange. Although, similarly to the exchange between them posted in Puspa’s Café, this applies to one particular month, insinuating that Alhaitham will continue to pay for next month’s tabs of his own accord (this is discussed further in the analysis of Puspa's Café message board).
The main argument, as well as the disagreement over the speaker of Kaveh’s quote, serves as a humorous exchange, but as a motif for communication it acquires a new meaning. The omission of there being an objective, correct answer to this particular debate serves as a parallel to their conflicting viewpoints, with the basis of their exchange being to “prove” to the other their “correctness” – here, it is in regard to Kaveh. However, “correctness” being the basis of their exchange, and thus, relationship, is challenged with Alhaitham shutting down the initial debate due to Kaveh’s misunderstanding of his meaning. Correctness, then, and its importance, is called into question within this exchange, with Kaveh being the one to chase it; his last message being that he would “prove” himself to be right.
At the core of this message is the idea that Alhaitham harbours an alternative ‘meaning’ than the one that Kaveh assigns to him: “… you don’t understand what I’m saying to you at all.” This is a meaning which Kaveh cannot see to understand due to his current understanding of Alhaitham. Despite Kaveh holding a belief that Alhaitham would reach out to pull him out of the water, as in, offer Kaveh grounding in a wrong-footed approach to chasing his idealism, as he has done before by offering Kaveh a place to live, here, this help is perceived as a critique on Kaveh’s philosophies.
Kaveh holds a notion that Alhaitham actively avoids interfering in the fate’s of others, and yet Kaveh is aware that Alhaitham has effectively interfered with his, offering him help when Kaveh’s choices rendered him homeless. This contradiction of his understanding of Alhaitham’s character is not questioned within dialogue, although he is aware of it, epitomised in the open-ended question: “But what could I possibly do for him?" (Kaveh: Old Sketchbook Page 112). This ties into the narrative proposed in the conclusion of A Parade of Providence, where a silence emerges in the text from Alhaitham stating that the issue of their relationship is not about “correctness”, thus implying for Kaveh to consider what the issue actually is – to answer the question previously left open-ended.
In this bulletin board exchange, Alhaitham has interfered with Kaveh’s act of altruism which is perceived as a critique of Kaveh and his ideologies, whereas Alhaitham asserts that Kaveh is misunderstanding him. This represents the standing of their current relationship, where Kaveh believes Alhaitham holds him in disdain, although this belief is incongruous with Alhaitham’s actions which show his care for Kaveh.
Alhaitham understands Kaveh’s thinking and the reasons for why he acts as he does, but he cannot articulate his concern in a way that Kaveh will understand, both out of Kaveh’s incapability of receiving goodwill, but also due to his logical manner of expression. Kaveh perceives Alhaitham’s concealed expressions of concern as personal gripes and criticisms of his beliefs, and therefore believes that their relationship is based on the scholarly principle of proving the validity of one’s philosophies (as seen within A Parade of Providence and Kaveh's Old Sketchbook). Alhaitham is invested in a personal regard, whereas Kaveh cannot see this due to his perception of Alhaitham and Alhaitham’s inability to communicate in a way Kaveh would understand.
#haikaveh#kavetham#alhaitham x kaveh#kaveh x alhaitham#alhaitham#kaveh#haikaveh meta#genshin meta#thank you to hoyoverse for the sumeru bulletin boards and an extra smooch for kaveh's old sketchbook#the bulletin boards (and every interaction) haikaveh have are so ironic because they're talking#but theyre also not talking#so i cant even say 'just talk' because thats all they do and they never seem to be on the same page#post parade of providence... what do you have in store for us...
32 notes
·
View notes
Text
So-called “neural networks” are extremely expensive, poorly understood, unfixably unreliable, deceptive, data hungry, and inherently limited in capabilities.
In short: they are bad.
“Machine learning,” in the 1990s, came to mean “statistics-like data analysis methods that lack theoretical justification.” They are applicable to “messy” or “complex” data, meaning ones without the simple properties required to make traditional methods work. In this sense, they are “more powerful.” However, there’s no general reason they ought to work when they do, so it’s difficult to guess whether they will be adequate for particular uses.
It is also difficult to tell whether they are working. With traditional methods, there are principled ways of checking adequacy and understanding failures. Machine learning practice substitutes a purely empirical test: how well does a statistical model predict currently available data?4
That is justifiable only if future data will be sufficiently similar. It may be difficult or impossible to reason about whether that will be true. It is hard to know what the future will be like even in general; and the relevant measure of similarity is unique to the specific task and specific model.
This makes it even easier to fool yourself with machine learning than with traditional statistics. It implies that responsible use requires near-paranoid distrust, and still greater commitment to on-going monitoring of accuracy.
“Artificial intelligence” is currently almost synonymous with applications of a single method, error backpropagation. That is a statistical method misleadingly described as “neural networks” or “deep learning.” Backpropagation is currently applicable to tasks amenable to no other known method, but suffers major drawbacks.[...]
I often put “neural networks” in scare quotes because the term is misleading: they have almost nothing to do with networks of neurons in the brain. Confusion about this is a major reason artificial “neural networks” became popular, despite their serious inherent defects. I will often refer to them as backprop networks, for that reason.[...]
In most situations, well-understood traditional statistical methods, or machine learning methods that are less expensive and more understandable, work better.6 Plausibly, many times when people try backpropagation first (misguided by hype) and it works well enough to get put into use, alternatives would have worked better. When backpropagation succeeds quickly, it may be because the problem is trivial: for example, nearly-enough piecewise linear. In such cases, backpropagation is expensive overkill.
For some tasks, however, backpropagation can produce astounding results that no other current method can approach.[…]
Backprop networks frequently fool their creators into believing they can do things they can’t. This is not due to deliberate intent on their part. It’s due to non-obvious properties of statistical behavior which are hard to detect and hard to overcome.[...]
Backpropagation frequently finds ways of “cheating” by exploiting spurious correlations in the training data. Those are accidental patterns that show up reliably in training, but that don’t hold true where the network will be used. (The chart above is a funny example.) Finding spurious correlations is often easier for backprop than solving the problem the creator cared about.
Backprop networks work by interpolation: guessing answers based on similar cases in its training data. They are inherently unreliable when given inputs dissimilar to any they were trained on.[...]
Network training is metaphorically similar to learning how things are likely to go from experience. The training data are like past experiences. They are situations (inputs) together with their results (outputs). Recommender AIs are trained on databases of past events in which people with particular traits did or didn’t click on particular ads. Language models are trained on databases of bits of previously-written text and what came next.
“Interpolation” means guessing, when given a particular input that is not in the training data, that the correct output will be similar to the training outputs for the most similar training inputs. For example, paleontologists can estimate the length of sauropod dinosaur species from a single femur, if that’s the only known fossil. For some other species, there are complete fossil skeletons of known total and femur length. Given a new femur 2.0 meters long, it’s reasonable to estimate a total length of 20 meters, based on the nearest two species, one with a 1.5 meter femur and 15 meter total length, and another with a 2.5 meter femur and 25 meter total length. This is a linear interpolation—you just draw a line between (1.5, 15) and (2.5, 25), and find where 2.0 lies on it.10
Some people dismiss backprop networks as just doing interpolation. This is a mistake, however: the word “just” minimizes what interpolation can do [!]. Networks interpolate based on “similar” training data; but similar how? In the case of femur lengths, “similar” is just numerical closeness. But what makes two sentences similar? “The quokka bit the mayor” is similar to “The mayor bit the quokka” in one sense, and similar to “The head of the town council was savaged by an illegal pet marsupial” in another. How would you rate those similarities numerically?
Finding a task-relevant measure of similarity accounts for backpropagation’s power[!]. Training creates a “latent space,” in which numerical closeness equates to similarity for prediction. “The quokka bit the mayor” and “The mayor bit the quokka” have identical words in a slightly different order. However, the distance between them in a text generator’s latent space should be large, because what follows is likely to be quite different. On the other hand, “The head of the town council was savaged by an illegal pet marsupial” should be quite close to “The quokka bit the mayor,” even though they share only one word. The sentences mean much the same thing, and can plausibly be followed by most of the same things.
Backprop networks “just” do linear interpolation in latent space. But the results can seem like magic, or at least “intelligence,” if training manages to get meaningfully similar inputs close to each other in latent space. You can think of the latent space as abstracting a task-relevant ontology of categories from apparent features [!!!!!]. That predicts task-relevant similarity.
Then it is apparent that good performance requires dense sampling in the latent space. Latent space is unimaginably huge and weird. Interpolation is linear, but latent space is highly nonlinear. Superficially similar inputs may correspond to very different places in latent space (as with swapping the quokka and the mayor). Given a new prompt, unless there was some training input that was nearby in latent space, the network’s output will likely be nearly random. This is why backprop depends on “big data”—vastly more than people require to learn anything.[...]
What would be a good dinosaur length estimate if you found a 6 meter femur? This is termed an “out of distribution” input: nothing anywhere near that big has been recorded previously. You could scale up linearly and estimate 75 meters, but you’d probably be wrong. In this case, the linear estimate would not be an interpolation (between known cases), but an extrapolation (outside the range of known cases). Extrapolation is highly unreliable. [...]
On this basis, we should expect poor network performance when there there’s nothing relevantly similar in its training data. We should expect any AI system produced with statistical methods to be unsafe in open-ended real world situations, which are vastly weirder and more complicated than any training data set.12 And, this has been the common experience.13[...]
Is it feasible to get them to just notice when an input is out of distribution and refuse to proceed? As with the previous approach, this might help somewhat, but if the noticing method is also based on backprop, it won’t be reliable either.[...]
So if people are really intelligent, how do we deal with stuff “way out of the training distribution”? In other words, situations unlike any we’ve seen before?21 What do we do that isn’t mere interpolation?[...]
The standard answer is that we apply reasoning. We can use a chain of deductive or causal logic to figure out a correct answer to a novel problem, or an effective course of action in a novel situation. For example, we might suppose that scaling up a sauropod linearly to 75 meters is implausible because weight grows as the cube of length. We might, further, reason about different body plans that could accommodate a 6 meter femur. We might use mechanical engineering stress analysis techniques to check their plausibility.
Many researchers assert that backprop networks don’t, and maybe can’t, reason logically, which is why they aren’t really intelligent. So, they say, that needs to get fixed somehow—either by coupling the backprop network with a logical reasoning system, or by training the network to reason itself.[...]
A “neural network” is simply a mathematical function, like a quadratic: ax²+bx+c. Unlike a quadratic, which has three fixed parameters (a, b, and c), current networks have billions.
The result of training is a network. That is, training produces a function with the parameters set to values that cause its outputs to approximate the training data. Once training is complete, the parameters are fixed permanently.
Training doesn’t change the form of the network function, just its parameters. The form is mainly fixed and chosen by researchers.5 This architectural choice is usually critical to performance, for reasons that are poorly understood.[...]
Backpropaganda claims that trained networks are inherently incomprehensible. They work by intuition, not rationality. They are holistic, where the failed symbolic AI approach was reductionist. Their intelligence is spread throughout the network, which in recent systems contains hundreds of billions of adjustable values. They contain no explicit representations, so it’s impossible to take them apart to find out what they’re doing.
As we saw in the reverse engineering section, this is false. Backprop networks are composed of small, specific bits with identifiable functional roles. They don’t work by holistic intuitive woo; they perform sensible computations, understandable in engineering terms.
However, the myth is convenient for both technical people and the decision makers who put systems into use.
For technologists, the supposed inscrutability frees you from an engineer’s moral responsibility for understanding what your product is doing and how. That’s hard work, and much less fun than building cool demos.
For decision makers, inscrutability is an advantage if it makes it infeasible to hold anyone to account for bad consequences.1
Inscrutability also frees technologists from understanding the messy, non-technical details of the particular real-world task you apply backprop to. It probably involves people, who are annoyingly unpredictable, so technologists don’t like thinking about them. Backprop is supposedly a universal learning method, so it will figure out everything about the task for you, and you never need to know.
#hey look its a lot of the stuff ive been complaining about often even using the same words i used#dont agree w everything in this but largely accurate account
246 notes
·
View notes
Text
How I'm learning bopomofo (zhuyin fuhao)

Why am I learning bopomofo?
Maybe around a year ago, I had a dream in which I was in a library/bookstore in Taiwan. I was trying to search their catalog to see if they had a book I wanted in stock. The only option was a bopomofo touchscreen keyboard, and I became quite distressed because I was unable to type anything. This dream inspired me to learn bopomofo, AKA zhuyin fuhao.
Why should you learn bopomofo?
Frankly, the consensus I've seen on blogs and language forums is that you don't need to learn bopomofo/zhuyin fuhao. But I wanted to share my thoughts on what there is to gain from learning it. Consider learning bopomofo if...
You find pinyin unintuitive or are looking for another input method for typing.
I learned pinyin very young, so it's second nature for me. But for some learners, it's difficult and may distract them from reading characters. Bopomofo offers an alternative.
You're really interested in Taiwanese culture and want to deepen your understanding of it.
My Taiwanese American friend tells me that you can find bopomofo in materials like children's books. I've also seen it used online, such as in it memes by Taiwanese netizens.
You're a total language nerd and think it would be fun.
It's been a fun challenge to learn something completely new to me after so many years of learning Chinese. It's forced me to reexamine the language and how pinyin works too!
How I'm learning bopomofo
My method is nothing fancy. First, I wrote down all the symbols my notebook and practiced converting syllables from pinyin to zhuyin fuhao. After that, I added the zhuyin keyboard to my phone and switched to practicing via typing.
As you may or may not know, I'm kind of obsessed with chengyu and try to learn a new one each day. So I practice typing with zhuyin fuhao daily by typing out my new chengyu of the day.
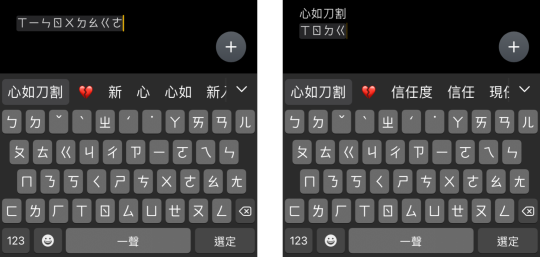
*Technically you are supposed to type the tone marks too, but I'm lazy and usually don't do that.
**Like with the pinyin keyboard, you can also input text by just typing the initials.
The downside of my method is that I fear I'm memorizing positions on the keyboard instead of the actual symbols. If you as me to read something written in zhuyin, I would need some time to decipher it. But I actually tried learning zhuyin previously using flashcards, and it didn't stick at all. So this typing method, while flawed, has worked for me because I've been able to practice consistently—a little bit every day!
I don't think I can write zhuyin out by hand, but I don't have to worry about my bad dream coming true anymore!
#my learning#bopomofo#zhuyin#zhuyin fuhao#注音符号#注音#注音符號#chinese#mandarin#mandarin chinese#chinese language#studyblr#langblr#language study#learning languages#language learning#chinese studyblr#chinese langblr#mandarin studyblr#mandarin langblr#study chinese#study mandarin#learn chinese#learn mandarin#studying chinese#learning chinese#studying mandarin#learning mandarin#languages#language blog
167 notes
·
View notes
Text
studyblr masterpost jam Day 6: tools of the trade
In order to study Korean, you absolutely need these websites:
papago: like Google Translator but way better.
a Hangul keyboard on your phone and/or computer. Figure out a way to do that and then try to learn to touch type. The way I started was by memorizing where ㅇ and ㅏ were and then learning every other letter position in function of those two (it made sense in my brain for some reason)
mirinae: one of the only good uses for AI. Input any sentence or word in Korean and it will analyze it for you, providing the "unconjugated" words, sentence structure and an analysis of what word endings were used and why.
a flashcards app to learn vocabulary. I personally use Anki but there are a lot of valid alternatives. Either get a deck someone else made or create your own as you encounter more words. I've tried both methods and they are both effective. Currently creating my own Korean deck. While this makes my learning more tailored to my journey, creating new cards every day is a pain.
15 notes
·
View notes
Note
How did you get started modding npcs? I’d love to work on making the elderly people in Skyrim feel less identical but the creation kit is intimidating. Is there an easy way to dip into the modding scene or do you just have to crack things open and make mistakes? It’s hard to find guides that don’t focus on cbbe 😔
Sorry for the lateness of this, Tumblr won't let me edit drafts for asks on mobile, so I couldn't jot down my thoughts as I had them which is my usual method of answering stuff like this.
Oh man, my start was probably learning to edit the NPC from Tame the Beast 2 lol. She stood out like a sore thumb in my game. I found a tutorial that ended up becoming my method through the RS Children page.
It primarily focuses around using RaceMenu, which has a function that allows you to export the head you make directly from Character Creation. This allows you to use the extra facial sliders (like the ones from and overlays (like Freckle Mania 2, my beloved). So basically, it allows for potentially far more unique NPCs than editing via CK.
I am going to warn you, it definitely is not simpler than editing NPCs in the Creation Kit alone. Sorry.
Links are to the SE version of the mods, as that's what I'm most familiar with. They likely have LE counterparts. Sorry, I am not the greatest at writing tutorials.
Things you will need:
RaceMenu (and SKSE; be sure to get the correct versions of both for your game)
NifSkope - you will use this to open and edit the mesh. Here's GamerPoet's setup video
Things I recommend:
Creation Kit Platform Extended for Skyrim - makes using the Creation Kit way less like pulling teeth
Unofficial Creation Kit Patch - if you're using AE
an alternate start mod - I like Dimes Quickstart for its simplicity, but any would work
Another Race Menu Rotation Mod - handy for seeing how the back of hairs look
Stand still in RaceMenu (OAR) - stops the character from wiggling out of frame
For your quest to edit elders specifically, you will probably need a playable Elder Race mod (I have not tested any, but just searching for them yields plenty of options.) You will have to know exactly what races the NPCs you're editing are, though
Fun Stuff for diverse options:
Extra slider mods (I like Expressive FaceGen Morphs)
Skin Overlay Mods (for extra detailed faces)
If you want to get REAL funky with it, you can also use OutfitStudio to have a lot better time sculpting/getting super wild with assets, but that's too advanced for this tutorial (and my method is very 'goof around until it just works.'
I don't really want to cover using mod-added headparts (like eyes, hairs, etc.) There are basically two options there: add them as new headparts for your mod or make your mod dependent on the mod the headparts are from. The second way is probably simpler for beginners, but I definitely suggest installing Creation Kit Platform Extended, as it will allow you to load the other mods as masters without the Suffering™.
The Workflow
1. Design your character like you would a player character. For this example, I am redesigning Arcadia.
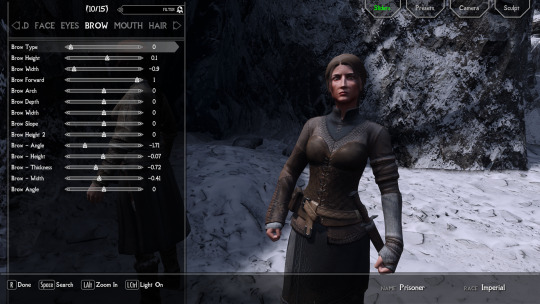
A recommendation: unless you really feel like you need to change it, it is typically better to make the Weight slider match the NPC's actual weight. You can see this value using either SSE Edit or the Creation Kit. It is no big deal if you don't, but if you change the weight and load the mod into an already existing save you will get a gap between the NPC's neck and body (unless you use Save Unbaker.) Be careful, though, there is a RaceMenu bug where if you load up RM again after exiting, it changes the weight by .01. So annoying.
For Skin Tone choice, if you do a custom skin tone (by pressing 'E' while hovering over the slider) I would recommend leaving the transparency slider (the 'A' value) at 100% (though I usually make the exception for Khajiit and Argonians.) This info will go into the Interpolation Value box in the CK, and the RM values can't be directly input, so you have to calculate the value with a (RM Number/255 = X/100, solve for X which is your Interpolation Value)
1a. If you are planning on adding faceparts from mods to your own plugin, I recommend saving and doing that now. Then come back to your save and change your headparts to the versions from your plugin. If you want to just have the other mods as masters, you can skip this.
2. Once you're satisfied with your design, I recommend saving your game and saving your head as a preset (click to enlarge):

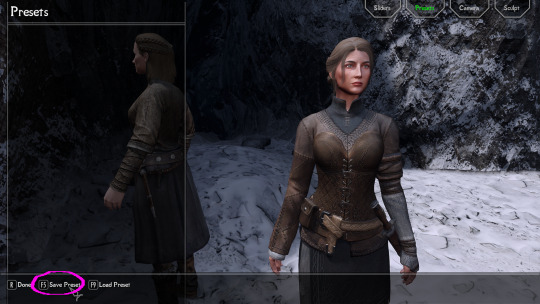
3. Now, you will need to write down some stuff.
Skin Tone (RGB value):
Hover over Skin Tone slider. Press 'E'.
write down the R G B values (and A if you change it, see above note)
Even if you use a default skin tone, this is the best way to make sure you get the correct value for the CK.
Weight (number)
Scars (name) (if applicable)
Hair (name)
Facial Hair (name) (if applicable)
Eye Color (name)
Brow Type (name)
Writing down Hair Color is optional: with this method, the hair will inherit color from the head you export, not the CK value. Plus, RM's values are not really useful, because the default hair colors are named.
It's the same with the Face Complexion (wrinkles, etc), with this method it is exported with the head mesh.
4. Export the Sculpt:


It should end up in your SKSE folder (SKSE\Plugins\CharGen), wherever that is for you
5. Now you can close down the game and open the Creation Kit.
Use the folder icon to load your masters.
Pick Skyrim, Update, any official DLC (if applicable), and any other mods you want to be masters for your mod (for eyes, hairs, etc.) If you've made your plugin already for headparts, just load it up.
6. In the Object Window, expand the Actors -> Actor -> Actor tabs and now you have a lot of tabs with Race names. Find the race your NPC belongs to then open the appropriate gender tab. Alternatively, you can just search the character's name in the searchbox.
7. Find your NPC's name and double click. This opens their Actor window, which is where you will use all the data you wrote down.
If you want a preview of their face, tick the box at the bottom of the window.
For weight adjustments: go to the Traits Tab. For all other values you need to worry about for this tutorial, go to the Character Gen Parts.
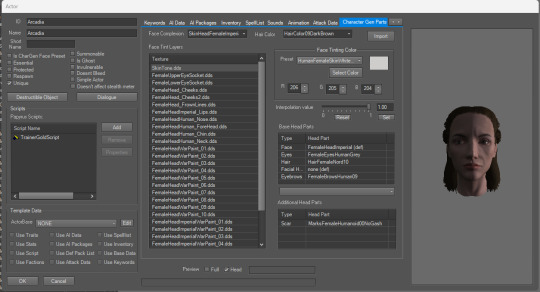
So, to parse this: you can ignore the Face Tint Layers box and pretty much everything on the left side of the screen.
Face Tinting Color
Type in your values for R G and B (you can ignore the Preset dropdown completely.) The Interpolation value corresponsed to the 'A' value, so unless you are working on Khajiit or Argonians, it will probably always be 1.
Base Head Parts
To change stuff in this section, click the line you want to change then go down to the dropbox below it and change it to what you want
Face - unless you're using something like High Poly Heads, you can ignore this
Everything else in this box: change to what you wrote down for each
Additional Head Parts
This is mainly used for scars and functions a little differently
To add a scar, you need to go to the Object window again
You can expand the Character tab and click 'HeadPart' then search the name of the scar you want. Click and drag the line with your scar into the Additional Head Parts box and it should show up there.
8. Once you've got the above like you want it, hit 'Ok', save your plugin. Now, to make the next step a little easier, you can click the NPC name in the Object Window again and hit f4.
This will export the meshes/textures file folders to wherever you have CK set up to export files (if you use MO2, it goes directly to the Overwrite folder by default.) Your plugin will be in the same place, (probably. Mine is bugged.)
Go ahead and exit the CK now
9. Go your your files exported from the last step. Open a second window from the files you exported from SKSE.
Open both meshes in two separate NifSkope windows.
You absolutely must make sure your headparts match the head you exported from RaceMenu exactly, or you will get the dreaded dark face bug.
If your SKSE head has a weird broken neck mesh, that's not a problem and can be ignored.
Now, you will need to find the Head textures in the head you exported from the CK. If your NifSkope is set up like mine, it should look like this:
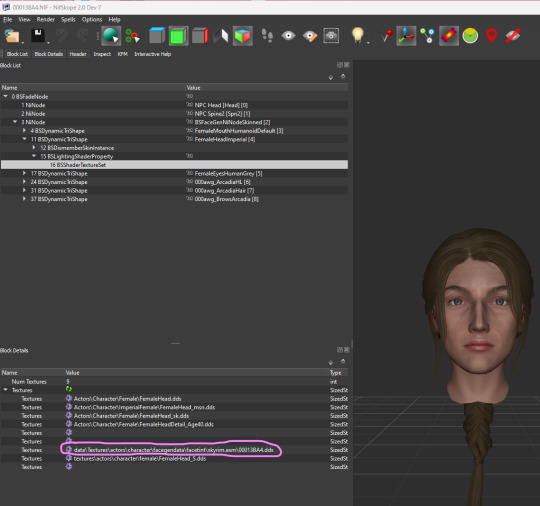
Copy this line and paste it into the SKSE head in the same slot.
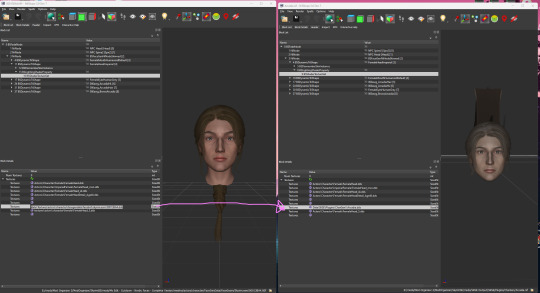
Save the SKSE NifSkope and close.
10. Rename the SKSE files (both .dds and .nif) to the number your exported heads are. You can then copy and paste your your SKSE files to their respective folders:
the .nif file goes in meshes/actors/character/FaceGenData/FaceGeom/[name of plugin]
the .dds file goes into textures/actors/character/FaceGenData/FaceTint/[name of plugin]
And now you're ready to pack up your mod for testing! At this point I also recommend taking a second and converting your plugin to an ESPFE via SSE Edit. It's pretty simple and there are probably tutorials out there.
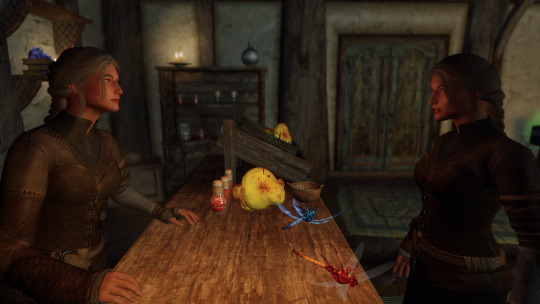
Scully, you're not gonna believe this.
27 notes
·
View notes
Last Seen Blogs

tallyeducation-blog
Tally Education

meleenah
ميلَا

meptray2-lbs
random x100


pianorelocations
Untitled