#words on canvas
Explore tagged Tumblr posts
Visit Tumblr Blog
Explore Tumblr blogs with no restrictions, modern design and the best experience.
Last Seen Tumblr Blogs


Fun Fact
In 2020, 27% of US Tumblr users had an annual household income of over $100,000.
Text


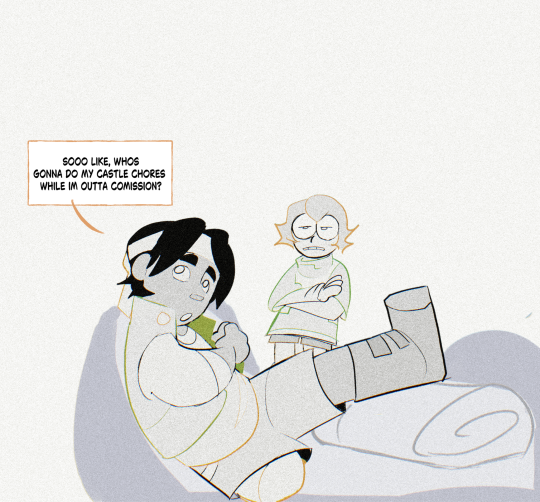
'It's not too late to learn, Fenris'
#fenhawke#fenris#hawke#garrett hawke#dragon age 2#i can't believe i finished a comic#it's been six months#and i've been anxious every time i stared at the canvas of a 'new page'#this one's been on my mind since January#thumbnailed in Feb#FINALLY the AF gave me enough energy and selfesteem to actually draw it#LOOK#i never chose this option#not ever#not even during my first playthrough a decade ago when I only knew Hawke by the looks#but the angst in this prospect is so chef's kiss#not to mention Fenfen would rip/ghost phase through the veil himself to bring him back#sigh#i'm also delighted I managed to draw a silent comic about words u_u#so many experiments in this one#also bedhair Hawke siiiigh#dragon age#las!art
8K notes
·
View notes
Text
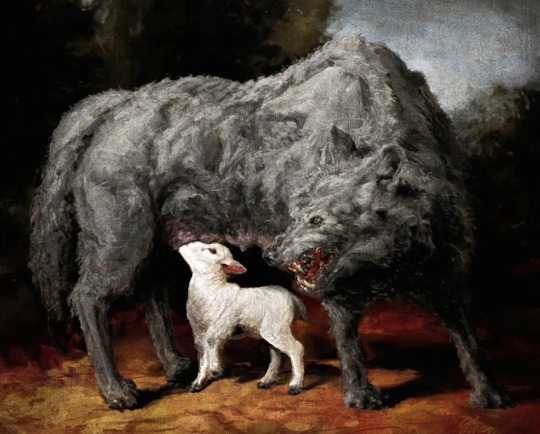
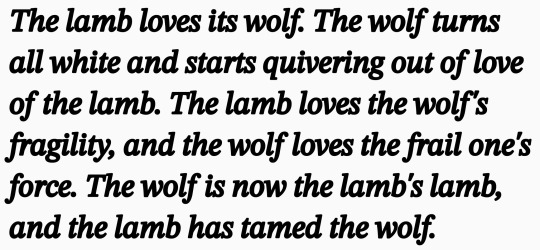
Dear Desolation by Eliran Kantor † Love of the Wolf by Hélène Cixous
#painting#art#artblr#oil on canvas#oil painting#prose#goth#gothic#dark art#lamb#wolf#literature#bookblr#writeblr#spilled ink#typography#spilled writing#spilled words#spilled poetry#spilled poem#spilled prose#spilled heart#spilled feelings#artist#artists#art community#art blog#art gallery
12K notes
·
View notes
Text

"If I am worth anything later, I am worth something now. For wheat is wheat, even if people think it is grass in the beginning." - Vincent Van Gogh
Painting: "Wheatfield with a Reaper" by Vincent van Gogh
#vincent van gogh#starry night#art history#oil on canvas#painting#expressionism#artblr#quotes#book quote#quotations#words#literature#lit#booklover#classical literature#classics#albert camus#booklr#books#books & libraries#book quotes#bookblr#reading#books and reading#bookworm#bookish#fragments#excerpts#letters#biblophile
7K notes
·
View notes
Text


#digital art#art#artists on tumblr#star wars#star wars the clone wars#star wars the bad batch#tbb crosshair#tbb tech#NEEEEERDS🫵🫵#I love them sm god help me#Idk what even to tag#i am at the loss of words#Just want to translate my thoughts on the canvas without drawing#those two guys on the kitchen#(I AM lazy with bg's and???)#(Bg's are not important when you have two smiling brothers☝️)
518 notes
·
View notes
Text
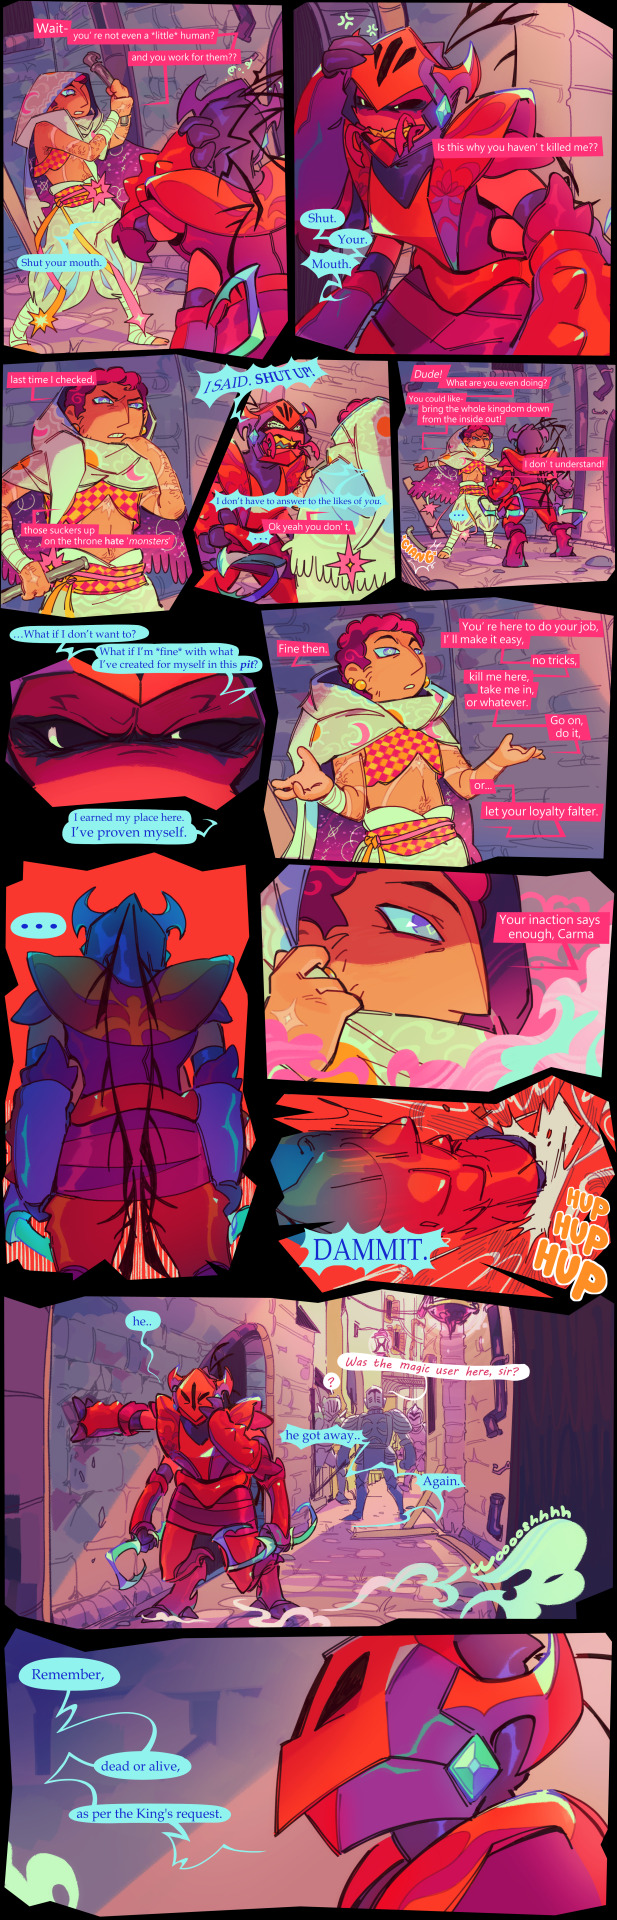
yes. yes he did hit him with a pipe
(medieval fantasy drama au??)
The Carmine Cavalier (Carma (like karma)) and Sīdus the Fallen star
#adventure time#fionna and cake#prismo the wishmaster#scarab the god auditor#prohibitedwish#theyre writing this as a colab fic#scarab gets on to prismo for using the word 'dude' cause its not time accurate#brooo the kingdom hates you ! ! get a grip ! !#this is probably the longest ive spent on a comic#also the largest by canvas size- 3000 by nearly 10000 px at 144dpi
5K notes
·
View notes
Text

part of something more? just a thing a did for fun rereading some of the dialogues?
who knows
#fanart#my art#isat#isat spoilers#isat loop#isat fanart#act 3 spoilers#act 4 spoilers#kind of both bc it's The Hangout#I kind of just started throwing this dialogue onto the canvas and was like “and what if I made like a small comic with all that”#as we don't really see any expressions and this dialogue is#I have no words to describe dialogues like this#but I kind of started forgetting isat a little bit#and with this it kind of reminded me of what I liked the most of the game#anyway#in stars and time#this is literally a part of a screenshot
378 notes
·
View notes
Text
Nik and Ghost...NikGhost? *nods*

based on @on-a-lucky-tide about Nik Olympic press Ghost
#a whole page of them#the last pose in the olympic press is a bit weird cuz arms forgive me LOL#also Nekros' Nik kinda influenced me to make his hair more curly so ye curly hair Nik it is#also looking back at this the canvas color is a tad bit too close to the pen color hue so it looks#uh#too light? xD sorry about that too HAHA#okieeeeeeeeeee have this while i go work#gummmyart#doodle#simon ghost riley#simon riley#nikolai cod#cod nikolai#im easily persuaded see literally could ship Ghost with anyone with the right about of words#so#nikghost#captain john price#john price
620 notes
·
View notes
Text
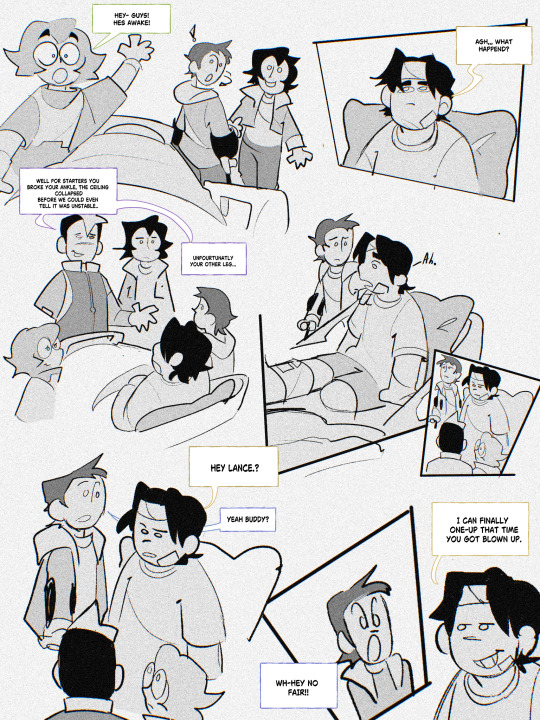
Little comic about hunk before he got his prosthetic^^
#sorry im too tired for a niceky worded caption lol#hes just chillin#ispy.png#voltron#vld#art#fanart#voltron fanart#vld art#vld fanart#hunk garrett#takashi shirogane#keith kogane#lance mcclain#pidge holt#ignore that i forgot to flip the canvas back around in the second image idk if its#even the right leg anymore lol#brain no work today
707 notes
·
View notes
Text
Word List: Moon

beautiful words with "moon" to try to include in your poem/story
Honeymoon - a period of unusual harmony especially following the establishment of a new relationship
Moonbeam - a ray of light from the moon
Moonbow - a rainbow formed by light from the moon
Mooncalf - a foolish or absent-minded person; simpleton
Moondust - fine dry particles of the moon's soil
Mooneye - a silvery North American freshwater bony fish (Hiodon tergisus)
Moonfaced - having a round face
Moonfish - any of various compressed often short deep-bodied silvery or yellowish marine fishes
Moonflower - a tropical American morning glory (Ipomoea alba synonym Calonyction aculeatum) with fragrant flowers
Mooniness - the quality or state of being moony; dreaminess, inattention
Moonlet - a small natural or artificial satellite
Moonless - lacking the light of the moon
Moonport - a facility for launching spacecraft to the moon
Moonquake - a seismic event on the moon
Moonrise - the rising of the moon above the horizon
Moonroof - a glass sunroof
Moonsail - a light square sail set above a skysail and carried by some clipper ships in light winds
Moonscape - the surface of the moon as seen or as depicted
Moonseed - a twining plant (Menispermum canadense) of eastern North America that has crescent-shaped seeds and black fruits
Moonset - the descent of the moon below the horizon
Moonshine - moonlight; empty talk, nonsense; intoxicating liquor
Moonshot - an extremely ambitious project or mission undertaken to achieve a monumental goal
Moonstone - a transparent or translucent feldspar of pearly or opaline luster used as a gem
Moonstruck - affected by or as if by the moon, such as: romantically sentimental, lost in fantasy or reverie, or not mentally sound
Moonwalk - to dance by gliding backwards while appearing to make forward walking motions
Moonward - toward the moon
Moonwort - a fern of the genus Botrychium (especially B. lunarium); honesty
If any of these words make their way into your next poem/story, please tag me, or send me a link. I would love to read them!
More: Word Lists ⚜ Writing Resources PDFs
#word list#moon#writing prompt#writeblr#writers on tumblr#spilled ink#dark academia#poets on tumblr#poetry#literature#nature#studyblr#langblr#linguistics#words#booklr#writing inspo#writing ideas#writing inspiration#writing tips#writing reference#thomas cole#romanticism#art#landscape#oil on canvas#writing resources
473 notes
·
View notes
Text

scenes that make me wanna eat drywall dust
#qkdraws#id in alt#haikyuu#kageyama tobio#hinata shouyou#tumblr can't even handle 4k images i had to compress this one. smh#did some layer fuckery to get the motion blur to work. the screenshots of this fuckery r kinda silly#this bitch rly is pieced together like a puzzle. kageyama himself is like.sliced in twain.#twain.that's a fun word#i've learned from past projects that blurring specific parts of an image is more complicated than just pressing the blur button#example: the blurring around lumen's hands in that suncaster pic of them all lying down in the grass#(i recognize a lot of people who will see this will see it in the haikyuu tag and have no idea who that is.roll w it)#the edges of her hands r still sharp in that image bc <3 i did it wrong<3#idk how to explain it but like#if u don't Also draw what's underneath whatever ur blurring it will not look right#especially if all ur colors r neatly snuggled up together and not overlapping (which i tend to snuggle them instead of overlap)#then the colors ur blurring have an empty Canvas Color beneath them that pokes out#this is prolly common knowledge to most people. in retrospect it seems like common sense. however (doesn't elaborate)
339 notes
·
View notes
Text


more portrait style sylvies
#♦️charlie's art#epithet erased#sylvie ashling#sylvester ashling#i actually love trying to draw him in the epithet artstyle (key word trying i still need to practice)#the second one was kinda based on the sylvie from my pfp#third one was kinda based on an older portrait style sketch where he's doing rui's brand new world pose you know the one#i also just wanted to let him look kinda cool and mysterious. god i need better adjectives#fourth one i thought 'serious sylvie crying sprite' and blacked out and this appeared on my canvas#you may notice hes trying to wipe his tears over his glasses. this was just the pose i thought of and halfway through sketching i forgot#that his eyes arent attached to his glasses and just went with it anyway because i liked the idea thar hes less trying to wipe his tears and#more trying to hide his face#also he might just be stupid
200 notes
·
View notes
Photo
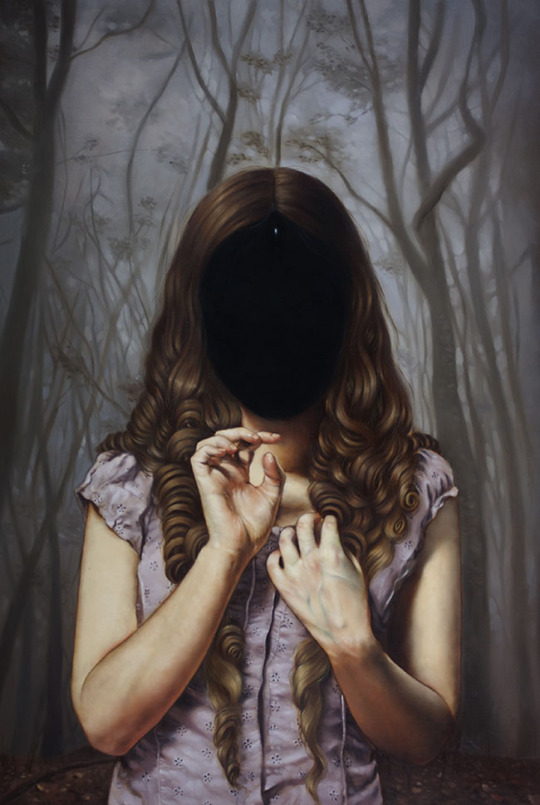
Ania Tomicka, “Astray”, from "Seed of Memory" exhibition, 2017, oil on canvas. B. 1985 in Łódz, Poland. From @beautifulbizarremagazine
“Seed of Memory is my representation of one of those really rare and precious moments in life that you know you will remember forever. It is just a second but it’s full of melancholy and beauty, even if sometimes it is not in a positive context.”
― Ania Tomicka
#ania tomicka#astray#2017#seed of memory#exhibition#oil on canvas#oil painting#painting#art#polish artist#memory#seed#woman#portrait#no face#dark face#dark#trees#forest#dark aesthetic#imaginative realism#surrealism#figurative art#contemporary art#polish art#words#quote#quotes
284 notes
·
View notes
Text

Death and the Soldier (1917) by Hans Larwin | Margaret Atwood, from “Roominghouse, Winter” The Animals in That Country
#art#painting#art history#artblr#oil on canvas#oil painting#prose#poem#poetry#spilled words#spilled ink#literature#writeblr#writer#writing#spilled poetry#spilled writing#dark academia#classical art#classic academia#artist#artists#art community#spilled truth#spilled poem#bookblr
4K notes
·
View notes
Text

My all time fav thing to do is to take my blorbos who have multiple outfits and shove all of my fav aspects of those outfits into one design. You can pry that stupid red collar out of my cold dead hands ANYWAY very self indulgent (and rushed/consept-y beacuse I wanted to get it on paper) Simm!Master design for an AU RP me n my freind r doing.
#sowwy this PNG is so shit i took a screen shot of my canvas and i'm not willing to put much more effort into it then that#chat how many times am I going to draw this pose to get a consept drawing out? LOOK ITS EASY OK!#so sad I couldn't find a way to shove a referance to his YANA outfit in here cuz thats one of my favs HEHEHE#Doctor Who#The Master#eds art#why did I make screenshot two different words#hey did I mention that it's 4AM where I am rn?#Hey chat I should draw and post the designs i have for The Doctor's siblings in this AU UGUGH#There are obly two of them he has WAAAY more siblings I have just only made two of them beacuse they are the only two alive in this AU
87 notes
·
View notes
Text
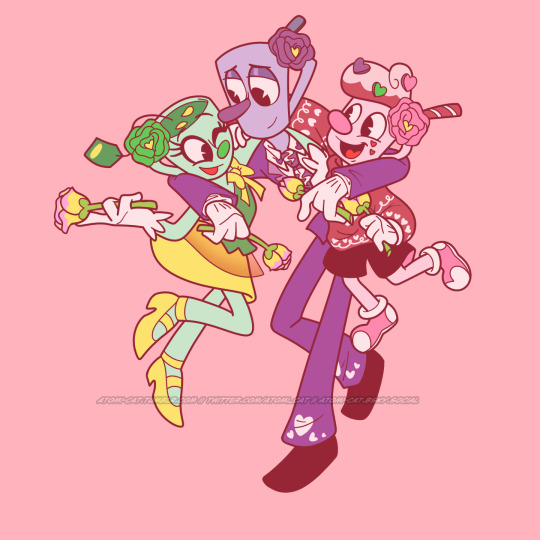


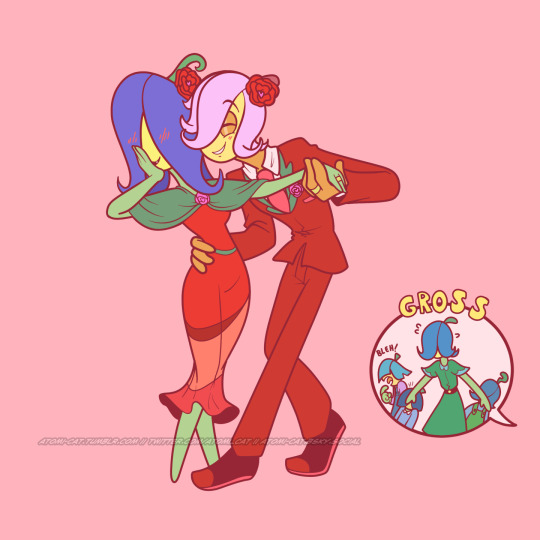


Way past Valentine’s Day by this point, but still wanted to get these done. Loosely based them off of the Greek words for love
#Atomi’s art tag#canvas country#valentine's day#Joe#Susen green#Malton#Landis munstead#Iggy#ember#Bertie#gabby#briar belle#Mr and Mrs belle#Penson#Ingrid#I thought about including the words but google was giving me#mixed results about how many there actually were XD;
138 notes
·
View notes
Text
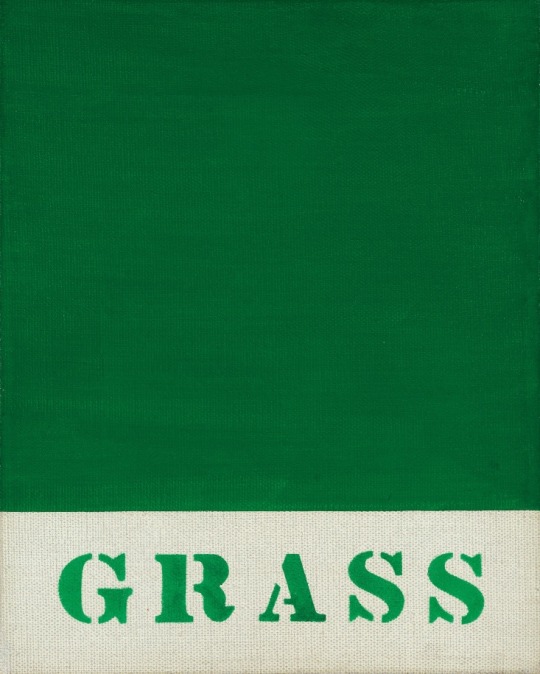
Robert Indiana (1928-2018)
Grass, 1962
Oil on canvas, 10 × 8 in.
#robert indiana#grass#fine art#art#artwork#contemporary art#artists on tumblr#paintings#contemporary artist#artist#painting#art of the day#oil on canvas#pop artist#pop art#1962#1960s#green#oil painting#word art#words
171 notes
·
View notes