#witchy diys
Explore tagged Tumblr posts
Text
Body Butter Recipe
This is the base for a basic body butter recipe, which is fairly quick, easy and cheap and good for those in the broom closet or (like me) are bouncing pay check to paycheck with low energy and money.
I love using recipe such as this one and my salt scrub recipe in self love rituals. Nothing screams decadence to me like spending extra time focusing on myself and my body. These types of spells are also great for glamours.
Basic Recipe:
3 cups shea butter of cocoa butter
1 cup carrier oil
a few drops of essential oil until desired scent is achieved
(optional) 1-2 tea spoons Vitamin E oil
(optional) 2 tablespoons cornstarch to thicken
Mix together the butter and oil, slowly ading your essential oils (or infused oils) until well mixed and you've achieved the desired scent - if your need to, you can heat up this mixture on a low heat to aid in mixing
If you desire a thick consistency, sift in your tablespoons of cornstarch into your cooled oil and butter mixture
Whip the mixture using an electric or hand whisk until desired consistency is reached and store in an airtight, wide rimmed container.
Self Seduction
3 cups shea butter
1 cup coconut butter
1 cup rosehip oil
a few drops of rose, lavender, ylang-ylang and sandalwood (or any other aphrodisiac oil or attraction/lust oils)
2 teaspoons vitamin E oil
1 teaspoon pink or red mica powder or food coloring (add more if needed, test on skin to ensure the colour doesn't transfer - optional)
Self Confidence Lotion
3 cups shea butter
1 cup carrier oil
1/4 cup aloe vera
2 teaspoons vitamin E oil (optional)
1-2 teaspoons water
a few drops of lemon balm, mint, jasmine, orange blossom (or other oils for confidence and prosperity)
As always, remember to adapt and change these recipe to fit your own practice and what you have on hand. Never feel like you have to follow exact recipes, diy your own spells and oils to what works best for you <3
#violet grimoire#queer witchcraft#queer witch#spoony witch#self care#diy#witchy diys#glamour witch#glamour magick#love magic#prosperity magic#hearth magic#kitchen witch#hedge with#anti capitalism#anarchist witch#self love spell#self seduction#broom closet witch#baby witch#grimoire tips#grimoire pages#witchy tips#witchblr
63 notes
·
View notes
Text

“Satisfied, you vultures? Your reindeer games are over. Now get the hell out.”
Got busy and didn’t have much else to do for this Winter’s Weekend. Ended up having to maybe do something else later on in January or February at the earliest to finish up everything most likely might have more time then. However, been quite busy with as is the setting up every other items for the Winter’s Eve. Beyond that, not much else to do.
#Riverdale core#Witch core#Riverdale Witch cores#Witchy core#witchy vibes#witchy things#witches#season of the witch#witchblr#witchy items#Riverdale witches#Riverdale seasonal colors#Witches seasonal colors#Riverdale things#Witches things#Diy Riverdale#jewelry diy#Witch diys#Riverdale witch DIYs#Diys winter#Witchy diys#Diys jewelry witch#Diys witches#witch jewelry#Diy witch jewelry collection#Diys collection witches#Jewelry collection DIYs#Riverdale collection diys#Witch Riverdale diys#Witch collection jewelry
1 note
·
View note
Text


Customising my stuff with trinkets and embroidery
#art#trinkets#diy craft#diy#sewing#embroidery#diy punk#witchy#design#customization#vulture culture#crowcore#my art stuff#my art#chaos crow arts
3K notes
·
View notes
Text

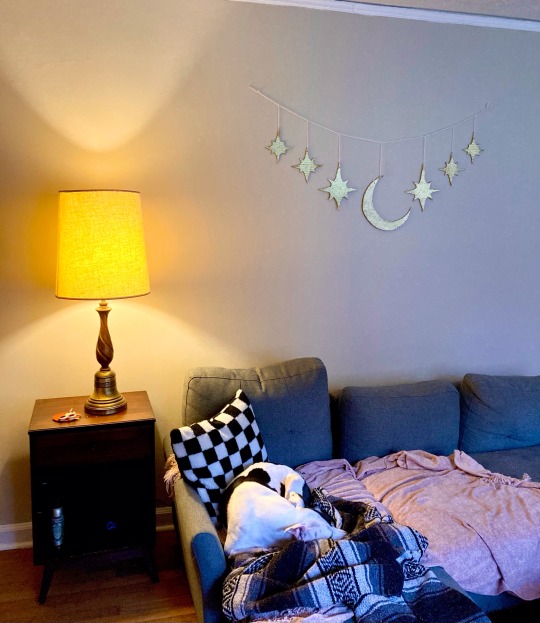
made a cute little celestial garland for my living room out of recycled cardboard, yarn, paint, and glitter glue ✨🌙
#haven’t really had the chance to decorate this room yet but i love how it turned out !#mine#my art#garland#decor#solarpunk#celestial#whimsigoth#witchy#upcycled#moon#diy decor#witchy art#witchy decor#dogs
115 notes
·
View notes
Text
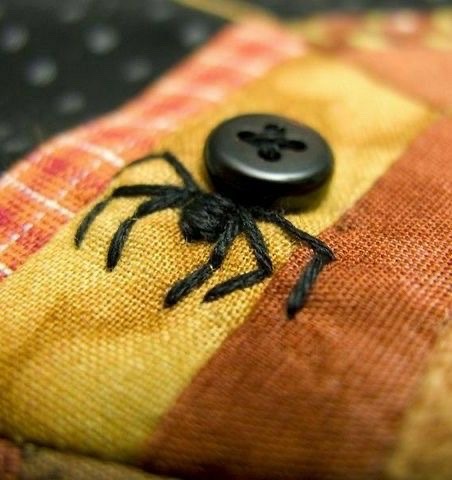
Oooh idea
#babacore#witchcraft#cottagecore#witch#goblincore#pagan witch#witchy#witchy things#witchythings#witchcore#witchyvibes#darkcore#goth#alternative goth#gothic#whimigoth#diycrafts#diy inspiration#diy ideas
2K notes
·
View notes
Text

Orange Sun Granny Square crochet pattern, now available on my Etsy, RoseOfMayGreece! Easy instructions in US terms with photos of every step!
#crochet#sun#sunburst#solar#sunbeam#granny square#crochet tutorial#easy crochet#gothic#goth#pagan#witchy#stained glass#orange#beautiful#whimsical#whimsigoth#symbol#sunny#applique#patch#square#tutorial#RoseOfMayGreece#etsy#ravelry#onewomanbusiness#small business#forest#diy
74 notes
·
View notes
Text
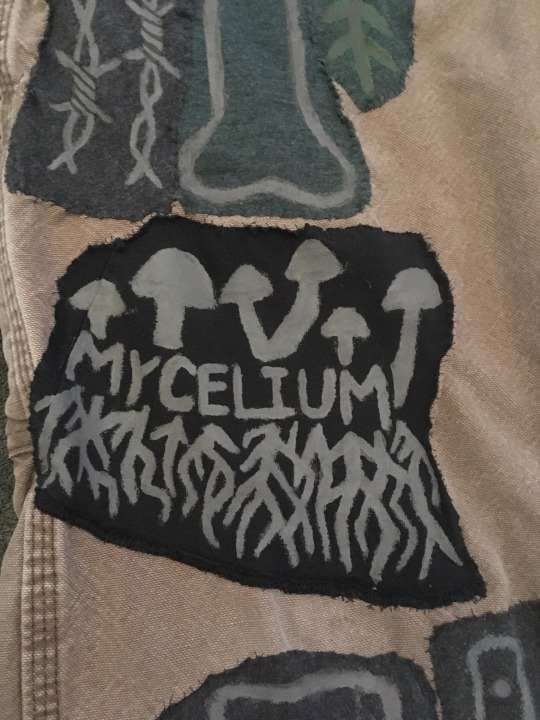
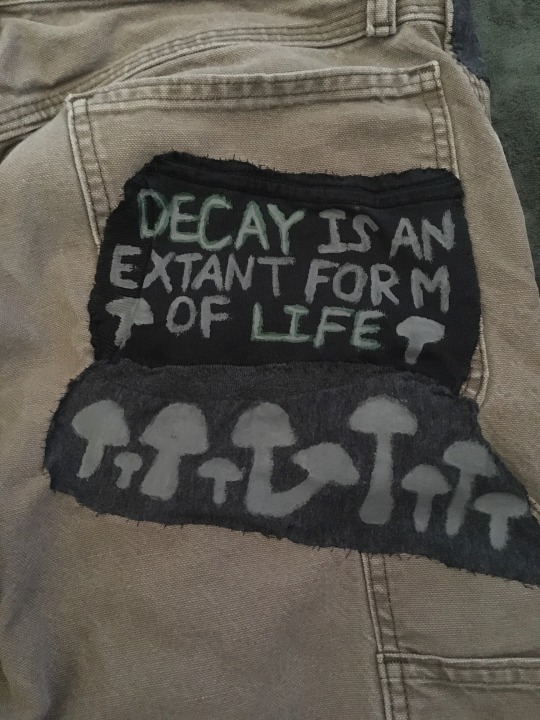
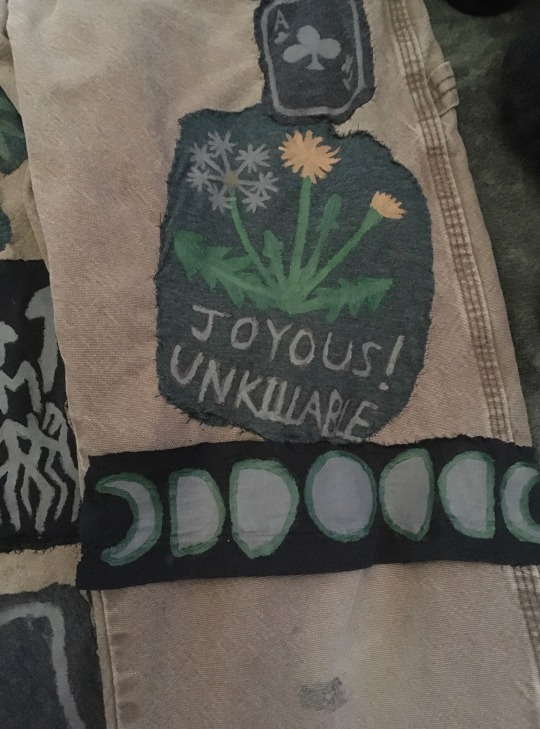

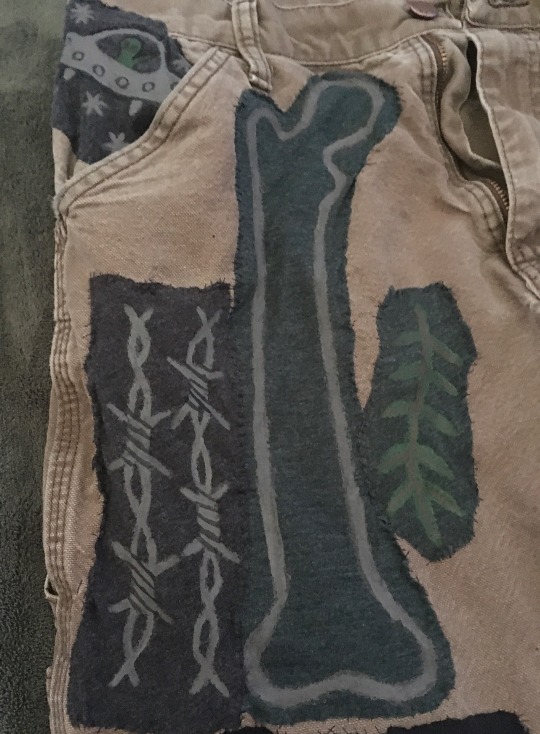
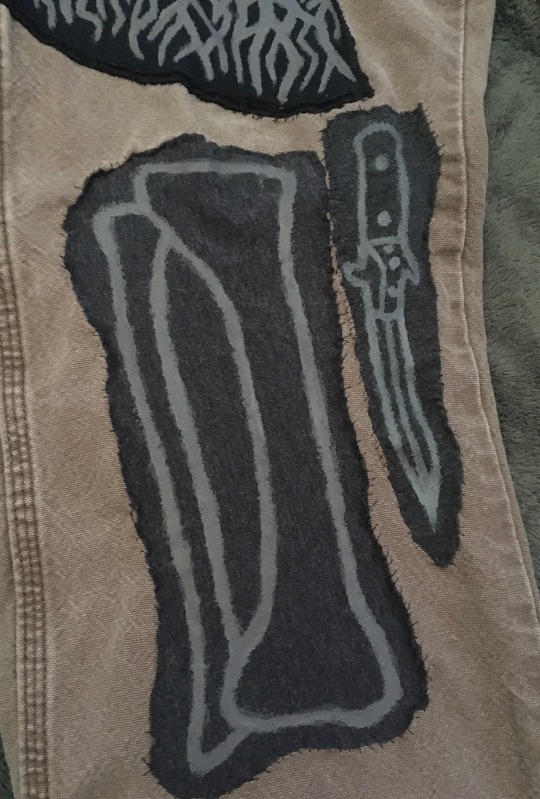
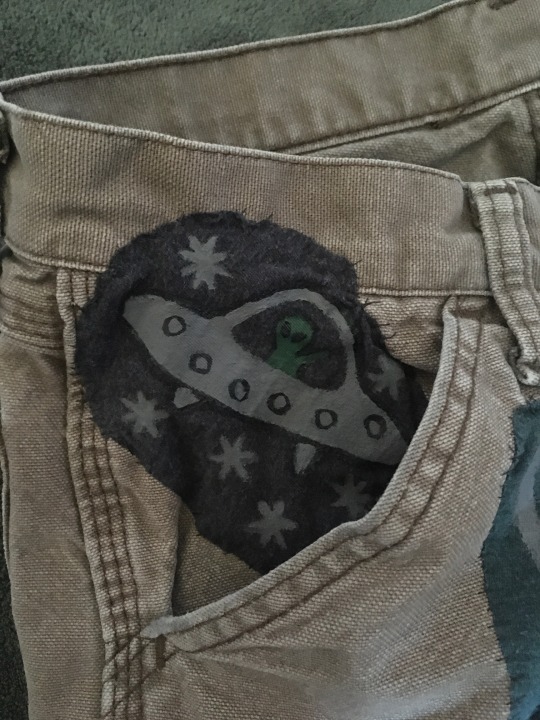
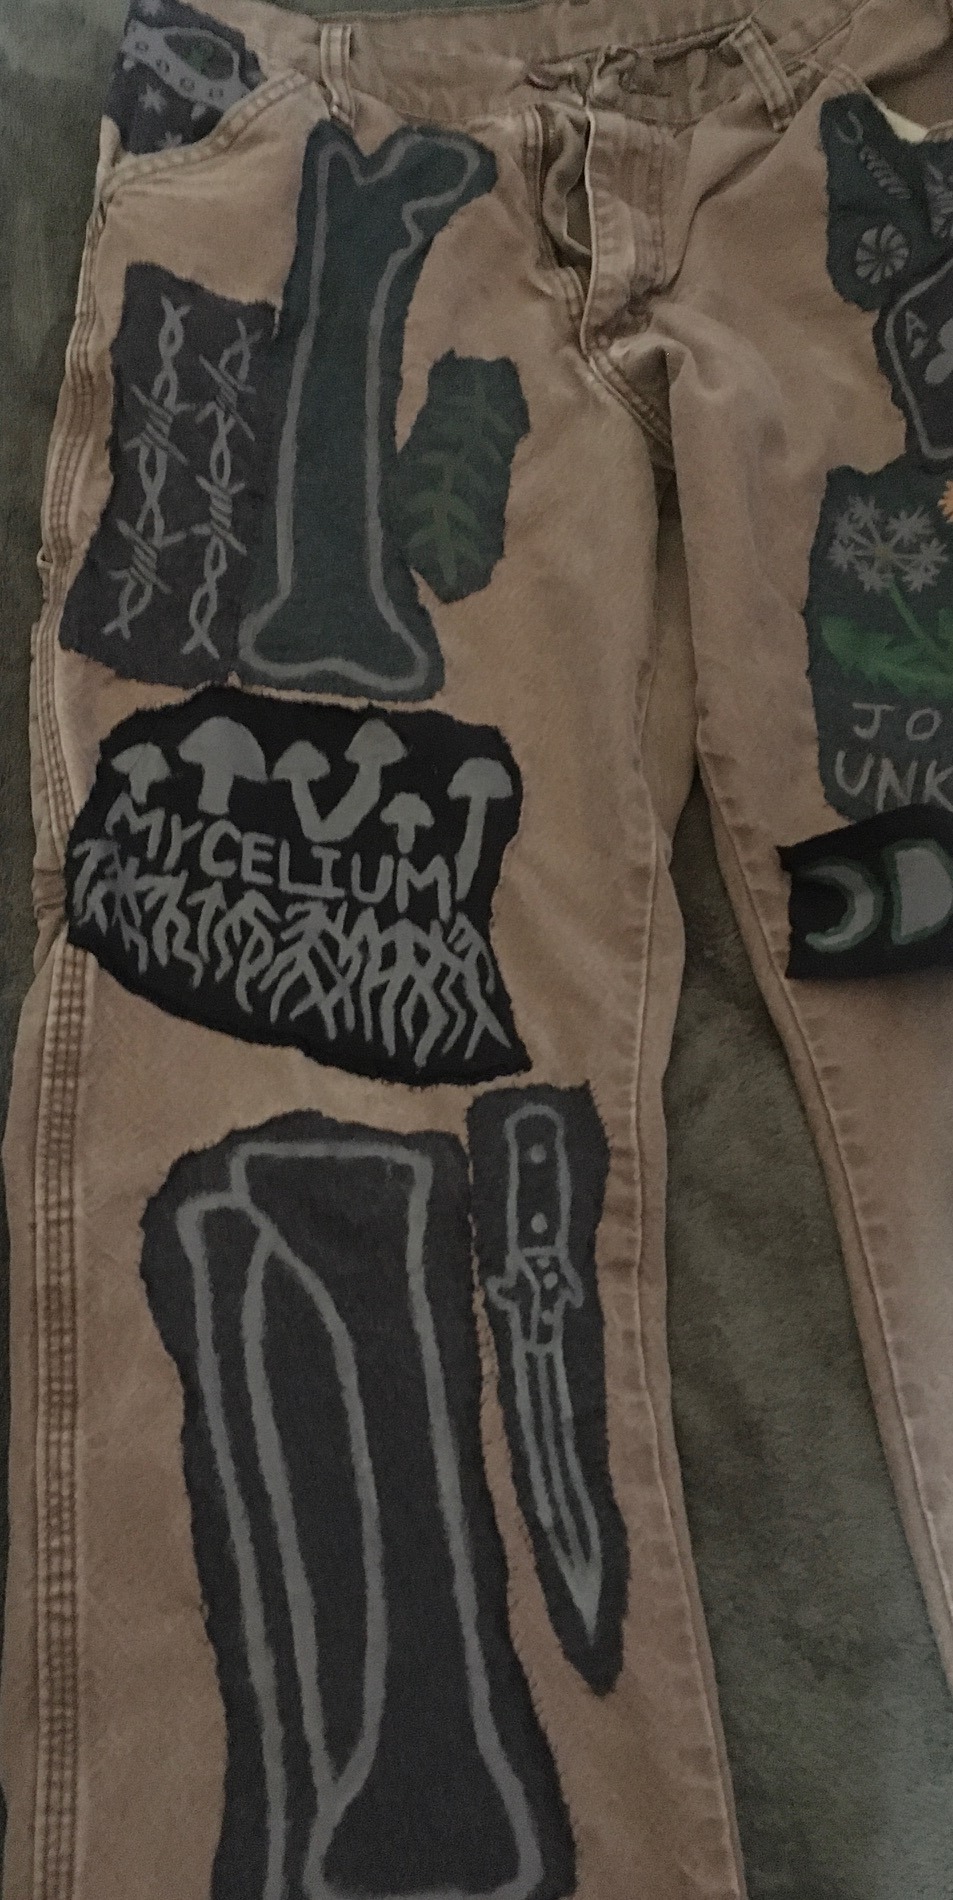
Here's some progress on my patch pants. These are a pair of old work pants that used to be my brother's, they've got some pretty good pockets! ✧d(•̀ v•̀ )
There's still more patches to add, and still some holes and stains I'd like to cover up, but I think they're coming along quite nicely! (๑^ω^๑) <3
#patches#diy patches#patch pants#sew on patch#patchwork#my post#my crafts#my photos#dirtcore#forestcore#gremlincore#crowcore#corvidcore#fairycore#cottagecore#mosscore#mushroomcore#fungi#decay#witchy#witch aesthetic#patch#goblincore#goblin community#goblin culture#goblin aesthetic#cryptidcore#cryptid aesthetic#diy punk#punk diy
880 notes
·
View notes
Text


#handmade#diy#embroidery#witchy#witchblr#they're done!!!#truly it took so long#now to go back to the many other projects i have pending lol
62 notes
·
View notes
Text

#decor#pagan witch#witch#witchcore#witches#once upon a witchlight#witch aesthetic#witchcraft#witchy#witch community#witch world#Yule#Yule decor#yule crafting#craft ideas#paper craft#crafts#christmas decorations#christmas#christmas crafts#art study#witch art#art and craft#Xmas#merry christmas#happy Xmas#diy craft#diy#witchcrafting#witch craft
83 notes
·
View notes
Text
City Magic: Painted Rock Wards
This post was released a week early over on my Patreon! You can subscribe for free to be notified of important projects announcements, or subscribe for as little as $2 a month to gain early access to my content, exclusive access to research/reading notes, and free digital goodies! Your support means the world to me and helps me to continue doing what I love.
We’ve all seen those pretty painted rocks over on Pinterest, right? These bad boys? Or perhaps you’ve even seen them around your neighborhood/public parks.
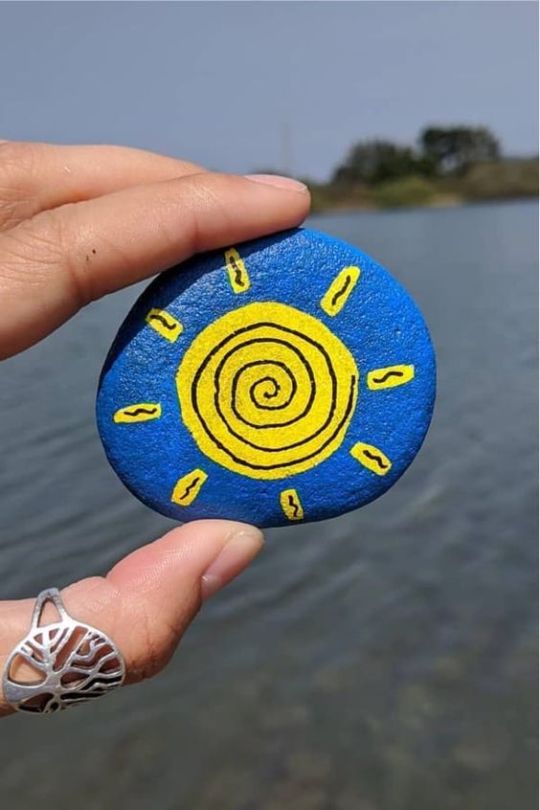
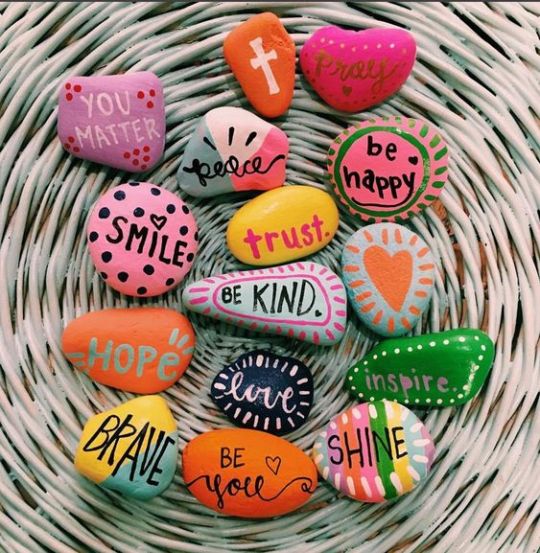

Traditionally, these are meant to be painted (sometimes with words of encouragement) and left in public spaces for people to take home, as an act of kindness. Some others paint them for their garden, either to deter pests with vibrant colors, or they’re used to label whatever’s in their garden.
Now, if you live in a big city, you probably have felt a disconnect from your craft or your practice. It’s difficult to connect with a nature-oriented spirituality, such as witchcraft, when you live in a concrete jungle! But there are many, many ways to feel connected to your craft, even if you don’t live in the middle of the woods or have a lot of nature around you. One of these ways is to connect with your neighborhood.
Your neighborhood has mass significance to your life, whether you realize it or not: this is where you live, where you work, where you breathe, where you practice your craft – you must make yourself known, and make the neighborhood known to yourself as well. One of the best ways to do this is to take walks!
Whenever you’re ready, take a walk through your neighborhood and bring a map, notebook, and a pen. As you walk, observe the behaviors of the residents around you. Do they seem to be struggling with anything? What kind of people are they like? Write these characteristics down. If you notice any parts of your neighborhood that evoke any specific emotions (such as unease, happiness, peace, or anxiety), mark them on your map. You might also notice some “problem areas” – perhaps some patches of the road or sidewalk are horribly paved and need to be repaired, or there’s a lot of loud dogs constantly barking at the end of your block. Mark these areas on your map as well, and report back to your home when you are ready.
Picking Your Purpose
Now that we’ve identified a few “problems” and made observations within your neighborhood, we can decide what we want to do. Do you want to protect against thieves? Ward against illness for one of your elderly neighbors? This is the time to select the primary purpose for your ward.
Picking The Area
Take the map that you marked up during your walk. Connect any common points you see (for example, connect up the "peaceful" areas you marked on your map, or connect any points that have a common theme). What kind of shape does it have? Does it remind you of any popular symbols? Can you use the general shape of the area to generate a sigil or symbol that represents the area? What area(s) would most benefit from your rock wards?
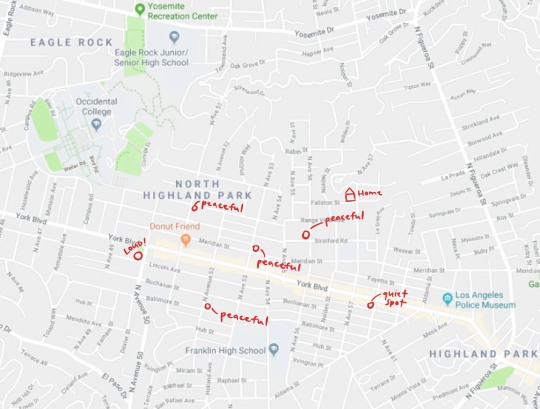
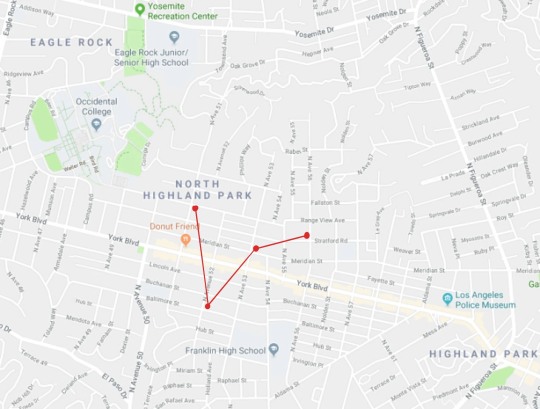
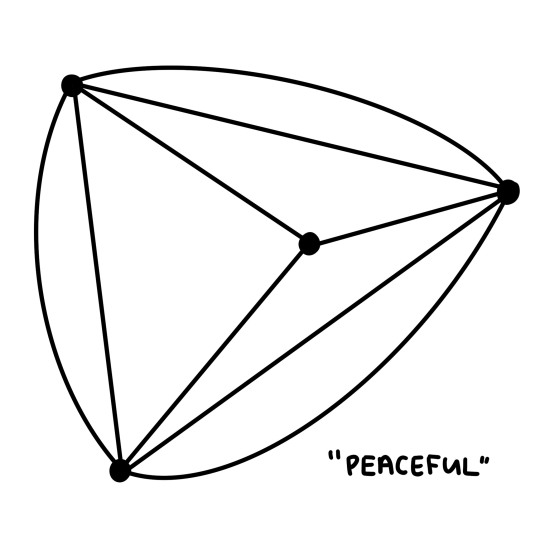
Here is an example of how I created a sigil from a fictional city map I found! Obviously, play around with this idea until it makes sense to you. You can connect up different routes, or perhaps create a border around the areas that feel safest to you.
Now is the time you also want to pick where you want to place your wards - you can use your neighborhood sigil to influence where you place them, or, place them based on intuition or based on need. For example, placing a rock ward at the end of the noisiest block, or in the middle of the block that has the most number of children in the area.
Creating and Using Your Sigils/Symbols
Now, you want to develop symbols or sigils for your purpose. You can use any method you’d like! You may wish to incorporate your neighborhood sigil into each one you create, but ultimately the design is up to you. This is also the point where you would “charge” your sigil, with whatever method you see fit - as long as the design, intention, and charging method makes sense to you, that’s all that matters!
Painting Your Rocks
Finally, onto the fun part!
Now, you could simply paint your sigils on your rock and call it a day. Or, you could paint your sigil, and layer a more “mundane” piece of artwork on top of the sigil, leaving the sigil hidden underneath. This technique works best if the “mundane” artwork connects with the ward’s purpose in some way (for example, if your ward is for protection against nosy neighbors, you could paint eyes; or if your ward is for health, you could paint green colors, or even a red cross). I definitely recommend this “layering” method of painting your rocks so no one in your neighborhood ends up reporting any “suspicious looking rocks” with “satanic symbols” on them to your local Facebook groups!
Materials
acrylic paint
rocks
paint brushes
toothpicks (optional)
paint markers
outdoor/water-proof sealant such as Mod Podge: Outdoor
Instructions
Lay out your rocks and other materials
Seal your rocks with a coat or two of your sealant before you begin painting. This is an important step, since rocks are porous and will suck up any paint you try to apply!
Paint your rocks to your heart's content! If you are layering paint on your rocks, please make sure each layer is dry before painting the next.
Once your rocks are completely dry, seal them up with your outdoor/water-proof sealant so they don't get damaged in the elements.
Lastly, take another trip through your neighborhood to place your rocks. Converse with the neighbors if you feel inclined, and make double-sure of the locations you chose for your wards. I recommend taking regular walks throughout your neighborhood to check on these wards, and make sure they’re doing their job. You may wish to refresh the wards with a new coat of paint, or replace them with something new if the situations within the neighborhood change.
Ultimately, magic is what you make it, especially when you live in a big city. Warding your neighborhood and showing care for the people that live there is one of the many ways you can connect to your neighborhood on a deeper level and feel more connected to your practice locally.
Recommended further reading: Urban Magick by Diana Rajchel
#thevirginwitch#witchcraft#witch#witchy#witchblr#witches of tumblr#city witch#urban magic#city magic#witch crafting#witchcrafting#rock painting#crafts#diy#crafting#ward#warding#baneful magic#baneful witch#protection magic#wards
202 notes
·
View notes
Text
~ zine culture and handmade art are more important than ever ~
The possibilities of using Artificial Intelligence in the arts has been a hot topic as of late. And of course it must be! The advent of AI generated images is really changing the art scene. The threat of being replaced by AI in many professions entices jitters for us all.
As an artist myself I am not immune to feeling uneasy on the outset of this new era. And I wonder …
• Could the advent of AI generated images create a renewed passion for hand drawn and handmade art? •
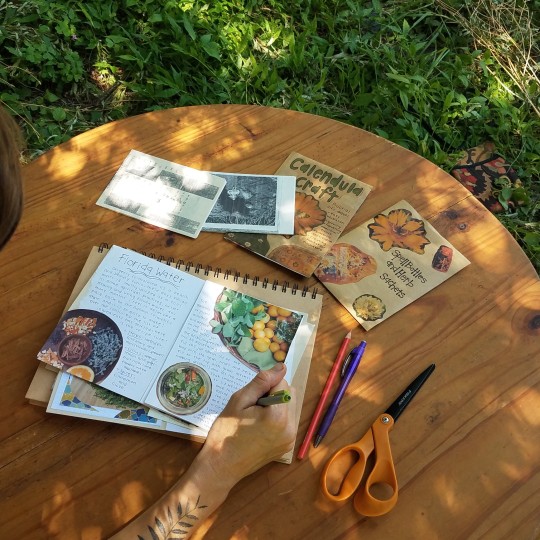
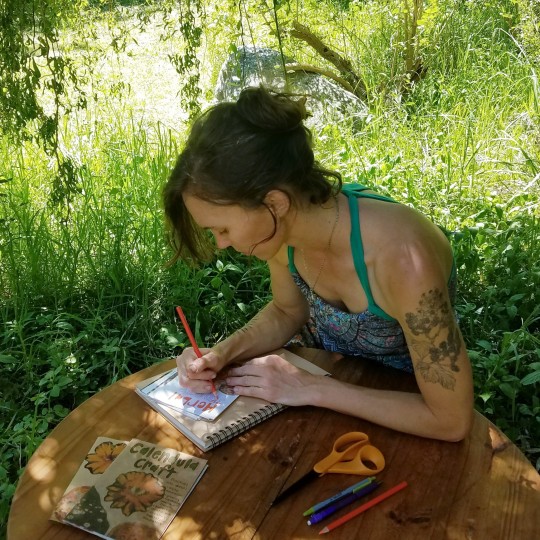
As a blogger I publish most of my work digitally. Even so I still desire to continue to create physical art as a means of sharing my writing alongside my articles here and social media. Many times I have created a story or post that felt so inspired it went onto to make up part of a physical zine.
• So... What exactly is a Zine? •
"Zines are handmade, self published booklets and — unlike magazines and books — can be made by anyone with a message, a bit of artistic vision, and access to a printer. Zines also have the benefit of being as short or as long as the creator wishes and can cover any subject matter and be of any style, much unlike traditional publishing."
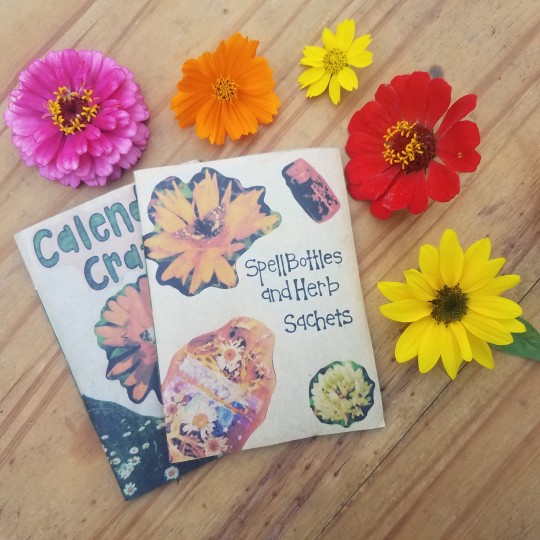
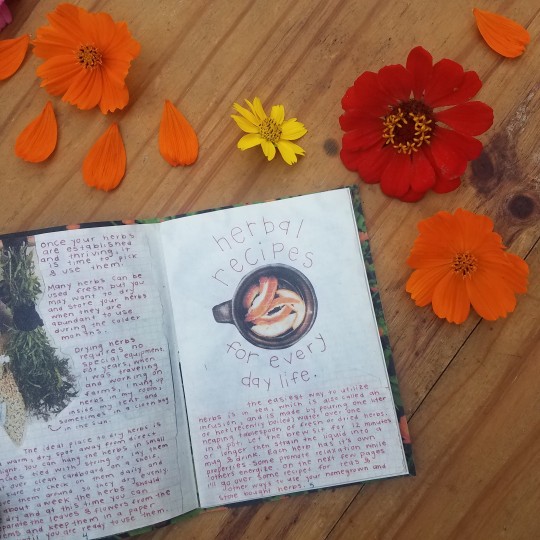
•• if your are curious to learn more about zines or read those that I have made you can find my collection of zines on Etsy ••
#zines#zine culture#witchy art#witchy zines#zinester#counterculture#herbalism#DIY#handmade#handwritten#snail mail#zine
188 notes
·
View notes
Text
Solid Perfumes and Balms Recipe
One of my favourite spell forms is something I can physically wear like a perfume, balm or body butter. Whilst this is not a recipe I favour (I prefer spray on perfumes and liquid oils), its one that has served me well in the past for glamours, anti-anxiety, and a little luck before job interviews.
Apply to your wrists and neck for a perfume, or use to create a creme makeup product such as a blush or bronzer.
Generic Recipe Base:
Always be mindful of irritants like cinnamon when creating balms!
1 tablespoon of oil (jojoaba or any other neutral oil)
1 tablespoon beeswax or emulsifier wax
OR 1 tablespoon of coconut oil or shea butter and 1/2 tablespoon of wax
10-20 drops of essential oils for a perfume (or add until desired scent is achieved), for more subtle scents 3-5 drops
1/2 -1 tablespoon of mica powder or mineral powder to colour
Melt together the wax and oil or simply melt down a dense, solid oil or fat like coconut oil, adding in vitamin E oil and mix well
Stir in essential oil (or oil you have infused with your herbs), add in your mica powder if you wish to colour it
Allow to cool slightly and pour into a slightly heated, wide rimed jar and let sit to solidify completely before sealing it - old lip balm tins, tiny jam jars and balm jars work well to store this
_________
Prosperity and Luck for Job Interviews:
Melt down your liquid oil and wax, and mix well
Stir in 9 drops of prosperity oil (ylang-ylang, lemon, basil and mint) - I like to add things in threes, so three lots of three
Allow to cool and add to a small tin or jar and allow to cool at air temperature
_________
Glamour Creme/Cream Blush
Met together shea butter and wax - more wax will make a thicker, longer lasting blush whilst more aloe will make a smoother, more subtle one
Add in aloe vera and a glamour or love/attraction oil (rose, apple blossom, lavender and jasmine - as this is blush only add 3 drops!) and whisk until smooth, taking it off the heat
Slowly add in mica powders and cocoa powder a tiny pinch at a time until the desired colour is reached
add to a tine or jar and let cool at air temperature
Adapt the recipes as needed for what you have and to your own practice <3
_________
(I will be sharing some of my generic grimoire recipes each Wednesday (hopefully) with the intent on letting people adapt the recipes to suit their needs ... )
_________
#Violet Grimoire#grimoire pages#hearth magic#queer witchcraft#witchblr#kitchen witch#green witch#book of shadows#baby witch#recipes#love magic#self love spell#grimoire ideas#valentines gifts#glamour magick#glamour spells#glamour witch#love witch#glamour magic#witchy aesthetic#diy craft
314 notes
·
View notes
Text

I had the urge to put some charms on my boots. Here's the finished look.
#eclectic witch#witchy#cottage witch#witchcraft#crystal witch#boots#charms#diy projects#crafty things
59 notes
·
View notes
Text
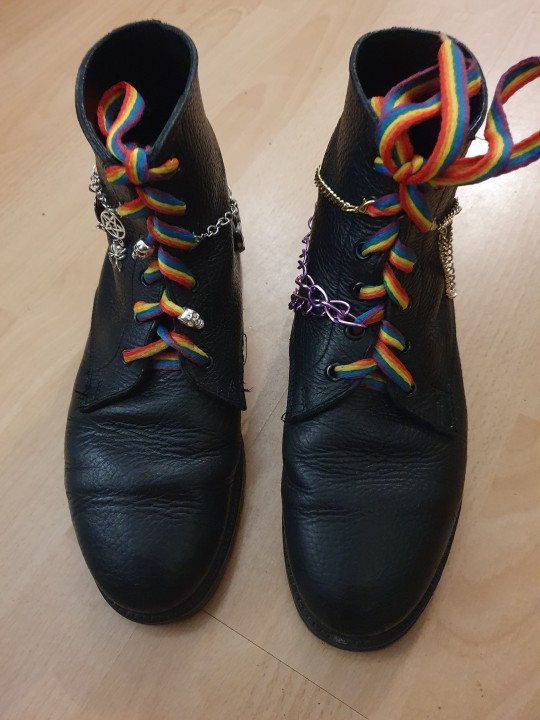

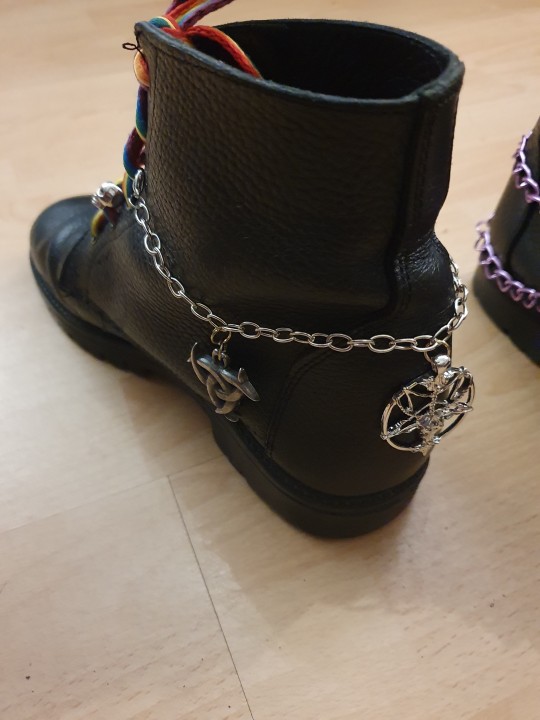


Gave the boots a little glow-up!
One is gay, one is goth. Together, they are me.
#things i made#boots#leather boots#not in fact#doc martens#but just nice leather boots#punk diy#diy#goth diy#diy jewelry#diy fashion#pentagram#witchy vibes
187 notes
·
View notes
Text

I made Yule ornaments today!
They're available in the shop.
#yule#christmas#ornaments#christmasornaments#yuleornaments#diy#witchcraft#witchy#wicca#pagan#witches#spellwork#spells#etsy#etsy shop#spell jar#spell jars#spelljar#witchblr#mine#foragewitch
228 notes
·
View notes
Text
Gonna learn how to sew a knit and crochet for the sole purpose of making things to wrap my friends in
#for the usual friend reasons#and also the witchy ones#love is stored in the “i made this for you”#diy#diy crafts#sewing#knitting#crochet#queer#love my friends#folkwitch#folk witchcraft#folk witch#folk magic
216 notes
·
View notes