#christmas crafts
Explore tagged Tumblr posts
Text

Happy Holidays @lil-lemon-snails ! I am your Secret Santa for the DCABeeTeam Secret Santa Exchange! ❤
I hope you like your lil jester sweeties enjoying their own little winter craft wonderland! I'm not the best with textures but I did try my best for you. The candles are battery powered so you don't have to worry about any fires ʕ ꈍᴥꈍʔ I also added the line art as a lil extra coloring pages for you to color in if you'd like! (and a version without the large text under the cut too)


#secret santa#DCABeeTeamSS24#fnaf dca#christmas crafts#fnaf sun#fnaf moon#lil lemon snails#bearitt doodles
152 notes
·
View notes
Text


#cross stitch#xstitch#cross stitchers of tumblr#free cross stitch pattern#craft freebie#modern cross stitch#christmas cross stitch#free christmas cross stitch pattern#gingerbread cross stitch#gingerbread biscuits#christmas crafts#christmas baking#christmas craft freebie#cross stitch design
120 notes
·
View notes
Text

#decor#pagan witch#witch#witchcore#witches#once upon a witchlight#witch aesthetic#witchcraft#witchy#witch community#witch world#Yule#Yule decor#yule crafting#craft ideas#paper craft#crafts#christmas decorations#christmas#christmas crafts#art study#witch art#art and craft#Xmas#merry christmas#happy Xmas#diy craft#diy#witchcrafting#witch craft
84 notes
·
View notes
Text
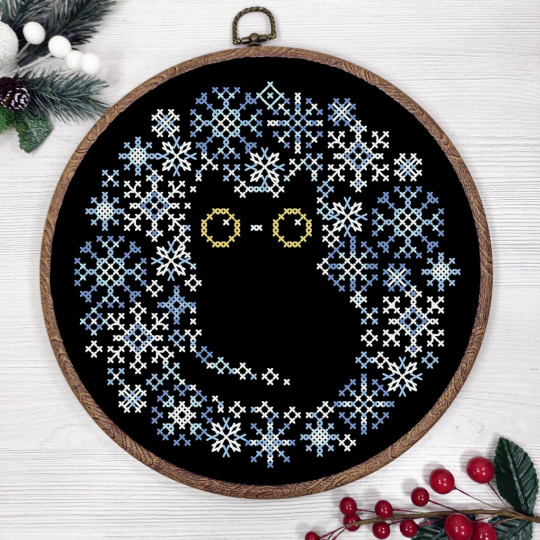
Hello, friends! I'm in a hurry to show you my new design for Christmas. This is a pattern for cross-stitch with a cat and snowflakes around. It is quite small - only 70 * 70 crosses, which is about 5*5 inches for 14 canvases. I plan to dismiss it in the near future. I think this ornament will look great in small round hoops on a Christmas tree.
You can find this pattern on my web site: https://smasterilli.com/product/winter-cat-and-snowflakes-cross-stitch-pattern-pdf-easy-christmas-ornament-0422/
#cross stitch design#cross stitch pattern#cross stitch#xstitch#needlework#embroiderydesign#christmas decorations#christmas crafts
241 notes
·
View notes
Text

ᴅᴀʏ 4: ᴄʜʀɪꜱᴛᴍᴀꜱ ꜱᴡᴇᴀᴛᴇʀꜱ - ᴛʜᴇᴏ ᴛʜᴏᴜɢʜᴛ ᴛʜᴇ ꜱᴡᴇᴀᴛᴇʀꜱ ᴡᴇʀᴇ ᴅᴏʀᴋʏ ᴀɴᴅ ᴡᴀꜱ ᴀʟʟ ʀᴇᴀᴅʏ ᴛᴏ ᴄᴀʟʟ Qᴜɪᴛꜱ ʙᴜᴛ ᴀ ᴘᴀɪʀ ᴏꜰ ʙᴀʙʏ ʙʟᴜᴇꜱ ᴄᴏɴᴠɪɴᴄᴇᴅ ʜɪᴍ ᴛᴏ ꜱᴛɪᴄᴋ ᴀʀᴏᴜɴᴅ. ʜᴏᴡᴇᴠᴇʀ ɴᴏʙᴏᴅʏ ꜱᴀɪᴅ ʜᴇ ɴᴇᴇᴅᴇᴅ ᴛᴏ ꜱᴍɪʟᴇ ꜰᴏʀ ᴛʜᴇ ᴄʜʀɪꜱᴛᴍᴀꜱ ᴄᴀʀᴅ ᴛʜᴇʏ ᴀʀᴇ ᴍᴀᴋɪɴɢ.
@theoraekenapperciation
#theo christmas week 24#theo raeken christmas week 24#theo raeken#teen wolf#corey bryant#mason hewitt#liam dunbar#mason x corey#morey#teen wolf thiam#thiam#liam x theo#theo x liam#baby it's cold outside#christmas sweaters#christmas crafts#christmas cards#puppy pack
34 notes
·
View notes
Text


It's Christmas crafting season! I actually set aside some time this year to have fun and make some presents. I dressed up some taper candles with pressed flowers. I attempted to make taper holders with air dry clay. Disaster. Air dry clay is very tricky to work with. It will take a bit more practice on my end. I made some homemade ornaments. I also knit some cute little beer koozies.
Hope you are all having a very crafty Christmas!
47 notes
·
View notes
Text

Fives, delighted: Echo, look! We’re balls! 😃
Echo: Ornaments, Fives. 😒
#star wars clone wars#the clone wars#star wars incorrect quotes#echo and fives#clone trooper echo#clone trooper fives#arc trooper fives#arc trooper echo#501st battalion#clone wars 501st#star wars the clone wars#christmas crafts#star wars christmas#star wars crafts#echo#fives#tcw echo#tcw fives#clone wars echo#clone wars fives#Star Wars life day#life day#life day ornaments#christmas ornament
40 notes
·
View notes
Photo
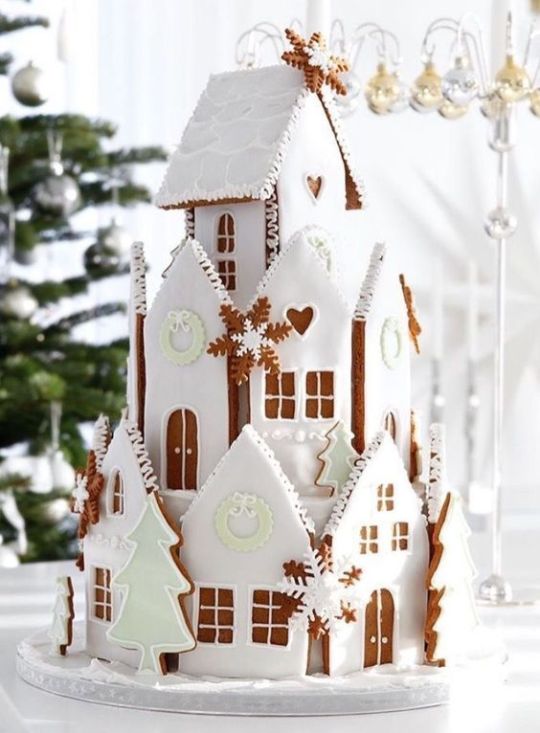
~ Fantastic Gingerbread Houses ~
181 notes
·
View notes
Text

⋆。°✩ Vaporwave Gingerbread House ✧˖°.
Are people still stitching Christmasy stuff? I present my Vaporwave Gingerbread House!
This month's pattern is bright and festive and vaporwave! It's a quick stitch if you're in the seasonal stitching mood. I stitched the white outlines first, so that the rest was easy fill like a coloring book! Perfect for zoning out stitching and watching TV.
I stitched this on 16ct Mediterranean Sea by Wichelt with DMC floss. Find this + a boatload of community and patterns on my Patreon!
#cross stitch#cross stitch pattern#fiber arts#broderie#stitchcraft#pixel art#crossstitch#xstitch#patreon creator#vaporwave#gingerbread house#christmas cookies#vaporwave cross stitch#christmas crafts#crafting#crafts#arts and crafts
28 notes
·
View notes
Text
Gift Bag Tutorial
In this tutorial, I will explain how to create cute fabric gift bags. I was shown this method several years ago by a quilter as a nice technique to work with jelly rolls (rolls of fabric strips) but I don't know what the actual origin of this technique is. These instructions are based on me figuring out how to do it from the vague memory of what I was shown once when I was first experimenting with quilting.

You will need:
Fabric
General purpose sewing thread
Needle
Pins
Thin ribbon
Step 1: pick your fabric
You will need 8 strips of fabric, 4 to make the outside and 4 to make the lining. You could do all 8 strips the same fabric, you could do all 8 different fabrics, or keep a few of them the same. I like doing pairs of strips, so for my demonstration, I will be showing it using 2 fabrics for the outside and 2 for the inside. Quilting cotton is great for this, but the key this is that you want the fabric to be non-stretch and you want all the fabrics you're using to be about the same weight. You could get away with having the lining pieces be of a lighter weight fabric than the outside fabrics, but aim for consistency in the outside pieces.
Step 2: measure and cut 8 strips
You want your strips to be approximately three times as long as they are wide. You can get away with a bit of variation and if you have longer strips, you'll end up with a taller gift bag. What really matters is that all your strips are the same size. For my demonstration, I cut out a piece of cardboard that was 2 inches by 6 inches and then drew round that as a template.
Make sure you leave yourself a seam allowance that you're comfortable with.

Step 3: Place your pieces to get the relative position correct
For each layer (outside and lining) you are going to want to position the four pieces that make it up so that the bottom of one strip is against one end of the long side of its neighbour. The end result is that you get a sort of spiral cross (if there is an actual name for this shape, I don't know it). All four pieces should meet in the middle.

You will want to do the same for the outside and lining layers, but you want their directions to be reversed. This is so that when you place the layers together in the final bag, they will spiral in the same direction. It's not the end of the world if you get this wrong, but the end result will be a lot neater if you get it right. This is the step I have to check repeatedly to make sure I'm getting it right.

Step 4: Pin pairs of strips
Once you're happy that they're placed correctly, pin the fabric strips in pairs so that the bottom of one strip is pinned to the end of the long side of its partner. Once it's done, your two lining pairs should be identical and your two outside pairs should be identical, but when you compare a lining and an outside pair, the placement should be mirror-images.

Once you've got them pinned, check one more time that you can get them back into the correct spiral cross shapes to make sure you haven't pinned the wrong side.
Step 5: Sew your pairs
Sew the short seams that you pinned in the previous step.
Step 6: Pin & sew your pairs together
Pin your two outside pairs together and your two inside pairs together to make the spiral cross shape and sew along these seams.


Step 7: Cut into the long side so it can turn
When we do the next bit of sewing, you're going to need to turn the long side of your strips at about a 90 degree angle but, as per step 1, we're not working with stretch fabric, so it's not going to want to turn like that. In order to make the next step work nicely, you're going to need to cut into your seam allowance on the long side at the point where your seam ends between the long side and the bottom edge of its neighbour.

I'm sure there's a technical name for this sort of cut. If you know it, please let me know what it is.
You're going to need to make this cut once on each of your eight strips of fabric, right at the point where that long side meets the short side. Cut as close as you dare to your seam without cutting into the seam itself.
Step 8: Pin and sew the long sides together
If you're doing this for the first time or you just want to play it safe, start with the lining as this will be less obvious if you make a mistake. Take one of your strips and find the long side that is joined to the short side of the neighbour. Fold this strip at the cut you just made so that the strip lies against the long side of the neighbouring strip and pin the front sides of the fabric together. You will find that the first strip stops partway up the length of the second strip. The difference in lengths will be the same as the width of the strips, because of the way the long and short sides are attached together at the bottom. This is what will create the triangular close flaps in the final gift bag.

Sew the two long sides together.
Repeat this process for the other three edges of the lining. Then repeat it for the four edges of the outside.
This will give your gift bags shape and you'll see the strips spiralling up the sides and ending in the triangular flaps.


Step 9: Cut your closure ribbons
You want a nice thin ribbon. I'm using 1cm wide ribbon. If you do bigger strips, you could get away with a thicker ribbon, but this width works nicely for the sizes I'm using. I cut 4 lengths each of approximately 5 inches, but I wasn't really measuring them precisely. As long as the 4 lengths of ribbon are pretty close to the same length and long enough to comfortably tie into bows, it should be fine.
Step 10: Assemble your bag - right side to right side
Turn your outside layer so that it is inside-out, with the nice side of the fabric to the inside of the bag. Turn your lining layer so that the nice side of the fabric it facing out, then place your lining layer inside your outside layer so that the good sides of the fabric are facing each other. Position the lining so that the triangle flaps line up with the flaps of the outside layer.
Take one of your ribbon pieces and put it between the two layers and pin one end of the ribbon at the point of the triangular flap where the outside and lining flaps meet. Do the same at the other three points. Make sure that the main length of each ribbon is tucked between the sides of the fabric that will be facing out when the bag is finished, and also take care that it's point straight down so that you won't end up sewing it on at an angle. While you're at it, make sure that the rest of the ribbon is well away from the seams so you don't accidentally sew any of it.

Use more pins at each V where two of the triangular flaps meet. Take your time over this stage to get the lining and the outside layer to line up nicely. The points and the dip of the V are the places that you need to take care with because the remaining edges should all be the same length, so if you get those positioned correctly, the rest of the edge should sort itself out.
Step 11: Sew most of the top
You want to sew a seam around most of the top of the bag to connect the lining to the outside. Note that I said "most" there because you need to leave yourself a gap so that you can turn it all the right way round. It's best if you leave this gap in one of the Vs rather than at a point, so you don't need to worry about the ribbon and so that it will be less noticeable when you sew the final bit closed.
Start about halfway up one of the flap sides and sew towards the point. When you reach the ribbon, sew straight across. If you sew to a point then the ribbon will be weird when you turn it the right way round because the point will be going the wrong direction. So straight across the ribbon and then down the other side of the flap. Keep going around the rest of the top until you're about halfway down the side next to where you started. At this point, the whole of the top should be secure apart from a small gap in the dip of the final V.
Step 12: Turn right side out and finish
Poke the entire thing inside-out through the small gap you have left. You may need to tug gently on the ribbons to get the points of the flaps to be nicely pointy. Once everything is the right way round, finish it off by sewing closed that little gap. Use small stitches in a thread that is a similar shade to your fabric if possible (this may be a challenge if you're using pieces in lots of different colours) to try and make these stitches unobtrusive. I used whip stitch to finish mine.

Step 13: Fill with chocolates
Fill your gift bag with chocolates and tie the ribbons closed. It is now ready to present.

26 notes
·
View notes
Text
Make Paw Print Ornaments with us! 🐾🐶🎄
#cute animals#dog#dogs of tumblr#pets#dog blog#cute#big dog#fur baby#adorable#aww#cute dog#cute pets#pets of tumblr#christmas diy#diy projects#diy craft#diy#diy ornaments#ornament#christmas ornament#keepsake#paw prints#dog paw#toe beans#oven bake clay#recipe#christmas gift#christmas tree#christmas#christmas crafts
16 notes
·
View notes
Text
I wanted to experiment with a Xmas project idea in my head…
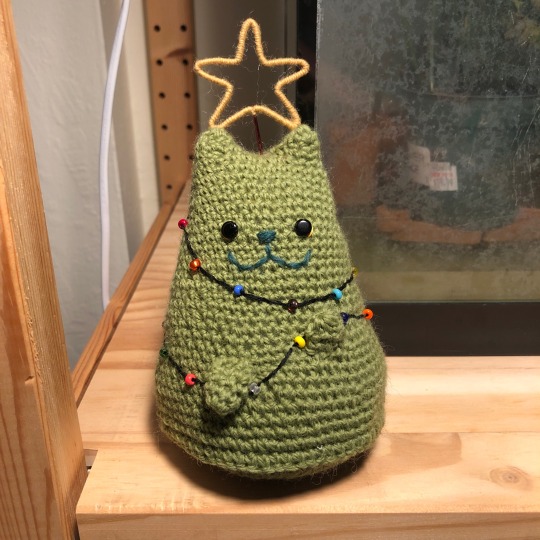
#crochet#Xmas#Christmas#christmas crafts#yarn#cat#kitty#christmas cat#now to get back to all my Halloween crafts
188 notes
·
View notes
Text
Погода всё ещё морозная, надо утепляться. Брать пример можно с гуся и уточки, они пусть и без штанов, зато голова и шея в тепле!


Больше бесплатных схем в Pinterest, а в Boosty огромная куча схем побольше и посложнее
#counted thread embroidery#cross stich pattern#вышивка#embroidery#вышивка крестом#counted cross stitch#cross stitch#счётный крест#needlecraft#christmas embroidery#christmas crafts#free cross stitch pattern
18 notes
·
View notes
Text


Christmas Journal Inspiration!
Who is excited for Winter Journal Challenge 2024 to start??
#WinterJournalChallenge is a December daily christmas-themed journaling challenge. There is a prompt for (almost) every day in December. Interpret the prompts in your journal.
Find out more here or follow the host on IG: kia.creates and inspiringjournals or find the Winter Journal Challenge collaboration playlist on YouTube 🎄
#art journal#creative journaling#journaling#book binding#handmade#junk journal#journal#youtube#winter journal challenge#winterjournalchallenge#christmas art#christmas crafts#winter journal#december journal#december daily
15 notes
·
View notes
Text


#christmas#vintage christmas#christmas crafts#vintage crafts#vintage illustration#vintage books#christmas books#make your own world of christmas#rosemary lowndes#claude kailer#vintage christmas decorations
14 notes
·
View notes
Text
Kid-friendly holiday crafts !! 🐣 I've created a list of all the crafts i want to do this year for the holidays. Most of them are kid-friendly as well and especially fun to do with regressors 💕 I've also included difficulty ratings of one to three stars. If a craft is more difficult littles might need some extra help to make them ! Homemade Gift Wrapping Difficulty: 🌟 Such a cute and easy way to make Christmas more creative !! And a good way to use the cute paper and stickers I've been hoarding all year because I don't know what to do with them 😖

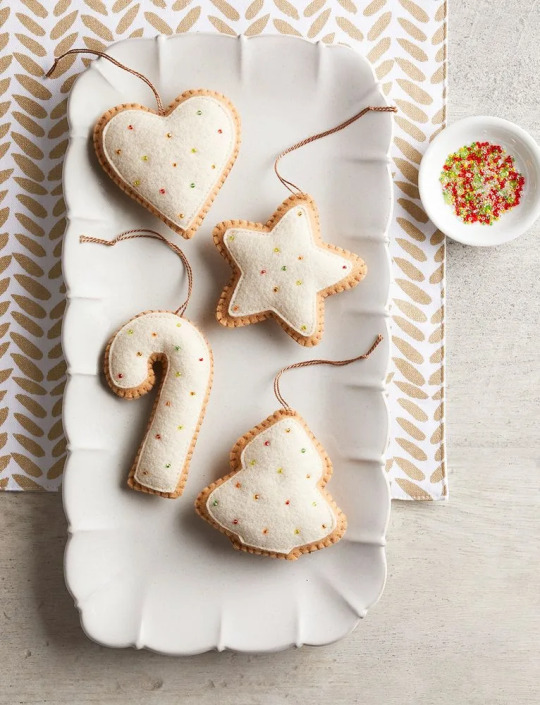
Felt Christmas Cookie Ornaments Difficulty: 🌟🌟🌟 These ones are a little tricky but they're so cute, I love the colourful beads on them that look like sprinkles !! And a Christmas tree would look so good with lots of these hanging up🎄
Scented Salt Dough Ornaments Difficulty: 🌟 I only gave these a one star difficulty because they're very easy to make. But keep in mind that they do use the oven ! Other than that, they're cute and smell nice, it's like the best of both worlds 😆
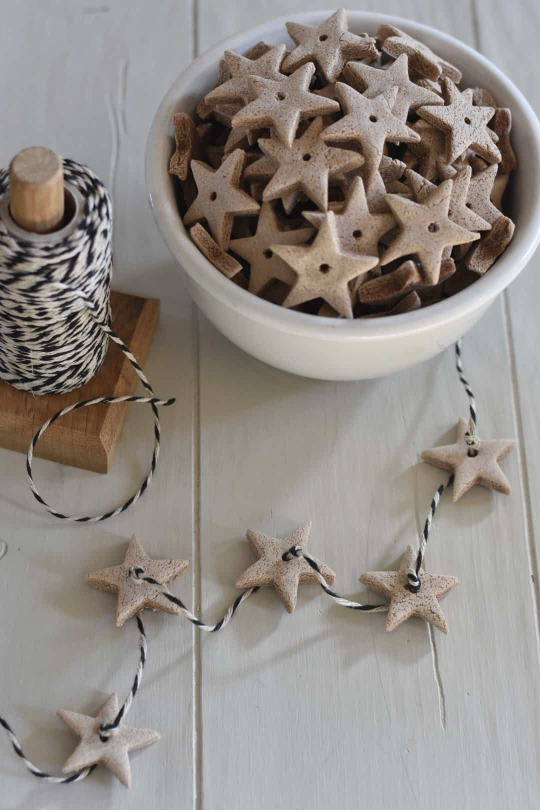
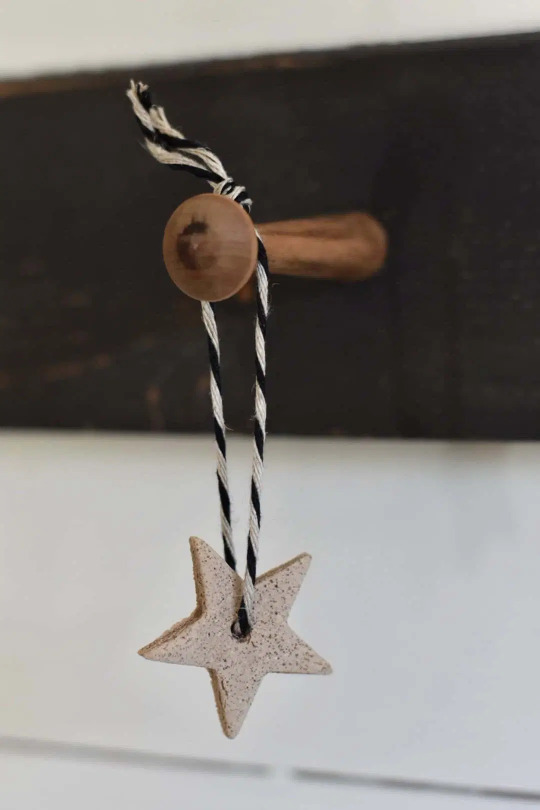
Christmas Bunting Difficulty: 🌟🌟 I love bunting, not only Christmas themed, but all year round !! It's my favourite wall decoration and makes my room feel like I'm having a party every day 🎉

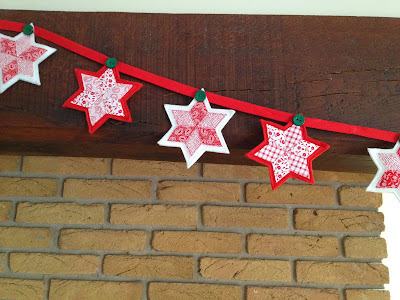
I also found some other bunting patterns in different shapes, these ones are more holiday themed ! But that means that they're a little more difficult to make. Here's the links for star and Christmas tree patterns. Difficulty: 🌟🌟🌟

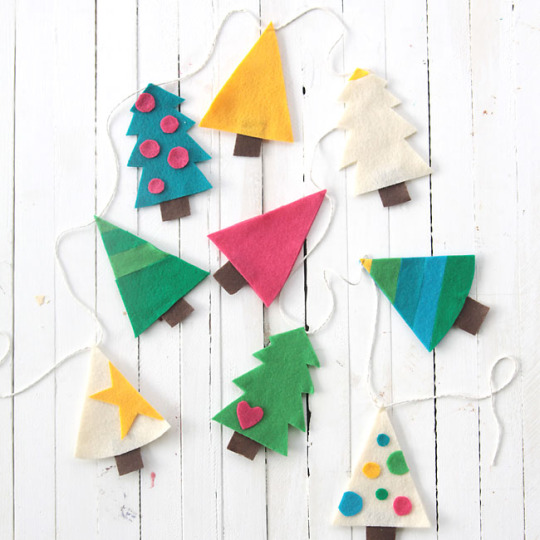
And also, another one because I just love bunting. This one's Christmas tree shaped but is much easier because it doesn't require any sewing ! Difficulty: 🌟
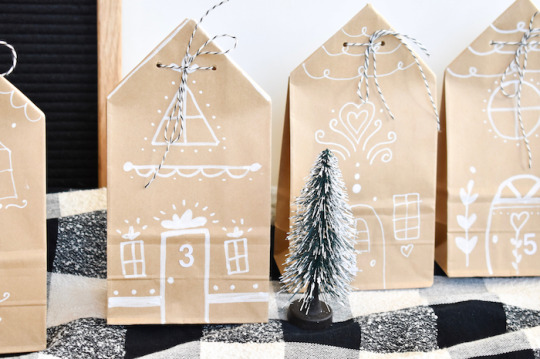
Gingerbread House Gift Wrapping/Advent Calendar Difficulty: 🌟 These ones are very similar so I grouped them together. Decorating brown paper bags with white markers to make little gingerbread houses ! Which you can use for wrapping presents but also to make a whole village for an advent calendar 🏡

Fabric Paperchains Difficulty: 🌟🌟🌟 I love paperchains but they always tear when I try to make them. These one's won't though and because they have velcro you can mix and match the patterns when you get bored of them 💭

Gingerbread House Card Difficulty: 🌟 You can probably tell I love gingerbread houses. I just think they're so cute and Christmassy ! And it would be so fun to make these cards but also everyone would be so happy to receive such a cute card ! 🌈

And that's all !! I might update this post as I see more crafts during the month but I think this is a good list to start off with. Also if anyone does any of these please post a picture ! I'd love to see them 🥰💖
#sfw agere#agere#sfw age regression#sfw regression#age regression#agere little#agere aesthetic#agere caregiver#crafts#arts and crafts#christmas#holidays#holiday crafts#christmas crafts#sewing
81 notes
·
View notes