#windows 11 tutorials
Explore tagged Tumblr posts
Text
5 Alternatives to Windows Features That Microsoft Dropped
Microsoft often updates Windows 11 with new features but can also remove ones it considers outdated. If you've lost a program or app after an upgrade, don’t worry—there are plenty of alternatives available. Let’s check out nine replacements for the Windows features Microsoft has dropped.
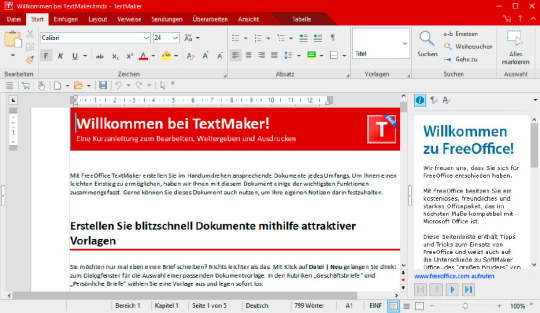
Find a suitable replacement for WordPad
Microsoft has declared WordPad obsolete, so it will no longer be updated and will be removed in Windows 11 version 24H2. The company advises switching to Microsoft Word, which is a paid option.
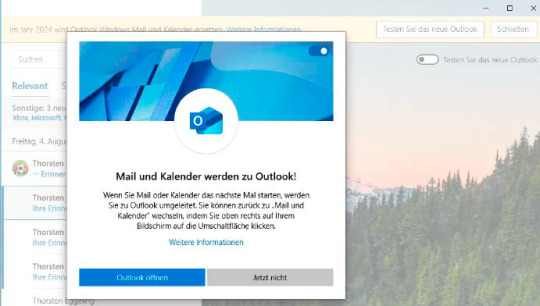
Should I switch from Windows Mail to Outlook?
The Mail and Calendar app, which replaced Outlook Express, is designed for handling IMAP and POP3 emails. Its successor, "The New Outlook," has been available to Windows 10 and 11 users for a while. The original Mail and Calendar app will be fully discontinued by the end of 2024.
Currently, users can switch back to the old Mail app from "The New Outlook," but this option only lasts for the current session. If you restart the app, it will automatically revert to "The New Outlook."
Clean up Windows quickly and thoroughly
Over time, your PC can become cluttered, which can slow it down and lead to errors. Disk Cleanup has been a part of Windows since Windows 98, but its days are numbered. Although it’s still available in Windows 11 23H2, Microsoft now recommends using the options found under System > Storage in Settings, even though these options offer fewer features than Disk Cleanup.
When Disk Cleanup is eventually discontinued, Cleanmgr+ will serve as its replacement.
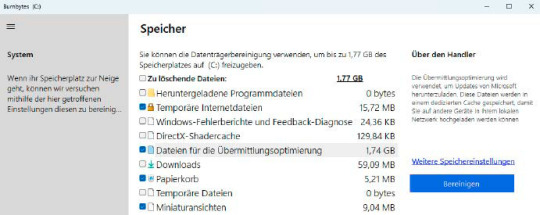
To use Cleanmgr+, open the tool and select "Run as Administrator." The package includes two programs; choose between them at startup. After selecting Cleanmgr, the Burnbyte tool will launch, presenting a drive selection window similar to the Disk Cleanup interface.
Start by selecting the system drive C:. Once you click OK, Burnbyte will show a clear interface detailing the different areas and the space they occupy on your hard drive. Check the options you want to clean and click "Clean Up." Be sure not to check "Download" if you want to retain the files in your download folder.
Uninstall programs and apps faster
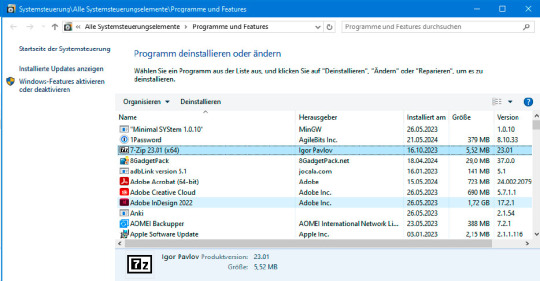
In Windows Settings, you can uninstall programs by navigating to App > Apps and features (or Apps > Installed apps in Windows 11). Unfortunately, you can’t uninstall multiple programs simultaneously, and some applications might leave residual files behind.
In Windows 10, you could also uninstall programs through the Control Panel under Programs and Features, which was more user-friendly. This option has been removed in Windows 11.
Expand or collapse the context menu
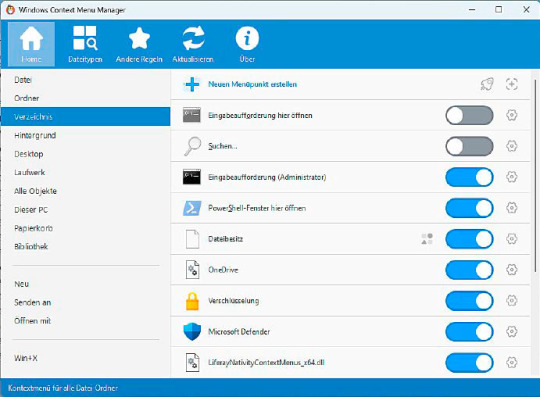
In Windows 11, right-clicking on the desktop or in Windows Explorer brings up a context menu with just a few options. While this streamlined menu helps avoid clutter when many programs are installed, it may limit quick access to certain features.
To see all available options, you need to select "Show More Options" from the context menu or hold down the Shift key while right-clicking.
#Windows Alternatives#Windows Features Alternatives#Windows 11 Tips#Windows Features Guide#Windows 11 Upgrades#Windows Feature Fixes#New Tools for Windows#how to#definite solutions#windows 10 tutorials#windows 11 tutorials
0 notes
Text
A Complete Guide on how to Fix & Optimize The Sims 2 on Windows 10/11
I've made a video tutorial and written guide on everything you need to know on how to Fix & Optimize The Sims 2 on Windows 10/11, with Performance, Stability, and Graphics Enhancements.
Watch the Video Tutorial on YouTube:
youtube
Read the Written Guide on my Website
#sims 2#the sims 2#ts2#sims 2 2024#sims 2 windows 11#sims 2 windows 10#fix sims 2#graphics rules maker#sims 2 RPC#sims 2 4gb patch#Empty standby list#empty standby memory#sims 2 shadow fix#sims 2 George#Sims 2 Settings#Sims 2 Ultimate Collection#Sims 2 Resolution Fix#Sims 2 tutorial#Sims 2 help#Sims 2 crash fix#Sims 2 error fix#Sims 2 video#BellaDovah#Youtube
223 notes
·
View notes
Text
How to Download Digital Witch Mayura
@lolmeowaj

First you have to download SSP, the program you can use to run her.
Once downloaded, attempt opening SSP by pressing the ssp.exe file
If it's running, this character should appear on the screen. Please make sure you don’t leave ssp in your downloads or you might get a fatal error and have to reinstall. I suggest just putting it on the computer itself.

Mayura Download
To change her to Mayura, download the RAR file from this site. Once downloaded, extract her files and put the "Mayura_v350" file into the "ghost" file of SPP. You can change the file name if you'd like.


Now, try running the program again and press Mayura in the "call ghost" section

Now, she should appear on screen. You can close the other ukagakas if you'd like.

Mayura English (Poor English, Though)
Go here and click on Mayura at the bottom, and then drag and drop the file onto Mayura on your desktop. It should show you a few options, and then she'll begin speaking english.
Mayura Outfits (Shells)
You can obtain most of her alternate outfits here. Just drag and drop the items and then go to "shells" and it should be added.
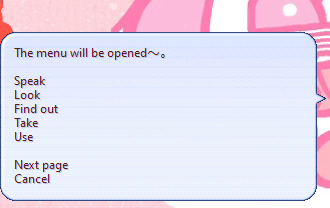
And that's mostly it!! You can download other Ukagaka from other archives online, just be careful what you download so you don't download any malware!! And here's other Ukagaka information from the archive here!

#digital witch mayura#2000s web#ukagaka#webcore#mayura#windows 11#moecore#moe#tutorial#kawaii#anime girl#mayura ukagaka
51 notes
·
View notes
Text

The Evolution of Hacking: From Cyberpunk Fantasy to Real-World Reality
Hacking has been a part of internet culture for as long as there’s been an internet to hack. For some, it’s a rebellious act—tearing down the walls built by corporations or governments. For others, it’s an artform, a way of playing with systems, seeing how far you can push boundaries. But what does hacking really mean today? And why does it still capture our imagination?
Historically, hacking has been portrayed as a dark art. Think back to movies like The Matrix or Hackers—hackers as antiheroes, taking down the system from the inside. But while these portrayals are often exaggerated, they did reflect a truth: hacking represents a desire to reclaim power and control. In a world where tech companies and governments collect personal data and monitor our every move, hacking is one way to level the playing field.
In the real world, hacking has taken on many forms. There’s ethical hacking, where people are hired to test systems for vulnerabilities, and there’s black-hat hacking, which involves illegal activities. But even those who engage in illegal hacking often see themselves as part of a larger rebellion against control and surveillance.
It’s easy to romanticize hacking, to see it as this cool, underground world of rebellious acts and revolutionary potential. But the reality is more complex. Hacking today isn’t just about taking down the man; it’s about finding flaws, building something new, or even just learning how things work beneath the surface. It’s about pushing boundaries, challenging authority, and questioning the systems that run our world.
And perhaps that’s the real reason hacking still resonates with so many people. It’s not just a skill or a rebellion—it’s a form of empowerment. It’s the ability to break free from the constraints placed on us, even if only for a moment.
In a world where everything feels so rigid, so controlled, hacking is the ultimate act of freedom. It’s a reminder that the digital world is malleable, that we can create our own paths through it, and that the rules are often made to be broken.
#hacking#ethical hacking#wifi hacking#password hacking#hacking techniques#hacking tools#atm hacking#hacking guide#hacking skills#hacking device#israel hacking#hacking mindset#israeli hacking#hacking tutorial#wireless hacking#black hat hacking#whatsapp hacking#python for hacking#hacking windows 11#how to learn hacking#government hacking#wifi password hacking#beginner hacking guide#why russians are hacking#state sponsored hacking
4 notes
·
View notes
Text
good morning rockinsquad today we will be attempting to downgrade to windows 10
#ive been putting this off for too long and windows 11 is shit and fart#plus most of the tutorials i have TRRIIIIEEEDDDDDD to follow were only for windows 10. do you Know how bad it feels to knkw that most of the#windows tutorials are Just For Windows 10
6 notes
·
View notes
Text
2 notes
·
View notes
Text
PSA: Sharing files from an andriod phone to your windows PC via bluetooth is easy and painless!
We've all been in a situation where you have some photo or file on your phone and it has to get onto your PC for some reason. This often involves uploading it to a third party service like google drive, or sending it to yourself on discord, or plugging in a cable and navigating the unfamiliar android file structure to find the file in question. Listen, there's a better way!

left click on that little arrow on your task bar, then right click on the bluetooth symbol
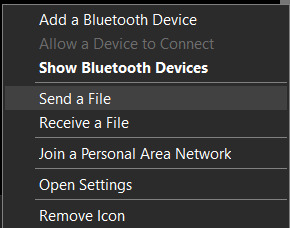
You should get another menue like this. From here you can click on "Recieve a file". That will put your computer on standby mode. Then you go onto your android phone, find the file or photo you want to send, use the "share" widget, and pick bluetooth. Your computer will show up on the list of devices to connect to, so tap on that!
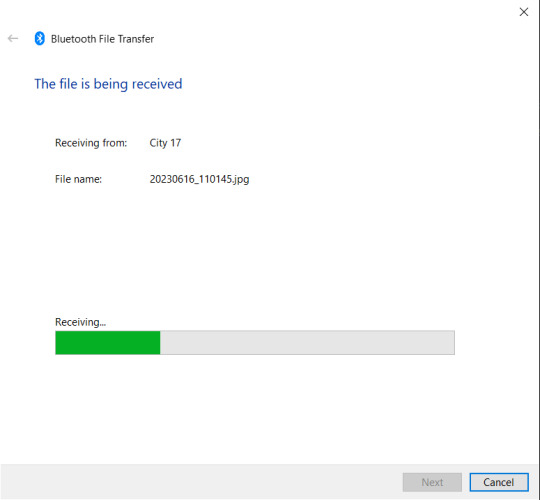
Yay! now you're receiving the file!
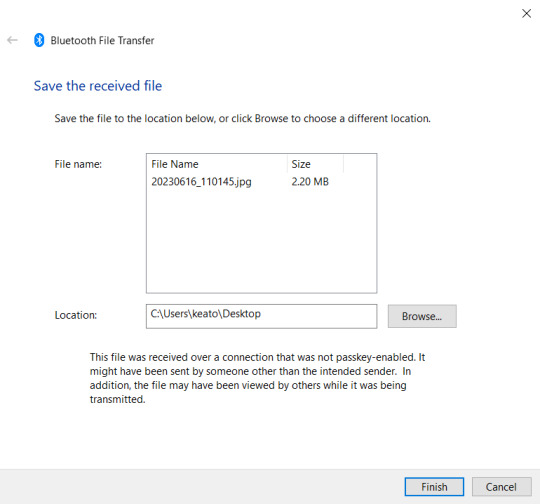
Once the transfer completes you get this helpful screen that lets you pick exactly which folder you want to send it to so the file doesn't get lost.
You can do this with as many files as you want in a big batch. It doesn't take any matching cables or ports, it doesn't even take internet. It's compatable with basically every single android smart phone (and probably some old feature phones could do this too).
We always assume that the bluetooth standard is only for audio and sometimes game controllers, but you can actually do so much more with it.
#yeah it's not as pretty as airdrop but it gets the job done#No clue if/how this works with iphones and macos#no clue how this works on windows 11 because I do not endorse windows 11 it is an affront to god.#bluetooth#tech tutorial#you should know#tech psa#windows 10
2 notes
·
View notes
Text
0 notes
Text
How to configure SSL for WAMP server
The WAMP server (Windows, Apache, MySQL, PHP/Python/Perl) is a software stack designed to create a local development environment on Windows. It bundles “Apache”, a web server to host websites and applications, “MySQL”: A”, a relational database management system for managing data, and “PHP/Python/Perl”, a programming languages for server-side scripting. In this short article, we shall discuss how…
#configure HTTPS for development server#configure SSL for WAMP server#enable HTTPS on WAMP server#enable SSL localhost#install SSL certificate WAMP#Microsoft Windows#secure WAMP server website#secure WAMP server with SSL#SSL#SSL 3.0#ssl certificate#SSL certificate installation WAMP server#SSL configuration tutorial WAMP#SSL Encoding Format and Extensions#SSL setup for localhost WAMP#WAMP HTTPS configuration guide#WAMP server HTTPS localhost#WAMP server secure connection#WAMP server SSL setup#Windows#Windows 10#Windows 11#Windows Server#Windows Server 2012#Windows Server 2016#Windows Server 2019#Windows Server 2022
0 notes
Text
youtube
Simple beginners guide how to build create WebHID API Electron JS Desktop App for windows 10 & windows 11. Electron webhid api Desktop App html js Script: https://bit.ly/4egIyAw or https://drive.google.com/file/d/1euT1JxtpOgdZwVpA5C1nXOZRZ7bnbsoa/ Electron JS Desktop App Project Tutorial for Beginners: WebHID API Example w/ Source Code
#tutorials#how to#programming#arduino#esp32-s2#esp32#WebHID API#Desktop App#Electron#Electron JS#Source Code#Project Tutorial for Beginners#windows 10#windows 11#Youtube
0 notes
Text

canva join
#canva pro#canva template#canva tutorial#canva art#canva tips#graphic design#digital design#windows 11#adobe illustrator#microsoft windows
0 notes
Text
How to Show only Specified Control Panel Items in Windows 10
Follow the steps below to show only specified control panel items in windows 10:
Press Windows Key + R
Type gpedit.msc than click OK
Double click on User Configuration, Adinistrative 4. Templates, Control Panel
Now double click on Show only Specified Control Panel Items
Click on Enabled
Than click on Show and double click on Empty box and type item names as seen on Control Panel.
Close Control Panel and open it again.
youtube
#windows 10#windows 10 tutorials#windows10tuts#microsoft windows#windows 11#howto#definitesolutions#definite solutions#Youtube
0 notes
Text
youtube
#how to change ip address on windows 10#windows 11#how to change ip address#windows 11 ip address#change ip address#networking#tech guide#how to change ip#change ip address windows 10#how to find ip address on windows 10#how to find ip address windows 11#IP address Windows 11#windows 11 how to find ip address#computer networking#IP address Windows 10#troubleshoot IP address#How to find IP address#Windows 11 tutorial#command prompt#Youtube
0 notes
Text
youtube
After recent Windows updates from Microsoft, windows 11 start menu was not working and tryout lot of other options until found this solution. watch this video to find out the fix for windows 11 start menu or explorer problem.
1 note
·
View note
Text
Comprehensive Guide to Backing Up Your Data on Windows, MacBook, and Chromebook Laptops
In our increasingly digital world, the importance of data cannot be overstated. From personal photos and documents to business files and critical information, data is at the heart of our daily operations. This makes backing up your data an essential practice to safeguard against data loss due to hardware failure, accidental deletion, or cyber threats. In this comprehensive guide, we will walk you through the process of backing up your data on Windows, MacBook, and Chromebook laptops, ensuring your valuable information is secure and easily recoverable. click inside for the tips!
#writing#quotes#macbook#windows 11#computer#technology#tech#phones#new gadgets#gadget news#back up#data#tips#guide#tutorial#student#school#college#learning#education
0 notes
Text
just figured something out: if you're annoyed by the windows search also giving you web results you can disable it the following way:

in settings, go to privacy & security and then to search permissions

and then under web search simply turn the "let search apps show results" to off
hope that helps!
0 notes