#sims 2 bodyshop help
Text
Meshing help please!

The mesh has 3 groups: top, noblend, fat morph
"Top" is just the hands. All the adult meshes are fine but with the elders and teens I must have done something wrong as they all lose the skintone on the hands.
How do I fix this issue?
23 notes
·
View notes
Text
Can anyone help me with the settings of Texture Tools Exporter 2023 for saving PNGs as DDS? I use Photoshop 2022 🏴☠️
I'm just a small Simblr account, so reblogging is appreciated


It looks way different from the NVIDIA tool that Poppet demonstrated in their tutorial (link: https://poppet-sims.tumblr.com/dds)

5 notes
·
View notes
Photo
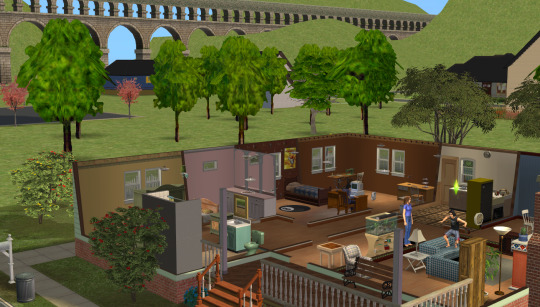
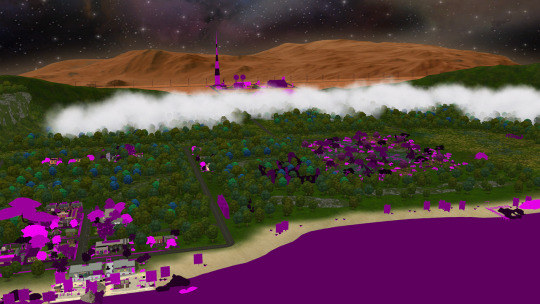
Finally starting to move Cudlow’s residents into their lots.
#ts2#sims 2#Cudlow#Cudlow Hood#Mirabelle Plum#Forrest Everett#but seriously I dont know how this will go#I set up my game on Windows 7#I remade my hood to have less place for adding lots#The hood is not even halfway decorated#and I'm still getting a lot of pink flashing and crashes when in cas or leaving lots#sigh#I even deleted reshade for now (which helped a little I think) and I'm just using post processing mod while setting everything up#but at least game and bodyshop are opening up much faster so at least there is that :')
105 notes
·
View notes
Text
yesterday bodyshop worked fine for me, but today I can't open the program because it crashes as soon as it starts.... help me please help me I'm opening it from the last ep and I've already cleared the cache.....
6 notes
·
View notes
Text
bodyshop help
hi! so i've been having this issue in bodyshop where whenever i import a new cosmetic into the game, it completely blurs the rest of my sims features. this has happened with both simple recolors and conversions now so i was wondering if anyone knows why this is happening and how to fix it?
BEFORE:

AFTER:

#sims 2#ts2#bodyshop#s2 help#this image is kind of ass but hopefully u can see what i'm talking about 😭
9 notes
·
View notes
Text
I have managed to break bodyshop I think. Here's my problem. Every time I clone an outfit, it reduces the texture size by one mipmap level. So if the outfit has a 1024x1024 texture, the project file will have a 512x512 bmp in it. Cloning this new file will give me a project file with a 256x256 bmp. Yes I tested, and it will go down to 32x32 but then bodyshop crashes if that one is cloned.
I can still extract and replace the textures at optimal size in SimPE and the packages work in game so it won't stop my progress, but loading the original texture size in the bodyshop project file won't allow it to update the preview or import. It is super annoying not to be able to accurately preview in bodyshop.
I am using the SP09 bodyshop from UC, and I believe the only thing I've done to it is install a window expander (from clean ui maybe?) and brightness fixer. Maybe nostupidexpressions? Seriously basic stuff only.
If you know how I managed to break bodyshop, let me know please? Or if not, feel free to leave me a big L or whatever. It's kind of funny and I am aware :)
8 notes
·
View notes
Photo


Having this awesome thing happen where the fat morph of this Top just...overrides the Bottom morph? I don’t really know how to describe this - the Bottom (shorts) fat morph works just fine with every other outfit, but when paired with this Top, it doesn’t change.
All the values I’m showing from Milkshape and SimPE refer to the top, because that’s what must be causing the issue. Problem is, I can’t figure out how to fix it. Anyone seen something like this before?
P.S. I try to include morphs in my LBB creations but its already a pretty niche shape and I personally don’t use it for morphs. So if I can’t fix this I will just delete the morphs and it will come in the standard shape only.
3 notes
·
View notes
Text
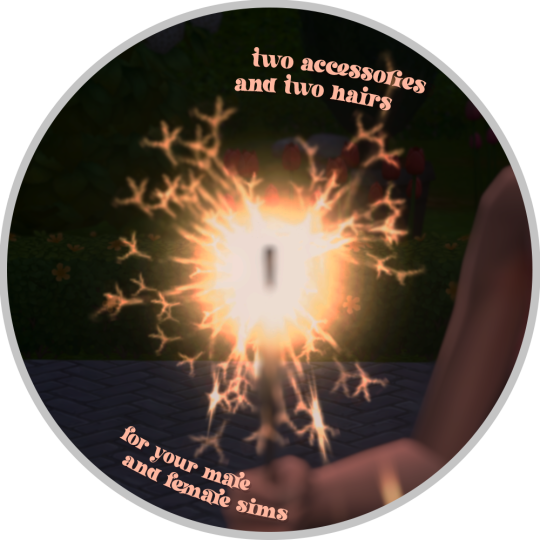

wooo, have another cas dump, this time for january 2024! 2 3 (sorry, added one last-minute!) accessories & 2 hairs for your beloved simmies! there's no particular theme, i just felt like playing around in bodyshop lol 😆
there are 5 items total, half of the previous dump, which somehow took even less time to fiddle around with and upload lmao. all are for teen-elders and the accessories are unisex. this time i decided to have two download options: you can download the entire dump, or the individual items below! more info under the cut 👇
DOWNLOAD: SFS | MF 🎇
credits go to @dogsill, @johnnysimmer, @pralinesims, @madlensims, and @jny-sims for the original ts4 meshes & textures of these conversions! and of course to @antoninko for the afterglow hair system the hairs come in, plus @roxanna-moxie for helping me with the dominic hair!
HAIRS INCLUDED
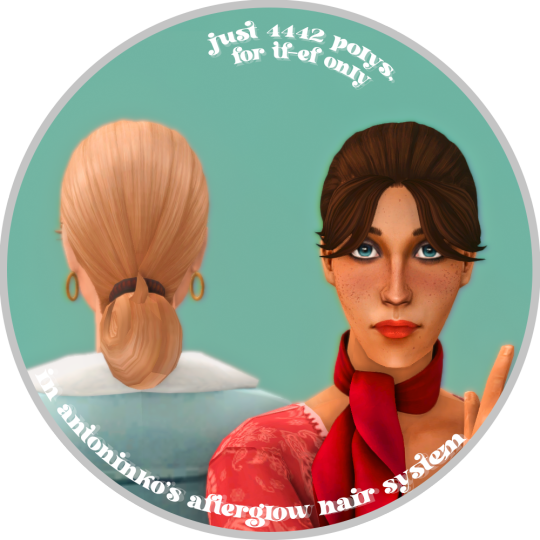


4T2 DOGSILL'S LEILA BUN HAIR ( SFS | MF )
- requested by miik
- 4442 polys
- tf-ef
- antoninko's afterglow hair system
4T2 JOHNNYSIMS' DOMINIC HAIR ( SFS | MF )
- 8924 polys
- tm-em
- smooth-boned, animated (tips)
- antoninko's afterglow hair system
ACCESSORIES INCLUDED
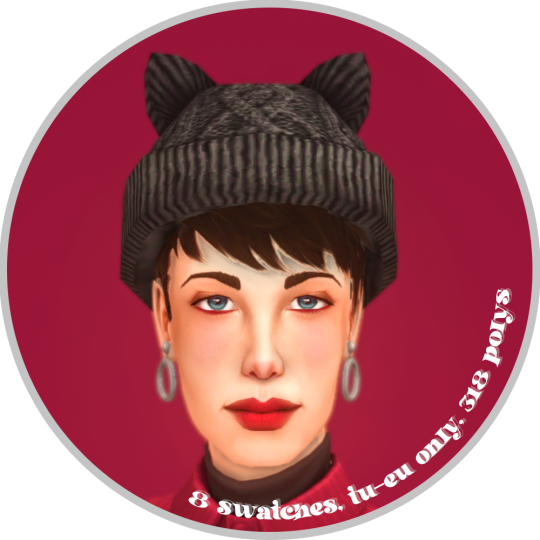


4T2 MADLENSIMS' NIVIA HAT ( SFS | MF )
- sorry for the typo, it was very last-minute!
- 318 polys
- tu-eu
- 8 swatches
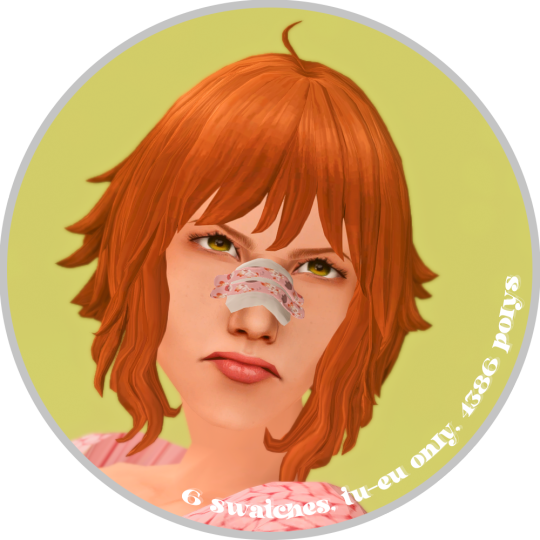
4T2 JNYSIMS' NOSEBAND ( SFS | MF )
- requested by @shibarulata
- 4386 polys
- tu-eu
- 6 swatches
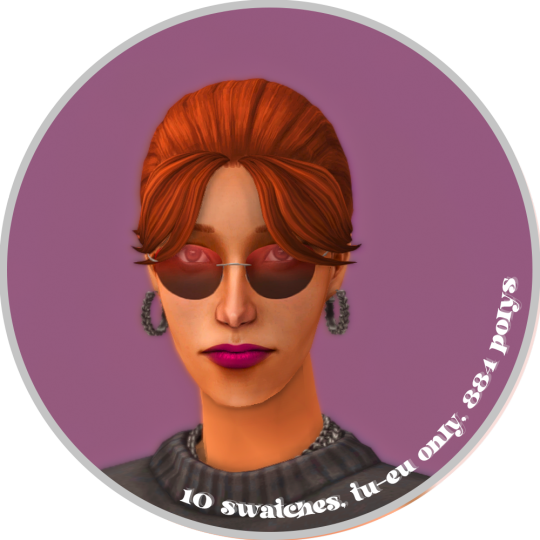
4T2 PRALINESIMS' PARADOX GLASSES ( SFS | MF )
- 884 polys
- tu-eu
- 10 swatches
SWATCHES

Madlensims' Nivia Hat

JNY's Noseband
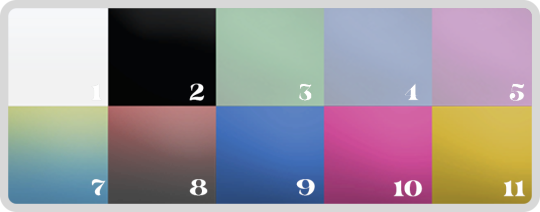
Pralinesims' Paradox Glasses

if there are any issues that you find with this dump, please don't be afraid to let me know! happy simming, and when you download this, do keep in mind,

#sims 2 download#the sims 2 cc#ts2cc#s2cc#sims 2 cc#the sims 2#sims 2#4t2#4t2 conversion#4t2 cas#suggestions#sims 2 suggestions
204 notes
·
View notes
Text
How I draw: Silver Metallic Buttons for Sims 2 Textures
As we all know, Sims 2 doesn't really appreciate large file sizes/dimensions for it's textures, so sometimes you have work very closely with the individual pixels. Here is how I draw buttons. Video is sped up so don't feel like you need to draw as fast as me!
Side note: this tutorial is created on the basis that you already know how to use the basic functions of Sims BodyShop to extract the texture file. There's plenty of tutorials out there explaining that so please don't ask me to clarify on that part. Anyway, on to the buttons...↓↓↓
What you need:
A PC
Digital Drawing app (like Photoshop, Krita etc)
A Graphics Tablet with pen - you could try this with a mouse but I wouldn't recommend!
And obviously Sims 2/Sims 2 BodyShop
First off, create a new layer - we don't want this button permanently stuck to our base texture. Then I get a standard hard edge brush (I use Krita as my drawing software, so just use whatever hard brush is available in your preferred software/app). Because I'm making relatively small buttons, I make my brush 7.09px in size. Select a mid to light grey colour as the base. Make a single circle.
Then decrease the brush size to be nice and small. As a comparison to my 7.09px circle, I decrease to 0.01px for this next step. Choose a slightly darker grey colour and lightly sketch in a 'semi-circular line' about 3/4 of the way around just in from the edge of the circle. By lightly sketching - and not pressing down hard, you'll get varying tones on each pixel to represent different reflections on the 'metal'.
Next choose a darker grey again, and lightly sketch around the similar area as the last colour, but don't be too fussy on hitting the same pixels - we want varying tonal values for our shadows.
Then choose white and lightly sketch the 'catch light' part of the button. This doesn't need to be right in the centre, in fact it's better if it's off to the side, or towards the top more. We're not always facing directly towards a light source so this creates a more realistic lighting effect. You'll see me select the same mid to light base grey I used just to lightly dust over the edges of the white area to soften it a tiny bit (only do this if your white edge is a little to crisp).
After that I go back and forth between a few different tones of grey to lightly sketch over the parts we haven't really drawn on yet. This just helps create some gradual shading that enhances the 'roundness' of our very flat, very 2D button texture.
Once you're happy with the shadowing (remember it looks somewhat janky this close up, but you can always zoom out to see if the button looks more smooth when further away), you can then make another layer, and drag it below your newly made button layer in the layer menu. Select a soft edge brush and increase the size to slightly wider than your buttons overall size (I chose 9.14px compared to my 7.09px button)
Choose black from the colour wheel/palette and lightly build up the shadow underneath the button, gradually increasing size and opacity until desired tone. If the colour of the 'garment' in this texture is light then keep the shadow to a minimum, if it's dark then the shadow needs to be deep enough to show up.
Zoom out and inspect how this button looks further out. If you're satisfied, then merge the button and shadow layers together, copy/paste it as many times as needed for the garment you're texturing and Voila! You made buttons for a Sims 2 Texture!!
Feel free to ask any questions below - I'm definitely no professional, especially in creating tutorials so I'm more than happy to clarify if something didn't make sense.
#sims tutorial#digital drawing#retexture#drawing tutorial#ts2#the sims 2#digital art tips#lraerosesims#lraerosesims-tutorials
89 notes
·
View notes
Text
Sims 2 on Windows 11
Alright, the new computer with Windows 11 is up and running and Sims 2 has been installed. These are the steps I took to get it running and looking pretty:
Installed the game through EA App
I installed "George" so I won't need to start the game up through EA App and let it waste resources and spy on me.
I ran the 4GB patch on the Sims2EP9.exe and TS2BodyShop.exe
I ran Graphics Rules Maker and tweaked things through that enabling it to use my full texture memory etc
I installed the EmptyStandbyList since without it I got pink flashing very quickly
????
Profit.
If this helped somebody else out, you're welcome! :)
(long, pretty messy and image heavy version of this process written as I did it is behind the cut. I mean it, it's very long!)
added my graphics card in the video cards file manually
did the common graphics rules tweaks (these) manually
applied 4gb patch to bodyshop and game exes
tested bodyshop, it started up but has no smooth edges, otherwise textures are good and new projects export and import as supposed. 4GB patch works as supposed. It'll likely require tweaking it through nvidia control panel so leaving that for later.
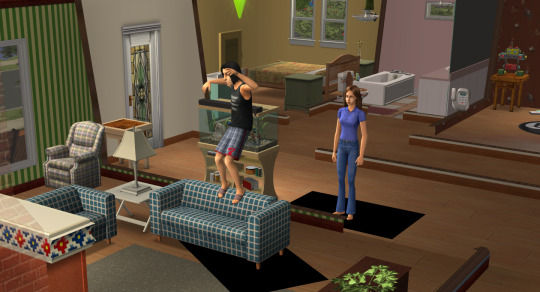
Started up game, after turning the edge smoothing on it looks this good (no mods thus the boxy shadows):
6. However my log is reporting only 1gb of RAM for the game to use, will have to reapply the 4gb patch and try again. But it's using all 12 gb for texture memory so that's cool, I probably won't need to worry too much about pink flashing but I'm going to stress test it a little.
View distance maximized:
Shaders work:

"I probably won't need to worry too much about pink flashing" I said earlier and then left the lot and:

:'D But looking at task manager I see my standby memory has filled up the remaining RAM already so this is actually working as expected, I just forgot one step.
7. installed the EmptyStandbyList.
8. This is where I closed game, applied the standby memory fix, rechecked my exe and remembered that you weren't supposed to run it in compatibility mode so I turned that off but just in case I also reapplied 4gb patch and restarted the game. Now it's correctly showing me 4GB of RAM to use for the game so that should be handled.
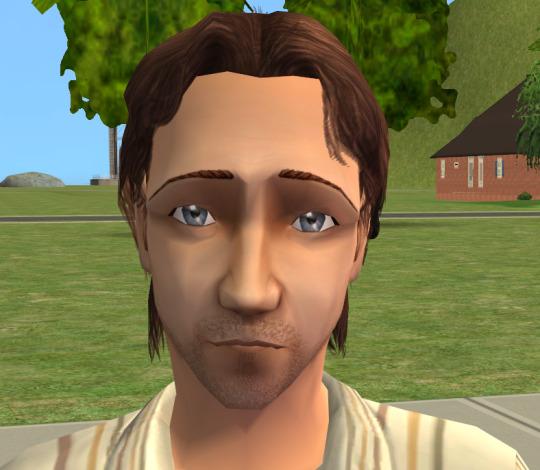
Side note: Mr. Humble spawned, I haven't seen him for years as I have mod to stop him from appearing. Was this sim always so ugly? It looks like his face is melting.
No pink flashing after leaving the lot this time:

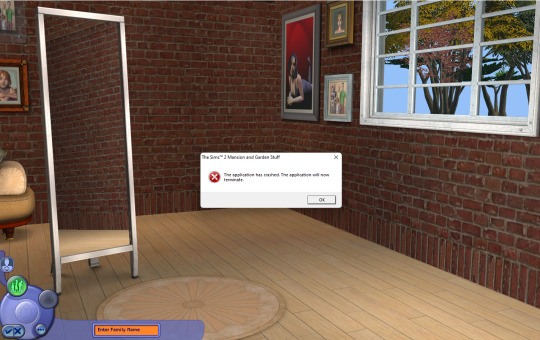
But it crashed when I clicked on the sims icon.
New try, game restarted and this time we'll go straight to CAS and... *immediately gets distracted* There are this many bin families by default?

I've used clean templates for years so this was an unpleasant surprise. I don't like them, you're all getting nuked soon once I've made sure the game runs as supposed and can go ahead installing clean templates. So then to the CAS, it loads and I click to create a sim and....
Oh. Okay then. :| Guess I'm missing some tweak still. Let's try graphics rules maker instead, it should also easily fix my resolution etc since I forgot to do that manually.
One restart later, are you fucking kidding me?
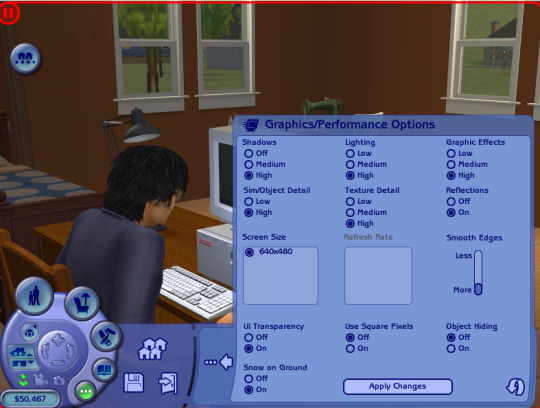
but hey, nice crisp textures. Too bad it's so tiny I can't see shit. (I realized this was my error after a moment, I thought graphics rules maker said minimum resolution in the spot I didn't change but it actually says maximum, so I fixed that and all is good) But I'm gonna ignore that now and try loading CAS again, pls work.
.... Hell yeah, at least that finally loaded up as supposed.

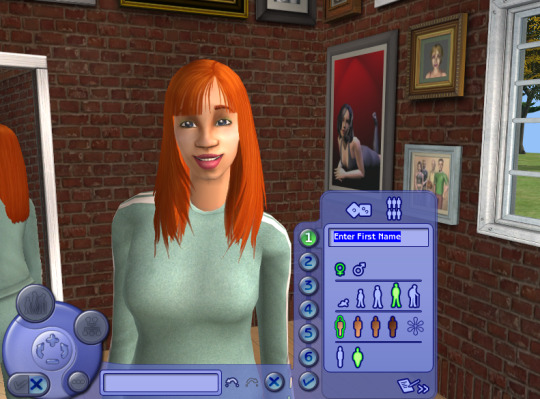
She is beauty, she is grace, maxis defaults really ruin her face.
After the final restart with screen size etc fixed I went back and forth to different lots trying to make it flash pink and it never did so I'm going to say this was success.
So to recap:
Installed the game through EA App
I installed "George" so I won't need to start the game up through EA App.
I ran the 4GB patch on the Sims2EP9.exe and TS2BodyShop.exe
I ran Graphics Rules Maker and tweaked things through that enabling it to use my full texture memory etc
I installed the EmptyStandbyList since without it I got pink flashing very quickly
????
Profit.
And seriously, that's all, even if this post ended up this long.
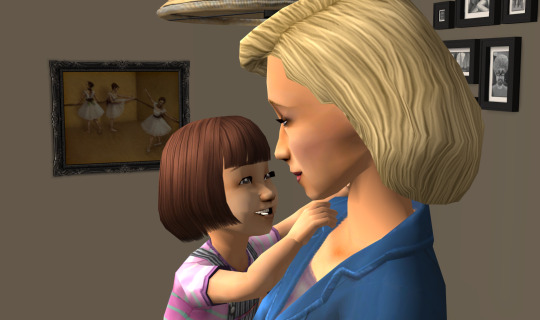
I still need to get smooth edges in bodyshop but that will likely be done with nvidia control panel rather than texture settings. Here's one more random maxis sims image to end this with a pretty picture instead of just huge wall of text.
#digi's ramblings#setting up the game for Windows 11#sort of tutorial#long post#my favorite part was needing to download and install 4 different things to get this game working#but it was pretty easy in the end#Now I just need to install everything else still....
582 notes
·
View notes
Text
I'm taking a break lol
I'm literally so exhausted with The Sims 2. Like...why am I still crashing at all? I've taken all the necessary steps. Yeah sure I could do the 50/50 method but jeez it's such a tedious process.
I wish there was an easy way to find what is EXACTLY wrong with my game when it randomly crashes, like...why the FUCK are two objects clashing with each other? Like leave me alone, I just want to play my game.
I'm using RPC and yet the 4 GB patch is somehow still not applied if I check the logs. I've gone to Reddit and nobody could help me to point out why the 4 GB patch is not applied.
I'm giving up. I found it to be relaxing to play Old Town but just as I was enjoying myself with shopping for CC to create lots...crashes again.
It's such a fucking exhausting game to play with these issues all the damn time. I can't enjoy myself for just a minute and the sad thing is I was really enjoying it for a while. I just wanted to play my game without my usual worries of accuracy or whatever.
Last time this happened I didn't touch The Sims 2 for MONTHS and somehow...the issue resolved on its own. Like wtf happened? The mods are SETTLING themselves???
Anyway, I might still be posting Bodyshop stuff. At least the crashes there are more bearable. But I swear to god I'm so fucking sick of The Sims 2 as much as Iove it. It really frustrates me cause this is supposed to be my relaxing escape from the world.
35 notes
·
View notes
Text

Welcome to the Starter Set for the Amphitrite Genetic Hair Project. This set comes with the Amphitrite Hairtone (Required), a variety of masculine/feminine hairs, 6 correlated eyebrows and 2 hairlines sorted into the Stubble category.
Features of the pack:
Hairs pass down through the generations and are set to Recessive, same as Blonde and Red hairs in the vanilla game.
Eyebrows and Facial hair have been correlated to the Amphitrite color and familied to their natural Poppet V2 counterparts, allowing elders to age up with eyebrows.
Hairs have been tested alongside additional custom hair bins and about half of the hairs come with greying amphitrite hairs.
This set and future uploads will not include genetic versions of other creator's Amphitrite textures. There will be a tutorial on how to set up hairs in this system using SimPE.
All hairs come with their meshes, Maxis amphitrite hairs are made to be used with my defaults for all the ages to work and are typically repo'd if possible to reduce file size. You will require the original Poppet V2 eyebrows/facial hair found in the links below in order for them to work properly.
Drawbacks are listed in the Keep Reading and I highly suggest reading it before installing. It also lists two mods that help alleviate an NPC thumbnail issue and a pie-menu option to help with elder hairs.
Amphitrite's Hairtone Hex Code: 00000080-4000-0000-0000-000000000000
Download: Simfile
Necessary Downloads:
Eyebrows: Loosiap's Foxy Eyebrows
Hairlines: Rudhira
A tutorial will be out soon detailing how to create your own custom bins with the correlated eyebrows/facial hair. Please stay tuned for them.
Credits: Loosiap, Rudhira, KittenInTheWindow, NewSea, Lifa, Lola, Krabby, RentedSpace, PlatinumAspiration, Anto, Kayleigh, Alienpod, SkySims, Roxanne-Moxie, Rio-Sims, and the many other Poppet V2 creators out there who helped inspired me to work on this.
Genetic hairs have some drawbacks due to current limitations of the game:
Toddlers through Adults cannot change their hairstyle currently. This is because the method used to correlate the hairs/eyebrows/facial hair hides the hair in CAS and Change Appearance. All hairs can be accessed in BodyShop regardless of age.
Elders can select Amphitrite hairs freely in both CAS and Change Appearance, so you could pick a hair as an elder and then revert to the age you want as a workaround in CAS.
When Sims age up into Elders, they will lose their hairstyle despite being available. This is easily fixed in Change Appearance.
Elders made in CAS cannot access the eyebrows and can only choose grey. They may also revert to grey when fixing their hairs in Change Appearance.
Elder Townies/NPCs have a higher chance of selecting unnatural hairs.
If you choose to remove these hairs at a later date, you will need to fix hair genetics in SimPE.
Familied hairs work, but come with two issues. The first is that if you have multiple custom genetic hairs in a bin, it will mess up the thumbnails in Bodyshop. The second issue is that if you attempt to use the same grey hair as natural hairs while it is familied, the hair disappears from the bin. It can still be accessed in-game by randomizing your sim in CAS, but it is hidden in both Bodyshop and CAS/Change Appearance.
Work hairs, bad haircuts and NPCs hairs work when familied, but are not currently included with this pack. If sims with genetic hairs do change into an outfit that changes hair color, typically the hair will be black/blond.
Advisable Downloads:
Elder NPC Thumbnail Glitch: No NPC Revert
Fix Elder hairs without a mirror: Gussy Up
23 notes
·
View notes
Text
Patchwork Sims Repository

While trying to help @ladyvenerasims find Ermelind's country chair set, she asked if I had more from PatchworkSims2 since she is making cottage style homes for her sims. I told her I would gather up what I could find on my pc and upload them to sfs.
The folder has sub-folders with lots, a few bodyshop, walls and floors, and compressed build and buy objects. The main folder is hit or miss on being compressed. They're from my massive half-done sort, organize, and compress folder of stuff I've accumulated over the years.
This is stuff I downloaded from the new and the old sites. More than half of my collection of goodies are build items.
Patchwork Sims 2 Repository Link!
103 notes
·
View notes
Text


☢️ade aura style 3 4t2☢️
welcome to part 2 of mine and my sweetie pie darling @socialbunny's cc collab! we have converted ade aura style 3 (!!! @blackswan-sims even though i realised i did the wrong number shh) and he retextured in poppet, and i retextured in my personal colours and textures. big thanks to dirk for helping with the simpe stuff while my pc and simpe were in intensive care
bodyshop pics under the cut and included in the rar, but on the preview, the right is poppet and the left is my hair texture.
cu-eu (poppet v2 has elders but mine dont because. im stupid)
13k polygons
dl @ sfs
credits - ade, poppet

my colours ^^^

poppet colours ^^^
118 notes
·
View notes
Note
on the subject of reducing texture sizes, have you experimented with only importing a single size for dxt images? i know that e.g. content made only using bodyshop sometimes (always?) only has the one size in the .package file, so in theory it would work generally, but i haven’t tested if the additional smaller images usually made by importing/building dxt impact file size or pink flashing in game.
Hi! You're talking about mipmaps and yep, I've experimented with them.
Yes, deleting them makes the file smaller, about 33% so to be precise. And yes, the texture works with or without mipmaps.
But no, I haven't seen any evidence that removing mipmaps would help with pink flashing. I recently deleted them from a big bunch of files to see if that would have any impact, and this is how my game looked like after doing that:
I don't blame deleting them for it since it was pretty unstable even before, but yeah. Didn't really help, either.
The thing about mipmaps is that they are a part of the game's texture memory optimization. This is a common technique that you can google more about, but in short:
Having them takes more memory than a texture without them, but in trade, they're supposed to make memory usage more efficient. The extra space they take is generally considered to be outweighed by the benefits they give for overall texture memory usage, rendering, and performance.
That's the factual theory. What really happens below The Sims 2's engine bonnet, we don't know (or if someone does know, please let me know, I'd love to have that info).
But what I do know is that deleting them didn't help with flashing in my game, and I also know that Maxis objects have mipmaps and the game is nearly impossible to get flash without CC. So personally, I'm not deleting them from my content.
#ask me anything#anon#sorry for the long answer#but sometimes a long answer ending with 'we don't know' is the right answer
40 notes
·
View notes
Photo

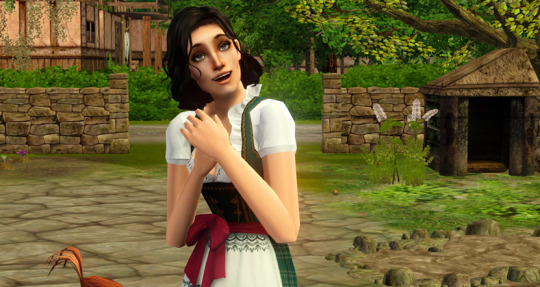
Some time ago, @namelesslibertad asked me how one would add tights to an outfit.
And truly, it is not difficult at all to do, so I’ve made a little tutorial!

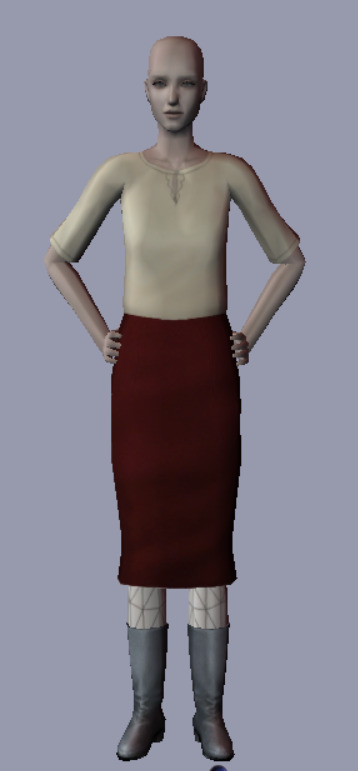
First, we will need a mesh to work with. I am using Bloom’s quite ancient elder skirt, separated from this seasons outfit.
It’s a nice little mesh! However, if it were going to truly be a part of an Outerwear outfit, we should have some leg coverage, no?
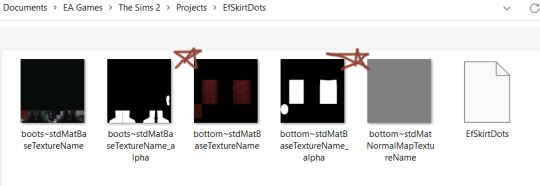
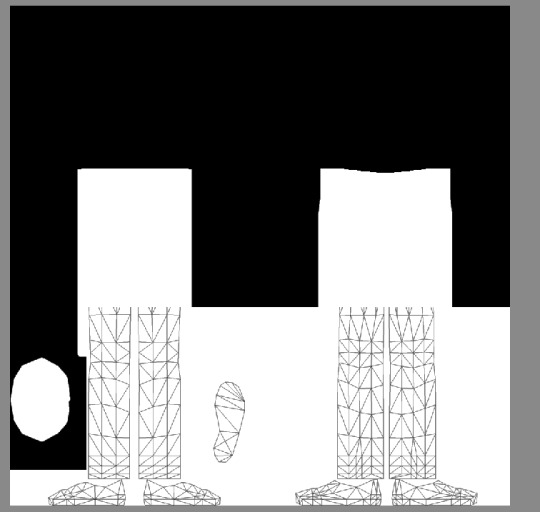
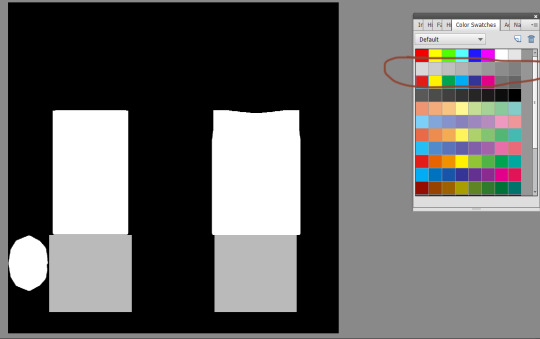
Once you have your clothing item in question in Bodyshop, and you have opened it in your Projects folder, we need to pay attention to the images files we have in front of us.
1 and 2 we don’t need to look at. This mesh is separated into groups, and the very first group is the boots. It’s the boots only and not the legs, so we do not need to mess with it.
If you want to know more about mesh groups aka subsets, @whattheskell‘s tutorial HERE is essential.
3 and 4 are what we want to look at. They are the TEXTURE of the legs and also the ALPHA of the legs. I’ll be saying the word ‘alpha’ a lot here, so if you do not know what that means: as mentioned in my tutorial about retexturing clay hair, the ‘alpha’ texture indicates where the texture should exist.
White means, “yes, texture”
Black means “no texture exists here”
Grey is in-between. Grey is what we want to work with; it’s how you can make sheer and semi-sheer tights.

Now you might be saying, “How did you know that the image file with the skirt texture would also have the legs available, you know, the place where tights go?”.
Well, totally optional step; you can go ahead and export the UV map (with a program like UVMapper) to find this out. The lower half of the texture contains the legs. @digisims2 explains this a little more right here.
Please know that even TS3 and TS4 conversions, while being mapped very differently from TS2 meshes, will still have a base ‘body’ map in one of the images files.
ALSO! When you open a clothing texture, you’re going to be limited to 1-4ish texture files to work with. So, you can just guess which one has the legs and undo undo if you are not correct. One of them has to have the legs texture!

Moving on!
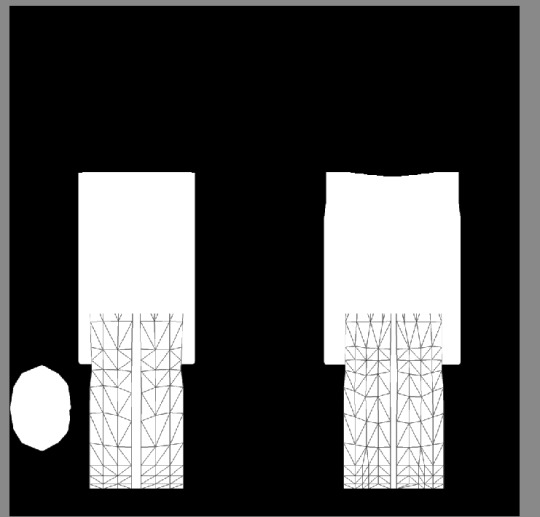
The skirt texture: that’s where the tights texture has to go.
If you are putting tights on an outfit, you can really just fill in with one color and it looks fine! Most tights are just one color. You can get fancy if you want.

Now for the alpha - you’re going to fill in 2 rectangles of white, grey or black here. The whiter, the more opaque. The blacker, the less opaque.
If you’re totally lost - grab a UV map. You can see pretty clearly what is legs and what is feet.

Clean it up, if you like! ‘
Fully remove the feet even, if you’re worried that the tights will end up somewhere they should not.

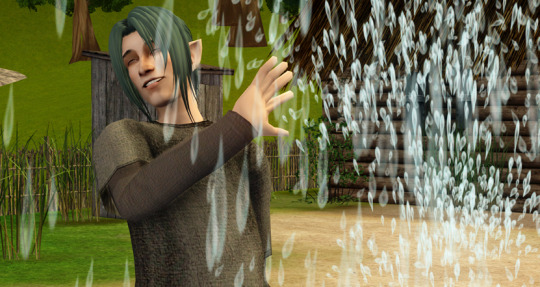
For the purposes of demonstration, let’s fill that all in with the brightest white you got.
See? Tights! But very dark, very floodfill tights.
If you were going for leggings and if you had a nice texture, that all white alpha would be great! But, we are talking about hose, here.
Also - we haven’t quite gotten all that we need covered. That white bit there is the sim’s skin. Not fashion.
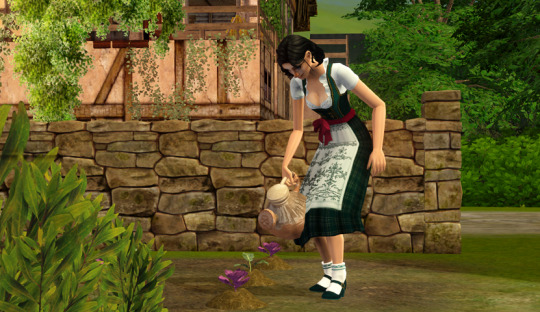
Let’s try a bigger section of alpha and a light grey this time.

You may have to play around with the grey scale to get the right result.
Also, I’d highly recommend you test your project on skintones S1-S4 to make sure that the alpha you choose works for light and dark tones. It also helps to catch mistakes.

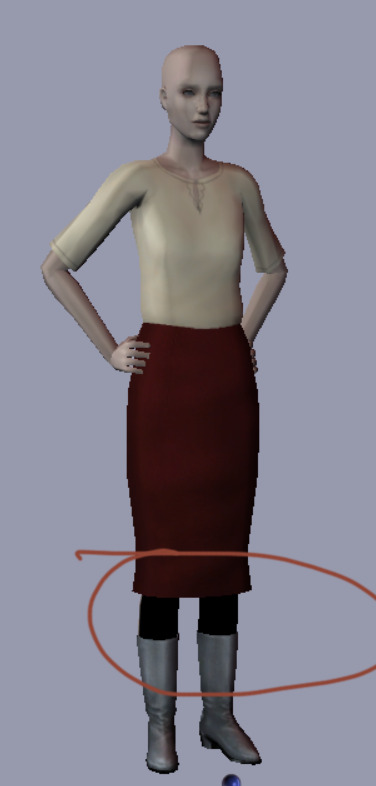
This is a little better! The full leg is covered, and they are more sheer.

You can go ahead and copy and save this UV map if you like, if you don’t want to mess around with SimPE or UVMapper or any of that jazz. Really does help if you’re lost about what goes where.

See?

Sinfully ugly texture though, haha.
Not grandma’s best look - but helpful for explaining.
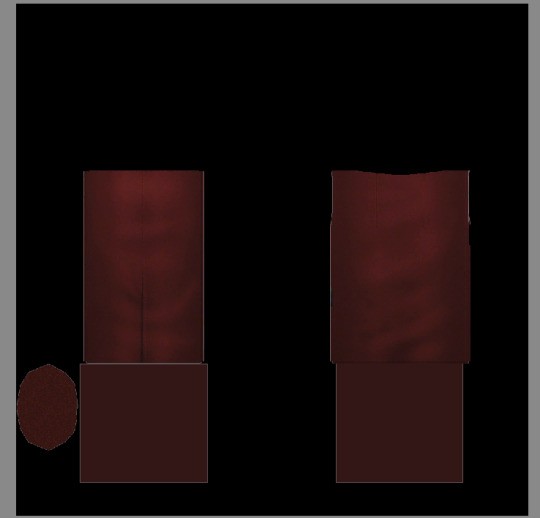
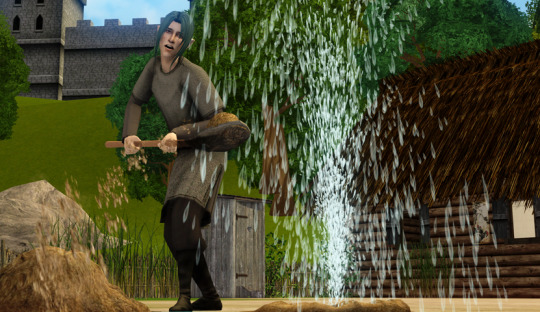
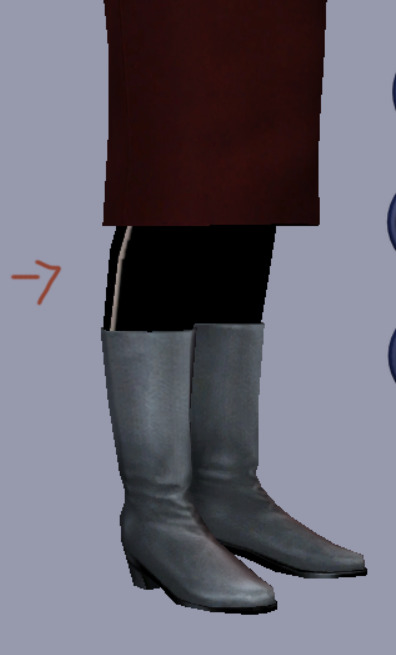
Alright, let’s fill in that texture with something nice, a deep burgundy.
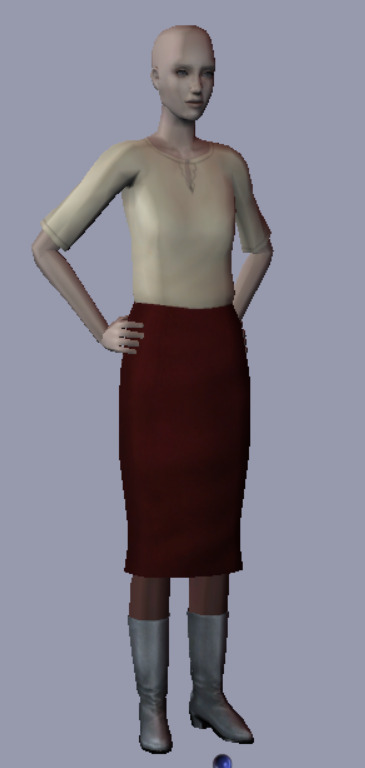
Oh, lovely! A little sheer but not too much.
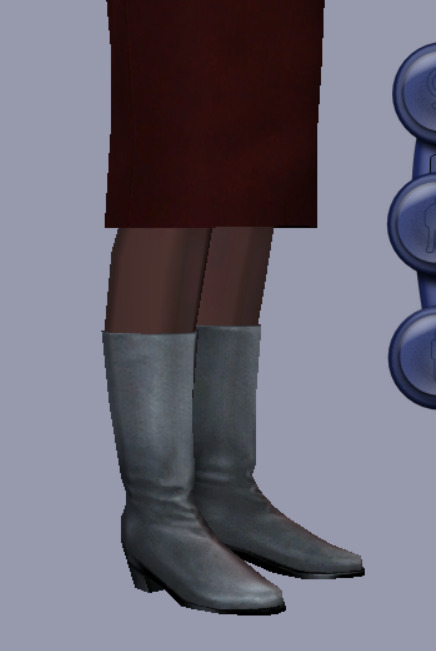
Hooray!
Let me know if you have any questions!
102 notes
·
View notes
Last Seen Blogs

tordlepower
with the book in his hand
tordlepower
with the book in his hand

cngzz-han
HANCI

imieeeee77
Untitled

thistooisyuri-ttv
Timeline 23