#quilter potholder
Explore tagged Tumblr posts
Visit Tumblr Blog
Explore Tumblr blogs with no restrictions, modern design and the best experience.
Last Seen Tumblr Blogs


Fun Fact
Tumblr has 411 employees.
Text
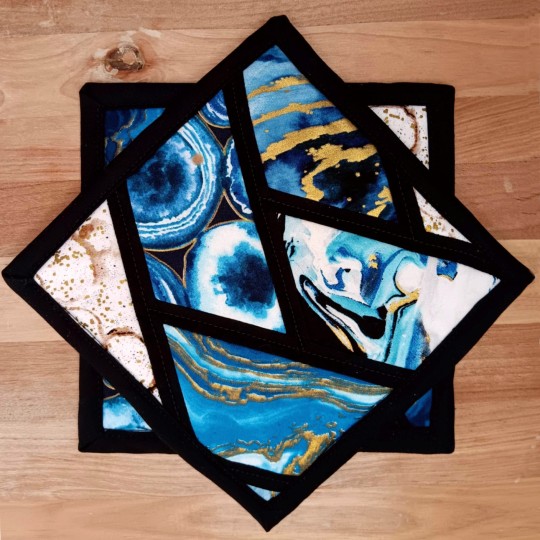
[ID. Two quilted potholders laid one on top of the other. The potholders are made with a "braided" half-hexagon pattern, each panel a different blue, gold, black, and white print with a swirled of geode-like appearance. Black sashing runs between the panels and the potholders are bound with black as well. End ID.]
On sale now! These quilted potholders are both stylish and functional. 100 percent cotton fabrics make the top and back sturdy, while an insulated batting layer keeps your hands cool even if the kitchen gets hot!
🔗in the next reblog.
#small business#for sale#quilt#quilting#quilted craft#potholder#cooking#baking#quilters of tumblr#sewing#sewists of tumblr
135 notes
·
View notes
Text
SHE'S DONE!!!!!!!!!

it's not perfect but i am RIDICULOUSLY proud of how this turned out!!!! this is my first time doing the top quilting and binding myself, and there were some hiccups but i got through it :D so so happy with this
#my projects#finished projects#quilting#quilters of tumblr#quilted potholder#quiltblr#handmade#foundation paper piecing
23 notes
·
View notes
Text
Last Minute Christmas Crunch Sew and Quilting Gifts
Welcome to December and time for the Christmas Crunch. That lovely time of year when the count down to Christmas really hits crafters. Well here are a bunch of quick and easy last minute things you can make. These babies can be made using up scraps, leftover fabric, or fat quarters.
First off for the quilters and seamstress is hot pads, bow cozies, casserole dish cozies, pie cozies, and bowl covers. They make great gifts for those that cook or bake. Also very lovely to pair with the edible gifts or hostess gift for Christmas dinner.
Special Notes for these projects. If you want to be able to put the cozies in the microwave you need a special type of batting called wrap n zap. It is microwave safe. Insul-bright the heat reflecting batting used in many hot pads can not go in the microwave as it can catch fire or spark due to the material. When making hot pads make sure to use only 100% cotton batting as any with poly (polyester) in them will melt from the heat.
27 notes
·
View notes
Note
Buttons and “tiles” - @roideny
Ack this is like the third ask I've ever received thanks for sending it in! I took some inspiration from the answer that @agentsnickers gave for the ask I sent them, which was about Race sucking at sewing, and also snuck my math nerd agenda in >:)
This only works for a modern AU, but Buttons is an occasional quilter (he prefers sewing clothes though), and what's quilting? Sewing a bunch of tiles together. Race spends years begging Buttons to make a Penrose tiling quilt, since he can't sew to save his life, and while Buttons knows that this theoretical quilt would look wicked cool, he would only take on a project that complex if it were 100% for himself (which this wouldn't be).
Anyway, there now exists a shape called the hat that also creates an aperiodic tiling (i.e. the pattern never repeats). When Race hears about this new shape, he manages to browbeat Buttons into making him a hat-patterned potholder.
It's a relatively small quilt, but the hat is a very weird shape that would be annoying to cut and sew properly once you take seam allowance into account (especially on such a small scale!), and it's the bane of Buttons' existence.
#I haven't written much (anything) about Buttons before so this is almost definitely very ooc#sorry about that i tried my best#however tilings are fun and i had fun procrastinating my homework#also if anyone sees this and wants to talk about math consider this your invitation lol#math#buttons davenport#buttons newsies#newsies#my posts#isabel says random stuff#asks
8 notes
·
View notes
Text
A few weeks ago I published part 1 of a tutorial on how to make your own awesome patchwork star. Well, here is part 2! This tutorial will teach you how to turn the patchwork quilt block into a potholder. Potholders are ideal as a present: Everyone uses them and they are small so don’t take too much time and materials to make.
Quilt tutorial: how to make a patchwork star
This article is published before during the artisan craft week at projecteducate. I promise you a never-ending sense of pride and accomplishment when you’re holding your first finished quilt.
In this article, I will discuss the following techniques:
Basting of a quilt
Quilting a quilt
How to sew a border around your quilt
Binding a quilt
If you want to know a bit more about the separate part of a quilt or how to make a quilt, see the following articles:
A lesson in the basic elements of a quilt
How to make a scrap quilt with many pieces in 4 steps
Which materials do you need?
18 x 19.5 cm of fabric for the border.
18 x 18 cm fabric for the back
18 x 18 cm fabric batting; either a piece of a fleece blanket or you can buy it in a quilt or craft shop
Quilting thread (quilting thread is best, but embroidery thread or any other thread you have is also fine)
Standard sewing notions (scissors, pins, needle etc…)
Fabric choices: I used the fabrics I also used for the star. You can choose any you want though! A contrasting border fabric will look very good as well.
Step 1: Basting your quilt
What is it?
A quilt consists of three layers: the top, a back and batting. When you bast a quilt you temporarily sew the pieces together with big stitches so the layers won’t move when you start to quilt.
How do you do it?
1. Put the three layers together. The batting goes in the middle. The ‘right’ side of the backing and quilt block face the batting. The right side is the front of your fabric which will be visible when the quilt is finished.

2. Cut off the excess batting and background fabric. Leave a border of around 2 centimetres.
3. There are two ways to bast a quilt: with pins and with thread. Normally I would not bother with thread for a piece this small, but I will show you both techniques.
Basting with thread: For this, you can use any leftover thread you have because you will remove it from the piece when it’s finished.

Basting with pins: This follows the same principle as basting with thread and is quicker. This technique is not suitable if the quilting will take a long time or when you’re quilting a big quilt. The needles will either fall out or prick you when you’re handling a lot of fabric.

Step 2: The quilting
What is it?
The term ‘quilting’ or ‘quilt’ is confusing because they are both used for the finished object, a verb and for the process we’re going to do now. Quilting means sewing through the three layers of a quilt. This is both to keep the layers in place, but also has ornamental value. Small stitches used to be the norm, but it is more important to create stitches of a consistent length. Quilting can be done to exaggerate the original pattern or to create a new kind of pattern. You see an example of both below.
How do you do it?
1. Thread a needle. Tie a knot at the end. Start with the first stitch where you gently pull the knot through one layer of fabric. This will secure the thread into the fabric.
2. Quilt in any pattern you want. I decided to quilt around the star shape, but you can also draw X-es in boxes, stripes, circles, whatever strikes your fancy! The middle block is ideal for some initials as you see in my finished piece.
3. If your thread is almost gone, tie a knot near the fabric and finish in the same way you started by pulling the knot through one layer of fabric.
4. Keep repeating this process until you’re satisfied with the quilting.

Step 3: Putting a border on your quilt
What is it?
To speak in the words of the brilliant Beyonce: ‘if you like it, then you should put a ring on it’. And that is what we are going to do with this quilt! A border is like a ring around a quilt which finishes the raw edges.
How do you do it?
1. Cut your block to the right size. About half a centimetre from the points of the star.
2. Cut four border strips of 19.5 by 4.5 cm
3. Pin the border strips with the pretty side to the block and sew as you see in the picture. Use pins on the star points inserting them at 90 degrees from the line you’ll sew. This will make the quilt look neater. Also, make sure an equal piece of the border fabric sticks out at either side of the block. That’s why the border strips are longer than the block. You’ll need that length later. When sewing the second set of borders don’t sew over the borders already attached (as shown in the picture).

3. Now fold over the border fabric at the back and pin it down. You have to fold twice so the edge of the fabric is secured inside the border. The corner is always fiddly, the pictures show how I usually do it but stick to any way that works for you.
4. Sew the border to the back as shown in the picture, With this stitch, the stitches are nearly invisible.

Step 4: Finishing your quilt
1. This part is always a lot of fun: removing the basting thread.
2. If you haven’t done that already, you can sew your initials in the middle block to make this quilt your own.
3. If you make many of these blocks and sew them together you get a big quilt!
I added two pictures of the finished result so you can see the initials I embroidered onto the quilt.

And now your first quilt is finished. Congratulations!
If you have any questions about this tutorial or suggestions leave a comment or sent me an email at [email protected]! I am always open to help people to get into this quilting obsession.
I would love to see what you make with this tutorial, so please leave a link in the comments section once you do!
May this first quilt be the first of many more to come!
See my DeviantArt, Facebook page or Instagram (username: bella.g.bear.art) for more artwork and WIPs. You can also follow my blog by clicking on the button on the left or by filling in your email address. There will be a monthly update at the end of every month and a new blog post every Sunday or Monday.
A few weeks ago I published part 1 of a tutorial on how to make your own awesome patchwork star. Well, here is part 2! This tutorial will teach you how to turn the patchwork quilt block into a potholder. Potholders are ideal as a present: Everyone uses them and they are small so don't take too much time and materials to make. A few weeks ago I published part 1 of a tutorial on how to make your own awesome patchwork star.
#creative tutorial#handmade#handmade gifts#how to quilt#patchwork#patchwork star#potholder#quilt#quilt tutorial#quiltblogger#quilter potholder#quiltlove#tutorial
0 notes
Text
Agilenano - News: NEW! Stitch it! Sisters Wrap It Up! Casserole Carrier Sewing Tutorial
NEW! Watch Stitch it! Sisters Program 205, Wrap It Up! Casserole Carrier! NEW! Watch Stitch it! Sisters Program 205, Wrap It Up! Casserole Carrier! with hosts Deanna Springer and Dana Casey from Team NZP! In this video, the Stitch it! Sisters share how to make our NEW! Wrap It Up! Casserole Carrier. In our NEW! Sewing Tutorial below, we’re sharing step-by-step how to make our NEW! Wrap It Up! Casserole Carrier with simple fabric rectangles and Nancy Zieman’s Wrapped Corner technique! NEW! Wrap It Up! Casserole Carriers are ideal projects for beginner sewers! Our NEW! Wrap It Up! Casserole Carrier design features an inner pocket for inserting a hot or cold pack, or for storing a potholder! Sew one of more of our Wrap It Up! Casserole Carriers. Wrap It Up! Casserole Carriers are ideal projects for beginner sewers! Purchase one of our NEW! Exclusive Wrap It Up! Casserole Carrier Bundle Boxes featuring two coordinating Wildflower Boutique Fabrics, Pellon Insul-Fleece, Cotton Handle Webbing, and Team NZP’s NEW! Wrap It Up! Casserole Carrier Sewing Pattern – with full-color step-by-step instructions and illustrations! Now available at ShopNZP.com! Our NEW! Exclusive Wrap It Up! Casserole Carrier Bundle Boxes are available in two limited edition colors and include everything you’ll need to make one NEW! Exclusive Wrap It Up! Casserole Carrier. Wrap It UP! Casserole Carrier Sewing Tutorial by the Stitch it! Sisters Wrap It UP! Casserole Carrier Supplies Listing Pattern Making Paper Pencil Craft Scissors June Tailor’s Quilter’s Starch Savvy Fabric Shears Clover’s Wonder Clips Clover’s Flower Head Pins Clover’s Point 2 Point Turner Clover’s 1/4″ Fusible Web Tape Clover’s Double Sided Basting Tape Clover’s Supersize 5-in-1 Sliding Gauge Clover’s Chaco Liner or Erasable Fabric Marking Pen Schmetz Denim Needle Size 90 Coordinating Thread Iron Eze-View Pressing Cloth Fine-Mist Bottle Rotary cutter, 6″ x 24″ Rotary Cutting Ruler and mat Optional: Tailor’s Clapper Optional: Clover’s 1″ Bias Tape Maker Optional: Clover’s Straight Tailor’s Awl Stiletto Optional: Clover’s Ultimate Quilt ’n Stitch Presser Foot Prepare your fabrics! Pre-shrink fabrics by steaming and pressing. Then, stabilize fabrics for the sewing process by pressing and starching fabrics with June Tailor’s Starch Savvy. Wrap It Up! Casserole Carrier Approx. Finished Size: 12″ x 12″ x 4″ Create Wrap It Up! Casserole Carrier Pattern Cut one rectangle from Pattern Making Paper, 13″ wide x 36″ long. This pattern will be used to cut all fabric, interfacing and batting rectangles. Cut Fabrics and Supplies Place outer fabric and inner fabric right sides together. Place pattern on fabrics and cut one inner fabric rectangle and one outer fabric rectangle – 13″ x 36″ ea. Place pattern on Insul-Fleece and cut two rectangles 13″ x 36″. Place pattern on Iron Quik Fabric and cut two rectangles 13″ x 36″. Place pattern on Sof-Shape Interfacing and cut two rectangles 13″ x 36″. Cut four 6″ sections of hook & loop tape. Apply Clover’s Double Sided Basting Tape to wrong side of hook & loop tape lengths, approximately 1/4″ inside short ends. Cut one length Red 1″ Cotton Webbing, approx. 72″ long. Stitch short ends to form a continuous loop handle. Press seam open. Create Wrap It Up! Casserole Carrier Following manufacturer’s instructions, press Sof-Shape Interfacing rectangle to wrong side of outer fabric rectangle. Repeat steps above and apply Sof-Shape Interfacing to wrong side of inner fabric rectangle. Place outer fabric rectangle to one Iron Quik rectangle right sides together. Place one Insul-Fleece rectangle behind Iron Quik. Wonder Clip layers together. Place inner fabric rectangle to one Iron Quik rectangle right sides together. Place one Insul-Fleece rectangle behind Iron Quik. Wonder Clip layer together. Using Supersize 5-in-1 Sliding Gauge, mark 8″ opening for turning – along one long side of outer assembly. Using Supersize 5-in-1 Sliding Gauge, mark 8″ opening for turning – along one long side of inner assembly. Place Flower Head Pins at each side of opening to denote the “No-Sew” zone. Insert a new Schmetz Denim Needle size 90, into sewing machine. Stitch long edges of outer sections, right sides together. “Wrap” stitched seam towards project, and stitch short end seams. Trim away excess seam allowances at corners. Wrapped corners make crisp corners! Wrap seam toward project center – folding along previous stitching line. Press seams open. Repeat steps above and create inner assembly. Turn outer assembly right side out, using Point 2 Point Turner. Press. Turn outer assembly right side out, using Point 2 Point Turner. Press. Press 8″ length of Clover’s 1/4″ Fusible Web Tape – at 8″ opening on outer assembly. Press 8″ length of Clover’s 1/4″ Fusible Web Tape – at 8″ opening on inner assembly. Remove paper backing from Fusible Web Tape and press outer assembly seam opening closed. Remove paper backing from Fusible Web Tape and press inner assembly seam opening closed. Attach Hook & Loop Tape and Handles Mark placement lines on outer assembly: Using 6″ x 24″ ruler, Chaco Liner or erasable fabric marking pen, mark horizontal lines 3″ inside each long edge – on right side of outer assembly. Mark vertical center of each line. Turn outer assembly over and place wrong side up. At one end of outer assembly, mark 6″ horizontal lines – 3″ inside each long edge – on wrong side as shown. Set Aside. At one end of inner assembly, mark 6″ horizontal lines – 3″ inside each long edge – on right side as shown. Turn inner assembly over and place wrong side up. At opposite end of inner assembly, mark 6″ horizontal lines – 3″ inside each long edge – on wrong side as shown. Remove paper backing from Double Sided Basting Tape. Place 6″ sections of rough hook & loop tape inside marked lines on fabric side of inner assembly, 1/4″ inside edge. Edgestitch around hook & loop tape. Turn inner assembly over and place right side up. Remove paper backing from Double Sided Basting Tape. Place 6″ sections of soft hook & loop tape inside marked lines on wrong side of inner assembly, 1/4″ inside edge. Edgestitch around hook & loop tape. Remove paper backing from Double Sided Basting Tape. Place 6″ sections of rough hook & loop tape inside marked lines on fabric side of outer assembly, 1/4″ inside edge. Edgestitch around hook & loop tape. Turn outer assembly over and place right side up. Remove paper backing from Double Sided Basting Tape. Place 6″ sections of soft hook & loop tape inside marked lines on wrong side of inner assembly, 1/4″ inside edge. Edgestitch around hook & loop tape. Topstitch around all four outside edges of outer assembly. Topstitch around all four outside edges of inner assembly. Lay handle flat, with no twists, prior to pinning to outer assembly. Fold handle in half and place Wonder Clips at each fold – identifying handle half-markings. Align handle inside placement lines, matching handle half-markings to vertical center markings on outer assembly. Pin handle to outer assembly using sturdy Flower Head Pins. Stitch handle to outer assembly – edgestitching along both handle long edges. Stop stitching with needle down and pivot around corners, at 1″ inside hook & loop tape. Finish Wrap It Up! Casserole Carrier Place inner assembly right side up. Place outer assembly (right side up) to inner assembly – perpendicular at 90º angle as shown. Pin through all layers with sturdy Flower Head Pins. Topstitch inner assemble to outer assembly, along three sides as shown. Stitching along only three edges creates the Wrap It Up! Casserole Carrier hidden inner pocket. Place a potholder, hot pack or cold pack inside inner pocket. NEW! Wrap It Up! Casserole Carriers make great gifts for housewarmings, bridal showers, and wedding showers! Use Wrap It Up! Casserole Carriers for transporting hot or cold dishes to picnics or potluck dinners, or for keeping a dish hot or cold on your table. Our Wrap It Up! Casserole Carrier easily accommodates round or square casserole dishes up to 9″ x 9″! Our Wrap It Up! Casserole Carrier is adjustable with hook and loop tape closures! NEW! Exclusive Wrap It Up! Casserole Carrier Bundle Boxes – Yellow & Red Our Wrap It Up! Casserole Carrier easily accommodates round or square casserole dishes up to 9″ x 9″! Our Wrap It Up! Casserole Carrier design features an inner pocket for inserting a hot or cold pack, or storing a potholder! NEW! Exclusive Wrap It Up! Casserole Carrier Bundle Boxes – Green & Teal NEW! Watch Stitch it! Sisters Program 205, Wrap It Up! Casserole Carrier! Related Posts Make our Potholder Plus in just two hours with our step-by-step sewing tutorial! Finished Potholder Plus measures approximately 8-1/2″ x 9-1/2″. Sew this super-quick Potholder Plus with one-half yard of fabric and two fat quarters and coordinating binding fabric! Make our No-Hassle Towel Topper in just two hours with our step-by-step sewing tutorial! Finished No-Hassle Towel Topper measures approximately 7-1/2″ x 20″. Sew this super-quick No Hassle Towel Topper with two fat quarters and a coordinating kitchen towel! We’re using Wildflower Boutique Fabrics! Showcase your kitchen style and hang this handy towel in your home, or RV. You’ll always know where your hand towel is hanging out! Make one or more of our NEW! Sew Organized Utility Totes featuring generous fabric shoulder straps! Choose from three roomy tote sizes – to meet your carry-all needs! Use Sew Organized Utility Totes to store pillows, bedding, and quilts! Keep one in your car for shopping in style with this reusable, and washable, Sew Organized Utility Tote! NEW! Sew Organized Fabric Bins are fast and fun to make! Make one or more of our NEW! Sew Organized Fabric Bins – to coordinate with your sewing space, or any room in your home! 10″ x 10″ x 10″ Fabric Bins fit standard cube organizers, or set on a shelf! Sew a Fun Fabric Caddy in four hours – and tidy your sewing space — or use in any room of your home. The sewing is easy with just a few fabric rectangles and squares. Plus, pattern includes instructions for our Fabric Bin made from four 10″ fabric squares! In a couple evenings of sewing, you’ll have a unique fabric caddy & fabric bin set – that also make great gifts! Make a Big-Bigger Laundry Bag that expands to handle laundry and/or storage needs. It’s a bag or tote that has both function and style! Reverse the Big-Bigger Laundry Bag for a whole new look. The sewing is streamlined with a few rectangles of sturdy canvas fabric and cotton quilting fabric. Our sewing tutorial includes adding secondary handles – that lend versatility to the Big-Bigger Laundry Bag! Showcase your sewing, quilting, and/or machine embroidery talents! The Nancy Zieman Productions Team is excited to announce our 2021 Viewer’s Showcase, taking place February 1–28, 2021! You’re invited to submit up to five different project photo(s) of project(s) you’ve been making from one or more of Team NZP’s Books, Patterns, Tools, Videos, and/or Blog Tutorials. Team NZP will share project photos in an upcoming March Viewer’s Showcase posting on The Nancy Zieman Productions Blog. Email hi-res photo(s) along with your name and hometown city and state to [email protected], by February 28, 2021. You could win one of the 2021 Viewer’s Showcase Giveaways valued at over $200! Thank you, Clovis P. for sending your Turtleneck Scarves photo for The 2021 NZP Viewer’s Showcase! Great Job! Email your project photos today to [email protected]! Wrap It UP! Casserole Carrier Supplies Listing Pattern Making Paper Pencil Craft Scissors June Tailor’s Quilter’s Starch Savvy Fabric Shears Clover’s Wonder Clips Clover’s Flower Head Pins Clover’s Point 2 Point Turner Clover’s 1/4″ Fusible Web Tape Clover’s Double Sided Basting Tape Clover’s Supersize 5-in-1 Sliding Gauge Clover’s Chaco Liner or Erasable Fabric Marking Pen Schmetz Denim Needle Size 90 Coordinating Thread Iron Eze-View Pressing Cloth Fine-Mist Bottle Rotary cutter, 6″ x 24″ Rotary Cutting Ruler and mat Optional: Tailor’s Clapper Optional: Clover’s 1″ Bias Tape Maker Optional: Clover’s Straight Tailor’s Awl Stiletto Optional: Clover’s Ultimate Quilt ’n Stitch Presser Foot Shop NEW! Exclusive Bundle Boxes at ShopNZP.com Shop Clover Tools & Sewing Supplies at ShopNZP.com! Shop Pellon Interfacing & Supplies at ShopNZP.com! Shop NEW! Fabrics at ShopNZP.com For a chance to be the random winner of a Stitch it! Sisters 5″ Short Stack with S!S button & sticker, please leave a comment below sharing your favorite color for the NEW! Wrap It Up! Casserole Carrier – Yellow & Red, or Green & Teal? Nancy Zieman Productions will give away one Stitch it! Sisters 5″ Short Stack with S!S button & sticker to one US resident in the 48 contiguous states. Winner must reply withing 30 days to the official giveaway announcement email message – sent from Nancy Zieman Productions. The randomly selected winner of a 20 pack of I Sew For Fun Heart-Shaped from the February 16 Blog Post, Cooler Grocery Tote Sewing Tutorial and NEW! Wildflower Boutique Bundle Boxes at ShopNZP.com, is Karen L. Her comment is: I am guessing that everyone needs an insulated bag like this as we all have to buy groceries. I like the technique for putting on handles. Definitely going to put this in my queue. Happy Sewing! Team Nancy Zieman Nancy Zieman Productions. LLC. Stitch it! Sisters is a production of NZ Productions LLC. Content in this feed is © copyright 2021 by Nancy Zieman Productions, LLC and may not be republished without written permission. You’re welcome to forward the email to a friend or colleague but it’s not okay to add the RSS feed automatically as content on a blog or other website. The FTC requires us to tell you that Nancy Zieman Productions, LLC has provided products by other companies in the course of doing business. The FTC requires us to advise you to take this information into consideration when reading this posting. Make sure you are subscribed to Nancy Zieman Productions, LLC enews mailing list so you won’t miss a thing. Sign up at nancyzieman.com/blog/enews. And join us on YouTube, Facebook, Instagram and Pinterest! #StitchIt!Sisters #Sewing #CasseroleKeeper #HotDishCarrier #HowToSewACasseroleCarrier

Agilenano - News from Agilenano from shopsnetwork (4 sites) http://feedproxy.google.com/~r/Agilenano-News/~3/j-5-vAz_FKk/new-stitch-it-sisters-wrap-it-up-casserole-carrier-sewing-tutorial
0 notes
Photo

I whipped together this quilter potholder super fast using the @officialcricut Maker. I posted my review on the blog today- and I gotta say, that rotary blade is awesome! It can precisely cut plain jane fabric without it needing to be fused on the back. 😍 I used my latest fabric collection #bunniesandblossomsfabric with some @rileyblakedesigns basics in the potholder. . . . #bunniesandblossomsfabric #fabric #bunniesandblossoms #cricutmaker #cricutmakersewing #iloverileyblake #rileyblakedesigns #pennyrosefabrics #pennyrose #sew #sewing #quilting #potholder #lovetosew
#fabric#cricutmakersewing#rileyblakedesigns#lovetosew#pennyrosefabrics#pennyrose#sew#quilting#sewing#cricutmaker#bunniesandblossomsfabric#iloverileyblake#bunniesandblossoms#potholder
2 notes
·
View notes
Text
Sewing: Daily Practice
Recently I had the honor of visiting the studio of Anne Brauer, the quilter of Shelburne Falls. Anne produces amazing work, and she’s been making a living at selling her quilts for thirty-six years. I bought two of her potholders, and I was shamed that I didn’t buy more things from her. But it was clear from the arrangement of her studio that she sews every day she’s in or at home in her…
View On WordPress
#daily practice#effort#fabric#Personal#quilting#sew#sew every day#Sewing#sewing machine#technology#textiles
0 notes
Link
Mark your calendars for the Tutwiler Quilters’ Exhibit and Sale, to be held from 10 a.m. to 3 p.m., October 7, at the Fellowship Hall at Saint Peter’s Episcopal Church in Oxford.
Attendees will be able to purchase gifts ranging from $7 to $400. The quilters will have homemade potholders, placemats, table runners, bags, and quilts, all of which make ideal wedding and Christmas gifts. Baby quilts are also available.
The Tutwiler Quilters are a part of the outreach program of the Tutwiler Community Education Center, originally organized by members of the Order of Holy Name Sisters. The Quilters support their families through this cottage industry and receive 80 percent of the proceeds of the sale.
At the same time, they preserve the distinctive style of African-American design in quilt making.
For more information, contact either Elizabeth Payne at 662-234-4258 (home) or 662-915-7629 (office) or by email at [email protected] or Ken Rutherford at 662-816-8105 (cell) or 662-513-3901 (office) or by email at [email protected].
For more questions or comments email us at [email protected].
The post Tutwiler Quilters Sale Will Feature Homemade Gift Items appeared first on HottyToddy.com.
0 notes
Text
Choosing The Best 9x9 Blue Area Rugs for Indoor Living Room
Leaving the edges of your handmade rugs unbound makes it too easy for the pieces of yarn to pull out accidentally, too tempting for the family dog to chew on, and the edges get dirty very easily. Binding the edges of twill fabric using elaborate miter cuts, pins or needle, and thread can be tedious if you don't like to sew (especially by hand). And having the rug professionally bound is prohibitively expensive. The Admin of thecraftyquilter.com has given information on Mug Rug binding tips.
Start with a 1 1/4″ wide strip of fabric (I needed 2 strips since they were cut from a fat quarter). I’m using straight-of-grain strips, not bias strips. Press 1/4″ under one long edge of the strip. Treat it the same as you would any binding. For this project, I decided to sew the binding onto the front of the mug rug and then hand-stitch it down to the back. The Crafty Quilter
Binding the edges of your handmade hooked rugs with one of the new do-it-yourself carpet binding tapes is quick, easy and requires only a few tools that you are sure to find around the house. This product is inexpensive and comes in a wide variety of styles and colors. You peel paper off the backing which sticks to the underside of the rug. Then you adhere the attached piping to the edges of the rug with hot glue. On the above article, The Admin of thecraftyquilter.com has given information on Mug Rug binding tips. Read more about 9x9 blue area rugs . Our first step was to ask her basic questions about her home. Number one: What type of flooring do you already have installed? She said she had a natural Bamboo flooring installed that was very light. Our second question was: What type of feel is your home? Or, what type of decorations do you have? She said that right now her home did not have very many things in it. Sarah has said about BINDING TO GET THE PERFECT RUG.
OK, I’ve been meaning to post about this little tip for months and months and just…I don’t know…didn't. And then a friend told me about the rug sale at Rugs USA yesterday (75 percent off people! GO. After you read this post!) and I found two rugs (crossing fingers they work) for hecka cheap, and then another friend mentioned she was bummed she couldn’t find any runners that were the right size for her space. Thrifty Decor Chick
Many people today are finding comfort from nature and enjoy the feeling of having their home surrounded by items made of natural materials. There are many natural fiber rugs available today made from seagrass, bamboo, coir, hemp, jute, mountain grass, sisal, wool, and paper. Each is unique and has its uses throughout your home and is a great alternative to synthetic carpeting which depends on the oil industry. Seagrass rugs are made of natural fibers and are one of the most inexpensive and versatile of all the natural floor coverings available today. Seagrass rugs are strong, withstand heavy traffic, durable, resilient, stain resistant and are also low dust and allergy free. Because of the light colored, mottled variegated appearance it hides most dirt well. Denise Russell has said about No binding mug rugs.
Remember those leftover blocks you did not know what to do with? Forget potholders! Enjoy their beauty every day in your studio, office, orby the couch after you transform them into mug rugs. Mug rugs absorb water, prevent spills, and add color to your day. As you read my previous posts you will see I am a big fan of them. I hope my friends are, too, because I made these for them this Christmas. Pieced Brain
Watch this video for more information about How to bind a rug:
youtube
0 notes