#kubernetes command
Explore tagged Tumblr posts
Visit Tumblr Blog
Explore Tumblr blogs with no restrictions, modern design and the best experience.
Last Seen Tumblr Blogs


Fun Fact
Tumblr is available in 18 languages.
Video
youtube
Kubernetes kubectl Tutorial with Examples for Devops Beginners and Students
Hi, a new #video on #kubernetes #kubectl is published on #codeonedigest #youtube channel. Learn #kubernetes #api #kubectlcommands #node #docker #container #cloud #aws #azure #programming #coding with #codeonedigest
@java #java #awscloud @awscloud #aws @AWSCloudIndia #Cloud #CloudComputing @YouTube #youtube #azure #msazure #microsoftazure #kubectl #kubectlcommands #kubectlinstall #kubectlport-forward #kubectlbasiccommands #kubectlproxy #kubectlconfig #kubectlgetpods #kubectlexeccommand #kubectllogs #kubectlinstalllinux #kubectlapply #kuberneteskubectl #kuberneteskubectltutorial #kuberneteskubectlcommands #kuberneteskubectl #kuberneteskubectlinstall #kuberneteskubectlgithub #kuberneteskubectlconfig #kuberneteskubectllogs #kuberneteskubectlpatch #kuberneteskubectlversion #kubernetes #kubernetestutorial #kubernetestutorialforbeginners #kubernetesinstallation #kubernetesinterviewquestions #kubernetesexplained #kubernetesorchestrationtutorial #kubernetesoperator #kubernetesoverview #containernetworkinterfaceaws #azure #aws #azurecloud #awscloud #orchestration #kubernetesapi #Kubernetesapiserver #Kubernetesapigateway #Kubernetesapipython #Kubernetesapiauthentication #Kubernetesapiversion #Kubernetesapijavaclient #Kubernetesapiclient
#youtube#kubernetes#kubernetes kubectl#kubectl#kubernetes command#kubectl commands#kubectl command line interface
3 notes
·
View notes
Text
Deploying Large Language Models on Kubernetes: A Comprehensive Guide
New Post has been published on https://thedigitalinsider.com/deploying-large-language-models-on-kubernetes-a-comprehensive-guide/
Deploying Large Language Models on Kubernetes: A Comprehensive Guide
Large Language Models (LLMs) are capable of understanding and generating human-like text, making them invaluable for a wide range of applications, such as chatbots, content generation, and language translation.
However, deploying LLMs can be a challenging task due to their immense size and computational requirements. Kubernetes, an open-source container orchestration system, provides a powerful solution for deploying and managing LLMs at scale. In this technical blog, we’ll explore the process of deploying LLMs on Kubernetes, covering various aspects such as containerization, resource allocation, and scalability.
Understanding Large Language Models
Before diving into the deployment process, let’s briefly understand what Large Language Models are and why they are gaining so much attention.
Large Language Models (LLMs) are a type of neural network model trained on vast amounts of text data. These models learn to understand and generate human-like language by analyzing patterns and relationships within the training data. Some popular examples of LLMs include GPT (Generative Pre-trained Transformer), BERT (Bidirectional Encoder Representations from Transformers), and XLNet.
LLMs have achieved remarkable performance in various NLP tasks, such as text generation, language translation, and question answering. However, their massive size and computational requirements pose significant challenges for deployment and inference.
Why Kubernetes for LLM Deployment?
Kubernetes is an open-source container orchestration platform that automates the deployment, scaling, and management of containerized applications. It provides several benefits for deploying LLMs, including:
Scalability: Kubernetes allows you to scale your LLM deployment horizontally by adding or removing compute resources as needed, ensuring optimal resource utilization and performance.
Resource Management: Kubernetes enables efficient resource allocation and isolation, ensuring that your LLM deployment has access to the required compute, memory, and GPU resources.
High Availability: Kubernetes provides built-in mechanisms for self-healing, automatic rollouts, and rollbacks, ensuring that your LLM deployment remains highly available and resilient to failures.
Portability: Containerized LLM deployments can be easily moved between different environments, such as on-premises data centers or cloud platforms, without the need for extensive reconfiguration.
Ecosystem and Community Support: Kubernetes has a large and active community, providing a wealth of tools, libraries, and resources for deploying and managing complex applications like LLMs.
Preparing for LLM Deployment on Kubernetes:
Before deploying an LLM on Kubernetes, there are several prerequisites to consider:
Kubernetes Cluster: You’ll need a Kubernetes cluster set up and running, either on-premises or on a cloud platform like Amazon Elastic Kubernetes Service (EKS), Google Kubernetes Engine (GKE), or Azure Kubernetes Service (AKS).
GPU Support: LLMs are computationally intensive and often require GPU acceleration for efficient inference. Ensure that your Kubernetes cluster has access to GPU resources, either through physical GPUs or cloud-based GPU instances.
Container Registry: You’ll need a container registry to store your LLM Docker images. Popular options include Docker Hub, Amazon Elastic Container Registry (ECR), Google Container Registry (GCR), or Azure Container Registry (ACR).
LLM Model Files: Obtain the pre-trained LLM model files (weights, configuration, and tokenizer) from the respective source or train your own model.
Containerization: Containerize your LLM application using Docker or a similar container runtime. This involves creating a Dockerfile that packages your LLM code, dependencies, and model files into a Docker image.
Deploying an LLM on Kubernetes
Once you have the prerequisites in place, you can proceed with deploying your LLM on Kubernetes. The deployment process typically involves the following steps:
Building the Docker Image
Build the Docker image for your LLM application using the provided Dockerfile and push it to your container registry.
Creating Kubernetes Resources
Define the Kubernetes resources required for your LLM deployment, such as Deployments, Services, ConfigMaps, and Secrets. These resources are typically defined using YAML or JSON manifests.
Configuring Resource Requirements
Specify the resource requirements for your LLM deployment, including CPU, memory, and GPU resources. This ensures that your deployment has access to the necessary compute resources for efficient inference.
Deploying to Kubernetes
Use the kubectl command-line tool or a Kubernetes management tool (e.g., Kubernetes Dashboard, Rancher, or Lens) to apply the Kubernetes manifests and deploy your LLM application.
Monitoring and Scaling
Monitor the performance and resource utilization of your LLM deployment using Kubernetes monitoring tools like Prometheus and Grafana. Adjust the resource allocation or scale your deployment as needed to meet the demand.
Example Deployment
Let’s consider an example of deploying the GPT-3 language model on Kubernetes using a pre-built Docker image from Hugging Face. We’ll assume that you have a Kubernetes cluster set up and configured with GPU support.
Pull the Docker Image:
bashCopydocker pull huggingface/text-generation-inference:1.1.0
Create a Kubernetes Deployment:
Create a file named gpt3-deployment.yaml with the following content:
apiVersion: apps/v1 kind: Deployment metadata: name: gpt3-deployment spec: replicas: 1 selector: matchLabels: app: gpt3 template: metadata: labels: app: gpt3 spec: containers: - name: gpt3 image: huggingface/text-generation-inference:1.1.0 resources: limits: nvidia.com/gpu: 1 env: - name: MODEL_ID value: gpt2 - name: NUM_SHARD value: "1" - name: PORT value: "8080" - name: QUANTIZE value: bitsandbytes-nf4
This deployment specifies that we want to run one replica of the gpt3 container using the huggingface/text-generation-inference:1.1.0 Docker image. The deployment also sets the environment variables required for the container to load the GPT-3 model and configure the inference server.
Create a Kubernetes Service:
Create a file named gpt3-service.yaml with the following content:
apiVersion: v1 kind: Service metadata: name: gpt3-service spec: selector: app: gpt3 ports: - port: 80 targetPort: 8080 type: LoadBalancer
This service exposes the gpt3 deployment on port 80 and creates a LoadBalancer type service to make the inference server accessible from outside the Kubernetes cluster.
Deploy to Kubernetes:
Apply the Kubernetes manifests using the kubectl command:
kubectl apply -f gpt3-deployment.yaml kubectl apply -f gpt3-service.yaml
Monitor the Deployment:
Monitor the deployment progress using the following commands:
kubectl get pods kubectl logs <pod_name>
Once the pod is running and the logs indicate that the model is loaded and ready, you can obtain the external IP address of the LoadBalancer service:
kubectl get service gpt3-service
Test the Deployment:
You can now send requests to the inference server using the external IP address and port obtained from the previous step. For example, using curl:
curl -X POST http://<external_ip>:80/generate -H 'Content-Type: application/json' -d '"inputs": "The quick brown fox", "parameters": "max_new_tokens": 50'
This command sends a text generation request to the GPT-3 inference server, asking it to continue the prompt “The quick brown fox” for up to 50 additional tokens.
Advanced topics you should be aware of
While the example above demonstrates a basic deployment of an LLM on Kubernetes, there are several advanced topics and considerations to explore:
_*]:min-w-0″ readability=”131.72387362124″>
1. Autoscaling
Kubernetes supports horizontal and vertical autoscaling, which can be beneficial for LLM deployments due to their variable computational demands. Horizontal autoscaling allows you to automatically scale the number of replicas (pods) based on metrics like CPU or memory utilization. Vertical autoscaling, on the other hand, allows you to dynamically adjust the resource requests and limits for your containers.
To enable autoscaling, you can use the Kubernetes Horizontal Pod Autoscaler (HPA) and Vertical Pod Autoscaler (VPA). These components monitor your deployment and automatically scale resources based on predefined rules and thresholds.
2. GPU Scheduling and Sharing
In scenarios where multiple LLM deployments or other GPU-intensive workloads are running on the same Kubernetes cluster, efficient GPU scheduling and sharing become crucial. Kubernetes provides several mechanisms to ensure fair and efficient GPU utilization, such as GPU device plugins, node selectors, and resource limits.
You can also leverage advanced GPU scheduling techniques like NVIDIA Multi-Instance GPU (MIG) or AMD Memory Pool Remapping (MPR) to virtualize GPUs and share them among multiple workloads.
3. Model Parallelism and Sharding
Some LLMs, particularly those with billions or trillions of parameters, may not fit entirely into the memory of a single GPU or even a single node. In such cases, you can employ model parallelism and sharding techniques to distribute the model across multiple GPUs or nodes.
Model parallelism involves splitting the model architecture into different components (e.g., encoder, decoder) and distributing them across multiple devices. Sharding, on the other hand, involves partitioning the model parameters and distributing them across multiple devices or nodes.
Kubernetes provides mechanisms like StatefulSets and Custom Resource Definitions (CRDs) to manage and orchestrate distributed LLM deployments with model parallelism and sharding.
4. Fine-tuning and Continuous Learning
In many cases, pre-trained LLMs may need to be fine-tuned or continuously trained on domain-specific data to improve their performance for specific tasks or domains. Kubernetes can facilitate this process by providing a scalable and resilient platform for running fine-tuning or continuous learning workloads.
You can leverage Kubernetes batch processing frameworks like Apache Spark or Kubeflow to run distributed fine-tuning or training jobs on your LLM models. Additionally, you can integrate your fine-tuned or continuously trained models with your inference deployments using Kubernetes mechanisms like rolling updates or blue/green deployments.
5. Monitoring and Observability
Monitoring and observability are crucial aspects of any production deployment, including LLM deployments on Kubernetes. Kubernetes provides built-in monitoring solutions like Prometheus and integrations with popular observability platforms like Grafana, Elasticsearch, and Jaeger.
You can monitor various metrics related to your LLM deployments, such as CPU and memory utilization, GPU usage, inference latency, and throughput. Additionally, you can collect and analyze application-level logs and traces to gain insights into the behavior and performance of your LLM models.
6. Security and Compliance
Depending on your use case and the sensitivity of the data involved, you may need to consider security and compliance aspects when deploying LLMs on Kubernetes. Kubernetes provides several features and integrations to enhance security, such as network policies, role-based access control (RBAC), secrets management, and integration with external security solutions like HashiCorp Vault or AWS Secrets Manager.
Additionally, if you’re deploying LLMs in regulated industries or handling sensitive data, you may need to ensure compliance with relevant standards and regulations, such as GDPR, HIPAA, or PCI-DSS.
7. Multi-Cloud and Hybrid Deployments
While this blog post focuses on deploying LLMs on a single Kubernetes cluster, you may need to consider multi-cloud or hybrid deployments in some scenarios. Kubernetes provides a consistent platform for deploying and managing applications across different cloud providers and on-premises data centers.
You can leverage Kubernetes federation or multi-cluster management tools like KubeFed or GKE Hub to manage and orchestrate LLM deployments across multiple Kubernetes clusters spanning different cloud providers or hybrid environments.
These advanced topics highlight the flexibility and scalability of Kubernetes for deploying and managing LLMs.
Conclusion
Deploying Large Language Models (LLMs) on Kubernetes offers numerous benefits, including scalability, resource management, high availability, and portability. By following the steps outlined in this technical blog, you can containerize your LLM application, define the necessary Kubernetes resources, and deploy it to a Kubernetes cluster.
However, deploying LLMs on Kubernetes is just the first step. As your application grows and your requirements evolve, you may need to explore advanced topics such as autoscaling, GPU scheduling, model parallelism, fine-tuning, monitoring, security, and multi-cloud deployments.
Kubernetes provides a robust and extensible platform for deploying and managing LLMs, enabling you to build reliable, scalable, and secure applications.
#access control#Amazon#Amazon Elastic Kubernetes Service#amd#Apache#Apache Spark#app#applications#apps#architecture#Artificial Intelligence#attention#AWS#azure#Behavior#BERT#Blog#Blue#Building#chatbots#Cloud#cloud platform#cloud providers#cluster#clusters#code#command#Community#compliance#comprehensive
0 notes
Text
Install Canonical Kubernetes on Linux | Snap Store
Fast, secure & automated application deployment, everywhere Canonical Kubernetes is the fastest, easiest way to deploy a fully-conformant Kubernetes cluster. Harnessing pure upstream Kubernetes, this distribution adds the missing pieces (e.g. ingress, dns, networking) for a zero-ops experience. Get started in just two commands: sudo snap install k8s –classic sudo k8s bootstrap — Read on…
View On WordPress
#dns#easiest way to deploy a fully-conformant Kubernetes cluster. Harnessing pure upstream Kubernetes#everywhere Canonical Kubernetes is the fastest#Fast#networking) for a zero-ops experience. Get started in just two commands: sudo snap install k8s --classic sudo k8s bootstrap#secure & automated application deployment#this distribution adds the missing pieces (e.g. ingress
1 note
·
View note
Text
How to Install Kubectl on Windows 11
Kubernetes is an open-source system for automating containerized application deployment, scaling, and management. You can run commands against Kubernetes clusters using the kubectl command-line tool. kubectl can be used to deploy applications, inspect and manage cluster resources, and inspect logs. You can install Kubectl on various Linux platforms, macOS, and Windows. The choice of your…
View On WordPress
#Command Line Tool#Install Kubectl#K8#Kubectl#Kubernetes#Kubernetes Command Line Tool#Windows#Windows 11
1 note
·
View note
Text
Developer Environment Presentation 1 Part 2: Generate Bootstrap Configuration Files, and Uninstall Previous Jannah Installation
From cloning the operator from github.com. To generating new Molecule configuration, environment variable files, for Jannah deployment. And uninstall previous Jannah installation.
Video Highlights Purpose is to showcase the developer environment (day to day developer experience). I performed the following steps: Clone the operator code base, from git. git clone https://github.com/jannahio/operator; Change into the cloned operator directory: cd operator; Operator configuration needs environment variables file to bootstrap. So copied environment variables file into…

View On WordPress
#ansible#artificial#backend#Commands#Configuration#container#Data#Developer#devOps#django#docker#Environment#Files#Intelligence#Jannah#Kubernetes#learning#Logs#machine#makefile#model#Module#molecule#operator#Package#Playbook#python#Science#software#ux
0 notes
Text
Best Kubernetes Management Tools in 2023
Best Kubernetes Management Tools in 2023 #homelab #vmwarecommunities #Kubernetesmanagementtools2023 #bestKubernetescommandlinetools #managingKubernetesclusters #Kubernetesdashboardinterfaces #kubernetesmanagementtools #Kubernetesdashboard
Kubernetes is everywhere these days. It is used in the enterprise and even in many home labs. It’s a skill that’s sought after, especially with today’s push for app modernization. Many tools help you manage things in Kubernetes, like clusters, pods, services, and apps. Here’s my list of the best Kubernetes management tools in 2023. Table of contentsWhat is Kubernetes?Understanding Kubernetes and…
View On WordPress
#best Kubernetes command line tools#containerized applications management#Kubernetes cluster management tools#Kubernetes cost monitoring#Kubernetes dashboard interfaces#Kubernetes deployment solutions#Kubernetes management tools 2023#large Kubernetes deployments#managing Kubernetes clusters#open-source Kubernetes tools
0 notes
Text
How to deploy web application in openshift command line
To deploy a web application in OpenShift using the command-line interface (CLI), follow these steps: Create a new project: Before deploying your application, you need to create a new project. You can do this using the oc new-project command. For example, to create a project named “myproject”, run the following command:javascriptCopy codeoc new-project myproject Create an application: Use the oc…
View On WordPress
#openshift openshift4 redhatopenshift openshifttutorial openshiftonline#application deployment#deploy openshift web application using openshift cli command line red hat openshift#kubernetes#openshift#openshift container platform#openshift deploy spring boot jar#openshift installation#openshift login#openshift online#openshift openshift 4 red hat openshift#openshift openshift 4 red hat openshift container platform#openshift tutorial#Openshift webconsole#red hat#red hat openshift#redhat openshift online#web application openshift online
0 notes
Text
Exploit Me, Baby, One More Time: Command Injection in Kubernetes Log Query
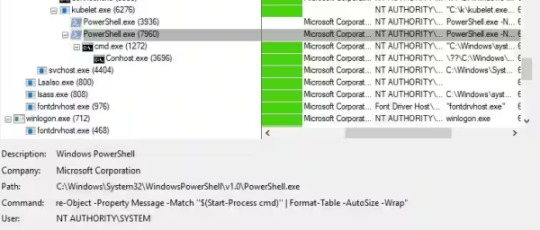
Source: https://www.akamai.com/blog/security-research/2025/jan/2024-january-kubernetes-log-query-rce-windows
2 notes
·
View notes
Text
Ansible Collections: Extending Ansible’s Capabilities
Ansible is a powerful automation tool used for configuration management, application deployment, and task automation. One of the key features that enhances its flexibility and extensibility is the concept of Ansible Collections. In this blog post, we'll explore what Ansible Collections are, how to create and use them, and look at some popular collections and their use cases.
Introduction to Ansible Collections
Ansible Collections are a way to package and distribute Ansible content. This content can include playbooks, roles, modules, plugins, and more. Collections allow users to organize their Ansible content and share it more easily, making it simpler to maintain and reuse.
Key Features of Ansible Collections:
Modularity: Collections break down Ansible content into modular components that can be independently developed, tested, and maintained.
Distribution: Collections can be distributed via Ansible Galaxy or private repositories, enabling easy sharing within teams or the wider Ansible community.
Versioning: Collections support versioning, allowing users to specify and depend on specific versions of a collection. How to Create and Use Collections in Your Projects
Creating and using Ansible Collections involves a few key steps. Here’s a guide to get you started:
1. Setting Up Your Collection
To create a new collection, you can use the ansible-galaxy command-line tool:
ansible-galaxy collection init my_namespace.my_collection
This command sets up a basic directory structure for your collection:
my_namespace/
└── my_collection/
├── docs/
├── plugins/
│ ├── modules/
│ ├── inventory/
│ └── ...
├── roles/
├── playbooks/
├── README.md
└── galaxy.yml
2. Adding Content to Your Collection
Populate your collection with the necessary content. For example, you can add roles, modules, and plugins under the respective directories. Update the galaxy.yml file with metadata about your collection.
3. Building and Publishing Your Collection
Once your collection is ready, you can build it using the following command:
ansible-galaxy collection build
This command creates a tarball of your collection, which you can then publish to Ansible Galaxy or a private repository:
ansible-galaxy collection publish my_namespace-my_collection-1.0.0.tar.gz
4. Using Collections in Your Projects
To use a collection in your Ansible project, specify it in your requirements.yml file:
collections:
- name: my_namespace.my_collection
version: 1.0.0
Then, install the collection using:
ansible-galaxy collection install -r requirements.yml
You can now use the content from the collection in your playbooks:--- - name: Example Playbook hosts: localhost tasks: - name: Use a module from the collection my_namespace.my_collection.my_module: param: value
Popular Collections and Their Use Cases
Here are some popular Ansible Collections and how they can be used:
1. community.general
Description: A collection of modules, plugins, and roles that are not tied to any specific provider or technology.
Use Cases: General-purpose tasks like file manipulation, network configuration, and user management.
2. amazon.aws
Description: Provides modules and plugins for managing AWS resources.
Use Cases: Automating AWS infrastructure, such as EC2 instances, S3 buckets, and RDS databases.
3. ansible.posix
Description: A collection of modules for managing POSIX systems.
Use Cases: Tasks specific to Unix-like systems, such as managing users, groups, and file systems.
4. cisco.ios
Description: Contains modules and plugins for automating Cisco IOS devices.
Use Cases: Network automation for Cisco routers and switches, including configuration management and backup.
5. kubernetes.core
Description: Provides modules for managing Kubernetes resources.
Use Cases: Deploying and managing Kubernetes applications, services, and configurations.
Conclusion
Ansible Collections significantly enhance the modularity, distribution, and reusability of Ansible content. By understanding how to create and use collections, you can streamline your automation workflows and share your work with others more effectively. Explore popular collections to leverage existing solutions and extend Ansible’s capabilities in your projects.
For more details click www.qcsdclabs.com
#redhatcourses#information technology#linux#containerorchestration#container#kubernetes#containersecurity#docker#dockerswarm#aws
2 notes
·
View notes
Text
Navigating the DevOps Landscape: Your Comprehensive Guide to Mastery
In today's ever-evolving IT landscape, DevOps has emerged as a mission-critical practice, reshaping how development and operations teams collaborate, accelerating software delivery, enhancing collaboration, and bolstering efficiency. If you're enthusiastic about embarking on a journey towards mastering DevOps, you've come to the right place. In this comprehensive guide, we'll explore some of the most exceptional resources for immersing yourself in the world of DevOps.
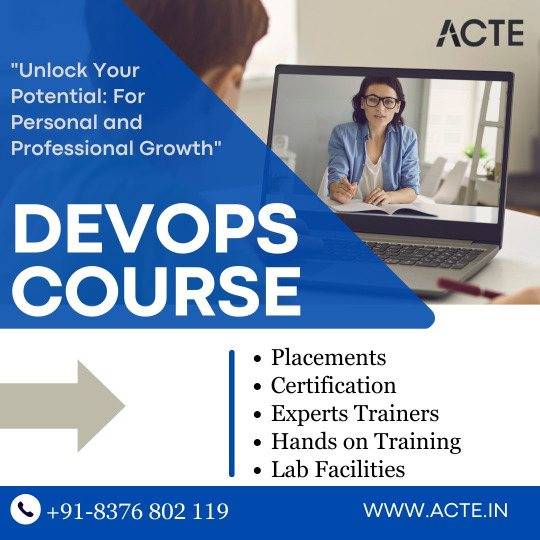
Online Courses: Laying a Strong Foundation
One of the most effective and structured methods for establishing a robust understanding of DevOps is by enrolling in online courses. ACTE Institute, for instance, offers a wide array of comprehensive DevOps courses designed to empower you to learn at your own pace. These meticulously crafted courses delve deep into the fundamental principles, best practices, and practical tools that are indispensable for achieving success in the world of DevOps.
Books and Documentation: Delving into the Depth
Books serve as invaluable companions on your DevOps journey, providing in-depth insights into the practices and principles of DevOps. "The Phoenix Project" by the trio of Gene Kim, Kevin Behr, and George Spafford is highly recommended for gaining profound insights into the transformative potential of DevOps. Additionally, exploring the official documentation provided by DevOps tool providers offers an indispensable resource for gaining nuanced knowledge.
DevOps Communities: Becoming Part of the Conversation
DevOps thrives on the principles of community collaboration, and the digital realm is replete with platforms that foster discussions, seek advice, and facilitate the sharing of knowledge. Websites such as Stack Overflow, DevOps.com, and Reddit's DevOps subreddit serve as vibrant hubs where you can connect with fellow DevOps enthusiasts and experts, engage in enlightening conversations, and glean insights from those who've traversed similar paths.
Webinars and Events: Expanding Your Horizons
To truly expand your DevOps knowledge and engage with industry experts, consider attending webinars and conferences dedicated to this field. Events like DevOpsDays and DockerCon bring together luminaries who generously share their insights and experiences, providing you with unparalleled opportunities to broaden your horizons. Moreover, these events offer the chance to connect and network with peers who share your passion for DevOps.
Hands-On Projects: Applying Your Skills
In the realm of DevOps, practical experience is the crucible in which mastery is forged. Therefore, seize opportunities to take on hands-on projects that allow you to apply the principles and techniques you've learned. Contributing to open-source DevOps initiatives on platforms like GitHub is a fantastic way to accrue real-world experience, all while contributing to the broader DevOps community. Not only do these projects provide tangible evidence of your skills, but they also enable you to build an impressive portfolio.
DevOps Tools: Navigating the Landscape
DevOps relies heavily on an expansive array of tools and technologies, each serving a unique purpose in the DevOps pipeline. To become proficient in DevOps, it's imperative to establish your own lab environments and engage in experimentation. This hands-on approach allows you to become intimately familiar with tools such as Jenkins for continuous integration, Docker for containerization, Kubernetes for orchestration, and Ansible for automation, to name just a few. A strong command over these tools equips you to navigate the intricate DevOps landscape with confidence.
Mentorship: Guiding Lights on Your Journey
To accelerate your journey towards DevOps mastery, consider seeking mentorship from seasoned DevOps professionals. Mentors can provide invaluable guidance, share real-world experiences, and offer insights that are often absent from textbooks or online courses. They can help you navigate the complexities of DevOps, provide clarity during challenging moments, and serve as a source of inspiration. Mentorship is a powerful catalyst for growth in the DevOps field.

By harnessing the full spectrum of these resources, you can embark on a transformative journey towards becoming a highly skilled DevOps practitioner. Armed with a profound understanding of DevOps principles, practical experience, and mastery over essential tools, you'll be well-equipped to tackle the multifaceted challenges and opportunities that the dynamic field of DevOps presents. Remember that continuous learning and staying abreast of the latest DevOps trends are pivotal to your ongoing success. As you embark on your DevOps learning odyssey, know that ACTE Technologies is your steadfast partner, ready to empower you on this exciting journey. Whether you're starting from scratch or enhancing your existing skills, ACTE Technologies Institute provides you with the resources and knowledge you need to excel in the dynamic world of DevOps. Enroll today and unlock your boundless potential. Your DevOps success story begins here. Good luck on your DevOps learning journey!
9 notes
·
View notes
Text
How to Deploy Your Full Stack Application: A Beginner’s Guide
Deploying a full stack application involves setting up your frontend, backend, and database on a live server so users can access it over the internet. This guide covers deployment strategies, hosting services, and best practices.
1. Choosing a Deployment Platform
Popular options include:
Cloud Platforms: AWS, Google Cloud, Azure
PaaS Providers: Heroku, Vercel, Netlify
Containerized Deployment: Docker, Kubernetes
Traditional Hosting: VPS (DigitalOcean, Linode)
2. Deploying the Backend
Option 1: Deploy with a Cloud Server (e.g., AWS EC2, DigitalOcean)
Set Up a Virtual Machine (VM)
bash
ssh user@your-server-ip
Install Dependencies
Node.js (sudo apt install nodejs npm)
Python (sudo apt install python3-pip)
Database (MySQL, PostgreSQL, MongoDB)
Run the Server
bash
nohup node server.js & # For Node.js apps gunicorn app:app --daemon # For Python Flask/Django apps
Option 2: Serverless Deployment (AWS Lambda, Firebase Functions)
Pros: No server maintenance, auto-scaling
Cons: Limited control over infrastructure
3. Deploying the Frontend
Option 1: Static Site Hosting (Vercel, Netlify, GitHub Pages)
Push Code to GitHub
Connect GitHub Repo to Netlify/Vercel
Set Build Command (e.g., npm run build)
Deploy and Get Live URL
Option 2: Deploy with Nginx on a Cloud Server
Install Nginx
bash
sudo apt install nginx
Configure Nginx for React/Vue/Angular
nginx
server { listen 80; root /var/www/html; index index.html; location / { try_files $uri /index.html; } }
Restart Nginx
bash
sudo systemctl restart nginx
4. Connecting Frontend and Backend
Use CORS middleware to allow cross-origin requests
Set up reverse proxy with Nginx
Secure API with authentication tokens (JWT, OAuth)
5. Database Setup
Cloud Databases: AWS RDS, Firebase, MongoDB Atlas
Self-Hosted Databases: PostgreSQL, MySQL on a VPS
bash# Example: Run PostgreSQL on DigitalOcean sudo apt install postgresql sudo systemctl start postgresql
6. Security & Optimization
✅ SSL Certificate: Secure site with HTTPS (Let’s Encrypt) ✅ Load Balancing: Use AWS ALB, Nginx reverse proxy ✅ Scaling: Auto-scale with Kubernetes or cloud functions ✅ Logging & Monitoring: Use Datadog, New Relic, AWS CloudWatch
7. CI/CD for Automated Deployment
GitHub Actions: Automate builds and deployment
Jenkins/GitLab CI/CD: Custom pipelines for complex deployments
Docker & Kubernetes: Containerized deployment for scalability
Final Thoughts
Deploying a full stack app requires setting up hosting, configuring the backend, deploying the frontend, and securing the application.
Cloud platforms like AWS, Heroku, and Vercel simplify the process, while advanced setups use Kubernetes and Docker for scalability.
WEBSITE: https://www.ficusoft.in/full-stack-developer-course-in-chennai/
0 notes
Text
Docker Tag and Push Image to Hub | Docker Tagging Explained and Best Practices
Full Video Link: https://youtu.be/X-uuxvi10Cw Hi, a new #video on #DockerImageTagging is published on @codeonedigest #youtube channel. Learn TAGGING docker image. Different ways to TAG docker image #Tagdockerimage #pushdockerimagetodockerhubrepository #
Next step after building the docker image is to tag docker image. Image tagging is important to upload docker image to docker hub repository or azure container registry or elastic container registry etc. There are different ways to TAG docker image. Learn how to tag docker image? What are the best practices for docker image tagging? How to tag docker container image? How to tag and push docker…

View On WordPress
#docker#docker and Kubernetes#docker build tag#docker compose#docker image tagging#docker image tagging best practices#docker tag and push image to registry#docker tag azure container registry#docker tag command#docker tag image#docker tag push#docker tagging best practices#docker tags explained#docker tutorial#docker tutorial for beginners#how to tag and push docker image#how to tag existing docker image#how to upload image to docker hub repository#push docker image to docker hub repository#Tag docker image#tag docker image after build#what is docker
0 notes
Text
OpenShift vs Kubernetes: Key Differences Explained
Kubernetes has become the de facto standard for container orchestration, enabling organizations to manage and scale containerized applications efficiently. However, OpenShift, built on top of Kubernetes, offers additional features that streamline development and deployment. While they share core functionalities, they have distinct differences that impact their usability. In this blog, we explore the key differences between OpenShift and Kubernetes.
1. Core Overview
Kubernetes:
Kubernetes is an open-source container orchestration platform that automates the deployment, scaling, and operation of application containers. It provides the building blocks for containerized workloads but requires additional tools for complete enterprise-level functionality.
OpenShift:
OpenShift is a Kubernetes-based container platform developed by Red Hat. It provides additional features such as a built-in CI/CD pipeline, enhanced security, and developer-friendly tools to simplify Kubernetes management.
2. Installation & Setup
Kubernetes:
Requires manual installation and configuration.
Cluster setup involves configuring multiple components such as kube-apiserver, kube-controller-manager, kube-scheduler, and networking.
Offers flexibility but requires expertise to manage.
OpenShift:
Provides an easier installation process with automated scripts.
Includes a fully integrated web console for management.
Requires Red Hat OpenShift subscriptions for enterprise-grade support.
3. Security & Authentication
Kubernetes:
Security policies and authentication need to be manually configured.
Role-Based Access Control (RBAC) is available but requires additional setup.
OpenShift:
Comes with built-in security features.
Uses Security Context Constraints (SCCs) for enhanced security.
Integrated authentication mechanisms, including OAuth and LDAP support.
4. Networking
Kubernetes:
Uses third-party plugins (e.g., Calico, Flannel, Cilium) for networking.
Network policies must be configured separately.
OpenShift:
Uses Open vSwitch-based SDN by default.
Provides automatic service discovery and routing.
Built-in router and HAProxy-based load balancing.
5. Development & CI/CD Integration
Kubernetes:
Requires third-party tools for CI/CD (e.g., Jenkins, ArgoCD, Tekton).
Developers must integrate CI/CD pipelines manually.
OpenShift:
Comes with built-in CI/CD capabilities via OpenShift Pipelines.
Source-to-Image (S2I) feature allows developers to build images directly from source code.
Supports GitOps methodologies out of the box.
6. User Interface & Management
Kubernetes:
Managed through the command line (kubectl) or third-party UI tools (e.g., Lens, Rancher).
No built-in dashboard; requires separate installation.
OpenShift:
Includes a built-in web console for easier management.
Provides graphical interfaces for monitoring applications, logs, and metrics.
7. Enterprise Support & Cost
Kubernetes:
Open-source and free to use.
Requires skilled teams to manage and maintain infrastructure.
Support is available from third-party providers.
OpenShift:
Requires a Red Hat subscription for enterprise support.
Offers enterprise-grade stability, support, and compliance features.
Managed OpenShift offerings are available via cloud providers (AWS, Azure, GCP).
Conclusion
Both OpenShift and Kubernetes serve as powerful container orchestration platforms. Kubernetes is highly flexible and widely adopted, but it demands expertise for setup and management. OpenShift, on the other hand, simplifies the experience with built-in security, networking, and developer tools, making it a strong choice for enterprises looking for a robust, supported Kubernetes distribution.
Choosing between them depends on your organization's needs: if you seek flexibility and open-source freedom, Kubernetes is ideal; if you prefer an enterprise-ready solution with out-of-the-box tools, OpenShift is the way to go.
For more details click www.hawkstack.com
0 notes
Text
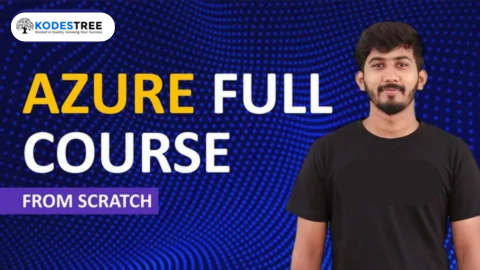
Where Can I Find the Best Azure Master Program in Bangalore, India?
Azure Master Program in Bangalore, India
In today's fast-paced IT world, cloud computing has become the backbone of businesses, driving innovation and scalability. Azure Master Program in Bangalore, India is one of the most sought-after courses for professionals looking to build expertise in Microsoft Azure. With cloud adoption skyrocketing, mastering Azure can significantly enhance career opportunities.
Kodestree offers one of the best Azure training programs, designed to equip learners with real-world skills and industry-recognized certifications. Whether you want to Learn Azure DevOps, get hands-on experience with Azure Cloud DevOps, or enroll in an Azure DevOps Certification course, choosing the right program is crucial.
Why Choose an Azure Master Program?
Azure has become a leading cloud computing platform, and organizations worldwide rely on it for infrastructure, software, and services. Enrolling in an Azure Master Program in Bangalore, India offers multiple benefits:
High Demand for Azure Professionals: The increasing adoption of Azure by enterprises has created a surge in demand for certified professionals.
Competitive Salary Packages: Azure-certified experts, especially those with Azure DevOps Certification, command higher salaries.
Career Growth: Azure expertise opens doors to high-level roles such as Cloud Architect, DevOps Engineer, and Azure Solutions Architect.
Hands-on Experience: Programs like Azure DevOps Training Online provide practical exposure to real-world scenarios.
Key Features of a Top Azure Master Program
When selecting an Azure Master Program in Bangalore, India, consider the following aspects:
1. Comprehensive Curriculum
A well-structured Azure program should cover:
Azure Fundamentals – Cloud concepts, Azure services, security, and compliance.
Azure DevOps Course – Continuous integration, deployment, monitoring, and automation.
Azure DevOps Advanced Online Course – Advanced DevOps concepts with hands-on implementation.
Azure Cloud DevOps – Infrastructure as code, Kubernetes, and serverless computing.
2. Certification-Oriented Training
A quality training program should prepare students for industry-recognized certifications such as:
Microsoft Certified: Azure Fundamentals (AZ-900)
Microsoft Certified: Azure Administrator (AZ-104)
Microsoft Certified: DevOps Engineer Expert (AZ-400)
3. Hands-on Learning and Projects
A strong emphasis on hands-on training is necessary for mastering Azure. Programs that offer real-world projects in Azure DevOps Training Online provide better practical knowledge.
4. Expert Trainers and Mentorship
A good training institute should have experienced instructors with deep industry knowledge. Kodestree ensures its trainers are certified professionals with years of experience in Azure DevOps Course and cloud solutions.
5. Placement Assistance
Top training providers in Bangalore offer placement support, helping students land jobs in reputed companies. Kodestree provides career guidance and interview preparation for Azure roles.
Best Institutes Offering Azure Master Program in Bangalore, India
Here are some of the best training institutes that offer in-depth Azure training:
Kodestree – Offers a structured Azure Master Program in Bangalore, India, covering all aspects of cloud computing and DevOps.
Simplilearn – Provides online Azure courses with instructor-led sessions.
Intellipaat – Known for its hands-on approach and real-world projects in Azure.
Edureka – Offers Azure training with certification guidance.
Online vs. Offline Training – Which One is Better?
If you are considering Azure Online Courses, it's essential to understand the pros and cons of online and offline learning.
Online Learning
✅ Flexible and self-paced ✅ Access to global trainers ✅ Cost-effective ✅ Ideal for working professionals
Offline Learning
✅ Classroom-based interaction ✅ Direct mentorship ✅ Networking opportunities ✅ Better for beginners who need more guidance
Kodestree offers Azure DevOps Training Online, providing the flexibility of online learning while ensuring high-quality mentorship and hands-on training.
How to Choose the Right Azure Master Program?
When selecting an Azure Master Program in Bangalore, India, keep the following factors in mind:
Course Curriculum: Ensure the course includes Azure DevOps Course, hands-on labs, and certification preparation.
Trainer Experience: Look for institutes with industry-expert trainers.
Student Reviews: Check testimonials from past students to gauge course effectiveness.
Job Assistance: Programs that offer placement support, resume-building, and mock interviews are ideal.
Career Growth After Completing an Azure Master Program
Completing an Azure Master Program opens doors to multiple job roles, including:
Azure Cloud Engineer
DevOps Engineer
Cloud Architect
Azure Solutions Architect
Salary Expectations
According to industry reports, Azure-certified professionals in India can expect:
Azure DevOps Engineer – ₹8-15 LPA
Cloud Architect – ₹15-25 LPA
Azure Administrator – ₹5-10 LPA
Top companies hiring Azure professionals include Microsoft, Amazon, Infosys, Wipro, TCS, and Accenture.
Frequently Asked Questions
1. Who Can Enroll in the Azure Master Program?
Anyone interested in cloud computing can enroll. It is beneficial for IT professionals, software developers, and system administrators.
2. Do I Need Prior Experience in Azure?
Basic IT and networking knowledge help, but beginner-friendly courses are available. Kodestree’s program caters to both beginners and experienced professionals.
3. Can I Get a Job After Completing an Azure Master Program?
Yes, most institutes offer placement assistance, and Azure skills are in high demand.
4. Is Azure Certification Necessary for Career Growth?
While not mandatory, certification adds credibility to your skills and improves job prospects.
5. How Long Does It Take to Complete an Azure Master Program?
Typically, 2-6 months, depending on course structure and learning pace.
Conclusion
Choosing the right Azure Master Program in Bangalore, India is crucial for career success in cloud computing. Kodestree’s industry-aligned training program provides a perfect blend of theoretical and practical learning, ensuring you are job-ready upon completion. Whether you are looking to enroll in an Azure DevOps Certification course or advance your skills with an Azure DevOps Advanced Online Course, Kodestree is the go-to platform for aspiring cloud professionals.
For more details and enrollment information, visit Kodestree’s Azure Master Program and take the first step towards a successful cloud career!
#Azure Master Program in Bangalore India#Azure Devops Advanced Online Course#Azure Online Courses#Azure Devops Certification#Azure Devops Training Online#Learn Azure Devops
1 note
·
View note
Text
Why Linode Accounts Are the Best Choice and Where to Buy Them
Linode has become a trusted name in the cloud hosting industry, offering high-quality services tailored for developers, businesses, and enterprises seeking reliable, scalable, and secure infrastructure. With its competitive pricing, exceptional customer support, and a wide range of features, Linode accounts are increasingly popular among IT professionals. If you're wondering why Linode is the best choice and where you can buy Linode account safely, this article will provide comprehensive insights.

Why Linode Accounts Are the Best Choice
1. Reliable Infrastructure
Linode is renowned for its robust and reliable infrastructure. With data centers located worldwide, it ensures high uptime and optimal performance. Businesses that rely on Linode accounts benefit from a stable environment for hosting applications, websites, and services.
Global Data Centers: Linode operates in 11 data centers worldwide, offering low-latency connections and redundancy.
99.99% Uptime SLA: Linode guarantees near-perfect uptime, making it an excellent choice for mission-critical applications.
2. Cost-Effective Pricing
Linode provides affordable pricing options compared to many other cloud providers. Its simple and transparent pricing structure allows users to plan their budgets effectively.
No Hidden Costs: Users pay only for what they use, with no unexpected charges.
Flexible Plans: From shared CPU instances to dedicated servers, Linode offers plans starting as low as $5 per month, making it suitable for businesses of all sizes.
3. Ease of Use
One of the standout features of Linode accounts is their user-friendly interface. The platform is designed to cater to beginners and seasoned developers alike.
Intuitive Dashboard: Manage your servers, monitor performance, and deploy applications easily.
One-Click Apps: Deploy popular applications like WordPress, Drupal, or databases with just one click.
4. High Performance
Linode ensures high performance through cutting-edge technology. Its SSD storage, fast processors, and optimized network infrastructure ensure lightning-fast speeds.
SSD Storage: All Linode plans come with SSDs for faster data access and improved performance.
Next-Generation Hardware: Regular updates to hardware ensure users benefit from the latest innovations.
5. Customizability and Scalability
Linode offers unparalleled flexibility, allowing users to customize their servers based on specific needs.
Custom Configurations: Tailor your server environment, operating system, and software stack.
Scalable Solutions: Scale up or down depending on your resource requirements, ensuring cost efficiency.
6. Developer-Friendly Tools
Linode is a developer-focused platform with robust tools and APIs that simplify deployment and management.
CLI and API Access: Automate server management tasks with Linode’s command-line interface and powerful APIs.
DevOps Ready: Supports tools like Kubernetes, Docker, and Terraform for seamless integration into CI/CD pipelines.
7. Exceptional Customer Support
Linode’s customer support is often highlighted as one of its strongest assets. Available 24/7, the support team assists users with technical and account-related issues.
Quick Response Times: Get answers within minutes through live chat or ticketing systems.
Extensive Documentation: Access tutorials, guides, and forums to resolve issues independently.
8. Security and Compliance
Linode prioritizes user security by providing features like DDoS protection, firewalls, and two-factor authentication.
DDoS Protection: Prevent downtime caused by malicious attacks.
Compliance: Linode complies with industry standards, ensuring data safety and privacy.
Conclusion
Linode accounts are an excellent choice for developers and businesses looking for high-performance, cost-effective, and reliable cloud hosting solutions. With its robust infrastructure, transparent pricing, and user-friendly tools, Linode stands out as a top-tier provider in the competitive cloud hosting market.
When buying Linode accounts, prioritize safety and authenticity by purchasing from the official website or verified sources. This ensures you benefit from Linode’s exceptional features and customer support. Avoid unverified sellers to minimize risks and guarantee a smooth experience.
Whether you’re a developer seeking scalable hosting or a business looking to streamline operations, Linode accounts are undoubtedly one of the best choices. Start exploring Linode today and take your cloud hosting experience to the next level!
0 notes
Text
SRE (Site Reliability Engineering) Interview Preparation Guide
Site Reliability Engineering (SRE) is a highly sought-after role that blends software engineering with systems administration to create scalable, reliable systems. Whether you’re a seasoned professional or just starting out, preparing for an SRE interview requires a strategic approach. Here’s a guide to help you ace your interview.
1. Understand the Role of an SRE
Before diving into preparation, it’s crucial to understand the responsibilities of an SRE. SREs focus on maintaining the reliability, availability, and performance of systems. Their tasks include:
• Monitoring and incident response
• Automation of manual tasks
• Capacity planning
• Performance tuning
• Collaborating with development teams to improve system architecture
2. Key Areas to Prepare
SRE interviews typically cover a range of topics. Here are the main areas you should focus on:
a) System Design
• Learn how to design scalable and fault-tolerant systems.
• Understand concepts like load balancing, caching, database sharding, and high availability.
• Be prepared to discuss trade-offs in system architecture.
b) Programming and Scripting
• Proficiency in at least one programming language (e.g., Python, Go, Java) is essential.
• Practice writing scripts for automation tasks like log parsing or monitoring setup.
• Focus on problem-solving skills and algorithms.
c) Linux/Unix Fundamentals
• Understand Linux commands, file systems, and process management.
• Learn about networking concepts such as DNS, TCP/IP, and firewalls.
d) Monitoring and Observability
• Familiarize yourself with tools like Prometheus, Grafana, ELK stack, and Datadog.
• Understand key metrics (e.g., latency, traffic, errors) and Service Level Objectives (SLOs).
e) Incident Management
• Study strategies for diagnosing and mitigating production issues.
• Be ready to explain root cause analysis and postmortem processes.
f) Cloud and Kubernetes
• Understand cloud platforms like AWS, Azure, or GCP.
• Learn Kubernetes concepts such as pods, deployments, and service meshes.
• Explore Infrastructure as Code (IaC) tools like Terraform.
3. Soft Skills and Behavioral Questions
SREs often collaborate with cross-functional teams. Be prepared for questions about:
• Handling high-pressure incidents
• Balancing reliability with feature delivery
• Communication and teamwork skills
Read More: SRE (Site Reliability Engineering) Interview Preparation Guide
0 notes