#jelly spoon
Explore tagged Tumblr posts
Visit Tumblr Blog
Explore Tumblr blogs with no restrictions, modern design and the best experience.
Last Seen Tumblr Blogs


Fun Fact
70% of Tumblr users say the Dashboard is their favorite place to spend time online.
Text
Ladles and Jelly-spoons
The Hallmark Channel's first attempt at an off-holiday film concerns the start of soup season, in which an uptight Campbell's executive who HATES home cooking ends up falling for the owner of a local diner who makes everything from scratch.
#bad idea#movie pitch#pitch and moan#hallmark#hallmark channel#tv movie#ladle#jelly spoon#ladies and gentlemen#soup#soup season#home cooking#scratch cooking#small town america#campbell's soup#holiday movies
0 notes
Text


Top MEME/INTERNET icons posted to @oldinterneticons in 2024
#top posts#icons#avatars#myspace#livejournal#xanga#msn#aim#2000s#old internet#old web#webcore#memes#internet#keyboard cat#lol wut#biting pear of salamanca#peanut butter jelly time#charlie the unicorn#my chemical romance#my immortal#rejected#my spoon is too big
784 notes
·
View notes
Text
haven't been able to get @on-a-lucky-tide's post about pancakes out of my head and since I'm waiting for my food...I doodled....

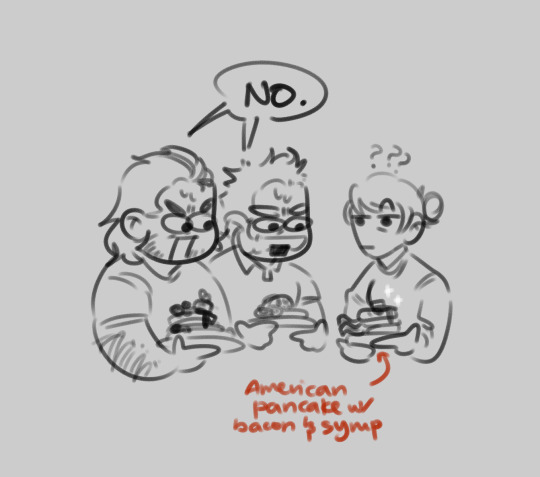
bonus my OCs' fav type
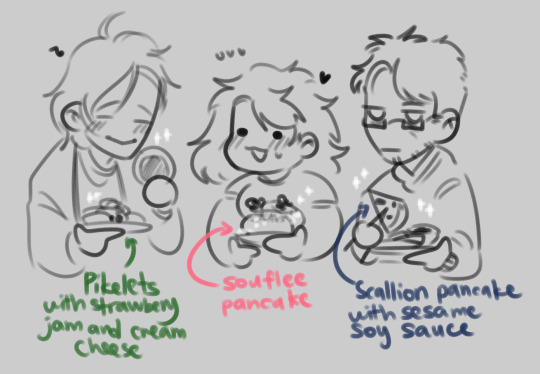
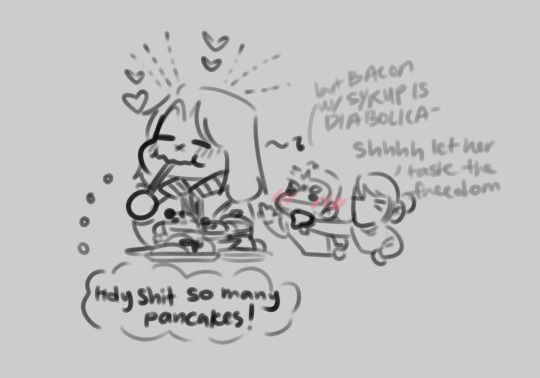
#am so hUNGRY#Raven would devour all of them (she loves trying new food)#will tell Kate the bacon was very nice she liked how the smell complimented the sweetness (Price is in distraught)#scallion pancake is chinese pancake and its ALSO very nice very good some have beef/mutton stuffing in them#my OC Fish is having scallion pancake with soy sauce but it's absolutely bomb if you try it with mala chili sauce WOOOOOOOO#im not a big fan of souflee pancake but it's aesthetically pleasing to smack it with a spoon and jiggle it#i have not tried pikelets but stuffed pancake? yes. gimme 20#same with Blini and English style pancake. would love to try those some day#i forgot to include Viktor's pancake preference I'll rb with it later#gummmyart#doodle#captain john price#cod nikolai#kate laswell#[oc]B6#[oc]Jelly#[oc]Fish#[oc]Raven
219 notes
·
View notes
Text

#sweets#dessert#candy#multicolor#multicoloured#colourful#colorful#multicolour#multicolored#bowl#spoon#pudding#jellies
37 notes
·
View notes
Text


Periwinkle stimboard
×/×/× ×/×/× ×/×/×
#text#gifs#autismposting#stim#stimblr#stimmy#sensory#stims#stimmies#stimming#stimboard#yarn stim#cloud slime stim#icecream stim#gemstone stim#cake stim#ice stim#shower jelly stim#plant stim#pearl stim#spoon stim#jiggly stim#food stim#sweets stim
27 notes
·
View notes
Text
Lily: The first time I ever got upset in front of Regulus, they put their arms around me and it was so awkward that I had to ask them if they were hugging me or reaching for something on the shelf behind me. Regulus: I was doing both, for your information. James: The first time Regulus hugged me, it was such a disaster we didn’t make eye contact for, like, a week after.
#this is why regulus is the little spoon#this is angsty because regulus was never taught how to hug as a child#jegulily#jelly ship#jelly babies#marauders#marauders era#james & peter & remus & sirius#incorrect marauders quotes#marauders incorrect quotes#james potter#regulus black#lily evans#james x lily x regulus
51 notes
·
View notes
Text
it is 11pm I have just slept for 4 hours and I am going to sleep for 4 more hours and after that? 4 more hours of snoozing
#dinner was me picking at leftover chicken and a coupoe spoons of jelly#like last night's dinner was so much i wasn't very hungry today lmao what a W gotta love a good meal#mmm sleepy#bue waffling
5 notes
·
View notes
Text
If elves can hold jobs in society with actual salaries, then what does their retirement plan look like?
#because let me tell you if my elf neighbour could get retirement salary at fucking 60 while looking younger than my 30y old kids#i would fucking riot#imagine being paid for 940 years#just to go party in elf wood orgies#while I'm in my rocking chair eating elder jelly in a spoon because all my teeth rotted off#I'm ending the elven race that day#♡elf culture#dnd
4 notes
·
View notes
Text
I have adverse reactions to conventional hair-care products but today I decided to use my SO's tea tree & mint shampoo and conditioner so I can feel something: cooling tingle (now) and regret (later).
#ooc#health#i had to clean the entire bathroom with zero spoons#it took 4-ish hours and now i feel like jelly
2 notes
·
View notes
Text
I have a lot of one shots where some very kind cool people want to hear more. Sometimes that really inspires me to write, so thank you! Sometimes I wish I could write, but I don’t have the energy to commit to it!
But if you ever seriously want to know what would happen next, I will likely happily tell you if I have any ideas. Just ask ❤️
#too much life too little spoons#jelly talks#jafss rants#looking through a few one shots that people commented on it wrote in the tags
3 notes
·
View notes
Text
#jelly #organic chemistry #colloids tags from above post

#Food and beverages#Banana bread#Jelly#Jam#Pectin#*laughing more and more*#*trying to understand the recipes people use*#I learned a whole different way 😂 (from redcurrants but it's the same technique)#Cook the fruits with their weight in sugar (or a little less) and let boil at least 5 minutes#When it feels half cooked mix with an immersion blender directly in the pan#Keep simmering testing regularly on a cool plate until it resists a bit#Using a fine mesh strainer and a spoon pour in pots by pushing through the strainer#Last year I did it with ordinary sugar next time I'll use “jam sugar” (with added pectin) so it sets a little more
12K notes
·
View notes
Text
I have some very important information that I need the world to know about.
disclosing this information will get me in some huge trouble with Big Butterknife but I am shouldering that burden to get this information to you.
You can use Back of Spoon instead of Butter Knife.
it spreads peanut butter, cream cheese, jelly, and all sorts of things just as well as Butter Knife.
I hope this information finds you well. take care
13K notes
·
View notes
Text

1 note
·
View note
Text
youtube
Taste Transparent Cake with Underwater World / Resin Art
#jedrek29t#resinart#epoxyresin#resin#epoxy#making#tutorial#diy#craft#cake#transparent#jelly#jellyfish#jellycat#howto#pouring#fruit#strawberries#spoon#Youtube
0 notes
Text
Committed maybe one too many shenanigans today and gave myself an achy leg. On the plus side, I discovered that soy ice cream is delicious with jelly.
#shenanigans#screaming my thoughts into the void#hobbling over with a spoon of jelly#the void can't escape
0 notes