#how to use iron on vinyl with cricut
Explore tagged Tumblr posts
Text
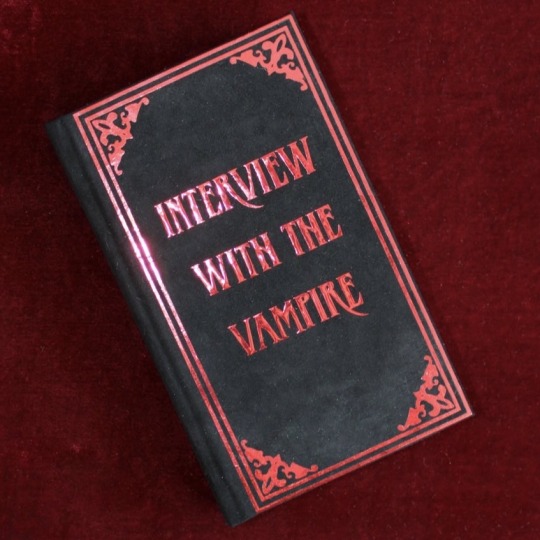
Interview with the Vampire | faux rebind
When my copies of Interview with the Vampire, The Vampire Lestat and Queen of the Damned arrived I was shocked to discover that every single one had a sticker on the cover. Except it wasn't a sticker. It was PRINTED on the cover. Who does that?
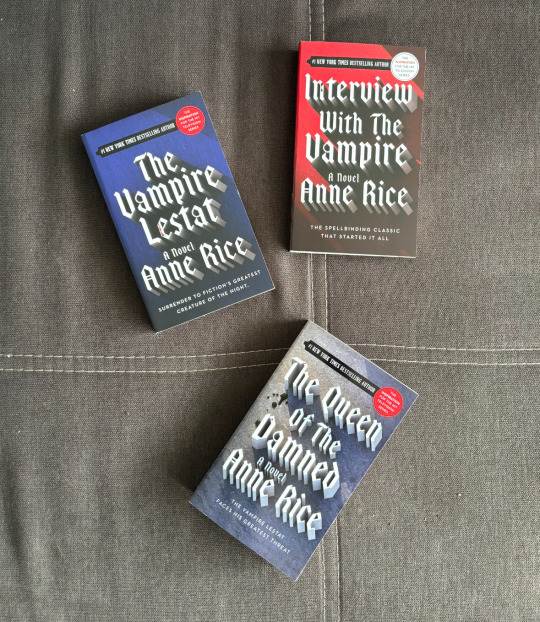
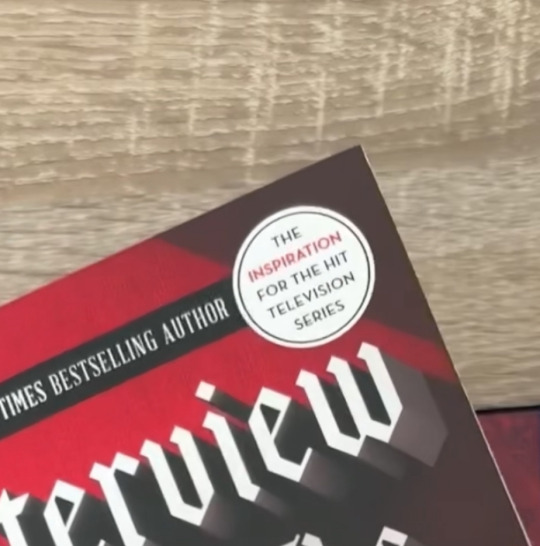
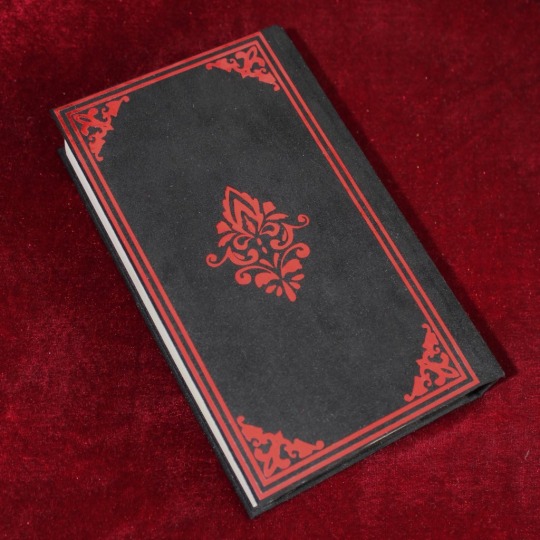
And after finishing the first book I wanted them to match the vibe of the show. So I do what I always do when I love a book. I rebind it. Not a full rebind, I still wanted to preserve the cover after all, but a faux rebind, a protective book jacket that would look great on my shelf and keep the book from getting even more roughed up. I'm using the tutorial made by bindrebindery on TikTok or on Instagram . I love her work, she's incredible.
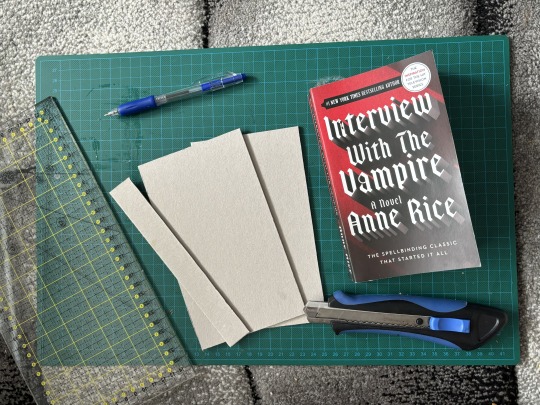
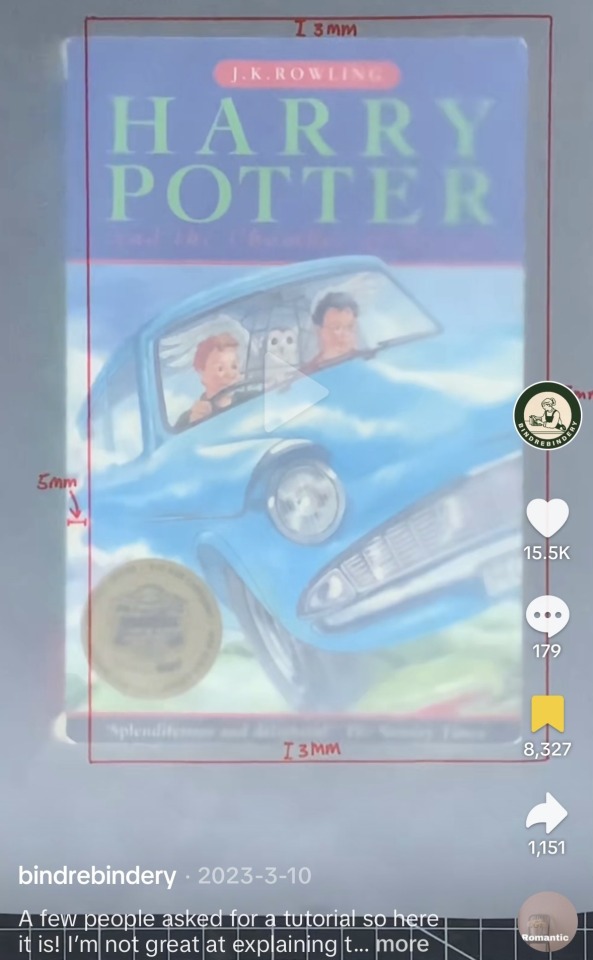
The first thing we gotta do is measure our book. It needs to be extremely exact, since we'll be working with millimeters here. The width of my copy is 10.4cm, and its height is 17.5cm. As per bindrebindery's tutorial we'll subtract 5mm from our width measurement and then add 3mm.
10.4 - 0.5 + 0.3 = 10.2cm
For the height we'll just add 3mm to the bottom and the top, so 6mm each
17.5 + 0.3 + 0.3 = 18.1cm
And for the back, we just copy the height measurement of 18.1cm and simply measure the width of the back which for my copy was 2.3cm.
I'm using 2.5mm thick cardboard and I would also suggest investing in a box cutter and a self-healing mat to not damage any of your surfaces. Now that we've got our pieces cut out, we can draw where we want to glue them to the book cloth. The space for the hinge in between the cardboard pieces depends on how thick your cardboard is. It's the width of the cardboard times 2 plus 5mm.
2.5mm x 2 + 5mm = 10mm
So the gap in between is 1cm wide.
We're also leaving a 2cm gap all around. I also like to invert-round the corners, to make it easier for me to fold it down later, but it's also possible to just trim off the excess on a straight line.
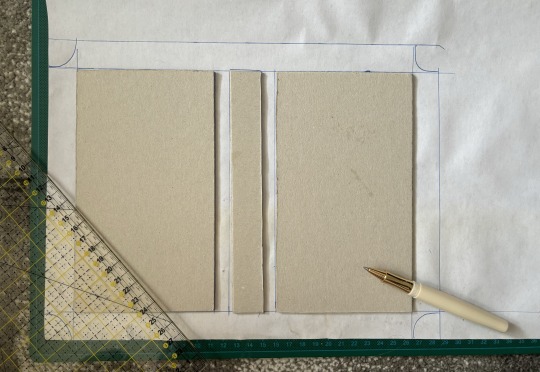
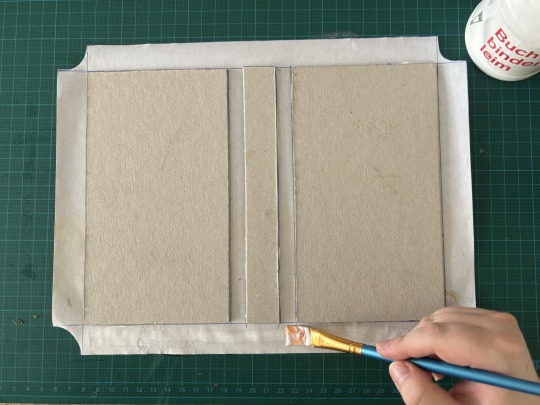
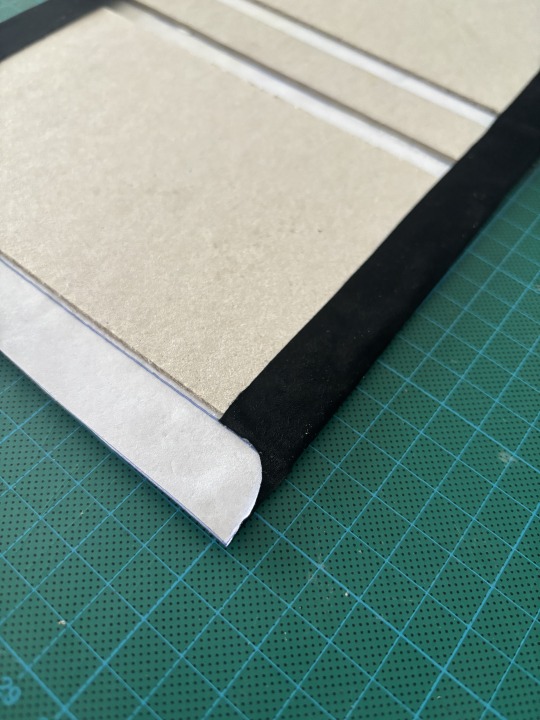
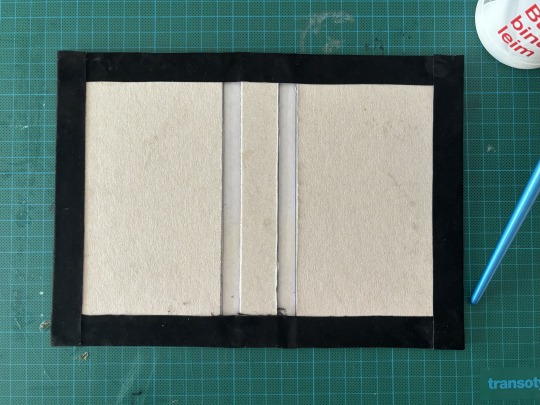
Now it's time to cut and glue everything down. I'm using bookbinder's glue for this and folding down the long pieces first. While the glue is drying I'm cutting out 2 more pieces with the measurements of our cover. These will be the sleeves that will hold our book in place.

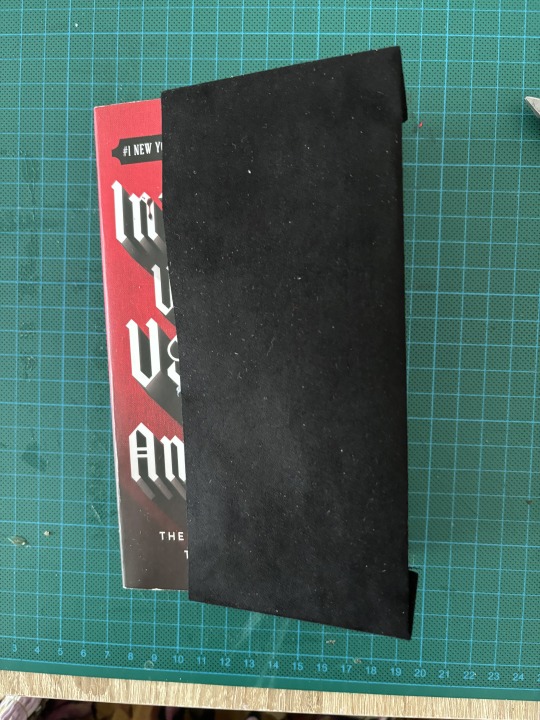
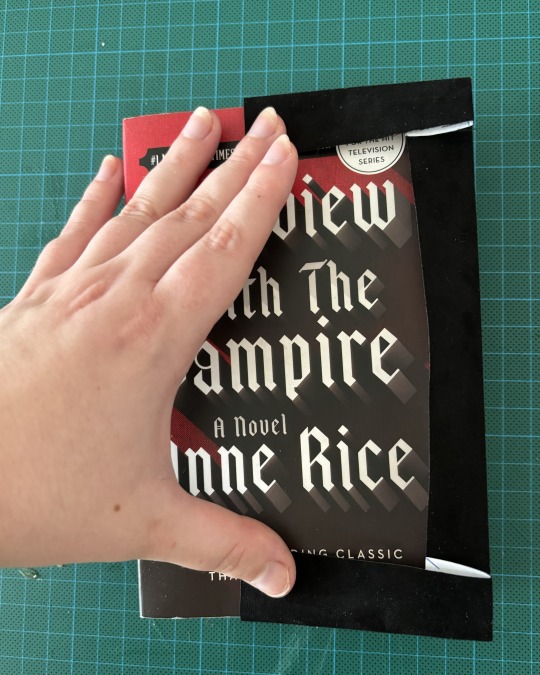
I'm folding it and making sure it's not too tight on the book so it can slide in and out easily and then I'm cutting off the excess, a little more than 2cm in this case.
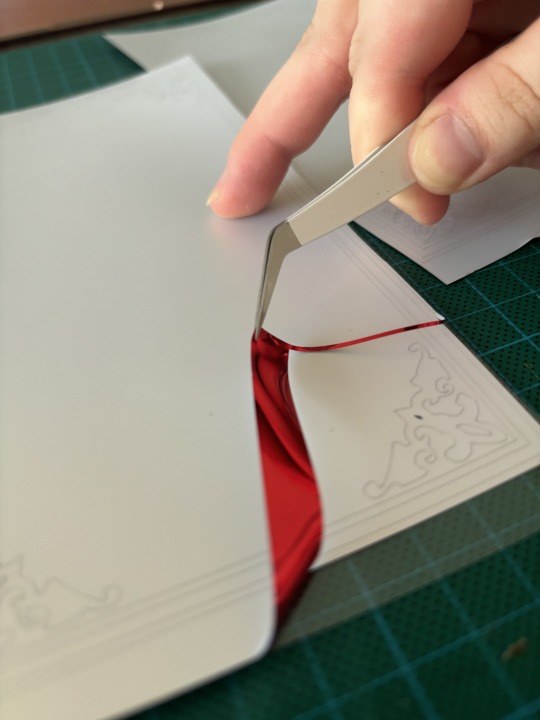

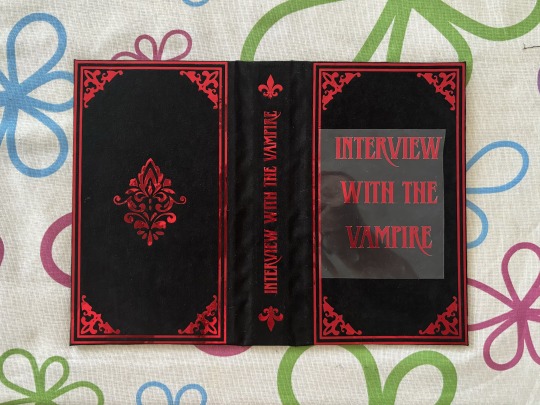
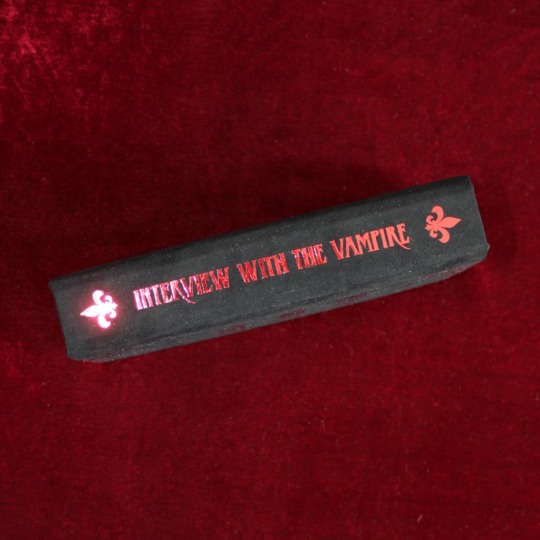
I also spent a hot minute designing a few embellishments. I got a few sheets of vinyl to play around with, to test my new cricut and ironed them onto the velvet, which worked fine for the bigger pieces, but those pesky little letters just did not want to stick. It took me a hot minute to iron each letter on individually. But it was totally worth it, I think. I love the look of it.
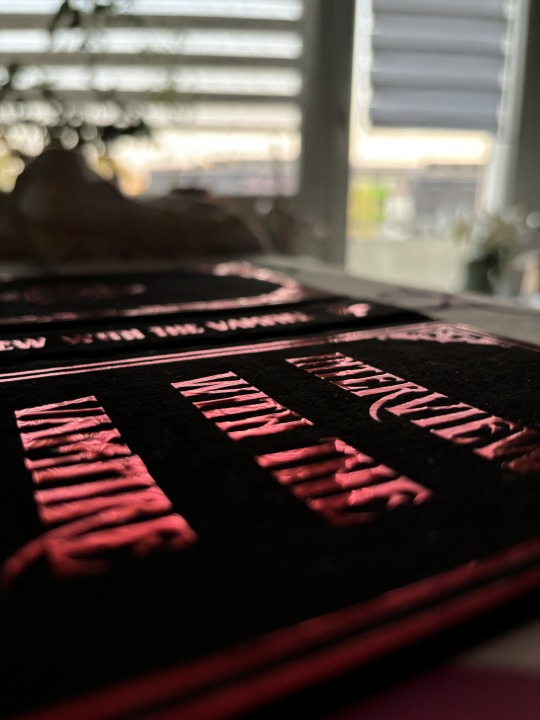
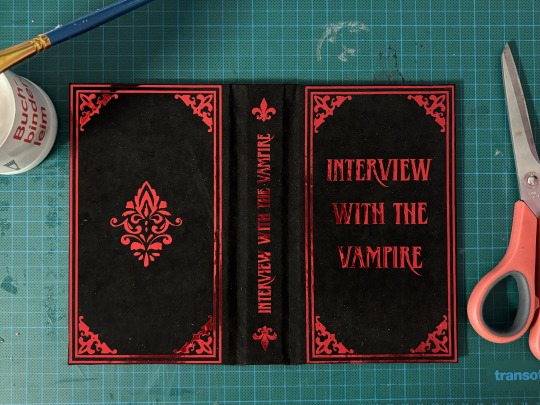
Look at that shine. Gorgeous.
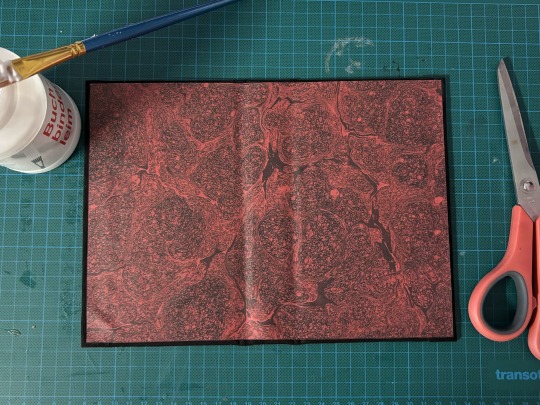
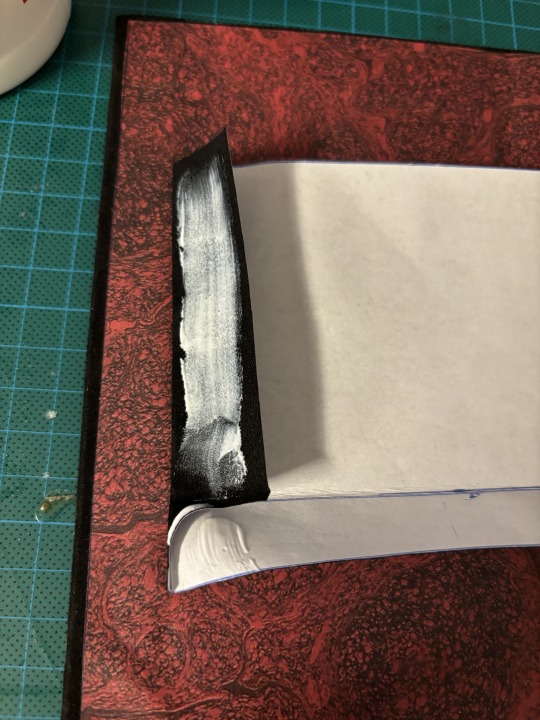
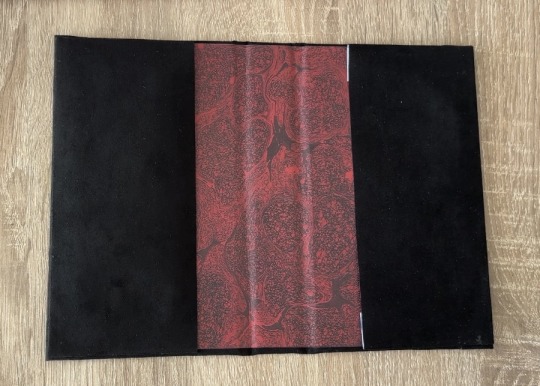
Now all that's left is glue on some decorative endpaper, turn it over and go over the hinges with something (I like to use the bow handles of my scissors) and add our sleeve-pieces. I also like to slide in some paper just to make sure the glue dries properly and doesn't seep out and (God forbid) glues the sleeves shut. And that's it.
#amc iwtv#iwtv#interview with the vampire#iwtv amc#interview with the vampire amc#daniel molloy#iwtv fanart#book binding#bookbinding#book#books#bookblr#booklr#iwtv louis#louis de pointe du lac#amc lestat#lestat de lioncourt#lestat#iwtv lestat
101 notes
·
View notes
Text


I finally got around to rebinding my copy of the complete Night Angel trilogy by Brent Weeks.
I picked this book up at random at Barnes and Noble years ago to use up a gift card and it ended up being one of my favorites. My paperback had seen better days. The spine was super curved, and coming apart at the corners. I even found sand in the spine glue when I took it apart cause the last time I read it I was at the beach lol


I used a heat gun to loosen the glue on the spine and let it set with weight on it to straighten it back out. Who needs tools when you have books lol.

The spine came out pretty straight once the glue was set back up. I had to loosen it again to get the paper cover to come off cleanly. I reinforced the spine with some new glue as well.


This was my first time doing guilded edges and 2/3 sides came out pretty good! I learned how to sand the edges and I was able to get them to a mirror shine with just manual hand sanding. Then I used heat transfer silver foil.


Once the guilding was done I finished up the text block with the headbands, a bookmark ribbon, and more glue. This book was massive so I had to use two sheets of chip board to get the covers cut out.


I covered the boards with black leather. I used leather repair material so it already had adhesive, and just had to peel and stick. I designed the cover on canva. I tried to match the general vibes of the original cover and other cover versions it's been printed with. Cut out the heat transfer vinyl with my Cricut and ironed it on!

Casing in the text block is always the most stressful part but all went smoothly and I'm really happy with how it turned out!

#bookbinding#rebinding#canva#night angel#brent weeks#Night Angel The Complete Trillogy#cover design#graphic design#cricut#heat transfer
63 notes
·
View notes
Text


Been doing some testing for Gale’s tunic embroidery! The plan is to cut it all out in iron-on vinyl using the cricut, and then embroider over it. I did a first test in paper just to see if the cricut could handle such a tiny design (it lost a few fronds along the way 🤣) and then a little stitching testing. Next I cut out a few in vinyl to gauge the size, practise weeding, and see how adhering ‘em would go. And then embroidery!
I’m doing the cuffs first since they’re the smallest and simplest sections. I’ve never worked with iron-on vinyl before, and I’ve got very limited embroidery experience, so this is all an adventure!
62 notes
·
View notes
Text
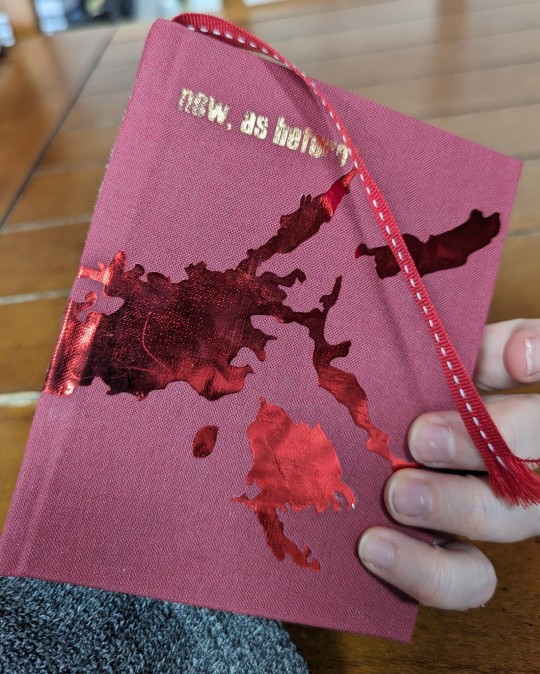


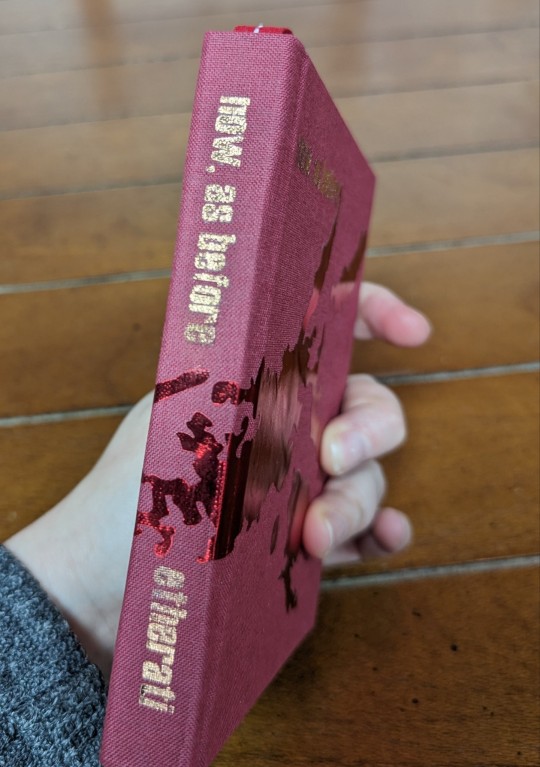
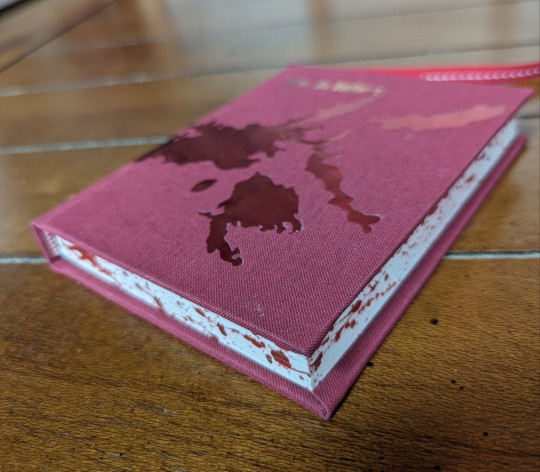
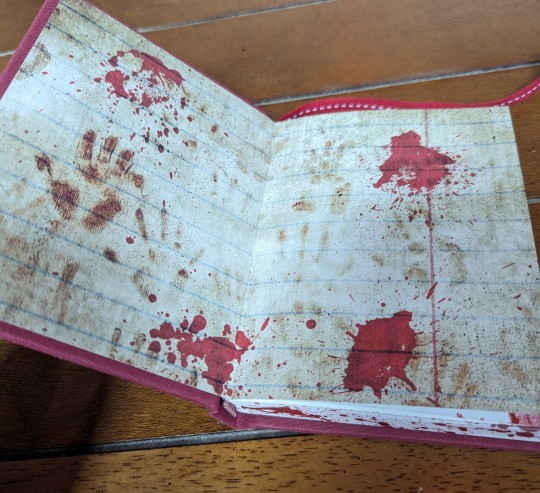
An au fic that is near and dear to my heart, and one that spawned hundreds of thousands of words of follow-up, companion pieces, aus, and so on. AKA the one where I fixed canon by turning a major character into a zombie.
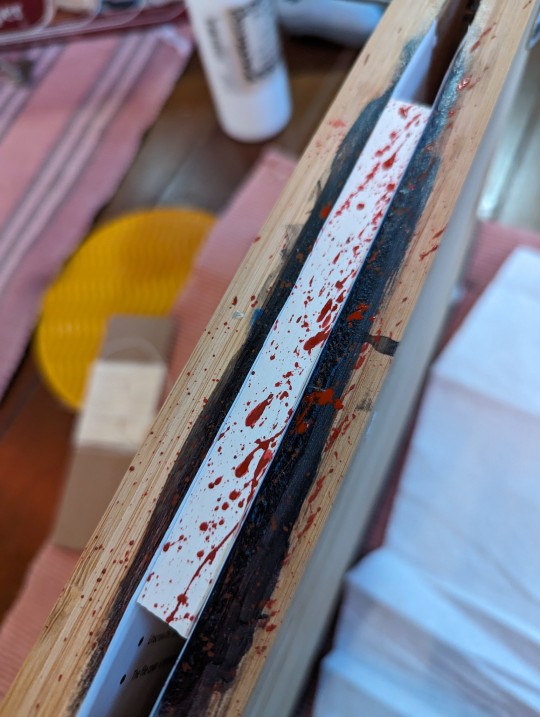
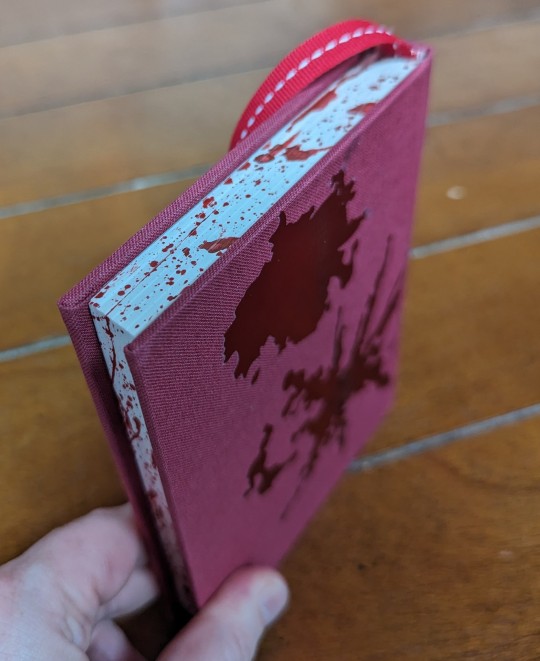
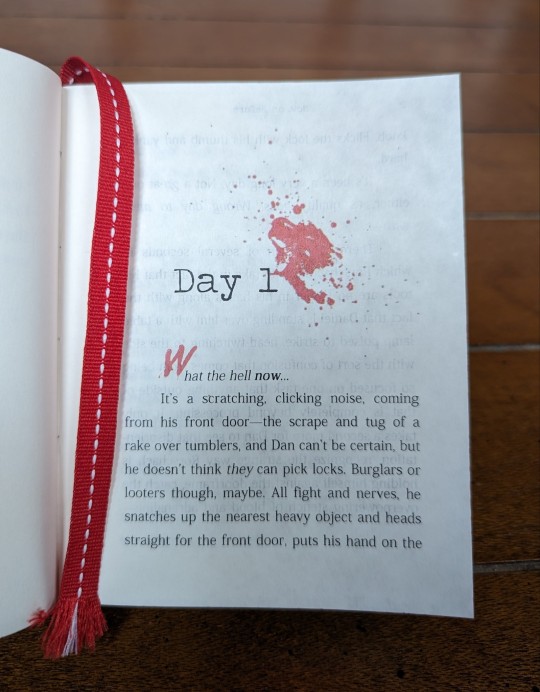
Lot of firsts on this bind -- first time using a guillotine for the edges, first time including a bookmark, and first time using heat transfer vinyl, for the lettering and bloodstains on the cover. For a first attempt, not awful; the letters came out a little raggedy but I decided to just roll with it since this is, thematically, supposed to be a bloodied and ratty relic of an apocalypse. And I FUCKING LOVE how the blood splattered page edges turned out.
Technical details under the cut.
Body text is Kozuka Mincho Pro R on French fleece white parchtone; titles are Haettenschweiler; chapter headers are Traveling Typewriter; chapter caps and Tshirt text are You Murderer BB. Blood splatters from a font called simply "splatter".
End papers are some kind of scrapbook paper from a "blood splatter" pack I found online somewhere. Bookcloth is generic BbH. Vinyl is Siser Metal HTV, cut with cricut, that I jacked up by using an iron instead of a proper heat press. Edge splatter with mix of liquitex naphol red light and FW Pearlescent black acrylic inks.
I think that's everything. Most ambitious bind I've done and one of the ones I'm happiest with in terms of overall presentation.
#book binding#bookbinding#fan binding#fanbinding#fic binding#ficbinding#hand binding#handbinding#book arts#I'm still very much a newbie at this ok#so don't be too harsh about my messed up vinyl#watchmen zverse
69 notes
·
View notes
Text
Fool in the Moon binding
All right, time for a successful binding post, how about that? This was for @arahir's amazing work, Fool in the Moon. As you can probably tell by the rest of my feed right now I'm a little obsessed with Trigun at the moment (it's okay, it's normal, I feel normal things about all of these people, I'm not obsessing and listening to the soundtrack 24 hours a day, I haven't watched the whole thing twice in two weeks, all of my targeted ads on my computer aren't about plants right now, I'm fine) and suffice to say this story was just an emotional gut punch. It's so good, you guys. Go read it.
Anyway. The binding.
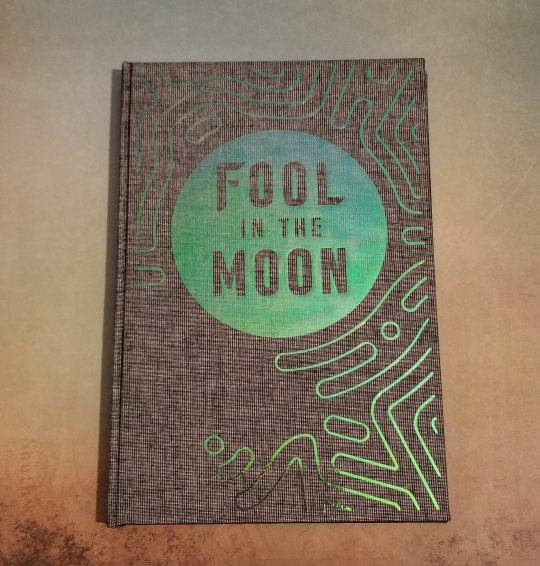
This was my first time using holofoil vinyl, and it turned out AMAZING. Look how pretty it is. And the color change in the light is just crazy.
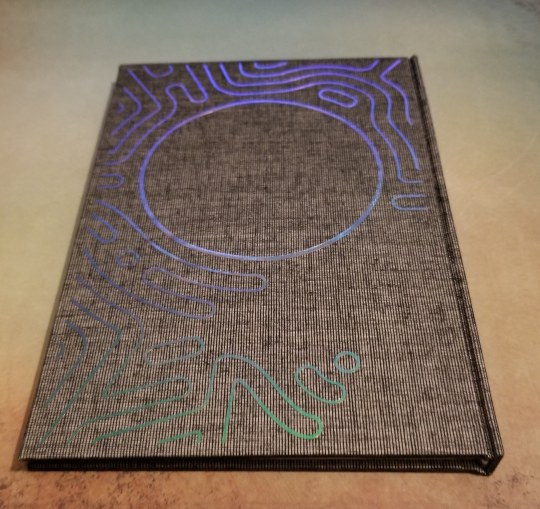
Here's the back. Sorry I don't know how to make a gif, or I would totally show you guys how it shimmers and ripples. At certain angles it's green, blue, purple, orange, sometimes you can get it to be all of those at once, it's a really neat effect.
Also, I love the effect it gives when you open the book up (hard to do once it's bound with the textblock, but doable. This picture was taken before I cased in).
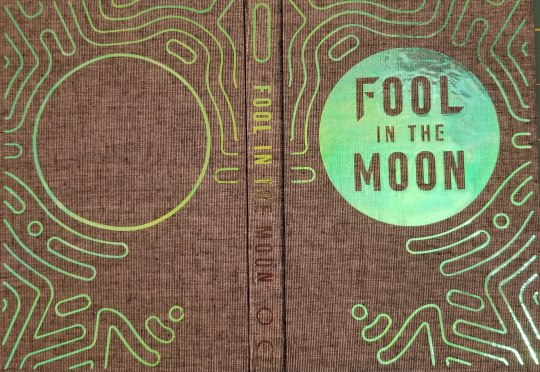
You have to squint your eyes a little but it's supposed to be reminiscent of Vash's sunglasses, and the way (spoilers? maybe?) his face looks when the plant lines come out. I think it's just the super neatest thing.
Here's the endpapers and the title page:
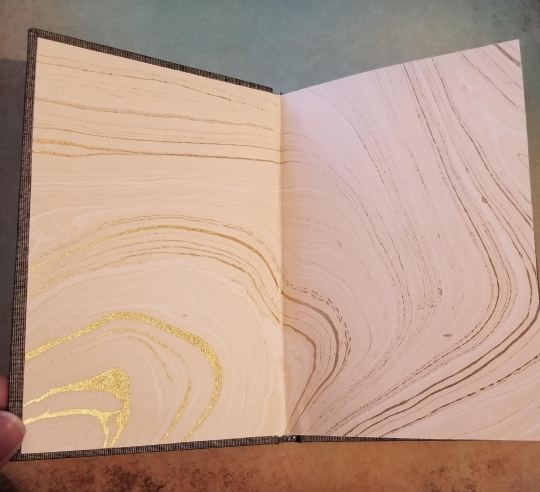
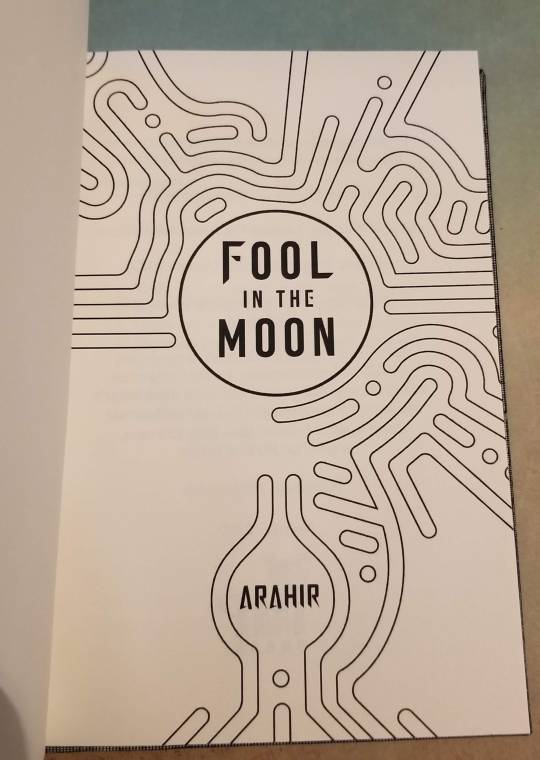
Isn't the title page just the coolest?
And here's a pic of some section breaks:
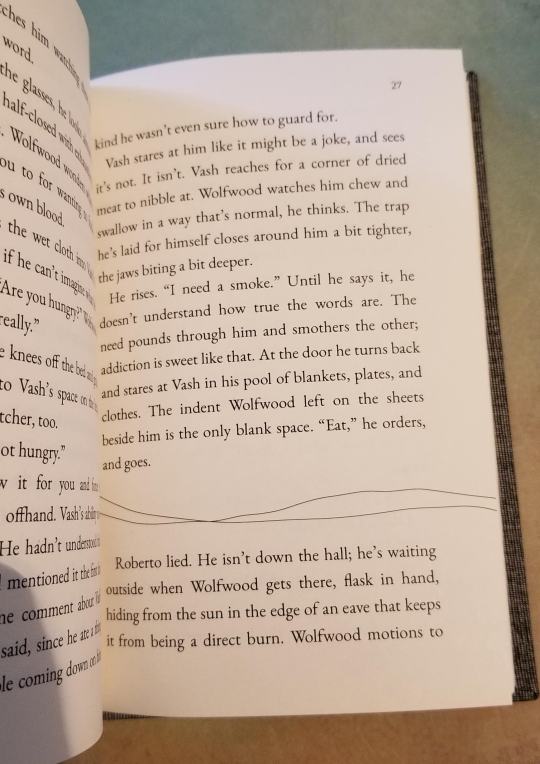
I just made them with the draw tool in Libreoffice, I wanted it to reflect the lines of the endpapers and maybe (?) look like dunes. Either way I think it turned out really great. I kind of maybe wish that I could have incorporated some of Wolfwood's imagery into this, but the design pretty much made itself and I'm super happy with it. Plus at the end of the day everything is about Vash, isn't it? He's Vash the Stampede! (I'm not crying YOU'RE crying!)
Anyway, I figured out the reason my previous book was so crooked was because my guillotine is messed up. It can't cut straight (which is...kind of the point) but it does okay on smaller works like this. So this one cased in very nicely. I used the 5 mm gutters again, and duo bookcloth (magpie I want to say?). The cricut vinyl came in a sample pack and unfortunately didn't come with a name (the sample pack was called Berry something), but it's very similar to Siser's Rainbow Pearl HTV, which is what I used for my copy. Once again the siser was a pain to use, with little bits flying off everywhere and wanting to wrinkle underneath the iron. I don't know why I keep buying that brand. But it worked in the end, and the effect of the holofoil is so cool I'll probably use it again. Endpapers are from Mulberry paper, I love those guys so much.
Let me know what you think! And if you have any questions please feel free to ask, I could talk about bookbinding stuff all day!
#fanfic bookbinding#fanbinding#bookbinding#trigun stampede#vashwood#ao3 author#fanfic#I'll get over that Trigun finale some day#but it won't be this day#my binding#imp press
152 notes
·
View notes
Text
The first batch of pictures for Amoré's character journal are here! Also I have been so super sick that I've literally had nothing to do but to work on this for like almost 2 weeks so...
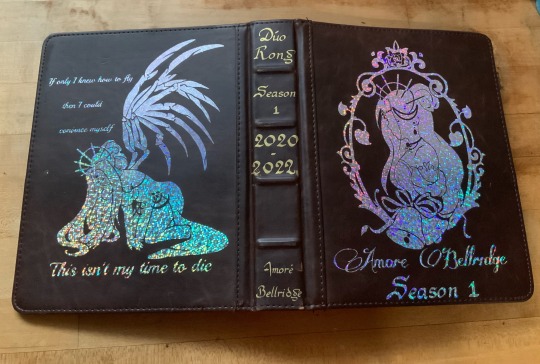
The cover to cover tour officially starts here. All I can say about the front & back is that I lament my lack of experience with my Cricut when I made these decals. I only had 2 "fun" colors to work with at the time & I was still getting comfortable drawing in Procreate, so my silhouette art leaves a lot to be desired compared to some stuff I've made recently. I also found it's incredibly easy to burn this leather book.
But she's volume one, everything with her is a learning experience, & I realized as much as it helps to have a mini heat press for tight corners & small spaces, the cloth barrier they suggest you use between the vinyl & the iron tends to make things harder to press on this scale. So instead I gotta quickly tap straight on the transfer film & hope I don't burn anything around it :(´◦ω◦`):゚゚
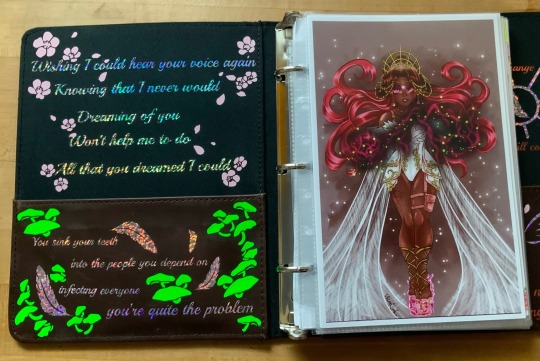
So at the risk of thoroughly exposing my inner theater kid, Amoré set the precedent with how I went forward creating campaign characters. I started off collecting 5 songs to make a mini story arc (almost like a show choir set list 🙃) that helps me figure out an outline for the kind of story I wanna give them.
Somehow Amoré ended up with a truly horrendous blend of rock & theatre. Absolutely incredibe. No wonder she's always such a dramatic bitch.
It was a lot easier to go in & add little decals around these lyrics. I'm definitely cursed with the Too Much™ gene, but I enjoy the little pops of color they give ✨ plus it justifies me hoarding all these vinyl scraps printing stuff this small lol.
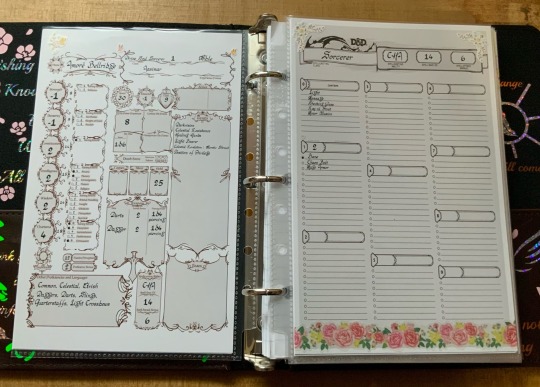
Stat sheet!
In all honesty, as my first character I had no fucking clue what I was doing when I placed these & if I could go back & change one thing I'd probably swap her Intelligence & her Wisdom. She’s definitely more people smart than book smart.
But everything else is...very accurate. She has all the upper body strength of a chicken nugget. Plus on top of the (already) negative I traded disadvantage on everything DEX for magic crystal shoes that can be periodically harvested. Just a way for her to carry around the family fortune without actually having to return to the vault✨
For something that started so average, her CON became a monster & always comes in clutch for her alcohol tolerance. I've played variations of her across a few different one shots & I always manage to roll well for anything alcohol related. The dice do respect a bit 🤣
Spells on the other hand, I floundered with a lot at first because we’re not a combat heavy game, but then I found Chaos Bolt & that was that. It’s essentially Amoré in spell form & I’ve had a ton of fun with it over the years. Also Mage Armor cuz my girl is SO DISTRESSINGLY SQUISHY.
Cantrips were more or less a bit of a toss up. Message was fun for the sheer idea of her using it to talk shit during social events without being caught. But aside from Light serving fun backstory purposes the other 3 are kinda just what looked fun ¯\_(ツ)_/¯ unless you count the idea that she would absolutely delight in zapping handshakes.
From there, I wanted to extend the world map made by our wonderful DM @cappierong into a full scroll. Ya know, for the aesthetic ✨

Our campaign started in Civania, where Amoré's main Estate is. I just wanted a quick mock up to reference, so I edited a preexisting picture I found that checked all the boxes (large, on a plateau, accessible only by bridge) and then absolutely smothered it in flowers.
But anyways... This is primarily where Diana & Amoré grew up together in their decade of backstory ✨
There was probably waaaay to much back & forth trying to keep the continuity between stuff I've already drawn & this big reference. But I think it turned out pretty ok? Not like if I make a mistake anyone will really know lol.
Scaling was also another big issue I had, & I moments where I thought something was too big I just kinda handwaved it away like "ehhhhh she's from a stupid rich family." But now I have a NEED to draw baby Diana & Amoré around like, the statue gardens or something cuz I feel like certain parts of this place are definitely ominous 👀 especially for children...

And lastly we have the back cover & the High Noble political relationship map! I normally have this closer to the front but for layout purposes it'll be here. I kinda feel like I need to do more for the decoration of it but I can’t think of anything else to add at the moment.
Sam if u read that no you didn't.

But now! Other than a family portrait that I've always wanted to draw, I think I'm ready to move onto the art for Season 1 : Arc 2. It's a pretty hefty amount of art in comparison to others, so I gotta get busy. Especially since I think I'm gonna have to draw a few comics *sobs*
If you made it this far, thanks so much for reading! I'm always excited to talk out our little idiots so thanks for indulging me ❀(*´▽`*)❀
#duo rong#dungeons and dragons#dnd character scrapbook#duo chronicles#amore bellridge#diana blackthorn if you squint#dnd#dnd character#dnd pc#dnd oc#character creation#character study(?)#dnd backstory#season 1#dnd art#dnd campaign#campaign art
42 notes
·
View notes
Text
Have not been on here nearly as much as I used to-outside of my job I've been working very hard on my next cosplay build: Electra from starlight express
This is the most complex costume I've ever made, but I'm very pleased with what I have so far!
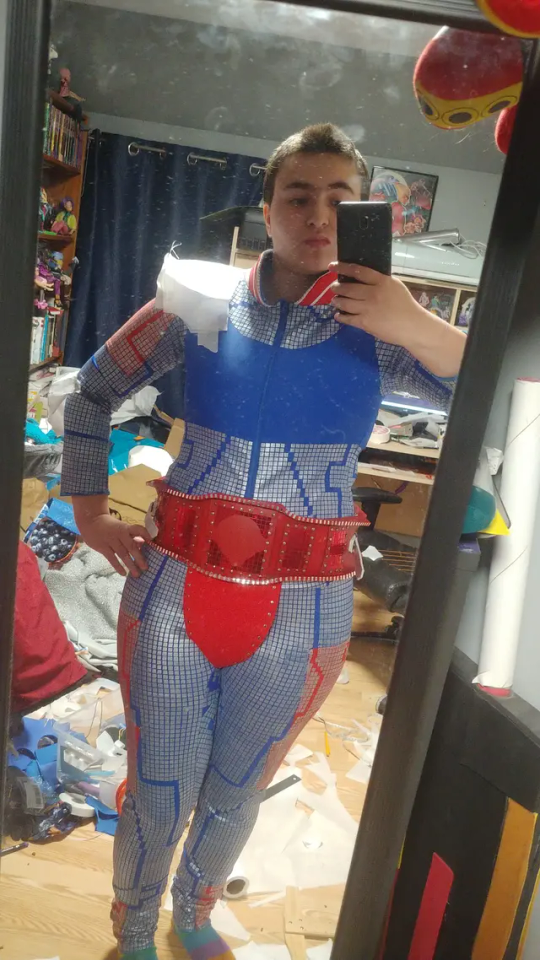
Still have a lot of ways left to go! But it's been extremely rewarding seeing things piece together so nicely
Write-up and WIP photos under cut
The very first thing I started with this costume was the bodysuit, it is the foundation that everything will sit upon so it should be out of the way first, and it would be easier to pattern my armour once I know how it will sit in relation to the rest of the costume
I also knew I would be wearing this to a convention and would want to have easy access for the washroom, so I actually turned a full bodysuit pattern into separate leggings and a leotard with a snap crotch closure
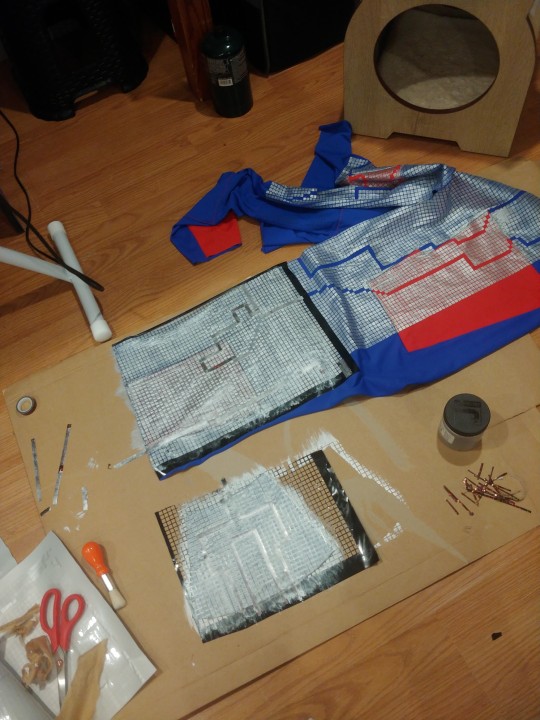
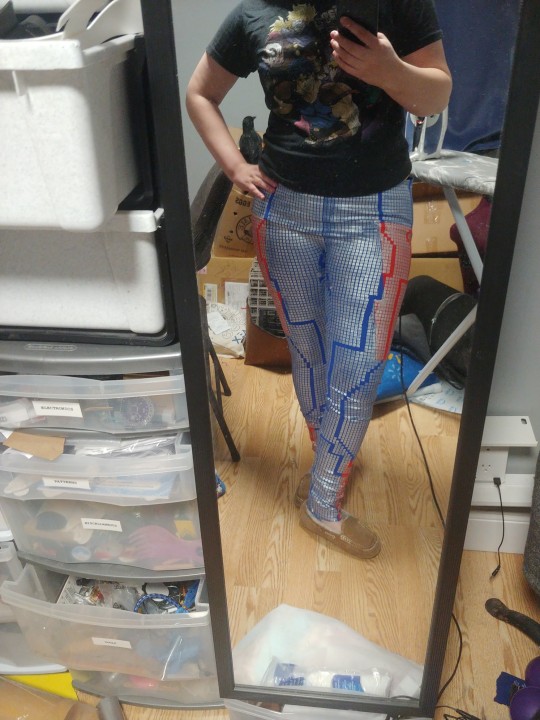
Did the leggings first-at first I wanted to be as accurate as possible with a silver chrome foil HTV that I cut on my Cricut machine with the circuit pattern cut out- but I found out after ironing that despite there being all these spaces between the squares that the fabric did not stretch enough to be able to fit(I had made mock-ups for my clothing pieces and those did fit correctly)
Red sections of clothing is turned edge applique done with water soluble stabilizer so it could stretch after throwing it in the wash
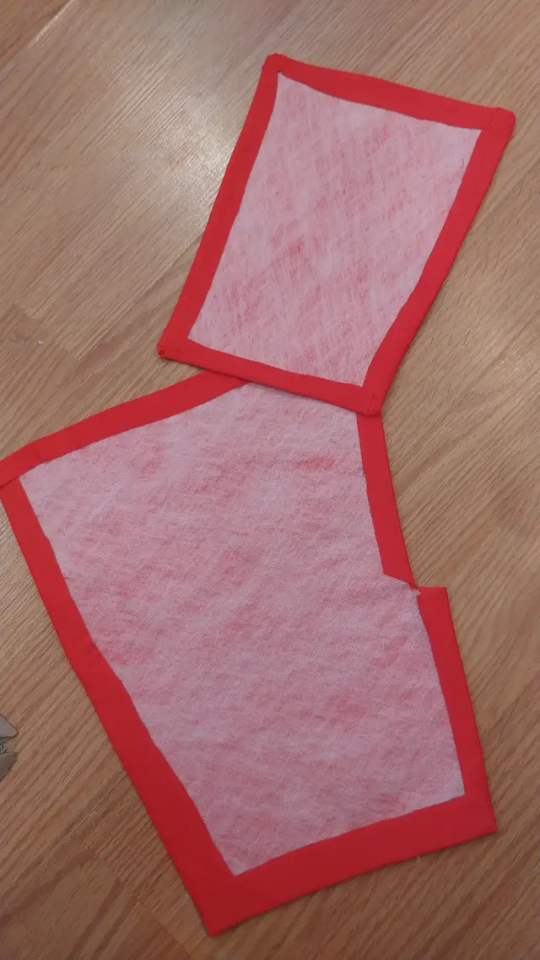
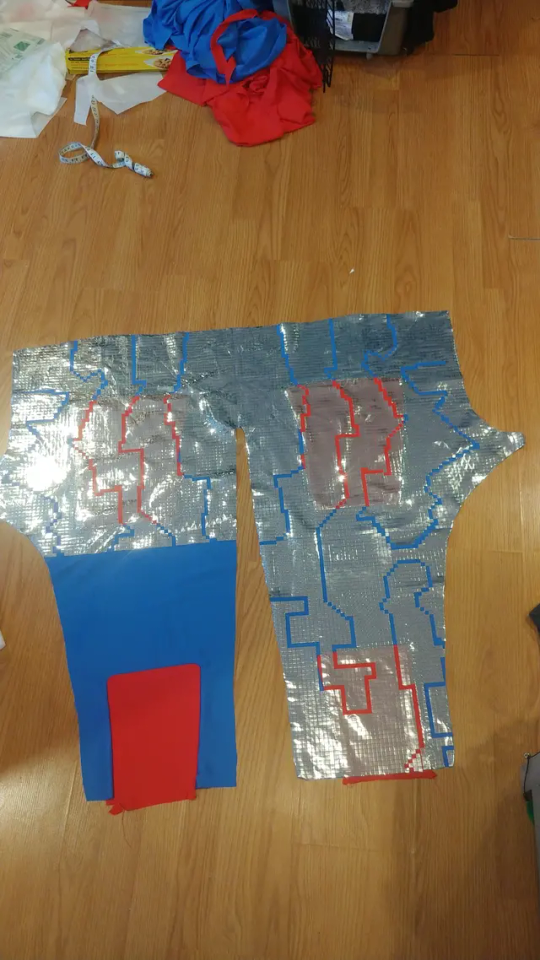
So after that didn't pan out I switched to a stretch HTV, just using the same design files, and widened the legs a bit, it helped a bit but the HTV not only did not stretch enough, but does not like the lycra I was using and in areas with the most stretch the squares were peeling and in some places even falling off
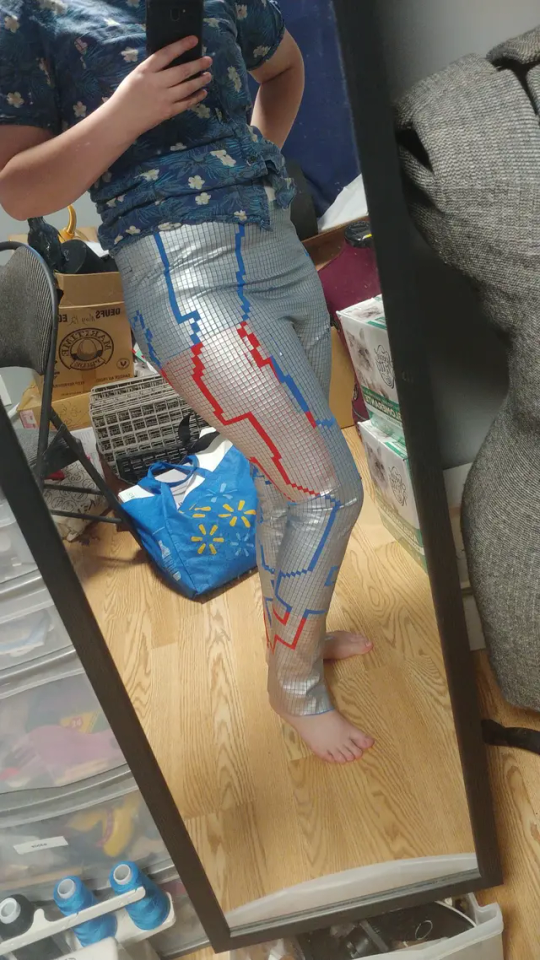
At this point I had spent almost an entire month on just my leggings-clearly I had to try something else because the HTV was just not going to work
I got jacquard lumiere fabric paint in silver-it's okay if I could go back I'd probably just have gotten angelus leather paint I find it has much nicer stretch and softer feel
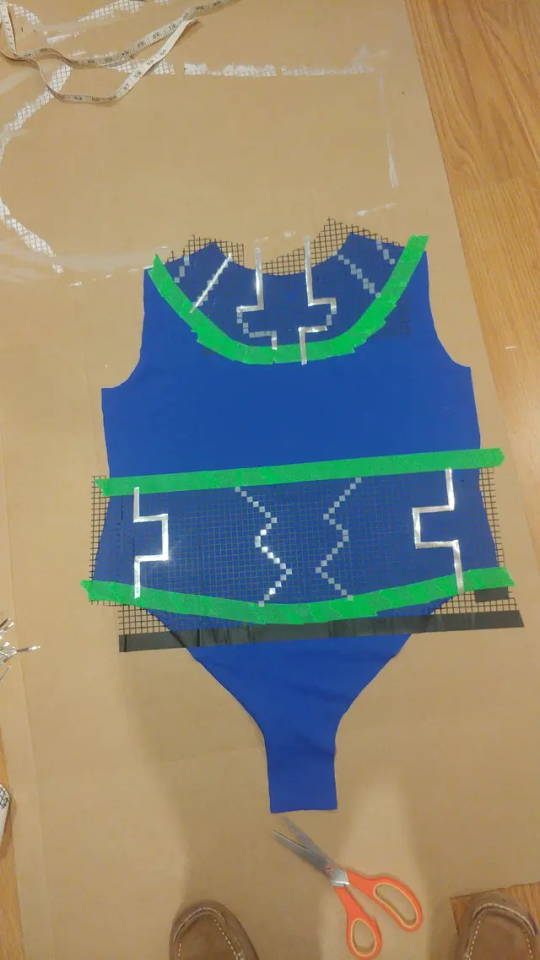
I also widened the spaces between my squares to give them a little more stretch, and cut just a full grid of adhesive vinyl to use as a stencil and kept the wider pants pattern from my second pair
I did have to mask off the circuit pattern this way but it came out very nicely and finally had a method that gave me a wearable garment
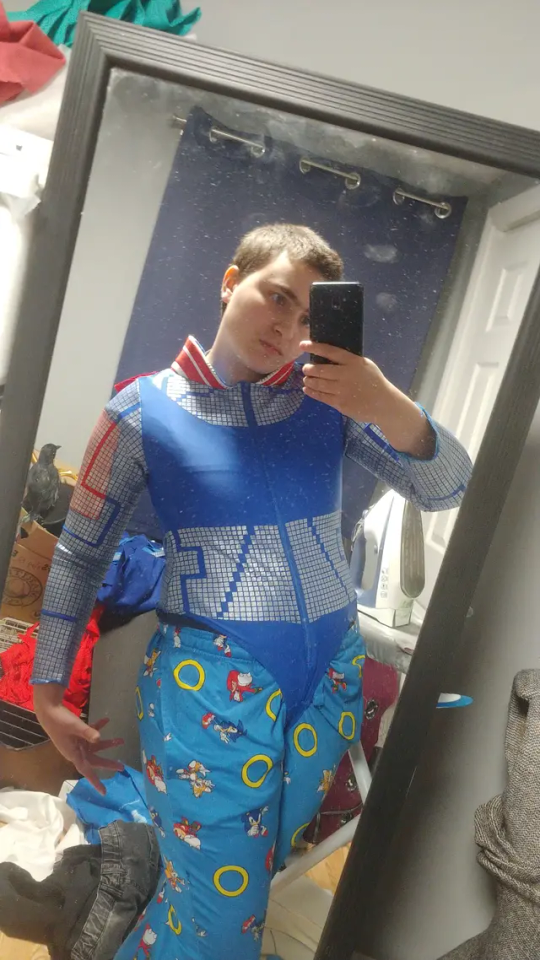
So I moved onto my leotard next with significantly less headaches- though my arms did not stretch enough after being painted but that was easily remedied with a gusset on the underarm
Collar is interfaced with flexfoam
Since my thigh armour will attach to the belt that was next, honestly pretty easy, mostly rectangles, used real studs and then permanent vinyl for the red and silver bits
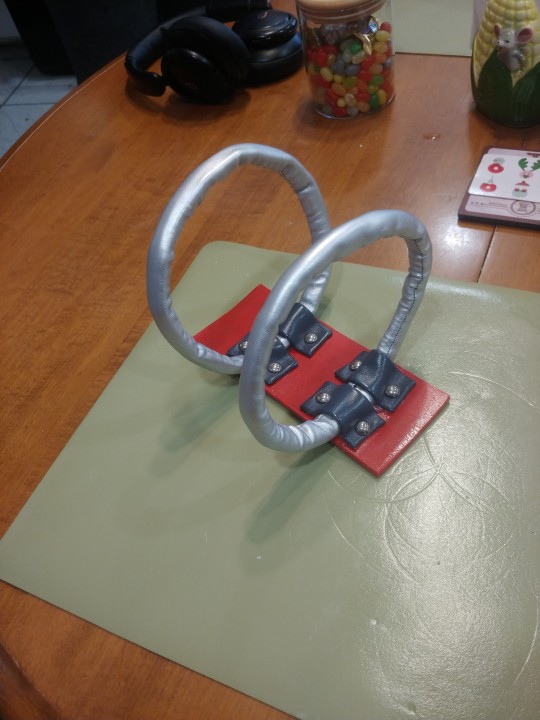
Couplers are flexfoam inside a tube of silver pleather, physical belting straps is a thick interfacing covered with the same silver, had to use grommets for the belt holes because it was very frayed when I punched them open
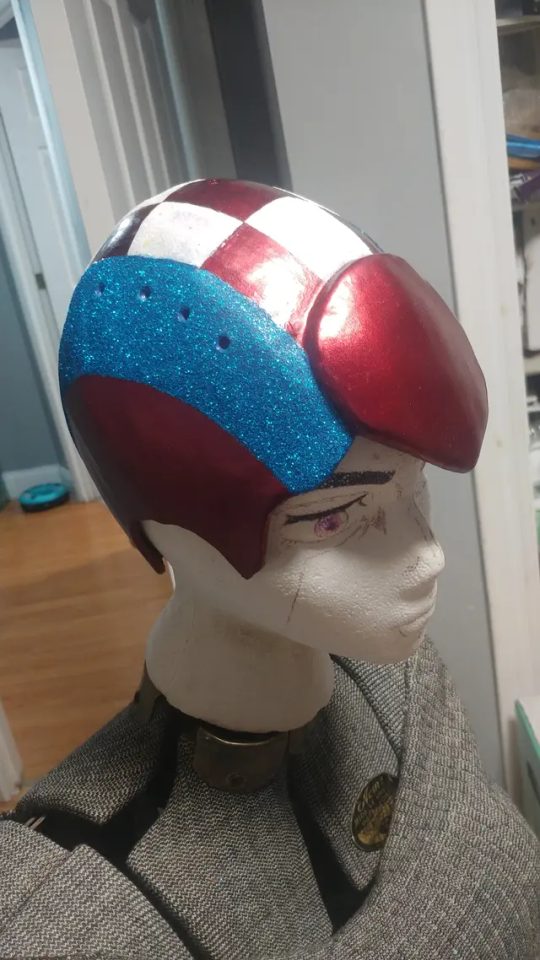
Tumblr mobile won't let me add more than 10 photos on mobile but for my helmet I duct tape patterned my head and then used 2mm foam covered in worbla, used wood filler and sanded that as much as I could, then covered in a few layers of flexbond and then wet sanded that
Painted with automotive paint to get those little silver flecks, and then painted the colour blocks and covered them with glitter
Still have to add the stripes and chinstrap, and going to be using magnet snaps to attach the Mohawk to the helmet
That's essentially what I have so far!
I 3D modeled the little arrow thing that goes on the front of the belt and elbows, my brother's going to 3D print them for me 🤭
Started foam patterning this week, my original goal was to have this done by November 7th(leaving for the con I'm taking them to) but again-i did have almost an entire month of setbacks so I'm going to try to not take it too hard if I don't
9 notes
·
View notes
Text
Covers Bookbinding for beginners by a beginner- The Home Stretch
*drinks half a gallon of coffee*
COVERS!
You've gotten your typeset done for the fic, you've battled the demon that is your printer, folded pages, stitched pages, glued pages, glued end pages, and end bands. Made the cover, covered the cover in potentially homemade book cloth.
Now it's time to design a cover.
It's time to make this thing into a fully functioning book and slide it on your shelf and have a nice bout of "Laying on the Floor while Questioning the Human Condition (TM)".
There are a few options.
It depends on what you want.
I can only take you so far with Cricut/vinyl applications. But I researched enough to maybe, MAYBE give you the run down on at least how to get your cover from Canva to the software to cut out your vinyl. I'll start there since this is what I know the least.
Open up your version of Canva.
Make a document, I've seen some fanbinders make all this in the cricut software but I can only smile and nod along. But for me- this is the best I've figured:

go to the search bar and type in book cover (or use the drop down menu) click on a random template.
Fiddle and fart your way into a design you like. Text and Font Options are available in drop down menus and find some designs that are "Easy to Weed" which I understand as "Getting rid of all the stuff that's not going on the cover".
For Example:

Do you like it? It took me 40 seconds, I'm very proud of it. But this isn't to impress you really I just need to show you how to save your file so you can make the leap from one software application to the next.
Hit "Share", Hit "Download", File Type- Hit the down arrow, Hit "PNG" I missed this for the first few times--- BUT!

Click the "Transparent Background"
If you're doing more than one colour Vinyl you're going to duplicate the page that is located right next to the lock icon above the document. Hit that. Delete the stuff that you want to be different colours. Otherwise it will just cut everything out as one colour and I've seen some vinyl covers that get damn fancy.
You can also build a title cover just measure the spine and height of your spine and rotate your text to horizontal if you please.
Now for how I do mine. I use Printable Iron On Vinyl. Keynote there is a difference, there is stuff for light fabrics, and stuff for dark. Choose for what your primary book cloth will be but the paper itself will be white.
Make your design.
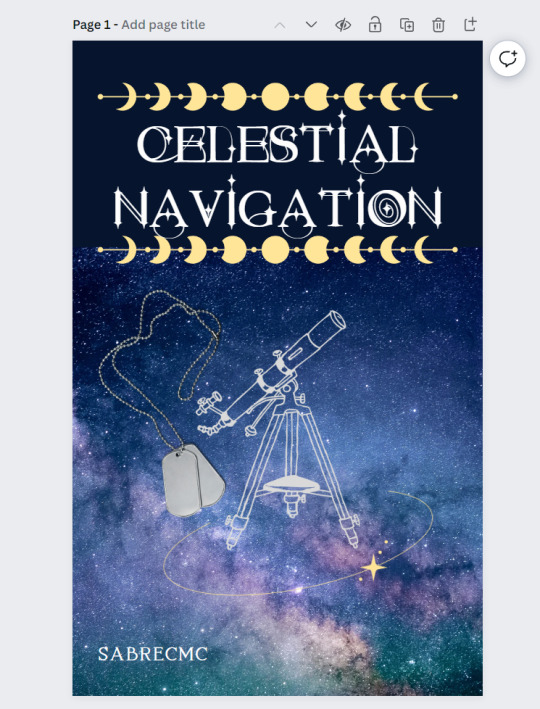
I have 3 different covers for Celestial Navigation by Sabrecmc just because of how LARGE the fic itself is. I had to split the text block up for ease of handling.
I saved as a PNG, and loaded up my fancy printable vinyl into my printer and went through the software for printing, I had to do some fiddling but for my purposes I had to get the whole cover in the right size on the page- it took some fiddling yours might be simpler it might be more complex. But once I got it printed I trimmed off the white and was left with a peel-able rather velvety feeling thing.
Remove the backing. Get the iron on and go low and slow with the provided barrier material to prevent melting and damage to the print you've just done.
I made spines as well and made an 11 x 8.5 (Or brochure template)

And lined up my spines accordingly as to not waste materials. There will be grids that pop up automatically to let you know if things line up.
Print them out on the "highest quality" out put for your photo software.
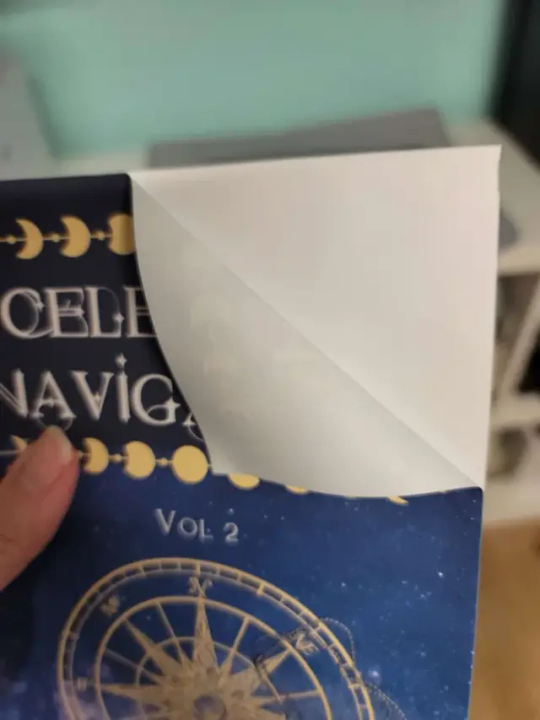
It peels like a sticker. It may take a bit to get it going.
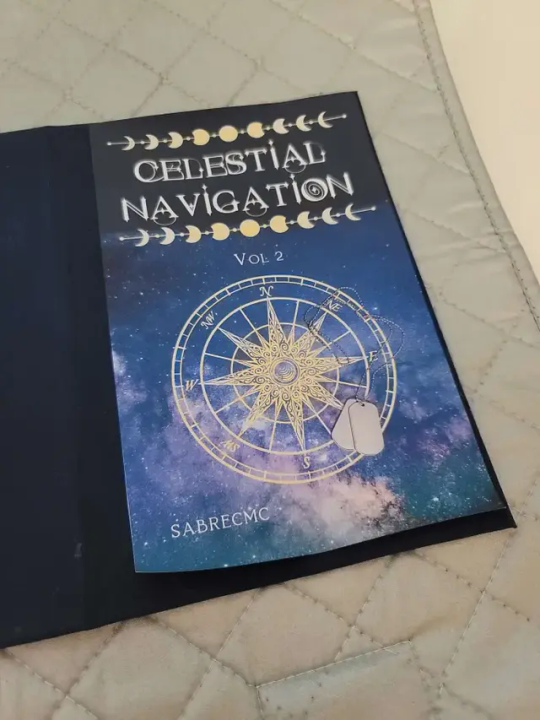
Line it up as nicely as you can on the cover (double check on the still exposed board).
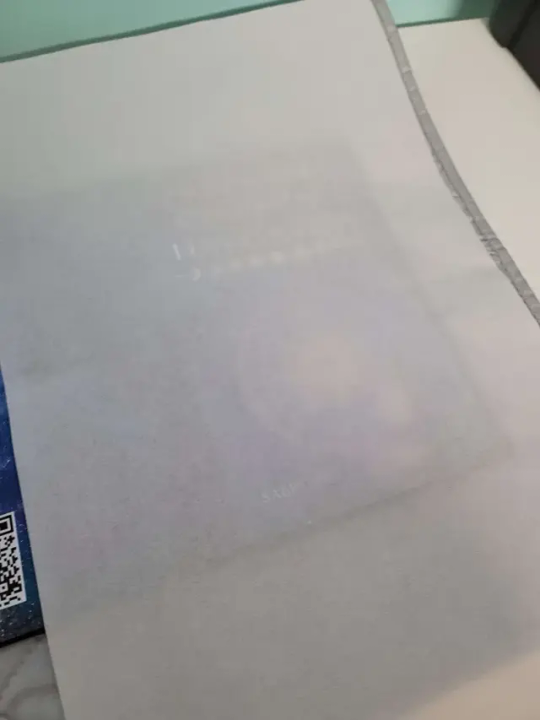
There is a protective sheet that comes with it USE IT. Set your iron to a low heat and move it around frequently.
If you're in a relatively humid area (I live in a coastal town so the humidity is pretty high all year). Have a heavy book to squish your covers down with to try and get out any bends that may happen post ironing (also why we want low and slow).
Leave to cool.
Now you have a text block and a cover.
For all intents and purposes for my demonstration I'm leaving the spine off and am redoing everything with this fic from the ground up. There are aspects and mistakes that I have made that have irked my brain. So I will be leaving the spines off for this round. This is the learning curve and since a lot have things have clicked into place since beginning this series that have given me the "AH HA! CLARITY!" moment. I have completely reworked EVERYTHING in my text block of Celestial Navigation. Plus I've a perfectionist issue that is a lot milder than what it was.
But these two text blocks will work as my "Ground Zero" and will be the books I compare all potential future binds too.
As a note that I said in the beginning of this endeavor:
THIS IS FOR PERSONAL USE ONLY. FOR THE LOVE OF FUCK DO NOT SELL WORK THAT DOES NOT BELONG TO YOU!!!! YOU HAVE ASKED PERMISSION (I dearly hope) TO DO THIS DO NOT BREAK TRUST WITH THE AUTHOR.
IF You want to offer a copy to the author- GO FOR IT. Close friend that is showing interest in the fic?? Sure ok.
But if you sell it for monetary gain? I hope you stub your toe, and just before it finally heals you stub your toe again and may all your breakfast cereal turn to slugs.
DO NOT BE A DICK. I am writing this whole 'How To' Series as an experiment of Good Faith that you, the potential binder, will do right by the community and not compound an issue that has been cropping up. Etsy sellers, and this horrible Facebook community that will steal other's typesets, and begin selling them.
Like I said- this is a breech in Fair Use.
Now with that lecture, again, out of the way lets settle the rest of this series.
You will need:
Glue
Book Press
glue brush
Wax Paper.
Your Cover.
Your Text block.
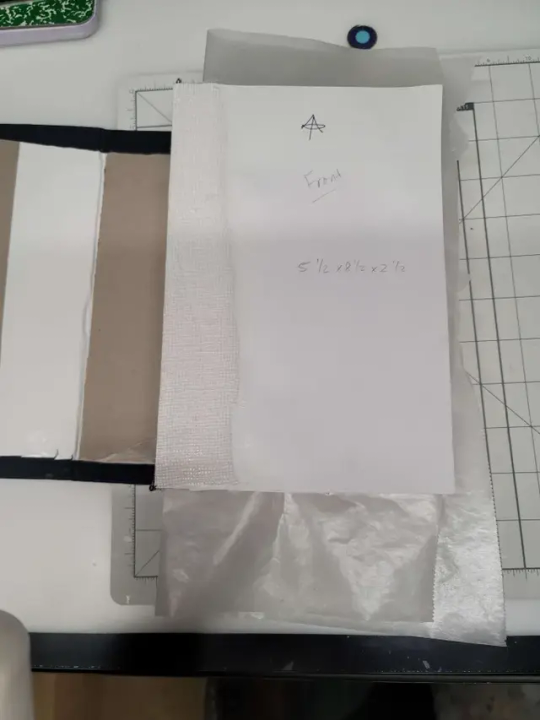
Get your textblock and cover lined up with some wax paper in the middle of the decorative pages (if you're doing them other wise the page you glue down to the cover and the rest of the text block.
Fiddle, fart and dry fit until you are satisfied.
Lay down a layer of glue on the page NOT THE COVER ITSELF.
DON'T BE ME. I FUCKED UP HARDCORE AND DID THE COVER WITH THE GLUE. HOOOOO NELLY LET ME TELL YOU HOW BADLY THAT FUCKED SHIT UP.
HOW BAD WAS IT? BAD. VERY BAD. DON'T BE LIKE ME THAT FIRST ROUND, BE LIKE ME ON THE SECOND ROUND AND PUT GLUE ON THE END PAGE.
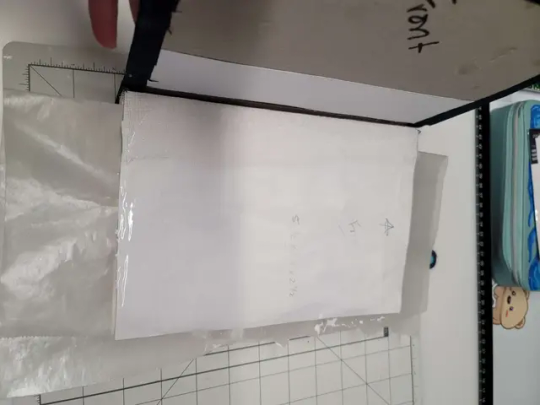
Line up the textblock for a final time and then apply the paper to the cover open the textblock and smooth what you just glued down. Flip over and repeat.
Then add weight to the text block put it back in your press, or if you're like me and have a reprint in the press just throw books atop the block.
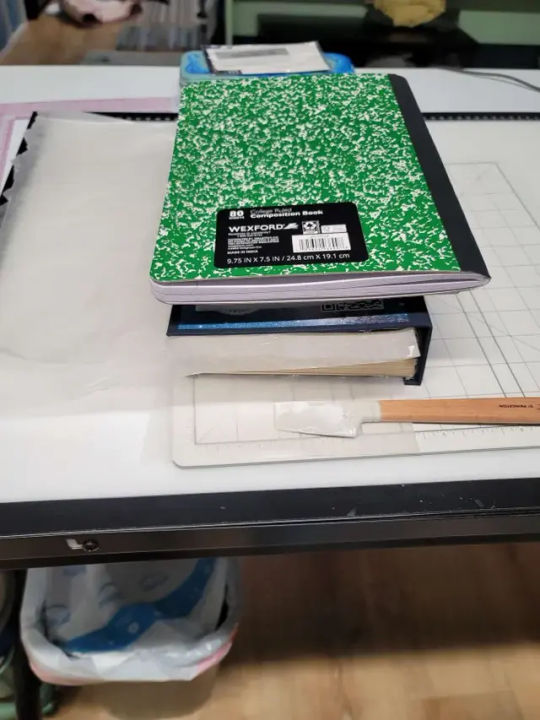
Allow glue to cure over night.
Shiver, shudder, and lay on the floor. Your fic is now a book that you can put on your shelf.
Welcome to the wild wild world of bookbinding.
I've been your host trying their best to explain all the things.
I will likely continue this series with "OK SO I LEARNED SOME SHIT ALL THAT SHIT I WROTE BEFORE FEEL FREE TO LISTEN BUT I'VE GOT BETTER SOLUTIONS NOW" time stuff.
#bookbinding#ficbinding#diy#bookbinding for beginners by a beginner#oh my god I'm done for now#I've done it#I wrote out all of the things#and i likely have to go back and FIX some shit cause.... whooooooooooo I learned a LOOOOOOOOOT#mistakes are great learning tools don't get me wrong but hoooooo I learned a lot
44 notes
·
View notes
Text
My feet, my back, my ADHD attacks...
It has been a productive few days, but ADHD strikes again, and I have a plethora of random things accomplished since last post. I am le tired....
Firstly, I cranked out and submitted my essay that was due on Friday, so a majority of that day was spent deep in case law and interpretations of the Supreme Court in the 60s about porn.
But otherwise, I tried out printing my HTV. I finangled out my SVE/PNG, and got a good print. Ish.


As you can see, I mis-aligned the vinyl, and the little cricut legs chewed up the very edge of the vinyl. Thankfully didn't mess up the actual design, but important to know in the future.
So I got to peeling.

Oh boy, is this a PITA. Its my first real print, so still learning, but man, was weeding (pulling out unwanted bits). I quickly found out the width of the design really dictated how well it'll come out.
Did not bode well for the letters.
I also found out that its easier to have predetermined sections, so you're not accidentally pulling up a part you're not working on. Most do this in cricut's design center, or whatever they use, but I just cut it out with a razor after the fact.

To save printing time, I had moved the spine segments to the blank space in the design. After the name I started segmenting the weeding.
But by the time I finished with the spine sections, I was done. Every other bit of writing didn't come out to a point that it would have been possible to weed. IDK if it was the font, or the size, or the technique in printing, but they all died and I just gave up immediately on the summary. The design also was destroyed! I guess line work isn't easy. I'll maybe try an offset version for the Lionheart's designs, because it did NOT like the thin line of the book+cuffs.

The filigree and title came out nicely, and Lionheart's design is much thicker than this one. I'll also go back through them and ensure the small bits are thicker than what was on The Perfect Match version.

Here is a good comparison to having uploaded my PDF directly to design space and uploading it as an SVE. Significant difference!
Next, I went to iron my work.
I only had a normal iron, so I googled how to apply using that, and got it set up.


I arranged the HTVs as I wanted them on the book, except the spine which I'll wait to apply until after I reprint the words. I used a piece of parchment paper to act as a barrier in case there was something on my iron that I didn't want to use. I used the corner of my bed for firm-squishyness, set my timer, and pressed away.
For 2 minutes a section.
For those who don't know, you're supposed to do 20 seconds. I did 120 seconds. I'm amazed I didn't ruin it entirely. Some sections came up (which I learned is a thing if you under AND over press) but it's close enough.
One thing I didn't anticipate is the fact, as I used a lasor printer, the ink semi-transfer itself within the book.

This is the worst I noticed with a quick flip through, but some of the ink transferred to adjacent pages. Good to know for future use!

Looks pretty good! I am happy with how it came out, besides the mentioned issues. I'll re-do the words and try to get those later.
Also accomplished this weekend was my bookpress!

I got myself a small slab of monkeypod wood, since it's endemic to the area and cheaper/better than a wood slab I'd get from a box store. Of course, I'm pretty sure the seller shorted me. He showed me the slab being 16inches across, but when I got home, my measurements were only 15. So I think his measurement is off at the start--and how can you plan to check for that at the time? Whatever. I wanted to keep the raw edge for the bottom piece, but the top will be smaller in all dimensions so will be square. In the picture is a majority of the supplies you'll need. Notice, I said majority, because I forgot several things, then realized I needed several things, and those things matured to more things and long story short, I went to Home Depot like 6 times the last few days.
In my defense, I had already gotten a Dewalt 780 miter saw from my Lexis school points, so that can't be blamed on my bookbinding hobby. Though that probably contributed, since I knew I'd get it and therefore more inclined to do other woodworking.

I didn't really have a table to use for the chopping of the block without covering my garage in sawdust, so I set this in my driveway. I am very enthused with my new saw, and my husband lent me his knee pads. Maybe I'll get one of those skeletal miter saw stands. While I'm in the military, I don't think I'll be able to get a full hobby/woodwork set up until I leave the service. So maybe a decade from now.

But here is its, the slab cut into one 11x11 piece, the other is 11x15-ish depending on the part (as the piece is not smoothly the same size, being a raw edge). I spent so long sanding. I didn't have a planer, and the flat face was very rough from the construction saw that made the slice from the log. Probably two hours sanding just those two tiny boards. And I still didn't get them all 100% flat. Close enough, pretty sure it won't cause an issue when pressing as I'll be using a bookboard anyway.
The screw is set to arrive tomorrow, Monday, and it should fit just into the cross joint. Truly, an cheap and easy way to get a very nice bookpress. Can be even cheaper/easier than what I have if you just use some Ross cutting boards.


I know I want the board to be nestled between the legs of the press, so I had to cut 1/2 holes on the side. The space between the legs is just about 10" so a 1/2 inch 1/2 hole in the middle. I didn't have any fancy tool for this, so I used a Jigsaw and hope. It was... mostly a success, just don't look to close at them, please.

I then made sure the legs were perfectly straight compared to the cross section. I'm debating whether I want to put some locktight on the threads. I'll try it out and see.
Next was finishing the wood slabs!


I managed to use more of that massive beeswax slab my husband brought, and I feel it made the boards so very lovely. Really matured the color. I made the finish with 2-1 ratio by weight of beeswax to boiled linseed oil. It was a bit stiff IMO, so maybe I'll go back and add more linseed. But for now, worked nicely. I did bake my wood slabs until they were warm to the touch and then rub the wax in then. Made application significantly easier, lol! Dunno if it was a good idea but eh. It worked. And killed any potential bug or fungus. There is a bit of spalting in this wood, which is visually lovely, but not supposed to be in the wood.
Tomorrow, after class, I'll polish the boards and assemble! Then maybe finally go back to the Lionheart bookbind, and glue up the spine for rounding.
Till next time!
4 notes
·
View notes
Note
Hi, just wanted to say your binding of "Faces In The Dust" looks gorgeous!!! Could I ask, how did you make the title + decoration and apply it to the front cover? :O
Hello! The cover designs are cut from vinyl with a cricut machine. In this book's case I used permanent vinyl. Which is essentially very sticky vinyl. There is also HTV(heat transfer vinyl) which you cut out and then adhere to the material via heat (such as an iron). I tend to use cricut to design and then cut most of my covers. The cricut is a cutting (and other things) machine that has a digital design space I run on the computer to help me design covers.
I typically like to start by 'making the case' out of colored blocks in the space that are the size of my actual cover so I can know what things will look like when I put it all together. I also color my items to match as close as possible to the colors I plan to cut them from as well. I mostly do this because I have aphantasia so I need the literal imagery in order to see what the design will look like. These steps are by no means necessary and if you can visualize what you want then you can just add the images/text in however you like.
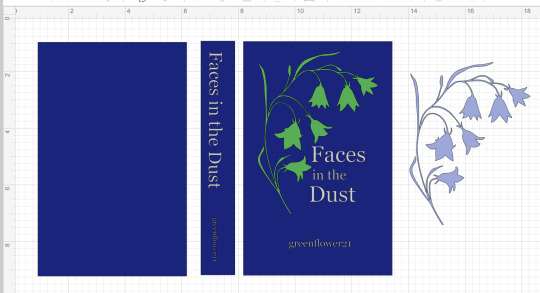
The vinyl is a plastic-y sheet or roll of vinyl in a given color. Because I wanted to have the flowers be one color(lavender) and the stem (green) another I needed to cut two sections and take the parts I wanted from each. I could have also edited the images so that each of the two only had the parts I wanted from it so it would only cut them. But it wasn't that much of a difference and if I just copy pasted a second one of the same image and changed the color then I would know they were the same size and everything would fit together.
Once the design is done I move to the cutting phase. The colors you pick determine which pieces are cut together.
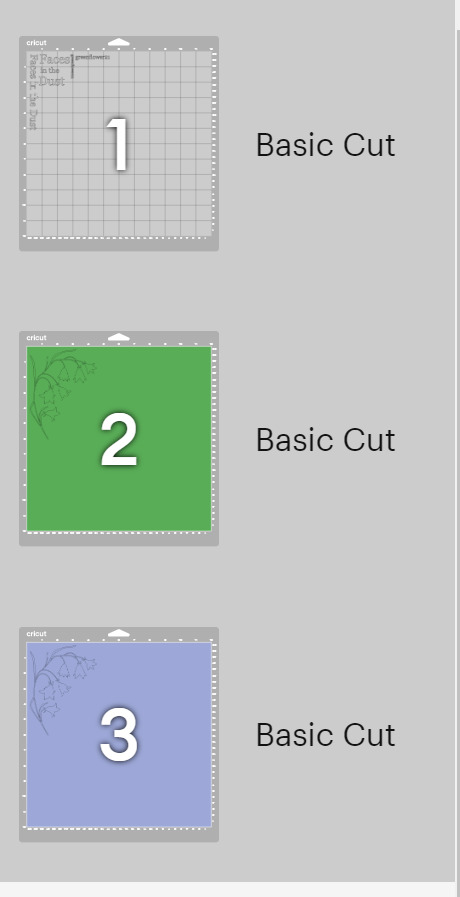
You load each sheet of vinyl in on a mat and it cuts the image out. When it is done you cut out around the section you just cut the image on and then use tweezers to remove the vinyl you aren't using around the image. This is called weeding. In the flowers & stem's case I also then used an exacto blade to cut off the flower heads from each of the cut outs so I could combine the two colors of vinyl to create my final version of the image.
Once it is all weeded you are ready to transfer it to the book case. You do this with transfer tape. It is a clear plastic sticky sheet that you place on your vinyl to 'pick it up' off of the backing it started out on.
Again in this instance to combine the colors I picked up the green vinyl on the tape and then lined up the purple flowers and pressed down to get them stuck to the tape as well. With it all now collected I placed the transfer tape on my book and pressed the vinyl into the case of the book. Smoothing it down with my bonefolder or anything else that helps make sure it is flat so it is really adhered and there are no air bubbles.
I do the same with all the titling and ta-da! A Book!
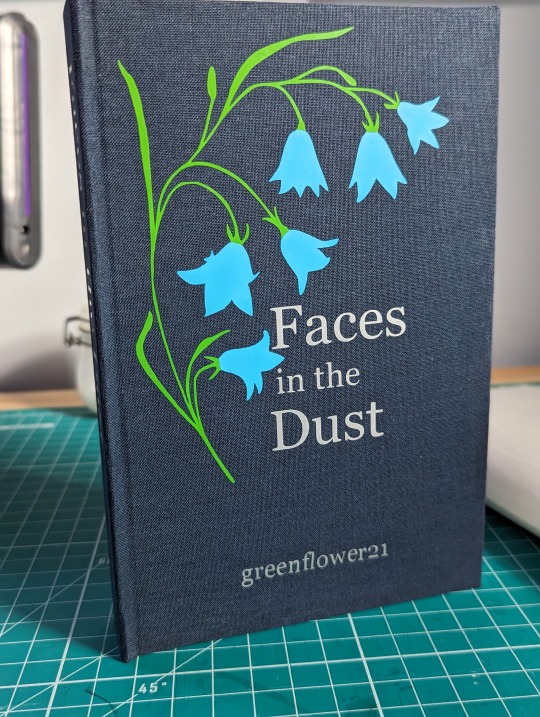
There are tons of ways you can title/design your book covers. I just got my hands on foil quills this past weekend so I hope to try making a cover with them in the not too distance future. Some folks I know use paint pens, or cut out stencils and use regular paint, or just free hand paint if you want to show off your skills of an artist. Hope this was helpful and not too rambling. Sorry I don't have pictures for all the steps, I can make a point to take pictures the next time I make a cover in cricut if that is something folks would want to have. Feel free to reach out if you have any more questions.
43 notes
·
View notes
Text
quick rundown of different ways i've made patches
for @pescabianca cuz they asked lol
gonna start by saying i'm far from an expert on any of this, especially proper screenprinting and blockprinting. i'm just some guy that's been winging it for the past 3 years and it's just kind of what i do now? idk. here's the methods i've used for making patches
method 1: stencil and fabric paint
in which you're making a stencil and painting by hand. first time i made patches i hand carved out the letters on some cricut vinyl (i didn't have a cricut i just used a craft knife and taped it to my desk), put it down on top of a piece of fabric and sponged on some fabric paint. you can also use cardboard or cardstock you tape down for the stencil and tape down, whatever you got, i just find the vinyl was the easiest to make it not bleed as much. pretty simple, pretty accessible. the vinyl option is more for a single patch, smth like a cardboard stencil is better for multiple. make sure to use an iron to set in your paint once it dries
method 2: diy screen with mod podge
you can make a simple screenprint with mod podge, some kinda mesh fabric and an embroidery hoop. take voile or chiffon, pull the fabric taut on the embroidery hoop, and sketch on your design with a pencil (be careful as to not rip the mesh). remember that the flattest part goes down on your fabric, so make sure youre drawing inside the hoop.
paint on the mod podge in the negative space of your design, let dry. you can at this point use screen printing ink or continue with fabric paint, i think this was the time where i first bought screen ink. put your screen flat onto your fabric, some ink/paint at the top of the screen, then use an old gift card or id as a squeegee to do the actual printing part, dragging it down in a scraping motion. pull away and leave the patch to dry. you probably wanna iron it to set in the ink once you're done.
this is good esp if youre printing a bunch at once but doesnt wash very well so it can be kinda one and done sometimes? i used fabric mod podge so it lasted like 2 gos before getting all gross. but if you already have this kinda stuff laying around for other crafts, its pretty simple and introduces you to screeprinting somewhat without spending too much money
inspo/instruction link
method 3: screenprinting
getting/making an actual screen, you can just buy them online tbh, though it's not too hard to diy imo, especially if you're good with wood (haha) at all. i'm not, the way i diy'd it initially was finding some cheap wood picture frames from the dollar store or smth, pulling the screen mesh taut with a big embroidery hoop cuz i didn't have clamps and such, and using the staple gun to staple them onto the frame. it works just as well tbh, but i don't know how much i can speak on the longevity of dollar store frames or how well i attached the screen mesh, those are kinda skills in of themselves you gotta hone which is why this is all so much more involved
speaking of which, the next part is emulsion. i use jacquard emulsion fluid because it's cheap and i'm used to it. speedball is fine but i bought a bulk bottle once that was expired and i've never forgiven them for it. emulsion is a fluid thats mixed with a photosensitive fluid that causes it to cure and harden in uv light. you spread that across your screen, leave it in a dry, dark place to dry overnight (i used to use the bottom shelf of a bookshelf with a curtain over it, then the top drawer of a dresser. you can put it in your closet or something, depends on the space you have.) keep it in that dark place until you're ready to use it, otherwise you risk hardening it by accident.
once you've got a screen prepped, you want to have a transparency of your image in all black so light can get in everywhere but your design, and then expose it either to the sun or a lighting set up that you've bought/made. once you've cured it, you can then remove your transparency and you should be able to rinse out the emulsion fluid that was under it, leaving you with a screen to use!
for lighting setup, i use a flood lamp type thing that speedball sells that i bought years ago off of blick, i think? since the places i've lived have very specific times of day where you get direct sun to reliably use, at a certain point getting the lamp became worth it. depending on what you're using both in terms of your emulsion fluid and light source, the curing time can be very different, but this method allows for fine detail that can be difficult to attain by hand. stuff like screentones to create gradients, and the ability to make several screens for different color layers. it can be tricky to do sometimes but the ease of making more complex designs and having longer lasting screens can be worth it
also at this point you definitely want to be using actual screen printing ink, probably. you can buy a squeegee, i often still just use old credit cards and such, especially with my smaller designs, so it's up to you on that end. make sure you're using fabric ink, not acrylic ink, for your patches. just in general be aware of what type of ink you're getting, i use water-based inks that rinse out the screen easy with a spray bottle of water and some paper towels (you can also just rinse em in the sink but mine is too shallow lol).
i'll link to some tutorials i used when starting out, cuz this stuff is a lot easier with a visual aide and i don't think i explained it very well skdjf
youtube tutorial // tutorrial 2 // tutorial 3 // screens i used to get // emulsion fluid i use
method 3.5: screen filler
if you liked method 2, you can use the screen filler method to make screens, i've never done it but i understand it's similar in that you are basically panting on the negative space or something? again, i've never done it, i've just used emulsion after moving on from the mod podge method.
method 4: blockprinting
block printing is pretty straightforward, imo. basically you take a block of rubber or linoleum (or wood but i've. never done wood printing but it's fairly similar in basic method afaik) and trace or draw a design onto it. you then carve out the negative space of your design, leaving an impression of only the part you want to print. you then take a brayer/roller, roll it in ink until it's covered and then roll the ink out onto the raised part of the block that remains once you've carved it. take your fabric and press it flat onto the inked block, using something smooth like the back of a spoon to press it down and make sure your ink gets in there. i usually always make at least one more patch than i need with this method, since the first print often tends to be a bit rough/light and it improves over time. like your first pancake bein the worst one i guess. when you're done, you can wash the blocks with soap and water, maybe using an old toothbrush to get in all those crevices. but that's it, it's intense on focus, time, and physical effort, but pretty straightforward
note that when you blockprint something, the image will be reversed, so if you're drawing directly onto one keep this in mind. what i usually like to do is take some paper and put it over my original sketch, draw over it with a soft charcoal, then press it down onto the block to transfer the image. that way it makes sure your image is flipped, and it's a hell of a lot easier than any of the weird printer methods i've seen.
btw you can get a plate for rolling ink onto but i'll be honest? for about a year or two i just used like panes of glass i had from the picture frames i used for screens or i'd tape a piece of plastic or transparency down onto the table/desk. it's like, slightly easier now that i have an inking plate, but only just because it's a bit less waste, but it doesn't change much, imo. i even sometimes prefer using a gel printing plate, which is not really supposed to be used the way i'm using it! honestly, as long as your surface is flat and smooth it seems to be fine.
theoretically you don't even really need to use block printing ink, but i'd always struggled using other stuff? idk. if you're making patches, id suggest getting some fabric blockprinting ink. it'll take a day to dry, a bit longer than screenprinting ink, but it'd very sturdy. you can iron it to help secure it like the other stuff, but if you let it dry a couple days you might not even have to.
youtube tutorial/inspo // carving tools i use // some rubber blocks to start with // rubber brayers for rolling ink
note: if you can find any art supply exchanges, they're great for getting supplies for the latter methods on a budget. in chicago, there's a like, art supply thrift store of sorts called the waste shed where i got most of my early blockprinting supplies for pretty cheap, and if i didn't have those, i probably wouldn't have started making blockprints when i did.
note 2: this is all for printing on fabric, but you can also get acrylic screen printing ink or block printing ink for making prints on paper if you want!!
18 notes
·
View notes
Note
Ulala from space channel 5, her classic white crop top and skirt outfit? I’m new to sewing and idk how I should do it
Hello there!
This is a very timely ask because I've been off and on considering remaking my own Ulala cosplay (RIP to the one that I wore so much the fabric disintegrated) and might finally do it.

My first piece of advice is: this costume is somewhat advanced just because of the materials involved, but if you don't mind using different materials, it's not TOO bad.
I'll start with the shapes and types of patterns you should look for, because thankfully the shapes of this are easy. The top should have princess seams, likely armhole princess seams. This will get you that tightly fitted look over the bust, and you can take in the side seams and the princess seams just under the bust for a tighter underbust fit. The collar is probably a quarter or half circle -- mess with shapes on paper scale mockups until you get one that looks right.
The skirt looks like a half circle to me, but again, play around with paper patterns to get the right shape. Use a circle skirt calculator to get the measurements you need for the skirt and for your collar. (Be sure to use the waist measurement where the skirt sits, not your true waist!) These are used by taking a string or measuring tape and drawing a circle using the radius it tells you -- the waist radius is the inside of the donut and the full radius is the full length.
I'd recommend getting a pattern for gloves that have finger gussets, and basting the gussets in by hand before machine sewing. Since you're doing the white version, you can probably purchase boots rather than making bootcovers, and use a paint like Angelus leather paint for the platform.
The 5 logo can be painted on with fabric paint or ironed on with HTV. If you don't have an HTV cutter, you can do it by hand or find a friend with a die cutting machine (Cricut, etc.) to do it. If you choose to stencil, I'd recommend the freezer paper method.
Fabric is the hard part.
The way the costume is drawn makes it look like shiny PVC vinyl type fabric. This fabric is what makes it a bit advanced -- vinyl type fabrics (I'm including shiny, smooth stretch pleathers here that have the same look even if they're PU or a material other than vinyl) require some different techniques -- but switching the fabric to something less perfect for the look but easier to sew would greatly help. A shiny spandex would work if you added structure to the skirt, but you may find it difficult to sew.
I'd go with a slightly shiny but still structured woven material for a beginner sewist. A bottomweight cotton sateen would work quite well. If you don't mind something a bit more slippery but that is shinier, I'd go with a peu de soie (a type of heavy satin).
If you choose PVC, I'd personally go with something more structured than a thin stretch one, but not TOO thick because of the gloves. Order swatches when ordering online. The official costumes from the promo events when the game came out seem to be made of a similar material. (Look at those for reference!) If you go with PVC, you need to use a teflon foot or a walking foot for your sewing machine, otherwise the fabric will stick, and you need to be VERY careful about sewing and pinning because needle and pin holes will not close back up like with most fabric. I'd invest in some cheap sewing clips.
Regardless, the skirt and collar will need some added structure -- I'm looking at using fusible foam (like Pellon Flex Foam) for mine, as I just did a cosplay with fusible foam in the skirt and the shape was great. Just make sure you test it ahead of time to be sure it plays nicely with your chosen fabric.
I hope that helps! Good luck :]
—Fabrickind / Q&A Staff / Twitter
32 notes
·
View notes
Note
Hello! I am absolutely obsessed with your book binding! Especially your “A bright ray of darkness” the fact that it catches the sun and looks like it’s on fire is just so cool!!! If you dont mind me asking. What kind of gold vinyl do you use, and how do you get it applied it so evenly?
Hi! Oh my God thank you so much!
I used Cricut’s own iron on vinyl this time, but I normally prefer to use Vinyl Frog. It’s just easier to weed 🥰


The burnt edge was the trickiest part. I transferred the line I would need to cut along on a piece of paper and cut out a mini pattern piece so I would know where to cut both pieces of book cloth so they wouldn’t overlap. I would absolutely recommend choosing a wider gash that allows you to cut along a vertical line to save yourself the headache. Using clamps to hold it in place also helped a lot.


I have this mini cricut iron which is an absolute lifesaver. I use the lowest temperature on each part of the design for 8-10 seconds, taking it step by step. After that, I iron over it once more, making sure everything sticks. And then you gotta let it cool completely before you peel off the protective film.
I’ve once or twice made the mistake of touching the iron on foil with the hot iron without the protective film in between which caused the vinyl to ripple.
It takes a little practice but you’ll get the hang of it in no time! Oh! And here’s the link to my cover design in the cricut app, just in case! Thank you again for the question and the kind words! 🫶🥰💕
#book binding#bookbinding#bookshelf#book#bookblr#cricut#diy ideas#diy#diy projects#diy craft#books and reading#books#book cover#crafts#craftblr#tutorial
4 notes
·
View notes
Text
It Took More Than A Month - But It’s Done
My second bookbinding project is So Wise We Grow by Deastar, who very kindly allowed me to bind this fic even though someone else has already done a wonderful job at it. https://archiveofourown.org/works/55410/chapters/73479


I made completely different mistakes this time, which is good while learning a new hobby! I hit a bit of a snag right away - did you know the average black ink cartridge only prints about 200 pages? Because I did not. And then I somehow broke the printer trying to change the ink cartridge (I could swear I had successfully done it in the past, but alas, I am not a tech person), so the reverse side of the pages ended up being printed by a different printer, with slightly different margins, etc. You can see the difference in the picture below. I don’t think it would bother me while reading it, and I decided I wasn’t enough of a perfectionist to reprint it.

I think the actual binding went pretty well! The spine is straight, I learned from my last project that I need to be careful how I put it in the press.
I was able to use my cricut so much for this project! I bound the cover in cloth, so I was able to use iron on vinyl for the front and back. I did have to do it over again because I overheated the back the first time, and the planet dissolved away. The second time I had some trouble with the vinyl coming partially away from the fabric (alas, I need more practice), but I was out of fabric and vinyl so I decided to sacrifice the words being even for the picture being clear and went with the second attempt.
I also used my cricut to do the poem that the title is from in foil on the inside page. I think it looks pretty good! The poem is absolutely perfect for this fic.

Overall, a good learning experience! I adore this fic, I really enjoyed typesetting it. I don’t have a picture of it, but I found a little planet doodle to use as the section break and I think it looks very cute.
I’m planning to take a short break from fanfic binding to make myself a planner for college in the fall (yes, I’m going back AGAIN), but I hope to get back to it after! Any thoughts on what I should bind next? I’m on a bit of a Steve/Bucky kick lately, or maybe an All For The Game fic.
30 notes
·
View notes
Note
hii. how do you make your covers? im limited to whatever bookbinding cloth i find, and i dunno how to add text or custom designs. yours look so nice!
Hi! I use heat transfer vinyl, I design it on canva and then cut it out with my cricut machine. The design is then ironed onto the book cloth, leather or whatever the cover is made of.
As for book cloth I bought a lot of colors off Amazon, I also made my own by ironing interfacing onto it. Ice started using leather repair material, it's leather that already has adhesive on it, it's meant to like patch couches and chairs but it works great as a book cover, Amazon has a lot of options!
2 notes
·
View notes
Note
Hi! I saw your binding of "clear and muddy loss of love". And listen I'm not familiar with the work and all that, but how did you do that fantastic foiling if you don't mind me asking? Is it hot foil, or glued foil? And how did you get it to be so even! Did you maybe use the method with a laminator? Because I didn't know you could do that onto bookcloth, thought it was paper only? I have only a single line tool and its really difficult to get thicker text/patterns
It's no problem at all!!! So, almost all of the foil work I've done in bookbinding is through a medium of a cricut and a hot iron. I've got a foil pen as well that I'm trying to improve with, but I think I've done only one color there so far, and I don't know if it'll ever reach the crispness of what the cricut is able to do for me (though I'm not so sure about that after seeing some of the other work people have done with it!), but I'll elaborate on what I know about options really quick.
I'm not sure if the cricut foil exaaaactly fits into either the hot foil or the glued foil categories, because it's not just foil, it's foil with a heavy vinyl injection. It does have a heat-activated adhesive binding, but at one point, I tried using it to foil the edge of a book, just to see what would happen, and it FUSED the edges of that sucker together. It had definite stretch to it as I attempted to pull the thing apart, and was generally stronger and held its shape more aggressively than the true foils I've tried.
The cricut method is really easy for getting that crisp effect, but it is a bit tricky in terms of expense, if you don't have access to one. I usually use my system fonts to determine the shape of the letters I want it to cut out. For the front covers on this binding, I arranged the chinese characters for the title, volume, and author in a space the size of the measured covers, and was able to tell my machine to cut it out of the foil. Then I weeded out the bits I didn't want, and ironed the rest onto my bookcloth. I did a similar thing for the spines. It means everything was precisely shaped according to the nice vectors on the computer, all I had to do was remove the bits that I didn't want and iron it on in the right place.
It's not totally foolproof! I have some early books where I went WAY overboard with the heat and melted some of the plastic cover into my bookcloth. If you don't fully iron everything and move too quickly, you can stretch or twist half-ironed characters or leave awkward marks. And it's not a problem I've had, but I hearrrrr some people have had trouble getting the foil to stick to certain bookcloths.
It's expensive to purchase a cricut, but the silhouette is a comparable brand of 2-d cutting machine that runs a bit cheaper (but has basically the same functionality), and the cricut joy is smaller and cheaper than the big maker models. If you have a friend with a cricut, they might be able to letting you use it if you bring your own foil, maker spaces frequently stock cricuts, and at least some libraries in the us have started carrying them.
And I can't speak to laminators at all (some people print on bookcloth, so using toner-activated foil, it... might work? but i'd be worried about how evenly it would adhere). But foil pens! Part of what intimidated me bad about these was the prospect of using them to freehand what I wanted to draw. But when I went to scope out some demo videos on youtube, it turns out that the bible journaling community specifically has a lot of interesting content on their capabilities. Bible rebinders are also the best resource i've found for yapp edges, so i don't know what it is about these places that fills them with niche information useful to me specifically XD
But if you check out this video where I've started it (shortly after the three minute mark)
youtube
It works PRETTY well to use these heat-activated foils through a layer of printer paper for tracing. That's how I did the cover for 'i'm gonna love you with my hands tied,' which was... basically my first time using the foil pen for anything! It's not super crisp, partly because I picked a VERY detailed image with zero experience, and partly because I was lazy and didn't glue my layers in place well, but I've seen people get MUCH more striking results than mine with a little more practice and patience. It takes some time to fill in big surface areas, but for something like titling, printing the layout on a piece of paper and tracing it with the foil pen can take you to some good places!
With my equipment options, the cricut is usually the easiest by far, which is why I've made very little progress with the foil pen or gold tooling. But there are other choices without having to plonk down money for a big fancy machine! Hopefully something in all that rambling is useful to you, haha. Best of luck!!
30 notes
·
View notes