#goofy ahh edits
Explore tagged Tumblr posts
Text
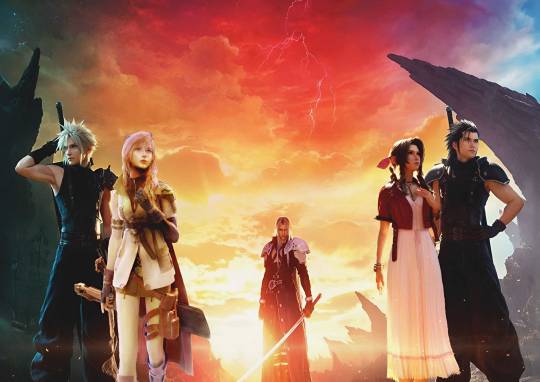
I was reading an FF7xFF13 Fanfiction that focused realitionship of Cloud and Lightning.
This is literally is what it looked like inside my head.
Ngl, I didn't think Lightning looked so fitted there.
Bonus: Zack and Aerith cause they are goated
#crossover ship#ff7xff13#final fantasy crossover#final fantasy vii rebirth#ff7 rebirth#final fantasy vii#ff7#final fantasy xiii#ff13#cloud strife#claire farron#lightning farron#zack fair#aerith gainsborough#clourai#zaerith#my fav ships#sephiroth#goofy ahh edits#clight#clightning#Cloud x Lightning
11 notes
·
View notes
Text
Rough and tumble edit 🧍♂️
20 notes
·
View notes
Text
Is this the plot to The Glass Scientists?
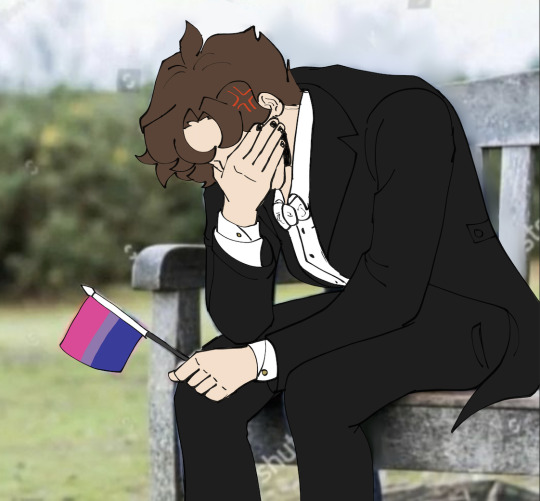
Aka: Back on my bullshit
(og screenshot)
#the glass scientists#tgs#tgs jekyll#tgs fanart#tgs meme#tgs jekyll fanart#screenshot redraw#goofy ahh#Anakin stop giving Jekyll black painted finger nails challenge (Impossible edition) (FAILED)#thespiritoflondonatnight'scollection
639 notes
·
View notes
Text
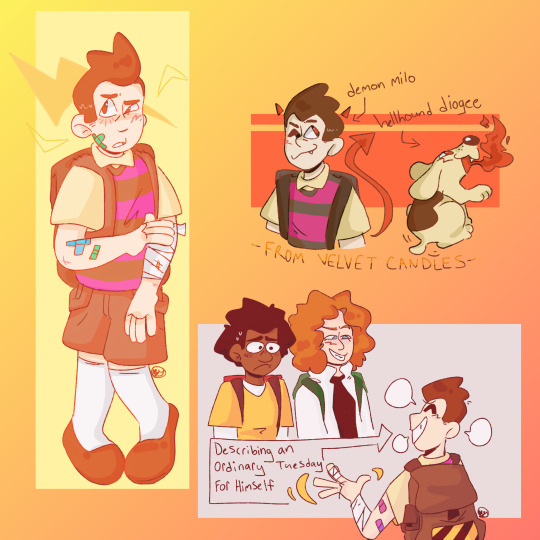
SILLY TIME
#goofy ahh#mml#milo murphy#milo murphy's law#milo murphys law#zack underwood#melissa chase#my art#digital art#dasicality#my stupid meme video why did it take me 45 min to edit that
244 notes
·
View notes
Text
chat what do we think about Togata + Mitski???
#fire punch#togata#togata fire punch#fire punch edit#togata edit#tatsuki fujimoto#csm#agni#agni fire punch#mitski#remember my name#goofy ahh cameraman#fire punch togata#manga#manga edit
47 notes
·
View notes
Text
I’ve created a piece of art…
SOUND ON🔉🔉
#mafia definitive edition#art#mafia trilogy#mafia i#paulie lombardo#sam trapani#tommy angelo#my edit#edit#goofy ahh post#erm what the sigma
31 notes
·
View notes
Text
kinito images as he insults jade in the background
audio, edit, 1st image and 3rd image belong to me, the rest are not mine
38 notes
·
View notes
Text
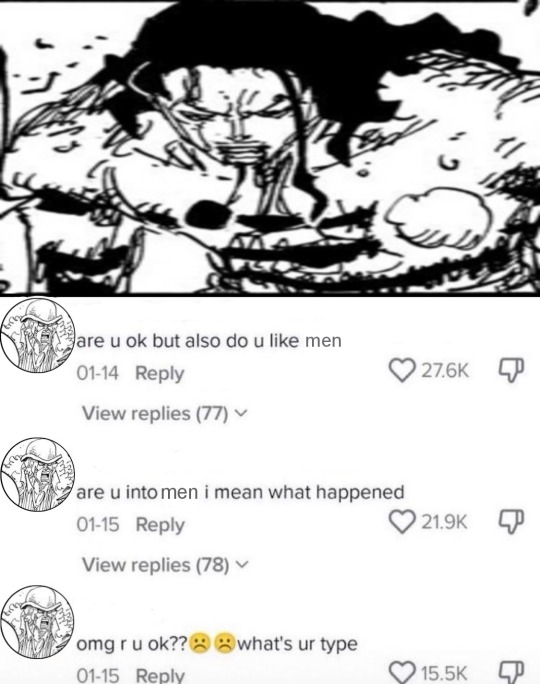
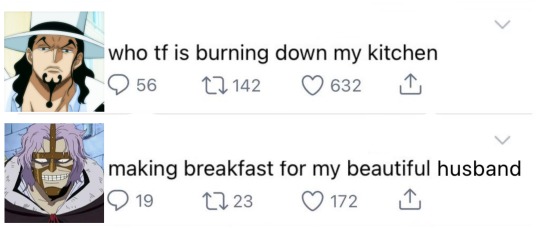
Made those silly things for me and fucking uhhhh like 3 people <3
#hopefully ill manage to make some more drawings of them soon 👉🏻👈🏻#enjoy those goofy ahh edits for now tho#spandam#rob lucci#spanlucci#luccispa#one piece#op
42 notes
·
View notes
Text
Eid Mubarak my brothers and sisters
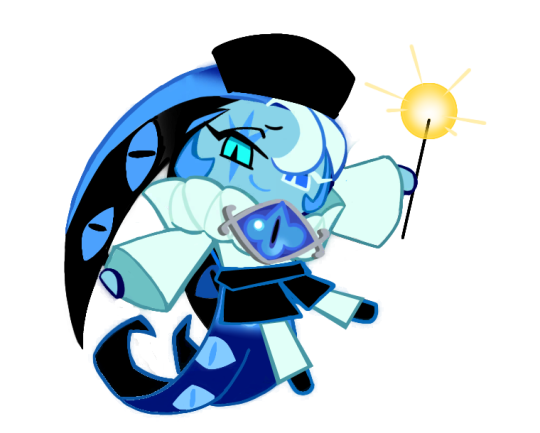
RUNS AWAY
#cookie run kingdom#cookie run#crk#ok 👍#cr kingdom#:33333#crk fanart#shadow milk crk#shadow milk cookie#goofy ahh#bro 💀#help 💀#💀💀💀#sprite edit#eid mubarak#lmfaooo
30 notes
·
View notes
Text
*GOOFY AHHH TUTUORIAL*
lesson 2: getting started on psds!!
hit "read more" if interested!
** NOT ALL PSDS ARE FILTERS, PSDS ARE USUALLY BASES THAT YOU CAN OPEN UP. PSDS ARE PHOTOSHOP FILES THAT YOU CAN OPEN UP AND EDIT WITH ALL OF THE LAYERS. THIS IS A TUTORIAL FOR A FILTER PSD (aka, making your OWN filters) **
hey there!! welcome to lesson 2. you don't need to tune in on lesson 1 to understand this, because it was just about finding editing programs and finding tutorials and motivation, so if you already know about all of that, you are basically prepared for this lesson.
this is a tutorial for PHOTOPEA, idk if this works anywhere else. also, this is INTENDED FOR A COMPUTER. (ex: dragging and dropping files and all of that stuff)
STEP 1: the first thing you may* see when going into photopea is this screen:
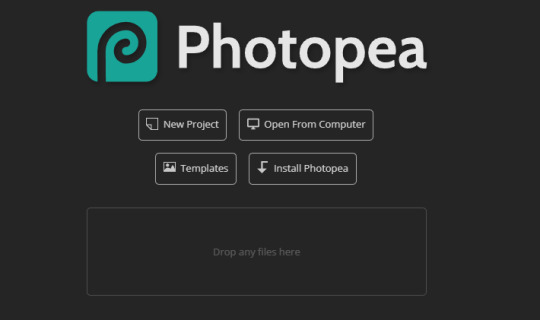
drag any image into the box that says "drop any files here" if you are a noob and don't know how to drag and drop files you can find a tutorial here. anyways, like i was saying drag and drop any image.
now it should look something like this (but instead of the hatsune miku image its the image that you prefer):
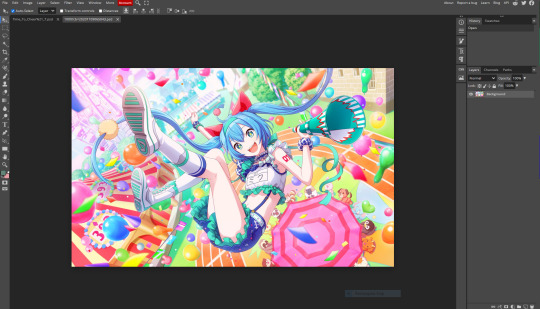
STEP 2*****: now that you have your image, look at the symbols at the bottom right corner. you should see this folder image (folder is circled in red)

you should click the folder button. now you have created a folder. this is going to be the filter.
now that you have the folder down, before proceeding further make sure that its HIGHLIGHTED
go a little bit above the corner, and you folder should be highlighted like this

if its not, just click on it.
now that its highlighted go back to that right corner and click this half circle button that i circled in red

once you click it, this should pop up

i usually hit the "selective color button" first
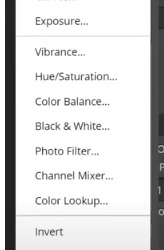
it usually presents you with this:
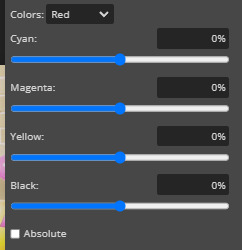
at the top of the image, you should see the "colors" button, thats the color you are editing. click it and choose the color you want to edit. you can edit how much a certain color is in a color lol. if yk what i mean.
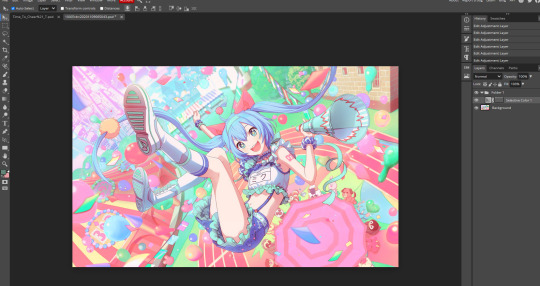
now i spent a little bit of time editing the selective color, and you can see that the image looks a little different. scroll up to the original image on stop one to see what im talking about! you can add many selective colors until your satisfied!
as you can see, i've added another selective color!

now, right below selective color, (back in the half circle menu) you can see "replace color" this is what it looks like (i've already edited it but you get the idea)

you can choose a color to make FUZZY** and after you do that, you can change the hue, saturation, and lightness to your liking.
here is what my miku image looks like after FUZZINESS**, not a big difference but u can still kinda see it.
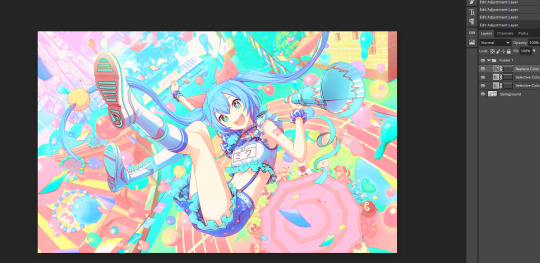
STEP 3*****: after you've done that, go back to the half circle menu and close to the top but not all the way, you can see "curves". they look like this:
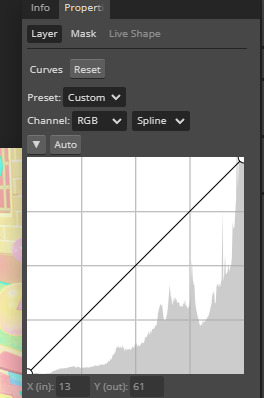
now you can bend them and destroy them to your liking.
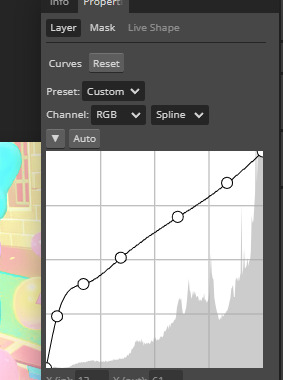
(the higher UP you make your curve go, the lighter it gets, the more LOW you make your curve go, the darker it gets. it also does some other stuff too***. just keep on breaking and bending it to your liking.)
now this is what my filter looks like

STEP 4*****: after your done with abusing and breaking lines now go back to half circle menu and find "color balance". it should look like this
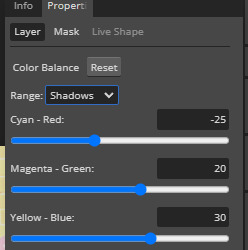
its already edited but whatever (everyone thing should start at zero) but just move the circle more towards the color that you want there to be more of. also hit the range thing to effect more then just the shadows.
now heres what it looks like:
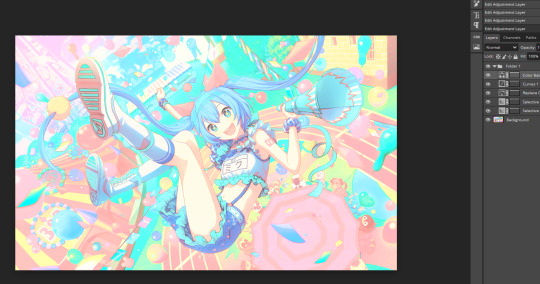
the difference is VERY small****, but you can see that theres more green and cyan + blue when you look closer.
Step 5*****: near the curves thing, you should see "brightness/contrast" you should probably hit that. and it should look like this
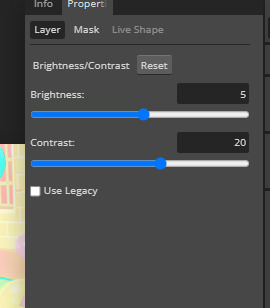
adjust it to your liking! its already been adjusted in the image as you can see but still.
Step 6*****: now if you hit the half circle button and look a little bit BELOW curves you should see "vibrance" it also has a saturation button but just drag the circle to your liking.
Step 7*****: next is "photofilter" its in the half circle button in the middle. if you want more of a certain color, click on the orange box to change it. here is what it should look like btw:

also the "density" is how much the color effects the image.
step 8: also, near the "photofilter" in that middle row a little bit above it, there is hue/saturation. its pretty explainable what it does, but just adjust the circles to your liking.
i have been editing this for the last hour, i hope atleast ONE person finds this post helpful. if you are currently reading this, thank you! if you used this tutorial, PLEASE send me the PSD you made!! (through the "request" button on my blog or @ me in a post!!) /nf
IF YOU FOUND ANY OF THE * SYMBOLS, THIS IS WHAT THEY ALL MEAN:
.. * i HOPE your photopea looks like that, it SHOULD. if it doesn't look like that your PROBABLY not on photopea.. your probably on some alien website or something. ** I honestly don't know what "fuzziness" means yet so i'm just as confused as you are. *** other stuff being: change of colors, making the image more red (making it look like it took place in hell!) interverting the image, making the colors more gray. **** honestly a lot of the options make the difference very small ***** you don't need to use ALL of these options if you don't WANT TO. i honestly don't use photo filter for most of my edits.
175 notes
·
View notes
Text
ty for the rat @bananapudding752
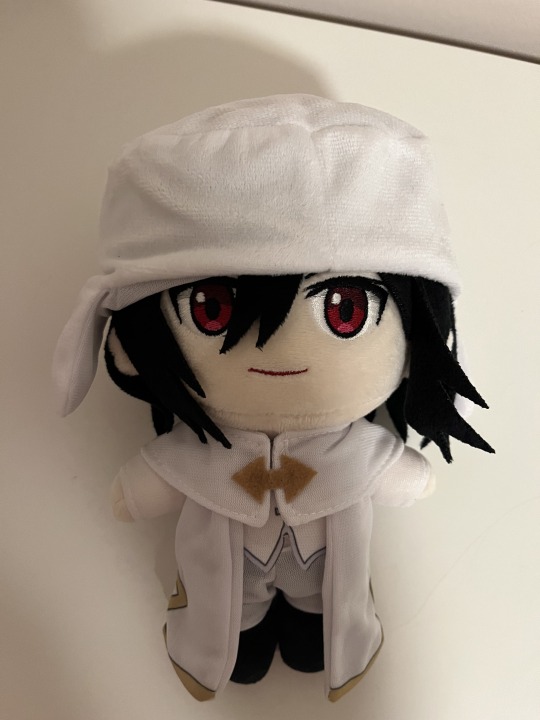
i even made a video for him (^ω^)(flash warning so beware)
✨🐀✨
again, ty for the late christmas present
4 notes
·
View notes
Text

#goofy ahh edit 🤣#but idgaf#i needed to do this#mother of vengeance incoming!!!#rhaenyra targaryen#hotd#house of the dragon#yshbshshshs
40 notes
·
View notes
Text
NEED TO REDRAW THIS PIC SO BAD i never got to show it off and it is now horribly outdated (2022)
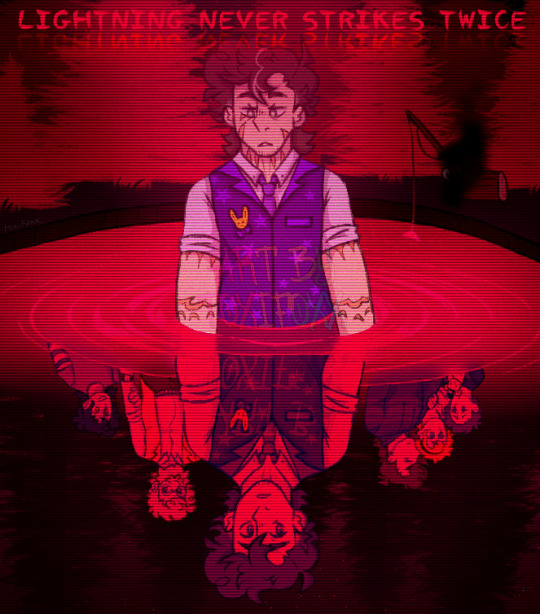
#it did look cool as fuck though. just saying it was cool as fuck#edit: okay i decided to show it but im keeping rbs off because i Dont want people spreading this goofy ahh old art#coincidentally for a fic which is now also horrendously outdated because i wrote it before i fully had a grasp on will's character#my art#toxi.txt
26 notes
·
View notes
Text
Anyone wanna boop a reaper? Anyone?

#cuz me and my friend sure does lol#who's with us?#just for shits and giggles#this is a goofy ahh post xD#mass effect legendary edition#mass effect trilogy#mass effect#mass effect 2#mass effect 3#reapers#mass effect reapers
11 notes
·
View notes
Text
SMG4 EXPO ‼️‼️🗣️🗣️💥💥

Something a made this being one of the best cursed miku expo concert but a SMG4....It is too PERFECT
17 notes
·
View notes
Text

Paulie stuck in my head…. Again.
#I promise I will redraw his goofy ahh face#not the final result yet!#mafia definitive edition#mafia trilogy#art#digital art#mafia i#paulie lombardo
8 notes
·
View notes