#garb
Explore tagged Tumblr posts
Text


Playing around with pouches. :) ⭐SALE⭐
For the next 48 hours get all 2024 Limited Edition pouches, bloom bags, and adventure gear 20% off.
https://www.etsy.com/shop/ArcherInventive
#sale#pouches#bags#bracers#bloom bags#adventure gear#handmade#fantasy fashion#garb#renfaire#archerinventive
469 notes
·
View notes
Text
Hey, have you ever wanted a really high quality custom chemise?
My mother in law is retired and helps to support herself with a little Etsy shop. It’s located here!


She makes absolutely stunning period garb for the SCA and her workmanship is stunning.
(She made my beautiful tunic on the left)

She only has those three listings but I believe she’s open to custom historical garb orders. Check it out! She’s great!
702 notes
·
View notes
Text
I present to you Lady Caterina de Savona's classes on patterning a tunic or gown, which I just used
youtube
youtube
youtube
And then the fun mash-it-up part with layers and accessories!
youtube
youtube
433 notes
·
View notes
Text


Embroidered tunic I made for my lawyer.
280 notes
·
View notes
Text
"Autumn is Here — but Like a Ghost (October 4th)" by David M. Briggs
performed live by the author for Fae Propaganda III: The Autumn Court in Springfield, Illinois
#poetry#poem#my writing#halberd books#spoken word#fae propaganda#autumn#fall#fall vibes#sweater weather#spooky season#renaissance faire#ren faire#bard#bardic#bardic inspiration#garb#larp#cosplay
57 notes
·
View notes
Text

That awkward moment when you realize your new coat makes you look like a younger, more violent Santa Claus...
34 notes
·
View notes
Text
Genuinely going nuts trying to figure out how to wear medieval men's clothing and deal with The Boobs at the same time.
26 notes
·
View notes
Text

Note
(August 29. 2018)
#2018#August#Bandage#Black Hood#Bloodborne#Cane#Close#Fine#Foreign#FromSoftware#Game#Game Screenshot#Gaming#Gaming Screenshot#Garb#Infants#Molotov Cocktail#My Screenshot#Note#PlayStation 4#PS4#Return#RPG#Screenshot#Sony Computer Entertainment#The Good Hunter#The Hunter#Trousers#Video Game#Yharnam
32 notes
·
View notes
Text

🌟 My Stars Tunic, Now in the shop. 🌟
The quest to make a full line of My Stars Adventure Gear continues with tunics!
Now in the shop while supplies last.
https://www.etsy.com/shop/ArcherInventive
Stay cozy, my companions. 🩵💙🩵
#stars#starry#blue#tunic#long sleeves#skirt#shirt#long#medieval#top#fantasy#fashion#ren faire#garb#adventure#gear#handmade#archerinventive
2K notes
·
View notes
Text

Tostin's been building on some of his ren faire gear while he's up in the northlands, and it looks damned good!


29 notes
·
View notes
Text
instagram
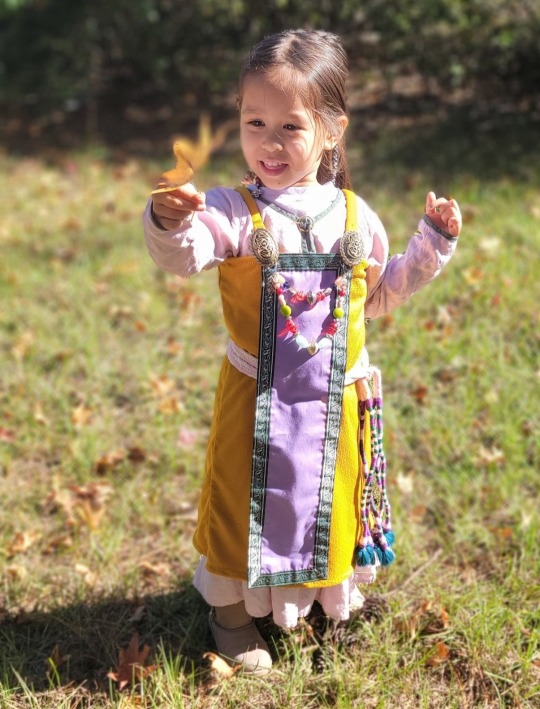
Its armor and weapons or massive bling - there's no in between with this kid. She finally approves of the dress.
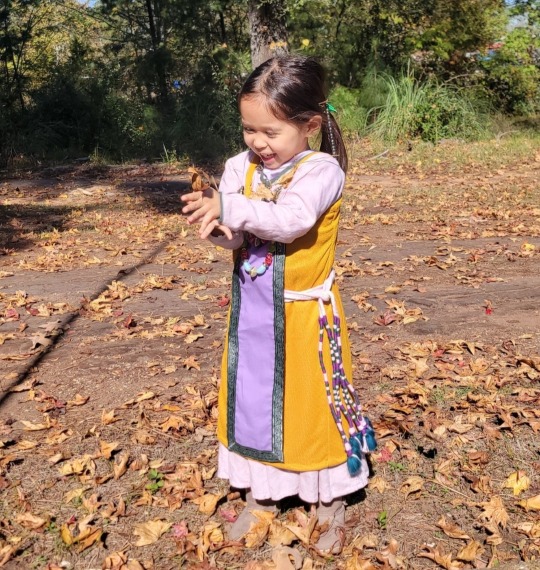


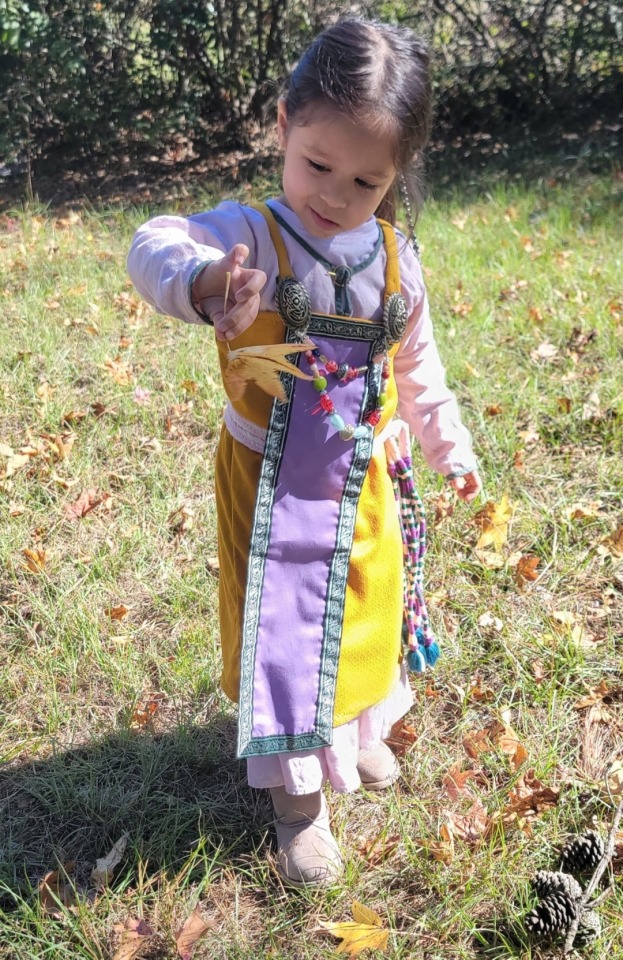


Tunic is linen from armstreet. Dress is made from bargain bin knit fabic with a fulled appearance to conceal the weave. Panel is cotton with brocaded trim, and beads are plastic so I won't regret if they break. Is it a bit overboard? Yeah, but if it gets her to play then cool beans. Now I need to make something for the wife to complete a full family outfit in norse theme. I look forward to being finished so we can maybe pay a visit to to the land of liripipes next
#garb#child garb#vikingstyle#viking aesthetic#norse aesthetic#smokkr#hangeroc#apron dress#my garb#costuming#my crafts
725 notes
·
View notes
Text
So which garb did everyone wear for Halloween? Mine was my 15th c. Italian made from a silk sari.
24 notes
·
View notes
Text

one of my favourite fan art pieces that I colored . I truly enjoyed every moment I spent coloring it. I even give it a name " regret"
#manga panel#one piece#monkey d. luffy#straw hat luffy#coloring#art#fanart#with: luffy#portgas d ace#anime fanart#manga art#garb#SoundCloud
50 notes
·
View notes
Text

My tablet weaving since February. These are all for other people and I'm so pleased that they are good enough for gift giving. The top two are even partial compensation for my husband's new armor.
26 notes
·
View notes
Text
The Don Marcus Project - a costuming diary
At Vindheim's first Accademia della Spada, the tournament for Princess Octavia's champion was held. My brother white scarf, Master Marcus von Furth, WSA was chosen as HSH's personal champion to be sicced on her foes and to defend her good name and honor. Several years ago, when Marcus was chosen to be Deanna I's champion, she approached my wife to make him one new suit so he could better look the role. That she did, and in addition a second hand silk suit (seen below) we had bought hoping it would fit me did not, but it sure did fit our boy!

(I'm still mad about that suit not fitting me, I'm OBSESSED)
This time, Marcus approached me about making 1 new suit and 2 extra doublets to help him better look the part and to accommodate his sick new gains! Ah, the joys of working out and eating sufficient protein. All your old stuff no longer fits right, and specifically in the difficult areas to let out and take in. Marcus's preferred style of doublet is almost more of a jerkin, with little sleeve puffs as seen in his old doublet and in Don Gabriel de la Cueva y Giron Duke of Albuquerque by Giovanni Battista Moroni (Moroni my beloved <3333) as seen below. Obviously, the heat of Ansteorra contributes to certain styling decisions and the removal of the full length doublet between the undershirt and the puff-sleeved doublet.

The time had come for my second attempt to figure out the barra system and pattern drafting method featured in Matthew Gnagy's The Modern Maker. For those of you who haven't yet used it, it is genius and intuitive in how counterintuitive it can feel. Gnagy walks even an intermediate (begrudgingly) sewist through a historical pattern drafting method that relies on the tendency of the human body to be proportional in certain measurements to the bust, waist, hip, and height. It makes an incredibly good first draft which, for the doublet I'm working on myself concurrently, only took one pass. In defense of the mockup for Marcus, I was figuring it out as I went, okay?

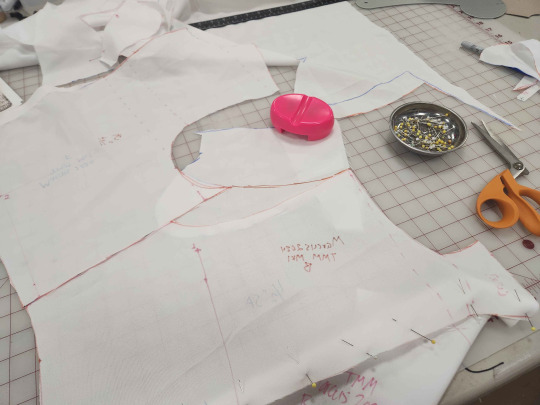
I used multiple colors of sharpies to keep my brain from melting as I went, starting with a fine pointed light pink as a "sketching" sharpie and frequently clarifying lines with an orange or blue sharpie. I did run into issues where my math failed me and had to insert extra fabric, as seen above, but who knew what chaos those simple insertions would portend....
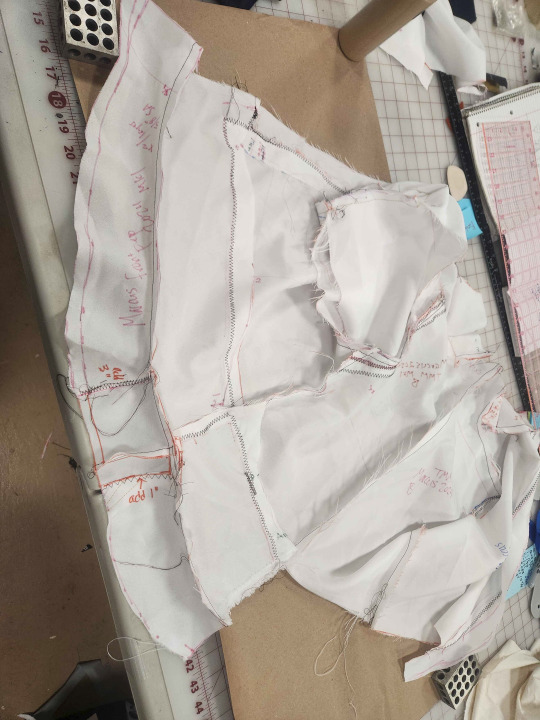
Behold, the frankendoublet. The result of me screwing up and miscalculating in some places, learning after the first try on that the wearer had gained 2 inches of bicep and almost 3 inches of chest and back muscle in the months since I'd last measured him, and in confirming his preference for a more modern, long-torsoed garment than the higher waistline seen in late period. I swear there was a method to this madness, but it gives a few of my apprentice siblings headaches looking at it and I don't blame them. I transferred the pattern to paper, and we were off to the races!
A quick interjection about the fabric choices: we are both in the middle of financial tight spots, so as much as I'd like to work with natural materials (that don't melt by campfires at the very least) we agreed to opt for 1 silvery-blue shot silk-look polyester doublet, 1 crimson shot silk-look polyester doublet, and 1 royal blue polycotton striped brocade full suit, all intended to be interchangable for a variety of outfits. I bought 2 yards for each of the doublets and 3 yards for the pants, rocking out at $40 flat for the self fabric. While not ideal for breathability and late night campfires, right now it's hard to beat costs like that. The silvery-blue can be seen for the remainder of this post as I chose to use it for the first doublet.
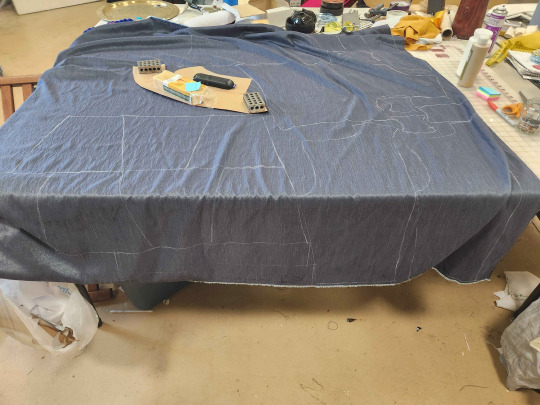
In one full day's work I have managed to chalk and cut out the full doublet from the self and the lining (a slate blue linen I pulled from stash) and used approximately 1.6 yards of each. Behold my selection of pattern weights, including a remote, a basket hilt, 3 bottles of paint, most of a block of wax, some drill blocks, sticky notes, and a can of coke I was putting off drinking so it could continue to serve as a pattern weight.
By the end of day 1 of sewing I had assembled the full body and sleeves and begun pinning the collar. This is my first suit lined doublet so I am definitely taking things a little slower than usual. Thus far all the seams have been machine sewn aside from the finishing on the sleeve cuff. After some extra thought considering biceps and the volume of fabric, I patterned the bicep cuffs to have approximately 2 inches of excess cuff to hide within the seam to be easily let out if further size changes do occur. At this point I left the cuffs open for one more fitting before seaming them closed. By the end of the night I also finished the strip of waist eyelets, sewn on linen canvas provided by Asa inn blindi, so in the future pants can be pointed to this doublet. By this time, however, I was a little too dangerously sleepy to be trusted with a sewing machine so with the collar pinned I ended for the night.
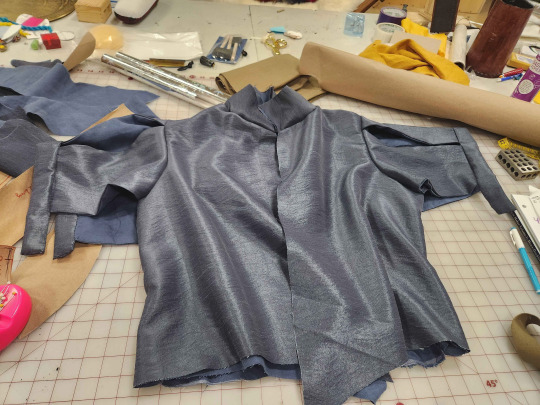
The next day saw the attaching of the collar, the reopening of the shoulder seam to "zhuzh" more of the length of the back into the shoulder to accommodate the natural volume of shoulder muscles and to make the collar fall correctly. The eyelet strip was first sewn to the seam allowance of the waist line, after which the seam allowance + eyelet strip was pressed to the body and stitched down securely. After that, some lovely hand dyed wool twill tape was donated by Asa in blinda to cover and protect the raw edges along the waist line.
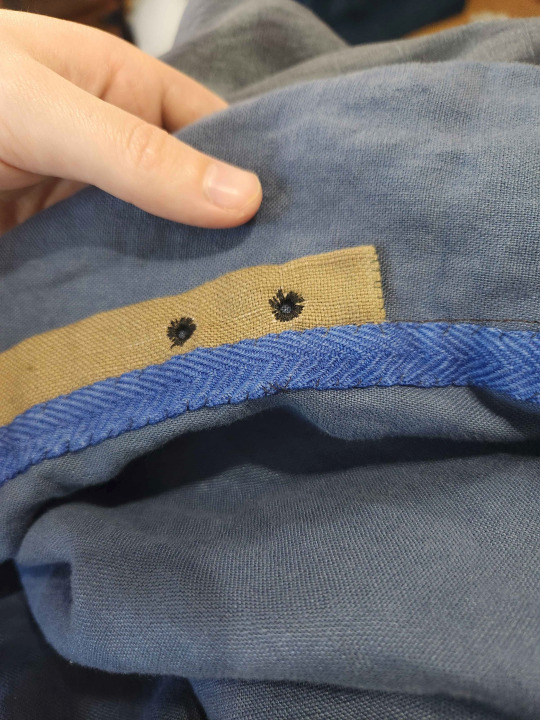
Rather than the strip of silk taffeta Gnagy recommends the tailor tacks in to the left side to reinforce the buttonholes, I ironed in a strip of fusible interfacing as reinforcement.
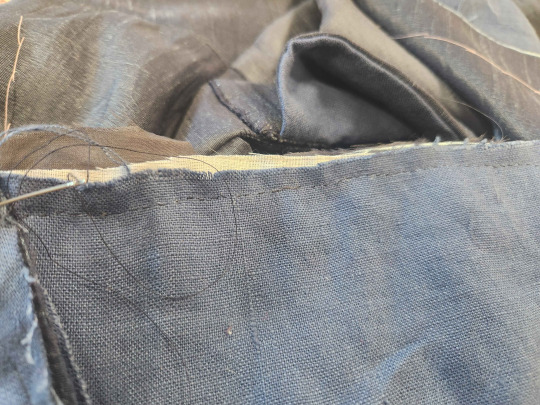
Glamor shot of the interfacing being sewn in by hand. My hand seams are getting a wee bit straighter.
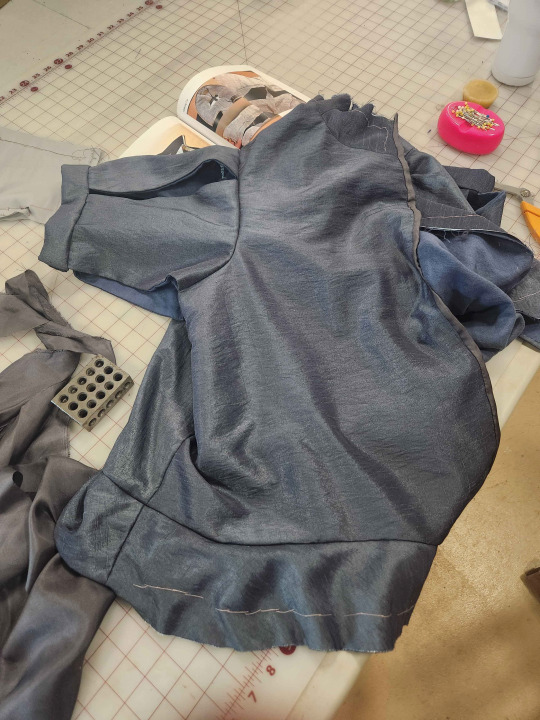
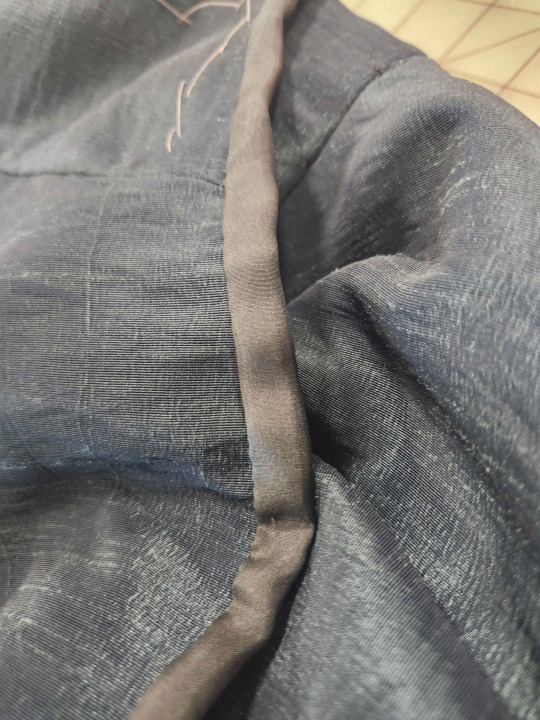
In absence of the much sturdier taffeta Gnagy recommends for both trimming and reinforcement, I used scraps of a much lighter weight silvery-gray silk fished out of Asa's scraps, like a raccoon through a trash can. This does not provide the same structural benefit as the taffeta trimming, but it does introduce a little extra "pop" to the colors imho.
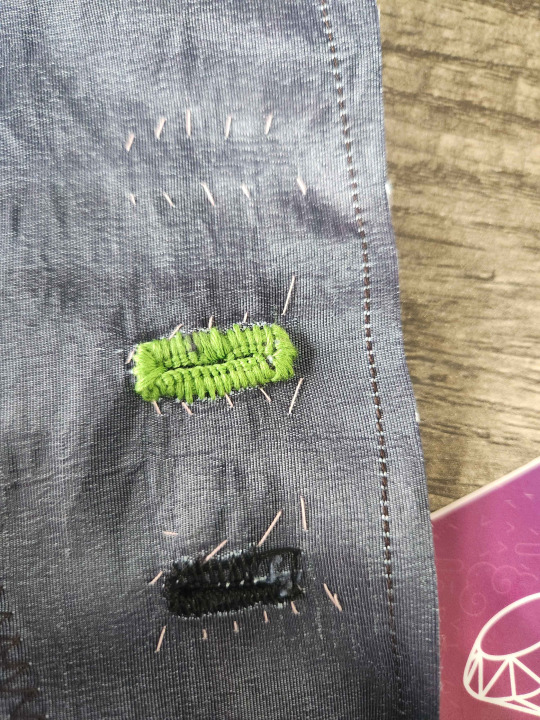
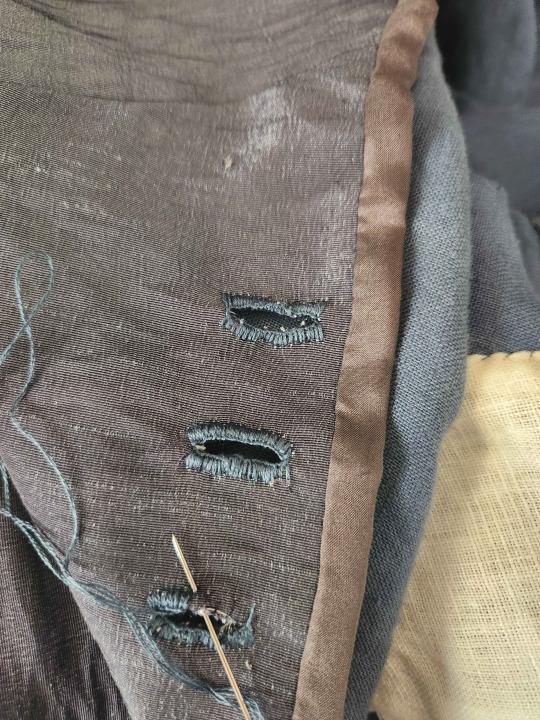
Then I tackled my first-ever hand sewn buttonholes. I opted for 3 strands of DMC 930 cotton embroidery floss on the final project after testing with buttonhole thread, all 6 strands, and 2 strands.
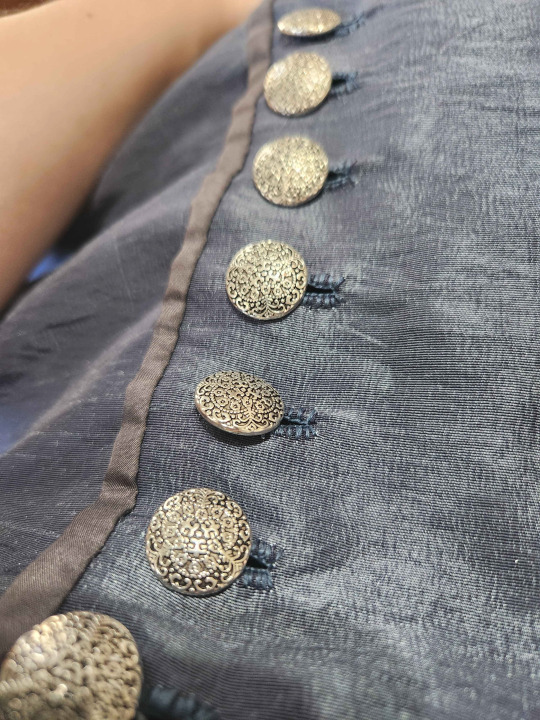
And finally, some glamor shots of the completed garment. From left to right, the "secret ease" on the bicep meant to make adjustments for more muscle growth easier to accommodate, the collar lining sewn in, and the final garment waiting in my office to be handed to the recipient at Coronation.
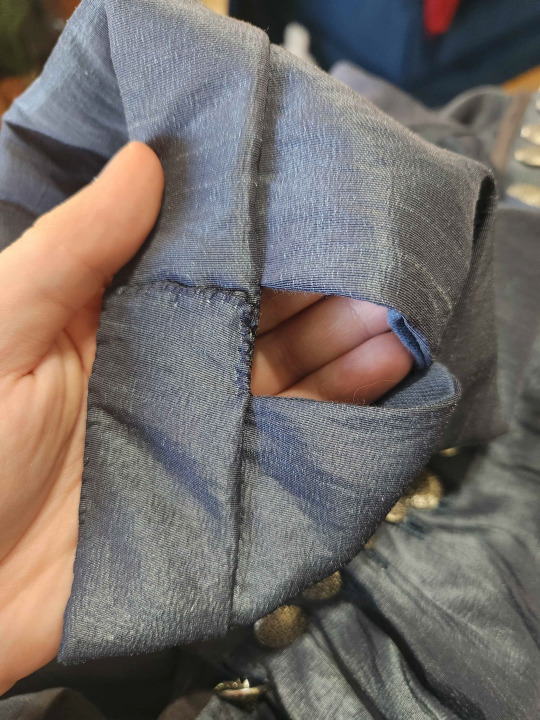


Overall, I think we're both very pleased with the results. Master Marcus retained his full (and simply absurd) range of motion on and off the field, the garment is machine washable, and it is a lovely color on him. The combined power of the ladies of our Princess's household has convinced him to let me raise the waistline on doublet 2 a whole two inches, which I am very excited about.

What did I learn?
The barra method is not nearly as terrifying to manage as I think it is, as long as you trust the process
Multiple colors of sharpies are a game changer.
I'm actually faster at hand-sewing buttonholes than I am at machine sewing them, because I get so anxious about sewing them by machine.
Suit-lined garments are SO much easier to do seam finishing on, it's absolutely night and day.
I think I want to make an entire doublet of silk taffeta. This is a problem. I need money and confidence to do so.
What's next?
Update the 14th C English clothing powerpoint to what I currently use for classes
I am currently making an Elizabethan suit for Darien de Shameless with my apprentice sibling Asa in blinda, with aims of finishing it for Queens Champion
I am currently making an Elizabethan-ish suit for Viscount Micauley Morison ahead of Winter Crown (but cheating on the pants so he has one pair of breezy breeches). The construction is largely the same to this one, so if I make a post about it it probably won't include an entire construction diary. Just some glamor shots.
I am making Rus for Dona Halldora Hrafnsdottir, but I keep getting distracted on which Navershnik I want to finish first.
I am looking forward to making some new and improved Rus for myself and Centurion Runa Bjarki ahead of the Crown/Coronet season, with an eye towards moving us to more accurate pieces.
I need to do a Shift Weekend where I just churn out shifts, chemises, and rubakhas
#sca#society for creative anachronism#historical costuming#elizabethan#historical reenactment#elizabethan era#garb#sca garb#sca costuming#a&s#arts & sciences
13 notes
·
View notes
