Doña Áshildr Inn Hárfagri | Barony of Namron, Principality of Vindheim, Kingdom of Ansteorra
Don't wanna be here? Send us removal request.
Text
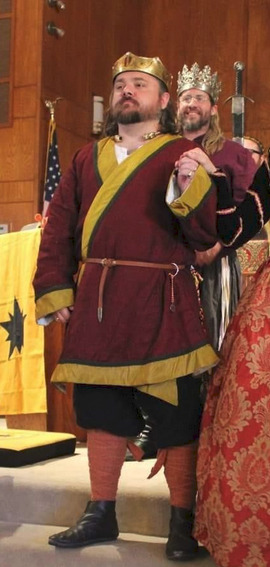
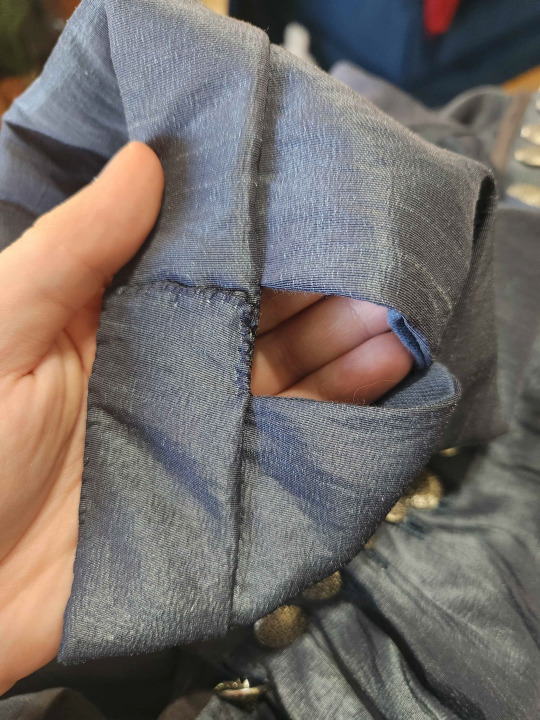
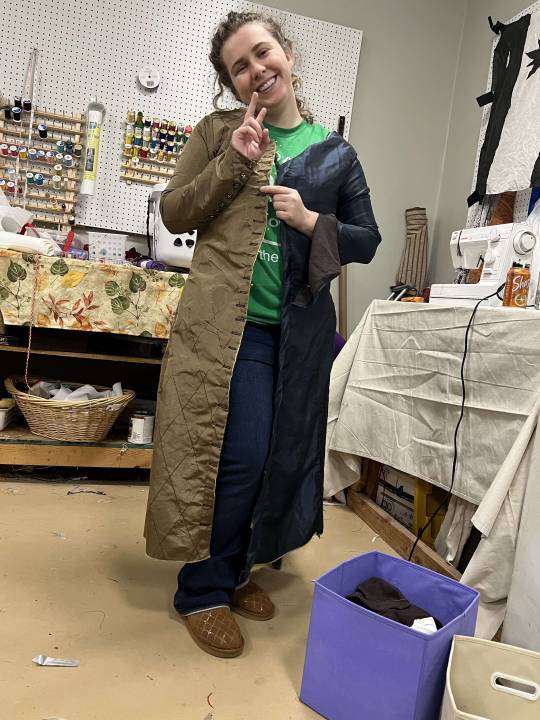
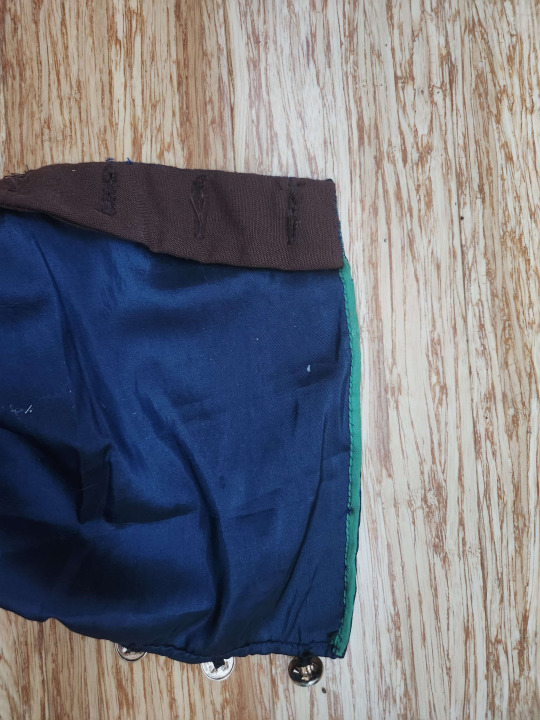
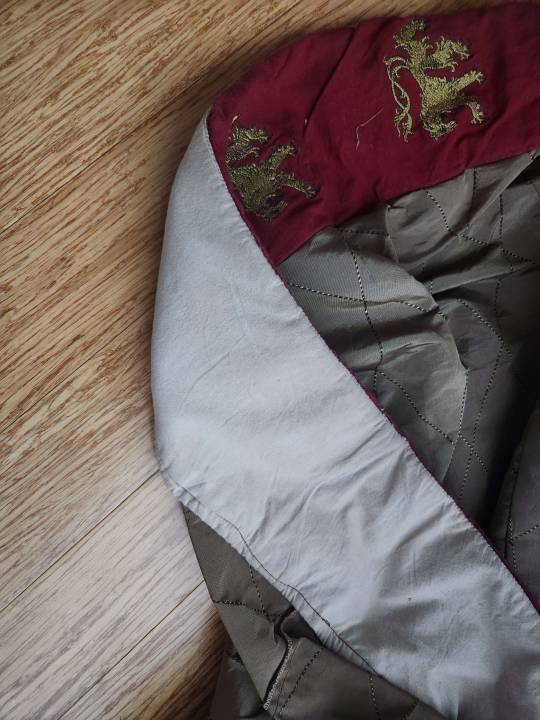
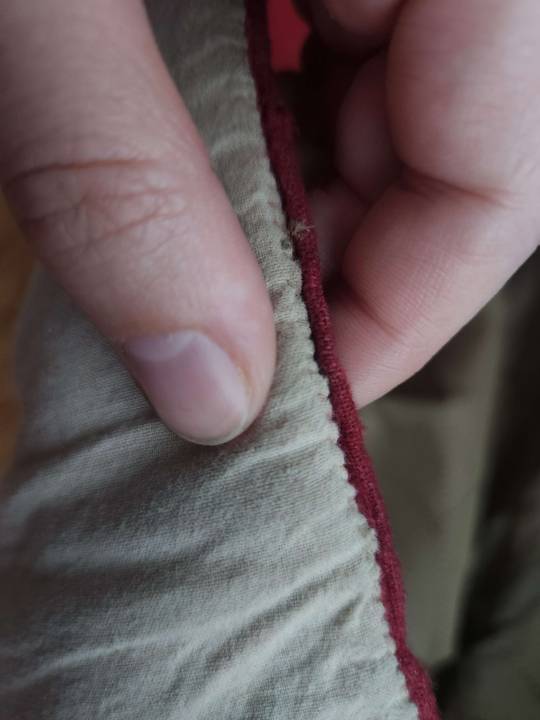
Detail photos of the coat after a few wears!


A Coat Fit for a Hersir
By Doña Ashildr inn Harfagri, 2024
Purpose
This coat is constructed for HE Brynjólfr Austmannaskelfir, Baron of Bonwicke, to wear at his baronial investiture with HE Beatrix Funteyn. Brynjólfr requested a Hedeby coat and referenced a red and gold coat frequently featured by the living history society Swehanaz. The featured coat is a cross-body coat that appears to fit fairly slim through the upper torso and arms while flaring past the waist and knees to allow for freedom of movement.

Vendel Period impression by Matt Bunker, from a pattern created by Swehanaz member Dave Huggins[1]
This style of coat is depicted clearly on the Sutton Hoo helmet in the design commonly referred to as “The Dancing Warriors” where the coats appear to have contrast, decorative facing around the edges of the front opening, the hem, and the cuffs, along with what could be trim along the outermost edge.
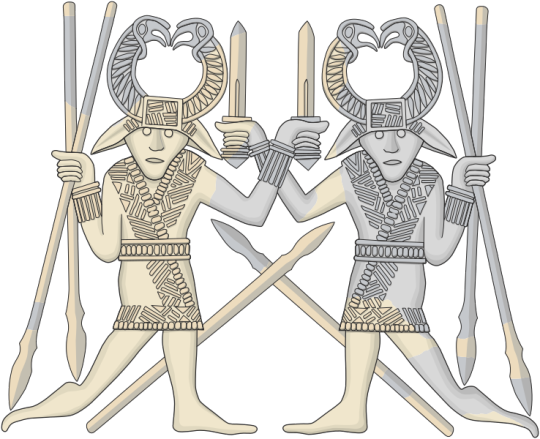
Detail of a motif on the Sutton Hoo helmet, commonly referred to as the Dancing Warriors.[2]
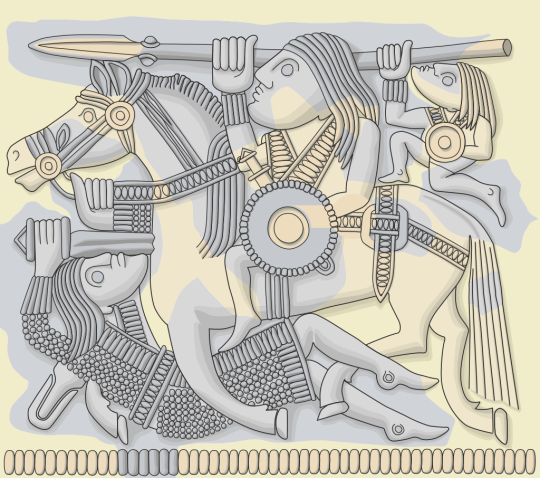
Detail of a repeating motif on the Sutton Hoo helmet, commonly referred to as the The Rider and Fallen Warrior. [3]
Design
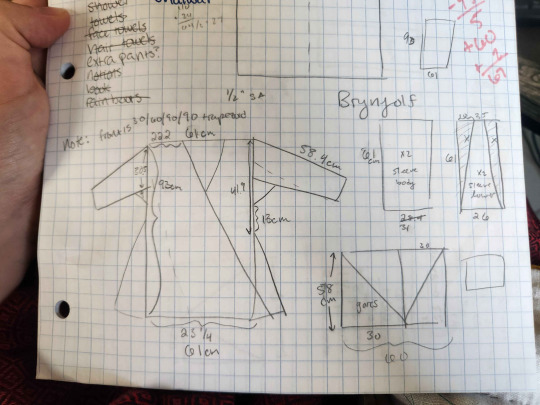
Rather than finding or buying an existing interpreted pattern, I decided to interpret based on the Dancing Warriors and the Rider and Fallen Warrior, as well as other similar garments. Foremost among my other references is the Bocksten tunic[4], well known for its simple, geometric construction and use of triangular gussets to add fullness to the skirt of the tunic. For this interpretation, I opted for a single, rectangular back panel, mirrored trapezoids for the front, triangular gores to insert into the side edges for fullness, and two-part paired trapezoids for each sleeve. The division of the sleeves was made after laying out a cutting diagram and realizing that, given the fabric width of the most precious, outer layer of fabric, splitting the sleeves into a larger and a smaller trapezoid would better optimize my cutting and reduce fabric wastage. As with many of my patterning decisions across early period garments, I opt for the most efficient use of fabric for my modern fabric widths as the tailors of the time may have opted for efficient cutting diagrams for their own fabric widths.
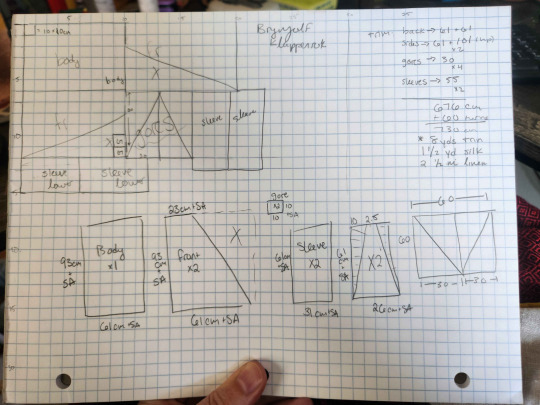
The recipient provided a red and black diamond weave linen for the outer layer, white linen for the lining, a gold silk for the contrast edge, and green woolen trim for accent. The recipient prefers triangular gores to side slits and prefers the look of trim “joining” the contrast silk edge to the main outer fabric. Embellishments such as trim or embroidery are common in Viking Age and medieval garments along seams and other potential weak areas, rather than just as decoration. I have also found anecdotally that seams which I have reinforced with either decorative stitching or by laying trim across the seam in question wear out less quickly than other, similar seams on my own garb. I speculate this is due to the application of trim spreading the force applied to the seam across two more lines of attachment, where the trim is tacked down along the two joined fabrics.
One frustrating design element is the presence or lack of the decorative edge along the back of the neck. As both designs from the Sutton Hoo helmet depict the torso square to the viewer, neither gives a clue to this design element. Many interpretations of this garment forego the decorative edge along the back of the neck entirely, but my original plan and design for this garment include this design element. As I have opted to go with a non-tailored design consisting of rectangles and trapezoids, the back of neck portion would be a simple rectangle. Additionally, the continuous piece of wool trim across the shoulders to the neck may ease some of the stress along the shoulder seam and yield a longer-lasting garment by distributing the stress down the front and back vertically.
After the design was finalized with the recipient of the coat, I came across The Klappenrock: A Viking warrior's Coat From 10th C Haithabu, an A&S paper by Elska á Fjárfelli (mka Susan Verberg) which highlights specific analysis of the extant fragments and provides fascinating details surrounding the cultural milieu that may have produced this coat as well as options for different interpretations of this coat.
Method
After an initial fitting in muslin to confirm length and mobility while wearing, the pieces were traced with chalk onto medium weight white linen[5] and the red and black diamond linen[6]. This choice of outer is remarkably appropriate to Haithabu, where approximately 6 fragments of diamond weave twill fabric were found and at least one was dyed red[7]. While all the colors were chosen in order to match the heraldry of the barony with Or, gules, and vert. Due to the looser weave and drape of the diamond linen, I experimented on scraps with different thread, gauges, and methods of sewing.
By machine with polyester all purpose thread
By hand with polyester all purpose thread
By machine with cotton thread
By hand with cotton thread
By machine with linen thread
By hand with linen thread
All attempts to sew the fabric with a machine resulted in unsightly puckering and even snagging of the delicate weave of the fabric, no matter the tension, new needle, or foot I switched out. Hand sewing with the thinner cotton and polyester threads did not produce sturdy seams and in the case of the polyester thread, actually sliced through some of the weft fibers when put under moderate stress. Sewing by hand with a thicker thread (the black 80/3 linen I had on hand) posed less damage to the base material and produced less puckering and was the final decision. Partway through the construction process the 80/3 was replaced with 80/2 due to availability issues.
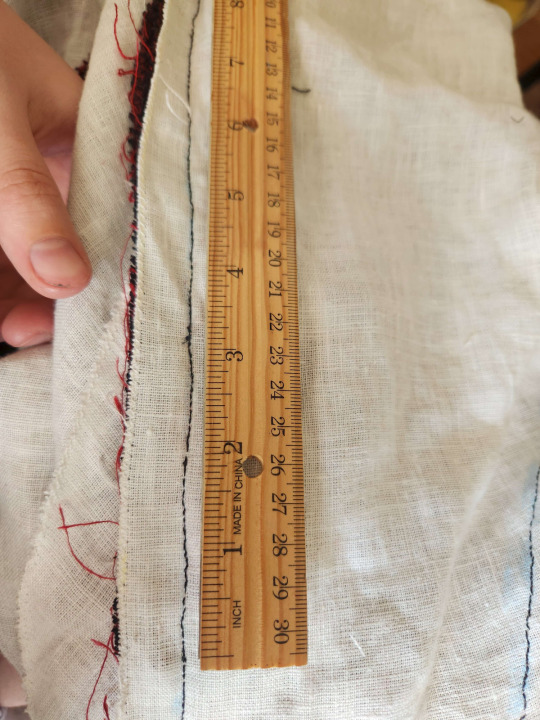
After cutting out the linen pieces, I ran them all through the sewing machine to overlock the edges so they could be safely transported as I handsewed anywhere I could. This is the only machine sewing on the garment, and the majority of it was trimmed off during the process of felling. The machine sewing is obviously not a period technique.
The coat is constructed by suit lining, so that the white linen's density and structure can reinforce all seams. The construction seams are backstitched, as seen above, with an average gauge of 8-12 stitches per inch. While the majority of construction stitches in archaeological finds seem to be running stitch[8], I did not yet trust my hand sewing to be sufficiently sturdy with just running stitch. The seams around the shoulder, armscye, and sleeves are flat felled open with a whip stitch as seen in Haithabu and York to reduce bulk, and the seams along the gores are run-and-felled as bulk is less of a concern.
What Did I Learn?
Next time I make a garment of this type, I will use a running stitch for the low-stress seams such as the sides and underside of the sleeves. I will also round up the front corners of the coat to prevent the “handkerchief” effect produced by the hanging as-is. I would also like to make one of these with fur accents one day, and to make one in wool to see how it affects the drape of the garment.
Even though it is not a period method, I will continue to use the sewing machine trick to reduce the wear and tear on the edges of the fabric. Modern commercially-available fabric is made to a lower standard and thread count than fabric in period and is thus more prone to fraying. In addition, my day job is not tailoring or sewing so these kinds of projects tend to be more on the move and are subject to more wear and tear while in progress than they would be if worked on only in a tailor’s shop.

Photos by Sigmund Ulfsson
Retrieved from https://www.facebook.com/Swehanaz/photos/pb.100080129846623.-2207520000/658095265631323/?type=3
By Goran tek-en, CC BY-SA 4.0, https://commons.wikimedia.org/w/index.php?curid=83175424
By Goran tek-en, CC BY-SA 4.0, https://commons.wikimedia.org/w/index.php?curid=95523565
Bockstensmannen och hans dräkt, Margareta Nockert m.fl. Hallands länsmuseer, Halmstad och Varberg, 1997.
ILO19 Medium weight white linen from Fabrics-store https://fabrics-store.com/fabrics/linen-fabric-IL019-bleached-fs-signature-finish-middle
Burgundy and Black diamond linen from Woolsome https://www.woolsome.shop/product/linen-fabric-diamond-black-burgundy-ld-11-02/#1702727755128-d097131d-b3cd
Hagg, Inga (1991) Textilfunde aus der Siedlung und aus den Grabern von Haithabu. [Textile Finds from the Settlement and from the Graves of Hedeby]. Hedeby-Ausgrabungen in Haithabu [HAGG 1991] Retrieved from https://www.vikingage.org/wiki/index.php?title=Cloth_Weaving_Patterns
Baker, Jennifer. Stitches and Seam Techniques: Seen on Dark Age / Medieval Garments in Various Museum Collections. 2009, retrieved from https://ia803100.us.archive.org/23/items/Stitches_And_Seam_Techniques/Stitches%20and%20Seam%20Techniques.pdf
11 notes
·
View notes
Text
A Coat Fit for a Hersir
By Doña Ashildr inn Harfagri, 2024

Purpose
This coat is constructed for HE Brynjólfr Austmannaskelfir, Baron of Bonwicke, to wear at his baronial investiture with HE Beatrix Funteyn. Brynjólfr requested a Hedeby coat and referenced a red and gold coat frequently featured by the living history society Swehanaz. The featured coat is a cross-body coat that appears to fit fairly slim through the upper torso and arms while flaring past the waist and knees to allow for freedom of movement.

Vendel Period impression by Matt Bunker, from a pattern created by Swehanaz member Dave Huggins[1]
This style of coat is depicted clearly on the Sutton Hoo helmet in the design commonly referred to as “The Dancing Warriors” where the coats appear to have contrast, decorative facing around the edges of the front opening, the hem, and the cuffs, along with what could be trim along the outermost edge.

Detail of a motif on the Sutton Hoo helmet, commonly referred to as the Dancing Warriors.[2]

Detail of a repeating motif on the Sutton Hoo helmet, commonly referred to as the The Rider and Fallen Warrior. [3]
Design
Rather than finding or buying an existing interpreted pattern, I decided to interpret based on the Dancing Warriors and the Rider and Fallen Warrior, as well as other similar garments. Foremost among my other references is the Bocksten tunic[4], well known for its simple, geometric construction and use of triangular gussets to add fullness to the skirt of the tunic. For this interpretation, I opted for a single, rectangular back panel, mirrored trapezoids for the front, triangular gores to insert into the side edges for fullness, and two-part paired trapezoids for each sleeve. The division of the sleeves was made after laying out a cutting diagram and realizing that, given the fabric width of the most precious, outer layer of fabric, splitting the sleeves into a larger and a smaller trapezoid would better optimize my cutting and reduce fabric wastage. As with many of my patterning decisions across early period garments, I opt for the most efficient use of fabric for my modern fabric widths as the tailors of the time may have opted for efficient cutting diagrams for their own fabric widths.


The recipient provided a red and black diamond weave linen for the outer layer, white linen for the lining, a gold silk for the contrast edge, and green woolen trim for accent. The recipient prefers triangular gores to side slits and prefers the look of trim “joining” the contrast silk edge to the main outer fabric. Embellishments such as trim or embroidery are common in Viking Age and medieval garments along seams and other potential weak areas, rather than just as decoration. I have also found anecdotally that seams which I have reinforced with either decorative stitching or by laying trim across the seam in question wear out less quickly than other, similar seams on my own garb. I speculate this is due to the application of trim spreading the force applied to the seam across two more lines of attachment, where the trim is tacked down along the two joined fabrics.
One frustrating design element is the presence or lack of the decorative edge along the back of the neck. As both designs from the Sutton Hoo helmet depict the torso square to the viewer, neither gives a clue to this design element. Many interpretations of this garment forego the decorative edge along the back of the neck entirely, but my original plan and design for this garment include this design element. As I have opted to go with a non-tailored design consisting of rectangles and trapezoids, the back of neck portion would be a simple rectangle. Additionally, the continuous piece of wool trim across the shoulders to the neck may ease some of the stress along the shoulder seam and yield a longer-lasting garment by distributing the stress down the front and back vertically.
After the design was finalized with the recipient of the coat, I came across The Klappenrock: A Viking warrior's Coat From 10th C Haithabu, an A&S paper by Elska á Fjárfelli (mka Susan Verberg) which highlights specific analysis of the extant fragments and provides fascinating details surrounding the cultural milieu that may have produced this coat as well as options for different interpretations of this coat.
Method
After an initial fitting in muslin to confirm length and mobility while wearing, the pieces were traced with chalk onto medium weight white linen[5] and the red and black diamond linen[6]. This choice of outer is remarkably appropriate to Haithabu, where approximately 6 fragments of diamond weave twill fabric were found and at least one was dyed red[7]. While all the colors were chosen in order to match the heraldry of the barony with Or, gules, and vert. Due to the looser weave and drape of the diamond linen, I experimented on scraps with different thread, gauges, and methods of sewing.
By machine with polyester all purpose thread
By hand with polyester all purpose thread
By machine with cotton thread
By hand with cotton thread
By machine with linen thread
By hand with linen thread
All attempts to sew the fabric with a machine resulted in unsightly puckering and even snagging of the delicate weave of the fabric, no matter the tension, new needle, or foot I switched out. Hand sewing with the thinner cotton and polyester threads did not produce sturdy seams and in the case of the polyester thread, actually sliced through some of the weft fibers when put under moderate stress. Sewing by hand with a thicker thread (the black 80/3 linen I had on hand) posed less damage to the base material and produced less puckering and was the final decision. Partway through the construction process the 80/3 was replaced with 80/2 due to availability issues.

After cutting out the linen pieces, I ran them all through the sewing machine to overlock the edges so they could be safely transported as I handsewed anywhere I could. This is the only machine sewing on the garment, and the majority of it was trimmed off during the process of felling. The machine sewing is obviously not a period technique.
The coat is constructed by suit lining, so that the white linen's density and structure can reinforce all seams. The construction seams are backstitched, as seen above, with an average gauge of 8-12 stitches per inch. While the majority of construction stitches in archaeological finds seem to be running stitch[8], I did not yet trust my hand sewing to be sufficiently sturdy with just running stitch. The seams around the shoulder, armscye, and sleeves are flat felled open with a whip stitch as seen in Haithabu and York to reduce bulk, and the seams along the gores are run-and-felled as bulk is less of a concern.
What Did I Learn?
Next time I make a garment of this type, I will use a running stitch for the low-stress seams such as the sides and underside of the sleeves. I will also round up the front corners of the coat to prevent the “handkerchief” effect produced by the hanging as-is. I would also like to make one of these with fur accents one day, and to make one in wool to see how it affects the drape of the garment.
Even though it is not a period method, I will continue to use the sewing machine trick to reduce the wear and tear on the edges of the fabric. Modern commercially-available fabric is made to a lower standard and thread count than fabric in period and is thus more prone to fraying. In addition, my day job is not tailoring or sewing so these kinds of projects tend to be more on the move and are subject to more wear and tear while in progress than they would be if worked on only in a tailor’s shop.

Photos by Sigmund Ulfsson
Retrieved from https://www.facebook.com/Swehanaz/photos/pb.100080129846623.-2207520000/658095265631323/?type=3
By Goran tek-en, CC BY-SA 4.0, https://commons.wikimedia.org/w/index.php?curid=83175424
By Goran tek-en, CC BY-SA 4.0, https://commons.wikimedia.org/w/index.php?curid=95523565
Bockstensmannen och hans dräkt, Margareta Nockert m.fl. Hallands länsmuseer, Halmstad och Varberg, 1997.
ILO19 Medium weight white linen from Fabrics-store https://fabrics-store.com/fabrics/linen-fabric-IL019-bleached-fs-signature-finish-middle
Burgundy and Black diamond linen from Woolsome https://www.woolsome.shop/product/linen-fabric-diamond-black-burgundy-ld-11-02/#1702727755128-d097131d-b3cd
Hagg, Inga (1991) Textilfunde aus der Siedlung und aus den Grabern von Haithabu. [Textile Finds from the Settlement and from the Graves of Hedeby]. Hedeby-Ausgrabungen in Haithabu [HAGG 1991] Retrieved from https://www.vikingage.org/wiki/index.php?title=Cloth_Weaving_Patterns
Baker, Jennifer. Stitches and Seam Techniques: Seen on Dark Age / Medieval Garments in Various Museum Collections. 2009, retrieved from https://ia803100.us.archive.org/23/items/Stitches_And_Seam_Techniques/Stitches%20and%20Seam%20Techniques.pdf
#society for creative anachronism#historical costuming#historical reenactment#viking clothes#viking#arts & sciences#a&s#sca#garb
11 notes
·
View notes
Text
Candlemas 2025
Bryn Gwlad's Candlemas: An Early Tudor Canterbury Tales features an exciting bardic championship format. In short, the format consists of 4 rounds matching specific themes (listed below) in reference to the stories within Canterbury Tales. Each piece will draw from a "bank" of 20 minutes, Chaucer's writings are fully off limits, original pieces are highly encouraged, and documented pieces cannot be more recent than 1509, the end of Henry VII's reign. Below I've included my selected pieces and their documentation including one original ballad.
1 COURTLY LOVE OR CARNAL LUST
Sapphic Fragment #2
I tell you someone will remember us in the future.
Sapphic Fragment #19
Honestly, I wish I were dead. Weeping many tears, she left me and said, “Alas, how terribly we suffer, Sappho. I really leave you against my will.”
And I answered: “Farewell, go and remember me. You know how we cared for you.
If not, I would remind you ...of our wonderful times.
For by my side you put on many wreaths of roses and garlands of flowers around your soft neck.
And with precious and royal perfume you anointed yourself.
On soft beds you satisfied your passion.
And there was no dance, no holy place from which we were absent.”
Retrieved from https://www.uh.edu/~cldue/texts/sappho.html, translated by Julia Dubnoff.
Poems by Sappho of Lesbos, approx 630-570 BCE
2 GREED AND HUBRIS
Arachne and Athena by Doña Áshildr Inn Hárfagri 2025
Arachne worked at her humble wood loom * aye, and a silken thread be spun The tapestry had no earthly kin * now she weaves the silk thread with no end
“I mak fine tunics fit for glorious kings I mak tapestries worth wide cities
All weavers envy my work said she, For no woman born can weave as me
Any king my wealthy Patron would be For none can a richer wall Hanging weave
My oaken shuttle weaves a merry dance My warp and weft happ’ly married be”
Aunce on a day came a wizened crone Softly sang the loom's gray weight-stones
“Lady, finer warp in Greece I've ne’er seen And more lustrous weft there ne’er has been
Lady tell this crone, tell me swift and true Has Holy Athena seen fit to bless you?”
“Blesséd are my hands by only me I am in my own the best weaver in Greece
Blesséd is my warp by no hand but mine I am by my hand the most skilled in all time”
“Claim you, then, skill past bright-eyed Athene?” “Oh she had no hand in creating me!”
“Would that the Goddess hear my challenge bold So I may prove my skill surpass her own!”
Then Holy Athena cast aside the crone’s face “Aye, then, lady, your challenge I would take!”
Four tales wove Athena of Olympian might Over foolish mortals’ boasts of right
Arachne’s shuttle wove far different scenes Of a score and once of the gods’ treachery
When side by side stood the lady and god Athene could’na find in the mortal’s a flaw
“Aye skilled may you be, by the foot of the loom But your boasts and scenes shall be your doom
How dare ye claim none a’ my hand in ye How dare ye slander the gods so holy?
If you would claim your weaving has no peer Then you shall weave and weave evermore
You’ll have no need for shuttle nor hands You’ll have no need for loom nor land
As a spider small you’ll weave finest thread But the finest that you shall weave will be a web
For none can deny your fine skill, have they eyes But to slander a god shall never be wise.”
In Metamorphoses, Ovid tells a tale of hubris in the story of Arachne. Arachne is a talented young weaver who claimed her skill was better even than that of Athena and denied the blessing of Athena in that skill. Athena, offended, sets up a competition between herself and the mortal to prove who is the better weaver. Athena weaves a collection of scenes showing the gods in their glory, triumphing over and punishing mortals for hubris and arrogance. Arachne weaves a series of twenty-one scenes of the gods’ infidelity (particularly Zeus). Despite the subject matter, Athena admits Arachne’s weaving is more skilled and beautiful.
In Ovid’s telling, Athena smacks Arachne with her shuttle as admonishment, and Arachne hangs herself in shame. In pity, Athena then turns Arachne into a spider to weave beautiful things for the rest of time. For the sake of simplicity of storytelling, I chose to depict Athena as turning Arachne into a spider for her hubris to weave beautiful things forever, but less beautiful than before.
This piece is written in “ballad meter,” consisting of alternating lines of 4 and 3 stressed syllables. The tune performed is commonly associated with The Cruel Sister, whose earliest written record dates back to a 1656 broadside known as “The Miller and the King’s Daughter.”
3 COMPETITION OF STRENGTH OR WITS
Inter Diabolus et Virgo, or Riddles Wisely Expounded c. 1450 (ms. Bodleian Rawlinson D.328)
1. WOL ye here a wonder thynge Betwyxt a mayd and the fovle fende?
2. Thys spake the fend to the mayd: `Beleue on me, mayd, to day.
3. `Mayd, mote y thi leman be, Wyssedom y wolle teche the:
4. `All the wyssedom off the world, Hyf thou wolt be true and forward holde
5. `What ys hyer than ys [the] tre? What ys dypper than ys the see?
6. `What ys scharpper than ys the thorne? What ys loder than ys the horne?
7. `What [ys] longger than ys the way? What is rader than ys the day?
8. `What [ys] bether than is the bred? What ys scharpper than ys the dede?
9. `What ys grenner than ys the wode? What ys sweetter than ys the note?
10. `What ys swifter than ys the wynd? What ys recher than ys the kynge?
11. `What ys yeluer than ys the wex? (what is yellow’r than the wax) What [ys] softer than ys he flex? (what is softer than the flax)
12. `But thou now answery me, Thu schalt for sothe my leman be.'
13. Ihesu, for thy myld mygth, (jesus for thy mild mig(c)ht) As thu art kynge and knygt,
14. `Lene me wisdome to answere here rygth, And schylde me fram the fovle wygth!
15. `Wewene ys heyer than ys the tre, (heaven is higher than the tree) Helle ys dypper than ys the see.
16. `Hongyr ys scharpper than [ys] the thorne, Thonder ys lodder than ys the horne.
17. `Loukynge us longer than ys the way, Syn is rader than ys the day. (sin is redder than the day)
18. `Godys flesse ys betur than ys the brede, (god’s flesh is better than the bread) Payne ys strenger than ys the dede.
19. `Grass ys grenner than ys the wode. Loue ys swetter than ys the notte.
20. `Thowt ys swifter than ys the wynde, Ihesus ys recher than ys the kynge."
21. `Safer is yeluer than ys the wexs, (saffron is yellow’r than wax) Selke ys softer than ys the flex. (silk is softer than the flax)
22. `Now, thu fende, style thu be; Nelle ich speke no more with the!'
The provided tune, Lay the bend to the bonny broom, is by my best efforts dated in the written record to approximately 1679 in Broadside: Bod1901, Fo. Rawl. 566(193)
4 A PILGRIMAGE OR JOURNEY
There were three rauens sat on a tree, downe a downe, hay downe, hay downe, They were as blacke as they might be. with a downe, The one of them said to his mate, Where shall we our breakfast take? With a downe, derrie, derrie, derrie, downe, downe.
Downe in yonder greene field, There lies a Knight slain under his shield, His hounds they lie downe at his feete, So well they can their Master keepe,
His Hawkes they flie so eagerly, There's no fowle dare him come nie Downe there comes a fallow Doe, As great with yong as she might goe,
She lift up his bloudy head, And kist his wounds that were so red, She got him up upon her backe, And carried him to earthen lake,
She buried him before the prime, She was dead her self ere euen-song time. God send euery gentleman, Such haukes, such hounds, and such a Leman.
“Three Ravens” enters the written record in 1611. However, it is thought by some (Malcolm Douglas: Bronson (Traditional Tunes of the Child Ballads, 1959, I, 308)) to come from the same “ancestral” song as “The Corpus Christi Carol” (1504), which is in The English Carol Book and presented below.
1. Down in yon forest there stands a hall, The bells of Paradise I heard them ring; It's covered all over with purple and pall [so tall] And I love my Lord Jesus above any thing.
2. In that hall there stands a bed, The bells of Paradise I heard them ring; It's covered all over with scarlet so red. And I love my Lord Jesus above any thing.
3. At the bedside there lies a stone The bells of Paradise I heard them ring; Which the sweet Virgin Mary knelt upon. And I love my Lord Jesus above any thing.
4. Under that bed there runs a flood [river] The bells of Paradise I heard them ring; The one half runs water, the other runs blood. And I love my Lord Jesus above any thing.
5. At the foot of the bed there grows a thorn The bells of Paradise I heard them ring; Which ever blooms [blows] blossoms since He was born. And I love my Lord Jesus above any thing.
6. Over that bed the moon shines bright, The bells of Paradise I heard them ring; Denoting our Saviour was born on this night. And I love my Lord Jesus above any thing.
Others (David Fowler, by contrast (Literary History of the Popular Ballad, Durham NC: Duke University, 1968, 58-64)), believe that “Three Ravens” is a secularization of “The Corpus Christi Carol.”
The suspected “parent” to both of these pieces is The Falcon Carol, dated to 1400 in Oxford, Balliol Library MS. 354, folio 165v
CHORUS:
Lully lulley lully lulley, The faucon hath born my mak away.
He bare him up, he bare him down, He bare him into an orchard brown.
In that orchard ther was an hall, That was hanged with purple and pall.
And in that hall ther was a bede; It was hanged with gold so rede.
And in that hall ther lithe a knight, His woundes bleeding day and night.
By that bedes side there kneleth a may, And she wepeth both night and day.
And by that beddes side ther stondeth a ston, Corpus Christi wreten thereon.
The reference included from Waltz 2005 includes some interesting analysis of the song, particularly the tuning and performance thereof on modern instruments.
This piece is relevant to the prompt of a Journey because the leman (an archaic term for mistress) drags the dead knight to the lakeside and buries him. Arguably this could also be deemed a journey for the amount I’m reaching here ;)
Selected Additional References
Waltz, Bob. Remembering the Old Songs: The Corpus Christi Carol. 2005, Inside Bluegrass. https://www.lizlyle.lofgrens.org/RmOlSngs/RTOS-CorpusChristi.html retrieved 1/28/2025
"The Miller and the King's Daughter (Roud Folksong Index S407108)". The Vaughan Williams Memorial Library. Retrieved 2 October 2020.
1 note
·
View note
Text
Winter 2024 Coronet Procession
Procession written for Zubeydah Hanim and Centurion Finn Alreksson
O swift and cunning coronet serene Who rest upon the stallion seated thrones You seek your heirs to prove by prowess great As twilight falls on slowly cooling coals
A light now enters to your windy hall Glinting off of feathers white and gold For Zubeydah, Hanim and Pelican, Fights Fynn Alreksson, sable Centurion
Of herself she's given great, In runes our names she's writ A battle-tithe he's rendered here Since golden star was lit
Fynn Alreksson, whose golden eagle dives On field and cloak stained with battle-dew And what is a noble Pelican but a warrior gone unseen Valk'ries' mercy on battlefields, whose service evergreen
O swift and cunning coronet serene Who rest upon the stallion-seated thrones For Zubeydah, Hanim in liege's court Fights Centurion Fynn Alreksson
Inspiration was taken primarily from the poetic sections of Egilsaga, such as this passage from chapter 30:
Mjök verðr ár, sás aura, ísarns meiðr at rísa, váðir vidda bróður veðrseygjar skal kveðja. Gjalla lætk á golli geisla njóts, meðan þjóta, heitu, hrærikytjur hreggs vindfrekar, sleggjur.
During the writing of this procession, emphasis was placed on the usage of alliteration, slant rhyme, and poetic kenning construction. The procession ended up mostly iambic for readability (shoutability) in a potentially loud event site. The structure of the repeating opening and closing stanzas was taken from Voluspa6 and Voluspa 9, which both open with
Þá gengu regin öll á rökstóla, ginnheilug goð, ok um þat gættusk:
Then sought the gods their assembly seats The holy ones, and council held:
It was important to me to reference that idea of the presiding authority taking their formal seats while the deeds of the day are done in their audience. The Vindheim Prince and Princess are typically referred to as Their Serene Highnesses, and the very lovely thrones are topped with carved horse-heads. While little of the poetry I've thus far studied in the sagas is written in second person or otherwise as a direct address to a person, for the sake of heraldic tradition I prefer to structure processions as a direct address to the presiding royals proclaiming the worthiness of the entrant couple.
The "windy hall" is a reference to the name of our principality, Vindheim, or Wind-home. -heim and -hal are frequently almost synonymous in the poetic corpus, as the roles of home and hall are deeply intertwined through ideas of frith and grith, hospitality and guest right. The imagery of the white feathers of a Pelican and the gold feathers of a Centurion of the Sable Star of Ansteorra was simply too tempting to pass up comparing these two.
A Pelican is frequently seen as a beacon of service within the SCA, and HE Zubeydah in particular has served as a kingdom historian since before I joined the SCA and has long been a proponent of recording our histories. Her motto is "That which is not written is forgotten." Fynn has been a brilliant fighter in our community since before the Principality of Vindheim, whose arms include a golden star, formed.
The golden eagle of the Centurions is frequently emblazed across a red cloak worn by members of said order, who regularly pass down meaningful cloaks with lineage and legacy to newer members of said order. If I remember correctly, Fynn was one of our first second-generation Centurions and received multiple important cloaks when he was made. Zubeydah, a member of and leader within the Valkyrie Company, has long been renowned for her service as a waterbearer and fighter support and her contributions to training, encouraging, and enabling others to do the same, and has been lovingly referred to as the Don of the Waterbearing Mafia.
This procession was delightful to write and went through many scrapped drafts before I settled in to this structure, and I'm very pleased with how it came out. More importantly, it pleased Fynn and Zubeydah.
#heraldry#society for creative anachronism#sca#vindheim#vindheim coronet#voice heraldry#arts & sciences#a&s#historical reenactment
1 note
·
View note
Text
Received one of my hats? Here's some info!
Did you receive a funny little medieval beanie with a tag reading something along the lines of
Monmouth Cap #99 by Doña Áshildr Inn Hárfagri Based on research by Jennifer L Carlson Made in the Barony of Namron
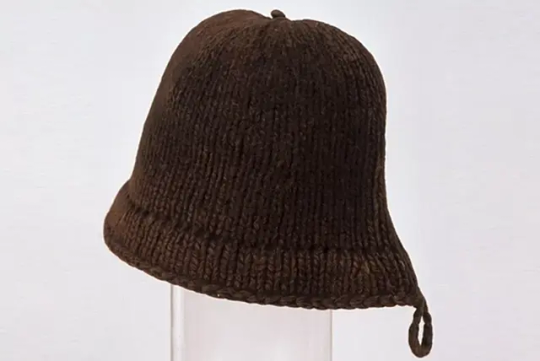
These caps, easiest to spot by the little hanging loop (which i stick my tags on!) have their roots at least as far back as the 15th century with the Capper's Act of 1488, which was instituted to protect English wool markets.
TL;DR: please enjoy your fun historical beanie in silly colors, I had a fun time making it and I'd love to see how far they make it around the Knowne World! If you can, post a picture of your hat to Facebook or Instagram tagging me or using the hashtag #ashildrhat so we can see how far it traveled!
If you'd like to read more about the history behind these hats, I've included some below the cut!

The Peasant Wedding, by Pieter Bruegel ca 1568, emphasis by Matthew Gnagy in Knitting With the Modern Maker Vol 1


As seen in these in these detail shots, these hats seem similar to the popular "tudor flat cap" in construction, with a distinct crown and brim, but have a more beanie-type structure with the brim occasionally turned up partially or all the way. I have often seen reenactors partially turn the brim up to create a bycocket-type shape.
As far back as 1415, the occupational surname Capper begins to grow within Monmouth. In 1465 we see the occupation "cappeknytter." The Capper's Act of 1488 fixes the prices of knitted caps and hats, delcares fines for foreign-made hats, and court records show that these rules were enforced frequently and to full extent. The 1571 An Act for the Continuance of the Making of Caps further protects the English wool, knitting, and capping industry by insisting everybody over the age of 6 will wear a woollen knit cap made in England on Sabbath and holidays, and women were required to wear white caps of the same restrictions unless their husbands were hereditary nobility or particularly important (Buckland 1979).
While these laws were each enforced for a time before being repealed, they give a glimpse into the storied history of this silly little medieval beanie we so dearly love.
The extant monmouth cap, pictured at the top of this post, dates to the 16th century and has been extensively analyzed by modern day knitters. The hat is 59 stitches in circumference with an inch double knit edge, knit 5-6 inches before crown decreases, and closed to 6 stitches before bindoff. Similar finds of knitted and fulled wool caps from the Mary Rose lead me to believe this very practical hat was fulled or felted but the nap has been lost over time.
For further reading, I recommend The Monmouth Cap by Kirstie Buckland and Making a Monmouth Cap by Jennifer L. Carlson.
My Spin On Things
When people ask why I bring so many hats to certain winter events, my reply is usually "I knit when I'm anxious, and boy am I poorly medicated!" I produce them for gift baskets, largesse derbies, coronations, trade days, and "taxes" for my landeds. I make them for commissions, for auctions, but almost always I make them to be freely given away.
I was introduced to these hats by Mistress Elsa von Snackenburg, OP, who is well known in my kingdom for these hats so much so that the kingdom knows this style of hat best as the Elsa Hat. She produces the hats from Lion Brand Thick and Quick, achieving a much more period gauge, and usually with just 1 or 2 colors per hat. However, thick yarn makes my hands cramp, so I chose to experiment with gauge and make a lighter weight hat to fill the spring and fall niches. My math has worked out to a happy 88 stitches cast on 4.0mm needles, giving an even 8-section crown decrease that lends itself well to distribution across 4 dpns, with occasional variations in cast on # to allow different crown patterns such as the stars or to create smaller or larger sizes.


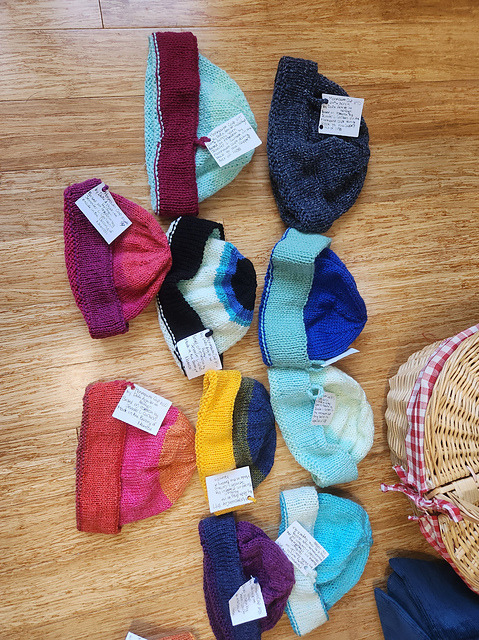

As seen above, I tend to do multicolored hats, incorporating pride flags or heraldic colors, and occasionally with an Ansteorran or Vindheim star at the crown. At the time of posting, I've made 210 of these hats. Producing this many hats, especially free of charge, would not be possible without the generous yarn donations of those like Lessandra della Torre, Katerine la Roux d'Anjou, Elionora inghen Ui Ceallaigh, and many others who have graciously donated yarn to the cause of warming noggins across the Knowne World.
#sca#monmouth cap#historical knitting#knitting#arts & sciences#society for creative anachronism#a&s#historical reenactment#historical costuming
9 notes
·
View notes
Text
The Don Marcus Project - a costuming diary
At Vindheim's first Accademia della Spada, the tournament for Princess Octavia's champion was held. My brother white scarf, Master Marcus von Furth, WSA was chosen as HSH's personal champion to be sicced on her foes and to defend her good name and honor. Several years ago, when Marcus was chosen to be Deanna I's champion, she approached my wife to make him one new suit so he could better look the role. That she did, and in addition a second hand silk suit (seen below) we had bought hoping it would fit me did not, but it sure did fit our boy!

(I'm still mad about that suit not fitting me, I'm OBSESSED)
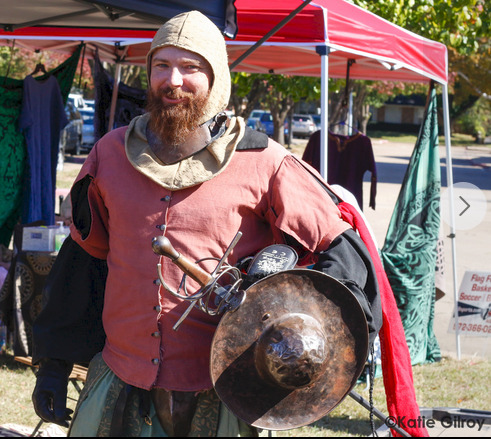
This time, Marcus approached me about making 1 new suit and 2 extra doublets to help him better look the part and to accommodate his sick new gains! Ah, the joys of working out and eating sufficient protein. All your old stuff no longer fits right, and specifically in the difficult areas to let out and take in. Marcus's preferred style of doublet is almost more of a jerkin, with little sleeve puffs as seen in his old doublet and in Don Gabriel de la Cueva y Giron Duke of Albuquerque by Giovanni Battista Moroni (Moroni my beloved <3333) as seen below. Obviously, the heat of Ansteorra contributes to certain styling decisions and the removal of the full length doublet between the undershirt and the puff-sleeved doublet.

The time had come for my second attempt to figure out the barra system and pattern drafting method featured in Matthew Gnagy's The Modern Maker. For those of you who haven't yet used it, it is genius and intuitive in how counterintuitive it can feel. Gnagy walks even an intermediate (begrudgingly) sewist through a historical pattern drafting method that relies on the tendency of the human body to be proportional in certain measurements to the bust, waist, hip, and height. It makes an incredibly good first draft which, for the doublet I'm working on myself concurrently, only took one pass. In defense of the mockup for Marcus, I was figuring it out as I went, okay?

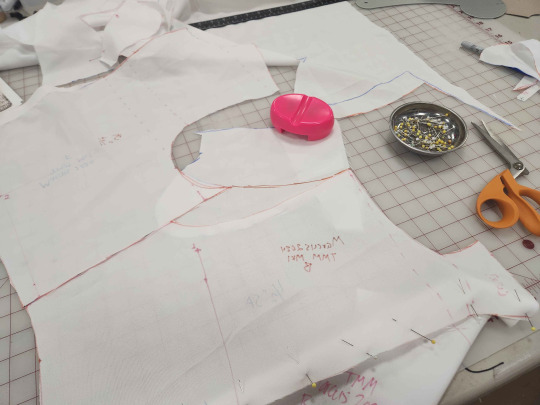
I used multiple colors of sharpies to keep my brain from melting as I went, starting with a fine pointed light pink as a "sketching" sharpie and frequently clarifying lines with an orange or blue sharpie. I did run into issues where my math failed me and had to insert extra fabric, as seen above, but who knew what chaos those simple insertions would portend....
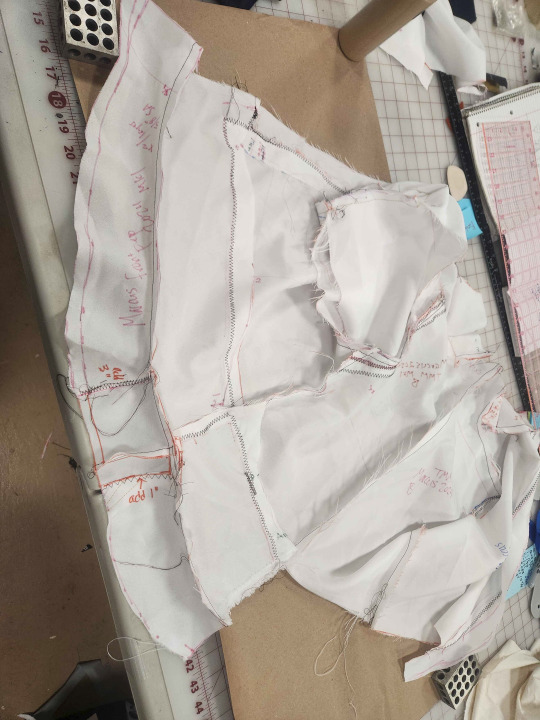
Behold, the frankendoublet. The result of me screwing up and miscalculating in some places, learning after the first try on that the wearer had gained 2 inches of bicep and almost 3 inches of chest and back muscle in the months since I'd last measured him, and in confirming his preference for a more modern, long-torsoed garment than the higher waistline seen in late period. I swear there was a method to this madness, but it gives a few of my apprentice siblings headaches looking at it and I don't blame them. I transferred the pattern to paper, and we were off to the races!
A quick interjection about the fabric choices: we are both in the middle of financial tight spots, so as much as I'd like to work with natural materials (that don't melt by campfires at the very least) we agreed to opt for 1 silvery-blue shot silk-look polyester doublet, 1 crimson shot silk-look polyester doublet, and 1 royal blue polycotton striped brocade full suit, all intended to be interchangable for a variety of outfits. I bought 2 yards for each of the doublets and 3 yards for the pants, rocking out at $40 flat for the self fabric. While not ideal for breathability and late night campfires, right now it's hard to beat costs like that. The silvery-blue can be seen for the remainder of this post as I chose to use it for the first doublet.
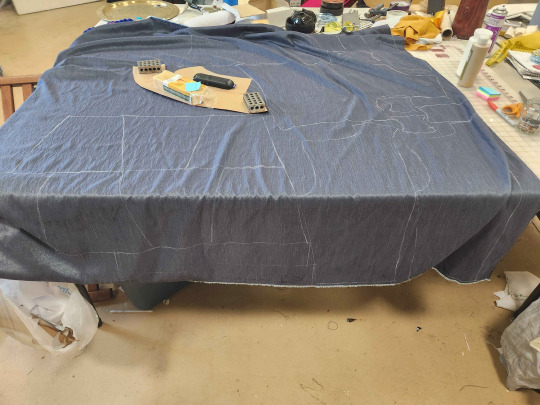
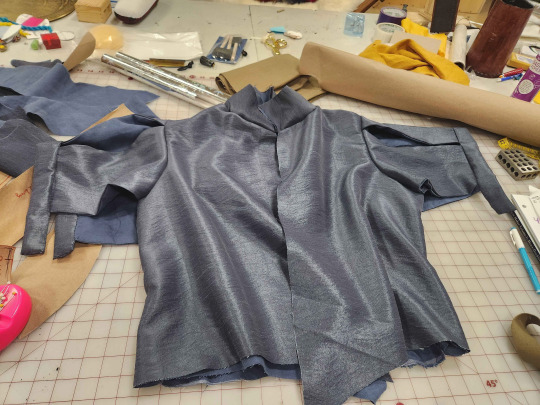
In one full day's work I have managed to chalk and cut out the full doublet from the self and the lining (a slate blue linen I pulled from stash) and used approximately 1.6 yards of each. Behold my selection of pattern weights, including a remote, a basket hilt, 3 bottles of paint, most of a block of wax, some drill blocks, sticky notes, and a can of coke I was putting off drinking so it could continue to serve as a pattern weight.
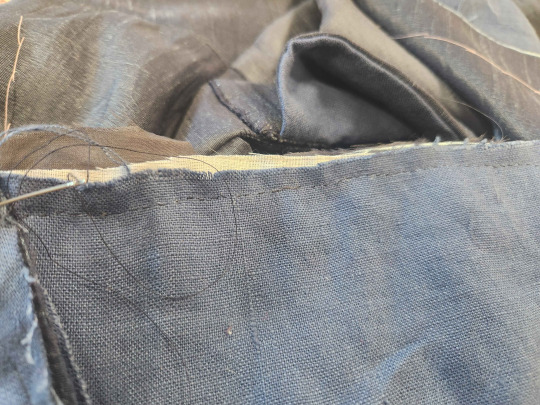
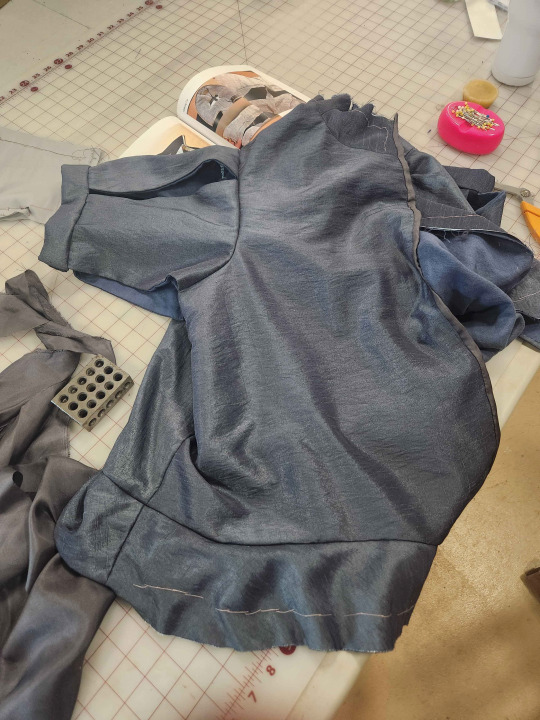
By the end of day 1 of sewing I had assembled the full body and sleeves and begun pinning the collar. This is my first suit lined doublet so I am definitely taking things a little slower than usual. Thus far all the seams have been machine sewn aside from the finishing on the sleeve cuff. After some extra thought considering biceps and the volume of fabric, I patterned the bicep cuffs to have approximately 2 inches of excess cuff to hide within the seam to be easily let out if further size changes do occur. At this point I left the cuffs open for one more fitting before seaming them closed. By the end of the night I also finished the strip of waist eyelets, sewn on linen canvas provided by Asa inn blindi, so in the future pants can be pointed to this doublet. By this time, however, I was a little too dangerously sleepy to be trusted with a sewing machine so with the collar pinned I ended for the night.
The next day saw the attaching of the collar, the reopening of the shoulder seam to "zhuzh" more of the length of the back into the shoulder to accommodate the natural volume of shoulder muscles and to make the collar fall correctly. The eyelet strip was first sewn to the seam allowance of the waist line, after which the seam allowance + eyelet strip was pressed to the body and stitched down securely. After that, some lovely hand dyed wool twill tape was donated by Asa in blinda to cover and protect the raw edges along the waist line.
Rather than the strip of silk taffeta Gnagy recommends the tailor tacks in to the left side to reinforce the buttonholes, I ironed in a strip of fusible interfacing as reinforcement.
Glamor shot of the interfacing being sewn in by hand. My hand seams are getting a wee bit straighter.
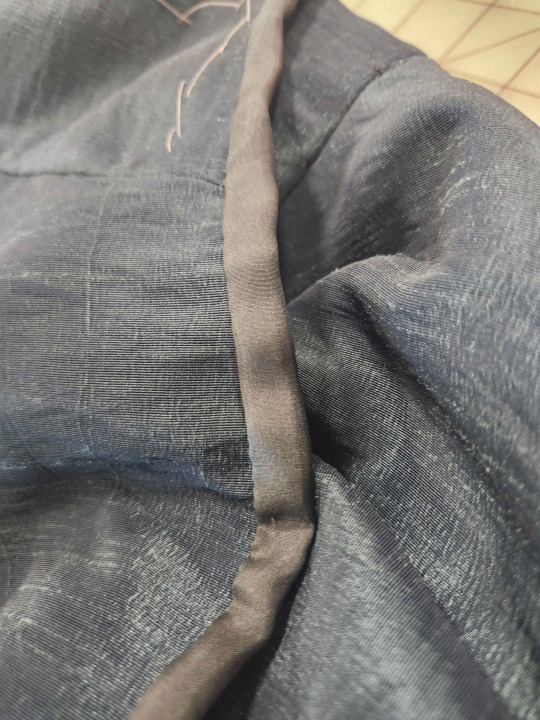
In absence of the much sturdier taffeta Gnagy recommends for both trimming and reinforcement, I used scraps of a much lighter weight silvery-gray silk fished out of Asa's scraps, like a raccoon through a trash can. This does not provide the same structural benefit as the taffeta trimming, but it does introduce a little extra "pop" to the colors imho.
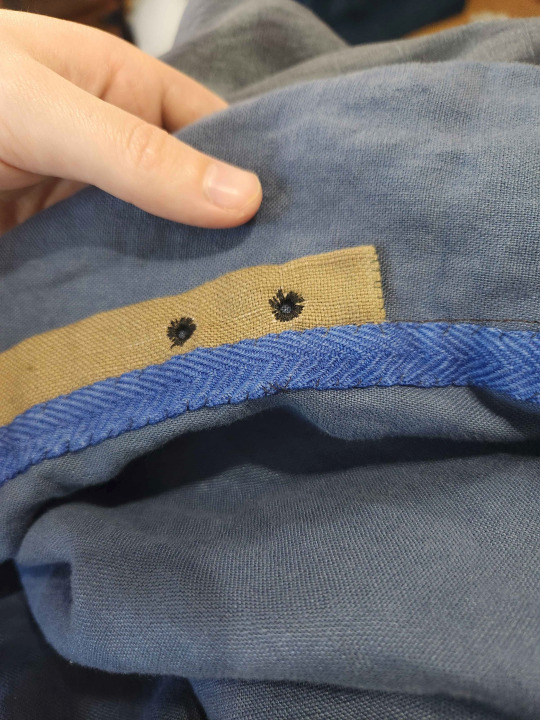
Then I tackled my first-ever hand sewn buttonholes. I opted for 3 strands of DMC 930 cotton embroidery floss on the final project after testing with buttonhole thread, all 6 strands, and 2 strands.
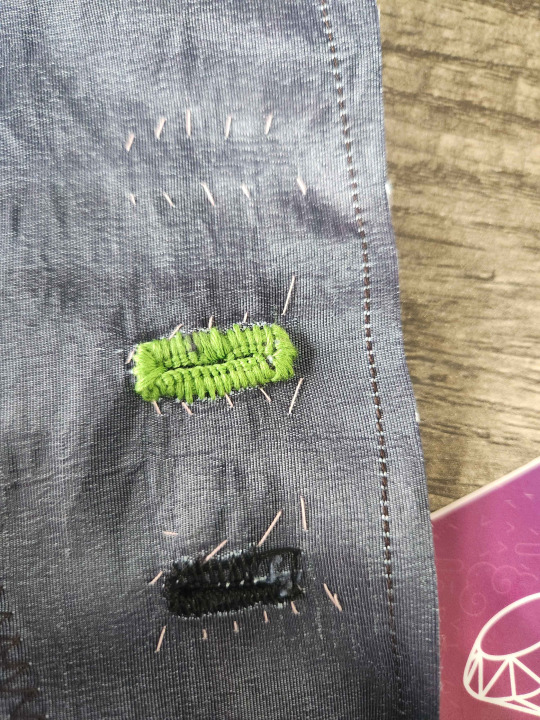
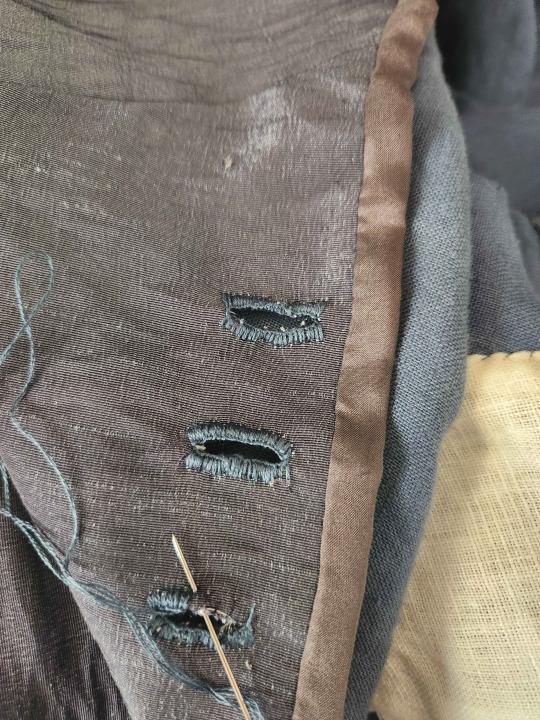
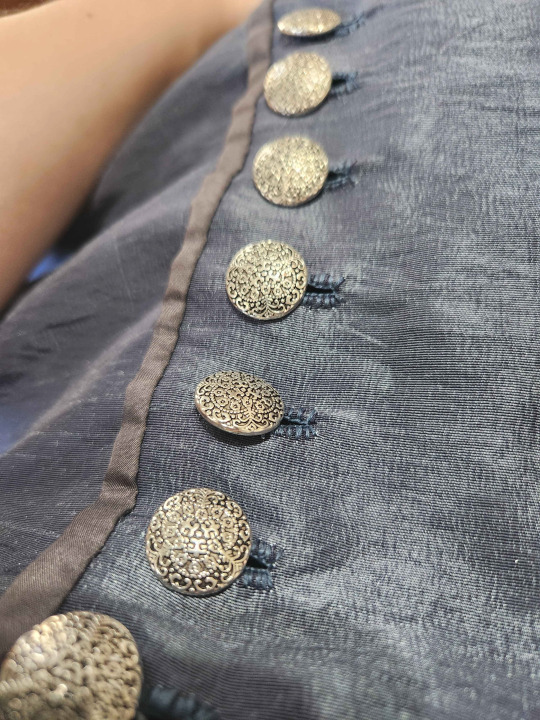
And finally, some glamor shots of the completed garment. From left to right, the "secret ease" on the bicep meant to make adjustments for more muscle growth easier to accommodate, the collar lining sewn in, and the final garment waiting in my office to be handed to the recipient at Coronation.


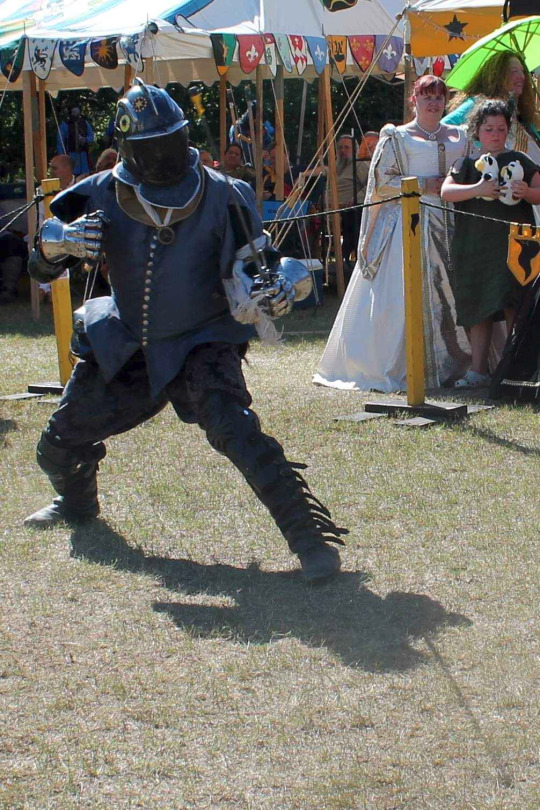
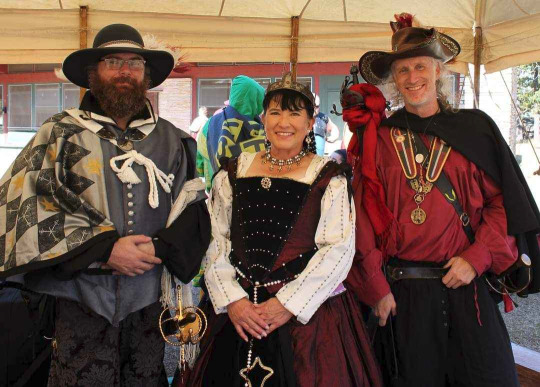
Overall, I think we're both very pleased with the results. Master Marcus retained his full (and simply absurd) range of motion on and off the field, the garment is machine washable, and it is a lovely color on him. The combined power of the ladies of our Princess's household has convinced him to let me raise the waistline on doublet 2 a whole two inches, which I am very excited about.
What did I learn?
The barra method is not nearly as terrifying to manage as I think it is, as long as you trust the process
Multiple colors of sharpies are a game changer.
I'm actually faster at hand-sewing buttonholes than I am at machine sewing them, because I get so anxious about sewing them by machine.
Suit-lined garments are SO much easier to do seam finishing on, it's absolutely night and day.
I think I want to make an entire doublet of silk taffeta. This is a problem. I need money and confidence to do so.
What's next?
Update the 14th C English clothing powerpoint to what I currently use for classes
I am currently making an Elizabethan suit for Darien de Shameless with my apprentice sibling Asa in blinda, with aims of finishing it for Queens Champion
I am currently making an Elizabethan-ish suit for Viscount Micauley Morison ahead of Winter Crown (but cheating on the pants so he has one pair of breezy breeches). The construction is largely the same to this one, so if I make a post about it it probably won't include an entire construction diary. Just some glamor shots.
I am making Rus for Dona Halldora Hrafnsdottir, but I keep getting distracted on which Navershnik I want to finish first.
I am looking forward to making some new and improved Rus for myself and Centurion Runa Bjarki ahead of the Crown/Coronet season, with an eye towards moving us to more accurate pieces.
I need to do a Shift Weekend where I just churn out shifts, chemises, and rubakhas
#sca#society for creative anachronism#historical costuming#elizabethan#historical reenactment#elizabethan era#garb#sca garb#sca costuming#a&s#arts & sciences
15 notes
·
View notes
Text
Hey sexy, you baptized?
By Áshildr Inn Hárfagri, 2024
Presented at Kingdom Arts & Sciences
The History of Tam Lin
Tam Lin is the 39th of the Child Ballads, a collection of ballads first published by Francis James Child in 1882 with the volume containing Tam Lin and its variants published in Volume I Part II in 1884. The earliest mention of this ballad is in 1549 in Vedderburn’s Complaint of Scotland, where "The Tayl of the Ȝong Tamlene" ('The Tale of the Young Tamelene') is “spoken of as told among a company of shepherds.”[1] A dance named “Thom of Lyn” is mentioned at the same party. “A ballett of Thomalyn” was licensed in 1558.
Child notes a diverse family tree of this story. A Scottish ballad, which he does not name, regards a farmer desperate to save his wife from the fairy court. He was told to wait for the procession of the fairies on Halloween, but “at the ringing of the fairy bridles…his heart failed him,” and he did not manage to rescue his wife from the fairy. A Danish ballad from 1721 regards a maiden transformed into a nightingale by an angry stepmother and the solution to her curse is a knight containing her in a bower as she turns into “all the marvelous beasts one ever heard of…a lion, a bear, a variety of small snakes, and at last to a loathsome lind-worm.” A Cretan fairy tale recorded in 1820 mirrors the tale of Thetis and Peleus, in which an old mentor instructs a protege to “lay hands on the nereid and keep his hold through whatever metamorphosis she might make.” His final point of reference is the 12th century medieval romance Lanzelet by Ulrich von Zatzikhoven, in which the titular character cannot turn a serpent back into a woman merely by kissing her, but by also bathing her in a spring. This introduces “immersion in a liquid” as a “process requisite for passing from a non-human shape, produced by enchantment, back into human.”
As Child says, “Whether it has come down to our time from mouth to mouth through twenty-five centuries or more, or whether, having died out of the popular memory, it was reintroduced through literature, is a question that cannot be decided with certainty; but there will be nothing unlikely in the former supposition to those who bear in mind the tenacity of tradition among people who have never known books.”
What is it about?
Tam Lin opens with a warning that all maidens who go to the woods of Carterhaugh will be met by the titular character and be required to pay him something–most often, their maidenhead. Our heroine known sometimes as Janet and sometimes as Margaret, hearing this, drops what she’s doing (in some cases literally dropping her sewing in her haste) to run to Carterhaugh as fast as she can go. As she pulls a mysterious double rose, Tam Lin appears and asks her to stop. She insists he is not the owner of Carterhaugh and she can do as she pleases, and notably does not offer him any form of material tribute. Therefore, his collected toll is her maidenhead, all according to her apparent plan.[2]
Janet returns to her father’s hall visibly pregnant enough to worry an elderly knight, who’s concerned all the knights will be blamed for her condition. Her father notices her pregnancy, and she admits she’s in love with an elfin knight and that she wouldn’t give him up for any of the gentlemen of her father’s court. Apparently deciding, though, that being a single mother to a half-fae child isn’t an exciting prospect, she runs back to Carterhaugh to pluck double rose to use to abort her pregnancy. Tam Lin confronts her, and asks why she wants to end the pregnancy. She asks if he was ever even human, and Tam Lin relates his tale.
When Tam Lin was young he went hunting with his grandfather and fell from his horse. The Fairy Queen caught him and trapped him forever in Carterhaugh as part of her retinue. It isn’t that bad of a gig, but every seven years on Halloween the Fairy Queen pays a tithe to hell, and Tam Lin worries that he’s the next payment. He explains a plan to Janet to free him from the fairies, which will consist of stealing him from a procession of riders on horseback and holding him while he is changed into a variety of fearsome creatures. He’ll then be turned into a red hot iron in hopes of forcing her to drop him, then a red hot coal, at which point she needs to throw him into a well and he will emerge human once more. At this point, he will be able to join Janet and be a father to the child.
The successful execution of the plan infuriates the Fairy Queen who hates whoever took away the handsomest member of her company and curses the thief. She declares if she knew what would happen she would have taken away his eyes, which can see the fairies when they are invisible, and replace them with wood, taking away his fairy-sight and mundane sight alike.
Tam Lin is about a young noblewoman who decides what she wants and seeks it out herself at every opportunity and does not allow anybody to decide her fate for her. It is a fascinating tale that has been adapted again and again through the centuries across genres and mediums. The most well known modern adaptation of Tam Lin, though adaptation is a strong word for a loosely-inspired work, is A Court of Thorns and Roses.
Performance notes
This selection of verses has been largely pulled from Child Ballad 39A, as one of the more narratively complete versions, with additions from 39I and some adjustments from the period language to better scan to an audience speaking modern English. As a performer, I believe the period thing to do is perform in a way my audience can understand the story and therefore value the comprehension more than the archaic language. These ballads were long performances, frequently series of performances, for the entertainment of groups of people in a world before the radio drama. Where these adjustments and additions are made, they are noted with footnotes.
I have not yet found notation indicating a period or near-period tune for this piece. However, the tune commonly associated (and performed here) with this piece seems to fairly match “the vibe” of the extant ballad tunes we do have. The reconstruction of period melodies is not my primary area of interest or study, but modern listeners should note differences between the songs with which we are familiar today and this piece. For instance, there is no verse/chorus verse/chorus bridge chorus structure as we are used to. Every verse is a verse and has approximately the same tune. The song does not always explicitly indicate who is speaking. The song frequently makes use of parallel structure and repetition (see verses 29-32). Unlike many modern songs, this does not seem to be written to showcase a wide vocal range or particular talent, but to simply provide a tune to aid the memory of the storyteller, the storytelling itself, and potentially a sick beat to dance to.
As is the case in many (but not all) of the Child Ballads, the subject matter is sensitive but is skirted with a “fade to black” which is not present in all versions but has been maintained for the listener’s discretion.
Tam Lin – Child Ballad 39
As Communicated by Áshildr Inn Hárfagri
O I forbid you, maidens a', That wear gowd on your hair, To come or gae by Carterhaugh, For young Tam Lin is there.
There's nane that gaes by Carterhaugh But they leave him a pledge,[3] Either their rings, or mantles green,[4] Or else their maidenhead.
Janet tied her kirtle green, A little aboon her knee, And she has gaen for Carterhaugh,[5] As fast as she can hie,[6,7]
She had na pu'd a double rose, A rose but only twa, Till upon then started young Tam Lin, Says, Lady, thou's pu nae mae.
Why pu's thou the rose, Janet, And why breaks thou the wand? Or why comes thou to Carterhaugh Withoutten my command?
"Carterhaugh, it is my own, My daddy gave it me, I'll come and gang by Carterhaugh, And ask nae leave at thee."
He’s aen her by the milk-white hand, Among the leaves sae green, And what they did I cannot tell, The green leaves were between
He’s taen her by the milk white hand, Among the roses red, And what they did I cannot say, She neer returnd a maid,[8,9]
Four and twenty ladies fair Were playing at the ba, And out then came the fair Janet, The flower among them a'.
Four and twenty ladies fair Were playing at the chess, And out then came the fair Janet, As green as onie glass.
Out then spake an auld grey knight, Lay oer the castle wa, And says, Alas, fair Janet, for thee, But we'll be blaméd a'.[10]
"Haud your tongue, ye auld fac'd knight, Some ill death may ye die! Father my bairn on whom I will, I'll father none on thee."
Out then spak her father dear, And he spak meek and mild, "And ever alas, sweet Janet," he says, "I think thou gaest wi child."
Oh father if I go with child,[11] Mysel maun bear the blame, There's neer a laird about your ha, Shall give the babe his name[12]
"If my love were an earthly knight, As he's an elfin grey, I wad na gie my ain true-love For nae lord that ye hae.[13]
Janet tied her kirtle green, A little aboon her knee, And she has gaen for Carterhaugh,[14] As fast as she can hie,[15,16]
She had na pu'd a double rose, A rose but only twa, Till up then started young Tam Lin, Says, Lady, thou pu's nae mae.
"Why pu's thou the rose, Janet, Amang the groves sae green, And a' to kill the bonny babe That we gat us between?"
"O tell me, tell me, Tam Lin," she says, "For's sake that died on tree, If eer ye was in holy chapel, Or christendom did see?"
"Roxbrugh he was my grandfather, Took me with him to bide And ance it fell upon a day That wae did me betide.
"And ance it fell upon a day A cauld day and a snell, When we were frae the hunting come, That frae my horse I fell, The Queen o' Fairies she caught me, In yon green hill do dwell.
"And pleasant is the fairy land, But, an eerie tale to tell, Ay at the end of seven years, We pay a tiend to hell, I am sae fair and fu o flesh, I'm feard it be mysel.
"But the night is Halloween, lady, The morn is Hallowday, Then win me, win me, an ye will, For weel I wat ye may.
"Just at the mirk and midnight hour The fairy folk will ride, And they that wad their true-love win, At Miles Cross they maun bide."
"But how shall I thee ken, Tam Lin, Or how my true-love know, Amang sa mony unco knights, The like I never saw?"
"O first let pass the black, lady, And syne let pass the brown, But quickly run to the milk-white steed, Pu ye his rider down.
"For I'll ride on the milk-white steed, And ay nearest the town, Because I was an earthly knight They gie me that renown.
"My right hand will be gloved, lady, My left hand will be bare And thae's the takens I gie thee, Nae doubt I will be there.[17]
"They'll turn me in your arms, lady, Into an esk and adder, But hold me fast, and fear me not, I am your bairn's father.
"They'll turn me to a bear sae grim, And then a lion bold, But hold me fast, and fear me not, And ye shall love your child.
"Again they'll turn me in your arms To a red het gand of airn, But hold me fast, and fear me not, I'll do to you nae harm.
"And last they'll turn me in your arms Into the burning gleed,[18] Then throw me into well water, O throw me in with speed.
"And then I'll be your ain true-love, I'll turn a naked knight, Then cover me wi your green mantle, And hide me out o sight."
Gloomy, gloomy was the night, And eerie was the way, As fair Jenny in her green mantle To Miles Cross she did gae.
At the mirk and midnight hour She heard the bridles sing, She was as glad at that As any earthly thing.
First she let the black pass by, And syne she let the brown, But quickly she ran to the milk-white steed, And pu'd the rider down.
Sae weel she minded what he did say, And young Tam Lin did win, Syne covered him wi her green mantle, As blythe's a bird in spring
Out then spak the Queen o Fairies, Out of a bush o broom, "Them that has gotten young Tam Lin Has gotten a stately-groom."
Out then spak the Queen o Fairies, And an angry woman was she, "Shame betide her ill-far'd face, And an ill death may she die, For she's taen awa the bonniest knight In a' my companie.
"But had I kend, Tam Lin," said she, "What now this night I see, I wad hae taen out thy twa grey een, And put in twa een o tree."[19]
FOOTNOTES
[1] All quotes from The English and Scottish Popular Ballads, Vol I by Francis James Child [2] We stan a girls’ girl who knows what she wants. Happy Hot Girl Summer. [3] 39A.2 - originally “but they leave him a wad,” changed for modern rhyme schemes [4] 39A.2 - originally “either their rings, or green mantles” changed for modern rhyme schemes [5] Chorus line drawn form 39B.3 [6] 39A.3 - originally a 6 line chorus changed for modern rhyme scheme and understandability. “Janet has kilted her green kirtle / A little aboon her knee, / And she has broded her yellow hair / A little aboon her bree, / And she's awa to Carterhaugh / As fast as she can hie.” [7] 39A.4 - verse skipped for time [8] 39I.10 and 39I.11 better provide context on why Janet went to Carterhaugh [9] 39A.8 - verse skipped for time [10] Accent added to “blamed” to better scan in modern prosody [11] 39A.14 originally "If that I gae wi child, father,” to better scan in modern prosody [12] 39A.14 originally “Shall get the bairn's name.” changed for modern understandability [13] 39A.16 - verse skipped for time [14] Chorus line drawn form 39B.3 [15] Refer to verse 3 [16] 39A.18 - verse skipped for time [17] 39A.30 exchanged for 39B.28 [18] Gleed” is a word for hot coal [19] “Mortals whose eyes have been touched with fairies’ salve can see them when they are to others invisible” (Child)
#tam lin#child ballads#bardic#acotar#sca#arts & sciences#a&s#society for creative anachronism#sca bardic#submitted a&s entry#a&s paper
25 notes
·
View notes
Text

a year later, she's out of time out and the 4th stripe is started. i can't wait to block this bad boy.
WIP: Sion Relic-Purse V - revenge of the birds
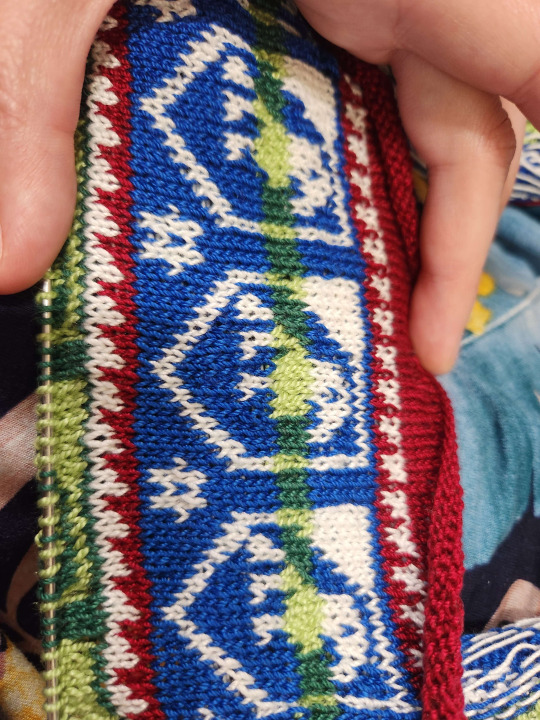
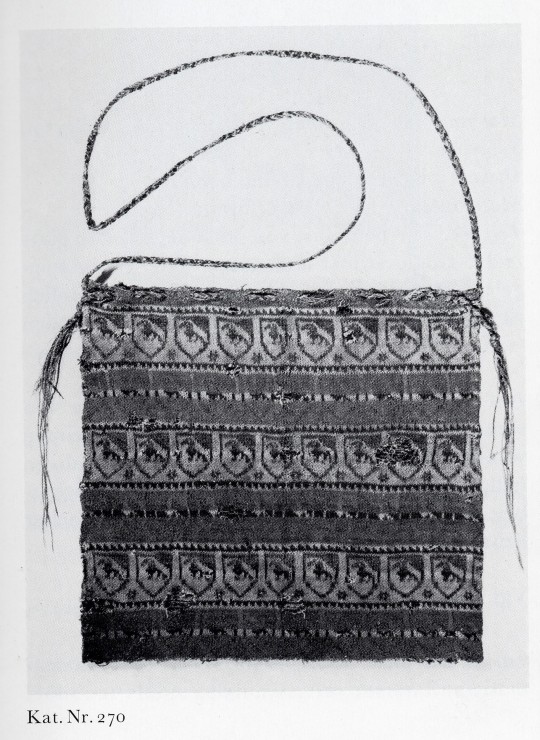
Apparently it's time for me to start another incredibly punishing knitting project and break out the crochet thread. I picked Sion V, as I haven't done this pattern yet and the birdies are DARLING. The extant is supposed to be frankly garishly colored, beige and blue birdies alternated with red and green birdies, and purple and white interstitial bands.
“Each band is composed of identical shields, with a small star at the bottom of the space between each two shields. The bands of shields are staggered by a lateral half-drop; each carries a bird. The bands alternate: one band of beige with the shields outlined and decorated in blue, one band of red with shields in green; all bands counter-changed with stripes across the middle of the shields in which the colors are reversed. The bands of shields are separated by a narrow saw-tooth design in violet and white.” -Richard Rutt, on Sion V
I chose to change some of the colors for the preferences of the modern-day recipient while still maintaining the spirit of the wildly colored original. I swapped the beige for more white, the red for a different shade of green, and the violet for a lovely maroon. I did all this color swapping and planning in GIMP 2.8, comparing an approximation of the extant's coloration and different combinations of the colors I'd like to use. All in all I'm delighted with the way the colors are coming out.
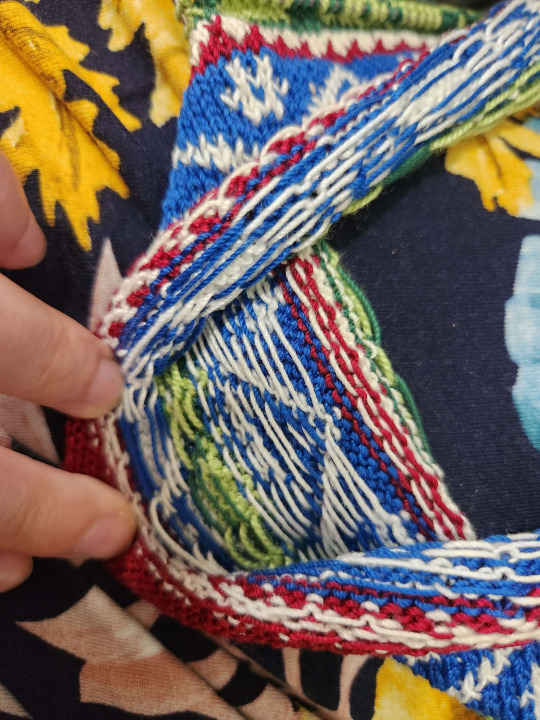
Considering this is my third sion bag and it's been more than 3 years since my first, I'm not surprised that my tension is a lot more consistent and resulting in a lovely texture on the front of the design. I've only bothered tacking down floats on stretches of 9 or more, which only occur at 2 points in the pattern. I'd love to see a picture of the inside of the extant, to know if the artisan tacked ANY floats down, or relied on their own consistency of stitching. Is the bag lined? I have so many questions and have struggled finding answers.
I originally cast on August 15, 2023, on 2.00mm needles and 10 crochet thread. My original plan was with 18 repeats, as the extant seems to have that many. However, 18 repeats of an 18 stitch large pattern resulted in 324 stitches, a number that I struggled to keep on the needles and seemed overall unwieldy after knitting 15 rows. I then tried 15 repeats (270), which was similarly unwieldy. I settled on 12 repeats at 216 stitches (or 54 on each needle), having knit and ripped out more than 2000 stitches in the search for the Right Count.
Somewhere along the way, I seem to have knit two stitches together between the bottom of the first stripe of blue shields and the top of the first stripe of green shields. After much searching, no culprit showed, so I've included a sneaky m1L near the BOR jog. Fixing dumb mistakes is period, look at the Pourpoint of Charles de Blois.
I also finally made a needle cozy for my 8 inch us0s, since they dont fit in the cozy i use for my 6 inch sock needles. No more stitches slipping and dropping!!!
You may notice my birdies face the opposite direction of those on the shields. I encourage you not to notice this fact. One thing this project has proven to me is that even when I think i understand the geometry involved in a knitting project, I am bound to make mistakes.
When I finish this, I think I'd like to submit it for competition unlined to show off the floats, then I'd like to line it before giving it to the recipient for use. I don't want anybody worried about messing up the bag by using it.
30 notes
·
View notes
Text
Dressing the Despencers pt 3: The End of An Era
Part 1 | Part 2
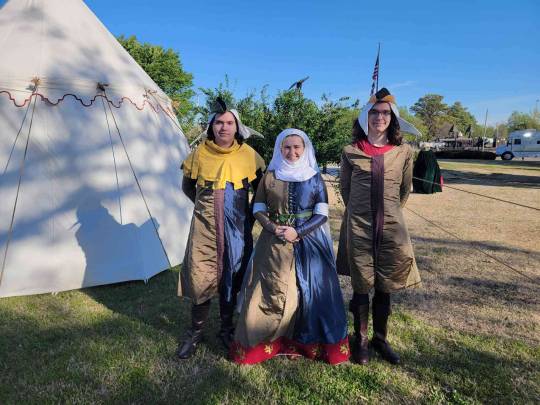
I had to accept that due to time constraints and a sum total of 1 hour to fit two people, my dreams of fully buttoned full length cotehardies would not be fulfilled. However, I am very satisfied with the way things turned out. My cuffs were long enough and sleeves snug enough to prevent riding up, and did not need the planned emergency Glamorgan chevronelly cuff. The mens' cotes were kept long (just below and just above the knee) for personal taste of the wearers. Both boys were put in hoods, though I seem to have failed to catch a picture with Thomas le Despencer in a hood. I have a habit of leaving my phone in the cast tent, so I am not surprised. The yellow dagged hood was my first foray into dagging and I am OBSESSED.
As both of the boys playing Edward and Thomas le Despencer were new to the historical costuming scene, neither were comfortable with the snug fit in the torso of a good cotehardie and requested an expansion to fit more like T-shirts. Due to the short time remaining, I opted to go for a stripe of dark brown linen down the front opening to ensure a semi-unified look. Unfortunately the literal last minute nature of this change resulted in some puckering down the front of each cotehardie that makes my eye twitch. I was terribly sad as this decision came after I'd installed what felt like thousands of buttonholes down the front of Edward's cotehardie.
Alas, some concessions must be made for the hellish clash of the impending deadline of an event and the limited available time for fittings with students. I have very mixed feelings about the results of this project, as I feel I did not make these costumes up to my standards, but I am incredibly proud of what I managed with the restrictions and barriers I encountered.
Some highlights:
To maximize the length of the sleeve and reduce the bulk, I applied a piece of 3/8" polysatin bridal ribbon to the serged edge with the tiniest back stitches I've ever done, then folded the ribbon to the inside and whip stitched it in place to secure the edge and hide the serging. To prevent the thin satin from tearing where I applied my (machine) buttonholes, I took a scrap of linen, folded it in half, and applied it to the buttonhole edge as a facing to take the majority of the strain of the buttons off the fashion fabric.
At the suggestion of Countess Christyana at LPT, I made a long strip of craft felt to apply to the inside of my hem, backing the lions. I found this gave a body to the bronze and blue fabrics that they did not have previously, giving me a much better silhouette, as well as stiffened the edge of the dress and helpfully preventing me from tripping over my own two feet. I wore it with just the craft felt basted in to one dress rehearsal before applying a facing of scrap muslin to the interior edge. This encased the felt, preventing it from picking up every blade of grass in the state of Oklahoma.
Regrettably I have no pictures of the process of inserting the felt, but my process was simple. First, I applied the felt as a facing, turning it towards the interior edge. This I basted fairly loosely to the seam allowance where the red trim is attached to the bottom of the dress.
I then cleaned up the edge where the "grass guard" met the felt met the red embroidered band with some small whip stitches to give a crisp, clean finish.
After three days in a variety of weather conditions, the interior lining did relax a little as seen below, and will require some cleanup.
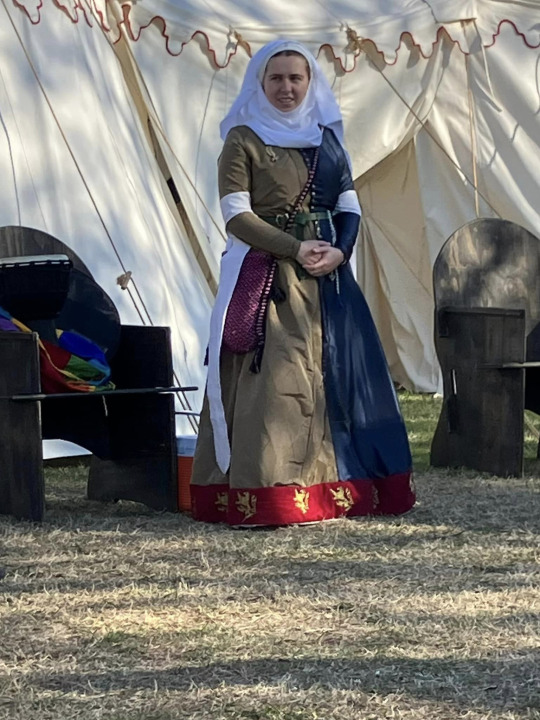
Pictured: Baroness Elizabeth Despencer attending the court of His Majesty Edward III, wondering why, exactly, one of the privateers has been handed the sword of state. (it was for a bit, we promise)
Also seen above, I purchased 14 badges of Prince Edward of Woodstock for the members of Prince Edward's Court (court 2) to wear, as a gift to the wonderful cast members who variously learned and developed new skills, stepped out of their comfort zones, and maybe let me turn them into human barbie dolls a little bit.
I really enjoyed wearing this outfit for three days through the course of the Norman Medieval Fair. I was incredibly worried about the polyester fabrics causing me to overheat, but found the linen lining and tight fitting torso prevented the polyester from building the dreaded heat pocket of humidity, and I stayed fairly cool and dry throughout the weekend. I found a personal preference for the structure and bulk of a wimple and veil when the face edges of both are folded, providing protection from the dust on the wind and the blazing sun. I cheated and safety pinned the bottom edge of my wimple together in the back, though the rest was secured by a single pin through the crossed upper edges to my brigitta cap and held tight by the pair of pins that attached my veil. Dancing in this garb made me feel more regal than I ever have in my life.
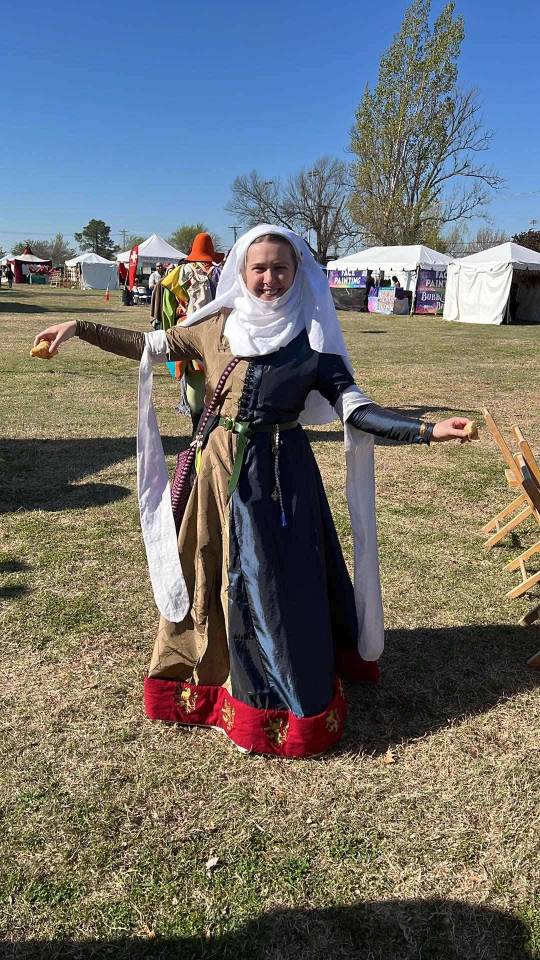
Pictured: a happy baroness with croissants. Fed nobility is happy nobility!
Unfortunately due to mental and physical health issues, I will not be returning as costuming director to the cast.
What comes next?
A klappenrock for a commission
Lesbian Minoan ;)
Coordinating Roman and Greek for myself and my consort
an attempt at a little viking cap!
a nap, probably.
#society for creative anachronism#historical costuming#historical reenactment#norman medieval fair#medieval#sca#arts & sciences#a&s#14th century#cotehardie#kirtle#medieval costuming#cote
11 notes
·
View notes
Text
T Tunic Assembly
Notes created for the cast of the Medieval Fair of Norman intended as a good starting point for costumers made nervous by curved lines.
Meaurements and suggested cutting layout for this tunic are here

Cut out 4 body panels, 2 sleeves, 2 gussets, and some* gores.
Sew 2 body pieces down the long edge. This makes your back panel. **Optional for skirt volume: sew butt gore into back seam**
Sew the other 2 body pieces down long edge. This makes the front panel
Sew the front panel to the back panel at the shoulders
Trace a circle with a 3" radius (6" diameter) with the center 1" down the front center seam (This places 2/3 of the circle on the front panels and 1/3 on the back panels). Cut this out & seam rip ~2-4" down the center seam of the front. This makes the keyhole neckline we use for trying on our mockup.
Center one of the sleeves along the shoulder seam. Repeat for the other side.
Sew the gusset (armpit) into the right angle formed by the sleeve and the body. Repeat for the other side.

7. Attach gores to the body panels as depicted in diagram on left. If gores are in multiple pieces (i.e. 4 or more right triangles, as instructed in the prior post, see diagram on right.)
8. Fold tunic in half and start sewing along the outside edge. Gussets should be folded diagonally making armpit "triangles" when viewed from the front.
You now have a T tunic! start fitting and making adjustments as desired. Consider the following suggestions:
pinch and pin along the sleeve to tighten the fit. mark and trim if the sleeve is too long.
pinch and pin under the widest part of the chest and along any part of the torso with too much ease.
mark how wide you want your neck to be, if wider than the keyhole neckline.
consider moving your gores up or down to start at your natural waist or hip.
Consider narrowing or shortening gusset if it has too much of a bat wing. Gussets can also be a "kite" shape with the long narrow end pointing down the arm and the short end into the body.
#society for creative anachronism#sca#historical costuming#14th century#cotehardie#kirtle#tunic#t tunic#t-tunic#sewing#diagrams
24 notes
·
View notes
Text
Loose Fitting Cotehardie AKA the T tunic starting point
Notes created for the cast of the Medieval Fair of Norman intended as a good starting point for costumers made nervous by curved lines.

MEASUREMENTS:
A. shoulder to hem + 1"
B. bust (widest part of torso)
C. (B + 4)/4 "
D. shoulder to wrist + 1"
E. circumference of arm @ the shoulder +1"
F. waist to hem + 1"
G. 6-12"
H. 4-6"
Assembly Notes:
Hypotenuse of gore goes to the body panel, right angles of gores go to each other
Top of gores start around natural waist, bottom rib, or top of hip
May be easier to assemble gores in pairs before attaching to the body
Offset the circle for the neck hole so that 1/3 of the circle is on the back panels (neck hole ~6" in diameter)
Closure can go to natural waist or to hem
This can be used as a basis for a more fitted garment
Additional Notes:
Using gores and body panels cut in this manner is one of the most efficient ways to use fabric if you're trying to be conservative with yardage
While it appears gores went into front, center, and side seams in period, many modern wearers prefer the "flatter" front effect of forgoing the front gores
Doing just side gores and no butt gores can give a "flat stanley" appearance
Remember to round out your hems after assembling!
#society for creative anachronism#historical costuming#sca#14th century#cotehardie#historical reenactment#kirtle#tunic#t tunic#t-tunic
5 notes
·
View notes
Text
Dressing the Despencers, pt 2
Part 1
And so it continues. With the supportive underkirtle complete and worn at an event (under a different kirtle of mine) to make it relax the rest of the way, I got the measurements for our Edward and Thomas Despencer and started marking and cutting materials. While I originally believed I would have more than enough of the bronze patterned fabric, I was proven quite wrong and resorted to piecing together several gores and small extensions in the front of the body for Elizabeth and Edward Despencer. The planned change in the last post (bronze body with blue sleeves for Edward and green sleeves for Thomas) was shifted again, back to my ideal of particolor for the married couple and coordinating for the brother in law. I also realized halfway through marking that I was 2 gores and a sleeve shy of enough of the blue, which led to much wailing and gnashing of teeth. I found a similar-enough-at-a-distance blue satin at OKC fabric market, pictured on the right. Flash makes the differences obvious, but there will be very few flash photos taken of this. It'll be fine. I'll be fine. I'm so normal about this.


Because all 3 outfits have similarly sized pieces in similar fabrics, I've taken to organizing them in 3 individual cubes to keep everything straight. It has been a real game changer, and I would recommend it to everybody.

Having cut out and serged everybody's blue and bronze fabric, I dug through my stash of scrap linen to make the lining. I worry the bronze especially won't hang exactly right without lining. Additionally, I'm making the cotes for Edward and Thomas Despencer for a pair of high school seniors who, while I hope they wear an undertunic at the NMF, I plan and prepare for them not to do so. For reasons I cannot fathom, I chose not to serge the lining pieces for Edward Despencer's cote, seen below. Yay, hand finishing.
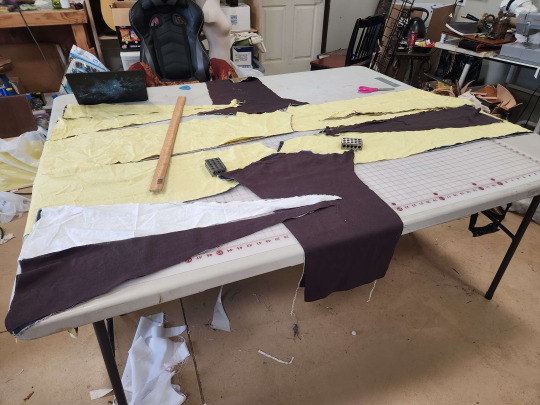
I usually bag line lined garments, but I also usually make garments in 2 layers of linen. I didn't want a bag lined garment to sag weirdly, so I sandwiched each seam, treating the lining and outer together as one piece of fabric each.
The picture below has two notable features: first, the blue of the body and the blue of the gore are the two different blues. This was proof of concept enough for me to accept the differences aren't terribly noticeable. Second, I did not bother pattern matching the various pieces of of any of the garments. Working from two extremely limited quantities of fabric, I found myself in the position I'd imagine many tailors in period would know well. Laying out pattern pieces over and over, I found the only way to effectively and efficiently use as much of my material as possible is to squeeze things in where I can (while still respecting the grain). I would like to find documentation on this speculation, but I would not be surprised if it is more period to not pattern match fabrics for anything less than a royal coronation garment. And the Despencers, while being played as nouveau riche landed nobility and close friends of the heir apparent, do not have pattern matching and wasting fabric money.
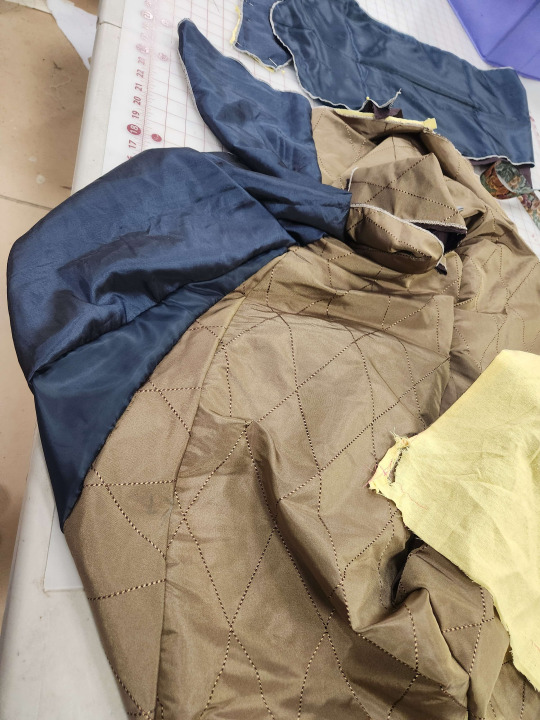
With Edward Despencer's cote largely assembled and waiting until I can do one more test fitting before I add button holes, I started assembling my/Elizabeth Despencer's outer gown. By this time, I decided for the remaining two Despencers to only line the 4 body panels, since that will help the drape enough in my humble opinion.


Don't worry, those gores get scooted up to a better height. I found myself working from Morgan Donner's example of a supportive kirtle, where her gores start where the flare of the bodice in the 4 body panels stops and turns into the straight lines to the floor. I still haven't quite figured out why mine looked so bad and noticeable in comparison to hers (seen below), but my best guess is the difference in drape of material, the fact that Mistress Donner is significantly smaller / less beefy in the hips than I, or that I just straight up placed them wrong.

I do love how much space the dress makes me take up though. It makes the transition from street to court feel a lot easier, I'm playing nobility and I take up space.
Tragedy struck and I realized I was short about an inch across the bust. Still not sure how I managed that, but it was time for a fix. Piecework is period, and I maybe panicked a little and overdid the width, but I added plackets to both sides of the front closure to give me more working room.
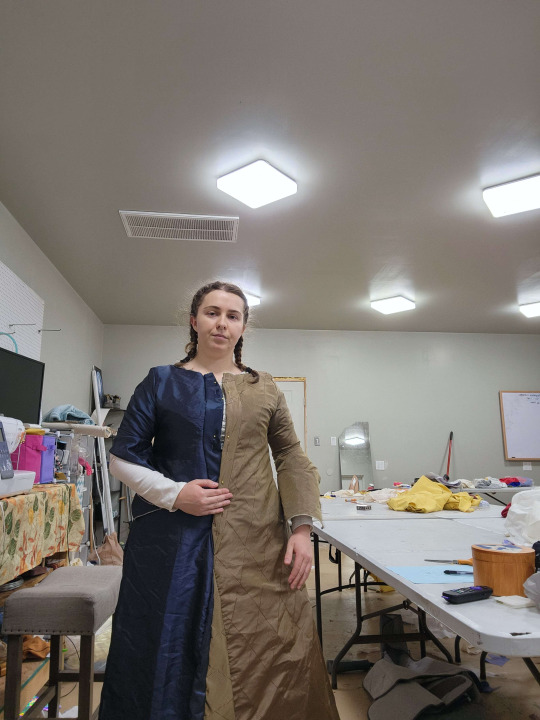
Then came the buttons, which I purchased from Bad Baroness buttons. I. Am. Obsessed. I wanted enough to do my front closure to the waist, both boys all the way to the hem, and sleeves for everybody. So I overdid it and bought 150. On my bodice, I spaced them about a button and a half apart to avoid gapping. Because the fabric doesn't play nice with chalk, I ran loose basting stitches to mark my button holes before I made them. Rather than using my wife's fancy new brother with an automatic buttonhole function, I learned how to use the button hole stitches on my old Janome (finally.) Overall, not a bad experience, and it means I don't need to borrow a machine to do buttonholes.

Then came what has been the most stressful point so far. Mistress Elizabeth Caton and Countess Amelot Lisette joined us for an unrelated sewing weekend extravaganza, and I took advantage of their expertise to help with fitting. Thus, the gores got moved up, and the sides taken in more. I really over did it with those front plackets RIP. But tragedy of tragedies, in moving the gores up, I left the dress 4 inches too short in places. Upon consultation with my trusted countesses and friends, we reverted to the original design with the red band and lions at the bottom. I was hesitant to do this because of the cast's restriction of true crimson to the royal family for readability reasons, and because it's not something I see much of in period depictions. However, the rest of the costuming committee reminded me of my own "10 foot squint rule", where if the costume isn't overwhelmingly crimson at 10 feet and squinting, it's fine. And this contemporary depiction of Mary of Waltham (Princess Mary) has a surcoat that appears to have a contrasting band at the bottom which may match gores going up the sides. The decision was made to cut myself some slack and get this workable ASAP.

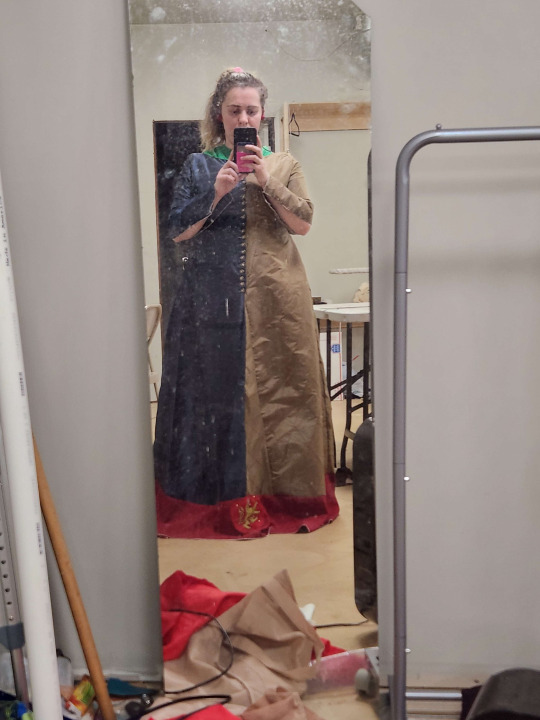

Much appreciation to Halldora for loaning me her machine and helping me embroider these godforsaken Burghersh lions.
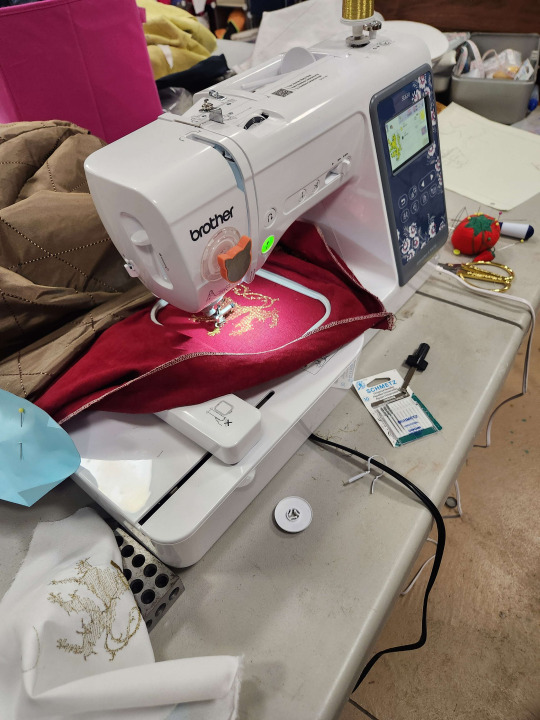
What comes next?
I need to finish the lions on Elizabeth's dress and hem the excess.
I need to add buttons and buttonholes to Elizabeth's sleeves
If the sleeves are too short, I may add contrast red cuffs of the same fabric as the hem, or gold cuffs and embroider them with the Glamorgan chevronelly in the Despencer arms
Buttons down the front of Edward Despencer, and close his sleeves. It's been fitted, and I had to add the button placket of despair to his garb as well.
Seam finishing for Edward :) since I didn't serge the lining for some reason :) I hate myself :) i've at least already started this.
Assemble and line Thomas's cote. I will definitely need a button placket on his too, I girlbossed too close to the sun and made the chests just a wee bit too tight for their comfort. For Thomas's, I'm going to embrace the pieced look and use some dark brown linen for the center closure.
Dye and attach the false sleeves for Thomas, they're going to be a lovely green :)
Hems and necklines for everyone!!
If i have time and spoons, I would LOVE to put some mammen scrollwork embroidery on at least one of the boys' cotes.
I am attending Ansteorra's Laurel's Prize Tournament this coming weekend and hope to have enough done on the Despencers' clothes to present them, so fingers crossed!
#arts & sciences#a&s#sca#society for creative anachronism#historical costuming#wip#norman medieval fair#medieval costuming#historical reenactment#medieval garb#kirtle#cotehardie#cote#14th century
11 notes
·
View notes
Text
Dragging a Viscount into Early Period
My first hack at more elaborate men's Rus has been prompted by a favorite Viscountess of mine dragging her fighter into early period.
I was given a pile of fabric for pre-determined aspects: a chenille upholstery fabric for the body, a buttery yellow linen for the facings, and a cream linen for the pants. For full disclosure, this piece is a commission that I'm doing at a reduced rate in hopes of getting my name out there on a pretty prominent figure in my region.
I used the calculations for measurements and layout given to me by Dvorianka Anastasiia which are derived from the patterning work done by Mistress Talana the Violet of blessed memory. It is similar to a variation of the style 5 tunic as categorized by The Renaissance Tailor, with trapezoidal gores in both the skirt and armpit, leading to an overall sleeker fit to the body than the standard square armpit gore. As some measurements had changed since Anastasiia last took them, I stressed myself out until I realized I have unlimited power at my fingertips: basic scripting. I wrote a short program to take hard coded measurements and spit out the exact dimensions of the pattern pieces, which felt a little bit like overkill and also not impressive at all.
With pieces patterned, cut out, and (mostly) serged, I delved into construction. I have learned from experience my preferred method of construction is starting by attaching the two body rectangles at the shoulders, attaching and turning the neckhole facing, and then assembling everything flat as follows.

This makes lining up and turning the facing significantly easier for me to do, and hides raw edges within the seams. Starting with the neckhole, however, means there's less fabric for me to fight while I turn a particularly annoying facing.
With the facing laid out on the body fabric, consultation with some of my apprentice siblings determined deep burgundy is the way to go for all the accents. I decided on split stitch around the neckhole and buttonhole stitch around the edges of the neckline, but quickly decided I prefer the split stitch for the rest of the decorative stitching on the garment.

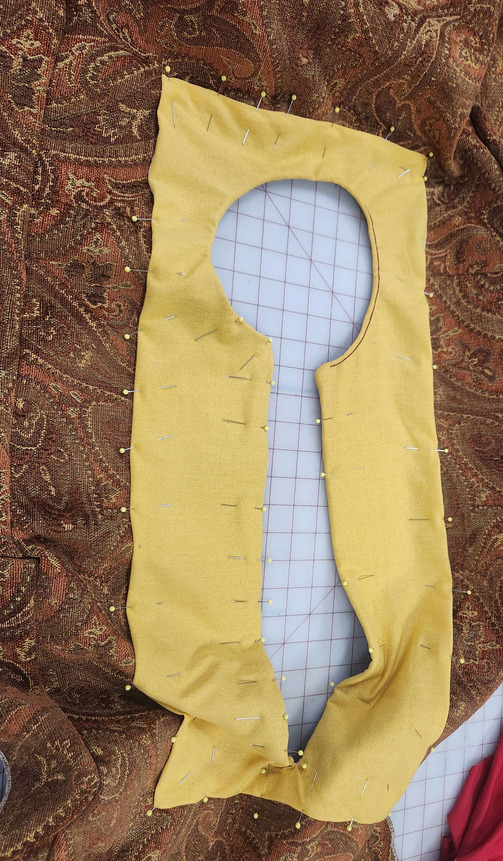
For the sleeve cuffs, I pinned them in place, ran a quick line of running backstitch along the tops of the cuffs to secure them in place, then did split stitch at the top of the cuffs and a running stitch around the opening to keep the edge tidy while still not using visible machine stitching.
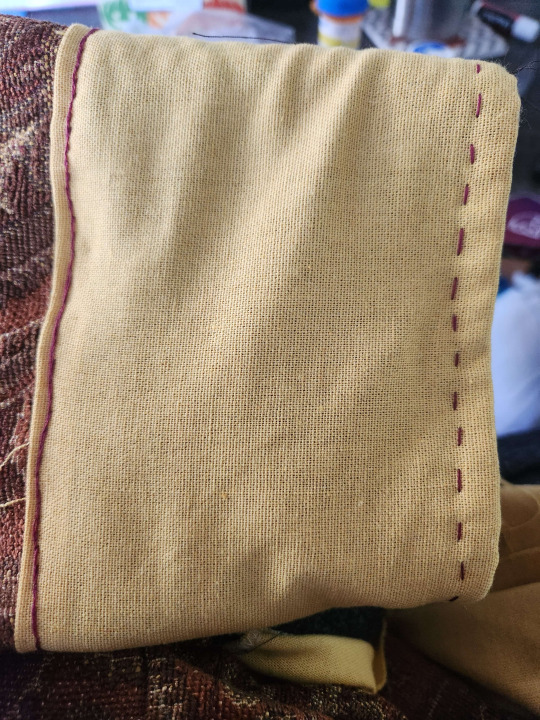
One thing the recipient of this garment expressed is that the striped facing secured with buttons or toggles is an ideal look, and luckily I have a significant quantity of the Vindheim buttons from Bad Baroness in stash. I do not have sufficient woven or braided trim in truly appropriate quantity or style for this garment to be aggressively period, but with the fabric we're already taking liberties and the ribbons look nice and appear to be a popular substitute for strips of silk tape performing the same function in our area. I laid the ribbon out at inch and a half intervals and made sure my lines would be straight on both sides. I turned the ends of the ribbons in and secured them with a whip stitch in a matching thread.
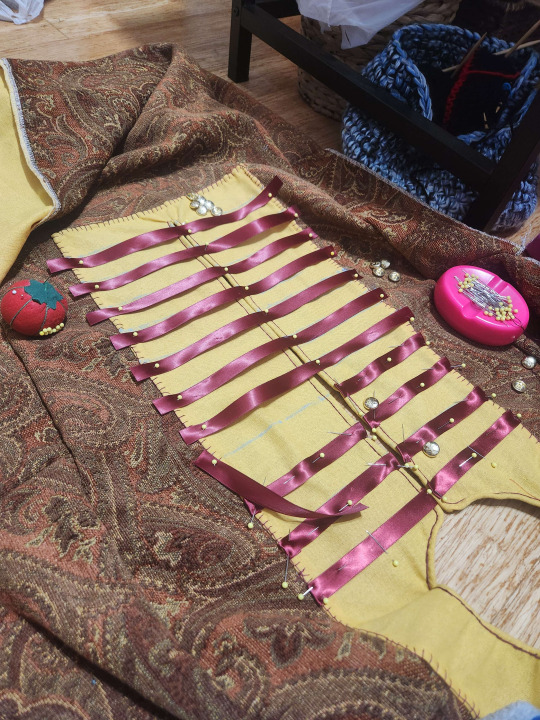
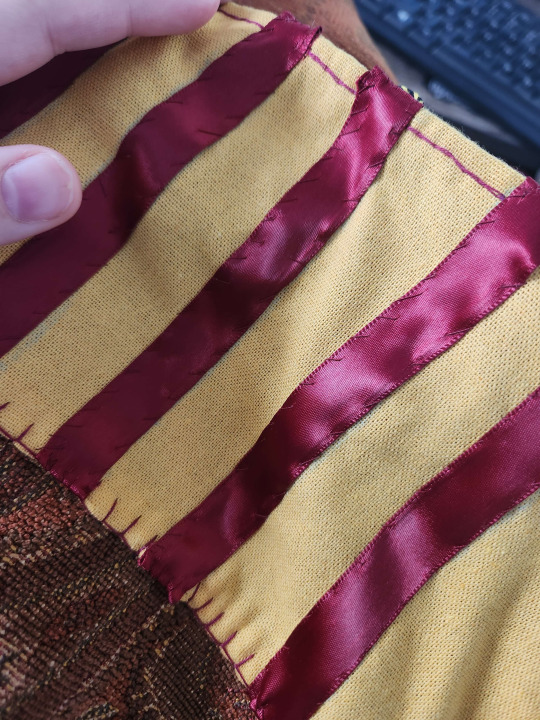
With my facing done and the worst of the neckhole dealt with, I seamed the rest of the garment into an actually clothing-shaped piece of fabric and let it hang for a day while working on other projects.
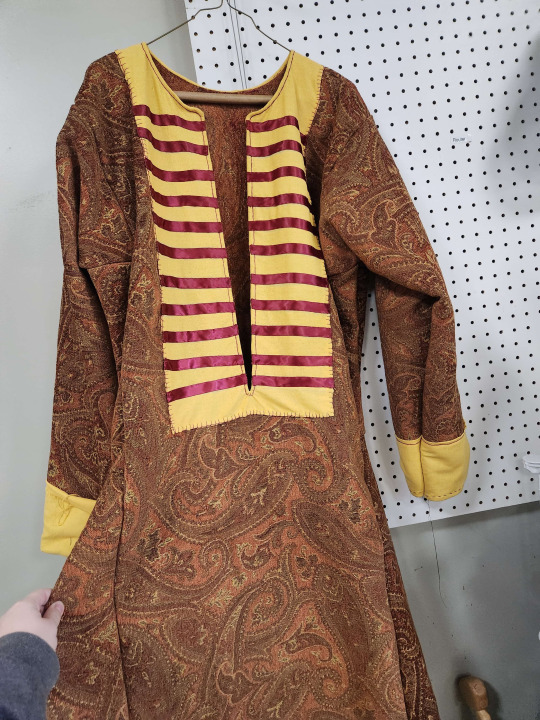
I decided to use a "looped cord" method of button loops, using a cord from an old site token that happens to look an awful lot like the cord used for an award the recipient has received. Starting from the bottom of the neckhole, on the wearer's right side, I've tacked the cord down under the edge of the garment, securing the loops aggressively.
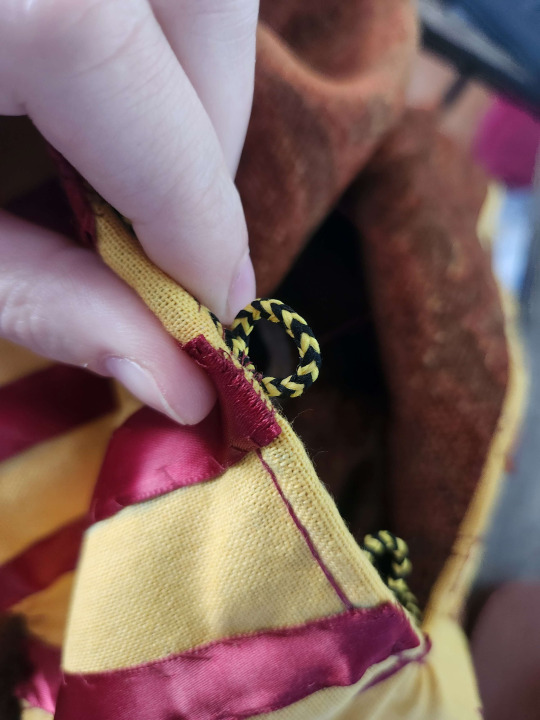
Sometime soon I will get clearer pictures of this garment on the recipient.

The more I look at this garment and all other Rus-ish garments i've made and seen, I think I may need to round the gores into the "skirt" of the tunic more dramatically. I can no longer find the artistic depiction that originally gave me the impression, but until this point i've been letting the right angles of the skirt remain as initially cut, giving an angular overall silhouette but the rounding may be necessary for the right look.
#arts & sciences#a&s#sca#society for creative anachronism#historical costuming#rus costuming#garb#rus and norse#tunics
8 notes
·
View notes
Text
Dressing the Despencers

Another post that's more of a costuming diary than anything else, to be added to as I get further in the process.
BACKGROUND
Since 2016 in the Medieval Fair of Norman (my gateway drug to the SCA) I have been cast as a street character named Margery Arkewright, the ditzy, excitable, joyful shepherdess of Avalon best known for her frequent proclamations that she is the Best Shepherdess in All of Avalon (the only shepherdess there) and her inability to keep track of her sheep. I could probably write an entire book about the development of Margery as a character from "<Mundane Name> - peasant townswoman" to the beloved sheep lady, and how that growth has helped me find myself as a person, but that's for another post. The original goal of Margery was to be as brightly colored and loud as I could be allowed. Pictured below are the original outfit I made in 2016 (with the wool blend felt "cloak" i regularly wore when chilly or to just have a huge storage pocket), and the updates to the outfit as of 2023. Even in that short time, I've grown as a costumer and amateur historian. If nothing else, I know how to put my sleeves in right and I know how to cover my hair so it doesn't get icky at the fair.


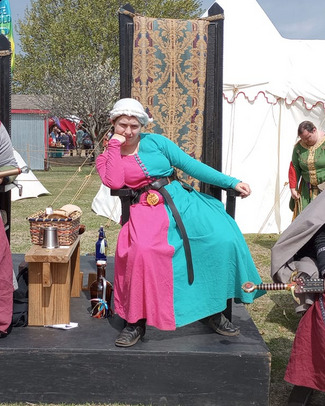
Being Margery has been a joy, but Margery takes a lot of energy that I just don't have anymore. In discussion with my casting director, we've put Margery on the shelf for a year or so to age like a fine wine, so when she comes back I can be a little less bouncy and not have it be as much of a shock. As far as the town is concerned, Margery is off trying to woo one of those muscley Bretons in the fleet of Captain Jeanne di Clisson. She'll be back.
On top of everything, I accidentally stepped into the position of Costuming Director at least in an interim. I've been handed certain goals to push for improved costuming standards across the board, as well as implementing some specific standards to improve readability to the audience.
DESIGN
In the meantime, I'm taking a step back to play a member of the court of Edward of Woodstock, Crown Prince of England, war hero and darling of the kingdom. For the time being, I am Baroness Elizabeth Burghersh, First Baroness Despencer. I decided to take the chance to really up my 14th century garb game with some Noblewomen's garb. I knew I had some lovely navy blue satin in stash that had just the right drape I wanted, and dug around to find some fabric with similar drape so I could make some particolor.
<insert picture of test wash>
I wanted to incorporate some of Elizabeth's armory as in 1369 (9 years after the medieval fair of norman is set) she inherits the title of Baroness Burghersh and is a heraldic heiress in her own right. I also have some red polycotton velvet that i wouldn't want to wear all over, but I would be more than willing to wear it on hems or cuffs. Some of the big pushes we're making in costuming direction are more heraldic designs, more silhouette varieties, more historical cuts and designs, more couples with coordinated outfits, and restricting large swaths of true crimson to the immediate royal family to improve readability to the public. My initial design below includes gold double-queued lions from the Burghersh along the hem. Shortly after, I adjusted the design to my formal submission (to my committee, I don't like the idea of approving my own stuff) on the right: the lions on lozenges, fitchets in the gown, tippets, and a wimple.
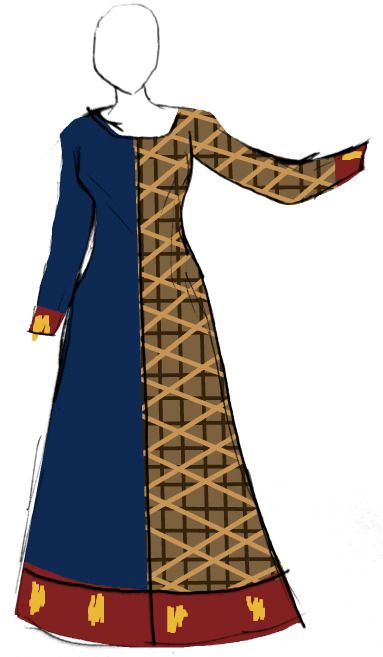
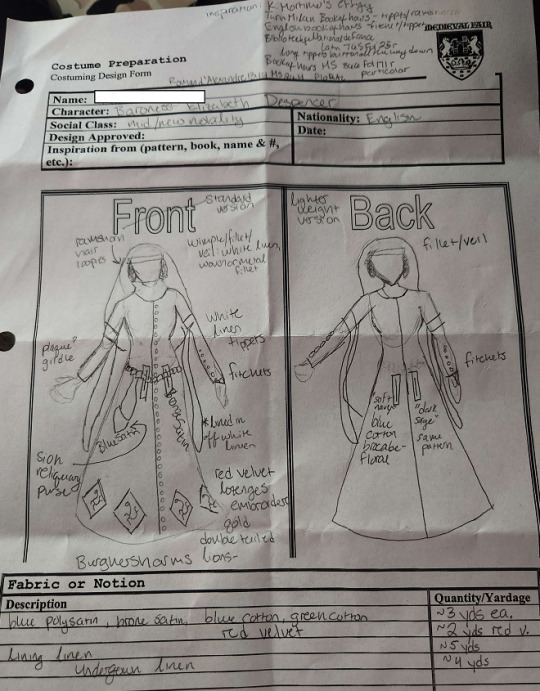
As it currently stands, a pair of new cast members are playing my "husband", Baron Edward Despencer and his brother, Thomas Despencer. Due to their inexperience with both med fair and costuming, I offered to make at least one tunic for Edward in exchange for creative control of the outfits. Due to a very limited quantity of this blue satin, I'm going for a particolor gown for myself buttoned halfway down, and using what's left on the false sleeves for Edward's cotehardie. I want to use a similar-- probably not the same-- bronze on the cotehardie for Thomas, and use green false sleeves. I really wanted to incorporate their family arms, but dear god they're miserable to depict.

I included headwear options to provide the boys with some suggestions and some embroidery options to dress up their cotehardies. The second version, below, should be a hot day version on the off chance we have a truly miserably hot day at fair. Fewer layers, and all linen.
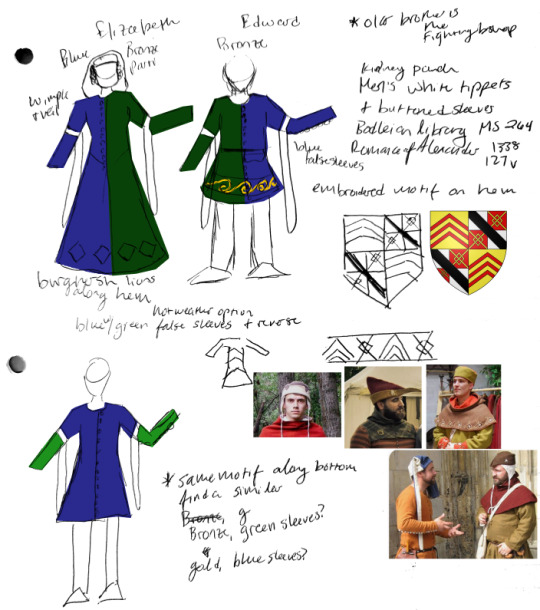
I've got hand me down tippets and an oval linen veil to use for a wimple / veil combo, that I added a gorget of a 2x3'linen rectangle using this method to secure.
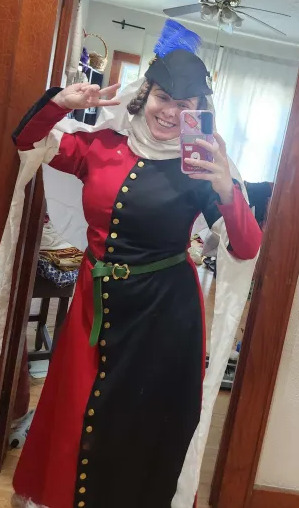
Halldora obtained a light weight, barely opaque creamy white silk for me to make a new wimple / veil combo that has more of the drape I really want to have. My problem is I'm obsessed with the fillet + gorget style of wimple with ramshorns braids, but some kind of scalp covering is practically mandatory with our role in the NMF. Sunburn on the scalp is miserable, and direct sun on the scalp can exacerbate symptoms of heat exhaustion, and I'm not looking for my third heatstroke.

Barring this, I am working with the other directors to obtain new and improved crowns for our royal family to justify a fancied up filette/barbette combo inspired by the fabric coronets our court baron/esses in Ansteorra tend to wear. While the pointed coronets of Ansteorran court nobility may be out of period for my goal here, I think adding some embroidery, pearls, cabochons, and the embroidered horribleterrible despencer arms (seen at the top of this post) may dress up Elizabeth Despencer even more. This is all pending new crowns for our royal family, of course, as a big goal is readability and identifiability for the average patron.


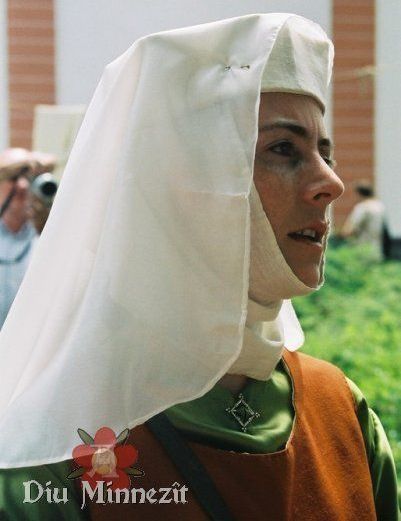
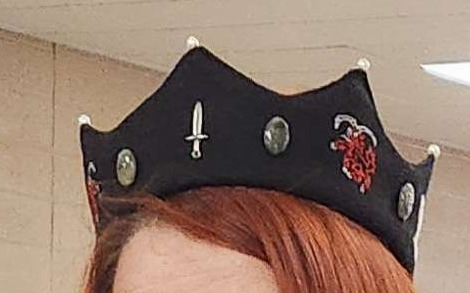
CONSTRUCTION
I have begun drafting the undergown using Morgan Donner's supportive kirtle tutorial. As someone who hates shapes and struggles with tailoring, the first pass at this was already impressively fitted. By round 2, I made the armscye a little larger. For the third round of fitting, I added a small kite shaped gusset to the armpit and rolled the shoulders back further onto my body.
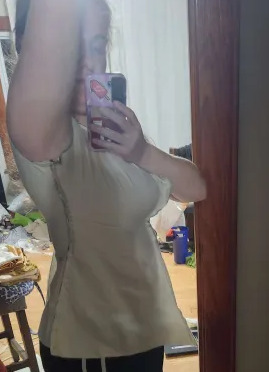

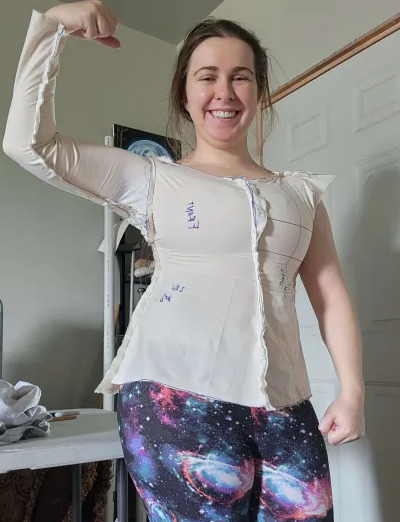
I made one last sanity check that the blue polysatin had sufficient yardage to make both Elizabeth and Edward Despencer coordinating outfits, and was satisfied with the resulting layout. One whole gore to go on the side, and two half gores, one each for the front and back.

In a fit of utter hubris, I decided I would completely hand sew this supportive underkirtle, a little bit to prove a point but also largely so I had something to work on during NMF rehearsals and Pathfinder games. I am using a single layer of medium weight linen, with a second layer of the same around the torso for reinforcement and to make everything lie just a little nicer. At the advice of Asa in Blindi, I have been finishing seams as I work, especially along edges I already know to be fitted as needed. One final double check on fitting before I secure sleeve seams, which will be obnoxious to undo--


I'm satisfied. It's not perfect, and I'll tighten the cuff some more and get rid of the back pucker on the outer garment, but I'm rather pleased with this. I did not think i would do gores in the front as historically I don't really like the silhouette it gives me, but this outfit was just begging for full, huge skirts, so I scurried back to the workshop to piecework another gore together, just for the front. Now I'm working on the eyelets, which I'm poking through with a sharp bone awl and widening with a us7 knitting needle. I'm sewing each eyelet with 2 strands of dmc embroidery floss.
I'd originally wanted to lucet some lacing for this gown but mastering tension on crochet thread is eluding me, so I am doing a 7 strand kumihimo braid in white size 10 crochet thread, using these aglets to cap either end rather than my nice ones from Bad Baroness.

Things I've learned so far:
The smallest measurement on my torso is NOT where I thought it is
French seams make hand sewing less miserable to do
Waxing your thread (with a little cake of beeswax) is worth every second and makes life so much easier. And periodically you should run a flame over the sides of the cake so it doesn't start flaking and falling apart
It's worth working with shorter pieces of thread you have to secure more often, i now max out at 2/3 of my armspan for thread lengths
knots are for scrubs, sew 2 stitches in the opposite direction of your intended seam and live your best life
#arts & sciences#a&s#sca#society for creative anachronism#historical costuming#wip#medieval costuming#historical reenactment#medieval garb#kirtle#cotehardie#14th century
7 notes
·
View notes
Text
Coronet V: Sheep and Bears
Armiger Runa Bjarki fought for me at Vindheim's fifth coronet tournament, after fighting for me for the first time at Vindheim's fourth coronet tournament.
This will be a bit more of a costuming diary than anything, detailing my process from design, to drafting, to learning new arts, to the finished project, and what I learned along the way.
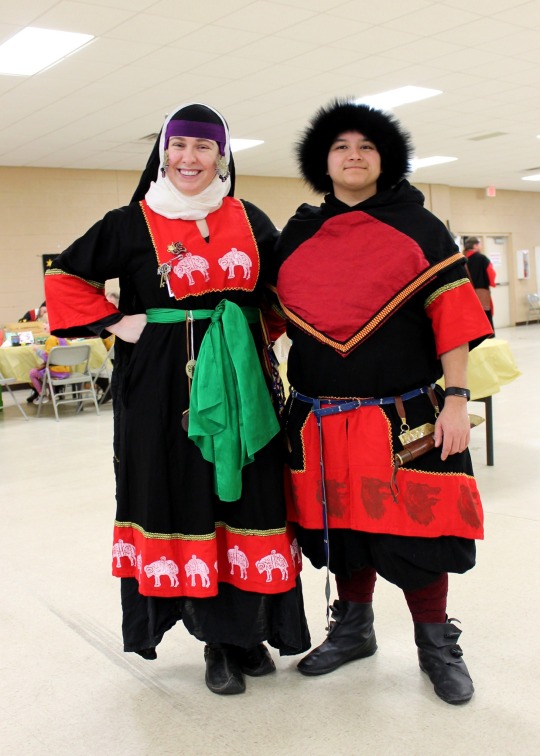

Our arrangement began prior to Vindheim's 4th coronet tournament, arranged by my wife and Runa's teacher much in the style of an arranged marriage. Runa would fight for me in exchange for me making our coronet garb, giving me an excuse to step up my garb game and enjoy some pomp and circumstance and giving Runa a growing closet of fancier garb. Our arrangement stipulated that I get to make Runa wear Pink, sometimes at least.
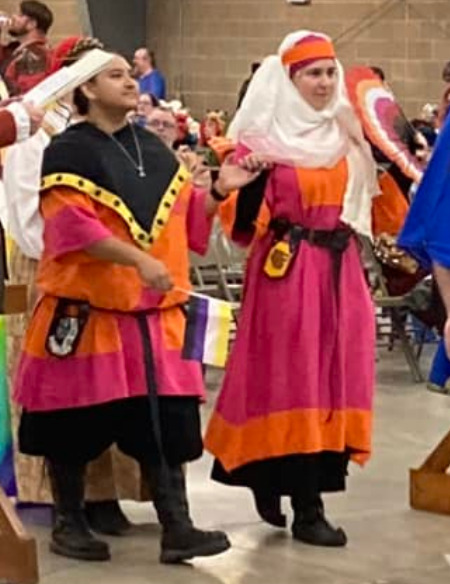
Our first outfits were pink and orange with black accents, which is TECHNICALLY Vindheim colors (dark Or, light gules, and sable :P) and includes the pink and orange which I have become associated with in the kingdom. These outfits would not have been possible without Dvorianka Anastasiia and Boiarynia Koia, who loaned me veils and undergowns, gave me instructions on drafting and assembly, and zhuzhed me incessantly day of to make sure the Rus impression was both up to their standards of accuracy and made me feel pretty.
A fun fact about this procession, we were the first ostensibly f/f entrant couple in a Vindheim coronet tournament, we were dressed as lesbian flags, and our procession was riddled with pride flags. Overall, a good day.
I created the following patterns for Runa's and my outfits, respectively:
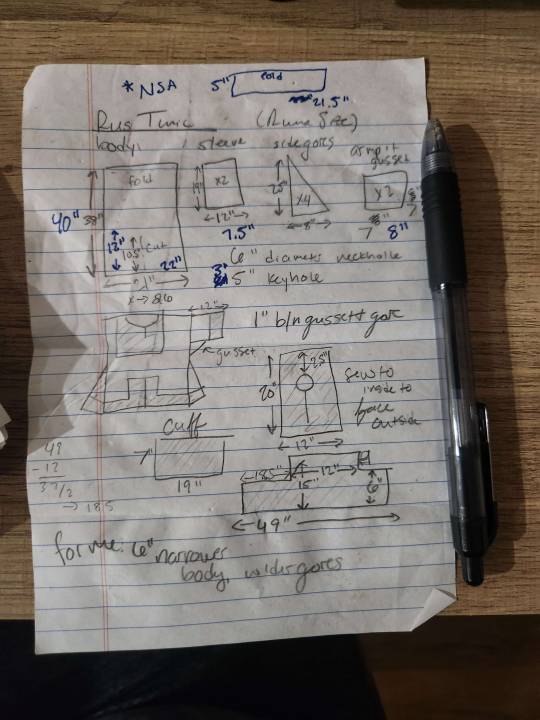
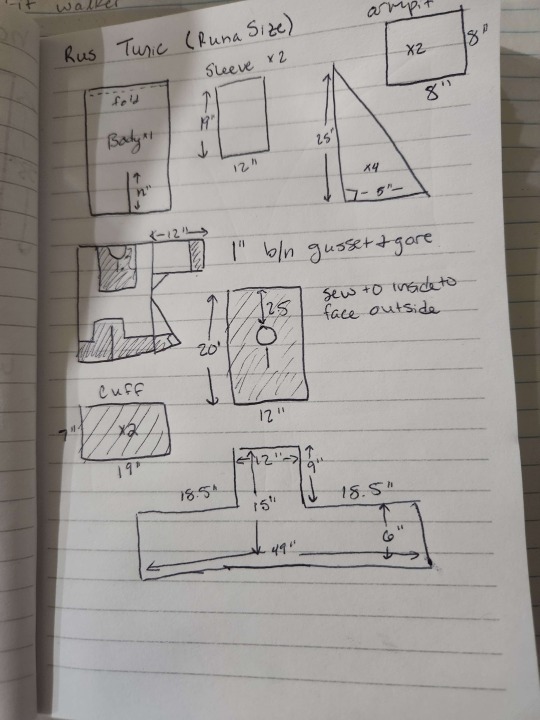
Our arms:

Time passed, the second coronet tournament was fast approaching, and per our agreement, the next set of outfits would be Vindheim/ Free Company / Runa's own colors. Rather than struggling with pens and sketching over and over and over, this time I simply made "dress up dolls" in GIMP to present design ideas to my fighter, which included the following:
I cannot recommend this process enough. I just sketch outlines of my design on paper, upload into GIMP, adjust levels and brightness, then set the alpha channel to white. Under the lines layer, I make a series of layers in neon colors of each of the "sections" of color I might want to adjust, which allows me to bucket fill to make different designs.
After selecting a design, I obtained stamp carving supplies and sent them to Runa for her to carve my fleece and her bear, the animate charges in our arms, to be applied to the final product.
I commissioned trim by trade from a local to me, Lady Kenda, to accent the borders of the red facings. I only asked for 6 yards. This would prove to be a mistake, although the trim itself was LOVELY

My first attempts to use the stamps were...fraught. Many inappropriate jokes were made about the sheep, in particular. Koia and Anastasiia troubleshooted the problem remotely and provided better paint, respectively, resulting in the superior stamping on the right.


Not a single picture I've taken captures the depth and warmth of the brown in the bears, unfortunately. In natural light, they're clear, vibrant, and a warm coffee brown. In every photo i've taken, they're barely there. With stamping conquered, so began the cutting, serging, and assembly.

I used the crimson and the black linen from OKC fabric market, which are both soft, mid-weight linens with an apparently short staple, but are plenty affordable for my needs. After cutting and labeling all t he pieces with chalk, I ran them through the serger to keep the pieces from fraying while I work. This also let's me be lazy and not do any seam finishing at the end of the proecess, when I may be very pressed for time.
I prefer to attach the two body pieces at the shoulders and apply the neck facing ASAP, as it's easier to cut and turn before the entire tunic is assembled. I also attached the facing to the cuffs before attaching the cuffs. I lay everything flat, attaching gores to the sides of the gown and tunic, then I run one seam each up from the hem to the cuff. The exception to this is the side on which I include my pocket, since I like to have my phone, emergency meds, eye drops, and lip balm on me at events. Runa's tunic does not have this pocket, but her pants have both the cell phone pocket and the Jameson pocket. I should make a post about these pants at some point ;)


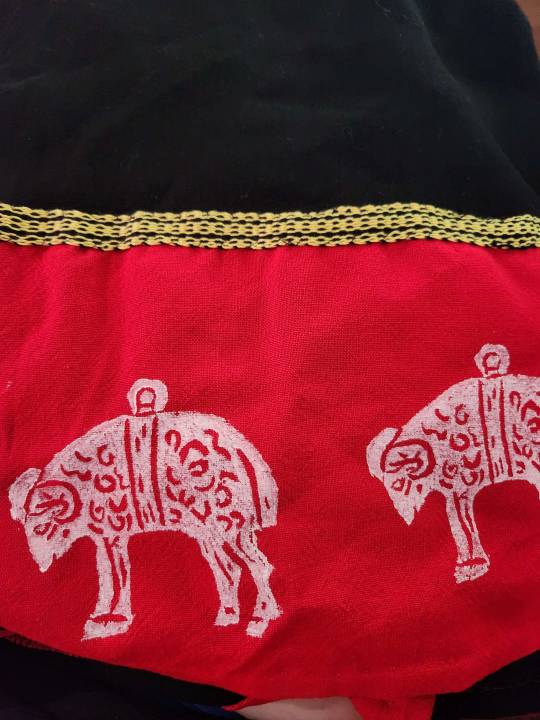
I didn't bother turning in the edges on much of the facings of my gown, anticipating applying trim over the top. Then I looked at how much trim I had left, and quickly decided to trim both of our sleeves, the bottom of my skirt, and the neck facing on Runa's tunic.

To the places I did not actually add trim, I embroidered the edge with a tacked herringbone stitch to add visual interest. Luckily, it turns out this particular design delights my fighter, is fairly strong, and has a very pleasant texture to the little hamsters in the brain.

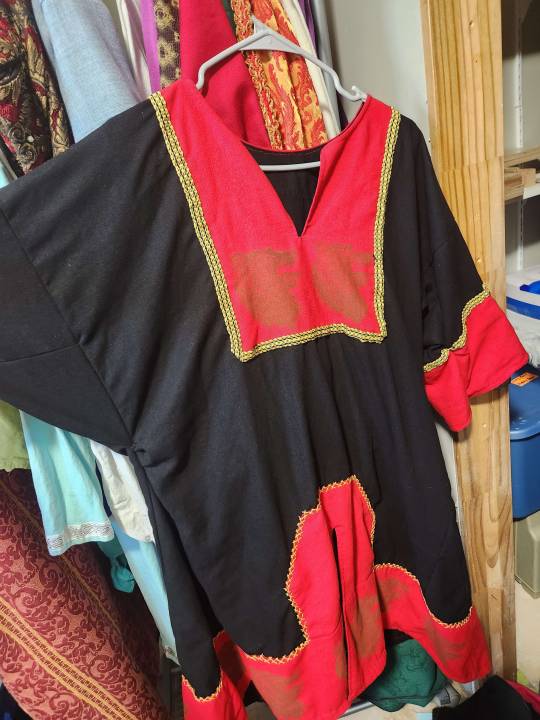
Overall, I'm incredibly satisfied with this result and look forward to wearing so much Rus in the future. I finally feel comfortable enough with the construction of both of these tunics to offer them on commission locally.
Some more glamor shots:
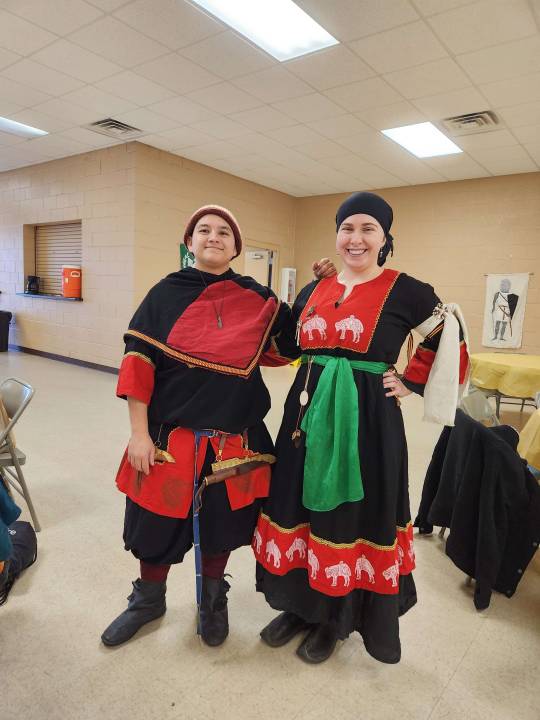
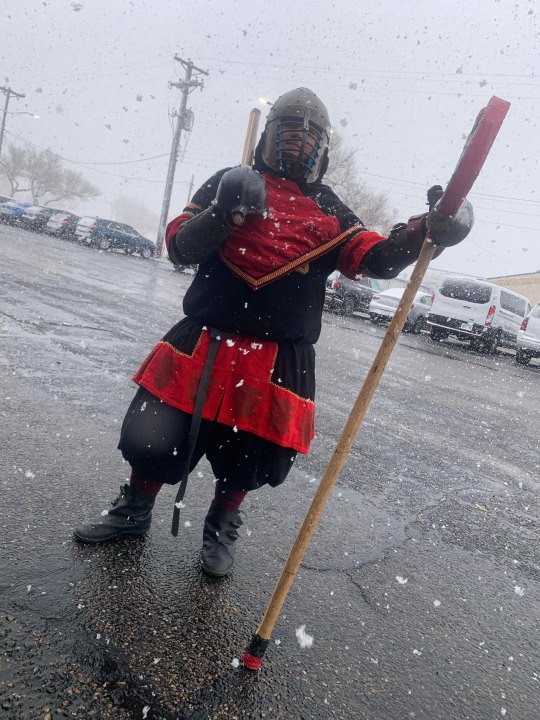
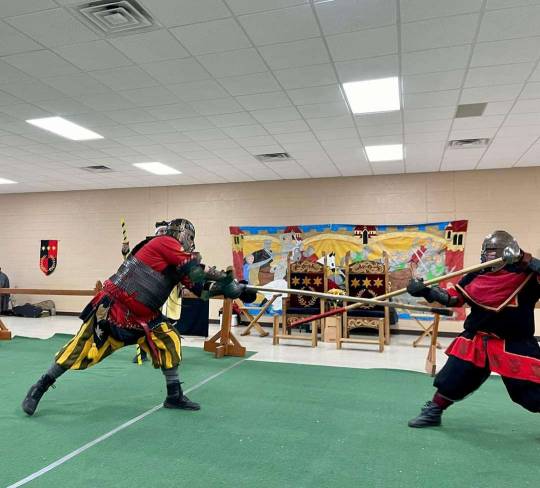
Endless thanks to Dvorianka Anastasiia Dmitrieva Sokolova and Boiarynia Koia Karasova, my Rus Mamas and tolerators of many midnight questions about stamping and styling.
So what am I on to next? Med Fair cotehardies. I'm currently handsewing the supportive underdress for my own impression. Fingers crossed I maintain my sanity!!
26 notes
·
View notes
Text
Clothing of the 14th Century: an unreasonably deep dive

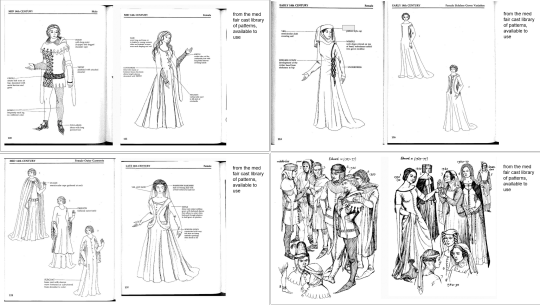

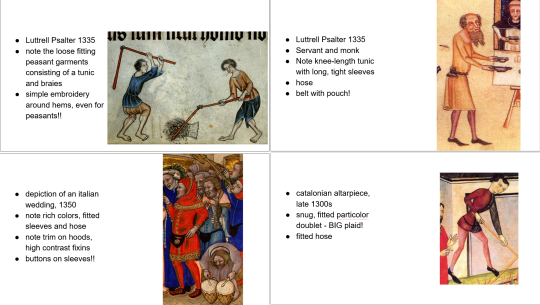
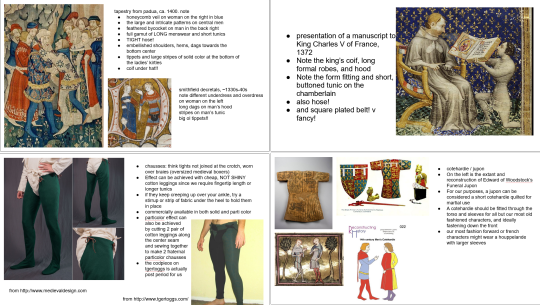





Hosting the costuming presentation for the Norman Medieval Fair on this blog so it can be shared to the mailing list.
#arts & sciences#a&s#sca#society for creative anachronism#nmf#norman medieval fair#historical costuming
204 notes
·
View notes
Text
Of Belt Favors and Letters
The Queen's Champion tournament of Nicolette Deuville II is this coming weekend (November 11, 2023) and for it, I have created two gifts for my inspirations. First, a belt favor for my wife. Second, a letter of intent for my queen.
This isn't my first time making a belt favor, but it's my first time making a sizeable belt favor for my wife. I made it for the Queen's Champion tournament of Nicolette Deuville II, in hopes that it brings my wife luck and glory. <3
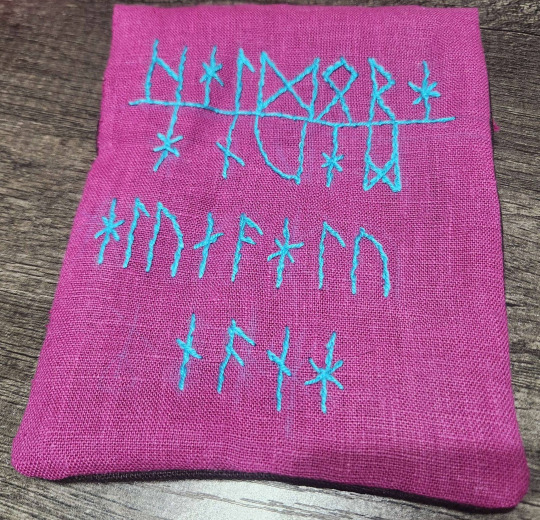
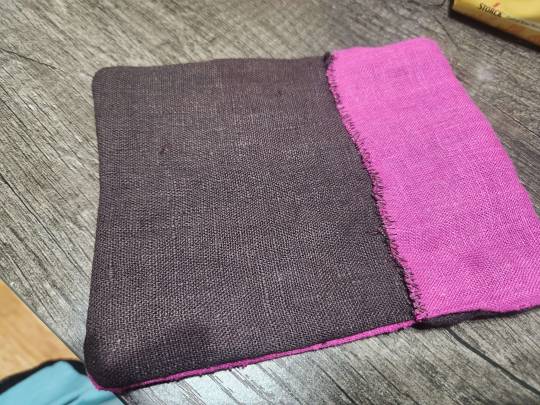
It is embroidered on a leftover piece from my first dress I ever made for reenactment and the first dress I ever wore to an SCA event. The text is based on the Setre comb inscription dating to about 600 AD. The text on the comb appears to read
hal maR mauna alunaalunana
Ever since I came across it, I've been entranced by Ottar Grønvik's translation of this inscription:
Stone-maiden may thrive achieve everything, enjoy everything
As my wife's SCA name is Halldóra, I've always wanted to interpret this poem into a gift for her. I used a single strand of cotton-wool blend yarn rather than using embroidery floss to call back to the embroidery texture of the Bayeux tapestry. As I did not have any large blocks of space to fill with the Bayeux couched satin stitch, I did this project in split stitch and a single couched line for the center line of the A section of the inscription

For my letter of intent, I wanted to do something that felt more appropriate to the persona of Áshildr Inn Hárfagri, so I decided to try my hand at carving leather. First, to draft and translate my letter itself.
While my letters of intent are usually rather wordy, since I would be trying a new craft for the first time I wanted to keep it short and sweet. I decided upon "My queen, my sword is yours" and began researching an appropriate sign off.
I came across the Einangsteinan inscript on the Einang stone, which is typically interpreted to read "ek (gu)dagastiR runo faihido" or "I Gudgæst wrote these runes." Substituting my own name for Gudgæst's, I now had a signoff of "ek ashildR runo faihido."

I wish past me did a better job of copying notes down somewhere present me would find them with regards to spelling my own name in runes as I've done this before for the Letter of Intent for the QC tournament of Toryn Sevenstitches II.

Make note that the "d" in Áshildr is spelled with a teiwaz rather than a dagaz. I thought that was interesting and not a choice I would have made casually, so I re-researched this difference. The Vatn Runestone, pictured below, appears to read rhoaltR ...something. rhoaltR is commonly interpreted in this case to be Roald, from Hróaldr. With the inverted algiz used as the R following the hard consonant at the end of the name, I consider this sufficient evidence of how to appropriately write a -dR name in runic inscription.

Then came the translation.
My Queen > dróttning mín (first person singular feminine possessive) > drotning min
My sword is yours > sverðsins (singular def. gen declension of sverð) mín er þín (second person gen. posessive) > swerþsins min er þin
I Áshildr carved these runes > ek Áshildr runo faihido > ek ashiltR runo faihido

As my queen's arms include a wolf in chief, I also carved a wolf into the leather. I used a pencil to sketch the runes and wolf onto the leather, then carved with an Xacto knife and a scalpel. I have found I prefer the straighter lines I accomplished with the xacto knife and found the ergonomics superior, but the scalpel produced clearer, easier to read marks against the undyed leather.
While this was meant to reflect the runic inscriptions in stone, this is obviously not stone. I chose to do this in leather rather than on paper or canvas because the three dimensional nature of carving, how runestones such as the Jelling, Einang, and Vatn stones were carved, is better represented in a thick material such as leather rather than painted on to canvas or drawn on paper. Carving these runes and this design gave me a greater appreciation for the straight lines of the Futhark runes and for the artistry, skill, and patience of those long-dead runewrights. Gudgæst, Roald, though long gone from this world, live forever in the carvings they left behind.
"Deyr fę, deyia frǫndr, deyr sialfr it sama; ec veit einn at aldri deýr: domr vm dꜹþan hvern."
#arts & sciences#a&s#sca#society for creative anachronism#leatherwork#leather carving#embroidery#runes#futhark#futhark runes
15 notes
·
View notes