#fansite resources
Explore tagged Tumblr posts
Text
i'm working on another character page theme, but in the mean time feel free to send me suggestions for psds or anything else you'd like to see :)
0 notes
Text

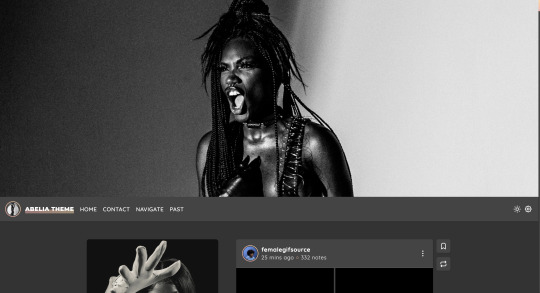
abelia | theme by sage
get the code: $6 - live preview / preview v1 / preview v2 a fansite theme with lots of options!
features (more info below the cut):
toggle: tags on click, faq & navigate popups, links, events, status, members, & affiliates boxes
optional uploadable header image with full, medium, & short height options
choose between left, right, or both sidebars
headerbar includes icon/blog title, home & archive links, ask link or faq popup, search bar or explore popup, scroll to top, day/night, & tumblr controls buttons
sidebars include an uploadable image with a custom description, links, events, status, members, affiliates, & info boxes
optional disclaimer footer
customizable: colors, body & title fonts, and font size
npf supported, responsive design, 3 corner options, tabler icons
only the (optional) faq & navigate popups need to be changed in the code, everything else can be changed in the customize panel! however there are other changes you can make in the code if you want - please see the customization guide
terms:
reblog if using
do not touch the credit
all terms / faq
credits listed in the code / credits page
please consider supporting me ♡
blog name !! important
make sure you fill out the blog name field, this is what will show on the top of all your original posts. to clarify: your blog name is your blog’s url - for example: phantomcodes
responsive sidebar
when the browser window gets too small the sidebar will disappear and become toggleable, the sidebar toggle button will appear on the right side of the headerbar next to the day/night button
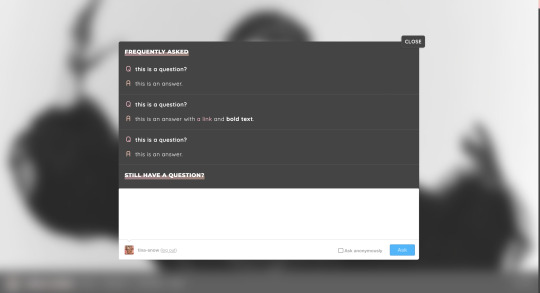
faq popup
the faq menu has your blog's ask box and allows for unlimited questions
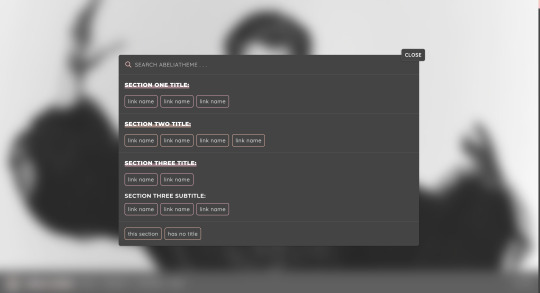
navigate popup
the navigation menu has a search bar and allows for unlimited links with optional section titles & subtitles
sidebars
if you use both sidebars the reblog button will move to the bottom of the post next to the like button, the permalink will move to the more info popup at the top of the post
if you want to move sidebar boxes around please see the customization guide!
links box
the links box has up to 6 links
events box
the events box has up to 2 events each with an optional image, title, date, status, a short description, and up to 2 links
status box
the status box has up to 4 status that can be on or off, and up to 4 updates
members box
the members box will automatically fill with the members of the blog, you can manually edit the members if you want (see the customization guide)
affiliates box
the affiliates box has up to 12 affiliates -more can be added in the code (see the customization guide) and a link to the submit box
info box
the info box has up to 4 stats
general notes
many things will not show up if they're left empty, some examples: if you don't want the updates leave the update 1 field blank, if you don't want the disclaimer leave the disclaimer field blank, etc.
reminders
remember tumblr’s customize panel is buggy, toggle the options on/off before saving
i’m still on a sort of semi-hiatus, i’ll be around for questions but please check my faq, answered asks, etc. before asking - i will not answer repeated questions!
#code hunter#tumblr resources#tumblr themes#tumblr codes#fansite theme#completeresources#allresources#fansite#userbru#userdre#usernik#tuserlucie#useraashna#usercharithra#usermaguire#tsusermels#useralien#abelia#phantom code#phantom theme
165 notes
·
View notes
Note
sorry if this is a dumb question , I’m new to twisted wonderland. I was wondering if you knew what dates classify as early to mid to late [month]? i like sebek’s armor card but it says it’s not coming till late November. Are there specific dates or timeframes i can look forward to?
hello! 💚💚💚 it sounds like you're on Eng and my experience is with JP (so if I'm wrong, somebody please correct me!), but assuming they work similarly -- when they say "late" in the month it's usually closer to the end of the month, like from the 20th or later. vagueness is unfortunately the norm there!
the tricks to get a better idea of when exactly an event will happen is 1) events are listed in the order they'll come, so seeing where it falls in relation to characters' birthday events can tell you that it will happen either before or after a specific date, and 2) check the end date/time of the currently-running event, because most often the next event will start right after, with a short maintenance inbetween (this doesn't count birthday pickups, because they have specific dates they gotta cover so they just run at the same time as other events). there's the occasional exception, but it's usually a safe assumption!
I checked the Eng news and it looks like you'll be getting a joint exam event that'll end on the 25th at 10:59 PM PST, so I'd guess 7.6 and Sebek's armor pickup will start a few hours later once the maintenance is done! fingers crossed that's correct, I am VERY excited for you guys to get this one :D :D :D
#twisted wonderland#joseimuke games are serious business#like over here we got a training camp that ends on the 22nd so i am hanging all my hopes on getting 7.11 then#🤞🤞🤞#also tangential but this is how i discover that eng gets like#actual site updates with announcements of game updates and events in the news section#what on earth#the jp website updates once every million years and it certainly doesn't keep a nice organized record of anything#like the last three updates are one in september to talk about upcoming merch#one in june apologizing for an audio glitch and asking people not to harass the voice actors about it (yikes people)#and one in april inexplicably announcing the main story progress campaign (this may be the only in-game event to be acknowledged on-site)#if you want any info on past events you either gotta dig through the twitter archives (horrible) or go to fansites#props to whoever is running the eng site. that is such a nice resource to have#call me smuckers because i am legit jelly right now
136 notes
·
View notes
Text
Tags Masterlist. Click to find tagged posts.
Updated 31 October 2024.
General tags:
themes - patterns - resources - navigation - sidebar - interactive - header - fansite - contained - fandom - tools - tags - pixels - gif - graphics - dividers - pages - all in one - blinkies - code - colours - html - javascript - no javascript - neocities - templates - tutorial -
Specific tags:
kingdom hearts - seashells - splatoon - summer - steven universe - book - cats - colourful - computer - constellation - cute - eyestrain - facebook - fish - hexagon - horizontal - metal gear solid - music player - particles - pokemon - reddit - simple - social media - space - spongebob - tarot - undertale - water - webcore - writing -
Year of creation:
2013 - 2014 - 2015 - 2016 - 2017 - 2018 - 2019 - 2020 - 2021 - 2022 - 2023 - 2024
Full masterlist page:
More will be added later. Feel free to suggest anything!
#masterlist#themes#sidebar#fandom#dividers#gif#header#resources#patterns#navigation#interactive#fansite#contained#tools#tags#graphics#music player#pages#html#neocities#blinkies#all in one#code#colours#javascript#no javascript#templates#tutorial
39 notes
·
View notes
Text
Fansite Links
This is a collection of links to a variety of sites that cover all things Pern, canon, fanon, or fandom, from RP directories to the Official fansite on Facebook.
The Official Dragonriders of Pern Site – Link (Facebook)
A facebook group created with official permission from Anne McCaffrey.
Pern Wiki – Link
A Meeting of Minds – Link
This used to be the official McCaffrey forum, however there are only three pages still accessible.
The Many Works of Anne McCaffrey – Link
Dragonchoice – Link
Fanlore, Dragonriders of Pern – Link
Sariel's Guide to Pern – Link ('Old' site), Link ('New' site)
Jillian's World of Pern Site – Link
Pern Connect – Link
Pernese Online – Link
Pern Home – Link
The Kitchen Table – Link (Fanlore)
This used to be Anne's Dragonrider of Pern specific forum, but it has long since closed down as has its replacement. I'm linking to the Fanlore page because it was a fandom staple and should be remembered!
Dragonriders of Pern on Abandonware – Link
This includes the Dragon Riders: Chronicles of Pern Ubisoft game (Wikipedia article here), and the Dragonriders of Pern strategy games on Commodore-64/Atari or DOS (Wikipedia article here).
Dragonriders of Pern on Play Classics – Link
A browser port of the 1987 DOS version of the strategy game. Manual can be found on Abandonware here.
11 notes
·
View notes
Text
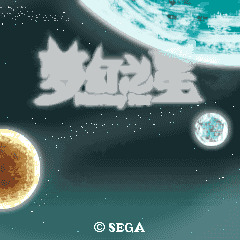


Some graphics from Phantasy Star Deluxe, the remake of the original game for old mobile phones. Because the service it was accessible from closed, the japanese version is probably lost media. I did just find the chinese version though, because piracy preserve stuff when companies don't! Have not tried to emulate it yet because it's past midnight and i should be asleep instead of finding an emulator, but you can easily view all graphic changes by just opening up the file with winrar or a similar tool, which is fun, as the graphics are pretty much all unique.
#phantasy star#someone's gonna have a time at spriters resource i guess#also i guess i just need to keep looking for old ass fansites to find that stuff#because it's pretty clear by now that some people are just sitting on this stuff without a clue how rare it is#phantasy star deluxe#i'll be honest i'm not quite sure this is the official name for this version#but it's how the fansites marked it#and it's useful to differentiate from the og so whatever i guess
13 notes
·
View notes
Text

NEW HEADER TEMPLATES AVAILABLE
Each header will open up exactly like the preview image and comes with the coloring psd, borders, textures, doodles, tutorials, etc (as shown in the individual design) and are all organized in folders to keep the file organized. Just add your images, change the colors to match and you’re done! The fonts and info about the headers are listed in the header notes so you can download them to use.
You can purchase each template by following the links below:
Dua Lipa Header • Laura Harrier Header • Ariana Grande Header
13 notes
·
View notes
Text

Poll Tuesday
I feel like I’m exposing myself a little bit with this bc my introduction to fic is soo random I think, but whatever your answer please tell me the story! I wanna know haha
#was looking for fanart for Taichi x Koushirou of Digimon#get led to a fansite calling “taishirou resource center” that had fanrts and a section called “fanfiction”#the rest is history#Taishirou
18K notes
·
View notes
Text
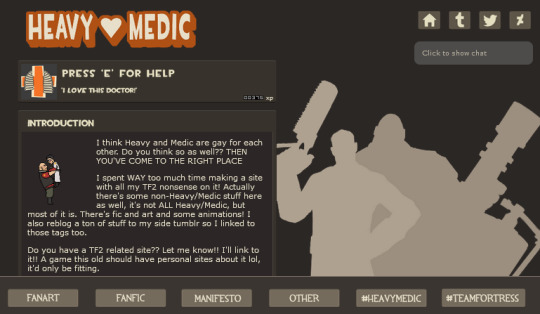
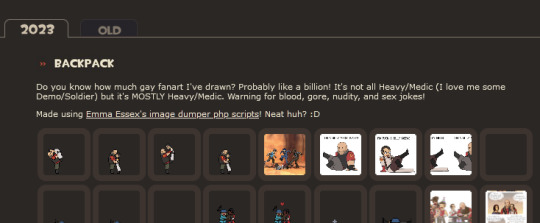
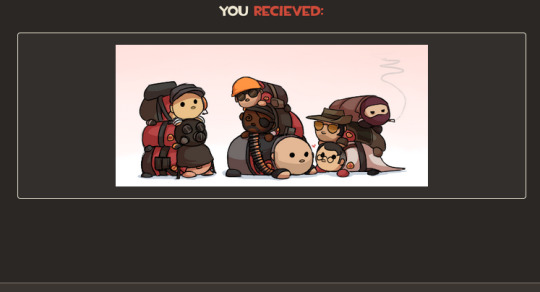
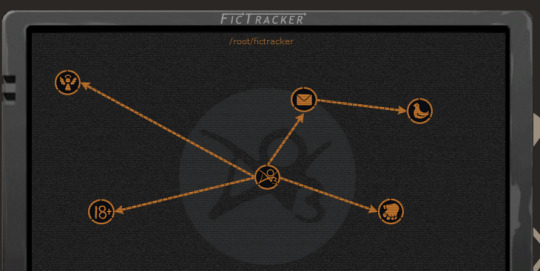
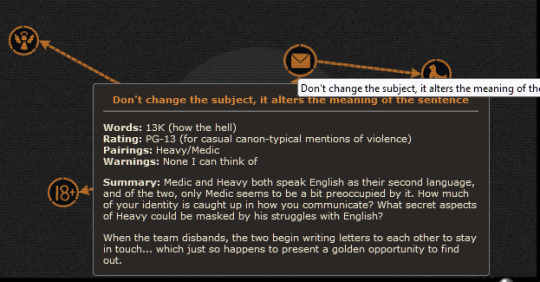
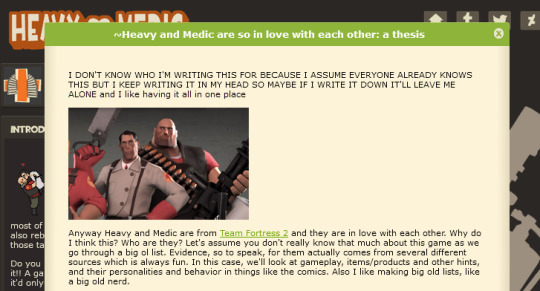
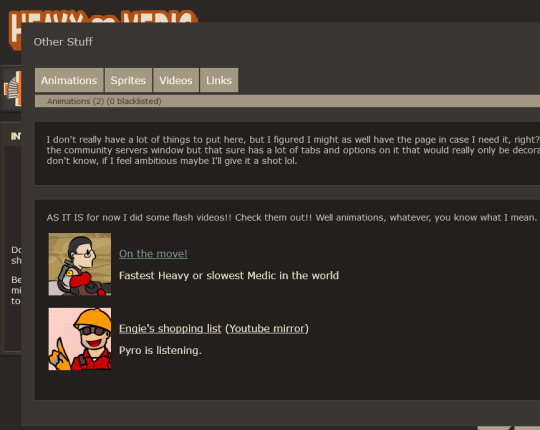
So I spent the last couple days making a HeavyMedic fansite and it is the most ELABORATE SITE I'VE EVER MADE and I'm so unbearably proud of it, it looks SO COOL!! Especially the Fictracker page!! It's even responsive!! You have no idea how long it took to get everything looking right and spacing it and everything. I've never made a site that looks this fancy before! I'M SO PROUD OF IT LOOK AT IT!! LOOK AT IT!!! LOOK AT IIIITTTT plz


Also made some link buttons! Still don't really have an official name for the site as it is but WHATEVER maybe I'll decide on one later. YOU CAN USE THESE TO LINK TO IT FROM YOUR OWN SITE you have your own site right, you should make onneeee (here are some resources if you don't know how) and if it's a TF2 site TELL ME AND I WILL LINK BACK TO IT
[patreon]
#team fortress 2#heavymedic#red oktoberfest#there are some easter eggs on the site too :3#try and find them!!#i just have this open in a tab and keep looking at it and being like man this is so cool#web design can be so tedious and yet so rewarding#have a new appreciation for how slick the tf2 ui is#absolute goldmine for site design#lol comparing this to the huntersmoker site or ghost tutorial that's as barebones as you can get
721 notes
·
View notes
Text
30 Below: resources & AO3 collection
First things first: here's the AO3 collection for all your future fanworks! Yay!
Now, some links to get you started.
🐢Where can I watch due South?
Well, we're all in luck — it's on youtube!
There's also Slings and Arrows and Hard Core Logo, both great—but not only—points to get into Canadian 6 Degrees. You can DM this blog, flownwrong on DW or emotionalrisotto on Discord for a better quality rip of HCL, or something more obscure ;)
🐢Are there transcripts?
Why, yes, there are — wonderful and detailed, on Dreamwidth and AO3. Courtesy of @agentreynard!
🐢Where do I look for history and discovery?
@juniperpomegranate's lists of Livejournal and Dreamwidth DSC6D communities are an endless rabbithole of joy (note that some of them are alive on DW, pop in to see what's up!)
LJC's due South page is just one example of many, many fansites of yore. This one is still up, offers lots to see, and links to many other fansites (see: Wayback Machine)
Fanlore. Linking categories, not just fandom articles, because there's a lot more: due South | Canadian 6 Degrees.
Official site, archived. Honestly, this one is just cute. This is a link to a random snapshot — if it doesn't work, see below.
You'll have to deal with a lot of broken links. Most often, Wayback Machine has your back: paste the link into the search bar and click around on the timeline until you find a working snapshot!
These links are just a few ideas, and mostly concern the online era of dS fandom — please feel free to share your own suggestions.
Otherwise — just pick a link and go from there. Use whatever you find as inspiration. You'll likely see something I didn't and do something I haven't thought of. That's the point. Enjoy!
🐢fest info
🐢themes & prompts
🐢navigation
274 notes
·
View notes
Text

Welcome to JUST PEACHY DESIGNS! a blog dedicated to bringing you mostly psds and templates.
However, I also take commissions for fansite headers / full graphics, as well as various other commissions that are located here.
Mads ( she/her ) | Commissions are OPEN
1 note
·
View note
Photo
We're not personally using this for ourselves, but @cacodile is and wer'e helping them set it up.
This is ABSOLUTLEY a breeze, the header enabled more advanced one takes a little bit getting used to - but in order to do some simple tricks it was easy once I realized I didn't have to use all the sidebar!
It's REALLY simple for simple stuff, and honestly set up was a breeze for them! <3
Please people if you see this post, PLEASE DO go support them, and any other theme creators - HTML isn't easy, and NPF support isn't easy either.
<3

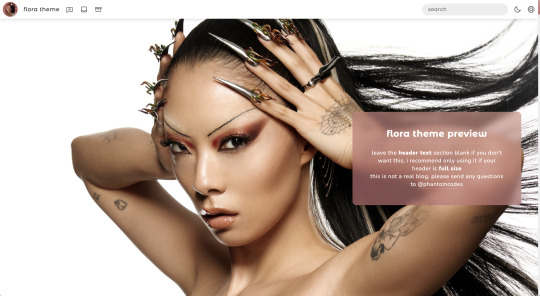
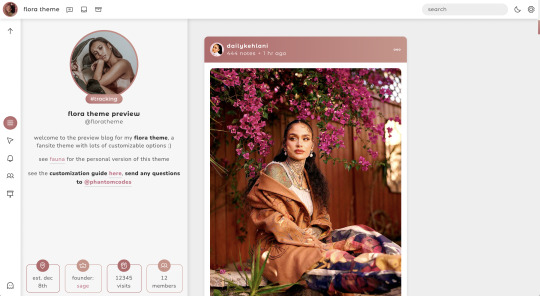
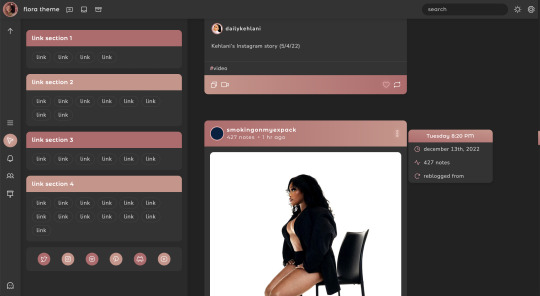
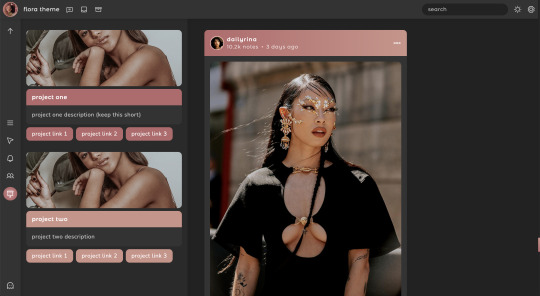
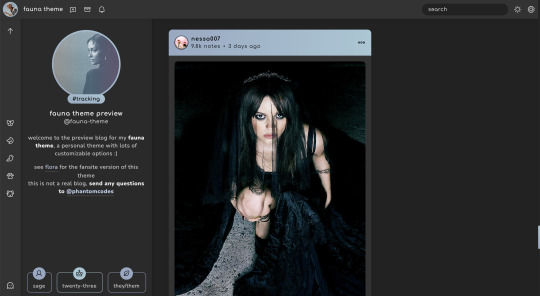
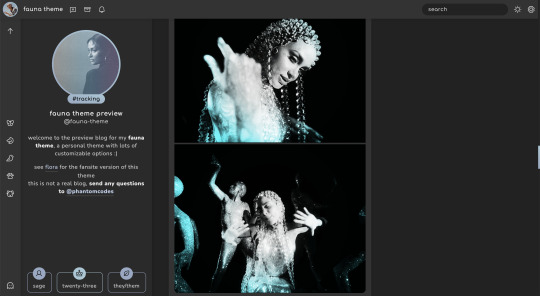

flora & fauna | themes by sage
flora is a header fansite theme ($5) - code: live preview / ver. 2 fauna is the personal version of flora (free) - code: live preview
nothing needs to be changed in the codes, everything can be changed in the customize panel!
features in both (more info below the cut):
headerbar with blog icon, blog title, links, search bar, day/night & tumblr controls buttons
responsive design, scroll to top button, uploadable sidebar image
3 border radius (corners) options, optional glow effect, optional tags on click
customizable: description, colors & gradient, body & title fonts, font size, & blog title
terms:
reblog if using
do not touch the credit
view all terms
credits listed in the code / credits page
please consider supporting me ♡
Keep reading
#themehunter#tumblr resources#completeresources#allresources#tumblr codes#codehunters#tumblr themes#themes#phantom theme#reblog#capsekai reblog#fansite theme#tumblr theme#flora#fauna#theme hunter#rp resources#psd#cocloring psd#carrd resources#rentry resources#icon#rp icons#capsekai
885 notes
·
View notes
Text
Black History Month at FFL: Highlighting Black Feedist Content Creators
As we round out the end of Black History Month, us here at FFL thought it was important to highlight our fellow feedist community members in the present! These Black feedist content creators put in the work year round to provide amazing feedist content. Models and Sex Workers are a huge part of the feedist community. They are pillars – providing the community with unique erotic content that could otherwise be hard to find as people with non-normative sexualities and desires, as well as providing ample representation of the diverse array of people who have and love this kink. Not only is this work needed, but it can be incredibly healing and validating to find erotic content highlighting feedism, especially if it is made by creators that look like you!
As the world has grown increasingly reactionary and puritanical towards porn, sex work, and virtual erotic content, censorship has grown alarmingly commonplace. Many workers find that it is a struggle to be visible on platforms and social media sites, and this struggle only heightens when you have to deal with antiblack and fatphobic algorithms and moderators. While FFL cannot remedy the shifting tides of internet censorship, the least we can do is create a resource that makes it easier for people to find and support our working members of the feedist community.
After reaching out to Black content creators, a handful agreed to be highlighted on FFL’s website and social media. Featured below are five feedist models alongside links to their clip and fansites, linktrees to find all their content, wishlists, as well as preferred payment methods! If you are looking for feedist content, check out the wide variety offered in these model’s catalogs. Or if you’re feeling generous, sending a tip through their payment methods is a great way to show your appreciation for the work they do for their community. And as always, Sex Work is Real Work, and Black History Month should be celebrated all year long! So feel free to come back to this post as a reference for the next time you are on the hunt for more feedisty and fat admiration content!
Big Belly Judy

Cashapp: https://cash.app/$chrissyjudy
Linktree: https://linktr.ee/bigbellyjudy
GreedyPiggy
Cashapp: https://cash.app/$piggyeatsworld
Linktree: https://linktr.ee/biggreedyp
Lavendarlove-96
Cashapp: https://cash.app/$lavlove96
Curvage: https://curvage.org/forum/index.php?/profile/240862-lavendarlove-96/
Tumblr: https://www.tumblr.com/lavendarlove-96
LilithIsFat/Lilith Void
Cashapp: https://cash.app/$abigbrat
Wishlist: https://www.wishtender.com/mothervoid
Manyvids: https://www.manyvids.com/Profile/1002293935/LilithIsFat/Store/Videos/
Fansly: https://fans.ly/LilithIsFat
LoyalFans: https://www.loyalfans.com/mothervoid
Onlyfans: http://www.onlyfans.com/lilithisfat
Clips4Sale: https://www.clips4sale.com/studio/139989
Sextpanther: http://www.sextpanther.com/lilithisfat
APClips: http://www.apclips.com/lilithisfat
Pornhub: https://www.pornhub.com/model/lilithisfat
Mz Fluff

LoyalFans: https://www.loyalfans.com/mzfluffssbbw
Email/Paypal: [email protected]
Instagram: https://www.instagram.com/mzfluff123
#links in posts tend to get buried under tumblrs algo#so be sure to reblog!#text#ffl#ethical feedism#bhm#black history month#ffa#fat admirer#make me fatter#belly kink#feedists for fat liberation
213 notes
·
View notes
Text
If you're familiar with the South Park Archives, pretty much the only SP fansite still online - there's over eighteen years of history there, pages and renders for tons of characters and locations, thousands of screenshots, a pretty dedicated staff, transcripts of every episode, and so much more. When I made my start writing shitty fanfics, it was a super useful resource, and that was a small chunk of what it is today.
FANDOM has today unveiled a new Offensive Terms Policy which continues a trend in the last few years been suggested in events like Community Connect, where it has previously been suggested wikis avoid references to canonical sex. The avoidance of slurs is something I would be super supportive of generally -- we don't need to see that kind of stuff on Wookiepedia or like, a wiki for Bluey. It'll keep people from vandalizing children's wikis with adult content for kicks. I am generally in favor of content filtering, especially for family-friendly-oriented content.
...but, this is going to cause a lot of problems for the South Park Archives, a show with a major character who frequently uses slurs and is firmly anti-censorship. You don't need to be an editor to think about that. If you're a fan, you know what kind of show we're talking about.
This is a show with episodes called "The Biggest Douche in the Universe", "Major Boobage", "Reverse Cowgirl" and "Titties and Dragons". There are songs like "Fuck the Police" and "Jacking it in San Diego". There is a character called 'Retarded Fish'. The names of these songs and episodes, bear in mind, are legally registered copyrights, not our choices -- how do you change that? Move an article to Episode 1601? What about "Fuck the Police", which isn't even a South Park original song?
You can clean up a synopsis, and formalize language on a character page, I've done both of those things when I was an editor, but you can't undo all of this. How do you?
That's not even getting into the transcripts pages, which are intended to be 100% accurate to the actual dialogue, continuing the tradition from the good ol' South Park Scriptorium...

Within the day of the policy change, FANDOM has already started to make changes to remove slurs from the transcript pages that are unable to be modified as it is directly related to global policy. I don't know that the staff were communicated with about this personally either, but I'm not in the know like I used to be.
No doubt some of this move is prompted by advertisers - FANDOM previously cited advertiser feedback as a motivation for inserting all sorts of videos on top of wiki pages (similar to their later push to include AI-generated content) and understandably many advertisers may not want their brand name mere inches from a discussion of cartoon eight-year-olds using slurs. I mean, shoot, I wouldn't if I were in charge of a major company, and I get someone needs to keep the lights on, but...
I don't know man, it's a shitty position to be in. It's a well-intended policy that I'd support in almost any other context but literally this narrow exception, and I definitely hate the thought of looking like I'd be defending use of offensive terms, but like, how do you cover "everything" about South Park, an explicitly adult show that is so firmly anti-censorship, that builds entire episodes around these kinds of jokes, or even analyze it from a critical perspective, in such a family-friendly, sanitized way, without betraying its spirit and creative intent?
You can imagine how many staff members there are probably scratching their heads or bashing them into lamp posts, trying to figure out what to do or how to move forward after this. They could apply for an exception, but would it even be granted? What would the alternative be? Are restrictions like this worth it or do they render the whole thing moot? How much responsibility lies with FANDOM? Are advertisers forcing the whole internet down this road? There are so many questions in the air on this. I certainly don't have answers.
60 notes
·
View notes
Text
GUIA COMPLETO DE COMO EDITAR FOTOS EM ALTA QUALIDADE (HQ)!
oiê, bem vindos(as)! à pedidos, estou trazendo um tutorial bem abrangente sobre como editar fotos no geral para icons, headers, etc., em alta qualidade. neste guia/tutorial trarei dicas, truques e informações gerais sobre o que é preciso para editar em hq. lembrando que o conteúdo deste guia é sobre como eu edito, a maneira que funciona comigo e meu progresso e aprendizado ao longo de quase 12 anos editando icons, ou seja, o que contém neste guia pode — e deve — ser adaptado à sua maneira e ao software de sua preferência. aproveitem e se divirtam!
nota: este tutorial está bem longo, então, se possível, veja este guia pelo pc/notebook!
O QUE VOCÊ VAI ENCONTRAR NESTE GUIA
softwares necessários com links para download;
onde e como baixar as fotos para as edits;
métodos de edição e passo a passo;
como melhorar a qualidade de uma foto;
como salvar a foto corretamente para postar;
dicas de actions e outros resources.
clique em “continuar lendo” para ver o tutorial.
1. SOFTWARE
photoshop
eu recomendo fortemente o uso do photoshop cc na versão mais recente, ou outra versão com camera raw ou filtros neurais suportada pelo seu pc ou notebook.
você também pode usar o photopea como alternativa (eu particularmente prefiro o photoshop pois acho que as edits ficam com mais qualidade). se você preferir o photopea, algumas dicas desse guia poderão não funcionar devido à falta de algumas funcionalidades que o photopea não oferece (ex: camera raw, galeria de filtros, filtros neurais e outros).
eu uso a última versão do photoshop (atualmente, a versão 25.5.1) e uso a versão paga (obrigada adobe pelo desconto de estudante!!!!!), mas vou deixar alguns links para você baixar o photoshop gratuitamente caso você não seja estudante e/ou não tenha condições para assinar um plano.
atualmente eu uso um mac mini 2014 para editar, mas sempre usei windows, então, as dicas e os links valem para os dois sistemas operacionais.
links
macos: 1, 2 & 3.
windows: 1, 2, 3 & 4.
2. BAIXANDO AS FOTOS
galerias de fotos
muitos artistas têm fansites com galerias de fotos e você pode achar facilmente digitando no google: “nome da pessoa + gallery”.
o artista que eu quero não tem galeria própria e agora? tranquilo, ainda temos galerias de fotos de famosos variados como hqdiesel, hqsource, hq-pictures e até mesmo o theplace.
em último caso você pode usar o gettyimages e usar um removedor de marca d’água ou um site como o gettyimages downloader.
instagram
para artistas estrangeiros que tenham apenas instagram e/ou não tenham fotos em galerias de imagens, eu recomendo o instagram pessoal da pessoa.
você poderá fazer o download das fotos com extensões de navegadores como o image downloader for instagram (para firefox e google chrome), ou sites como o saveig, o snapinsta ou o igdownloader.
eu recomendo baixar pela extensão do navegador, pois ela baixa a foto direto do site do instagram no computador, diferente dos sites que você precisará ir foto por foto, copiar o link e colar no site para fazer o download.
mas, caso a extensão esteja indisponível, com algum erro ou pare de funcionar, o site é uma excelente alternativa (só precisa ter mais paciência).
nos sites para baixar fotos do instagram, geralmente eles dão a opção para você escolher o tamanho da foto. você deve sempre selecionar a resolução maior da foto (acima de 1000px é o melhor).
pinterest
em casos extremos de artistas low profile, sem instagram, sem aparições públicas, sem galerias de fotos, nadica de nada, eu recorro ao pinterest.
porém, é preciso ter muito cuidado ao fazer download de fotos do pinterest, porque são muitas fotos repetidas e muitas com baixíssima resolução e qualidade.
se você for baixar fotos do pinterest, escolha a foto com maior resolução (imagens maiores que 500px já são ok para editar icons), e depois de baixar a foto, eu recomendo fazer um tratamento na foto para melhorar a qualidade dela, como vou ensinar.
3. EDITANDO
3.1 importando a foto no photoshop
apertando ctrl+o ou cmd+o uma guia vai abrir no programa, onde você vai até a pasta onde a foto foi salva. selecione a foto e clique duas vezes nela para abrir.
3.2 cortando a foto nas dimensões desejadas
muitos tutoriais de edições de icons sugerem que você copie a imagem e cole ela em um documento novo já do tamanho da sua edit, mas eu não recomendo essa opção, pois ao redimensionar a foto com a ferramenta de transformar (ctrl+t), ela dá poucas opções para manter a qualidade da foto e se você não souber o que cada opção faz, poderá perder a qualidade da imagem. então, eu sempre faço o recorte na própria foto para não alterar muito a qualidade dela.
aperte a letra c no teclado para abrir o atalho da ferramenta de corte. (se o seu photoshop for alguma versão do cc, eu recomendo que você marque a opção para usar o modo clássico de corte, assim fica mais fácil e você tem um controle maior sobre a ferramenta!). para fazer essa alteração é simples, vá no ícone de engrenagem, clique e marque a opção “usar modo clássico”.
para fazer icons, você deverá cortá-lo usado dimensões quadradas, ou seja, 1x1, e para headers 15x5. você pode mudar as dimensões na caixinha da ferramenta de corte.
3.3 redimensionando a foto
nessa parte você precisará prestar atenção, pois ao redimensionar a foto, você poderá perder ou ganhar um pouco mais de qualidade na foto, e para isso você usará uma opção chamada reamostrar (ou resample se seu photoshop estiver em inglês). deixe a opção marcada para usar as definições.

3.4 explicando as definições do reamostrar e qual definição usar de acordo com o resultado que você quer
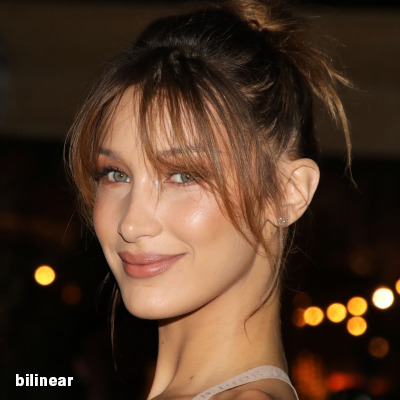
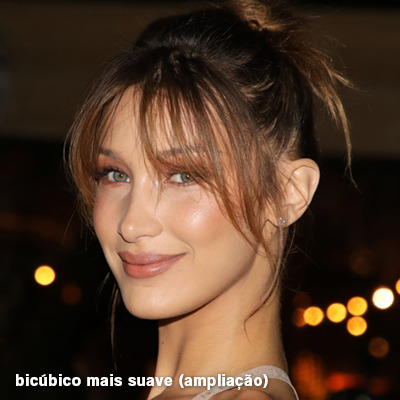

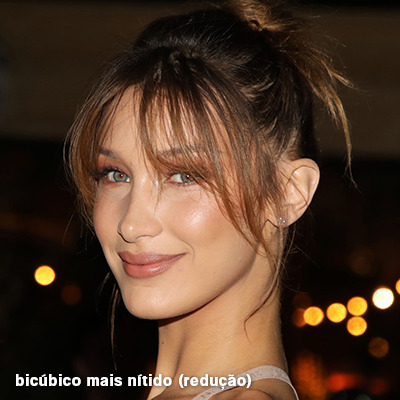
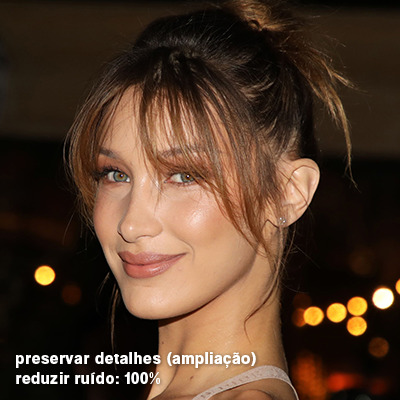
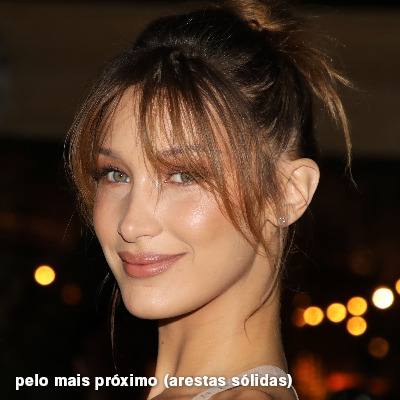
bilinear: a melhor opção para redimensionar gifs, mas para fotos não é tão bom pois dependendo da foto algumas partes ficam nítidas, outras mais suaves e se você for aplicar action de nitidez, pode ficar com um aspecto de “craquelado” com as bordas granuladas, o que eu pessoalmente acho que fica um pouco estranho.
bicúbico mais suave (ampliação): como o nome já diz, ele deixa a foto mais suave, ou seja, os pixels “craquelados” e granulados da foto ficarão mais suaves. é uma ótima opção tanto se você for aplicar actions de nitidez ou actions mais desfocadas e mais suaves.
bicúbico (gradientes suaves): pode parecer a mesma coisa do bicúbico mais suave, mas esta opção além de suavizar a imagem, cria um “desfoque iluminado” nas transições das cores da foto. é a melhor opção para fotos sem muita qualidade e principalmente se você for usar actions suaves e desfocadas, sem muita nitidez.
bicúbico mais nítido (redução): acentua os pixels e as arestas nítidas da foto, ou seja, essa definição redimensiona a imagem mas preserva a nitidez da foto. se você usa actions de nitidez que não tem desfoque nas configurações, essa é a melhor opção de reamostra. (mas cuidado, se sua imagem ficar muito nítida com essa definição, você precisará usar outra opção. caso contrário, quando você aplicar a action, a edit poderá ficar muito exagerada e/ou com aspecto áspero.)
preservar detalhes (ampliação) com redução de ruído: esse em especial é ótimo para quando você precisar redimensionar uma foto para deixá-la maior sem distorcer tanto a imagem. você pode ajustar a redução de ruído para deixar a foto mais suave, sem perder muita qualidade. (obs.: essa opção não deve ser usada para redimensionar imagens muito pequenas, por exemplo de 200x200 para 400x400, ou a imagem vai ficar muito distorcida. ela deve ser usada quando a diferença de pixels não é muito grande, por exemplo, você cortou a foto e ela ficou no tamanho 370x370, aí sim você pode redimensionar para maior sem perder muito da qualidade. então você pode ir ajustando a qualidade com a porcentagem da redução de ruído).
pelo mais próximo (arestas sólidas): essa é uma opção traiçoeira, pois não fica bem em quase nenhuma imagem (a menos que seja um pixel art). essa definição redimensiona a imagem e mantém os pixels nítidos, ou seja, a foto fica menor mas tudo nela que tem aspereza vai prevalecer. é muito usada para redimensionar pixel art, pois preserva as bordas ásperas. pode ocorrer de ficar boa em uma foto aleatória mas não será possível aplicar action, ou a imagem ficará exagerada.
3.5 aplicando a nitidez depois de redimensionar
depois de escolher a foto, baixar, redimensionar de acordo com o estilo da action da sua escolha, está na hora de aplicar.
eu fiz duas versões para mostrar como fica com cada tipo de action:
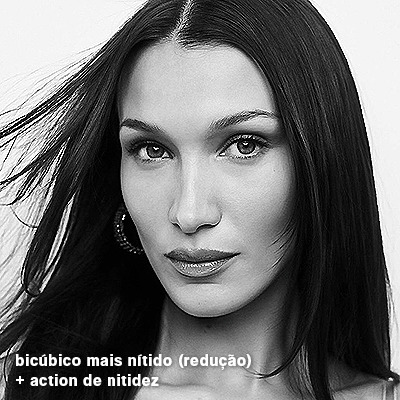
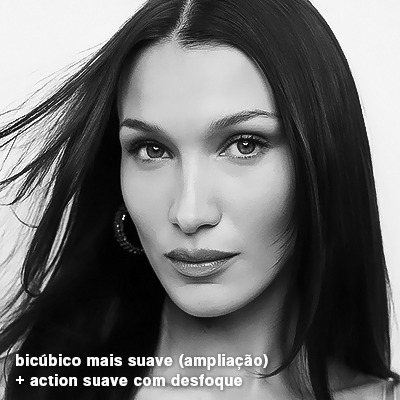
assim, os dois icons tem uma alta qualidade usando actions diferentes, graças a remostragem ideal para cada tipo de action :)
4. TRATAMENTO DE IMAGEM PARA MELHORAR A QUALIDADE
nesta parte, é muito importante que você tenha baixado uma versão do photoshop com neural filters e/ou com o camera raw, mas caso você não tenha, tudo bem também, vou ensinar como fazer uma melhoria na foto de três jeitos: com camera raw, com neural filters e com desfoques. a melhor forma vai depender de quão ruim está a qualidade da sua foto. em geral, apenas fazendo ajustes no camera raw você já tem um ótimo resultado na maioria das fotos.
camera raw
se seu photoshop tem o filtro do camera raw, ele vai estar em filtro > filtro do camera raw...
tudo que iremos fazer será na aba de “detalhe”, ali você deve dar mais atenção ao ajuste de redução de ruído, pois é ele que vai remover o ruído da imagem e melhorar a qualidade dela.
vá mexendo nas configurações de redução de ruído até que a foto fique mais suave. ajuste também o detalhe e o contraste da redução de ruído.
essa parte será mais no olhômetro mesmo, pois as configurações vão variar de foto para foto, mas eu recomendo muito você mexer também na nitidez para não deixar a foto tão desfocada, mas nada muito intenso para não interferir na action que você irá usar.
eu mexo também na redução de ruído de cores, porque dependendo da foto, algumas cores estarão saturadas ou com muito ruído. só cuidado para não colocar um número muito alto, pois esse ajuste pode tirar a saturação da sua foto e deixá-la apagada.
enfim, aqui está uma comparação da foto original com o tratamento feito com o filtro do camera raw e depois já com a action de nitidez aplicada:
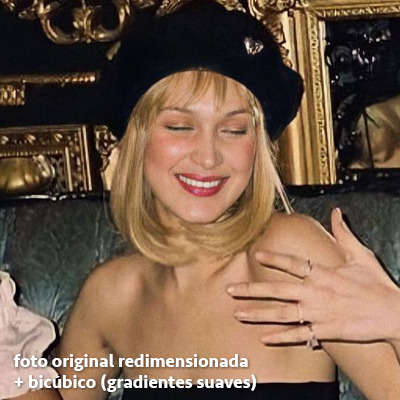
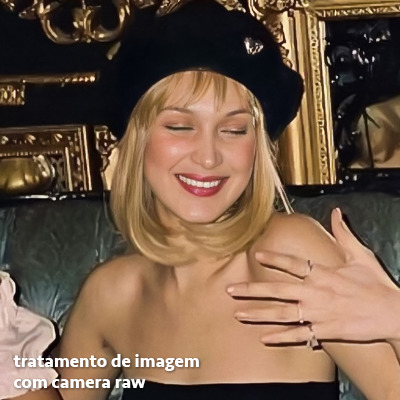
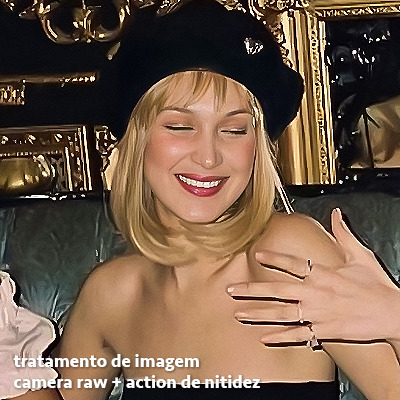
e essas foram as configurações que usei nessa foto em específico:
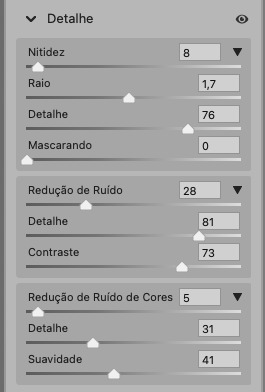
como eu disse antes, as configurações irão variar de foto para foto, a depender da qualidade de cada uma e de quão ruim a foto está, mas com essa configuração básica, você já vai conseguir melhorar algumas fotos.
neural filters
se a versão do seu photoshop vem com neural filters (ou filtros neurais), ele estará em filtro > neural filters...
irá abrir uma janela com vários filtros mas o que a gente irá usar vai estar em “restauração”, com o nome “remover artefatos jpeg”. se precisar, faça o download do filtro.
eu recomendo usar a intensidade sempre média, a menos que a foto esteja muito ruim, aí você usa a intensidade alta. mas em geral, a intensidade média ou baixa já dá conta do recado.
a saída deve sempre estar na camada atual, ou seja, na camada da foto selecionada.
assim:
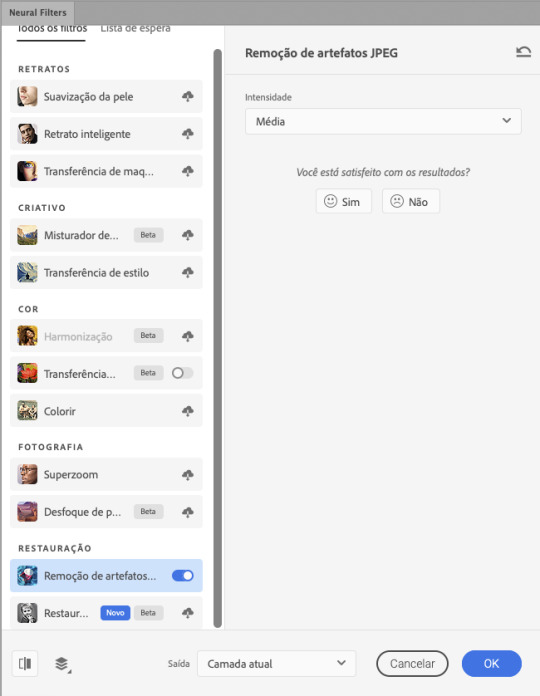
e aqui está uma comparação da foto original com o tratamento feito com o neural filter e depois já com a action suave com desfoque aplicada:
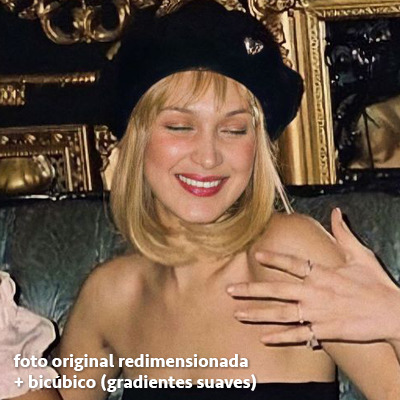
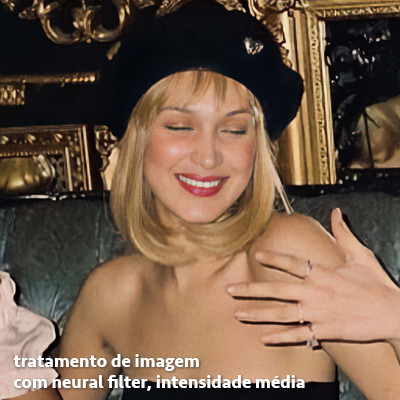
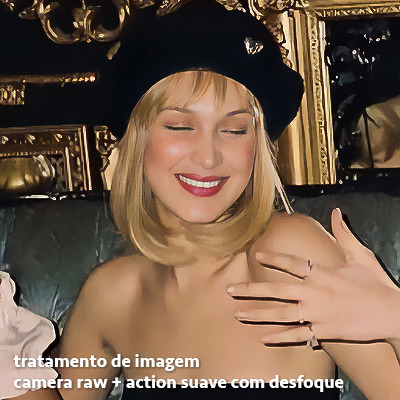
a opção do neural filter é uma ótima alternativa ao camera raw, o único contra é que ele deixa a foto com uma textura áspera, e quando você usa uma action de nitidez eles ficam muito visíveis e acaba não ficando muito legal.
porém, um bom jeito de contornar isso é adicionando ruído na foto. eu uso o efeito de granulação do camera raw para adicionar ruído no icon (você também pode adicionar o ruído em filtro > ruído > adicionar ruído..., mas eu prefiro o camera raw pois ele dá mais opções para ajustar o granulado do jeito que eu preferir).
no primeiro icon abaixo, dá para perceber a textura áspera que o neural filter deixa depois de melhorar a foto e adicionar nitidez; já no segundo icon eu mostro como eu adicionei o ruído e contornei esse defeito.
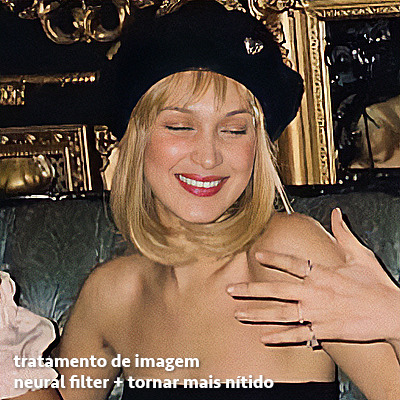
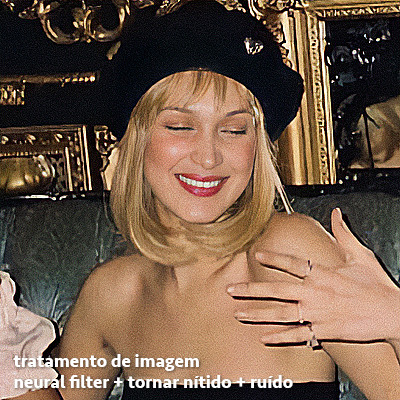
as configurações de ruído que usei no camera raw foi 12 de granulado, 35 de tamanho e 20 de aspereza.
lembrando que, se você for usar uma action de desfoque e/ou remoção de ruído, não será necessário adicionar a granulação, pois a própria action já vai suavizar a textura do neural filter (a menos que você queira adicionar o ruído, claro).
redução de ruído + desfoque
caso a sua versão do photoshop não tenha nenhuma das opções de camera raw ou neural filter, caso você use um photoshop mais antigo, photoshop portable ou prefira usar o photopea, essas alternativas podem ser úteis.
mais uma vez, irei me basear no olhômetro, de acordo com a foto e irei ajustando as configurações de acordo com o que eu quero e acho necessário.
vamos começar com a redução de ruído! ele está em filtro > ruído > reduzir ruído...
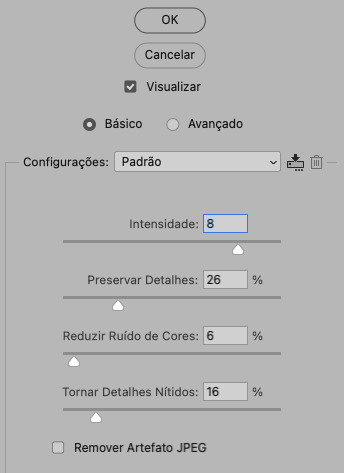
na janela de redução de ruídos você verá alguns ajustes que são: intensidade, preservar detalhes, reduzir ruído de cores e tornar detalhes nítidos e vou explicar cada um para que você possa saber ajustar eles de acordo com sua foto:
intensidade: o número de 1 a 10 irá definir a intensidade da luminescência, a intensidade do filtro e o quanto da imagem você quer preservar ou extinguir, sendo 1 o mínimo da intensidade do filtro e 10 o máximo;
preservar detalhes: o número digitado irá definir a porcentagem de detalhes a serem preservados. quanto maior o número, maiores serão os detalhes mantidos na foto, como ruídos, manchas e outras aberrações da foto;
reduzir ruído de cores: o número digitado irá definir a intensidade e reduzir o ruído cromático, ou seja, vai reduzir as aberrações cromáticas, como por exemplo, fotos que distorcem as cores. preste atenção na porcentagem inserida, pois quanto maior o número, menos saturação sua foto terá e poderá ficar com aspecto de foto envelhecida;
tornar detalhes nítidos: o número digitado vai definir a porcentagem de nitidez para restaurar pequenos detalhes da foto. quanto maior a porcentagem, maior vai ser a intensidade dos detalhes da foto. preste atenção na porcentagem inserida, pois se a intensidade da nitidez for muito alto, vai afetar a sua action, seja ela de nitidez ou de desfoque.
sendo assim, para a foto usada eu fiz estes ajustes:
obs.: se você for um usuário mais avançado do photoshop, poderá explorar a opção avançado, que possui as configurações básicas para melhorar a foto e também as configurações para remover ruído das cores primárias (vermelho, amarelo e azul) individualmente. mas, mesmo se você não for um usuário expert, eu recomendo você dar uma olhada nessa opção e explorá-la, mexendo nas configurações e ir ajustando e aprendendo, pois o resultado poderá ficar ainda melhor nos ajustes avançados.
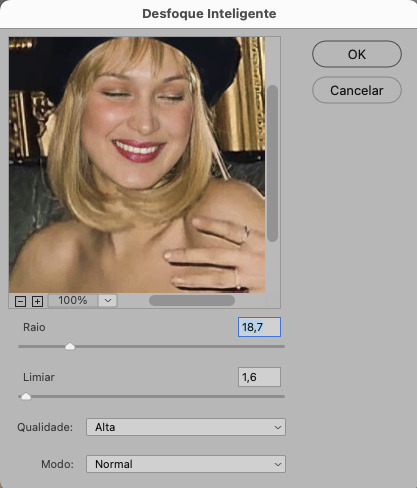
aplicado a redução de ruído, vamos partir para o desfoque! eu estarei usando o desfoque inteligente antes do desfoque de caixa. você vai achá-lo em filtro > desfoque > desfoque inteligente...
na janela que abrirá, você verá os ajustes: raio, limiar, qualidade e modo. vou explicar eles:
raio: vai determinar o tamanho da área que será considerada para o desfoque. quanto maior o número, mais detalhe serão preservados;
limiar: vai determinar a diferença dos pixels entre si antes de serem alterados pelo desfoque.quanto maior o número, maior será a área em que o desfoque será aplicado;
qualidade: vai determinar a qualidade e intensidade do desfoque. ao escolher a opção mais alta, mais partes da foto o desfoque atingirá;
modo: vai determinar o traçado das linhas de bordas que o filtro identificar. o modo normal aqui é o ideal, pois os outros modos “somente arestas” e “sobrepor arestas” irão identificar somente as bordas da imagem.
sendo assim, esses foram os ajustes:
após o desfoque inteligente, partiremos para o desfoque de caixa! ele está em filtro > desfoque > desfoque de caixa...
(você também poderá usar o desfoque gaussiano a depender da foto, mas para esta em questão, o desfoque de caixa funcionou perfeitamente)
a intensidade do desfoque de caixa, assim como do desfoque gaussiano, é medida em pixels e o mínimo é 1 pixel, e para icons é uma intensidade forte, então eu coloco o número mínimo (1, no caso) e depois de clicar em OK e aplicar o desfoque, vou em editar > atenuar desfoque de caixa... e ajusto a porcentagem de acordo com a foto. nessa foto deixei a porcentagem em 33% e ficou ótimo.
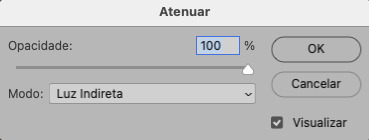
no entanto, infelizmente, por não ser o melhor método para melhorar a qualidade de uma imagem, ela ficará um pouco desfocada demais. mas podemos contornar isso usando o filtro alta frequência para devolver um pouco da nitidez e detalhes na foto. você encontrará esse filtro em filtro > outros > alta frequência...
o filtro de alta frequência, assim como os desfoques, é medido através de pixels e quanto maior o número, mais detalhes passarão despercebidos, ou seja, menos detalhes e menos nitidez sua foto terá. eu recomendo em torno de 2px se você quiser mais detalhes e em torno de 5px se você quer mais suavidade.
a primeira vista esse filtro parecerá estranho e distorcido, mas dará tudo certo, você só precisará mudar o modo de mesclagem. para isso vá em editar > atenuar alta frequência e mudar o modo de mesclagem para “sobrepor” ou “luz indireta” se você quiser que fique mais suave. se preferir, poderá também ajustar a opacidade para os detalhes ficarem mais ou menos intensos.
assim:
assim fica o resultado sem o filtro de alta frequência e com o filtro:
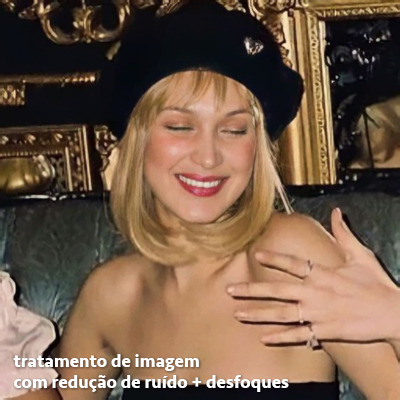
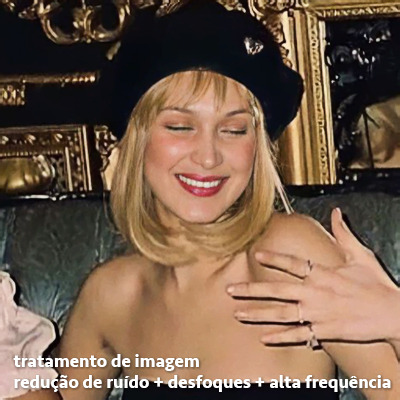
sendo assim, fica a seu critério usar o filtro ou não.
aqui está a comparação das fotos com o tratamento de redução de ruído + desfoque com e sem o uso das duas actions:

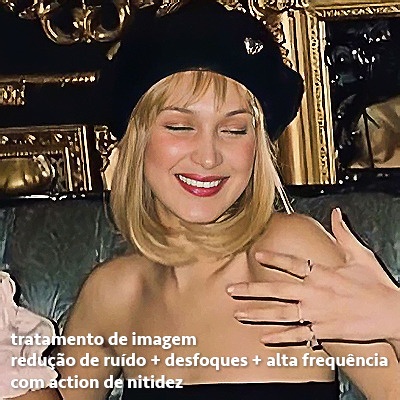
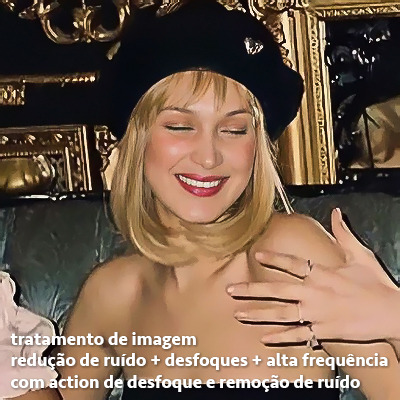
5. SALVANDO A EDIÇÃO
e chegou a melhor parte: salvar a edição para postar!
seja a edição um icon, uma header, ou qualquer outro gráfico estático (edições não animadas), a melhor opção é sempre, sempre, SEMPRE, salvar no formato PNG!
o formato jpg ou jpeg não preserva a qualidade original como o formato png preserva. então, sempre escolha esse formato ao salvar suas edições estáticas!
a melhor forma de salvar uma edição em alta qualidade é exportando ela. sendo assim, vá em arquivo > exportar > exportar como...
em “configuração de arquivo”, selecione o formato PNG e desmarque a opção “transparência” se sua foto não é uma imagem com fundo transparente; em “tamanho da imagem” deixe como a altura, a largura e a escola como estão, apenas mude a opção em “criar nova amostra” para BICÚBICO AUTOMÁTICO; e em “espaço da cor” marque a opção CONVERTER PARA SRGB, porque assim, independente da calibração do seu monitor, a foto ficará com as cores originais e não sofrerá alteração.
assim:
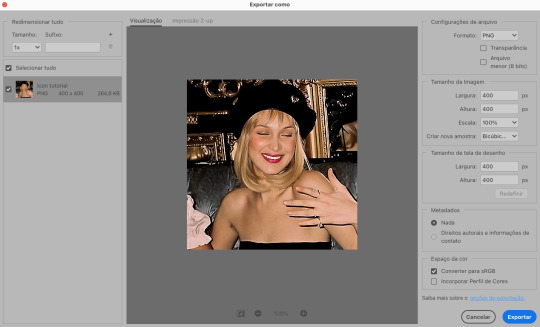
no entanto, se você tiver um pc ou notebook lento, ou apenas não tiver paciência para salvar sua edit em exportar, você pode salvar no modo normal, indo em arquivo > salvar como... OU arquivo > salvar uma cópia..., no entanto, se você for usar essa opção, não esqueça de marcar a caixinha para “incorporar o perfil de cores srbg”, essa opção geralmente fica na parte de baixo da janela que abre quando você vai salvar a edição.
6. ACTIONS & RESOURCES
para facilitar pra vocês, todos as configurações de filtros usados neste guia, estarão disponíveis para download em uma pasta de action. para fazer o download é só clicar aqui: ★. já a dupla de actions usadas (a de nitidez & a de desfoque suave) estarão disponíveis para download na lista de dicas abaixo.
dicas de actions de nitidez – premium & gratuitas (free)
lovie potion by @loviestudio [premium]
action #26 by @harupsds [premium]
action #25 by @harupsds [free]
01 action by @harupsds [free]
cherrie by @loviestudio [free]
action #11 by @miniepsds [premium]
face action by @miniepsds [premium]
crispy by @nebulies [free]
scarlett by @l-agallerrie [free]
eight action by @peachcoloring [premium]
bubblegum by @hisources [free]
kendall by @hisources [premium]
hekate by @hisources [premium]
sharpen by @l-agallerrie [free]
#01 action by @buntterflies [free]
dicas de actions “suaves” – premium & gratuitas (free)
teddy bear by @loviestudio [free]
action ten by @peachcoloring [premium]
caelestis by @miniepsds [premium]
fleuriste by @hisources [free]
angel by @loviestudio [free]
action #13 by @harupsds [premium]
action #12 by @harupsds [premium]
wild action by @hisources [free]
outras actions – premium & gratuitas (free)
denoise action effect — remove o ruído das fotos sem perder muita qualidade by @loviestudio [premium]
photopea quality action — action para melhorar a qualidade da foto no photopea by @loviestudio [free]
exclusive hq actions — um conjunto com as actions que foram usadas neste tutorial by @girasois, @loviestudio [free]
denoise and sharpen actions — conjunto de actions para melhorar a qualidade da foto automativamente by heavnsent
7. BÔNUS: DICAS EXTRAS
a adobe cc learn tem muitos tutoriais que você pode dar uma olhada e aprender muito mais sobre o photoshop e outros programas da adobe!
o youtube é outra fonte incrível para você aprender edição no photoshop, lá você encontra tutorial para quase tudo de edição de fotos e muito mais! se você entende inglês, eu recomendo muito os canais piximperfect e brendan williams tutorials.
para fonte de inspirações, o tumblr é o lugar certo! se jogue nas tags para se inspirar e nos blogs de photoshop para ver muito mais tutoriais e muito mais resources.
o blog @looksgreat infelizmente não é mais atualizado, mas você ainda pode encontrar muitos tutoriais sobre quase tudo de edição, e o melhor, todos os tutoriais são em português!!
ainda recomendo outros tumblr brasileiros de resources e tutoriais: @miniepsds, @harupsds, @peachcoloring, @gmfioart, @colour-source, @l-agallerrie, @wasirauhlpsds, @hisources, @opulenceps, @sunshinepsds, e @loviestudio; e no deviantart: jungrainsoul, rockjealous, heavnsent, aureangels e rohdossantos.
8. CRÉDITOS E INFORMAÇÕES
crédito colorings
off hearts + whimsy by @miniepsds ♡
informações
antes de tudo eu gostaria de pedir desculpas pelo tamanho deste guia, mas eu quis abranger o máximo de dicas possíveis para vocês e deixar o tutorial super completinho.
em segundo lugar eu gostaria de agradecer todo o carinho de vocês, isso me motiva muito a continuar. obrigada, de coração!
enfim, é isso! minha ask estará sempre aberta para dúvidas, sugestões, pedidos e mensagens fofas (sempre com educação e respeito, claro)!
#tutorial#photoshop tutorial#tutoriais#tutorials#resources#hq tutorial#tips#useful#ptbr#adobe photoshop#photopea tutorial#tutorial tips#dicas#dicas de edição#dicas de actions#guia completo#guia#guia de edição#guia de edits#edits tutorial#edit tag#masterpost#long post#editing tips#icon tutorial#header tutorial#hq edits
144 notes
·
View notes
Text
so i've been coding a website
home of: the dervampireprince fanart museum, prince's art gallery, a masterlist of resources for making websites and list of web communities, and more!
[18+, minors dni (this blog is 18+ and the art gallery and art museum pages on my site have some 18+ only artworks)]
littlevampire . neocities . org (clickable link in pinned post labelled 'website')
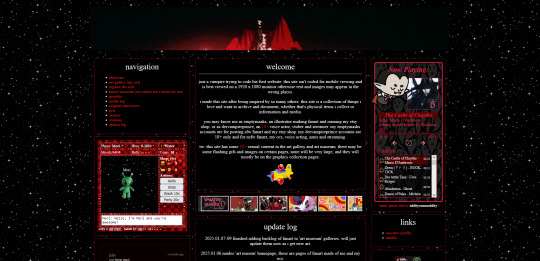
if you don't follow me on twitch or aren't in my discord, you might not know i've been coding my own website via neocities since june 2024. it's been a big labour of love, the only coding i'd done before is a little html to customize old tumblr themes, so i've learnt a lot and i've been having so much fun. i do link to it on my carrds but not everyone will know that the icon of a little cat with a wrench and paintbrush is the neocities logo, or even what neocities is.
neocities is a free website builder, but not like squarespace or wix that let you build a website from a template with things you can drag in, it's all done with html and css code (and you can throw in javascript if you wanna try hurting your brain /hj). i love the passion people have for coding websites, for making their own websites again in defiance of social medias becoming less customisable and websites looking boring and the same as each other. people's neocities sites are so fun to look through, looking at how they express themselves, their art galleries, shrines to their pets or favourite characters or shows or toys or places they've been.
why have i been making a website this way?
well i used to love customising my tumblr theme back when clicking on someone's username here took you to their tumblr website, their username . tumblr . com link that you could edit and customise with html code. now clicking a username takes you to their mobile page view, a lot of users don't even know you can have a website with tumblr, the feature to have a site became turned off by default, and i've heard from some users that they might have to pay to unlock that feature.
i've always loved the look of old geocities and angelfire websites, personalised sites, and i've grown tired of every social media trying to look the same as each other, remove features that let users customise their profiles and pages more. and then i found out about neocities.
are you interested in making a site too?
neocities is free, though you can pay to support them. there is no ads, no popups, they have no ai tool scraping their sites, no tos that will change to suddenly stop allow 18+ art. unlike other website hosters, neocities does have a sort of social media side where you do have a profile and people can follow you and leave comments on your site and like your updates, but you can ignore this if you want, or use it to get to know other webmasters.
to quote neocities "we are tired of living in an online world where people are isolated from each other on boring, generic social networks that don't let us truly express ourselves. it's time we took back our personalities from these sterilized, lifeless, monetized, data mined, monitored addiction machines and let our creativity flourish again."
i'd so encourage anyone interested to try making a website with neocities. w3schools is an excellent place to start learning coding, and there are free website templates you can copy and paste and use (my site is built off two different free codes, one from fujoshi . nekoweb . org and the other from sadgrl's free layout builder tool).
your site can be for anything:
a more fun and interactive online business card (rather than using carrd.co or linktree)
a gallery of your art/photos/cosplays/etc
a blog
webshrines to your a character, film, song, game, toy, hobby, your pet - anything can be a shrine!
a catalogue/database/log of every film you've watched, every place you've visited, birds you've seen, plushies you own, every blinkie gif you have saved, your ocs and stories, etc
hosting a webcomic
a fanwiki/fansite that doesn't have endless ads like fandom . com does (i found a cool neocities fansite for rhythm game series pop'n music and it's so thorough, it even lists all the sprites and official art for every character)
i follow a website that just reviews every video game based on whether or not it has a frog in it, if the frog is playable, if you can be friends with it. ( frogreview . neocities . org )
the only html i knew how to write before starting is how to paragraph and bold text. and now i have a whole site! and i'm still working on new stuff for it all the time.
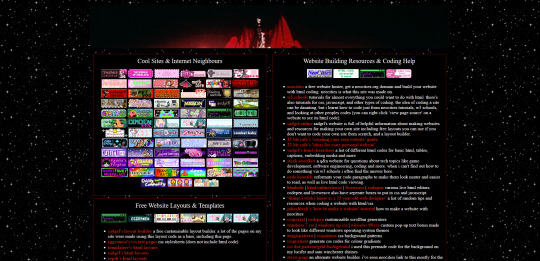
i just finished making a page on my website called 'explore the web'. this page lists everything you might need to know when wanting to make or decorate your website. it lists:
other neocities sites i think are cool and i'm inspired by, check them out for more ideas of what your site could look like and contain!
website building resources
coding help and tutorials
free website html code layouts you can use if you don't want too start coding from scratch
places to find graphics and decorative images for your site (transparent background pngs, pixels, favicons, stamps, blinkies, buttons, userboxes, etc)
image generators for different types of buttons and gifs (88x31 buttons, tiny identity buttons, heart locket open gifs, headpat gifs)
widgets and games and interactive elements you can add to your site (music players, interactive pets like gifypet and tamanotchi, hit counters, games like pacman and crosswords, guestbooks and chatboxes, etc)
web manifestos, guides, introductions and explanations of webmastering and neocities (some posts made by other tumblr users here are what made me finally want to make my own site and discover how too)
art tools, resources and free drawing programs
web communities! webrings, cliques, fanlistings, pixel clubs (pixel art trades) and more!
other fun sites that didn't fit in the other categories like free sheet music sites, archives, egotistical.goat (see a tumblr users audio posts/reblogs as a music playlist), soul void (a wonderful free to play video game i adore), an online omnichord you can play, and more.
i really hope the 'explore the web' page is helpful, it took three days to track down every link and find resources to add.
and if you want to check out my site there's more than just these pages. like i said in the beginning, i recently finished making:
the dervampireprince fanart museum
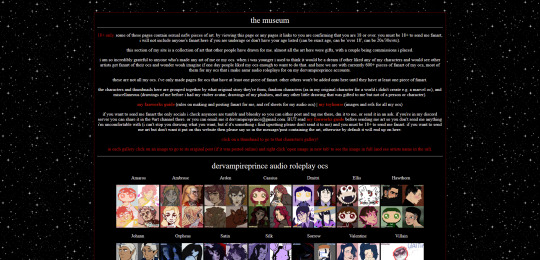
every piece of fanart i've received (unless the sender asked me to keep it private) has been added to this museum and where possible links back to the original artists post of that art (a lot the art was sent to me via discord so i can't link to the original post). every piece of fanart sent to me now will be added on their unless you specifically say you don't want it going on there. there's also links to my fanworks guide on there and how to send me fanart.
other pages on my site
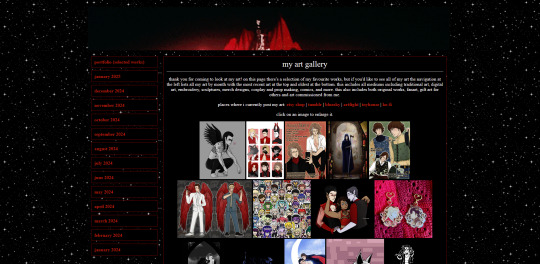
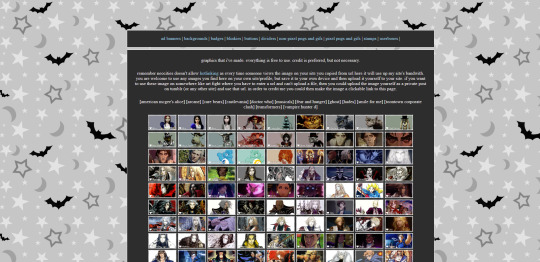
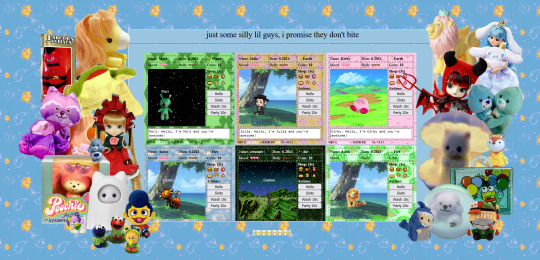
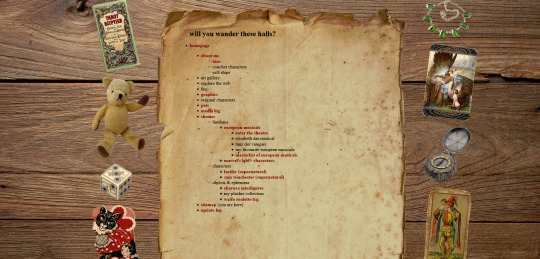
about me (including favourite media, quizzes, comfort characters, kins, and more)
art gallery (art i've made, sorted by month)
graphics (so far it's just stamps i've made but plan to remake this section of my site)
media log (haven't started the 2025 one yet, but a log of all films, tv, writing, music, theatre, fandoms, characters and ships i got into in 2024)
silly web pets
shrines
site map
update log
my shrines so far:
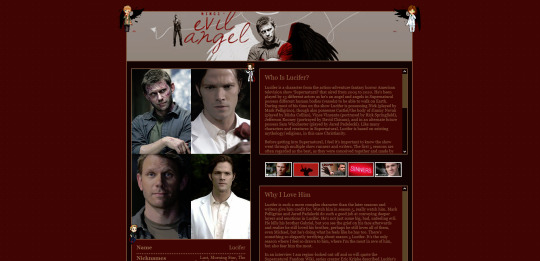
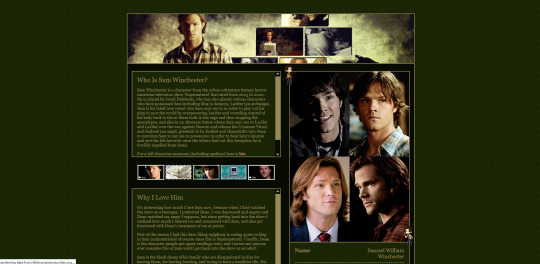
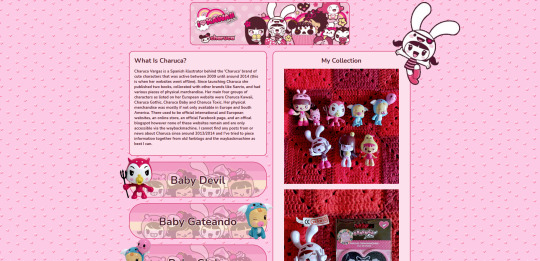
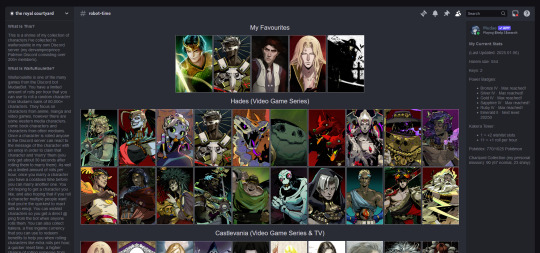
i have ones for lucifer from supernatural, sam winchester from supernatural, charuca minifigures (arcade prizes i wanted as a kid that i'm trying to finish collecting as an adult), my waifuroulette discord tcg collection. my masterlist of every lgbt+ marvel character is a wip. i love making each shrine look different and suit the character/fandom/thing the shrine is about. and then there's also:
the european musical section

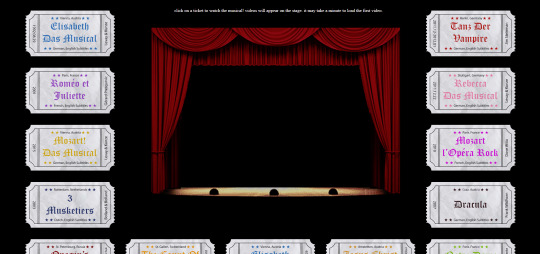
i ramble about them a lot and it's no surprise there's multiple shrines for them. i fell in love with german musical theatre in 2020 and that expanded in being interested in all non-english language musical theatre and trying to spread the word of it and how they deserve to be as known as english-language musicals. one musical in particular, elisabeth das musical, is my biggest special interest so expect a very detailed shrine about that one day.
so far this part of the site includes
'enter the theatre' an interactive web theatre where you choose a ticket and that musical will play on the stage (click a ticket and the embedded youtube video for that musical will appear on the stage and play. i dealt with javascript for the first time to bring the vision i had for this page alive, it might be slow but i hope enjoyable)
elisabeth das musical webshrine [not made yet]
tanz der vampire webshrine [not made yet, might abandon the idea]
my favourite european musicals [not made yet]
a masterlist of european musicals [a wip, only two musicals listed so far, i am listing every musical and every production they've had, this was a word document i kept for a long time that i always wanted to share somehow and this page is how i'll do it. there's no other list for european musicals out there so i guess it's up to me as always /lh]
the future for my site
i will update my art gallery, the fanart museum, my media log and other collections as often as i can. there's so many more pages i want to add including:
profiles for my ocs
finish my european musical masterlist
finish my 'every marvel lgbt+ character' masterlist (i have no love for marvel or disney's lgbt+ representation nor are all of these characters good representation and a lot are very minor characters, but for some reason i have gotten hyperfixated on this topic a few times so here comes a masterlist)
make shrines for loki (marvel), ares (hades), my sylvanian families collection, vocaloid (and/or vocaloid medleys), my plushie collection, pullip dolls
make a 'page not found' page
and i have one big plan to essentially make a site within a site, and make a website for my monster boy band ocs. but make it as if it was a real band, an unfiction project (think like how welcome home's website portrays welcome home as if it was a real show). this site would have pages for the band members, their albums, merch and maybe a pretend shop, and a fake forum where you could see other characters in the story talking and click on their profiles to find out more about them. and then once that's all done i want to start posting audios about the characters and then people can go to the website to find out more about them. that's my big plan anyway. i hope that sounds interesting.
i also want to make an effort to try and join some website communities. be brave and apply for some webrings and fanlistings, and make some pixel art and join some of the amazing pixel clubs out there.
but yeah, that's my site, that's neocities. i hope that was interesting. i hope it encourages people to make their own site, or at least look at other's small websites and explore this part of the internet. and if you go and check out mine feel free to drop a message in the guestbook on the homepage, or follow me on neocities if you have/make an account.
31 notes
·
View notes