#balenaetcher
Explore tagged Tumblr posts
Visit Tumblr Blog
Explore Tumblr blogs with no restrictions, modern design and the best experience.
Last Seen Tumblr Blogs


Fun Fact
Tumblr has a low social media market share in South America.
Text
Ok. I'd manage to install Linux Mint ISO onto my new flashdrive with balenaEtcher.
I also learn something new today;
Newsflash: Apparently, Linux Mint downloaded with torrent doesn't work on balenaEtcher... at least on my end. I don't know if that's normal or not, but that's just what I found out today and learn the hard way while trying to transfer operating system from Linux Ubuntu to Linux Mint.
Just in case if anyone wanted to do the same like me.
#linux mint#ubuntu#torrent#balenaetcher#linux#linuxposting#open source#computers#debian#customization
8 notes
·
View notes
Text
Just learned that my (now formerly) favorite disk imager, balenaEtcher, contains intentional Spyware that reports user activity to various analytics groups (including google analytics) without the user’s knowledge or consent.
Thank Torvalds for the Arch Wiki and the contributors there who included a warning about it, but goddammit now I have to find a new disk imager.
2 notes
·
View notes
Text
BalenaEtcher, işletim sistemi imajlarını (ISO, IMG, ZIP) USB bellek veya SD karta kolayca yazdırarak bootable (önyüklenebilir) medya oluşturmanızı sağlayan açık kaynaklı bir araçtır.
0 notes
Link
Etcher是一款简洁易用的USB镜像写入工具,支持多平台及多种存储设备。拥有简洁直观的界面设计、强大的兼容性、高速稳定的写入性能以及可靠的校验机制等特点。这些特点使得 Etcher 在众多写入工具中脱颖而出。
0 notes
Text
BalenaEtcher: La Herramienta Libre y de Código Abierto para USB de arranque para Linux
En el mundo de la tecnología, la creación de medios de arranque es una tarea esencial, ya sea para instalar un nuevo sistema operativo, realizar reparaciones del sistema o probar distribuciones de Linux. Para simplificar este proceso, balenaEtcher se ha convertido en una herramienta imprescindible para muchos usuarios. En este artículo, exploraremos qué es balenaEtcher, sus beneficios y por qué…
0 notes
Text
hey, privacy concerned folks,
DON'T USE BALENA ETCHER TO USB YOUR ISOs
As @tailsos-official stated in their blog post, it displays ads which is weird for a simple disk imaging tool and more important:
It shares your IP address, the file name of the image the model of the USB stick and a bunch of other things with the Balena company and third parties.
On Windows, use Rufus instead. It's pretty neat.
On Mac, use the Raspberry Pi Imager. It does its job. Or if you don't mind the terminal, use dd. It's built-in.
On Linux you can use dd, or whatever comes with your DE. Or whatever else you prefer. We got options.
You can also use Ventoy and just chuck all your ISOs on it. No need to reformat your usb drives again just for a new boot stick. One USB to rule them all.
sources under the cut
youtube
#linux#linuxposting#windows#microsoft#mac#macos#balena etcher#tailsos#tails os#privacy#data privacy#internet privacy#Youtube
446 notes
·
View notes
Text
Guía sobre Debian: El Pilar de las Distribuciones Linux
1. Introducción
Presentación de Debian
Debian es una de las distribuciones Linux más antiguas y respetadas, conocida por su estabilidad, seguridad y adherencia a los principios del software libre. Fundada en 1993 por Ian Murdock, Debian ha servido como base para muchas otras distribuciones populares, incluyendo Ubuntu.
Importancia y legado de Debian en el ecosistema Linux
Como una de las "distribuciones madre", Debian ha jugado un papel crucial en el desarrollo y popularización de Linux. Su robustez y compromiso con el software libre lo han convertido en una elección preferida tanto para servidores como para entornos de escritorio.
2. Historia y Filosofía de Debian
Origen y evolución de Debian
Debian fue creado con la intención de ser una distribución gestionada de manera abierta y colaborativa. Desde su lanzamiento, ha tenido múltiples versiones, cada una con nombres basados en personajes de la película "Toy Story".
Filosofía y compromiso con el software libre
Debian sigue estrictamente las Directrices de Software Libre de Debian (DFSG), lo que significa que todo el software incluido en la distribución debe ser libre. Además, su contrato social garantiza la transparencia y la cooperación dentro de la comunidad.
3. Características Clave de Debian
Estabilidad y seguridad
Debian es conocido por su estabilidad, lo que lo convierte en una opción confiable para servidores y sistemas de producción. Las actualizaciones y nuevos paquetes se prueban rigurosamente antes de ser lanzados en la versión estable.
Gestor de paquetes
APT (Advanced Package Tool) es el gestor de paquetes principal de Debian. APT facilita la instalación, actualización y eliminación de software desde los repositorios de Debian.
Comandos básicos: sudo apt update, sudo apt install [paquete], sudo apt remove [paquete].
Formatos de paquetes soportados
Debian soporta varios tipos de archivos para la instalación de software:
.deb: El formato nativo de Debian para la instalación de paquetes.
.appimage: Formato portátil que puede ejecutarse directamente sin necesidad de instalación.
.snap: Aunque no es nativo de Debian, se puede habilitar soporte para instalar paquetes Snap.
.flatpak: Otro formato universal que puede ser instalado en Debian, aunque requiere la instalación previa de Flatpak.
Ramas de desarrollo
Stable (Estable): Ideal para entornos donde la estabilidad es crítica.
Testing (Pruebas): Contiene paquetes más recientes y es una buena opción para usuarios que desean un equilibrio entre estabilidad y novedades.
Unstable (Inestable/Sid): Donde se introduce el software más nuevo y experimental.
Amplia compatibilidad de hardware
Debian soporta una amplia gama de arquitecturas de hardware, desde las más comunes como x86 y ARM, hasta plataformas más especializadas.
4. Proceso de Instalación de Debian
Requisitos mínimos del sistema
Procesador: Pentium 4 o posterior.
Memoria RAM: 512 MB para un sistema básico, 1 GB o más recomendado para un entorno de escritorio completo.
Espacio en disco: 10 GB mínimo, 20 GB o más recomendados para una instalación con múltiples aplicaciones y entornos de escritorio.
Tarjeta gráfica: Compatible con X Window System.
Unidad de CD/DVD o puerto USB para la instalación.
Descarga y preparación del medio de instalación
El sitio web oficial de Debian ofrece imágenes ISO para descargar. Se puede preparar un USB booteable usando herramientas como Rufus o balenaEtcher.
Guía paso a paso para la instalación
Selección del entorno de instalación: Debian ofrece opciones de instalación tanto gráfica como en modo texto.
Configuración de particiones: Se puede optar por particionado automático o manual, dependiendo de las necesidades del usuario.
Configuración de la red y selección de paquetes: Durante la instalación, se configuran las opciones de red y se seleccionan los paquetes de software esenciales.
Primeros pasos post-instalación
Actualización del sistema: Es recomendable ejecutar sudo apt update && sudo apt upgrade para asegurarse de que el sistema esté completamente actualizado.
Instalación de controladores y software adicional: Dependiendo del hardware, puede ser necesario instalar controladores específicos. Además, se pueden instalar entornos de escritorio adicionales o programas específicos.
5. Entornos de Escritorio en Debian
Gnome (predeterminado)
Gnome es el entorno de escritorio predeterminado en Debian, conocido por su simplicidad y enfoque en la productividad.
KDE Plasma
Un entorno de escritorio altamente personalizable que ofrece una experiencia visualmente atractiva.
Xfce
Ligero y eficiente, ideal para sistemas con recursos limitados.
LXQt y otros
Alternativas para quienes buscan un entorno aún más ligero o con diferentes características.
6. Gestión de Paquetes en Debian
APT: El gestor de paquetes de Debian
Comandos básicos: apt-get, apt-cache, aptitude.
Instalación y eliminación de paquetes: sudo apt install [paquete], sudo apt remove [paquete].
Repositorios y backports
Debian ofrece diferentes repositorios: stable, testing, y unstable, así como backports que permiten instalar versiones más recientes de software en la rama estable.
Configuración de repositorios adicionales
Los usuarios pueden añadir repositorios adicionales en el archivo /etc/apt/sources.list para acceder a más software.
7. Debian en el Entorno Empresarial y Servidores
Uso de Debian en servidores
Debian es ampliamente utilizado en servidores debido a su estabilidad y seguridad. Es ideal para aplicaciones web, bases de datos, y como servidor de correo, entre otros.
Mantenimiento y soporte a largo plazo
Debian ofrece soporte a largo plazo (LTS) para sus versiones estables, garantizando actualizaciones de seguridad por al menos cinco años.
Herramientas de administración y automatización
Debian se integra bien con herramientas como Ansible, Puppet, y Docker, facilitando la gestión de infraestructuras complejas.
8. Comparativa de Debian con Otras Distribuciones
Debian vs. Ubuntu
Objetivo: Ubuntu se basa en Debian y se orienta más hacia el usuario final, con actualizaciones más frecuentes y un enfoque en la facilidad de uso.
Filosofía: Mientras que Debian sigue estrictamente los principios del software libre, Ubuntu incluye software propietario para mejorar la compatibilidad y experiencia del usuario.
Debian vs. CentOS
Objetivo: CentOS, basado en Red Hat, es otra opción popular para servidores, enfocada en la estabilidad y soporte a largo plazo en entornos empresariales.
Filosofía: CentOS es más conservador en cuanto a actualizaciones, mientras que Debian, aunque estable, ofrece más flexibilidad en la gestión de paquetes.
Debian vs. Arch Linux
Objetivo: Arch Linux es para usuarios avanzados que desean un sistema minimalista y personalizado, con un modelo de actualización continua (rolling release).
Filosofía: Debian prioriza la estabilidad, mientras que Arch sigue la filosofía KISS (Keep It Simple, Stupid) y proporciona control total al usuario.
9. Conclusión
Debian como una opción sólida y confiable
Debian sigue siendo una de las distribuciones más confiables y seguras disponibles. Su enfoque en la estabilidad y el software libre lo convierte en una elección excelente para usuarios, administradores de sistemas y desarrolladores.
Recomendaciones finales para quienes consideran usar Debian
Debian es ideal para aquellos que valoran la estabilidad sobre la última tecnología y están dispuestos a invertir tiempo en aprender sobre su gestión y mantenimiento.
10. Preguntas Frecuentes (FAQ)
¿Debian es adecuado para principiantes?
Aunque Debian es más técnico que distribuciones como Ubuntu, es accesible para principiantes con paciencia y disposición para aprender.
¿Cómo actualizo mi sistema Debian?
Ejecutando sudo apt update && sudo apt upgrade mantendrás tu sistema actualizado.
¿Es Debian una buena opción para servidores?
Sí, Debian es muy utilizado en servidores debido a su estabilidad, seguridad y soporte a largo plazo.
#Debian#distribución Linux#Linux#servidor Debian#instalación Debian#software libre#GNOME#KDE#APT#gestión de paquetes#Debian Stable#Debian Testing#Debian Sid#comunidad Debian#recursos Debian#seguridad en Debian#soporte a largo plazo#Debian vs Ubuntu#Debian vs CentOS#Debian vs Arch Linux#formatos de paquetes#.deb#.appimage#.snap#.flatpak
11 notes
·
View notes
Text
Installing Kali Linux on a USB Stick: A Step-by-Step Guide
If you want a portable, powerful cybersecurity toolkit you can carry in your pocket, installing Kali Linux on a USB stick is the perfect solution. With Kali on a USB, you can boot into your personalized hacking environment on almost any computer without leaving a trace — making it a favorite setup for ethical hackers, penetration testers, and cybersecurity enthusiasts.

In this guide, we'll walk you through how to install Kali Linux onto a USB drive — step-by-step — so you can have a portable Kali environment ready wherever you go.
Why Install Kali Linux on a USB?
Before we dive into the steps, here’s why you might want a Kali USB:
Portability: Carry your entire hacking setup with you.
Privacy: No need to install anything on the host machine.
Persistence: Save your settings, files, and tools even after rebooting.
Flexibility: Boot into Kali on any system that allows USB boot.
There are two main ways to use Kali on a USB:
Live USB: Runs Kali temporarily without saving changes after reboot.
Persistent USB: Saves your files and system changes across reboots.
In this article, we’ll focus on setting up a Live USB, and I'll also mention how to add persistence if you want. and if you seek knowledge about kali linux you can visit our website any time
Website Name : Linux Tools Guide
What You’ll Need
✅ A USB drive (at least 8GB; 16GB or more recommended if you want persistence). ✅ Kali Linux ISO file (download it from the official Kali website). ✅ Rufus (for Windows) or Etcher/balenaEtcher (for Mac/Linux/Windows). ✅ A computer that can boot from USB.
Step 1: Download the Kali Linux ISO
Go to the Kali Linux Downloads page and grab the latest version of the ISO. You can choose between the full version or a lightweight version depending on your USB size and system requirements.
Tip: Always verify the checksum of the ISO to ensure it hasn't been tampered with!
Step 2: Insert Your USB Drive
Plug your USB stick into your computer. ⚠️ Warning: Installing Kali onto the USB will erase all existing data on it. Backup anything important first!
Step 3: Create a Bootable Kali Linux USB
Depending on your operating system, the tool you use may vary:
For Windows Users (using Rufus):
Download and open Rufus (Get Rufus here).
Select your USB drive under Device.
Under Boot selection, choose the Kali Linux ISO you downloaded.
Keep the Partition scheme as MBR (for BIOS) or GPT (for UEFI) based on your system.
Click Start and wait for the process to complete.
For Mac/Linux Users (using balenaEtcher):
Download and open balenaEtcher (Get Etcher here).
Select the Kali ISO.
Select the USB drive.
Click Flash and wait until it's done.
That's it! You now have a Live Kali USB ready.
Step 4: Boot Kali Linux from the USB
Restart your computer with the USB plugged in.
Enter the BIOS/UEFI settings (usually by pressing a key like F12, Esc, Del, or F2 right after starting the computer).
Change the boot order to boot from the USB first.
Save changes and reboot.
You should now see the Kali Linux boot menu! Select "Live (amd64)" to start Kali without installation.
(Optional) Step 5: Adding Persistence
Persistence allows you to save files, system changes, or even installed tools across reboots — super useful for real-world usage.
Setting up persistence requires creating an extra partition on the USB and tweaking a few settings. Here's a quick overview:
Create a second partition labeled persistence.
Format it as ext4.
Mount it and create a file /persistence.conf inside it with the content: cppCopyEdit/ union
When booting Kali, choose the "Live USB Persistence" option.
Persistence is a little more technical but absolutely worth it if you want a real working Kali USB system!
Troubleshooting Common Issues
USB not showing up in boot menu?
Make sure Secure Boot is disabled in BIOS.
Ensure the USB was properly written (try writing it again if necessary).
Kali not booting properly?
Verify the ISO file integrity.
Try a different USB port (preferably USB 2.0 instead of 3.0 sometimes).
Persistence not working?
Double-check the /persistence.conf file and make sure it's correctly placed.
Conclusion
Installing Kali Linux onto a USB stick is one of the smartest ways to carry a secure, full-featured hacking lab with you anywhere. Whether you’re practicing ethical hacking, doing security audits, or just exploring the world of cybersecurity, a Kali USB drive gives you power, portability, and flexibility all at once.
Once you’re set up, the possibilities are endless — happy hacking! 🔥
2 notes
·
View notes
Note
if say a college student wanted to migrate to linux what do you think would be the best method of doing so, like I know there's libreoffice but what version of linux
https://linuxmint.com/
Linux Mint is basically the go-to distro recommendation for beginners and while I personally haven't used it much I'm not inclined to disagree.
It should come with things like LibreOffice and Firefox pre-installed, even. Installation these days is generally straight forward, but walkthroughs are very easy to find if you have difficulty.
If you want, you don't even need to install it to try it out, just slap it on a USB stick and boot from it and you can mess around to see what you think.
7 notes
·
View notes
Text
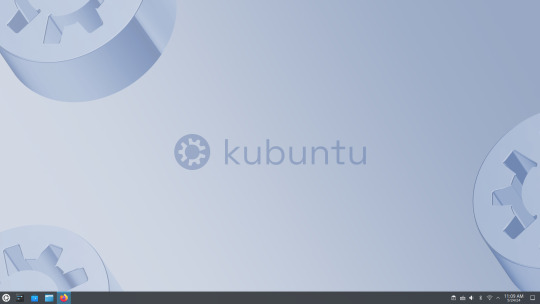
Howdy been a bit busy not only from the job hunt but also cause I've been making the switch to Linux specifically Kubuntu. I should be back to my art soon. Luckily I should have an easier time adapting as I've never really used much Windows only software LibreOffice/Krita have always been my go to etc.
Also figured I'd add if y'all wanna make the switch with Kubuntu as the sole operating system here's what I did in the end.
IMPORTANT NOTE I AM NOT IN ANYWAY RESPONSIBLE FOR WHAT YOU AS A HOPEFULLY SANE PERSON DO TO YOU COMPUTER.FOR THE LOVE OF GOD RESEARCH SHIT BEFORE SWITCHING TO A DIFFERENT OPERATING SYSTEM.
Optional but suggested use Oracle VM to test if Kubuntu is right for you!If not maybe try out some other distros Linux Mint for instance is considered a wonderful choice for new bros. Flash Kubuntu's ISO to a Usb I used BalenaEtcher. Optional With important files use Winrar/7Zip to compress em down. Archive any files important to you this can be done via Blank DVDS,USBS,CLOUD STORAGE SYSTEMS.I used mega.io. Prepare ze purge get KillDisk on a DVD/USB and wipe the Windows partition to scorched earth. Insert the Kubuntu USB then Restart your PC. Boot into Kubuntu (I also had to spam repeat press ESC whilst the computer was restarting to boot it, this which is something to do with HP from what I understand???) Install it how you'd like it!
ALSO LITERALLY NOT EVEN JOKING IT TOOK ME 8 HOURS TO FIGURE ALL THIS SHIT OUT I MAY BE A DUMBASS STILL I GOT IT IN THE END!

2 notes
·
View notes
Note
Some of your follower might not like listening about your Edelgard rant but I certainly do, please tell us more
Well I'm supposed to be doing my fucking job right now, but I'm stuck waiting for balenaEtcher to flash some SD cards and the whole time I'm wishing I was home playing Fire Emblem so y'all may have to wait for your Edelgard Update. One of my students was very amused when I mentioned all of the above tho, so there's that
2 notes
·
View notes
Note
how do i install linux i have windows 11 and it sucks
step 0 is picking a distro that fits your needs. i wrote a post about that earlier. if you don't feel like reading that/if it's too overwhelming: use fedora workstation if you like macOS, use fedora kde if you like windows, and use pop!_os if you have an nvidia gpu.
step 1 is backing up your data. if you have anything important on your computer you should 100000% back it up since if you click the wrong buttons it's very easy to delete everything.
step 1a is deciding if you wanna dual boot or just remove windows entirely. i dual booted for a while before i realized i hadn't booted into windows in weeks and just deleted it. if you wanna dual boot you have to shrink your windows partition before installing linux to free up space, here's a post i made where i talked about that more.
step 2: download the ISO image of the distro you picked and write it to a flash drive using a tool like balenaEtcher (this will erase the flash drive so back that up too if there's important stuff on it)
step 3: boot off the flash drive. this depends on your computer/motherboard but basically you have to enter the bios and change the boot order to boot from a flash drive first OR you can set it to boot from a flash drive temporarily if you're motherboard has a menu for that. usually you get to the bios by spamming delete, f1, or f12 on boot. you might also wanna check if secure boot is enabled since that prevent you from booting other OSes, make sure you disable it. (if you're worried about security you can set up secure boot in linux but you have to install the OS without it) it's probably on if you installed windows 11 since iirc windows requires it to install now (but it should still boot with secure boot off).
step 4: install linux! this is usually pretty straightforward, just follow the steps in the installer.
#linux#wow that post ended up being longer than i thought it would be sorry lol#also feel free to ask me more questions if you have them :3
0 notes
Text
Guía sobre Red Hat Enterprise Linux: La Solución Empresarial en Linux
1. Introducción
Presentación de Red Hat Enterprise Linux (RHEL)
Red Hat Enterprise Linux (RHEL) es una distribución de Linux de clase empresarial desarrollada por Red Hat, Inc. Lanzada en 2000, RHEL está diseñada para ser una solución robusta y confiable para entornos empresariales y de misión crítica.
Importancia de RHEL en el ecosistema Linux
RHEL es ampliamente utilizado en servidores y entornos de nube debido a su estabilidad, soporte técnico y la capacidad de integrarse con una amplia gama de tecnologías empresariales. Es conocida por su enfoque en la seguridad y la escalabilidad.
2. Historia y Filosofía de Red Hat Enterprise Linux
Origen y evolución de RHEL
RHEL se basa en la distribución comunitaria Fedora y fue creado para ofrecer una versión comercial y soportada de Linux. Red Hat ha lanzado versiones de RHEL con ciclos de vida extensos, lo que garantiza soporte a largo plazo para empresas.
Filosofía de RHEL y el software libre
RHEL sigue la filosofía del software libre y open source, pero ofrece soporte comercial, lo que incluye asistencia técnica, actualizaciones y servicios adicionales. Esto proporciona a las empresas la confianza de contar con respaldo profesional.
3. Características Clave de Red Hat Enterprise Linux
Soporte a largo plazo y estabilidad
RHEL ofrece soporte extendido para cada versión, con actualizaciones de seguridad y mantenimiento durante 10 años. Esto es crucial para entornos empresariales que requieren estabilidad y confiabilidad a largo plazo.
Gestor de paquetes
YUM (Yellowdog Updater, Modified) fue el gestor de paquetes tradicional de RHEL, pero ha sido reemplazado por DNF (Dandified YUM) en versiones más recientes. DNF mejora la gestión de paquetes y la resolución de dependencias.
Comandos básicos: sudo dnf install [paquete], sudo dnf remove [paquete], sudo dnf update.
Formatos de paquetes soportados
RHEL utiliza varios formatos de paquetes:
.rpm: El formato de paquetes nativo de Red Hat y sus derivados.
.deb: Aunque no es nativo, puede instalarse en sistemas basados en RHEL con herramientas específicas.
Soporte para entornos virtuales y en la nube
RHEL ofrece herramientas y soporte para la virtualización, incluyendo KVM (Kernel-based Virtual Machine), y es compatible con plataformas de nube como AWS, Azure y OpenStack.
4. Proceso de Instalación de Red Hat Enterprise Linux
Requisitos mínimos del sistema
Procesador: 1 GHz o superior.
Memoria RAM: 1 GB como mínimo, 2 GB o más recomendados.
Espacio en disco: 10 GB de espacio libre en disco.
Tarjeta gráfica: Soporte para una resolución mínima de 1024x768.
Unidad de DVD o puerto USB para la instalación.
Descarga y preparación del medio de instalación
La descarga de RHEL requiere una suscripción activa con Red Hat. Se puede preparar un USB booteable usando herramientas como Rufus o balenaEtcher.
Guía paso a paso para la instalación
Selección del entorno de instalación: El instalador gráfico de RHEL, basado en Anaconda, ofrece una interfaz intuitiva para la instalación.
Configuración de particiones: El instalador permite particionado automático y manual, adaptándose a diferentes configuraciones de almacenamiento.
Configuración de la red y selección de software: Durante la instalación, se configuran las opciones de red y se pueden elegir paquetes y características adicionales.
Primeros pasos post-instalación
Actualización del sistema: Ejecutar sudo dnf update después de la instalación garantiza que todo el software esté actualizado.
Instalación de controladores adicionales y software: RHEL puede instalar automáticamente controladores adicionales necesarios para el hardware.
5. Comparativa de RHEL con Otras Distribuciones
RHEL vs. CentOS
Objetivo: CentOS era una versión gratuita y sin soporte de RHEL, pero ha sido reemplazado por CentOS Stream, que ofrece una vista previa de la próxima versión de RHEL. RHEL proporciona soporte técnico y actualizaciones extendidas, mientras que CentOS Stream actúa como un puente entre Fedora y RHEL.
Filosofía: RHEL se centra en el soporte empresarial y en la estabilidad, mientras que CentOS Stream se enfoca en el desarrollo y la contribución de la comunidad.
RHEL vs. Ubuntu Server
Objetivo: Ubuntu Server está diseñado para ser fácil de usar y de administrar, con un ciclo de lanzamientos regular. RHEL, por su parte, se enfoca en ofrecer soporte a largo plazo y en satisfacer las necesidades de grandes empresas.
Filosofía: Ubuntu Server ofrece versiones LTS para estabilidad, mientras que RHEL proporciona soporte y servicios comerciales extensivos.
RHEL vs. SUSE Linux Enterprise Server (SLES)
Objetivo: SLES, desarrollado por SUSE, es similar a RHEL en términos de soporte empresarial y estabilidad. Ambas distribuciones ofrecen soporte extendido y herramientas para la gestión de servidores.
Filosofía: RHEL y SLES son comparables en términos de soporte empresarial, pero cada uno tiene su propio enfoque y conjunto de herramientas específicas.
6. Herramientas y Servicios de Red Hat
Red Hat Satellite
Red Hat Satellite es una solución de gestión de sistemas que permite la administración centralizada de sistemas RHEL, incluyendo la implementación, configuración y mantenimiento.
Red Hat Ansible Automation
Ansible Automation es una herramienta para la automatización de tareas y la gestión de configuraciones, facilitando la administración de sistemas a gran escala.
Red Hat OpenShift
OpenShift es una plataforma de contenedores y Kubernetes gestionada por Red Hat, ideal para la implementación y gestión de aplicaciones en contenedores.
7. Comunidad y Soporte
Acceso al soporte de Red Hat
Red Hat ofrece soporte técnico profesional a través de sus suscripciones, que incluyen asistencia técnica 24/7, actualizaciones de seguridad y parches.
Recursos comunitarios y documentación
Red Hat Customer Portal: Acceso a documentación, guías de usuario, y foros de soporte.
Red Hat Learning Subscription: Cursos y formación en línea para usuarios de RHEL.
8. Conclusión
RHEL como una opción robusta para empresas
Red Hat Enterprise Linux es una opción sólida para empresas que buscan una distribución de Linux con soporte técnico profesional, estabilidad y escalabilidad. Su enfoque en la estabilidad y el soporte extendido lo convierte en una opción ideal para entornos empresariales y de misión crítica.
Recomendaciones finales para quienes consideran usar RHEL
RHEL es adecuado para organizaciones que requieren soporte técnico y estabilidad a largo plazo, y que están dispuestas a invertir en una solución de Linux empresarial respaldada por Red Hat.
9. Preguntas Frecuentes (FAQ)
¿RHEL es adecuado para pequeñas empresas?
RHEL es ideal para empresas de todos tamaños que buscan un sistema operativo empresarial robusto y con soporte técnico profesional.
¿Qué diferencia a RHEL de CentOS?
CentOS era una versión gratuita y comunitaria de RHEL, pero ahora CentOS Stream sirve como una vista previa de las próximas versiones de RHEL. RHEL proporciona soporte empresarial y actualizaciones extendidas.
¿Cómo obtengo soporte para RHEL?
El soporte se obtiene a través de una suscripción con Red Hat, que incluye asistencia técnica, actualizaciones y acceso a herramientas de gestión.
¿RHEL es compatible con software de terceros?
Sí, RHEL es compatible con una amplia gama de software y aplicaciones de terceros, y Red Hat ofrece soporte para integrar soluciones empresariales.
#Red Hat Enterprise Linux#RHEL#distribución Linux empresarial#Linux#gestor de paquetes#DNF#RPM#instalación RHEL#soporte técnico RHEL#Red Hat Satellite#Red Hat Ansible#Red Hat OpenShift#comparación RHEL#RHEL vs CentOS#RHEL vs Ubuntu Server#RHEL vs SLES#comunidad RHEL#recursos RHEL#actualizaciones RHEL
3 notes
·
View notes
Video
youtube
Getting Started with Home Assistant & Raspberry Pi: Install Add-ons, Control Lights.
Home Assistant is an open-source operating system for the Smart Home. It operates like IFTTT or Samsung Smart Things but is different in the sense that it's online, open-source, and a completely local alternative to things like HomeBridge and SmartThings.
Here is a tutorial on how you can install and setup Home Assistant on Raspberry Pi. https://www.iotdesignpro.com/projects/getting-started-with-home-assistant-and-raspberry-pi
4 notes
·
View notes