#anyway <3 downloaded tumblr to post these
Explore tagged Tumblr posts
Text
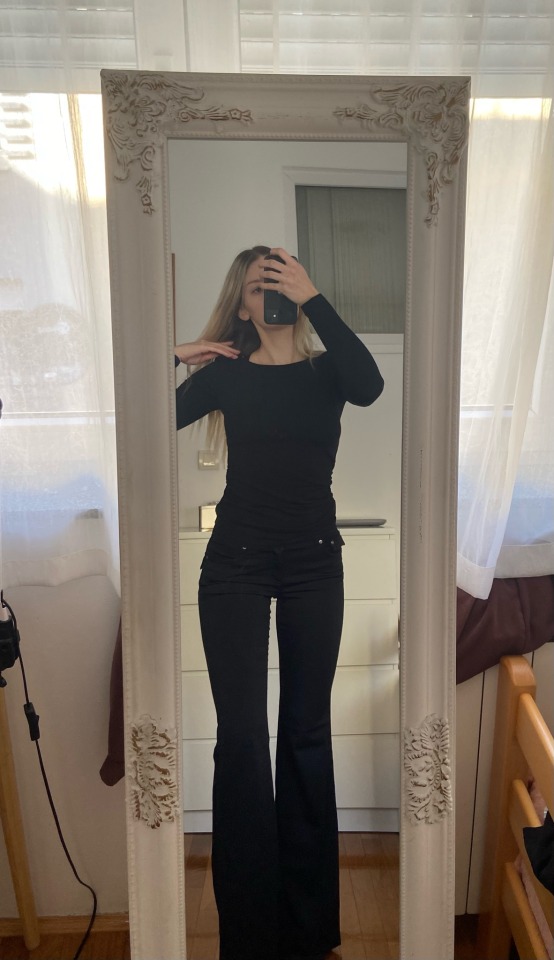
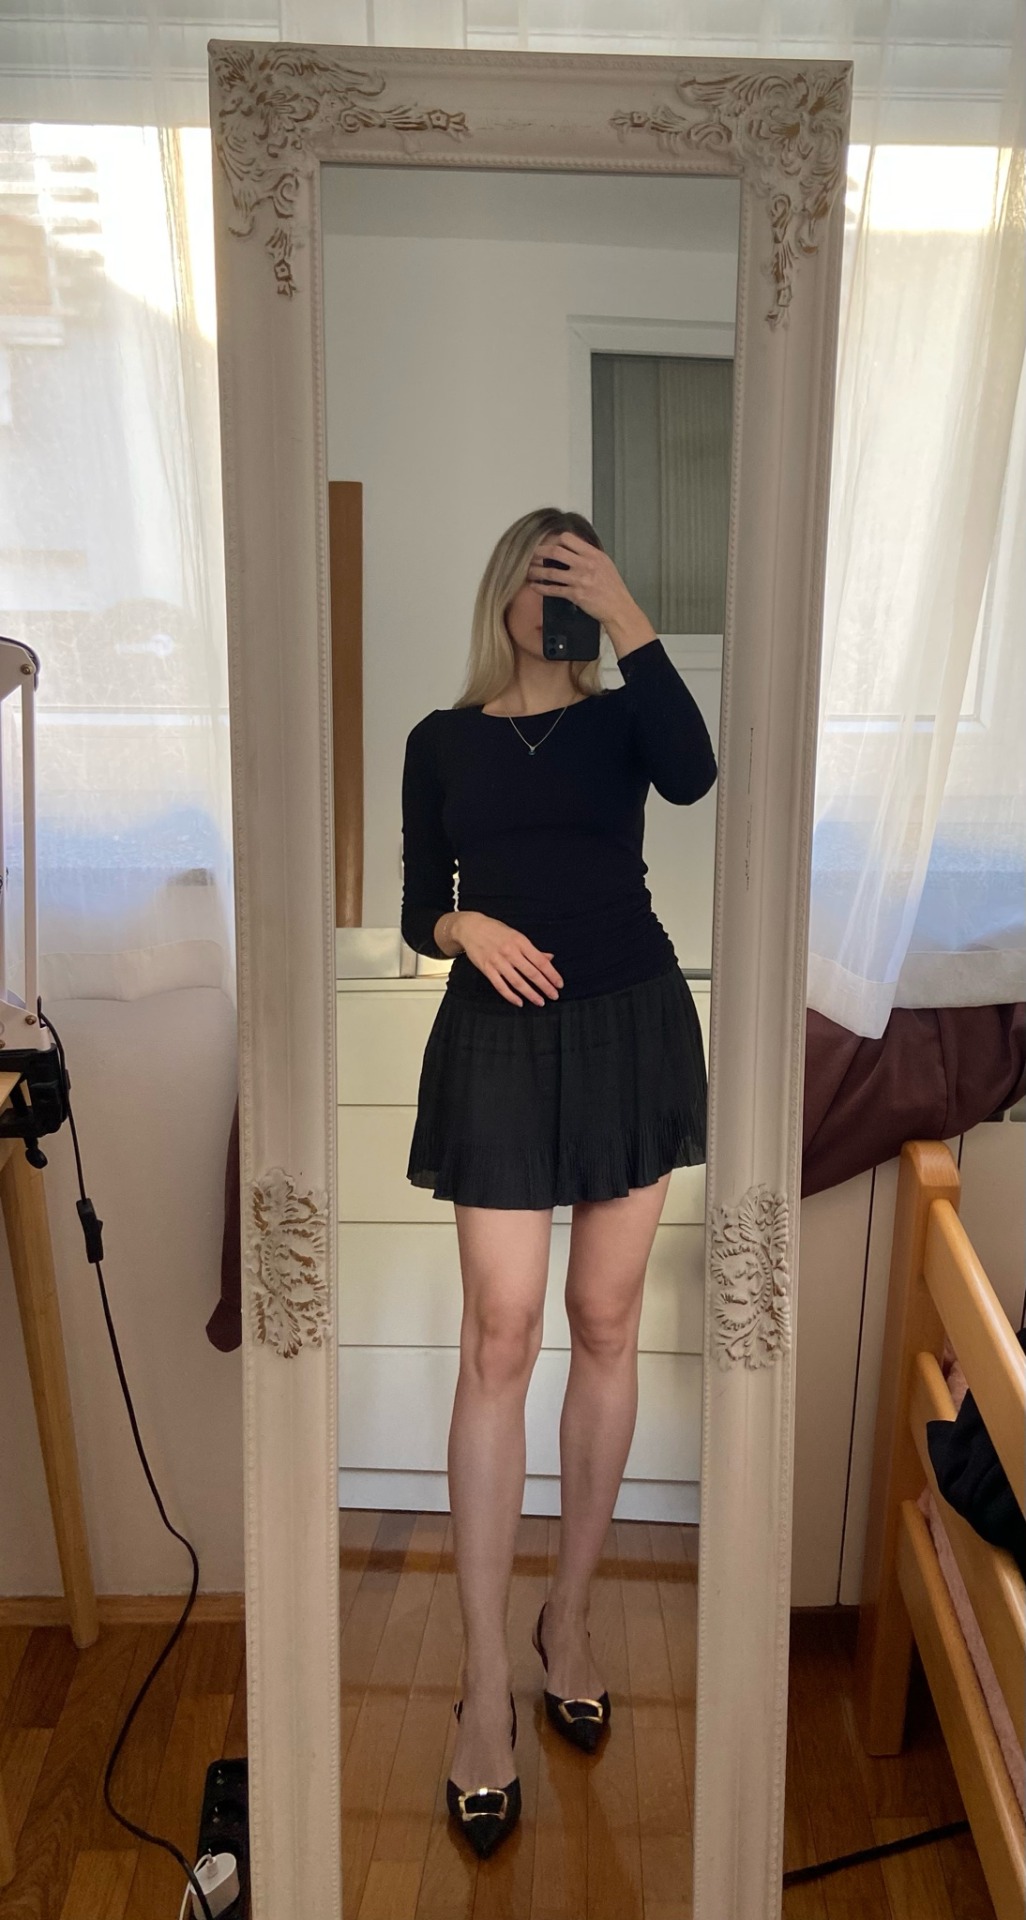
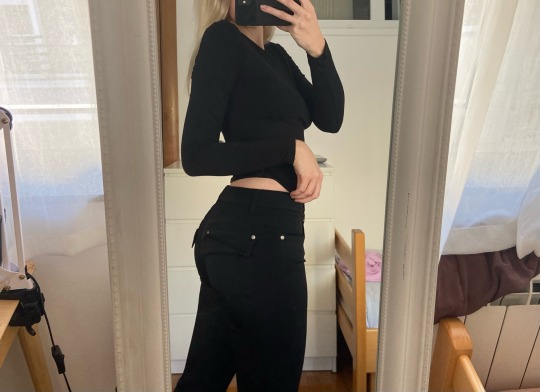
you know i said i am doing no buy february well these just arrived i did NOT fail but i wanted to share my little haul 😌🖤
#i did NOT know the flares will be low waisted she did not write correct measurements but thank god they fit#and the skirtttt 🖤🖤🖤 it has two types of pleats and a waistband that is 100% wool#it’s very alaïa the skirt i posted yesterday in a mb and also pleats please you knowww#but the flares omg they make my ass look FANTASTIC are you seeing it!!!?#anyway <3 downloaded tumblr to post these#fits#btw the huge scar i have on my leg it’s when i fall down the stairs while watching jeonghans fancam#like rhjwkalskfjsj it is nawt going away after almost a year damnnn
37 notes
·
View notes
Text
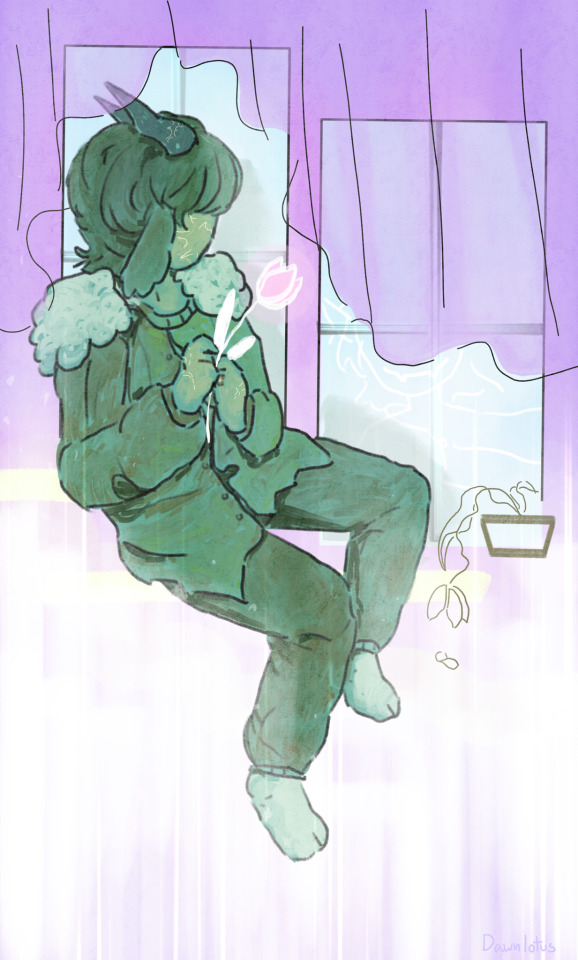
A loneliness like morning frost.
#dsmp fanart#dsmp#c!tubbo#c!tubbo fanart#dsmp tubbo#YEAHH drawing my boy again. literally drawing him makes me so happy#gosh the current arc on the brain loop is snowchester and for me personally overall the feeling of loneliness was more pervasive than the#domestic fluff. Both of them were equally important to each other - the loneliness and the love#but between the lore streams I can only imagine what kind of chill that house held. especially those last few months#with cranboo dead - their ghost slowly fading away - ctommy watching ctubbo from afar invisible#I downloaded two Snowchester Zines awhile back - and each of them had Drastically different tones. I LOVED both.#one made me warm and the other cold. The one called Safeguard does an amazing job of depicting the haunting feeling of Snowchester#anyway. ahem. yes I’ve still been drawing and stuff just have not been on tumblr so much. see ya guys next post <3#dawnsart
105 notes
·
View notes
Text

just so you know my opinion is the only correct one
#.yappin#point 3 on the 2nd list; mostly just applies to harvey#callout post on those people that make/download harvey mustache removal mods#ill get you. i will.#also you are allowed to prefer un-mustached bj but what i will not stand for is people saying he looks bad with it#you are wrong and ill kill you on this hill#also i dont think anyone that has watched My Name Is Earl is on tumblr if im honest#so that is one front i dont have to worry about. im correct anyway#feel free to contribute candidates and i will google them and probably agree with you and add them to my list
5 notes
·
View notes
Text
omg wait its been 6 years since i saw phantom.....
#my post#happy phantom day ^_^ to me ^_^#most important day of my life bcus it turned me into a theatre kid#and also i was so obsessed w this show and had nowhere to put all that energy so i downloaded tumblr <3#oh my god its also been 6 years since that minion stalked me n my friends to an olive garden#anyways i still have no idea why my teacher took us on that field trip but im so glad she did hashtag france class sweep
0 notes
Text
hi hello so for any people curious bout the dream beef i am talking about im gon chronicle it all here in a hopefully fully contextual way for both longterm weirdos and new people who dont know bout my parasocial beef w dream. ill try to keep my biases out of it somewhat but anyways,
this began with a podcast Tommyinnit and Jack Manifold have together in which they had philza as a guest. Episode 9 is currently behind a paywall on their patreon but they have a youtube channel where they post them publically as well. Not sure if they make all their episodes public eventually or not but i digress.
Twitter user _constel_ has posted 5 clips from the podcast in question that contain their discussion about dream. I have downloaded the videos but tumblr doesnt want me to put them in this post so i will try and sum up each clip as I go.
Clip 1: Phil starts talking about how once the dsmp was done people would joke about how their 'contracts' would be over and they would be allowed to talk about things behind the scenes. philza mentions the infamous philza tweet in response to dream.
for context, the main discussion is around this exchange from around february 2021, where dream 'jokingly' argues that he is responsible to tommy's high viewership on youtube:
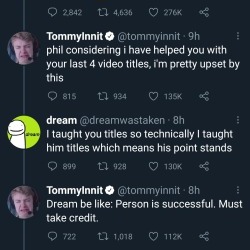
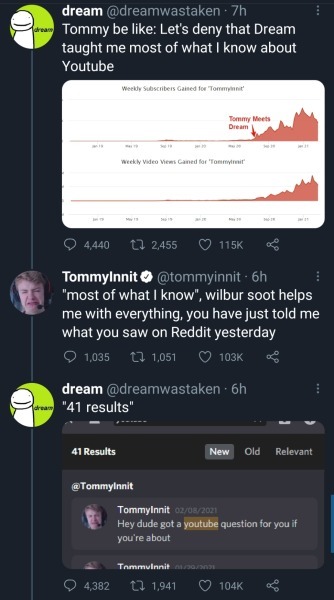
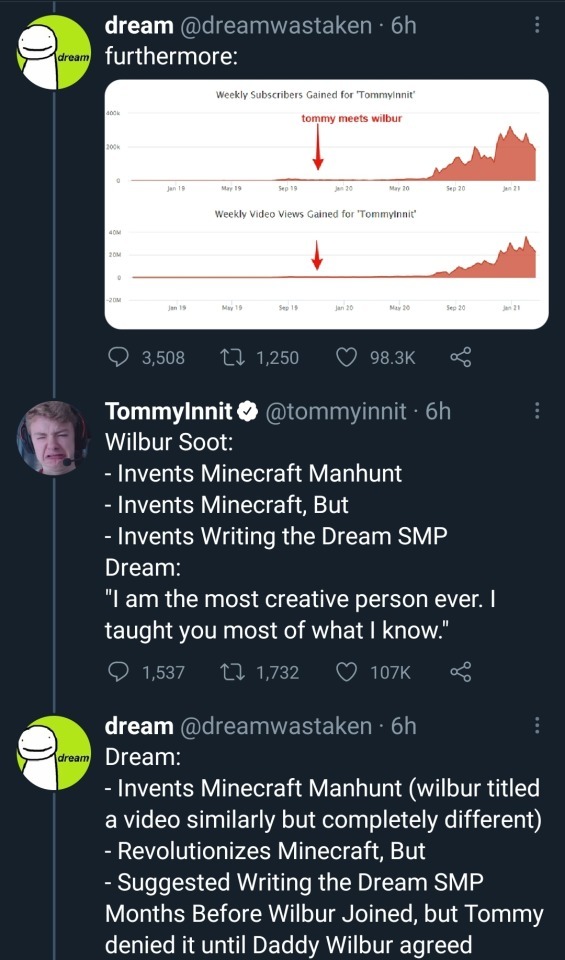
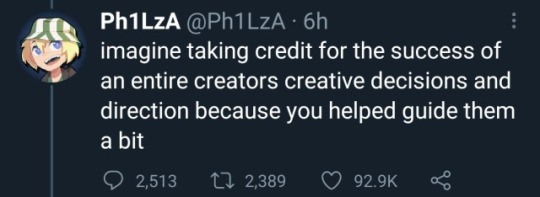
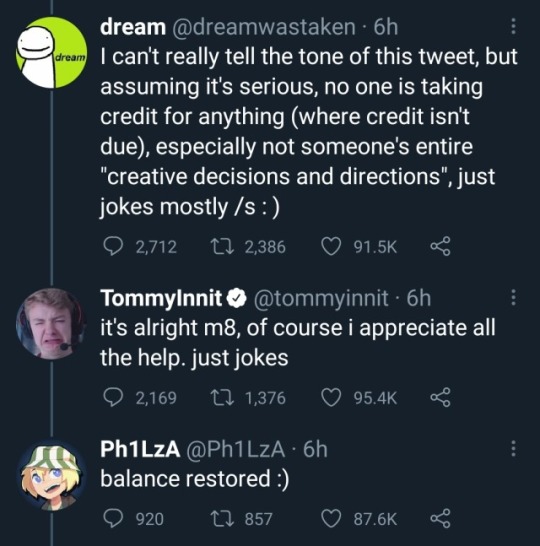
Most of it the tweets are deleted by both parties but it was very much a whole thing. Phil has apparently joked about revealing the context of his reply 'when he retires' (mentioned clip 1).
Jack Manifold had apparently been in a call with tommyinnit when the exchange was happening and recalls tommy being extremely stressed. The context philza gives is that he was texted by tommy to look at the thread while he was going on a walk and tommy was panicking over if dream was genuine (mentioned clip 2). Philza says "I'll find out if he's fucking joking' and that he essentially vibe checked dream. Tommy also states that after the twitter exchange he legitimately wrote in his diary to never be rude to dream: "never be horrible to dream. It's not worth it. It makes me too sad". Additionally jack manifold establishes that he hated dream from the beginning, they hate each other, and that, although he acknowledges dream aided him through the dream smp, he hates how dream 'takes ownership of other people and their accomplishments because he was a guiding hand' (mentioned clip 3).
Jack manifold mentions that tommy was 16 during this exchange and philza additionally says it was out of line (Clip 4). Philza more openly talks about there being 'reds flag after red flags' with dream in clip 5.
OKAY thats honestly a vague description and theres a LOT more so watch the clips if u want. Heres another tweet 'summarizing' it as well. But anyways this of course had people talking about dream again, some people (accidentally?) acting like this is about dream smp lore, and a lot of people concerned about how tommy was afraid to upset dream and would blame himself when dream picked fights with him.
Dream's response on dreamwastaken was to tweet about how he appreciated everyone who was on the server dispite differences, as well as a zip file to download the dsmp server/world file.
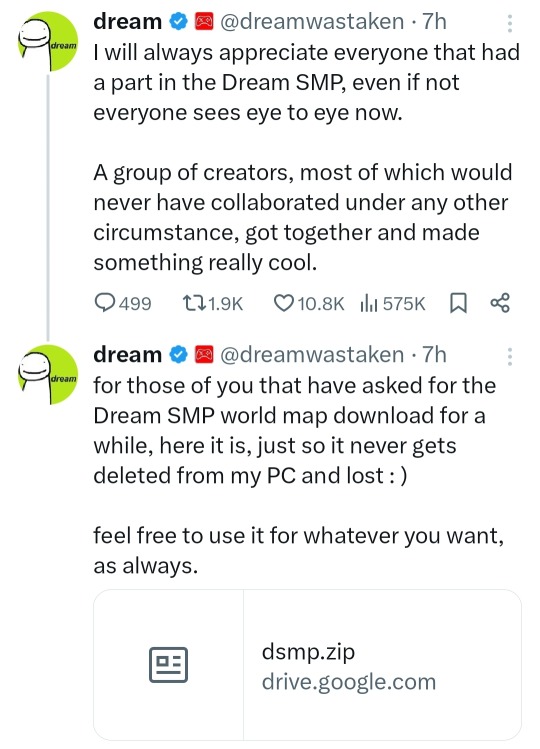
Worth noting there is a limitation on how many people can download the file within 24 hours so now people are only getting an error message when trying to access it which is fucking funny. On his private he also tweeted "love and appreciate you guys <3 very happy to be uploading again :) hope to keep it rolling" (Im not cropping out the reply its funny)
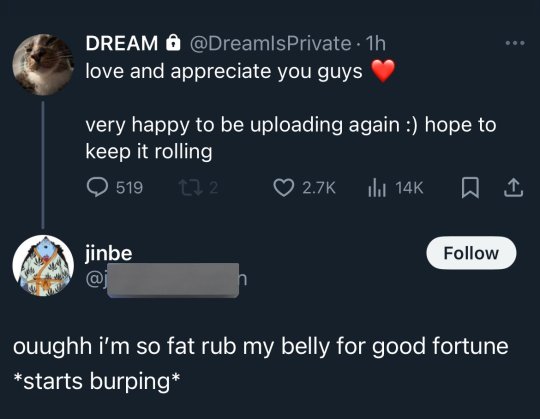
Thats all hes said so far, I havent seen tommy or jack manifold talking about it either. technically it isnt outright in response to their podcast but obviously everyone is taking it as such.
final stuff/my thoughts: dream has obviously had a tendency to kinda 'take credit' for 'making' the streamers who were on the dsmp and its notable that in his tweet he still acts like his server was the reason for people's fame and relationships. Saying 'a group of creators most of which would never have collaborated under any other circumstance got together and made something really cool' is just his thinly veiled way of still taking credit for tommy's fame and the relationships he and others have made and its moronic. Not to mention dsmp was very much NOT the server that got these specific people together, i mean techno and phil met through minecraft mondays, tommy and jack manifold met both of them through smp earth i believe. Even if the dsmp wasnt a thing they probably would have collaborated with other members through mcc eventually. the idea that the dsmp was what brought them together and a bunch of minecraft clowns would 'never have collaborated under any other circumstance' is stupid.
anyways sorry this is long as shit. im going to pray dream doesnt let this go for at least 3 to 5 business days as per usual
#fuckit im tagging things#dsmp#dream smp#jack manifold#tommyinnit#philza#dream hate#spent way too much time on this.#if more happens ill add it in rbs. might try n post the clips seperately too#philza says some goodass shit
432 notes
·
View notes
Text
My GIF Making process: Screen capturing using MPV player, Organizing files, 3 Sharpening settings, Basic Coloring PSD + Actions set

This is a very long post so heads up.
I’ll try to be as thorough and true as much as possible to the way I make my gifs (I already use Photoshop Actions which I’ve long since set up but now for this tutorial I’m reviewing them to show you the exact steps I’ve learned to create my gifs 😃) and present them to you in a semi-coherent way. Also, please bear with me since English is my second language.
First things first. Below are the things and tools we need to do this:
Downloaded 4K or 1080p quality videos (let’s all assume we know where to get these—especially for high definition movies and tv series—so this post doesn’t get removed, okay? 😛)
Adobe Photoshop CC or the CS versions can work as well, but full disclosure I haven’t created gifs using the CS versions since 2020. I’m currently using Adobe Photoshop 2024.
mpv player. Use mpv player to get those frames/screenshots or any other video player that has a screen grabber feature. I’ve used adapter for the longest time but I’ve switched to mpv because the press to screenshot feature while the video is playing has been a game changer not to mention ultimate time saver for me. For adapter you need to play it in another video player (like VLC player), to get the start and end timestamps of the scene you want to gif which takes me ages before I can even open Photoshop.
Anyway! Please stop reading this post for a moment and head over to this amazing tutorial by kylos. She perfectly tells you how to install and use mpv player, both for Mac and Windows users.
One thing I have to share though, I had a tough time when I updated my MacOS to Sonoma since MPV is suddenly either duplicating frames or when I delete the duplicates the player seems to be skipping frames :/ I searched and found a solution here, though it didn’t work for me lol. My workaround for this in the meantime is decreasing the speed down to 0.70 then start screenshotting—it’s not the same pre Sonoma update but it works so I’ll have to accept it rather than have jumpy looking gifs.
Now, after this part of kylos’ tutorial:

you can continue reading the following sections of my gif tutorial below.
I want to share this little tip (sorry, this will only cater to Mac users) that I hope will be helpful for organizing the screenshots that MPV saved to the folder you have selected. Because believe me you don’t want to go through 1k+ of screenshots to select just 42-50 frames for your gif.
The Control + Command + N shortcut
This shortcut allows you to create a new folder from files you have pre-selected. As you can see below I have already created a couple of folders, and inside each folder I have selected screenshots that I want to include in one single gif. It's up to you how you want to divide yours, assuming you intend to create and post a Tumblr gifset rather than just one gif.

Another tip is making use of tags. Most of, if not all the time, I make supercorp gifs so I tag blue for Kara and red (or green) for Lena—just being ridiculously on brand and all that.
Before we finally open Photoshop, there's one more thing I want to say—I know, please bear with me for the third? fourth? time 😅
It's helpful to organize everything into their respective folders so you know the total number of items/frames you have. This way, you can add or delete excess or unnecessary shots before uploading them in Photoshop.
For example below there are 80 screenshots of Kara inside this folder and for a 1:1 (540 x 540 px) Tumblr gif, Photoshop can just work around with 42-50 max number of frames with color adjustments applied before it exceeds the 10 MB file size limit of Tumblr.

Sometimes I skip this step because it can be exhausting (haha) and include everything so I can decide visually which frames to keep later on. You'll understand what I mean later on. But it's important to keep the Tumblr 10 MB file size limit in mind. Fewer frames, or just the right amount of frames, is better.
So, with the screenshot organization out of the way, let's finally head over to Photoshop.
Giffing in Photoshop, yay!
Let’s begin by navigating to File > Scripts > Load Files into Stack…

The Load Layers window will appear. Click the Browse button next.
Find your chosen screenshots folder, press Command + A to select all files from that folder then click Open. Then click OK.
After importing and stacking your files, Photoshop should display the following view:

By the way, I'll be providing the clip I've used in this tutorial so if want to use them to follow along be my guest :)
If you haven't already opened your Timeline panel, navigate to Windows > Timeline.
Now, let's focus on the Timeline panel for the next couple of steps.
Click Create Video Timeline, then you’ll have this:

Now click the menu icon on the top right corner then go to Convert Frames > Make Frames from Clips

Still working on the Timeline panel, click the bottom left icon this time—the icon with the three tiny boxes—to Convert to Frame Animation
Select Make Frames From Layers from the top right corner menu button.
So now you have this:

Go and click the top right menu icon again to Select All Frames
Then click the small dropdown icon to set another value for Frame Delay. Select Other…

The best for me and for most is 0.05 but you can always play around and see what you think works for you.
Click the top right menu icon again to Reverse Frames.
I think Photoshop has long since fixed this issue but usually the first animation frame is empty so I just delete it but now going through all these steps there seems to be none of that but anyways, the delete icon is the last one among the line of feature buttons at the bottom part of the Timeline panel.
Yay, now we can have our first proper GIF preview of a thirsty Lena 😜

Press spacebar to watch your gif play for the very first time! After an hour and half of selecting and cutting off screenshots! 😛 Play it some more. No really, I’m serious. I do this so even as early (lol) as this part in the gif making process, I can see which frames I can/should delete to be within the 10 MB file size limit. You can also do it at the end of course 🙂
Now, let’s go to the next important steps of this tutorial post which I’ve numbered below.
Crop and resize to meet Tumblr's required dimensions. The width value should be either 540px, 268px, or 177px.
Convert the gif to a Smart Object for sharpening.
Apply lighting and basic color adjustments before the heavy coloring. I will be sharing the base adjustments layers I use for my gifs 😃.
1. Crop and Resize
Click on the Crop tool (shortcut: the C key)

I like my GIFs big so I always set this to 1:1 ratio if the scene allows it. Press the Enter key after selecting the area of the frame that you want to keep.
Side note: If you find that after cropping, you want to adjust the image to the left or another direction, simply unselect the Delete Cropped Pixels option. This way, you will still have the whole frame area available to crop again as needed and as you prefer.
Now we need to resize our gif and the shortcut for that is Command + Opt + I. Type in 540 as the width measurement, then the height will automatically change to follow the ratio you’ve set while cropping.
540 x 540 px for 1:1
540 x 405 px for 4:3
540 x 304 px for 16:9
For the Resample value I prefer Bilinear—but you can always select the other options to see what you like best.
Click OK. Then Command + 0 and Command + - to properly view the those 540 pixels.

Now we get to the exciting part :) the sharpen settings!
2. Sharpen
First we need to have all these layers “compressed” intro a single smart object from which we can apply filters to.
Select this little button on the the bottom left corner of the Timeline panel.


Select > All Layers
Then go to Filter > Convert for Smart Filters
Just click OK when a pop-up shows up.
Now you should have this view on the Layers panel:

Now I have 3 sharpen settings to share but I’ll have download links to the Action packs at the end of this long ass tutorial so if you want to skip ahead, feel free to do so.
Sharpen v1
Go to Filter > Sharpen > Smart Sharpen…
Below are my settings. I don’t adjust anything under Shadows/Highlights.
Amount: 500
Radius: 0.4
Click OK then do another Smart Sharpen but this time with the below adjustments.
Amount: 12
Radius: 10.0

As you can see Lena’s beautiful eyes are “popping out” now with these filters applied. Click OK.
Now we need to Convert to Frame Animation. Follow the steps below.
Click on the menu icon at the top right corner of the Timeline panel, then click Convert Frames > Flatten Frames into Clips
Then Convert Frames > Convert to Frame Animation
One more click to Make Frames From Layers
Delete the first frame then Select All then Set Frame Delay to 0.05

and there you have it! Play your GIF and make sure it’s just around 42-50 frames. This is the time to select and delete.
To preview and save your GIF go to File > Export > Save for Web (Legacy)…
Below are my Export settings. Make sure to have the file size around 9.2 MB to 9.4 MB max and not exactly 10 MB.

This time I got away with 55 frames but this is because I haven’t applied lighting and color adjustments yet and not to mention the smart sharpen settings aren't to heavy so let’s take that into consideration.
Sharpen v1 preview:

Sharpen v2
Go back to this part of the tutorial and apply the v2 settings.

Smart Sharpen 1:
Amount: 500
Radius: 0.3
Smart Sharpen 2:
Amount: 20
Radius: 0.5
We’re adding a new type of Filter which is Reduce Noise (Filter > Noise > Reduce Noise...) with the below settings.

Then one last Smart Sharpen:
Amount: 500
Radius: 0.3
Your Layers panel should look like this:

Then do the Convert to Frames Animation section again and see below preview.
Sharpen v2 preview:

Sharpen v3:
Smart Sharpen 1:
Amount: 500
Radius: 0.4
Smart Sharpen 2:
Amount: 12
Radius: 10.0
Reduce Noise:
Strength: 5
Preserve Details: 50%
Reduce Color Noise: 0%
Sharpen Details: 50%
Sharpen v3 preview:

And here they are next to each other with coloring applied:
v1

v2

v3

Congratulations, you've made it to the end of the post 😂
As promised, here is the download link to all the files I used in this tutorial which include:
supercorp 2.05 Crossfire clip
3 PSD files with sharpen settings and basic coloring PSD
Actions set
As always, if you're feeling generous here's my Ko-fi link :) Thank you guys and I hope this tutorial will help you and make you love gif making.
P.S. In the next post I'll be sharing more references I found helpful especially with coloring. I just have to search and gather them all.
-Jill
#tutorial#gif tutorial#photoshop tutorial#gif making#sharpening#sharpening tutorial#photoshop#photoshop resources#psd#psd coloring#gif coloring#supercorp#supercorpedit#lena luthor#supergirl#my tutorial#this has been a long time coming#guys. i'm BEGGING you. use the actions set - it was a pain doing all this manually again ngl LMAO#i've been so used to just playing the actions#so this has been a wild refresher course for me too 😆
477 notes
·
View notes
Text
[Simmerianne93]Portrait_poses_11

----------
Hello everyone!!! How are you today???!!!
I'm 3 days late with these poses.... sorry for that... but here they are!!! Finally!!! The winner pack from the last public survey: Portrait poses with triplets!!! and as such it's a free pack for everyone to enjoy, inmediatly...
Thank you so so so so much for participate in the survey! I'll be doing another one soon, so keep an eye in my socials and here for the announce!!
I really love this pack! I know I say that a lot lately haha but I trully love this one.
Back when Growing Together went on sale, a friend of mine give it to me.... I decided to play with a sim called Pilar to test the expansion pack and she fell in love with Don Lothario. I don't hate Don, I actually love him. I read an NSB that redeemed him a few years ago and I started to love him. So I was glad that my lovely Pilar fell in love with him in this save. They woohoo and my game decided to troll me and give me for the first time a pregnancy with triplets... no traits used no on the sims, nor in the lot... It was just a game's choice.
A few days later, when the triplets were beautiful infants, Pilar and Don wished to woohoo again... I was hesitant xD (I have Mccc and WW installed, and I have a % to get a sim pregnant even with the normal woohoo interaction) and every time they were going to Woohoo, I would cancel the action, but after canceling it about 5 or 6 times, I decided to let them be haha and that was a mistake, 'cause they got pregnant again... with triplets.... yeah... no cheats, no traits... it just seems that this Don and my lovely Pilar were too fertiles... hahahaha...
Anyway, I got two triplets in a row, with just two woohoo tries... and that was when I started to think about triplet packs. Actually, that's how my "Infant_poses_01" came to life... and now you have this new posepack, inspired for that unexpected event to "complete" in a way the triplet's journal... haha kind of a "memories" posepack, triplets for all ages from infants to teen/adults.
I hope you all like them as I do, because I'm in love with the way they came out:
----------
What is on it?
12 groupal poses:
4 poses for 5 sims (2 adults and 3 infants; 2 adults and 3 toddlers; 2 adults and 3 kids; and 5 teens/aduts)
4 poses for 4 sims (1 adult and 3 infants; 1 adult and 3 toddlers; 1 adult and 3 kids; and 4 teens/adults)
4 poses for 3 sims (3 infants; 3 toddlers; 3 kids; and 3 teens/adults)
--- What do you need?
Andrew poses player.
Teleport any sim by Scumbumbo or Mccc by deaderpool.
"Rustic stool" chair from "Jungled Adventure" Gamepack (tho it can be use with some other "stools" from the game like the one from "For rent" Expansionpack)
"The hipster hugger" sofa from Basegame (or any 3sits-sofa, tho it can glitch a little bit depending on wich sofa you choose)
A double bed.
Invisible infant mat replacement by mcrudd (OPTIONAL)
Instructions in the original post.
——
TOU
Do not claim my creations as your own.
Do not re-upload or modify my creations.
Do not make money of my creations.
Do not include my creations in Mods folders to download.
Please follow my Term Of Use.
——
Download it now here — [FREE FOR EVERYONE]
——————
If you want to support me: Patreon | Ko-fi
All my poses overview: Pinterest | Wix | Tumblr
More in-game preview pics of all my poses: Instagram
My socials: Twitter | BlueSky | Instagram | Tumblr
Lives and videos: Youtube
——————
I really hope you like them and I will say in advance: Thank you so much for using them.
@ts4-poses
#poses#ts4#simmerianne93#sims4poses#thesims4#posesforsims#sims4#thesims#ts4poses#creator content#familyposes#portraitposes#infantposes#toddlerposes#childrenposes#childposes#kidsposes#groupalposes#tripletsposes#trioposes#freeposes#freedownload#giftposes#publicposes#publicdownload#public#free#freecontent#download
417 notes
·
View notes
Text
anyway did you know that someone uploaded the tv-n subs for toqger on archive.org
it has all the episodes, plus the gaim crossover episode that’s supposed to be watched sometime early on. the gaim crossover can be skipped, there’s like one (1) funny scene that got big on tumblr so just look at that post and that’s all you need. it does *not* have the films or specials, but this upload does
Galaxy Line SOS, listed as ‘Ressha Sentai Toqger Movie’: takes place between eps 20 and 21, it’s a cute and fun movie :)
Farewell, Ticket! The Wasteland Super ToQ Battle!!, listed as ‘Ressha Sentai Toqger Special DVD’: takes place between ep 26 and 27 and is MANDATORY
ToQger vs. Kyoryuger, listed basically as-is: takes place between ep 35 and 36, a character from Galaxy Line S.O.S comes back for a cameo, also a cute and fun movie
Ninninger vs. ToQger - post-series, I don’t remember this one and it’s not on the playlist so it’s probably not important
They Went and Came Back Again Ressha Sentai ToQGer: Super ToQ 7gou of Dreams, listed as ‘Ressha Sentai Toqger Returns’: post series, also pretty mandatory
as for ‘why toei’s baby train toy commercial is worth watching’:
It’s written for children in an intelligent way, there are a lot of lessons that I thought were delivered kindly and conscientiously
It’s written intelligently in general, both the heroes and the villains have goals with a lot of room for interesting progression; the heroes start with trying to regain their memories, the villains start with trying to resurrect the emperor of darkness, and both storylines are balanced really well. Some of those twists and developments Got Me
It’s mostly lighthearted, very sincere, and some of the emotional beats are really devastating… episode 32 does make me tear up every watch
The fight choreography is fun! Since the theme is imagination, they can get pretty goofy/playful in some eps
One of the gimmicks is that the sentai team can switch colors, which means while it has a traditionally structured sentai team—male red, 2 girls and 3 guys—there are times where the gals are red and the guys are pink, and I like that :)
The villain aesthetics


179 notes
·
View notes
Text
90 GENETICIZED SKINTONES + DEFAULTS
EDIT: NOT POSTING THIS ON MODTHESIMS ANYMORE BUT THE MEDIAFIRE DOWNLOAD HAS BEEN FIXED. REASON BEING THAT SOME SKINS HAVE DISCOLORATION THAT I DON’T HAVE THE TIME TO FIX : /
First of all, Happy holidays!
This is my second post, and the whole purpose of this Tumblr account is for me to share Sims 2 content that I personally use.
Now, for my game, my favorite skintone set is by oepu, which were defaulted by Sadisticpyro, both on modthesims.
I love this skin because it's not too cartoonish and also not too realistic/shiny. I like that it too has two-toned lips, and has the same lip color as mine. It also goes well with the proportions of how I make my sims.
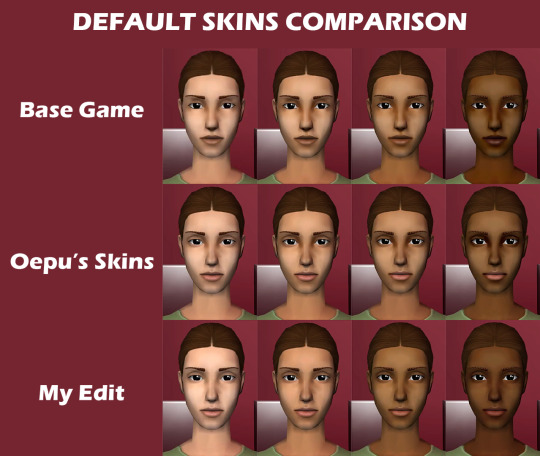
Anyways, I don't like the skintone shades of any default skintone replacements out there because generally, they make skintone 1 and 2 look the same, and skintone 3 wayy lighter, so I created my own variation and modified the oepu skin: - I made skintone 1 lighter, skintone 3 darker and more saturated, and skintone 4 more saturated and less contrasted. - I made the male and female sims have the same skin so that they don't look too drastic from one another. - I also lightened the nose and browridge shadows so that the skin is compatible on monolids and non-prominent noses.
picture comparison of sims 2 skins: base game, oepu's, and my edit
Afterwards, I used python to turn the 4 skintones into 10 skintones first, each skintone number has these genetic values (using Wardrobe Wrangler):
1 - 0.1 2 - 0.15 [default skintone 1] 3 - 0.2 4 - 0.3 [default skintone 2] 5 - 0.4 6 - 0.5 [default skintone 3] 7 - 0.6 8 - 0.7 [default skintone 4] 9 - 0.8 10 - 0.9
Then, per 10 skintones, I made 3 sets of undertone variations: cool, neutral and warm. So now you have 30 skintones. I thought the first set of 30 was too saturated, so I made the "Natural" versions of them. Then I also decided to make them even more desatured, these are the "Pale" versions. So overall, 90 skintones.
Because I used python, some skins are pixelated, but I really don't mind it. Also, the teeth for some is yellowish but I'll make cc teeth overlays.
DOWNLOAD HERE (MEDIAFIRE) 👈 mediafire link has the default edits, the nondefault geneticized skintones, and a gif preview of the skintones.
Note: If you choose to use the default replacements, remove any default skin replacements you may have in your game.
Again, huge credits to oepu and sadisticpyro for the og skins. I don't think they're active, but if i'm asked to take this down I will gladly do so. I'm just here to share what I already use in my game.
Happy Holidays everybody! 🎊🥳
132 notes
·
View notes
Text
How to edit! Part 2… Tips and tutorial!
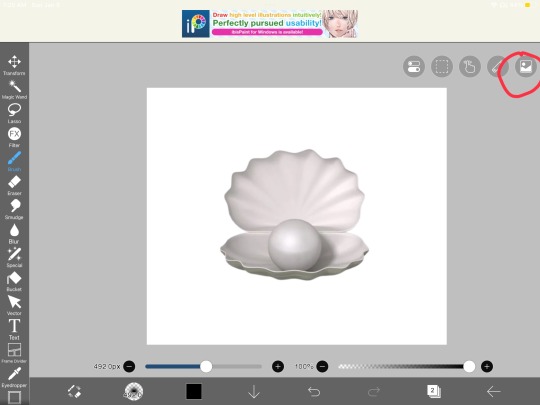
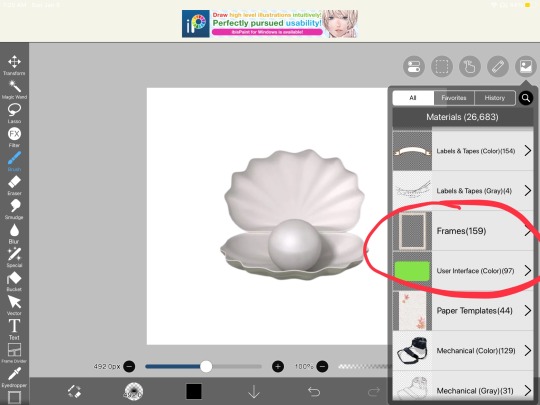
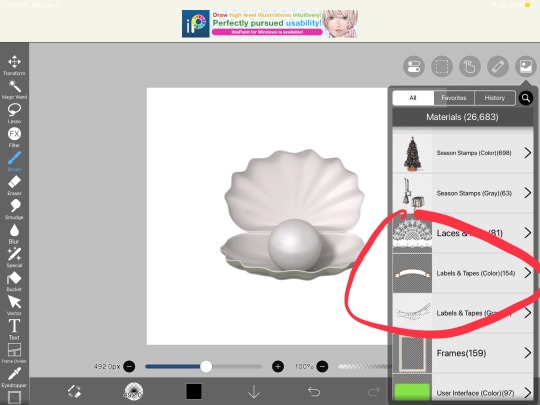
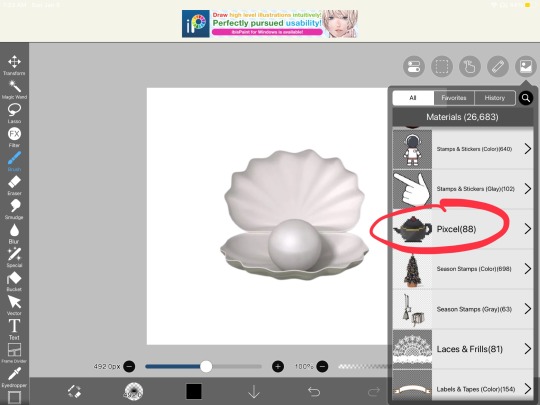
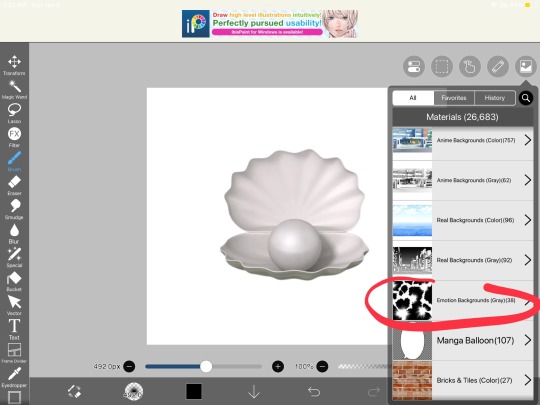
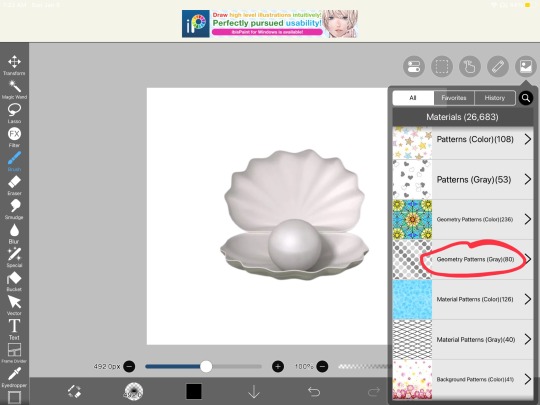
So for resources that you can find through ibispaint x, click the little image icon at the top right corner, and the ones I have circled are ones I have used or plan on using! The pixel one is usually only if you plan on making pixels/favicons !!
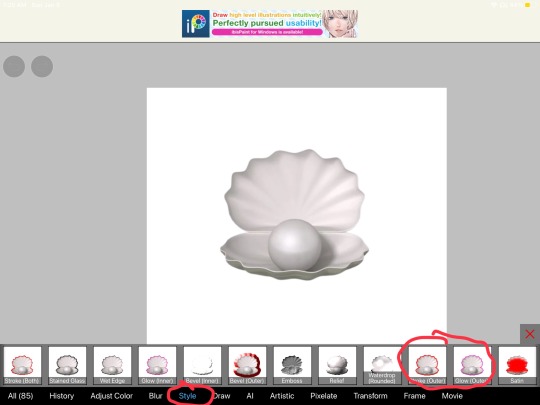
As far as filters go for me these are what I use and how to find them!
So for the basics of using ibispaint x.. you can figure out as you go and can probably find out the basics of the interface through their website and/or their in app tutorial as you click on buttons and such 🫶🏻 don’t be afraid to mess around with buttons, but just know if you exit out of ur canvas/project or ur app closes, you will not be able to double-tap/click to remove past mistakes or undo anything.. so like don’t mess around too much and keep that in mind while editing.. 😭 I’ve done it a few times while drawing on ibis (because I am also an artist) and editing ofc
Also DONT merge ur layers. If someone asks for proof you made ur graphic, even if you have 100 layers.. don’t merge them because all you’ll have is a speedpaint and if you don’t add ur watermark too on top of it.. they’re gonna think u stole it.. so just like keep it mind.. 😭
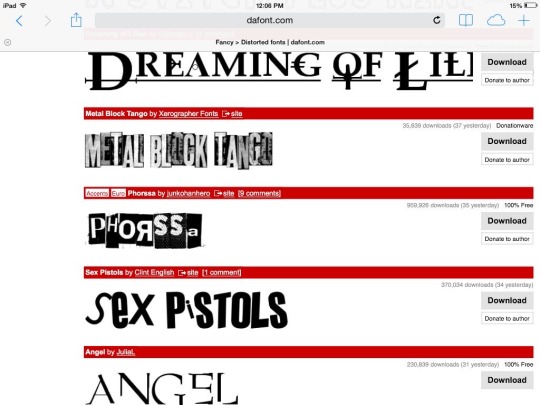
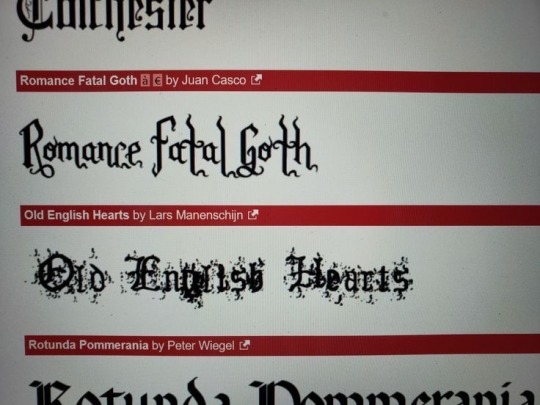
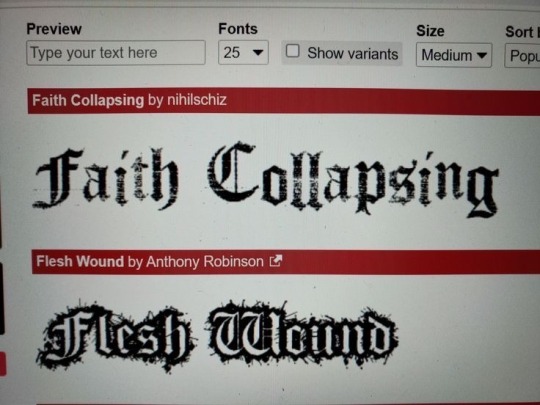
Here are some fonts that you can download for ibispaint x! If you plan on making a blog, watermark, or anything text related! Ibispaint x does have a lot of free fonts you can use through their app but having some fun downloaded fonts is also great! I used to have a massive collection but I’m on my iPad now 😭 so I have one.. it’s romance fatal goth LOL
I’ll have to make a thread for this because you can only add 10 images to ur posts so… if I have anything else to add that’s image related I’ll reblog some more things..
Pinterest is gonna be ur best-friend 😭 so is tumblr.. and rentry resources!
I’m gonna make a video on how I colour graphics and such probably tomorrow because it’s almost 2 a.m and probably will be past 2 a.m when I’m done making this..
Anyways.. HERES SOME RENTRIES FOR RESOURCESSS AND ALSO ON HOW TO GRADIENT YOUR TEXT ON TUMBLR!!
Rentry Rentry 2 Rentry 3 Gradient text tutorial!
#( ╹ ╹)? a post!#rentryblr#editors on tumblr#rentry#rentry decor#rentry stuff#editblr#tutorial#tutorials#rentry graphics tutorial#rentry tutorial#tumblr tutorial#fonts#ibispaintx
91 notes
·
View notes
Text
Stop overconsuming shifting / loa information
Quite a lot of you have probably seen posts like these, and it may be tiring to see yet another, it's true. You need to stop overconsuming information about reality shifting and loa.
For example, let's say you're downloading a file on your device, but you have too many apps open so the download is way slower. It's kinda like that, but with a difference. Shifting is not a process. (I'm not gonna get into that though.)
You may or may not have seen it, but there was a tt where a fellow shifter explained shifting to their friend, then the next day their friend said they shifted!!! That person felt jealous. "Why didn't I shift then? I knew about it earlier than my friend.." They thought. But here's why.
The person told their friend about shifting and how easy it was already. Yet they have been overconsumimg information about shifting so they kept thinking "should I do this 9282747181 day challenge first?" "Maybe I should listen to subs too, ___ post said that!" "_ post said this!!! So I should also do it." Also btw you shouldn't feel jealous about ANYYYYONE when it comes to shifting, you can easily do that too!
Anyway.. my advice is to get off tumblr, any app that talks about shifting / loa and just.. do it.. just simply apply the law / go shift !!!!!! <3
PERSIST!!! ^_^
Hearts from Mel <3

#୧ ‧₊˚ mel's silly rantz ⋅ ☆#shifting blog#shiftblr#reality shifting#shifting community#shifting antis dni#shifters#shifting#shifting motivation#shifting memes#reality shifter#loa affirmations#loa advice#loa tips#loa blog#loa success#loa tumblr#loablr#loa#loass states#loassumption#shifting consciousness#shifting advice#shifting tips#shifter#shifting help#shifting mindset#shifting methods#shifting script
101 notes
·
View notes
Text

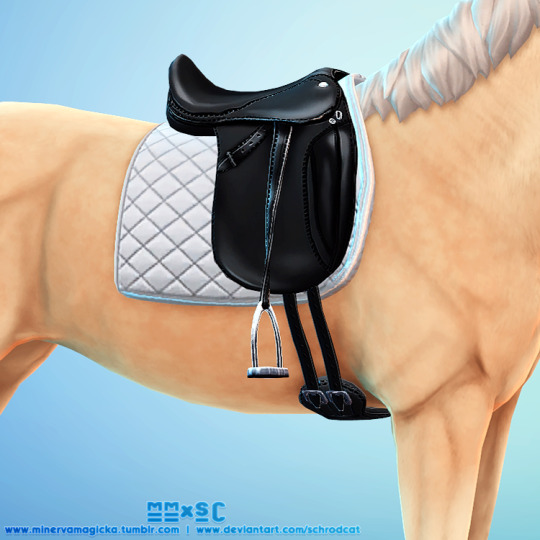


[SSO Conversion] TS4 Dressage Saddle
At last! It is nigh! Includes 3 different saddles in 2 different polycounts (~13 swatches), with 1 saddlepad overlay (~14 swatches) that is universal to them all. Full LODs & maps.
If you post anything involving this saddle to tumblr & tag me in it, I'll be reblogging!
Important info, additional previews, TOU and download below the cut!
By myself & Schrodcat @ DA 🖤
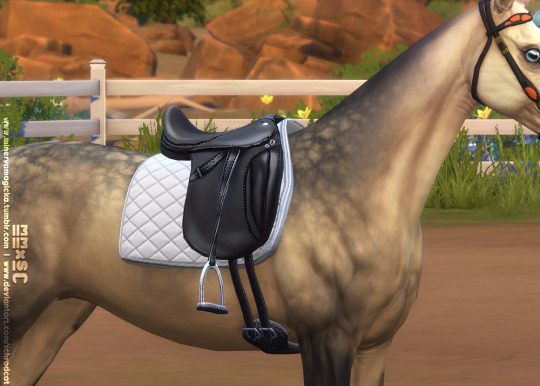
Choosing a Version
First things first; in the download folder there are two different .rar files to choose from. One is labelled Highpoly and the other is labelled Maxispoly. YOU MUST CHOOSE ONE. THEY WILL OVERRIDE EACHOTHER IF YOU INSTALL BOTH HIGHPOLY AND MAXISPOLY TOGETHER.
The Highpoly version of the saddles is the original mesh resolution from Star Stable Online (which is surprisingly high-quality). However, taking into account the 3D pad and whether there are stirrups or not, it pushes the saddle very far out of EA's expected polycount range (the LOD0 on the Highpoly w/ stirrups clocks in at ~6,044 polys) which is why we have labelled this version as Highpoly. We offer it primarily for simmers who plan to be taking screenshots vs actually playing the game for extended periods of time, or for those with stronger PCs.
The Maxispoly version of the saddle is a decimated version of the mesh intended to be more in-line with Maxis polycounts, and therefore be more performance-friendly. It's about 50% less dense in polys than the Highpoly counterpart (LOD0 on the Maxis w/ stirrups clocks in at ~3,021 polys), however it is still higher-poly than the EA saddles, but again this is because it includes additional mesh details like a 3D saddlepad and/or stirrups, just bear that in mind. This version is for simmers who might have weaker PCs or intend to primarily play the game with the saddles.
Once you've chosen between Highpoly and Maxispoly for your saddle, you'll want to grab the saddlepad overlay .package. This saddlepad (it is found in blankets in CAS) acts like an accessory overlay you'd see for Human content, where it will replace the saddlepad texture on your saddle. You can use the saddlepad overlay without the saddle, but it's not exactly designed for that, as it's designed to match the UVs of the 3D saddlepad. It's unlikely it would fit the EA saddle or any other saddles as just as a flat 2D texture.

All the parts included have custom thumbnails, with the EA fit version having a special identifier.
That concludes all the required reading. Please note that the Realistic Fit of the saddles is not going to line up with EA riding animations and may stretch horribly on them, too. This is because it was rigged and weighted specifically for pose makers. It should look fine when posing. If you want a saddle to fit the EA animations, then the EA Fit version is precisely that, and is meant for gameplay exclusively. The saddlepad overlays are cross-compatible between the Realistic Fit and EA Fit saddles, & any custom saddlepads made by other creators, provided they're intended to fit the UVs, will also be cross-compatible!

Custom Saddlepad Resources (CC Creators Only)
Disclaimer: If you're not a CC Creator you can skip this section and move on to the TOU & download!
If you're interested in making your own saddlepad overlays, I highly recommend cloning the saddlepad overlay included in this download as a starting point. This saddlepad/blanket actually has a "mesh" attached to it (it's just the part of the horse GEOM where the saddlepad texture is) to allow for full normal maps, allowing for better-detail in your saddlepads. Otherwise, you can clone the EA saddlepads and just replace the diffuses with ones you make to fit this saddle, it just won't have that extra jazz.
Anyways, included the folder is a .psd file which is meant to help streamline making saddlepads to fit this mesh (and any future Dressage Saddle meshes/swatches) - There's a guide in the .psd but in general, just keep your textures within the mask/provided guide UVs in the .psd and you'll be golden!

Terms of Use
Credit/link to me AND Schrodcat AND note it is a conversion from SSO if you intend to edit, replicate or otherwise use this .package, meshes & textures as a base for your own derivative work. Additionally, at this time, we both ask you do not backport this model or its' textures to TS3.
Do not sell or post behind a paywall, even a timed one. This tumblr is anti-paywall to the extreme. This includes any content that might be created under Rule One. Do not do this. I will think you are an asshole. I have had issues with this in the past and my tolerance for it is absolutely zero. Additionally this asset is exported from a copyrighted game with the intention of it being used transformatively for derivative fanworks; it may be actually illegal to profit from it!
Do not reupload. If you let me know if there's an issue with SFS, I'll reupload it myself. Please link to this post or to the .package on SFS when sharing.
Credits: SSO for the base mesh & textures; Schrodcat with fitting the meshes & testing/screenshots, me for putting it all together into one diabolical package.
Download [SFS]
☕ Buy me a coffee!
☕ Buy SchrodCat a coffee!
1K notes
·
View notes
Text
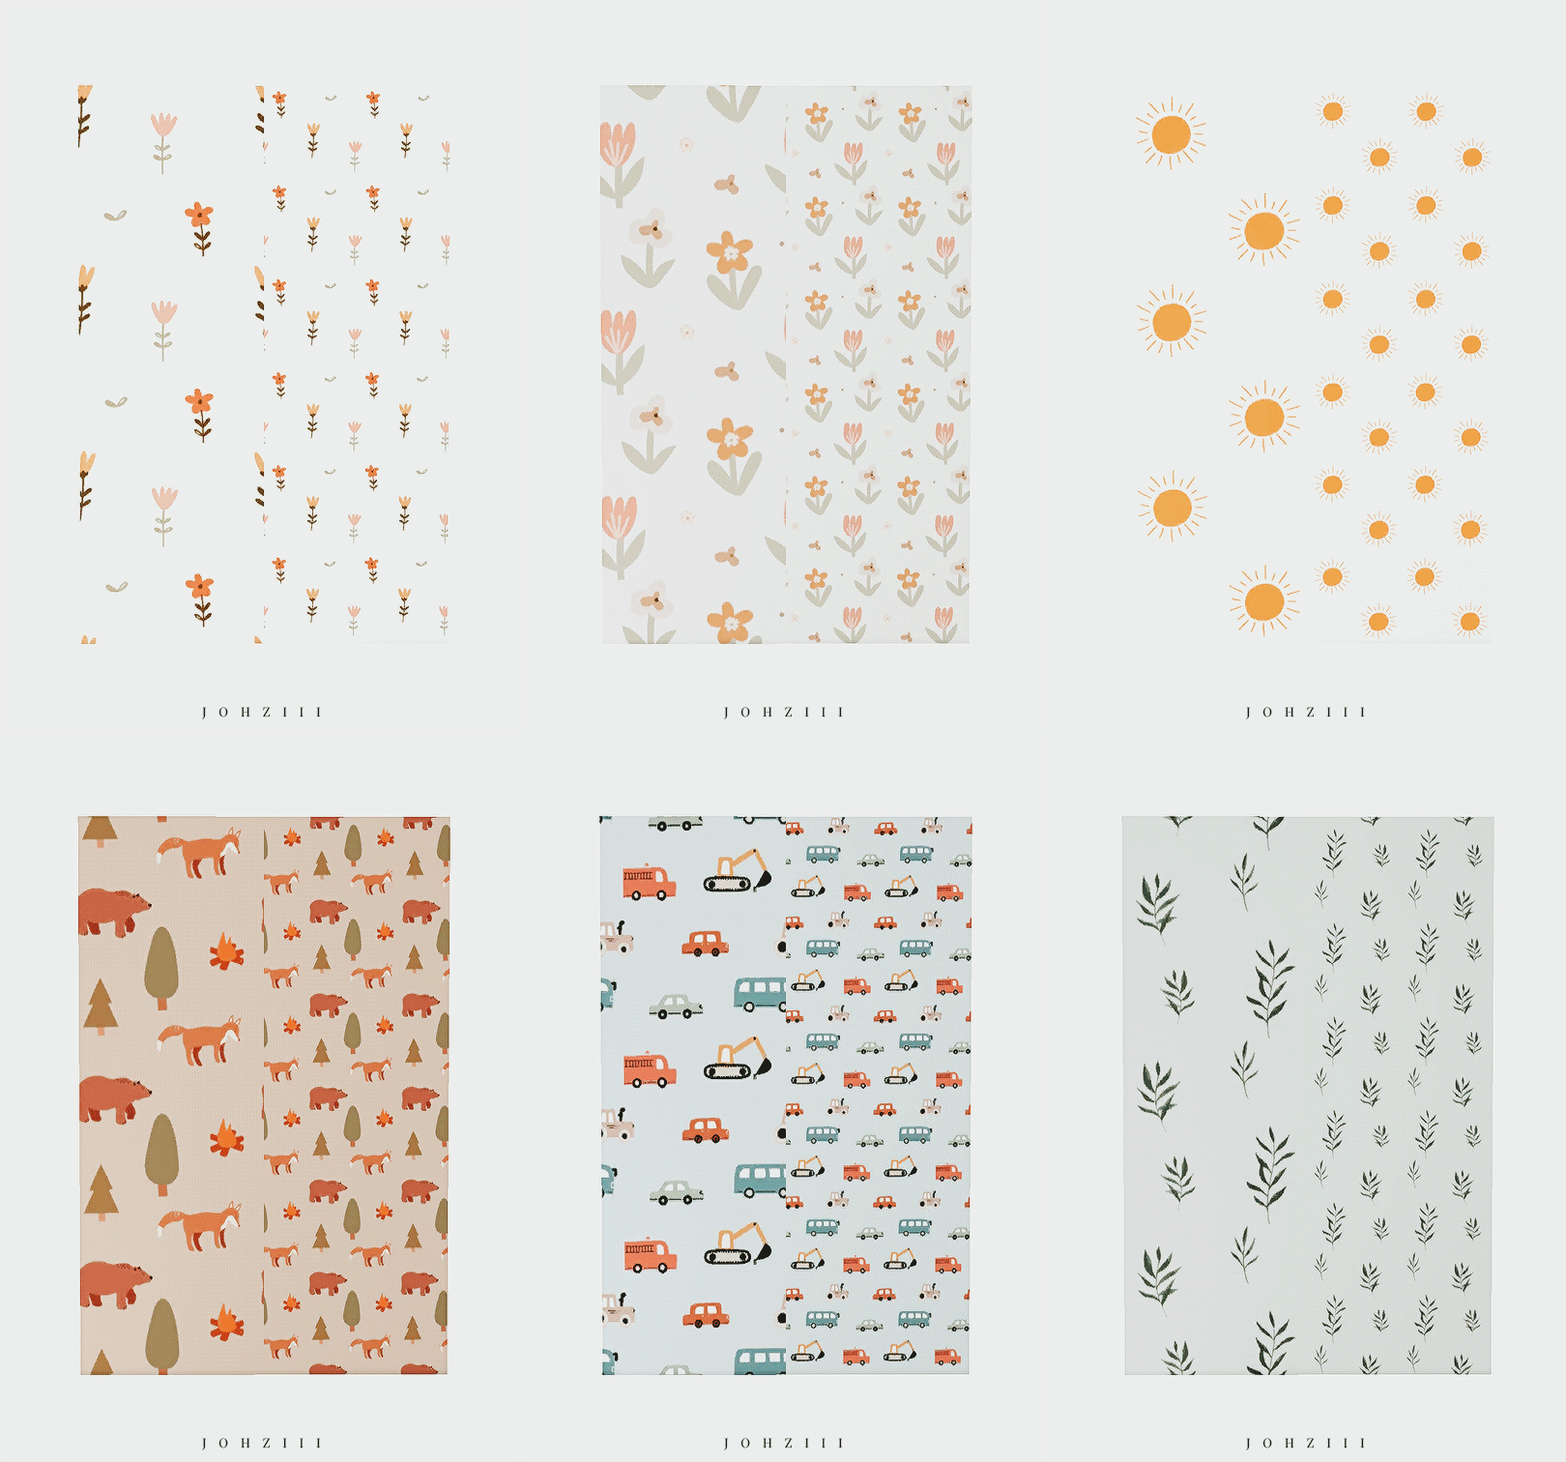

i was debating whether or not to upload this bc i made these patterns using photoshop and create a pattern tool, but the designs are NOT MINE. i found these vectors online and the original owners may actually be selling them, so i feel like i'm putting their designs up for free even tho its just for a game and im not putting it behind a paywall. anyways, idk if anyone has a problem with this being up for download pls lmk!! i'll take it down without hesitation.
**disclaimer: i do not own any of the artwork used in this cc set (they are pics i found online)**
info of cc item(s) is under the cut! pls lmk if there’s any problems & feel free to tag me if you use them in your gameplay and post to tumblr! <3
TOU ♥ CC PAGE ♥ MY KO-FI ♥

sfs | google drive
nature pattern set
found in theme
ver 1 (left) and ver 2 (right)
9 patterns (18 total)
422 notes
·
View notes
Note
Hello! I absolutely love your blog, everything from your festival recounts to animation analysis and programming (one of tumblr's recommended posts was the one where you made your own rasteriser, and I liked your attitude in what I've read so much that I'm gonna attempt to conquer my 3-year-long grudge against using opengl during college and do something similar now that I'm a bit older and have no deadlines :D).
But anyway, I have 2 questions (sorry if there's easily accessible answers, tumblr search is not helping): 1. During your animation nights, does the screen stay black while everyone watches their own video while you provide commentary? I haven't caught any yet but maybe someday! And 2. do you have any youtube channels or just one-off video essays that you like that also cover animation/directors? Or, even programming lol.
Sorry for the long ask have a nice day!
hiii! i'm very touched that you like my dorky eclectic blog <3
For the Animation Nights, I just stream the video over Twitch from local sources on my computer, typically by playing the video in mpv and recording it in OBS. This is obviously not ideal from a video quality perspective, but it's the easiest way to watch video in sync without making everyone download files in advance. Then we all chat in the Twitch chat box (in large part to crack stupid jokes, it's not that highbrow lmao). I've gotten away with it so far!
As for youtube channels, I can recommend...
anime production/history (i.e. sakuga fandom)
SteveM is likely the most sakuga-fan affiliated anituber. He makes long, well-researched and in-depth videos on anime history, usually themed around a particular director or studio.
Pyramid Inu might be my fave anituber - very thoughtful analysis of Gundam, obscure mecha anime and oldschool BL and similar topics. tremendously soothing voice too.
The Canipa Effect does excellent deep dives into the production of specific shows, both western and anime. I appreciate the respect he gives to the Korean animators of shows like AtlA in particular!
Sean Bires's 2013 presentation on sakuga is pretty foundational to this whole subcultural niche, and a great place to get an introduction to the major animator names to know and significant points in the history of anime. unfortunately a couple of the segments got slapped down by copyright but the rest holds up!
animation theory (for animators and aspirants)
I'm going to focus here on resources that are relevant to animation in general, and 2D animation. if I was going to list every Blender channel we'd be here all week :p
New Frame Plus is one of the best channels out there for game animation, describing in tightly edited videos how animation principles work in a game context and analysing the animation of various games. highly recommend
Videogame Animation Study is similar, examining the animation of specific games in detail
the 'twelve principles of animation' (defined by Disney's Ollie Johnston and Frank Thomas) remain the standard approach to animation pedagogy; there are various videos on them, but Alan Becker (of Animator vs Animation) has quite a popular series. I haven't actually watched these but many people swear by them! Dermot O'Connor expands the list to 21. Note that some of the terminology can be a little inconsistent between different animators - c.f. 'secondary motion'...
Dong Chang is an animator at Studio NUT, who produces a lot of fantastic, succinct videos on standard techniques in the anime industry, timesheet notations, etc. etc. Studio Bulldog, a small anime studio, are a good complement; they focus more on douga than genga and are generally a bit more traditional.
programming
big topic here, I'm going to focus on game dev and tech art since that's my field. but also some general compsci stuff that's neat
SimonDev - graphics programmer with a bunch of AAA experience, fantastic explanations of advanced optimisations and some of the more counterintuitive aspects of rendering
Acerola - graphics programmer who makes very detailed guides to a variety of effects with a very rapid and funny 'guy that has seen monogatari' editing style. When he's good, he's really good. His video on water is probably the best one I've seen (though I can recommend a couple of others).
TodePond - the most charming, musical videos about recursion and cellular automata you've ever seen. less programming tutorial and more art in themselves.
Ben Eater - known for his breadboard computer series, a fantastic demonstration of how to go from logic gates up to the 6502 with actual hardware. worth watching just for how clean he puts the wires on his breadboards like goddamn man
Sebastian Lague, Useless Game Dev - both do 'coding adventure' style videos where they spend a few weeks on some project and then document it on Youtube, resulting in a huge library of videos about all sorts of fascinating techniques. great to dive into
Freya Holmér - creator of the 'shapes' library, makes videos on mathematical programming, with gorgeously animated vector graphics. Her video on splines is a particular treat.
There are definitely many more channels I can recommend on these subjects, but I'll need to dig into my history a bit - unfortunately I need to rush out right now, but hopefully that should be good to be getting going with!
79 notes
·
View notes
Text
ok so i just finished my book cover for First, Best Destiny - Part 1 by the amazing @ophelia-j !!
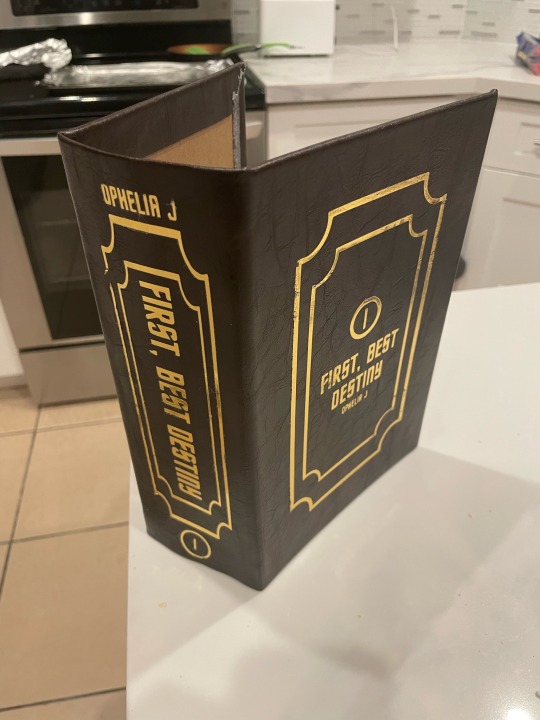
admittedly i was going to wait until i actually attached the text block to the cover before i posted this haha, but i was SO excited after making this cover that i decided to just post it and then update with the finished product later!!
this book is absolutely embedded in my soul, and words cannot even describe how gorgeously it’s written. it’s a book that made me realize - hey, the adventure doesn’t end as you grow old.
you can read it here. i promise you won’t regret it!!!
anyways!!! here’s all of my other bookbinding steps for anyone interested.
cam’s somewhat incomplete bookbinding guide
please note that i am an AMATEUR hobbyist. please do not actually use this as a tutorial.
oh also!! bookbinding terminology will have a * by it which will be explained at the end in order to make this flow better. i’ll also link the tutorials i used at the end of this for anyone interested.
1) Formatting the document! I downloaded the original text as a PDF, and then designed a cover page, grabbed some art from the internet (i know, frowned upon, but this is just a personal copy so it is what it is), and then designed a table of contents and chapter icons!!
*side note! i added which episodes each chapter follows to the table of contents (pictured below) as this book was written as an accompaniment to TOS and the movies.
2) Next, I printed out all NINE HUNDRED PAGES??? admittedly i could have done it in less if I’d used a bigger page size, but sending things out to be printed is expensive so we made do. after printing, i folded them into signatures*.
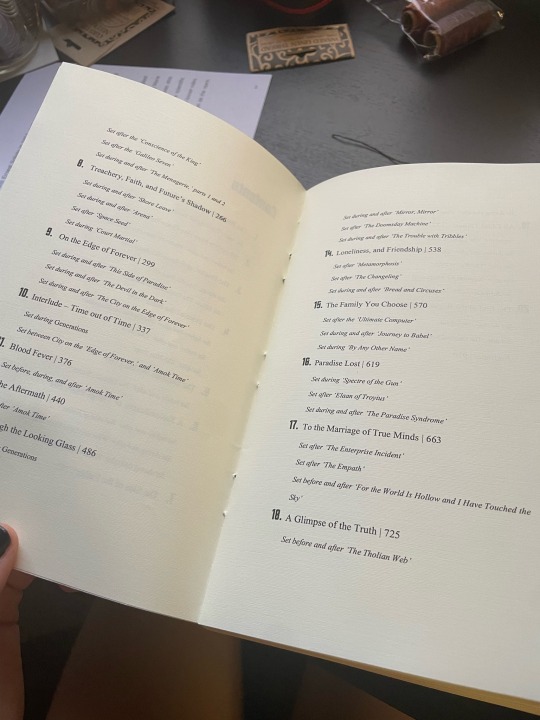
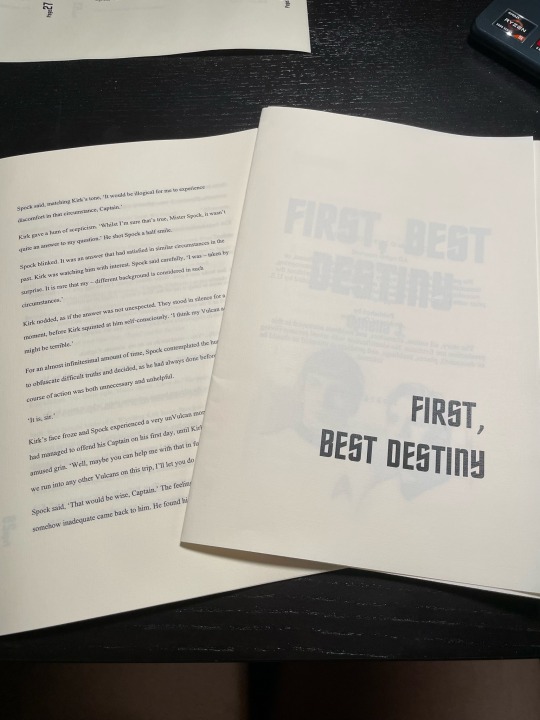
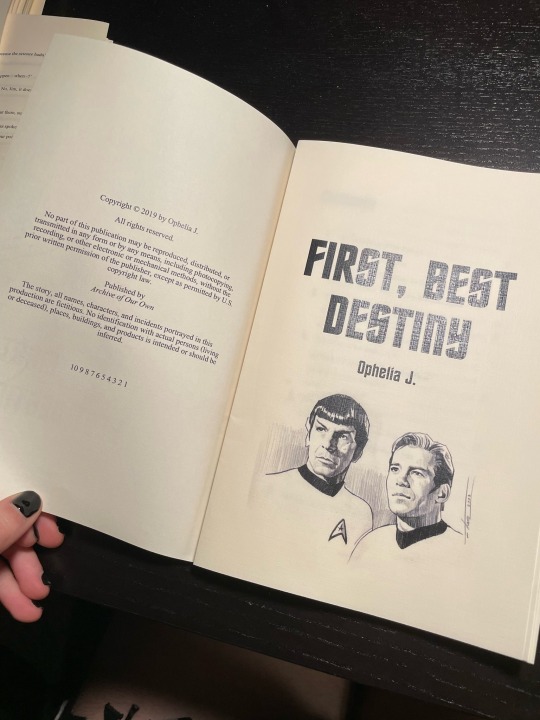
*there’s an additional note about the paper i used at the end
3) punching out holes in all the signatures! although not technically necessary, I honestly don’t think i would’ve been able to sew this behemoth without doing it.
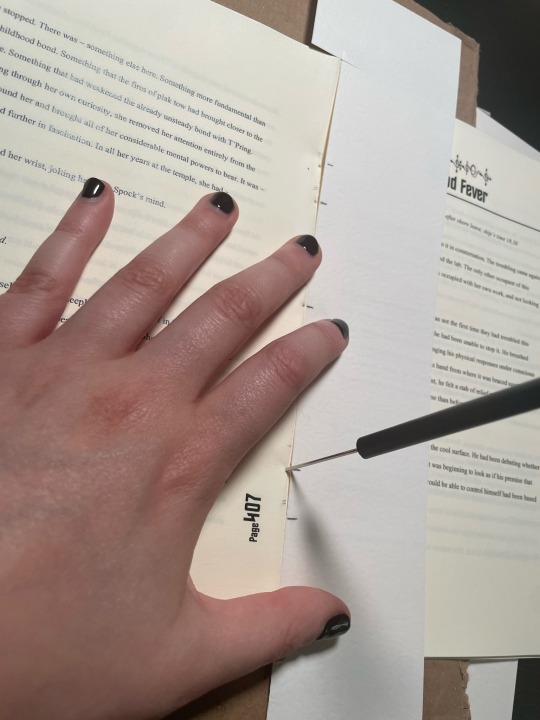
4) sewing the pages into a real!! actual!! book!! this was the part i was most nervous about. i’ve NEVER attempted to sew anywhere near this large of a book before, so i tried out a new method of sewing in hopes of making it a bit more sturdy. we won’t know if it worked until this book endures some wear and tear, but i’m pretty optimistic!
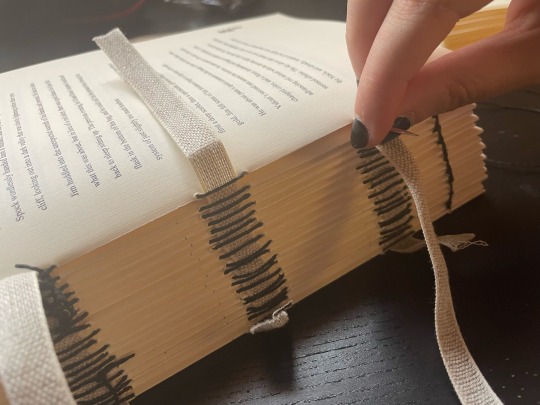
5) next up is glueing the spine! this is where it really hit me that a lot of bookbinding is just…glueing shit together. later i also added cardstock to the spine in hopes of helping it adhere to the cover better, and a book headband* for decoration.
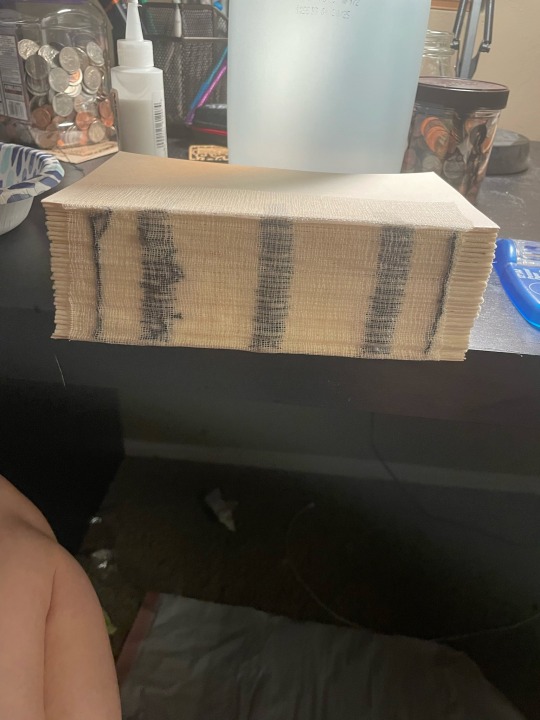
5) now we’re onto the book cover!! they only sell bookboard in minor bulk around here, so we’re not even gonna discuss how much bookboard i now own… anyways! i glued the faux leather onto the bookboard and then let that dry.
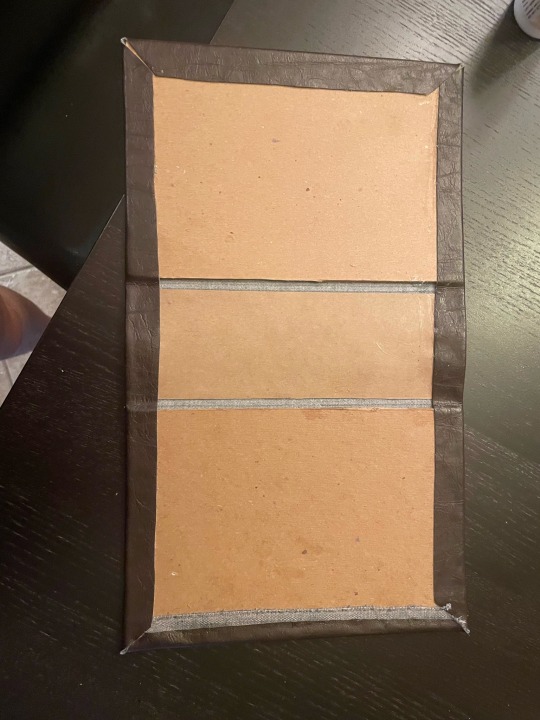
6) last up! off to the cricket! a huge thank you to my friend for letting me borrow her cricket AND supplies! anywho, this is where i designed my cover art. i then adhered the design to the cover. after this step, i realized i…definitely need some kind of sealant - so, if any more seasoned bookbinders have suggestions for this i am all ears!!
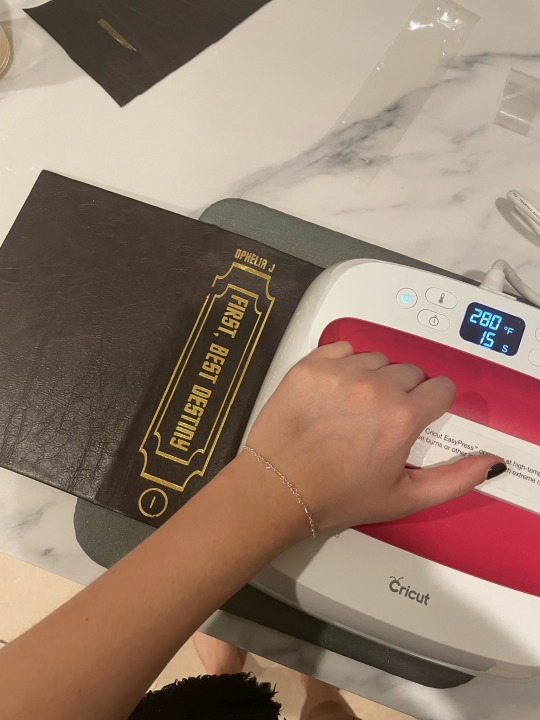
all in all, this was a super fun project, and a great way to kill some time while i recover from surgery! i absolutely plan to bind the sequel at some point, but that may be a…ways away. i’m a STEM major and school starts back up soon so…time will be in short supply lol!
To be continued...
Terminology
*signature: group of sheets folded in half, to be worked into the binding as a unit.
*book headband: just look up a picture if you’re curious because tumblr says i can't add any more pictures lol.
*about the paper!! i actually got it from a local specialty paper store, but if you want something similar i've heard amazon has some good bookbinding alternatives!
Tutorials
please PLEASE go check out Jess Less on youtube. she's phenomenal. here are her vids and what i used them for.
youtube
don't laugh!! i actually stole MOST of my techniques straight from this video.
youtube
i used this one to help me format the book correctly! although i still ended up with some goofs haha (see: any pages on the left side have the page number in the margin LMAO).
#Youtube#k/s#k/s fanfic#tos spirk#spirk#star trek#i have no creative tags :((#star trek fanart#star trek tos#star trek art#book binding#custom book bind
96 notes
·
View notes
Text
So. You once believed tumblr to be your safe space, your archive, your goldmine. Instead, thanks to "unforseen" circumstances (fuck you dorna), you now fear for the safety and integrity of your blog and you want to know if there's a quick way to download a lot of posts without having to do it manually (I spent half an hour yesterday doing it. Do not recommend)
Fret not my child, and welcome to
How to save the posts under a whole tag in five easy steps!
Needed preface: while this method works great for images, videos, and gifs, the same thing cannot be said for text post, which will be saved in unreadable html. I mean, you can always feed the file to a compiler, I guess. Or painstakingly copy paste everything on word. Maybe it could work on ao3 too, actually, I should check.
ANYWAYS.
Step 1: go here, and download the zip file. Once you've done it, extract it, open it, and run the program, that inside the folder will look like

this. (the one in the centre. so that we're all on the same page)
Step 2: once you've done it, you'll run to me saying "cate anitalianfrie, this graphic interface looks like a relic from the nineties!" to which I'll answer, yes, but it works and that's all that matters. Then, you'll open the settings (gear on the botton right of the page) , go to the page named "blog" and where you see the option "tags" put the tag you want to download the content from.
(it's located in the bottom right section of the page)

the space will be blank. put the tag without the "#", and with the spaces.
if you want to download from more than one tag at a time, you can! just beware that it's not an intersection of the two tags (aka: not downloading the post that have both tags) but a union (aka: WILL download posts with one, the other or both tags). if that's still fine by you, put a "," between a tag and the other (ex: "my gif, cate.txt").
SAVE BEFORE CLOSING THE SETTINGS
Step 3(optional): the program automatically saves in the folder blog inside the folder your program is in. if you wish to change this, go to the "general" page of the setting. at the top, you'll see this:

go to browse and select the floder you want to put your posts in. (ps. obviously your download location will be different than mine. i've already changed it. the standard would have been C:\User\your_username\wherever_you_extracted_the_zip\Blogs)
SAVE BEFORE CLOSING THE SETTINGS
Step 4: past the link of your blog as https://www.your_blog_name.tumblr.com or https://www.tumblr.com/your_blog_name (ex: https://www.anitalianfrie.tumblr.com, https://www.tumblr.com/anitalianfrie) in the little space down on the left,

and press "add blog" on its right
Step 5: click two times on the blog (it now should be at the top of the page) and click "download"
And voilà you're all set! Wait for the machine to finish the crawl and enjoy your newly downloaded content
52 notes
·
View notes