#Sculpting And Modeling Tools
Explore tagged Tumblr posts
Visit Tumblr Blog
Explore Tumblr blogs with no restrictions, modern design and the best experience.
Last Seen Tumblr Blogs


Fun Fact
Tumblr posted its first advertisements in May 2012 and subsequently earned $13M in revenue.
Video
tumblr
Stone Carving Tools - Tabvlarasa.com
Tabvlarasa.com - There are several different kinds of stone carving tools that may be utilised. The most typical are hammers and chisels, although other options include pneumatic, electric, and hydraulic tools. There are benefits and drawbacks to each kind of instrument.
#Smalti Mosaic Tiles#Stone Carving Chisels#Marble Mosaic Tiles#Sculpture Tools#Stone Carving Tools#Mosaic Tools#Sculpting And Modeling Tools#Handmade Mosaic Tiles
0 notes
Text


tried blender for the first time the other day
#silver spills#i dunno if i can even tag this as art#its more like.. abominations of my creation#me nd 2 others had 3d modeling software open nd another friend gave us prompts#these are my “horse” and my “fish”#strangely very helpful way to learn the sculpting tools#was fun and i learned :3#plus my gf made even worse abominations bc she actually knows how 2 use blender lmao
19 notes
·
View notes
Text

my stubborness is paying off
#wip#i just finished sculpting the base#now to play with modeling#i want some better details and i keep messing it up when working with the sculpting tool
11 notes
·
View notes
Text
if you peel back exactly one layer of the excuse "the tools don't make it easy for 3d artists to make black/curly/textured hairstyles" underneath you will see "this is an industry-wide problem that I do not want to address because it would force me to admit that the tools have not been developed because that specific need is not seen as a priority"
#there is an argument on twitter and i just#i spent a week attempting to figure out how to make corkscrew curls in blender#and in the end i had to frankenstein together several methods#because it was clear that the default assumption if you're animating/modeling hair is that you want it to be straight or soooort of straigh#in which case 'just sculpt it! it's fine!'#but there were several tools with just the slightest bit of tweaking could have been perfect#for creating things like locs and tighter curls#so it is both an industry wide standard issue#as well as a not wanting to put in the time issue#what im saying is if you see a 3d artist complain about specific nonwhite hairstyles they're a little crybaby bitch
5 notes
·
View notes
Text
How does one create miniature accessories for action figures?
Action figures are popular toys for children and collectors alike, but they often come with limited accessories. Making your own miniature accessories for action figures can add a personal touch and enhance your collection. Whether you are creating weapons, tools, or other props, there are several techniques and materials you can use to create custom accessories for your action figures. Continue…
View On WordPress
#Action figures#Crafting#detailing#DIY#Miniature accessories#Modeling tools#painting#Polymer clay#sculpting#Super glue
0 notes
Text
Here's a list of Free tools and resources for your daily work!🎨
2D
• Piskelapp Pixel art + animation • Krita general digital painting + animation • Gimp image manipulation + painting • MapEditor Level builder (orthogonal, isometric, hexagonal) • Terawell manipulate 3D mannequin as a figure drawing aid (the free version has everything) • Storyboarder Storyboard
3D
• Blender general 3D software (modeling, sculpting, painting, SFX , animation…). • BlockBench low-poly 3D + animation. • Dust3D low-poly 3D (similar to Zbrush Zsphere)
Sound Design
• Audacity Audio editor (recording, editing, mixing) • LMMS digital audio workstation (music production, composition, beat-making). • plugins4free audio plugins (work with both audacity and lmms) • Beepcomp chiptune/8-bit/16-bit music synthesizer
Video
• davinciresolve video editing (the free version has everything) • OBS Studio video recording + live streaming.
2D Animation
• Synfig Vector and puppet animation, frame by frame. Easy. • OpenToon Vector and puppet animation, frame by frame. Hard.
↳ You can import your own drawings.
For learning and inspiration
• models-resource 3D models from retro games (mostly) • spriters-resource 2D sprites (same) • textures-resource 2D textures (same) • TheCoverProject video game covers • Setteidreams archive of animation production materials • Livlily collection of animated lines
694 notes
·
View notes
Text
Steps of creating a 3D model replica from scratch
trace photos of character from available and cleanest angles. attempt to get a 90 degree*, front and back, side profile and straight on of the face. save additional reference photos such as bottom of body, back, and various extra angles without tracing which may help reference later on.
*more on angles later, but trying to get a 90 degree from each side is the most realistic and practical option if you dont actually have the character you're copying

2. block out the body and head


and by block i mean, yeah, its made out of elaborate rectangles


4 aha, you thought I would hand sculpt those? no. no. I used the curve tool to add these swirls. And yes i exactly traced them over the drawings to match the original as best as possible. The end of the curve tool is flat by default so I added a few spheres to make the ends nice and round. (there is absolutely a way to make the ends of curves rounded but I did not feel like looking it up or messing with the settings)
this wasn't mirrored to the other side- I traced both sides of the body and the front from photos and sculpted the swirls for each side. I couldn't get a single photo of the swirls at the butt area so I just winged it.

6 I am struggling to not make Cha Cha look angry.


I feel like the eyes are basically traced off the original and yet she looks so much grumpier. maybe it just needs to be smoothed out?

I added a little definition to the area around the eyes and I do think it looks a little better. The more definition I add in this stage the better, because I prefer this to sculpting. However, if you're more adept at sculpting you would probably not make this as detailed.


7 Here she is after smoothing everything out in sculpt after remeshing, in both Eevee (left) and Cycles (middle/right). still trying to figure out how best to render things. For some reason her nose ended up lighter in cycles but i cant be bothered to fix that rn
On the previous step I made the elements of her face + ears mirrored but once I start sculpting I'm not using the mirror tool. In fact nothing ends up mirrored, even the back right foot is slightly shifted in position.


this is probably not even the final version, I think i might redo the smooth/sculpt part and fiddle with the underlying shapes (basically go back a step)
Cha Cha's face. is one of the most difficult things to sculpt. It is extremely difficult to understand the shape of the underlying sculpt because there aren't any photos of her with the eye paint removed. There are so few of her out there I don't think anyone would willingly remove the paint to make a custom or anything unless it was in truly awful condition, and I dont think that has ever happened.


I have saved dozens of references from a number of different sites- these pics here are from etsy, the above was from the wiki. Her eyes are different from every single other pony and pony and friends- they're so bulging, so round, the eyelashes are longer. It's wild.


I can only see all the things that are wrong with it.


It's basically impossible to get something like this 100% perfect unless you have like, a set of turnaround photos all from the same angle that you can match up to the camera. You can basically overlap references with the camera view but you will never know the exact angle so if you make edits from multiple angles like this you'll inevitably not match each angle and then have to go back and adjust the angles and then you're fiddling with it infinitely. That's why I usually go for the "trace 4 angles and make the rest up as you go along" method.
I don't want to spend _too_ long on every model I make- the Takara pony which took 6 months really shows how far down the rabbit hole I will go with something like this, and it's just not practical. But I think with a slight amount of fiddling I can match the reference a little better.
388 notes
·
View notes
Text
High Maintenance 101
Prissy Girl Beauty Regimens 🎀

my prissy girl guide to beauty services and building a beauty lifestyle that fits you 💗
Skincare:
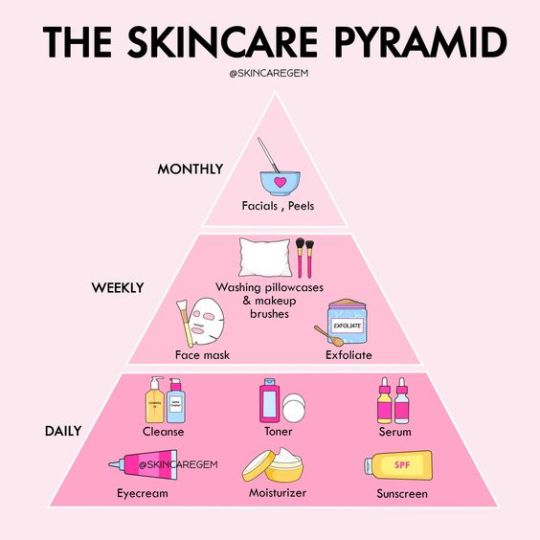
Essential Skincare Routine ❤︎︎
twice daily, in the morning and at night
daytime: gentle cleanser, toner, serum, eye cream, moisturizer, SPF
prep and protect skin
nighttime: double cleansing with oil and cleanser, exfoliation, treatments, moisturizer
wash away the day and help skin accept treatments and actives during your beauty sleep
products will change depending on skin type and goals, but sequence will more or less stay the same
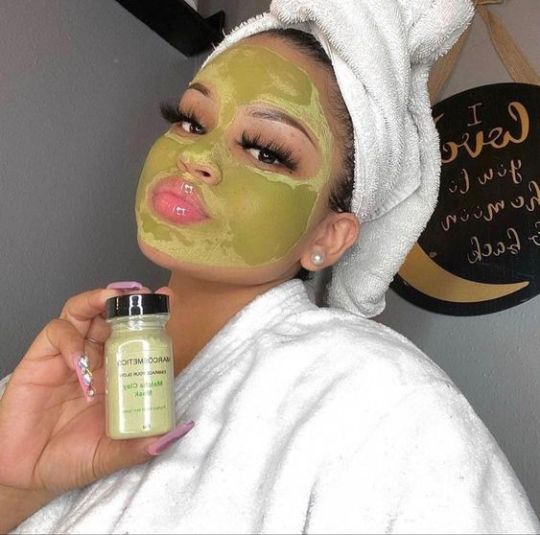
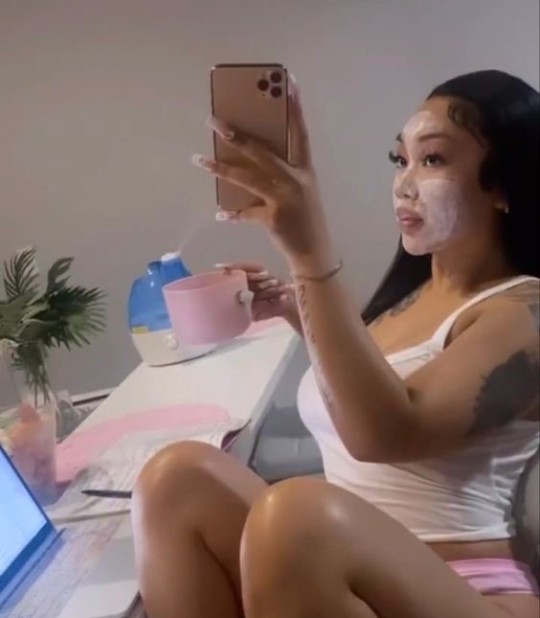
Face Masks + Treatments ❤︎︎
Face Masks -
typically done at home 1-3x/week
clay, gel, mud, cream, liquid
my fav masks at home:
aha + bha liquid mask by the ordinary: a literal overhaul of my pores. it’s refining and helps reduce texture and hyperpigmentation. 1-2 x/week
korean modeling mask: i use this after doing everything in my routine. it’s super cooling and smooths my skin out. the low temp of the mask reduces flushing of my skin and helps the steps in my routine absorb better. 2-3 x/week
Treatments -
done either 1-3x/week and/or exclusively at night
consumer grade Retinols, AHAs, BHAs at high strength
little extra things i like to use to enhance my routine:
gua sha, ice pack, rose quartz roller, however often i choose
Facials ❤︎︎
done every 1-2 months by licensed estheticians
often includes exfoliation and extraction
Classic Facial: cleanse, extract, massage, moisturize
HydraFacials: extracts pores while infusing serums to boost skin’s vitamin and nutrient content
dry, dehydrated skin
Microdermabrasion: microabrasive tool removes outermost, textured, damaged layer of skin using suction to reveal a smooth and refined new layer of skin
sun damaged, aged, textured skin or skin with hyperpigmentation
Chemical Peel: application of medical grade AHA, BHA, Lactic Acid, Fruit Enzymes, or Retinol to peel away top layers of skin over the course of 1-2 weeks
pore refining, brightening, and anti-aging
after care is crucial. skin will be peeling and sensitivity to sun is increased. SPF MUST be used. it’s heavily advised that clients stay home for the first few days.
HydroJelly Facial: facial made of electrolytes, algae, organic white grain oat flour, rice flour, and white willow bark powder. leaving your skin hydrated, plump, and nourished. forms a vacuum-like seal that compresses facial contours.
there are 25 different hydrojelly pro masks for most skin concerns you may have, check here
More Facials ❤︎︎
Contouring Facial: sculpting, tightening, and lifting of facial muscles
LED Facial: uses LED light to soothe inflammation, aiding in acne healing and prevention
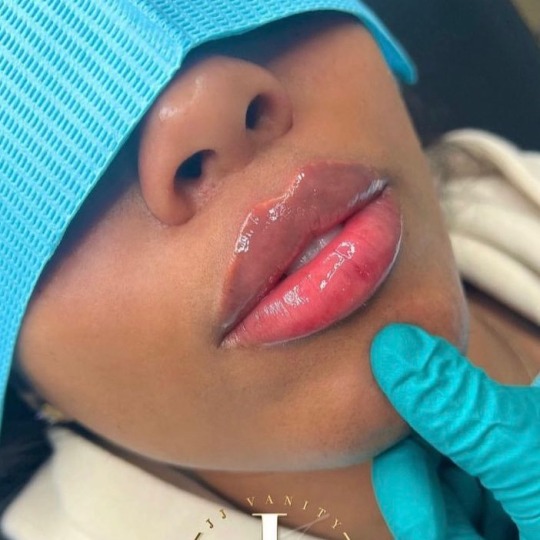
Vampire Facial: plumps skin and improves wrinkles by extracting blood, removing its platelets, then either re-injecting it into the skin or applying it topically
Diamond File Facial: finely ground diamonds resurface skin by filing to improve dark spots
Glass Skin Botox: multiple tiny botox injections just below the surface of the skin. alleviate fine lines, redness, texture, and more achieving glass skin
AquaGold Facial: microinjections that combine vampire facial methods, hyaluronic acid, botox, stem cells, antioxidants, vitamins, peptides, etc. improves fine lines, wrinkles, pores, pigmentation, acne scarring, dryness, tone, texture, skin elasticity, and more
cite
Hair:

Hair Care ❤︎︎
Wash Routines:
curly textured: wash and condition every 2-3 weeks, deep condition every 1-2 weeks
straight: wash and condition every 2-3 days, deep condition every 2-3 weeks
Styling ︎❤︎︎
Hair should have a style everyday! At home hairstyling is limitless and really depends on your taste and lifestyle. The everyday woman does her own her once every 1-4 weeks using natural hair products, heat, or other tools.
Professional Stylists:
hair is styled every 1-3 months: uses heat to straighten or curl, extensions to lengthen and add volume, shears to maintain/attain a shape and length
trim ends: every 6-8 weeks
hair color: touched up roughly every 6-8 weeks (depending on how fast your hair is growing and how fast your color will fade)
Silk Press:
after a clarifying wash and deep conditioning, natural hair is straightened using flat iron and/or pressing comb, then usually curled in feathers or pin curls to preserve the style
lasts 3-4 weeks depending on maintenance
preserved by wrapping hair at night, keep hands out of hair, and using a wide toothed comb only
can be further styled with different kind of rollers, or with pin curls
Braids:
afrocentric hairstyles typically done to protect hair while maintaining beauty
lasts 3-8 weeks
styles include knotless braids, faux locs, stitch braids, french braids, etc
Extensions:
hair added to natural hair to enhance length or volume
can be done at home with patience and proper materials
sew-in extensions: (my personal fav) 1-2 months
your natural hair gets braided down flush to your scalp and the bundles are sewn on by the wefts in a flat pattern typically with a section of hair left out to cover the wefts $100-600
microlinks: up to 4 months
i-tip extension is added to hair using micropliers, clippers and loop tool. takes far longer than most extension methods but looks the absolute most natural $500-1000
tape-in extensions: up to a year, touch ups every 4-6 weeks
medical grade tape is used to attach extensions to small sections of hair $200-400
clip-in extensions: 3-6 months
extensions are clipped on by the wefts. the hair itself can last up to six months, but it’s not recommended to sleep, shower, or swim with the extensions in $50-100
Natural Styles:
all last roughly 1-2 weeks at most. allowing hair to completely DRY is crucial for these styles. your natural hair can be further changed in styles like buns, puffs, etc once dry
natural hair essentials: scalp oil, leave in conditioner, detangling brush, wide tooth comb, curling cream, styling gel, edge control and edge brush
wash n’ go
wash and detangle, then use leave in conditioner to keep hair moist. oil on the scalp and ends is recommended for growth and healthy ends
bantu knots
a traditionally african style where the hair is cleanly sectioned (usually parted in a cute pattern) and twisted into knots. style can be worn just like this or taken down for curls
braid/twist out
a specific pattern of curls is achieved after hair is twisted or braided with curl preserving products. end result depends on how big your twists or braids are
roller set
hair is sprayed with water and curl cream applied before roller of your choice is added. hair is left to dry usually overnight for springy well formed curls
Brows and Lashes:
Brow Shaping ❤︎︎
in salon or at home
Waxing - every 3 weeks
Threading- every 2-3 weeks
Razor Shaping - weekly
Brow Enhancement ❤︎︎
Tinting - monthly
can be done at home or by pro in the salon
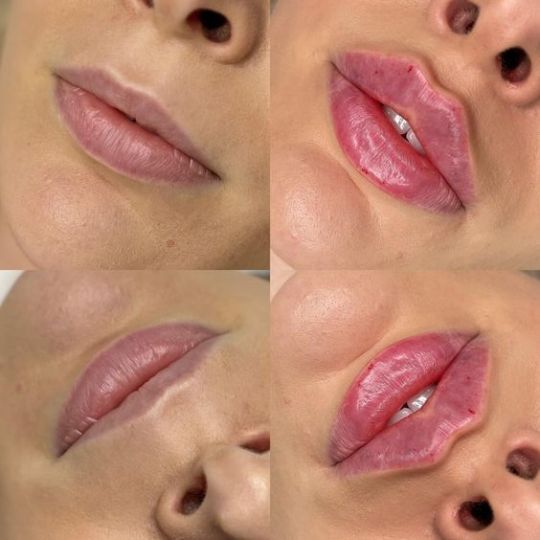
Microblading - every 1-3 years + annual touch ups, exclusively professional work
cosmetic tattooing using a manual tool with nearly invisible hair-like needles to inject pigment in brows to create your desired brow look
Lash Enhancements ❤︎︎
*done exclusively by professionals
Lifts - every 6 weeks
basically a perm for your lashes to curl them semi-permanently for lashes to appear longer
Lash Extensions - new set every 6-8 weeks, fill ins every 2-3 weeks depending on quality and style
false individual strands of lashes glued to natural lashes to create semi-permanent length and/or volume
lash baths: wet lashes and apply a small amount of gentle cleanser or a “lash bath” to lashes. cleanse lashes and eyelids for about 10 seconds. hold a towel under your eye and use a nozzle bottle to flush soap and bacteria from lashes then dry with a disposable lint free towel. finish by brushing your lashes with a spoolie. daily.
Lash Styles:
Classic: one lash on each fan, thin lashes
Volume: fluffier lashes with more lashes on each fan
Hybrid: uses classic and volume lashes to make an alternated look
Russian: volume lashes made with very thin individuals, 5-6 extensions per natural lash, fanned out look
DIY Lash Extensions - lasts about a week (sometimes longer)
lash fragments or individual wisps are glued either under the lashes or on the lash line. KISS Falscara is a product that makes this concept simple and easy
Nails:
all these services can be done at home with the proper materials and KNOWLEDGE
Classic Manicure ❤︎︎
every 1-2 weeks
nail service that consists of soaking hands in warm soapy water then drying them. nails are trimmed, filed, and buffed. cuticles are pushed back before applying nail polish (base coat, color, top coat), then finally cuticle oil is applied.
nails can be enhanced with rhinestones, glitter, or charms and attached with uv gel or nail glue
my fav styles are pink, cream, white, black and any french tip using those colors
Pedicure ❤︎︎
every 2-4 weeks
sister to the classic manicure, but can be upgraded depending on materials. steps are similar to manicure, except feet are scrubbed and exfoliated before feet are washed and dried to apply nail color
regular polish, acrylic, or gel can be used on toenails
Gel or Shellac Mani ❤︎︎
every 2-3 weeks
same process as the classic manicure, but traditional nail polish is replaced with uv base coat, gel or CND Shellac polish, then uv top coat that’s cured in a UV or LED lamp
longer lasting and more strong/3d than classic mani and is typically removed by soaking in acetone
Apres Gel-X Nails ❤︎︎
every 2-3 weeks
my personal fav at home nails using the artme yoko matsuda nails. after doing a classic mani sans polish, you apply a dehydrator and primer to prep nail for gel. then you apply builder gel to your natural nail and cure. then you apply that same builder to the nail extension after etching it using an electric drill or acetone. marry the gel to your nail and cure. then just shape to your liking and top with uv top coat. tutorial here
Acrylic Nails ❤︎︎
every 2-3 weeks, nails are fully grown out after 6 weeks
manicure done with liquid monomer and acrylic powder to build and extend natural nail, then polished with color or just a top coat if desired
Russian Mani ❤︎︎
every 4-5 weeks
essentially a gel manicure, but more invasive. the eponychium is snipped away so polish can be applied more closely and flush to the cuticle. this aids in visuals and longevity
service is seen as risky because the skin is more susceptible to fungal or bacterial infection. this is actually how i do my nails at home.
Body:
Bathing ❤︎︎
2x daily
self explanatory, we all know how to bathe. i have other posts that talk about my shower and bath routines.
use a gentle cleanser then a scented body wash to complement perfume and smell fresh all day.
if needed, you can use body soaps with actives like aha, bha or retinol to exfoliate or treat skin at night
exfoliation - 2-3x/week. using scrubs, loofahs, bath brushes, etc.
Hair Removal ❤︎︎
shaving - 2-3x/week
waxing - every 3-5 weeks
sugaring - monthly
ipl device - a device that uses light therapy to slowly destroy hair follicles and unwanted pigment in skin. i use mine after every 5-6 shaves but i could really use it more often.
Vajacial ❤︎︎
1-2x/month
a “facial” for your lady area
the esthetician will first wax, then cleanse and apply an enzyme exfoliant. then they extract any blackheads or ingrown hairs from the area before applying a soothing mask usually in the jelly form.
Moisture and Hydration ❤︎︎
body cream or lotion - daily right after bathing to hydrate skin
body oil - daily to seal in moisture and protect skin from debris and dryness
masks - weekly to address particular skin concerns
ex. when i was having eczema flare ups on my back, i used a dead sea mud mask every 1-2 weeks to help treat it
done at home or at spa
glycolic, clay, mud, salicylic, etc.
Enhancement Procedures:
the goal is to look younger and balance facial features. all these services are exclusively done by professionals usually in a medspa and are widely considered luxury.
Botox ❤︎︎
every 6-8 months; between brows, smile lines, outer corners of eyes, etc
discourages muscle movement to reduce wrinkles
Lifts ❤︎︎
lasts about 10 years; face, neck, brow, eyelids
skin is lifted to desired look, then excess skin is removed
Fillers ︎❤︎︎
every 6-12 months; under-eye, lips, jawline, wrinkle sites, cheekbones
injects acids (usually naturally occurring) like Hyaluronic Acid and Calcium Hydroxylapatite to add volume to your face
Body Contouring ❤︎︎
every 2-4 months until desired results are achieved
non invasive liposuction to achieve desired physique
CoolSculpting - cryolipolysis freezes fat cells for the body to the metabolize and and remove them
SculpSure - essentially the same as CoolSculpting, but uses heat and laser technology to destroy fat cells
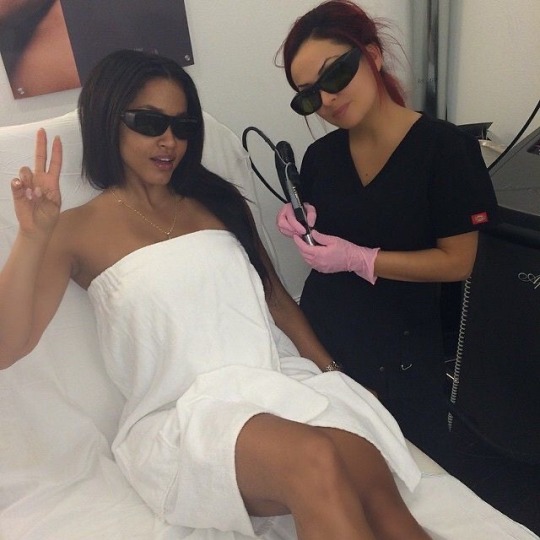
Laser Hair Removal ❤︎︎
every 5-6 weeks; bikini, underarms, legs, arms
touch ups done every 1-2 years
hair growth is inhibited by exposing follicles to light at frequencies that kill them
Building the Regimen 🗒️💕:


when making appointments with your “glam squad” you can stagger your services by week depending on what’s being done. for example you can get your mani and pedi done one week. then your facials, brows and lashes another week.
Things to Keep in Mind 💭💞:
these frequencies won’t be the same for everyone depending on personal wants, budgets, etc. but will most likely land somewhere in the ranges i gave. if you need touch ups or redos any sooner than i mapped out, then the service most likely was of poor quality.
anything done at home may or may not be up to the level of detail and longevity as salon or spa work. if you see yourself doing the majority of your beauty maintenance at home, this can save money but may end up taking more time than professional services. so it’s a give and take.
More Resources:

manage your routines, services and products using a beauty binder
a look at my skincare routine
at home beauty treatments for the summer
my hair care routine at home
pretty on purpose by @shefromhouston
monthly beauty routine by @angeljpg
dream girl routines by me
#the prissy girl agenda#dream girl journey#prissy lifestyle tips 💕🎀#dream girl routines#masterpost#my posts#skincare
2K notes
·
View notes
Text
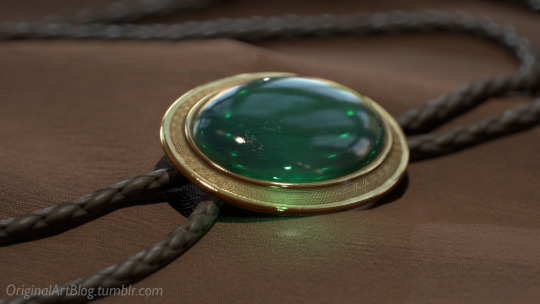
"Nawy what do you MEAN quick-ish 3D render it's got scratches and everything and I thought this was real for a minute!!"
Well, first, thank you very much that was the intention ❤, and second, you see, all speed is relative, and between finding my references, modeling, texturing and lighting, on top of having to learn how to make convincing gems, it still took me quite a few hours. I, however, cut corners everywhere for speed, and I wouldn't put this piece in a portfolio in its current state.
But! for the curious, I thought I could do a simple breakdown of how the witchcraft happens, without using too much specialized language to make it more accessible. In short,

In this case, I’m talking about a 3D model that was textured (colours and stuff) and then lit (lights on!) to make a pretty final picture. The objective is not to make a tutorial, but to put in simple terms what a 3D artist does to make something go from this, to that:

(people curious and/or trying to see if this interests them welcome)
I'm skipping the 3D modeling part altogether, since it isn't where most of the magic happens here. Just know that to be able to add colour and stuff on a 3D object, you have to go through the process or "unwrapping" it, which is like doing those foldable cubes in reverse
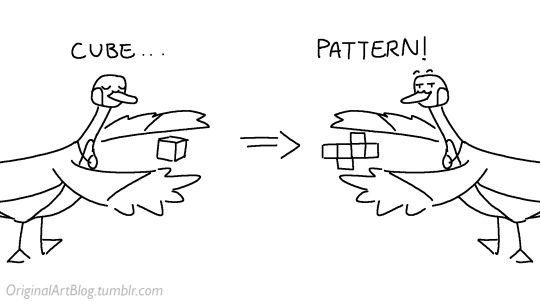
and then we can draw on it!!
Now, the good stuff:
Surfaces (metal, plastic, fabric, wood, skin, etc.) have different looks that make you able to differentiate them on sight. To make something look realistic, you have to try to replicate real life into the 3D world (duh.)
The software developers took care of the hard part (math and coding), so as artists we can play with the parameters available to make something pretty. What those parameters are depend on which "recipe" we're using. One of the most common "recipes" for realistic results is called PBR: Physically Based Rendering, named that way because it's trying to replicate real-life light physics. In this case, the 4 basic parameters are called albedo, roughness, metalness, and normal.
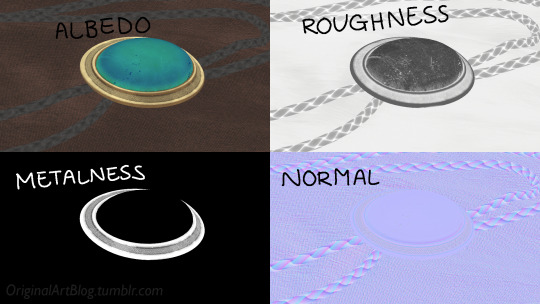
Albedo is the base colour of the surface (easy stuff). Roughness is to determine if a surface is rough or shiny. Metalness is to say if something is made out of metal or not. The normal is there to add all those tiny details you don't want to or can't sculpt on your 3D model (engravings, fabric bumps, etc.)
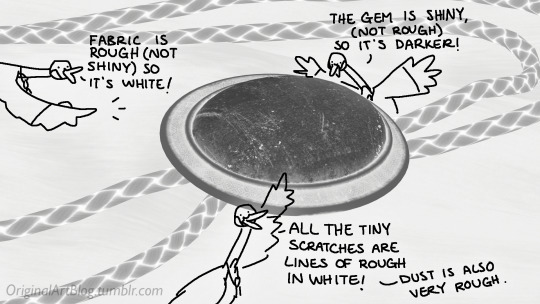
The roughness and metalness are black and white images because the information you're giving to the software is black = no and white = yes. It's easier to understand in the metalness image, where everything that is NOT a metal is black, and everything that IS a metal is white.
The normal is a bit more complex, but in short, it uses the colours green and red to know what is up/down or left/right, and will help the software fake relief on top of the model. You don't make it by hand; it's computer-generated from other stuff I'm not getting into.

With the technical stuff out of the way, we can actually use these. There are specialized softwares that will let you preview the results of each parameter in real time, so you can see what you're doing easily. This is what I have.
That software comes with some types of surfaces that are already set up, like the fabric in my piece, which was already 85% good for me straight out of the box. Then, it's up to me to use the tools available to decide how shiny a surface is, if there's dust or scratches and where, what colours things are, if there's metal parts, etc. That's where you can see a 3D artist's skills.
And finally, you bring it all together into a specialized software that can render 3D stuff and use those images on the corresponsing parameters, and then light the scene.
Because it all comes down to this: the light! For something realistic, light is vital to get right. You can pour your heart and soul into those tiny scratches, but if you don't light the scene correctly, well...
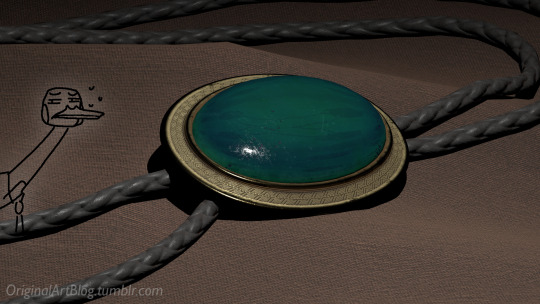
So we carefully light the scene to get some nice highlights to make the textures look good and highlight our subject (it's basically a photography studio inside a computer)
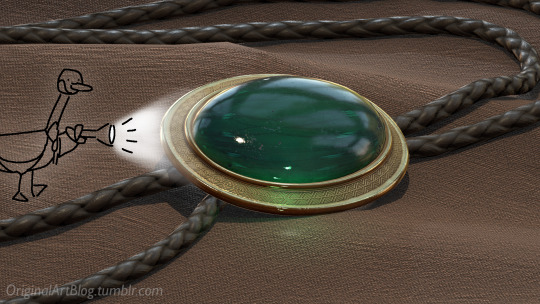
And then we add some camera effects...

and voilà! pretty picture!!
... and if you somehow did notice something different with the bolo tie from my last post, I did find out while taking all these screenshots that I messed up my initial renders in a way that made everything darker than it was supposed to be and that's why my gold looked so muddy...

I hope this was interesting and that you learned a thing or two!
#welcome to nawy's 3d school for complete beginners#nawy's 3d#technically not art but... you know...
364 notes
·
View notes
Text
in general i agree that the pursuit of hyper realistic video game graphics to the exclusion of developing a unique and memorable style is not a good way to make games and should be criticized, but ive seen this image several times now and it just gets under my skin

yes you get diminishing returns from adding more polys but first of all, more polys isn't the end all be all of high-end graphics - it's high res textures, more detailed animations, more particle effects, physics simulations, raytracing, transparency/translucency effects, and more. and a game can still look amazing without any of those - they have for years - but similarly it is perfectly fair to use the tools at your disposal to create a detailed work of art, if that's the style. (the real evil is crunch time and unoptimized games being shipped broken because hey, high-end pc gamers can buy more storage for our 200+GB game and we'll patch it later 🙃 but that's neither here nor there)
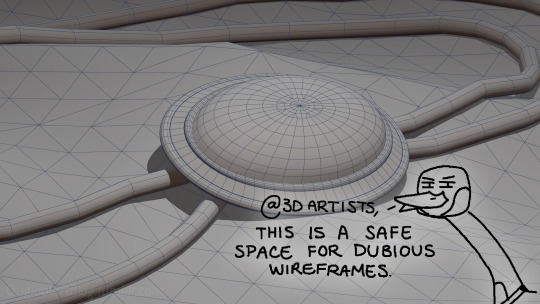
BUT THE REAL PROBLEM IS
THAT'S JUST A SHITTY SCULPT!!!! IT'S NOT EVEN A VIDEO GAME CHARACTER MODEL!!!!! YOU CANT JUST PRESS "subdivide" IN BLENDER ON A RANDOM ASS MODEL WITH 6000 POLYS AND EXPECT THE RESULT TO LOOK ANY MORE DETAILED YOU GOTTA PUT THAT SHIT IN THERE BY HAND YOURSELF!!!
60k tris and THAT'S what the hair looks like???? THAT'S what the lapels of the jacket look like?? what even is that thing on his chest- a bow or a crevat??? are you kidding me??? no wonder youd think high end graphics are a waste of time if that's what all you believe it is
146 notes
·
View notes
Text

I get asked this a lot, but I'm actually a vertex modeler. Meaning, I hardly if at all use the sculpting tools and just model using vertex point manipulation. (I'm actually terrible at using the sculpting tools) My model edge flow ends up clean af and the model is easier to edit and animate doing it this way. Here's a pic of my vertexes so you can see how I keep them somewhat on the lower to medium poly end and just use a non destructive subdivision modifier and a mix of sharp and smooth edges to define the form.
617 notes
·
View notes
Text
Today is Day 9 Of Me Playing Girls' Frontline 2.
Like any other gacha, the start is braindead because they need even the most non-sentient of creatures to be able to clear. This is nothing new, but it really stuck out like a sore thumb in this particular case because this game heavily uses the XCOM formula as its inspiration. For the uninitiated, the original 1994 X-COM: UFO Defense starts incredibly brutal and only gets harder as you advance. The 2012 reboot, XCOM: Enemy Unknown starts reasonably brutal and scales pretty harshly and always demanding you really, really are learning what your tools can do and what the game mechanics are as you basically fight an asymmetrical Civilization III game against an opponent that 1) outguns you most of the way and 2) fights you with the hatefulness one only reserves for someone that has fucked one's wife. GFL2 starts you off against enemies that require absolutely no tactical acumen whatsoever, that do not use cover, and that deal pitiful amounts of damage even if you yourself don't use cover. This lasts a little too long for comfort but again it's industry standard. Once you get to parts of the game that require sentience, it's fun to see how they've gone about the flow of combat: You're basically pitting your characters with their own special conditions, specialties and passives against many enemies that initially are simple as hell (they just move and shoot) but steadily become more complex and nuanced (enemies that target an area for bombardment at the end of their turn, enemies that can counter in specific circumstance, enemies that trap your enemies with overwatch fire, reaction intereceptions, AoE, etc). The system definitely has potential. I've yet to truly find anything actually challenging that wasn't me fighting enemies 10-20 levels higher than my units, but the fundamentals of cover and risk-reward are there even on-level; if you get shot at completely exposed, you are going to take hefty damage (unless you are rocking a Suomi shield).
The biggest departure from XCOM proper is that there is no accuracy: All attacks will always hit, unless certain abilities outright deny the damage -- like certain enemy Medics that can use the Anesthesia skill to negate one instance of damage -- and the game really favors a more aggressive style for both the player and the enemy through the Stability System: All units have a Stability counter, which decreases by certain amounts depending on the attack received. Once it's depleted, units can only benefit from the most bare and basic defensive effects of cover, which are not very good. Stability Break also may have additional special effects on certain enemies, chiefly bosses, resulting in extra damage taken, reduced attack power, changing forms, losing certain active or passive skills, etc. As a huge fan of systems like this, I Enjoy.
The game is gorgeous looking: The environments are highly detailed, the character models are incredibly well made, the guns are lovingly sculpted. I know the overarching meme is that it's got the best anime girl feet in the industry -- and it's true, they put more love into rendering and modelling these girls' feet, stockings and socks that I've seen parents put into raising their children -- but the model quality is truly overarching, they spared no effort in any obvious area, it's a really gorgeous looking game. The sound design and the music are all fine and have not wowed me in any special way, really, but visually, good lord, the game truly does go hard. Another thing the game does really well is video cutscenes, the action and choreography of actually very decently lengthy cutscenes they show pretty often go very hard, with good explosions, good gunplay, fluid and good looking motions, etc. The animation direction in GFL2 is really, really good, something I wasn't expecting given they've not really delved on this area particularly in previous games. They probably hired a really good studio for this-slash-got themselves some very talented and skilled personnel for it.
The game economy is Post-Mihoyo style: There's a set cast of Max Rarity characters, called Elites in the game's nomenclature, that inhabit a Standard Banner with absolutely fucking horrendous rates. 0.6% chance of rolling anything Max Rarity, 0.3% of an Elite Doll, 0.3% of an Elite Weapon. Besides this, there's the Limited Banners, which is every banner ever, meaning post-launch Elites are all Limited with a Limited Signature Weapon. In other words, shit sucks. The only saving grace is that the game, in thankfully true XCOM fashion, is much less about having Strong Individual Units, and much more about having a team with good synergy, and there's plenty of great non-Elites you'll have plenty of copies of. Gameplaywise, you won't get shafted by not having the Newest Woman With A Broken Kit, which is good. Signature Weapons so far from what I've seen are very nice to have but no functionality is tied to them and no character feels incomplete without their Signature Weapon or without multiples dupes, which is really good practice and a deal breaker for me if it's present. About the only stupidly broken character I can think off right this second is definitely Suomi, who supports so incredibly well that she lets you Not Play XCOM. She's seriously and hilariously busted and futureproofed.
The writing is pretty damn stiff. This is nothing new with Sunborn. The thing with Sunborn is that when it hits highs, they are VERY high, but the trip to those highs is clunky and stiff, with an overabundance of nothingburger technobabble and tacticool filler dialogue that, were this a megahit the way One Piece is, would definitely inspire a dogged group of fans to make a website that tells you exactly where to read and where to skip to avoid all the meaningless filler. Even if you like some tacticool, it's just SO much of it that serves no purpose. The characters are... Unfortunately, not super fun. Our old friend Oats, ahem, Groza (OTs-14) is there, and she's fun, but the rest of the characters have not done a good job to endear me to them: Colphne I'm pretty ok with, Nemesis and Krolik really have exhausted the fucks I can give for them by this point (I'm in Chapter 4). This is particularly painful in the case of Nemesis for me, a character whose design I really, really love and who I was looking forward to a lot. Nemesis' whole thing is that she literally cannot speak normally and has to communicate entirely in cryptic theater kid ramblings, and Krolik conversely only exists as the only person that can somehow accurately decipher what the fuck it is she's saying. This is charming for all of three cutscenes before it becomes very old and basically filler: Nemesis says "The embers of starlight long forgotten by statues lingers in the fingertips of the deaf" and Krolik replies with "Hah!? Who are you calling a coward?! I'll beat you up!" because Nemesis shittalks Krolik a lot, and that's the crux of both of their personalities. I know they are building Nemesis for something else but good lord it's torturous and stale. There's a Super Powered Child that I don't care about and she's the main plot device. Mayling is funny and endearing, and I like her. We meet characters from Ye Olde GFL 1 days and so far it's been pretty nice every time: Suomi, Lenna (UMP9), Kalina, Leva (UMP45), always a good time hanging with them. I particularly enjoy how divorced Commander and Kalina are. Oh, the Commander (your character) is an actual character, fully voiced and all, I like that a lot, and I like them. You can choose a male or female Commander, with fully 3D rendered distinct non-obscured, non-masked models and that's pretty damn cool. Still, can't help but miss the bangers that were ST AR-15, RO635, DEFY, and others from GFL1.
There's plenty of stuff to do without using Stamina, especially event stuff, but I fear that once you run out of it, you enter that weird limbo of "logging in, autoclearing the RNG drops mode, logging out". I'm not there yet but I dread reaching it. I know they just launched the game here (1 year old in CN) but, I guess I've been immensely spoiled by Arknights' several replayable game modes, this game, being XCOM in nature, would ROCK a roguelite mode or some sort of replayable game mode so much.
Overall, it's been a pretty nice time, as someone who dropped but nonetheless greatly enjoyed GFL, it's great seeing the Old Friends better than ever. My friend Suomi and my friend Tololo (CHILE MENTIONED 🇨🇱🇨🇱🇨🇱) are there for me and I'm glad to hang out with them again. I wish my friend Sabrina would also join me sooner than later :'). Color me surprised that so far, the gameplay seems both fun and has potential, but we'll see how it goes from here. Overall: Good first impression.
Say something nice about my friend Tololo

86 notes
·
View notes
Text

Experimenting with new ways to present my Mononoke 3D models. Watching them tenbin spin off-sync is oddly mesmerizing - like a pair of hanging mobiles swaying in the breeze.
These will be the first of (hopefully) a series and slightly cleaned up models!
Update 05/23/24: Now updated with colors! 🌈
Q&A below the cut!
How did you create these models? Using gratuitous amounts of reference images, I made schematics in Adobe Illustrator and/or Photoshop. Then I import the 2D images into Google Sketchup 2017 to sculpt! I used the camera animation feature to cobble together a spinning animation, which I then exported as a MP4 and converted to a GIF in Photoshop.
Why did you make these models? They were for my most recent Mononoke fan art. A lot of work went into these models, so I wanted to showcase them more thoroughly! Additionally, I noticed that fan artists had difficulty depicting these complicated props on-model. I want to contribute a resource which this community can draw from!
What other models do you intend to create? Coming down the immediate pipeline are the classic exorcism sword and medicine box. Later on, I want to tackle their 2024 counterparts. The current version of the 2024 sword model is too messy and needs remodeling. The 2024 medicine box hasn't been modeled yet, as I haven't collected enough references.
May I use these as reference? As long as it isn't being used for the likes NFTs and/or generative AI, yes! Credit is appreciated but not mandatory as these designs don't belong to me. I would love if you tagged me in your creations though!
Can you render these in a different camera angle? Yes, but it'll have to be an image rather than a GIF as I'm not familiar enough with SketchUp's animation tools to do much beyond this. Please send requests to my ask box!
Can you render these in different poses? Send me an ask with a description of the specific pose. Depending on its complexity I may be able to pull it off.
Can you make a colorized version of these? As of 05/23/24, yes! Though the colors aren't 100% accurate due to how lighting is set up in SketchUp. Please refer to my non-animated turnarounds instead!
Are these models available for download? At the moment, I'm not comfortable sharing my working files. Please don't pester me about this, as it'll likely discourage me from changing my mind in the future.
240 notes
·
View notes
Text
Falling and Filament
Pairing: Harry x Designer reader (curvy or plus size whatever you feel they should look like. This is my preference 😌)
Summary: He loves watching you work but there will always be casualties
Word Count: 1.3k
Warnings: Minor burn injury. Fluffy 💗
✨masterlist✨ read the rest of Harry x Designer Reader there
...
Harry was always in awe of your artistic endeavours. Every time he thought he had seen it all, you’d surprise him with something new—whether it was sketching intricate designs, sculpting digital models, or, his personal favourite, watching you bring those 3D models to life. The fact that you could design something on a computer, print it physically in just an hour, and hold the finished product in your hands was nothing short of magic to him.
But today, instead of watching you create, he was watching you fix—crouched over your 3D printer, sleeves rolled up, hands skillfully unscrewing tiny parts as you diagnosed whatever issue had put a pause on your latest project.
Harry sat on the floor beside you, his chin resting on his palm, completely fascinated by the whole process—even if he didn’t fully understand what you were doing.
“I swear, Y/N, I think you could build an IKEA shelf in under an hour,” he mused, watching as you carefully adjusted a setting on the machine.
You chuckled, eyes still focused on your work. “That’s easy if you have the instructions and a little patience.”
Harry scoffed. “Yeah, except IKEA furniture is impossible—too many tiny parts, too many confusing details. How do you make sense of stuff like this?”
You didn’t even look up, just shaking your head with a small laugh as you continued your work. “Because I like problem-solving. Besides, once you do it enough times, it’s just second nature.”
Harry watched as you pushed a thin plastic string through a tube, demonstrating with ease. “What happened to your printer, anyway?” he asked.
“Oh, just some basic maintenance,” you replied. “The nozzle’s clogged, so I just need to swap it out.”
Harry frowned slightly, watching as you fed the filament through. “This is the filament,” you explained. “It’s what comes out of the nozzle to form the print.” You gestured toward the machine as a small blob of plastic sluggishly oozed out of the tip. “See? It’s clogged. It should be coming out in a steady, clean stream.”
Before he could ask another question, you grabbed a small tool and began unscrewing the copper nozzle with practiced precision.
And then—
“Ow!”
Harry’s head snapped up. “What? What happened?” His voice was immediately laced with concern.
You shook your hand out nonchalantly, blowing on your fingers. “The nozzle slipped. It was still hot.”
Without hesitation, Harry reached for your hand, gently cradling it as he examined the small red mark where the nozzle had landed. His brows furrowed, and without thinking, he blew softly over the irritated skin. “Be careful, Y/N, please,” he murmured, his voice softer now.
You smiled at his concern, shaking your head. “Harry, don’t worry too much. I’ve done this a million times. When you work with your hands, you get used to a few injuries here and there.”
“That doesn’t mean you should keep burning yourself,” he mumbled, still holding your hand like he could protect it from any future harm.
You gave his fingers a reassuring squeeze before pulling away to finish the job. With a few more careful turns, you secured the new nozzle into place, giving it one last check before straightening up. “And… done.”
Harry watched in amazement as you ran a quick test, the printer coming to life with a soft whir. The filament now flowed smoothly, a perfect, clean stream extruding from the nozzle.
You turned to him with a satisfied grin. “Now I can finish my other projects. C’mon, you can watch me.”
Harry stood, shaking his head in disbelief but smiling nonetheless. “You’re ridiculous,” he said fondly, wrapping an arm around your shoulders as you led him toward your workspace.
...
A little while later, Harry found you hunched over your latest 3D print, carefully slicing off imperfections with a precision cutter. He leaned against the table, watching you work.
“But I do wish you were more careful,” he said, frowning slightly as you dragged the blade along the plastic, removing small bumps from the surface. “You already burned yourself today, and now you’re using a sharp tool on a tiny piece of plastic.”
You snickered, not even looking up. “I actually do know when to stop, you know.”
Harry arched an eyebrow. “Oh yeah?”
You nodded, still focused. “It’s when I get too angry.”
That made Harry pause. “Wait—what?”
You giggled at your own ridiculousness, finally looking at him. “If I’m getting too frustrated, I know it’s time to stop before I accidentally take off a whole chunk of my model… or my own finger.”
Harry groaned, running a hand down his face. “That’s not reassuring, love.”
You just grinned and turned back to your work. “Relax, I have it under control.”
“I don’t know if I believe you,” he muttered. “You did just burn yourself like twenty minutes ago.”
You shrugged, pressing your lips together to hide another laugh. “That was a heat-related incident. This is a precision-related incident. Different categories.”
Harry let out an exaggerated sigh. “Bloody hell. You’re going to give me a heart attack one day.”
You just smirked, holding up your freshly cleaned 3D model. “And yet, you love watching me work.”
Harry crossed his arms, shaking his head but smiling nonetheless. “Yeah, yeah. Just don’t make me have to call for medical help, alright?”
You shot him a wink. “No promises.”
And with that, you turned back to your project, Harry staying right by your side, watching with equal parts amazement and exasperation as you worked your magic.
Later that evening, the two of you were curled up on the couch, a quiet moment settling between you. The TV was on, but neither of you was really paying attention. Instead, you were absentmindedly tracing your fingers over Harry’s hand, feeling the rough texture of his fingertips.
“Well, your work does have casualties too,” you mused, pressing your thumb lightly against one of the hardened spots. “Your fingers are so calloused from playing the guitar.”
Harry smirked, flexing his hand under your touch. “Part of the job, love.”
You hummed thoughtfully, still running your fingers over his. “And, you know… you fall a lot, Harry. I’m surprised you haven’t broken an ankle yet.”
Harry gasped dramatically, placing a hand over his heart. “How dare you?”
You grinned. “I dare because I’ve seen the videos. I’ve seen you trip over nothing—on stage, on the street, probably in your own house.”
Harry rolled his eyes, but his lips twitched in amusement. “It’s called commitment to the performance. If I fall, I do it with style.”
You laughed, shaking your head. “No, Harry. You fall like a baby deer learning how to walk.”
Harry groaned, flopping back against the cushions. “Unbelievable. My own girlfriend, bullying me.”
“Just speaking facts,” you teased, poking his cheek.
With a mischievous glint in his eye, Harry suddenly grabbed your waist, flipping you onto your back as he hovered over you. “Alright, let’s talk about your track record, shall we?”
You gasped in mock offense. “Excuse me?”
“Oh, don’t think I’ve forgotten about you burning yourself earlier. Or the time you dropped your phone on your face. Or when you tripped over your own 3D printer cord and almost wiped out.”
You let out an indignant squeak. “That was one time!”
Harry raised a brow. “It was last week, love.”
You groaned, covering your face. “Okay, fine. Maybe we’re both accident-prone.”
Harry chuckled, leaning down to press a kiss to your forehead. “Match made in heaven, then.”
You peeked at him through your fingers. “Yeah, yeah. But if you ever actually break something from falling, I told you so.”
Harry smirked. “And if you ever lose a finger to that cutter, I told you so.”
You both burst into laughter, tangled together on the couch, fully accepting that neither of you was particularly graceful—but at least you had each other to soften the blows.
...
I need to include more design jargon in this series.
#harry styles fluff#harry styles husband#harry styles imagines#husband!harry#harry styles smut#harry styles#harry styles blurb#harry styles blurbs#harry styles one shot#harry styles fic#harry styles fanfiction#harry styles x y/n#harry styles fiction#harry styles fanfic#x reader#harry styles au#one direction fanfiction#solo harry#harry styles x gf!reader#harry styles writing#harry styles x you
60 notes
·
View notes
Text
We Don't Gatekeep Art Resources | A Comprehensive List
Here's a list of some of the tools/sites I currently use or have used previously for works/studies. I'll separate it into Software/Utility, Reference, and 'Other' which will be just general things that could help you map out things for your experience with art. **[Free highlighted in pink, paid highlighted in green. Blue is variable/both. Prices Listed in USD]**
Software/Utility:
2D
Krita Painting app (PC) (my main digital art software on PC for 5+ yrs)
Clip Studio Paint [PC] [CSP 2.0+ allows for 3d modelling within the painting app and a lot of other cool features] [apparently allows up to 6 months free trial]
Procreate (12.99) [iPad/iPad Pro] (the GOAT)
Artstudio Pro [iPad/iPad Pro] (An alternative to Procreate if you enjoy the more traditional art app layout) -- I find this app handy when Procreate is lacking a feature I need, or vice versa. (you can easily transfer files between the two, but keep in mind Procreate's layer limit)
2D "Collaborative Painting/Drawing apps"
Magma Studio
Drawpile
Discord Whiteboard
Gartic Phone (Pretty decent for 2d animation practice, but has a hard limit on frames)
3D
Blender [3D Modelling, Sculpting + Layout] (PC)
Sculptris [PC] (it's an old unsupported version of Zbrush, but can help to get ideas out, and functions better than browser sculpting apps
Nomad Sculpt [iPad/iPad Pro] ($20) Works pretty well if you prefer a mobile setup, but it is a bit intense on the battery life and takes some getting used to
References + Study
Magic Poser [ PC and Mobile ] Has both free and paid versions, I've made do with just the lite version before
Artpose ($9.99) [Iphone + Steam]
Head Model Studio [IPhone] A 3D head, with both a basic blockout version for angles, and a paid version with more detail
Cubebrush [simply search "[keyword] pose reference pack"], they usually have good results + they frequently have sales!
Line of Action [Good for Gesture practice + daily sketching], also has other resources built in.
Quickposes Similar to Line of action, more geared toward anatomy
Drawabox | Perspective Fundamentals Improvement modules (Suggested by @taffingspy )
Sketchfab, this skull in particular is useful, but there is other models that can help you study anatomy as well.
Pinterest can be good, you just have to be careful, usually you're better off just finding reference pack if you have the money, sometimes certain creators have freebies as well
Artstation Marketplace can be decent [make sure to turn on the Aye-Eye filter so it doesn't feed you trash], a colleague of mine recommended this head model for practicing facial blocking, there is also this free version without lighting.
Local Art Museums [Unironically good for studying old "master work" if you're into that, or even just getting some inspiration]
Brushes + Other Useful software:
I personally have used both of these brush packs before making my own
(I actually don't know how to share my daily brush set because I frequently switch between Krita, Procreate, and ASP, but once I figure that out I'll be sure to do that lol)
Marc Brunet's Starter brush pack [Technically free but supporting him for this if you like it is ideal, there's some good brushes]
Dave Greco Brush Pack [$3]
Gumroad in general is a good place to find brushes and art resources. *Note; for Krita specifically, brush packs are a bit weird, so it may require you to find different packs, or import them in a particular way
PureRef [PC] - Reference Compiler/Moodboarding
VizRef ($3.99) [iPad] - Moodboarding/Reference Compiler
Artist Youtubers/Creators that helped me improve/guide me along as a self-taught artist from when I first started digital art to where I am today:
Proko
Marco Bucci
Sinix Design
Sycra
Hardy Fowler
Lighting Mentor
Winged Canvas
Moderndayjames
Swatches
Chommang_drawing
Marc Brunet (YTartschool)
+ Observing a lot of speedpaint art by people whose work I enjoy on social media/youtube, trying to dissect their processes
If you've gotten this far, first of all, congrats, you can read a lot, and second of all, thank you for reading and I hope this helps! I'll continue to come back and update this if I find any new resources in the future, or if my processes change :)
Much Love,
-Remidiy
#art#artwork#digital painting#painting#artists on tumblr#drawing#anime art#sketch#digital illustration#transfem#art tools#art resources#useful websites#small artist#illustration#digital art#artist on tumblr#procreate#my process#my art#krita#art tag#sharing is caring#learning#knowledge#useful stuff#links#reference
202 notes
·
View notes
Text
Socialite Series: Cherry’s Master Post
Things that have helped me, that could help you. Here is a master list of my softmaxxing journey!
Body:
J*hn Bent*n’s workouts: Yes he’s an asshole but his workouts really do work. He used to train models and his workouts are life changing.
2. B-12 Lipo salines: These you can consume in a shot (like an injection) or in a saline (go to a GOOD DOCTOR for this). I prefer the saline, and my doctor recommended the 6 week course for me (one saline every week). It burns subQ fat and that was the main reason why I began using those. There is zero side effect to these, acc to my doc. edit: don’t really recommend these anymore. I’ll update this list when I finish my Emsculpt.
3. Diet: More protein, more vegetables, more water and lesser intake of carbs. Carbs are important but i used to over-consume them. Cutting down has helped me a lot. I also did a gut bacteria test (you basically sent a piece of your shit to a lab and they analyse it) to understand what foods worked for me and what didnt.
4. Probiotics for metabolism management
5. Measuring: I stopped tracking weight and began tracking body fat % instead. I feel that this works better for me.
6. Wood therapy: I KNOW. You lot will think its bogus but it helped me and im sticking to it, so there. There’s no wood therapy spa near me, so i ordered the wood therapy tools from amazon, plastic wrap, a waist trainer, almond oil. I looked up videos on wood therapy and lymphatic drainage, and i do it for about 5 mins on my tummy and thighs before my work outs, wrap my torso with plastic wrap, throw the waist trainer on top.
✨
Skin:
Accutane: this helped me tremendously with my acne and my skin is 95% blemish free now. If you are taking this, remember to be disciplined and regular.
Zero alcohol: I stopped drinking completely and its done my skin and health wonders.
Products: Sunscreen + Vitamin C combo in the AM. Retinol + moisturiser at night. Recommended by my dermat.
Hair removal: I refuse to shave because its so uncomfortable so i prefer to wax once in 2 months. Personally, when I began exfoliating my body twice a week - I use a scrub by the Body Shop - I noticed that the hair was growing back slower than it used to. I use a loofah for everyday too. I don’t believe in laser because it’s never just 6 sessions; you do have to have “maintenance” sessions as well post the 6.
Face sculpting: Gua sha on alternative nights. I dont know if this works or is placebo, but I felt like it did.
Body lotion every day. Twice a day sometimes. I swear, it makes you smell good and feel so soft.
Expensive make up: specially, foundation. I’m sorry, i know this could be controversial. But idk what cow semen Charlotte Tilbury puts in her make up, it seriously makes me glow. I’m yet to find a good drug store alternative. A while back, I stopped wearing concealer, and I began using a lighter shade of CT’s foundation as concealer over my normal shade. I feel that because the products are chemically the same, they blend better and don’t react and “peel.” Highly recommend that too. For the rest of my face like powder, blush, eyeliner, I do use normal drug store make up.
✨
Oral hygiene:
I used to have braces. After taking them off, I noticed a difference in my jaw.
Brush, floss, Listrine, tongue cleaner
Mild whitening. I think Hollywood level teeth whitening looks crazy and I want to look as “naturally” beautiful as possible.
✨
Hair care:
For hair growth: as recommended by my doc: minoxidil hair foam 5% w/w Tugain Foam.
High frequency wand before wash days on my scalp.
Moroccan hair oil. I use a tiny amount everyday on my ends after I finish my make up for the day and I swear it makes my hair shine like crazy.
I also got hair Botox done because i used to have curly but absolutely unmanageable hair. I tried to make it work for years but i gave up and caved in to having permanent straight hair and I love it.
I only shampoo twice a day so on days when i workout but don’t shampoo, i use hair perfume. I spray some of it on my brush and run it through my hair. I swear it works.
✨
Overall:
The colour palette theory seriously works. I didn’t realise that wearing the right colours can impact you so much.
Confidence is absolutely key. I seriously recommend going to a group class of some sort if you have the time and just mingling with random people. Social situations are important to gauge your “standing.”
Random but if you have a big nose: grow out your eyebrows / fill them in slightly thicker. I noticed that when I had thin eyebrows, my nose would stand out more but when I made them thicker, it balanced my face out better.
Steam iron your clothes before you wear them. You will look 100% put together.
*IF* you’re aesthetically challenged when it comes to picking clothes, use my rule of thumb: never wear any more than 3 colours at once (remember: IF you can’t put outfits together).
#girlblogging#this is a girlblog#it girl#just girly thoughts#divine feminine#hyper feminine#Looksmaxxing#softmaxxing#beauty#Skincare#Glow up#level up#upgrade#girly#outfits#make up tips#make up#weight loss#fat loss#transformation#Socialite#How to be a Socialite#Maintenance#high maintenance#low maintenance#Beauty ritual
165 notes
·
View notes