#Heavy intercessors
Explore tagged Tumblr posts
Text


Also I painted a Raven Guard Heavy Intercessor. I know it’s not Heresy content but it’s my Warhammer blog and I’ll do what I want.
13 notes
·
View notes
Text


Used this Heavy Intercessor to practice my line work. Thoughts or suggestions of how to improve are always welcome 😊 I used some of the XIII upgrade kit so I could avoid relying on transfers 🤣
#painting#acrylic painting#paintingwarhammer#warhammer#warhammer 40k#warhammercommunity#warhammerpainting#painting miniatures#warhammer 40000#ultramarines#thirteenth legion#heavy intercessors
22 notes
·
View notes
Text
Tower is getting smaller.
The Heavy Intercessors of Atlas Squad are complete. Frustratingly huge mold lines on one set but that should get covered up when I prime and paint them.

Yes, the Sergeant is akimboing heavy rifles. I saw an opportunity and I took it.
But that's not all, the dark counterpart of Squad Heracles is also complete. Relic/Assault Terminators of Squad Lycaon.

Ready to rend flesh and metal alike.
#Warhammer 40k#Warhammer 40000#Space Marines#Iron Snakes#Heavy Intercessors#Relic Terminators#Cataphractii Terminators
9 notes
·
View notes
Text
Paintbrush, PlasGlue, and Holy Clippers: Sparse Marns Part III: Priming
So now we FINALLY begin some painting :)
Alright: First I covered a table with newspaper so I had a nice, warm, safe place to set my minis while their paint dried. Then, I used the double-sided tape from The Team to stick my lads to a random box lid I cut off, like so

They stuck really well to the tape. Too Well. Stumbly came off his base when I tried to detach him and I had to glue him back on XD Admittedly, that was more my own error in grabbing the model rather than the base when trying to detach them so remember to NOT DO THAT(!!!), but still I think I’ll experiment with poster-putty next time, given how fiddly some of these sculpts are and how <:[ <:[ pulling them loose felt.
Now: It’s Prime Time *sunglasses*

The Culprits. I didn’t buy the hobby-company-branded spray-primers cuz they’re the same as the stuff you’ll get from the hardware store except about three times the cost. There are many reasons to prime before you paint but the primary one is because paint sticks to other paint better than to Surfaces. It’s important to get flat primers; some people think gloss-primers are “stickier” or something, but really all the gloss will do is make your models look... glossy, and one thing you’ll notice about life is that most things aren’t glossy! But, you know, sometimes that’s what you want and that’s Cool(the idea of doing some Adepta with glossy power armor has been rotating in my head the last two days... Durkhari are honestly probably the best fit)
Now, why did I get three? I’m going to be doing something called “Zenithal Priming”. Basically I’m going to prime the minis in three coats; a black coat completely covering the models, a grey coat in a triangle sprayed from above(~40-60 degree arc), and finally a white coat sprayed from directly above. What this is going to do(hopefully) is simulate sunlight falling on the models, from a lightsource(The Sun) at it’s “Zenith”. All paints are translucent and the primecoats will minutely show through the layers I build up on them; this style of priming will make the recesses super-dark, the highest surfaces super-bright, and the spaces in-between a gradient between the two, dispersed as natural light falls on objects: From somewhere above. Obvsl you can do this from different angles and with different tonal values to simulate different lightsources from different locations, but I’m not trying to be fancy here u_u It’s also perfectly Fine to just do this with black and white instead of this three-tone method I’m using(it’ll obvsl make for more dramatic contrasts), but I’m trying to be a little fancy here u_u u_u
These cans have been sitting in my house since I bought them cuz they need to be warm for use, and I shook each of them Prodigiously(4 minutes u__u) right before going outside to spray with that can. I did this because I wanted nice, even sprays. I sprayed outside, wearing a respirator so I wouldn’t be breathing paint fumes and a disposable spray-suit so I wouldn’t be painting myself. If you, unlike me, have hands, you Absolutely Should Wear latex or nitriles gloves >:|
The warmer and dryer it is the better for spraying, but “dry” is the most important one here. I found a good spot in the backyard where the paint wasn’t likely to drift onto anything, aligned myself with the wind at my back, and got to work. Spraycan solvents can dissolve minis(D: D:) and heavy coats can obscure detail, so the idea is to keep the can away from the models and moving so the solvents can float off into the air, and to build a series of light dusting up into complete coverage. The black layer doesn’t have to be all done at once; I did mine in two goes, with 20 minutes of drying time inside the house between, and you can do three if you think yours needs it. The important things are 1)to not get too close with the can, 2)to spray the can in short quick spurts across the models, and 3)to not spray into the wind :p This is how they looked with the black layer done


After these were dry I prepped the grey can(another 4 minutes of shaking :|) and went out for round 2(or 3 if you could the two for black). I did one pass from just forward of directly above, one directly above, then one from just beyond directly above(by turning them around: NOT by spraying towards myself), thought they maybe needed a bit more, and did a second pass for each. On reflection I probably should have waited 20 mins to do the second pass, but nothing got gloopy cuz of how light my passes were. Here’s how they looked then


At first, I was really upset with myself because these looked REALLY Grey, and I thought I’d totally wiped out that great black depth I’d applied. I could have tried to start over by coating them in black again, but I decided this whole thing was a learning experience(and reminded myself that Perfectionism is often just Anxiety sabotaging you) so, rather than try to start over, I went forward with them as they are, and good thing that I did(as you’ll see at the end of the post).
So: once these were dry I went back out and applied the final, White, layer, in two passes. It didn’t look that strong to me after two, so I also -making sure to keep the can at a goodly distance and be Very Quick about it- did a stationary spot-spray to each model from a LEETLE to the right of directly above, and after than I thought it looked good ^w^ Here they are after a good 30minutes of drying(I was watching episode 3 of Cabinet of Curiosities on Netflix during the dry-times, and didn’t want to spoil the finale by stopping it so they got extra time :3 :3)

Honestly I think these look really neat! Tumblr’s kinda blurrifying the image which I lament(or at least, in my preview; idk how it looks to y’all), but the effect came off great and I really dig it. It was EVEN BETTER the next morning tho:


And all together

I guess as the grey dried it darkened into the black beneath, and all that depth I thought I’d erased came roaring back! Any light that hits them like this looks just SUPER Dramatic :D Honestly, one day I think I might zenithal prime some models and just varnish them right there to have some cool dinky marble-looking little statues around owo owo owo
So! That was the priming ^v^ The next post in this series will be... whenever I finish painting the lads(XD XD) so Stay Tuned for that :> :>
9 notes
·
View notes
Photo


Finished the start of my Deathwatch Space Marine Army. Really proud how the models and bases came out. Really enjoy how the tundra bases came out. Has been really fun learning. Currently working on Infiltrators, will post them once they are finished and based.
#warhammer 40k#space marines#primaris marines#primaris#intercessors#primaris intercessors#heavy intercessors#primaris heavy intercessors#aggressors#primaris aggressors#primaris apothecary#primaris lieutenant#deathwatch#my stuff#my work#my army#my art
11 notes
·
View notes
Text


Chapter Master Olympia Vilaris
The current leader of the Hounds of Terra, Olympia assumed this post after the internment of the chapter founder in a dreadnought sarcophagus following an ambush by traitor forces and the fall of the forgeworld of Potassiar. She is a measured tactician, often found fortifying the chapter's position, or else rallying the core of offenses in which she finds herself deployed. Her bolt rifle is of her own construction, incorporating wood from the world of Coria which the chapter was born upon. Her thunderhammer is a masterwork forged by the chapter's master of the forge after she noted a power sword was not gaudy enough.
#warhammer 40k#painting log#finished units#hounds of terra#I need to get more of these ladies repainted!!!#I also need to get a job so i have enough income to justify updating my terminators to truscale#I'm set on that#so I know I shouldn't strip and repaint the current models#but I want more painted heavy infantry!#so ofc next on the block for marines are assault intercessors and a dreadnought
44 notes
·
View notes
Photo

Carcharodon Astra Heavy Assault Intercessor by Wolfdawgartcorner
#Warhammer#40k#Adeptus Astartes#Space Marine#Carcharodon#Carcharodon Astra#Sci-Fi#Heavy Assault Intercessor#Wolfdawgartcorner#Imperium#Imperium of Man
492 notes
·
View notes
Text
Week #30: Blends. Nothing, But Blends
I know I said that I would paint more cultists last week, but I decided to take some time and practice blending, glazing, and light volumes. These Heavy Intercessors I had bought awhile ago to make an easier Kill Team to play for my baby cousin, but he's still to young to play. So I'm taking the opportunity to practice on them.


I think this was a good test of my artistic abilities. It's nothing crazy, but it's not miserably bad. I can see where I could have blended things better and I probably could have done some more with the parts that aren't the armor. Red is still not my strength even though it's my favorite color. This helmet leans a lot more towards pink than red. I also didn't try to do NMM for the gold or silver. I stuck with just normal metallics even though it would have been good practice to at least try so NMM since I was practicing blending.
This took a bit too much effort in my opinion and I probably wouldn't do something like this across an entire army. However, for a Kill Team, maybe. We'll have to see in the future.
#Warhammer Community#Warhammer#Warhammer 40k#Warhammer Painting#Warhammer 40000#Space Marines#Heavy Intercessor#Tabletop#Tabletop Painting#40k Warhammer#Paint Warhammer 40k#Painting Warhammer#Warhammer 40k Painting#Painting Warhammer 40k#Citadel Miniatures#Tabletop Games#Citadel#Miniature Painting#Painting Miniatures#Tabletop Miniature Painting#Painting Tabletop Miniatures#Games Workshop#GW#Miniature
30 notes
·
View notes
Text
drew a heavy intercessor for my friend !!
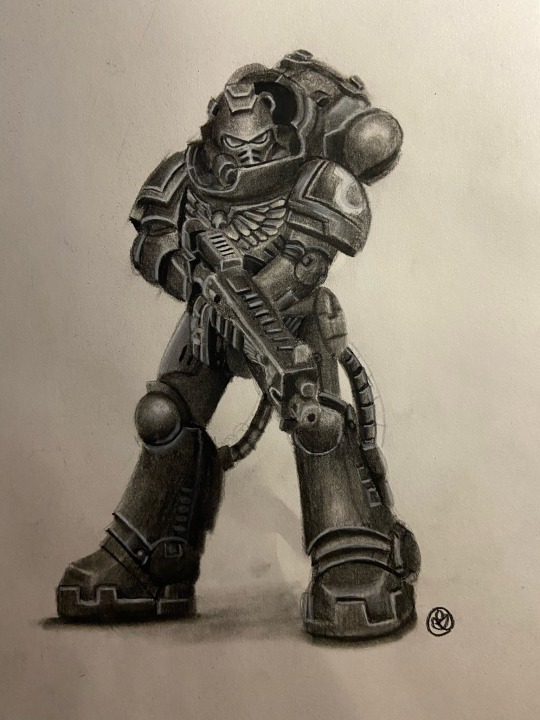
ive been having fun doing this !!
#traditional art#charcoal drawing#charcoal#warhammer drawing#warhammer 40k#warhammer 40000#warhammer art#heavy intercessor#warhammer heavy intercessor#realism#realism art#i loooooove charcoal!!!#warhammer fanart
32 notes
·
View notes
Text

My first Heresy-era World Eater, Commander Vendra
Not pictured: the sources of all that blood on her, especially not the poor sap she bit
#warhammer 40000#warhammer 30000#horus heresy#world eaters#traitor legions#heretic astartes#khorne#female space marines#not sure i have it in me to do a whole squad of these even 40k tac squad style (though i've got the weapons for it)#but i do want enough world eaters to run a 7TV game with 'em. and a heresy-era-ish kharn.#(i mean i'm gonna kitbash him out of a heavy intercessor and some goliath arms but he's definitely heresy-era kharn)
43 notes
·
View notes
Note
What’s your fave SM helmet?


I think… it might be this specific chaos marine helmet or the normal primaris helm. Or firstborn helmet. Or the heavy intercessor. Probably not the blade guard but he gets to be here anyway.
There’s a lot of really good helmets for the space marines and I’m really sad leagues of votaan got shafted in terms of helmets for the most part…
Like, if I HAVE to choose one, it’s probably the firstborn, helmet. Whichever that one is. I’m showing my surface level knowledge of warhammer but maybe that’s a good thing ^_^

9 notes
·
View notes
Text
Fleshing out my space marines' lore leads to more messy drama in the narrative, more messy drama leads to me wanting to build more models. I need to find a job so i can buy the stupid hobby supplies and mush 28mm barbies together as I narrate them beating the shit out of each other.
#Like#I wanna have my terminators redone with tortuga bay models#I wanna redo all my castaferum and redemptor/balistus/brutalis dreadnoughts with the knight recursor kit from cults#I wanna print a bunch more heavy intercessors now that you pair HQs with similarly armored troops#need to make refreshed character models for Vendras and Tetys#I need to fix my 3d printer and get new resin to do this shit#not to mention how much shit I wanna add to my imp guard
0 notes
Text


Salamanders Heavy Intercessor
by Konstantin Void
#imperium#space marines#loyalist astartes#primaris space marines#salamanders#dark imperium#warhammer#warhammer 40k#warhammer 40000#40k#konstantin void
306 notes
·
View notes
Text
Paintbrush, PlasGlue, and Holy Clippers: Sparse Marns: Part VII: Basing
The End!SO CLOSE to The End!! All that's left is to do SOMETHING with their bases and then varnish the minis to protect the paintjob!
Ok so TECHNICALLY, you really don't have to do anything to the base.
I mean I've never really been in the gaming part of the fandom as I said at the start, I only ever played by myself or with my sibs, so maybe some ppl would hassle you for leaving them with just your basic black+primer bases, but really: Who Cares? So What! If you didn't want to do anything with the bases you could just leave them as is, and if you wanted to do SOMETHING but not anything crazy, you could just paint them a uniform color: black, or grey, or a nice terrainy green or brown. Allot of folks do basically this:, painting the sides of the base brown and the tops green. Most mini-hobby companies also make "basing pastes" and terrain-paints meant to simulate particular terrain environments which you can apply with a brush and maybe schnazz up with a few licks of paint once they dry.
BUT! The point of all this was for me to practice skills, old and new, so I decided to do some flocking. "Flocking" just means "gluing terrain-like Stuff to your mini bases". SO! I went to the gamestore and bought some Army Painter flocking materials
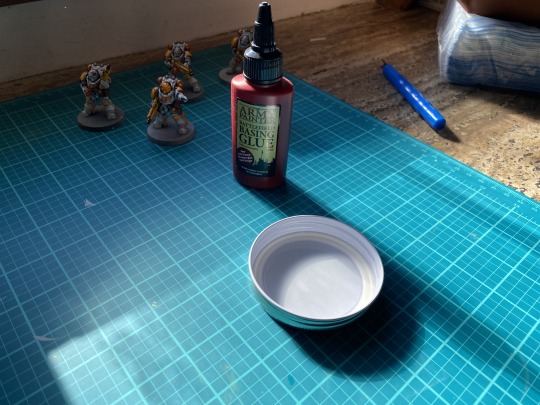
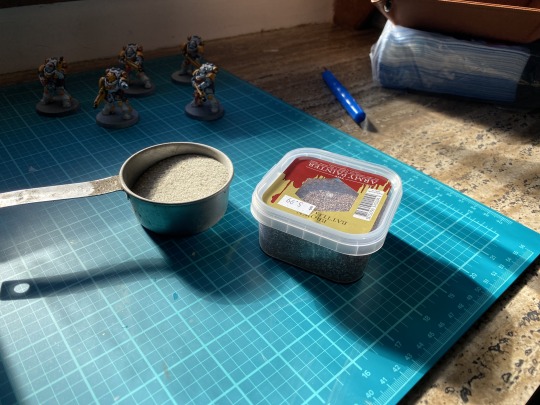
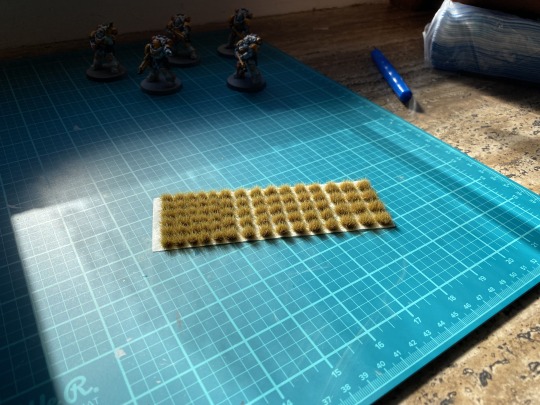

Lots of folks call Basing Glue "PVA Glue", which is basic wood glue or Elmers to most USians, so Im assuming that's what that is: it certainly looks, smells, feels, and behaves like it. I used the lid from one of my water jars to hold the glue, and This Brush

to apply it.
The flock itself is some Paver's fill I had lying around, plus Army Painter's Brown Battlefield(a sort of gritty rubble-sand), Green Field, and Battlefield Rocks, which I found those tweezers I didn't like much from assembly to be PERFECT for manipulating, placing, and holding secure. The shrubbery is Army Painter's Highland Tufts which I LOVE! I LOVE THEIR TUFTS SOMUCH!! Seriously after I got done with the basing I immediately went out and bought, like, 3 more packs of different varieties. The Flocks cost ~$15 total and the glue was, I think, another 5 or so, so it was about 20 bucks. The Paver fill didn't really do a super great job which was unfortunate, but now I know sand isn't a great flocking material(at least: not how I used it. I'll get to that later).
Working one base at a time, I brushed the glue on, held it at a tilt, then sprinkled the gravel and sand down it, adjusting and turning to til I was satisfied with the coverage. Then I let it sit for 30 minutes to dry, held it vertical and gently tapped to knock loose any excess, and did that again with the grass, only applying it in patches where I thought grass would Look Neat, letting it dry for another 30 minutes. Here's how that looked
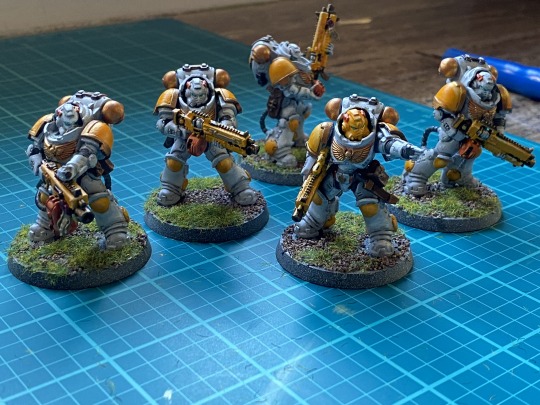

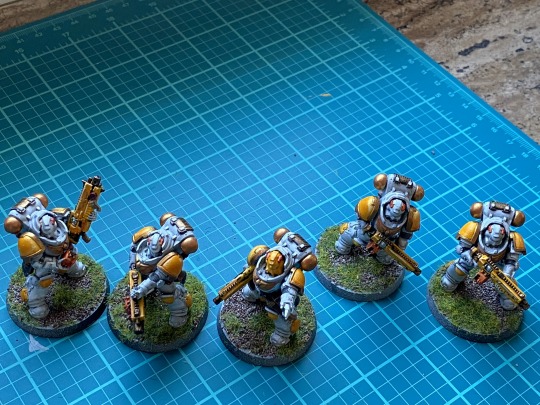
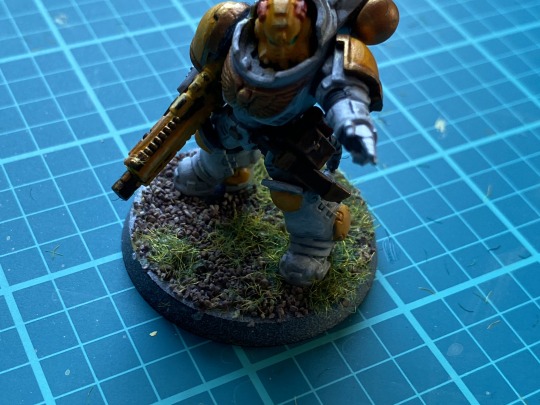
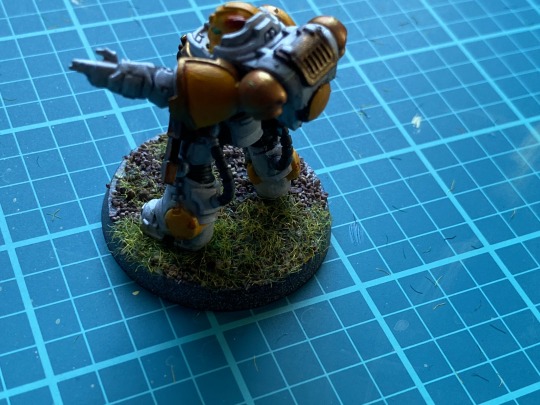

Swag!
Then I applied glue to the bottom of the rocks and stuck those wherever I thought a rock should live on the bases, letting dry for another 30 minutes, then did the same with the BEAUTIFUL Tufts My Beloveds uwu Here's how they looked after all that!

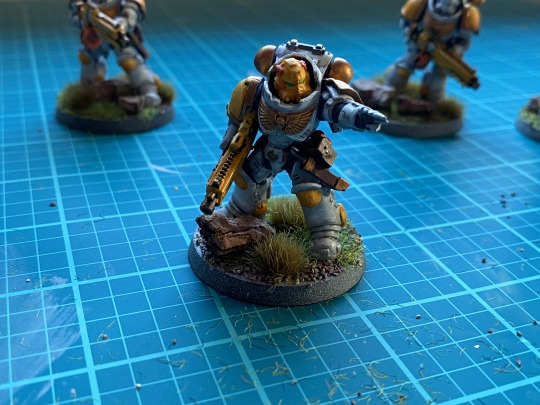
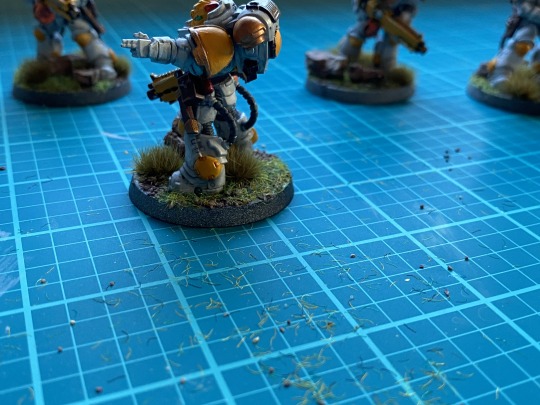


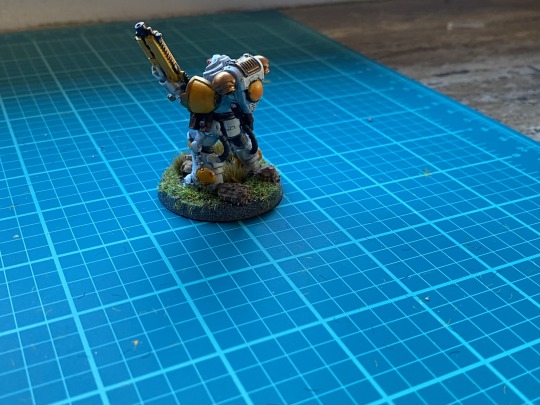


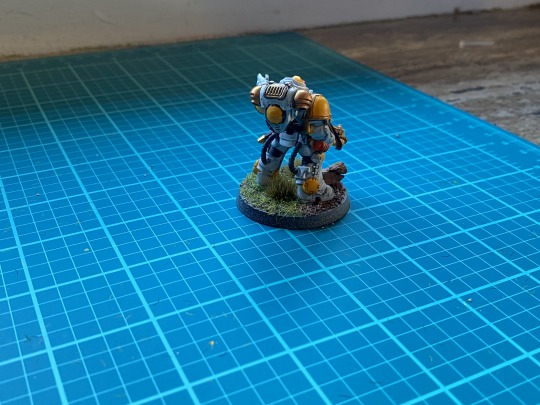
I love how this looks!
Unfortunately, the brown battlefield and green field flocking doesn't stay on so well X| This may be my fault: I might have not used enough glue. But, I decided to go looking for a way to lock it down and found some videos about "sealing" your flock to keep it from doing that, and decided to try covering the flock with a layer of VERY watered-down glue, to hold it in place, then decided to paint the wee skull on Sarge's helmet white, to stand out more. Here's how that looks
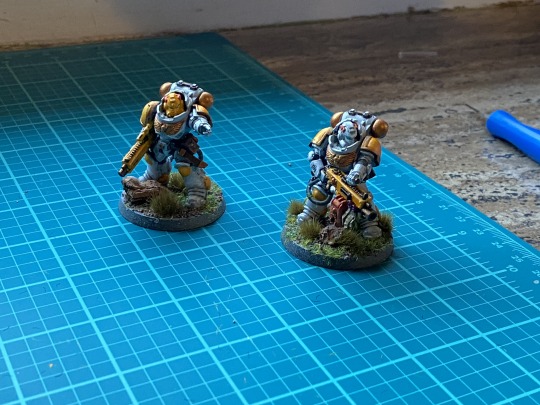

Oh: and once the flocking was dry, I painted the rim of each base in Mournfang Brown with a #2 brush, taking the time to fill in any empty spaces on the edge. I think it's fine, but it's definitely less charismatic than with the grass standing up all willy-nilly. When I went to get the tufts last time, I saw they also sold spray cans of "Terrain Sealer". Now, I KNOW this is for actual terrain pieces you build and paint, and for sealing gameboards you might create, but I figure that, with sufficient distance, it'd probably work well at sealing base-flock, too.
In general I think the flock-experiment went well, but I think I probably made a few mistakes in it. Next time I'll fully paint the bases in a ground-color before applying any flock, and I'll use a thicker layer of glue and see if that changes the stickability. Another option is to use the flock purely for texture and paint over it once it's dry. It's allot more work, and it requires prepping the basing substrate before you attach the minis and some VERY careful painting of said substrate at the finish, but most of the painting tutorials I've been watching lately do something like this, often using cheaply or freely available materials like sand, pebbles, and chopped up Ephemera instead of branded flocks. I could also use branded basing-pastes which, again, allot of video I watched prepping for this used. I'd like to give all those options a go sometime in the future just to see how it works out, though I worry about weight; one benefit of the Army Painter flocking is that it's pretty light and doesn't really impact the handling of the mini.
All that's left now is applying the varnish, going over my thoughts on the project, what I think I need to work on, and discussing my next one! Seeya then ^v^ ^v^
#zA Paints#zA Hobbies#Basing#GamesWorkshop#Space Marines#Heavy Intercessors#Nova Paladins#Hobbyposts
8 notes
·
View notes
Text

Some Space Marine Heavy Intercessors
#warhammer40k#40k#space marines#novamarines#iron hands#white scars#miniatures#games workshop#warhammer
21 notes
·
View notes
Text
Just finished another squad of Heavy Intercessors. I didn't really need to try anything new this time around, but I still enjoyed working on them. I am going back to Legions Imperialis for my next project, which shouldn't take very long.


32 notes
·
View notes