#350 8-10 mins
Explore tagged Tumblr posts
Text

Today I give thanks to cake decorators, calligraphers, artists, surgeons, and anyone else that successfully wields a steady hand in their profession, because I DO NOT possess this talent aaaand this has been very difficult.
Writing, not baking, that’s fine. I’m a cursive writer, it’s taking everything in my power to not chicken scratch my way through these, so help me 🤦♀️ My writing is not easy to read, and these are for my kid’s cookie swap. This is a gift many take for granted ijs. I’d rather bake them. I suck at this 😆
And here have a recipe 🍪

These have only gone through one dip, needs 2 😊
#350 8-10 mins#Mexican wedding cookies#Italian wedding cookies#my family calls them both depending who you ask#I say Mexican bc yes pecans and no star anise which is common for Italia#husbands fav ever#holidays#cookie recipe#thank god for steady hands#y’all are gods imo#I should probably drink less coffee
6 notes
·
View notes
Text
oh my god i figured it out
okay so it took an accident of me not checking on it, but I FINALLY figured out why I wasn't getting enough loft on my bread:
I was NOT giving enough time for yeast/bacteria production.
So if I do my other bread recipe's 4 hour levain development, then follow the pullman's recipe and do about an hour and a half initial rise (with stretch and folds) with a one hour final rest and rise, I get something like this:
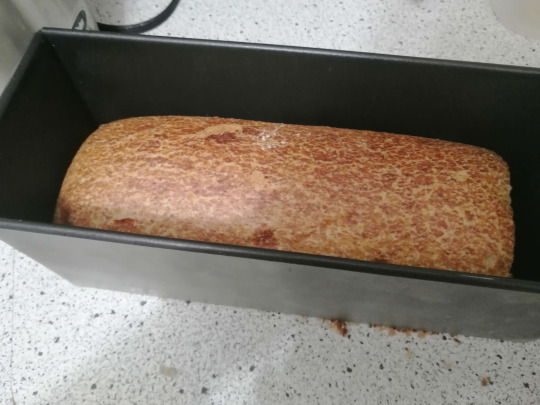
okay that rose in the oven but like. not a whole lot, yknow?
tried again, a little longer on the levain, but this time I tried to do the final rest/rise in the fridge overnight like when you have an overnight ferment on a classic sourdough
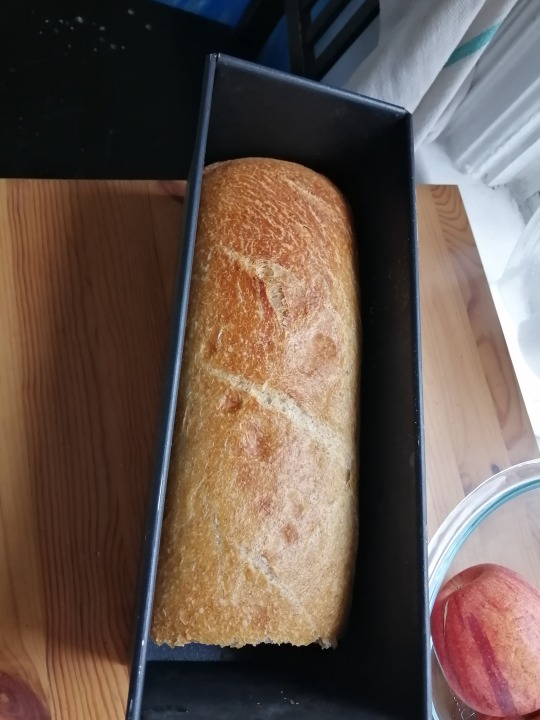
oh that's a lot better! but the recipe is for a PULLMAN'S loaf, it should be square as possible, am I using enough ingredients?
NO I WAS. I JUST WASNT GIVING ALL THE TIMES ENOUGH TIME
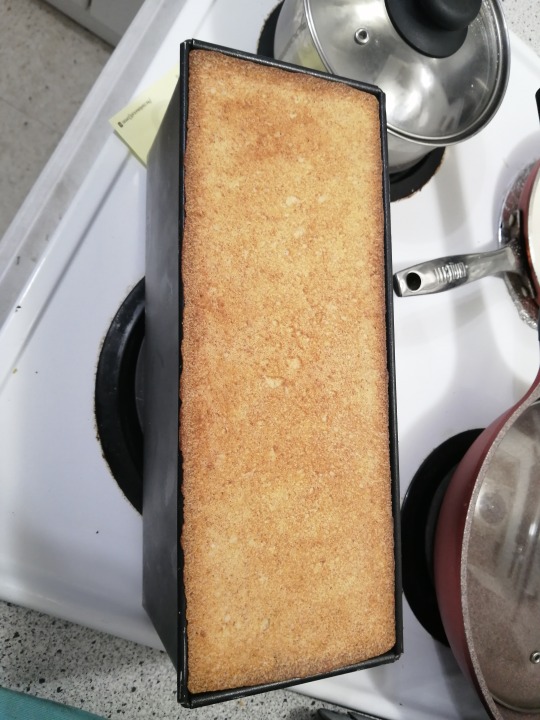
this time I let the levain (40-50g starter, 35g whole wheat flour, 35g AP flour, 70 mL water) develop for like six and a half hours in a proofer or a slightly warmed oven.
pour levain into a stand mixer if you've got one, bowl if you dont. Mix in sugar (35g) and warm water (400mL). Let that sit for the usual half hour in proofer.
add flour (600ish grams total, i often do about a third whole wheat to two thirds AP), 5g salt, 80-90g fat of choice (butter, margarine, etc). I put it in the stand mixer for around 10 minutes on low. (this is a REALLY old stand mixer so it CAN go real slow- do 7-8 min on lowest setting on a modern mixer, 15 min if you wanna do a hand knead)
cover and put in proofer. As usual I did 4 stretch and folds at half hour intervals, but on the final interval I forgot about the timer- it was left in the bowl for around a full hour after the last fold rather than the planned half hour.
by the time I checked on it, it rose WAY more than i was expecting it to. Decided to roll with it (lol), greased the pullman's pan (butter if no one's allergic, margarine otherwise), flattened, rolled up the dough, plopped it in and slid on the lid.
Did the final rest for two full hours in proofing temps, then baked at 350-60ish for a half hour with the lid slid on, 15 min with the lid off.
so, all in all: the ideal loaf of pullman's sourdough starts when you wake up and comes out around dark lunch.
not practical but hey! an interesting study to be sure
2K notes
·
View notes
Text
Chilchuck: EEEEYIKES!!! I'd better find a way out of this "Dungeon" before things start getting "Meshi!"
Laios:
3 very ripe bananas, (medium/large)
½ cup unsalted butter, (8 Tbsp) at room temperature
3/4 cup granulated sugar
2 large eggs, lightly beaten
1 ½ cups all-purpose flour
1 tsp baking soda
½ tsp salt
½ tsp vanilla extract
1 cup walnuts
½ cup raisins
Instructions
Preheat the oven to 350°F. Grease and flour a bread loaf pan (9.25 long x 5.25 wide x 2.75 deep). Lightly roast walnuts on a skillet, continuously stirring so they won’t burn. Coarsely chop and cool to room temperature.
In a mixing bowl, cream together 8 Tbsp softened butter and 3/4 cup sugar (or honey if using honey).
Mash bananas with a fork until the consistency of chunky applesauce and add them to the batter along with 2 eggs, mixing until blended.
In a separate bowl, whisk together: 1 1/2 cups of flour, 1 tsp of baking soda and 1/2 tsp of salt then add to batter.
Add 1/2 tsp of vanilla extract and mix in chopped walnuts and raisins. Pour into prepared loaf pan. Bake at 350˚F for 55-60 min or until a toothpick inserted into the center comes out clean. Let banana bread rest for 10 min before transferring to a wire rack to cool.
2K notes
·
View notes
Text
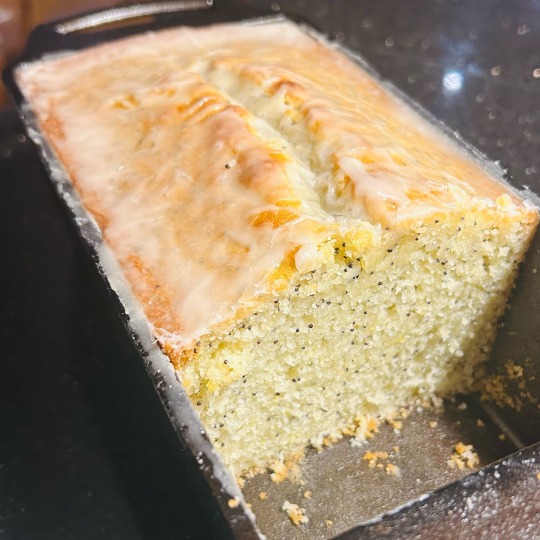
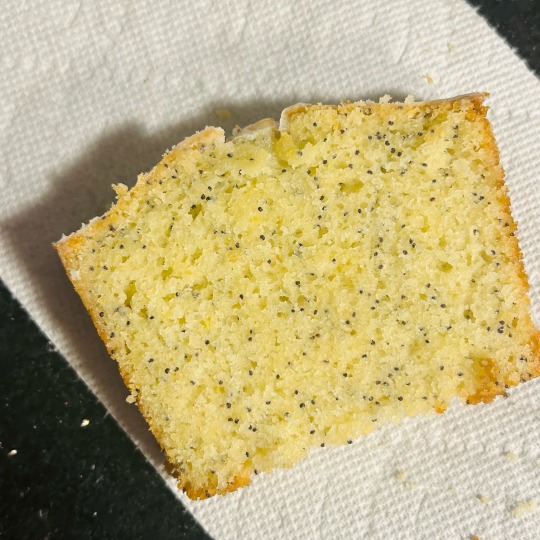
Cast iron loaf pan continues to be one of my favorite things ever, it consistently delivers perfect loaf cakes. In a perfect world my kitchen would have enough storage for cast iron pans of every imaginable size.
Recipe under cut, it’s basically the NYT Lemon Poppyseed Pound Cake but with some tweaks.
LEMON POPPY SEED LOAF CAKE
INGREDIENTS
zest of 2-3 lemons (the more the merrier)
1 cup white sugar
1/2 cup buttermilk (1/2 cup milk + 1.5 tsp white vinegar or extra lemon juice, stir, let curdle 10 min) or sour cream
1/4 cup (4 Tbsp) lemon juice
3 eggs
1 3/4 cup flour
1.5 tsp baking powder
1/4 tsp baking soda
1/4 tsp salt
2/3 cup oil
2 Tbsp poppy seeds
glaze:
1/2 cup powdered sugar
1 Tbsp lemon juice
1 tsp vanilla
DIRECTIONS
1. Heat oven to 350°. Grease 1 x 8-9” loaf pan.
2. Mix together lemon zest and sugar in a large bowl, stirring and smearing until the zest releases oils and the sugar is very fragrant and looks like wet sand.
3. Whisk in lemon juice, buttermilk, and eggs.
4. In a separate bowl, whisk together flour, baking powder, baking soda, salt.
5. Whisk dry ingredients into wet. Whisk in oil and poppy seeds until smooth and combined.
6. Pour batter into prepared pan. Bake 1 hour until a knife inserted in the center comes out moist but clean. Let cool at least 30 minutes before slicing.
7. To make glaze, whisk together powdered sugar, lemon juice, and vanilla until smooth. Taste and add more sugar or lemon as desired. Brush over cake while hot to get a translucent crinkly glaze look, or drizzle over when cool to get a clean icing look.
NOTES
- Can use batter to make muffins (fill cups almost all the way to the top). Double recipe for a bundt pan.
- Instead of glaze, can also boil together 1/3 cup white sugar + 1 Tbsp lemon juice. When cake is fresh out of oven, poke top all over with a toothpick and pour lemon syrup over to soak in.
82 notes
·
View notes
Text
Blueberry muffins + tips to get bakery style muffins
Muffin batter Ingredients
2 cups + 1 tbsp all purpose flour
2 tsp baking powder
1/2 tsp salt
8 tbsp unsalted butter melted and cooled (around 112g)
2 eggs
2 tsp vanilla extract
1/2 cup of milk
a pinch of lemon zest
1 1/2 cup of blueberries (fresh or frozen)


Blueberry syrup ingredients
1 cup blueberries
1 tbsp granulated sugar
1 tbsp lemon juice
Streusel crumble topping ingredients
1/4 cup all purpose flour
2tbsp + 1 tsp granulated sugar
1 1/2 tbsp brown sugar
Pinch freshly grated lemon zest
Pinch of salt
2 Tbsp of unsalted butter melted and cooled
(This is a blend from a few recipes that I tried to extract the best of each to combine them into something delicious. One of the original recipes called for double the streusel ingredients but after making it myself I only used half)
Instructions
Mix the dry (- the berries) and wet ingredients for the batter separately and then combine
Add the berries and let it rest
Making the sauce (in my opinion the best part of this recipe) is super easy, just heat these blueberries (I like to lightly press them) in a saucepan, add lemon juice and sugar
To make the streusel / crumble topping just mix the ingredients together
Add a 1/4 cup of dough + 1 spoon of dough to each muffin liner
Add the jam and then the streusel (be generous with it for a prettier look)
Bake them at 425 for 15 min before reducing to 375 for 10 min
Bakery style muffins
Want bakery style muffins every time?
Use these 4 tips to guarantee super-domed muffins!
1. Once your batter is mixed, let it rest for 45 minutes to allow the leaveners to active resulting in sky-high muffin tops
2. Use every other muffin well. This allows heat to penetrate on all sides of batter which will help them muffins rise.
3. Fill each well to the very tippy top so you get those perfect muffin tops that spill over onto the tin. These aren't cupcakes, so no flat tops here!
4. Bake at 425 degrees F (NOT 475! ) for 6-8 minutes to super charge the leaveners creating tons of rise. Then without opening the oven door, drop the temperature to 350 degrees F and continue baking for 8-10 minutes.
#personal#level up#femininity#personal development#feminine#proverbs 31 woman#tradfem#traditional wife#home cooking#cooking#baking#traditional femininity#traditional gender roles#traditionalism#tradblr#recipes
89 notes
·
View notes
Text

Shakshuka
Ingredients:
3 Tbsp olive oil
1 large yellow onion, diced
1 red bell pepper, diced
2 jalapeño, seeded and diced
5 ribs celery, diced
2 tsp salt
2 Tbsp smoked paprika
1 ½ tsp cardamom
¼ tsp cinnamon
¼ tsp cayenne pepper
1 tsp oregano
1 tsp cumin
½ tsp freshly cracked black pepper
4 cloves garlic, minced
1 14.5 oz can fire roasted diced tomatoes, with juices*
2 Tbsp tomato paste
1 lemon, zested + 1 Tbsp juice
2 tsp sugar
1 cup water, as needed
3 eggs (optional)** (see note)
2 Tbsp fresh parsley for garnish
Preheat oven to 350 degrees. Drizzle olive oil in a large, oven-safe skillet or oven-safe sauté pan and add diced yellow onion, diced red bell pepper, seeded and diced jalapeño, and diced celery. Add salt, smoked paprika, cardamom, cinnamon, cayenne pepper, oregano, cumin and black pepper.
Stir and cook down on medium heat until all vegetables are softened and spices are fragrant, about 10-12 minutes.
Add minced garlic, fire roasted diced tomatoes with juices, tomato paste, lemon zest and juice, and sugar. Stir and cook an additional 10 minutes, until fragrant and well-combined. Add water, as needed to thin out the sauce if you want it to be a little more brothy and less thick. I like mine to be the consistency of a hearty stew or chili, but not pasty.
Make egg-size dents in the sauce with the back of a large spoon or a ladle, and crack an egg into each spot. You can add one egg for however many people you are trying to serve.**
Transfer the pan with the eggs to the preheated oven for 8-12 min until the egg whites are opaque.*** Top with black pepper and fresh parsley.
Serve with toasted pita and fresh avocado (optional). Enjoy!
16 notes
·
View notes
Text

Jam Shortbread Prep time 10 mins Cook time 35 mins Total time 45 mins Serves: 16
Ingredients
⅔ Cup butter, softened ¼ cup white sugar 1¼ cups all-purpose flour ⅓ Cup fruit jam 2 tablespoons sliced almonds (optional) Powdered sugar, optional
Directions
Heat oven to 350°F. Grease 9-inch square pan with cooking spray. In a medium bowl, mix together ⅔ cup butter, white sugar, and flour until evenly crumbly. Reserve 2 tablespoons of the dough for topping. Press the rest of the dough into a 8 inch square baking pan. Bake for 15 minutes. Remove from oven and spread the jam on top. Crumble the reserved dough on top. Sprinkle with almonds if using. Return to the oven and bake until the edges are golden brown, 20 more minutes. Let cool completely before cutting. Once cool, sprinkle with powdered sugar if using. Cut into 16 bars or triangles.
42 notes
·
View notes
Text

Vegan Gluten Free Maple Challah
You don't need wheat, eggs, or honey to make this Jewish staple delicious! This vegan and gluten free recipe will be a showstopper at Chanukah, Rosh Hashanah, or French Toast Brunch☺️
This bake turned out a bit denser than I intended, so I recommend starting with only 3 cups of flour blend and adding more as needed. But as long as the texture is right at each stage, it will turn out in the bake!
3 1/2 c. Bob's Red Mill 1:1 Baking Flour
1 1/2 tsp. BRM Xanthan Gum
1 c. BRM Tapioca Flour
2 tsp. Double-Acting Baking Powder
1/4 c. Sugar
4 tsp. Salt
1 1/2 c. Water
8 Tbsp. Olive Oil
4 1/2 Tbsp. BRM Egg Replacement + 3 Tbsp. Water
3/4 c. Maple Syrup
2-4 Tbsp. Maple Syrup (for glaze)
Whisk dry ingredients together
Mix Egg Replacement and Water, let sit for one minute to thicken
In a separate bowl, combine wet ingredients
With a flat rubber spoon, fold together wet and dry ingredients
*If dough is too dry or crumbly, add Olive Oil 1 Tbsp. at a time
*Dough should have consistency of wet play-doh
Chill in airtight container 1-2 hours to soak up moisture
Dust a large, flat surface with flour blend and tapioca flour (3:2 ratio)
Turn dough out onto floured surface, knead until no longer sticky
Divide into 3 equal pieces, roll into cylindrical shapes
Pinch tops of dough strands together, tuck under
Carefully complete a 3-strand braid with the dough, being careful not to pull on the dough
Let rise in a warm, draft-free spot for 45-60 min
Brush with maple syrup
Bake at 350 for 30 min
Rotate 180 degrees, brush again with syrup
Bake at 325 for 15 min or until golden brown
Brush with syrup one more time, let stand 10 min
Enjoy!
20 notes
·
View notes
Note
We heard you have a brownie recipe? I've been wanting to make brownies for my partner for ages, but haven't had a chance to get around to it - Mae
Yeah! Happy to share! (Fun fact can never have these cause allergic to gluten nd dairy </3 Anyways, long ass brownie recipe under the cut)
Ingredients -
10 Tablespoons Melted Butter (IT IS A LOT)
1 Cup Sugar
2 Eggs
2 1/2 Teaspoons Vanilla Extract
1/2 Cup Melted Choco Chips
3/4 Cup All Purpose Flour
1/4 Cup Cocoa Powder
1/2 Teaspoon Salt
1 Cup Add In Of Your Choice (ex - almonds, walnuts, pecans, mnms, more choco chips, the list goes on. pecans are heavily recommended tho)
Add-ins are optional but we've noticed the recipe acts a bit different if you leave them out!
Steps -
1 - Mix 8 tablespoons of the butter with your sugar till fully combined.
2 - Melt down your choco chips with your extra 2 tablespoons of butter (helps it incorporate easier, melt more evenly, keeps it thinner) And add that to the bowl, mix thoroughly
3 - Add in your eggs HOWEVER mix fast cause otherwise your eggs will cook cause the butter and chocolate are hot :'D (we've made the mistake, please just safe yourself)
4 - Now proceed to add your vanilla because this is the point where we typically forget it :D
5 - Now add your flour, cocoa powder, and salt to the bowl and mix thoroughly (just go till it's fully combined, no more)
6 - Fold in your add ins (If using nuts, chop them finely, really its not good if theyre whole)
7 - Pop the brownie batter in the freezer for 45 mins, yes it takes a while, but this is how they stay fudgy <3
8 - Preheat your oven to 350 when there's about 15 mins left. Oh and grease your baking dish (Heavily recommended butter for greasing)
9 - After your brownie batter is outta the freezer, shove it into the baking dish and bake for 20 mins TO START WITH.
10 - Baking time depends on how shallow the bowl you put it into the freezer is, your freezer temp, how long you waited after you took it outta the freezer, and so many other things. It might take up to 50 mins, just be patient.
11 - Your brownies are done once you stick a toothpick in it and it comes out with wet crumbs DO NOT wait for it to be dry.
12 - Let fully cool before cutting into them and enjoy <3
Would've just dmed it but yknow now the world gets to know our brownie recipe, have fun for whoever makes it!
11 notes
·
View notes
Text
Savoury Tart With Pumpkin And Katiki Cheese
🥧

Savoury Tart with Pumpkin and Katiki cheese - Almyri Tarta me Kolokytha kai Katiki
BY: Greek Cooking Made Easy
SUBSCRIBE TO MY YOUTUBE CHANNEL: https://www.youtube.com/greekcookingmadeeasy
Check My YouTube Video: HERE
Κοιτάξτε Επίσης Την Συνταγή Μου Σε YouTube Βίντεο, Το Λίνκ Είναι: ΕΔΩ
youtube
SERVES 🍴⃒ PREP. TIME 🕔⃒
4-6 pers. 25 min + 1 hour wait
COOK. TIME ♨ DIFFIC. LEVEL 👩🍳⃒
Pumpkin: 30 min.
Tart: 45-50 min. Easy
Tarts are meant to be an easy dish that can be batched up quickly and feed a whole family without a lot of fuss.
This one has a really seasonal feel, being prepared with bright orange pumpkin combined with tangy cheeses and "mixed spices", for that cherished, light, sweet/salty pairing with a delicate fragrance.
It brings a ray of Autumn sunshine at your dinner table.
I hope you will enjoy it.
Suitable for lacto-ovo Vegetarians.
INGREDIENTS:
• 1 sheet (roll) / 300 gr. / 10.5 oz Short crust pastry or Kourou pastry, thawed
• 450-500 gr. / 1 lb-1 lb 2 oz Orange Pumpkin, in cubes of 1.5 cm / 0.6 in. thick
• 2 large Eggs
• 250 gr. / 9 oz Katiki cheese (from Domokos), whipped (alter: Ricotta cheese)
• 1/4 cup / 50 gr. / 1.75 oz Graviera, Gouda or Kaseri cheese, grated
• 1 tsp. "Mixed Spice"
• 3 tbsp. / 45 ml Olive Oil
• Ground Salt and Pepper

NOTE:
Make your own "mixed spices" that are used to flavor this Pumpkin Tart, if you can not find them ready in the supermarkets. You can also add them to your Pumpkin Bread, Christmas Turkey Stuffing or hot Cappuccino or to other sweets or foods, to make them slightly spicy.
🎃 The recipe is to mix together and homogenize:
��︎ 9 parts ground Cinnamon
✔︎ 2 parts ground Nutmeg
✔︎ 2 parts ground Ginger
✔︎ 1.5 parts ground All-Spice
✔︎ 1.5 parts ground Cloves
🎃 🎃 🎃 🎃 🎃 🎃 🎃 🎃 🎃 🎃 🎃
METHOD:
A. Precook the pumpkin:
1. Line a Pyrex dish with parchment paper. Scatter the pumpkin cubes all around the dish.
2. Place them in a preheated oven FAN @180 ℃ / 350 ℉ and bake them for 30' (depends on the oven).
3. Remove from the oven and let pumpkin cubes cool down.
B. Prepare the tart base:
4. Brush 1 tbsp. Olive oil at the bottom and sides of a round tart dish of 22 cm / 8.7 in.
5. Place the pastry sheet at the bottom of the dish.
6. Press and raise the pastry edges, forming a lip around the sides to help hold the filling. Cut any overhanging pastry.
7. Now with a small fork, make little holes all around the pastry sheet.
8. Cover the dish with pastry using plastic wrap and place in the fridge for 1 hour to chill.
C. Prepare the filling and finish the tart:
9. Sprinkle half of the mixed spice on top of the cooked pumpkin cubes and with a spoon toss to cover them well.
10. Use a sharp knife to cut the pumpkin cubes to even smaller pieces.
11. In a large bowl, crack and whisk the 2 eggs.
12. Next season with a bit ground salt (not too much) and ground pepper followed by the rest of mixed spice, the grated cheese and whipped Katiki cheese.
13. Blend all ingredients very well.
14. Add the pumpkin cubes in the thick liquid mix and stir to blend them well.
15. Bring the dish with pastry from the fridge and pour the filling on top.
16. Level its surface and then drizzle 2 tbsp. Olive oil followed by some more ground pepper.
17. If you like, you could decorate the tart by pressing the edges with a small fork. Tart is now ready for the oven.
D. Baking instructions:
18. Bake the Pumpkin Tart in a preheated oven FAN @180 ℃ / 350 ℉ for about 45'-50' or until the tart is crisp and golden (depends on the oven).
19. When ready, remove from the oven.

E. Serving instructions:
This tart should be served warm for lunch or as 1st course with a fresh green salad.

A great contradicting combo of the sweet pumpkin with the tangy cheeses, wrapped in a crispy tart.

Light, delicately sweet, tangy and slightly salty and look at these warm, deep, fall colors! A pure ray of Autumn sunshine at your dinner table.

F. Storage info:
Leftover tart can be stored in plastic wrap in the fridge for up to a week. Reheat quickly in the oven.
G. Info about Pumpkin-The Superfood 🎃:
Pumpkin is undoubtedly considered the Queen of Autumn and we identify it with the fall months.
So don't just carve the pumpkin to make a Jack-o'-Lantern, eat it as well. It is a Great Superfood!!
A pumpkin is a cultivar of a squash plant, that is round, with smooth, slightly ribbed skin, and deep yellow to orange coloration. The thick shell contains the seeds and pulp. Pumpkin has an exceptional versatile character, hence it can be used for savory and sweet concoctions.
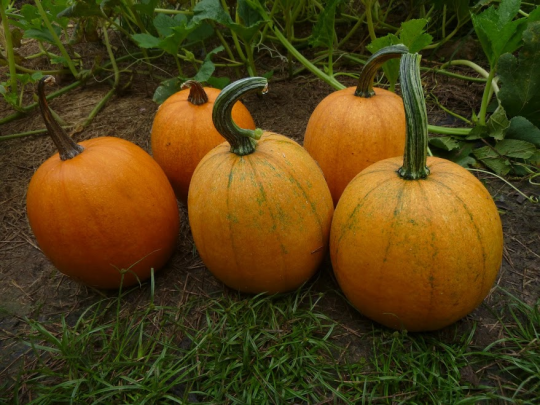
🎃 The origin of pumpkin:
The origin of pumpkin is American and/or African. The oldest evidence of pumpkin fragments are found in Mexico, dated between 7,000 and 5,500 BC. Pumpkins and other squash species, alongside maize and beans, feature in the Three Sisters method of companion planting practiced by many North American indigenous societies.
In general, it likes temperate climates with few winds and can easily cope with drought conditions due to its high water content.
There are indications that it was also known in ancient Greece. Nowadays, they are not systematically cultivated, but you will be able to find pumpkins in various regions of mainland Greece. They are sown outdoors around April and the earliest ones are on the market as early as August.

As Pumpkins are native mainly to North America, they are widely grown for commercial use and are used both in food and recreation. Pumpkin pie, for instance, is a traditional part of Thanksgiving meals in Canada and the United States, and pumpkins are frequently carved as jack-o'-lanterns for decoration around Halloween.

There are even local competitions being held in the US for the most elaborate jack-o'-lantern or the largest pumpkin cultivated.
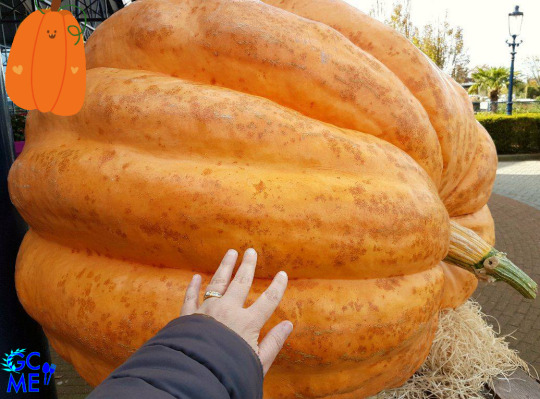
🎃 Nutritional value:
Pumpkin is a highly nutrient-dense food. It is rich in vitamins, Beta carotene and minerals but low in calories. Pumpkin seeds, leaves, and juices all pack a powerful nutritional punch.
The fiber, potassium, and vitamin C content in pumpkin all support heart health. Studies suggest that consuming enough potassium may be almost as important as decreasing sodium intake for the treatment of hypertension, or high blood pressure.
Also did you know that Pumpkin puree can be used as a replacement for butter or oil in baking recipes? (with excerpts from Wikipedia and medicalnewstoday.com)
Check my YouTube Video: HERE

Αλμυρή Τάρτα με Κολοκύθα και Κατίκι
BY: Greek Cooking Made Easy
SUBSCRIBE TO MY YOUTUBE CHANNEL: https://www.youtube.com/greekcookingmadeeasy
ΜΕΡΙΔΕΣ🍴⃒ ΠΡΟΕΤΟΙΜΑΣΙΑ 🕔⃒
4-6 25 min + 1 ώρα αναμονή
ΜΑΓΕΙΡΕΜΑ ♨ ΒΑΘΜ. ΔΥΣΚΟΛΙΑΣ 👩🍳⃒
Κολοκύθα: 30 min.
Τάρτα: 45-50 min. Εύκολη
Οι τάρτες είναι ένα εύκολο πιάτο που μπορεί να παρασκευαστεί γρήγορα και να ταΐσει μια ολόκληρη οικογένεια χωρίς πολλή φασαρία.
Αυτή η τάρτα έχει μια πραγματικά εποχιακή αίσθηση, μιας και ετοιμάζεται με έντονα πορτοκαλί κολοκύθα σε συνδυασμό με πικάντικα τυριά και "ανάμεικτα μπαχαρικά", για αυτό το αγαπημένο, γλυκό/αλμυρό ζευγάρωμα με λεπτό άρωμα.
Φέρνει μια αχτίδα φθινοπωρινού ήλιου στο τραπέζι σας.
Ελπίζω να την απολαύσετε.
Κατάλληλη για χορτοφάγους.
ΥΛΙΚΑ:
• 1 φύλλο / 300 γρ. / 10,5 oz Τριφτή Ζύμη ή ζύμη Κουρού, ξεπαγωμένη
• 450-500 γρ. / 1 lb-1 lb 2 oz πορτοκαλί Κολοκύθα, σε κύβους πάχους 1,5 εκ. / 0,6 ίντσες
• 2 μεγάλα Αυγά
• 250 γρ. / 9 oz Κατίκι Δομοκού, χτυπημένο (εναλλακ: τυρί Ricotta)
• 1/4 φλ. / 50 γρ. / 1,75 oz Γραβιέρα, Γκούντα ή Κασέρι, τριμμένο
• 1 κ.γ. "Ανάμεικτα μπαχαρικά"
• 3 κ.σ. / 45 ml Ελαιόλαδο
• Φρεσκοαλεσμένο αλάτι και πιπέρι

ΣΗΜΕΙΩΣΗ:
Φτιάξτε τα δικά σας «ανάμεικτα μπαχαρικά» που χρησιμοποιούνται για να αρωματίσουν τη τάρτα κολοκύθας, αν δεν τα βρείτε έτοιμα στα σούπερμαρκετ. Μπορείτε επίσης να τα προσθέσετε στο ψωμί κολοκύθας, στη χριστουγεννιάτικη γέμιση γαλοπούλας ή στον ζεστό καπουτσίνο σας ή σε άλλα γλυκά ή φαγητά, για να γίνουν ελαφρώς πιπεράτα.
🎃 Η συνταγή είναι να ανακατέψετε μαζί για να ομογενοποιηθούν:
✔︎ 9 μέρη Κανέλα σκόνη
✔︎ 2 μέρη Μοσχοκάρυδο σκόνη
✔︎ 2 μέρη Τζίντζερ (πιπερόριζα) σκόνη
✔︎ 1.5 μέρη Μπαχάρι σκόνη
✔︎ 1.5 μέρη Γαρύφαλο σκόνη
🎃 🎃 🎃 🎃 🎃 🎃 🎃 🎃 🎃 🎃 🎃 🎃 🎃
ΜΕΘΟΔΟΣ:
Α. Προψήστε την κολοκύθα:
1. Στρώστε ένα ταψί Pyrex με λαδόκολλα. Σκορπίστε τους κύβους κολοκύθας μέσα στο ταψί.
2. Βάλτε σε προθερμασμένο φούρνο στον αέρα @180 ℃ / 350 ℉ και ψήστε τους κύβους για 30' (εξαρτάται από τον φούρνο).
3. Βγάλτε από το φούρνο και αφήστε τους κύβους κολοκύθας να κρυώσουν.
Β. Ετοιμάστε τη βάση της τάρτας:
4. Βουρτσίστε 1 κ.σ. Ελαιόλαδο στο κάτω μέρος και στις πλευρές μιας στρογγυλής ταρτιέρας των 22 εκ. / 8,7 ίντσες.
5. Βάλτε το φύλλο τριφτής ζύμης στον πάτο του σκεύους.
6. Πιέστε και ανασηκώστε τις άκρες της ζύμης, σχηματίζοντας ένα χείλος στα πλαϊνά για να κρατηθεί η γέμιση. Κόψτε την επιπλέον ζύμη που προεξέχει.
7. Τώρα με ένα μικρό πιρούνι κάντε τρυπούλες στην επιφάνεια της ζύμης.
8. Σκεπάστε το ταψί με τη ζύμη με πλαστική μεμβράνη και βάλτε στο ψυγείο για 1 ώρα να παγώσει.
Γ. Ετοιμάστε τη γέμιση και τελειώστε την τάρτα:
9. Πασπαλίστε το μισό από τα "ανάμεικτα μπαχαρικά" πάνω από τους κύβους της ψημένης κολοκύθας και με ένα κουτάλι ανακατέψτε ώστε να καλυφθούν καλά.
10. Χρησιμοποιήστε ένα κοφτερό μαχαίρι για να κόψετε τους κύβους της κολοκύθας σε ακόμη μικρότερα κομμάτια.
11. Σε ένα μεγάλο μπολ, σπάστε και χτυπήστε τα 2 αυγά με αυγοδάρτη.
12. Προσθέστε φρεσκοαλεσμένο αλάτι (όχι πολύ) και αλεσμένο πιπέρι και μετά τα υπόλοιπα "ανάμεικτα μπαχαρικά", το τριμμένο τυρί και το χτυπημένο κατίκι.
13. Ανακατέψτε πολύ καλά όλα τα υλικά.
14. Προσθέστε τους κύβους κολοκύθας στο παχύρρευστο υγρό μείγμα και ανακατέψτε να ενωθούν καλά.
15. Βγάλτε τη ταρτιέρα με τη ζύμη από το ψυγείο και ρίξτε από πάνω τη γέμιση.
16. Ισιώστε την επιφάνειά της τάρτας και στη συνέχεια περιχύστε 2 κ.σ. Ελαιόλαδο και μετά λίγο ακόμα φρεσκοαλεσμένο πιπέρι.
17. Αν θέλετε, μπορείτε να διακοσμήσετε την τάρτα πιέζοντας τις άκρες της ζύμης με ένα μικρό πιρούνι. Η τάρτα είναι τώρα έτοιμη για το φούρνο.
Δ. Οδηγίες ψησίματος:
18. Ψήστε την τάρτα κολοκύθας σε προθερμασμένο φούρνο στον αέρα @180 ℃ / 350 ℉ για περίπου 45'-50' ή μέχρι η τάρτα να γίνει τ��αγανή και χρυσαφιά (εξαρτάται από τον φούρνο).
19. Μόλις είναι έτοιμη, βγάλτε τη από το φούρνο.

Ε. Οδηγίες σερβιρίσματος:
Αυτή η τάρτα πρέπει να σερβίρεται ζεστή για μεσημεριανό γεύμα ή σα 1ο πιάτο με μια φρέσκια πράσινη σαλάτα.

Υπέροχος συνδυασμός-κόντρα της γλυκιάς κολοκύθας με τα πικάντικα τυριά, τυλιγμένα σε τραγανή τάρτα.

Ελαφριά, με υπόγεια, φινετσάτη γλύκα, πικάντικη και υφάλμυρη και δείτε αυτά τα ζεστά, βαθιά, φθινοπωρινά χρώματα! Μια ζεστή αχτίδα φθινοπωρινού ήλιου στο τραπέζι σας.

Ζ. Πληροφορίες φύλαξης:
Η τάρτα που έχει απομείνει μπορεί να φυλαχτεί σε πλαστική μεμβράνη στο ψυγείο για έως και μια εβδομάδα. Ξαναζεσταίνετε γρήγορα στο φούρνο.
Η. Πληροφορίες για την Κολοκύθα-Το superfood 🎃:
Η Κολοκύθα θεωρείται η αδιαμφησβήτητη βασίλισσα του φθινοπώρου και την ταυτίζουμε με τους φθινοπωρινούς μήνες. Γι' αυτό μην χαράζετε την κολοκύθα μόνο για να φτιάξετε το φανάρι Jack-o'-Lantern για το Χάλογουιν, αλλά να την φάτε κιόλας μιας και είναι Superfood! Η κολοκύθα ανήκει σε μια ποικιλία φυτών σκουός, που είναι στρογγυλά, με λείο, ελαφρώς ραβδωτό δέρμα και βαθύ κίτρινο έως πορτοκαλί χρώμα. Το παχύ σκληρό κέλυφος περιέχει τους σπόρους και τον πολτό-τη σάρκα. Η κολοκύθα έχει έναν εξαιρετικά ευπροσάρμοστο χαρακτήρα, επομένως μπορεί να χρησιμοποιηθεί σε μεγάλη ποικιλία από αλμυρά αλλά και γλυκά παρασκευάσματα.

🎃 Καταγωγή/προέλευση της Κολοκύθας:
Η προέλευση της κολοκύθας είναι από την Αμερική ή και την Αφρική. Τα παλαιότερα στοιχεία για θραύσματα κολοκύθας βρίσκονται στο Μεξικό, που χρονολογούνται μεταξύ 7.000 και 5.500 π.Χ. Οι κολοκύθες και άλλα παρόμοια είδη, μαζί με τον αραβόσιτο και τα φασόλια, περιλαμβάνονται στη μέθοδο φύτευσης συντρόφων των Τριών Αδελφών ��ου εφαρμόζουν πολλές αυτόχθονες κοινωνίες της Βόρειας Αμερικής.
Γενικά, οι κολοκύθες προτιμούν τα εύκρατα κλίματα με λίγους ανέμους και μπορούν εύκολα να αντιμετωπίσουν συνθήκες ξηρασίας λόγω της υψηλής περιεκτικότητάς τους σε νερό.
Υπάρχουν ενδείξεις ότι ήταν γνω��τή και στην αρχαία Ελλάδα. Σήμερα η κολοκύθα δεν καλλιεργείται συστηματικά, αλλά θα συναντήσετε καλλιέργειες τους σε διάφορες περιοχές της ηπειρωτικής Ελλάδας. Σπέρνονται γύρω στον Απρίλιο και οι πιο πρώιμες κυκλοφορούν ήδη από τον Αύγουστο στην αγορά.

Καθώς οι κολοκύθες είναι εγγενείς κυρίως στη Βόρεια Αμερική, καλλιεργούνται ευρέως για εμπορική χρήση και χρησιμοποιούνται τόσο για βρώση όσο και για αναψυχή.
Η κολοκυθόπιτα, για παράδειγμα, είναι ένα παραδοσιακό μέρος του γεύματος της Ημέρας των Ευχαριστιών στον Καναδά και τις Ηνωμένες Πολιτείες, και οι κολοκύθες είναι συχνά χαραγμένες ως jack-o'-lantern για διακόσμηση στο Χάλογουιν-Halloween.

Υπάρχουν μέχρι και τοπικοί διαγωνισμοί που διεξάγονται στις ΗΠΑ για το πιο περίτεχνο jack-o'-lantern ή τη μεγαλύτερη καλλιεργημένη κολοκύθα.

🎃 Διατροφική αξία:
Η κολοκύθα είναι ένα εξαιρετικά θρεπτικό και υγιεινό φυτό. Είναι πλούσιο σε βιταμίνες, βήτα καροτίνη και μέταλλα αλλά χαμηλή σε θερμίδες. Οι σπόροι κολοκύθας, τα φύλλα και ο χυμός τους έχουν ισχυρή διατροφική αξία.
Η περιεκτικότητα σε φυτικές ίνες, κάλιο και βιταμίνη C στην κολοκύθα βοηθάει στην καλή υγεία της καρδιάς. Μελέτες υποδεικνύουν ότι η κατανάλωση επαρκούς ποσότητας καλίου μπορεί να είναι σχεδόν εξίσου σημαντική με τη μείωση της πρόσληψης νατρίου για τη θεραπεία της υπέρτασης ή της υψηλής αρτηριακής πίεσης.
Επίσης, γνωρίζατε ότι ο πουρές κολοκύθας μπορεί να χρησιμοποιηθεί ως αντικατάσταση του βουτύρου ή του λαδιού στις συνταγές ζαχαροπλαστικής;!!
(με αποσπάσματα από την Βικιπαίδεια και medicalnewstoday.com)
Κοιτάξτε επίσης την συνταγή μου σε YouTube βίντεο, το λίνκ είναι: ΕΔΩ

#Youtube#Savoury Tart with Pumpkin and Katiki cheese#lunch#light#diet#pie#pastry#vegetables#cheese#lowcost#vegetarian#fall#pumpkin#Αλμυρή Τάρτα με Κολοκύθα και Κατίκι#pumpkin tart#pumpkin recipes#savoury pumpkin tart
3 notes
·
View notes
Text
Easy and slow warm, gooey soft Molasses Cookies
Blend in a glass :
1 egg
1/2 tsp vanilla extract
4 Tbs vegetable oil ( light olive is best)
2 Tbs molasses
2 Tbs white sugar
In a separate bowl, mix:
1/4 tsp salt
1/4 tsp baking soda
1/2 tsp baking powder
1 Tbs Mochiko rice flour
1 tsp cinnamon
10 Tbs all purpose flour (that's a level half cup, plus 2 Tbs, which is an unusual measure, but the exact right amount.)
Then add the wet to the dry and stir until combined
Stir in 1/2 cup chopped dates.
Mixture should be just a little too gooey to handle. This is good. Cover the bowl, put it in the refrigerator and let it rest several hours.
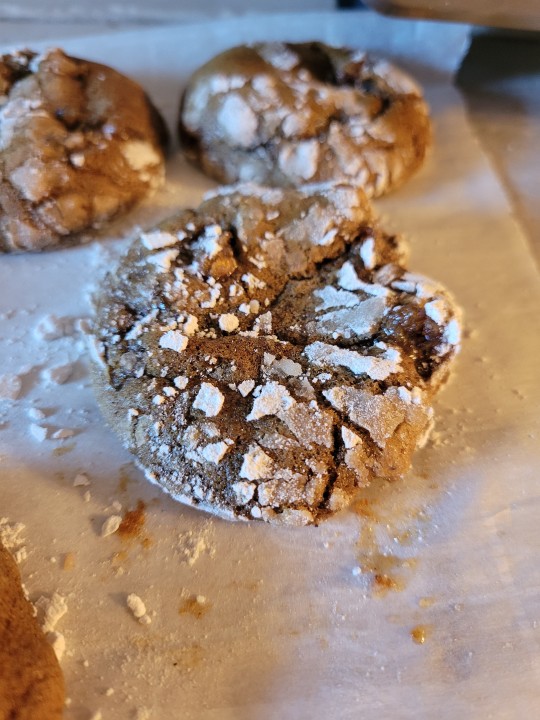
Next day, make a small container of powdered sugar with some cinnamon. Drop a half Tbs spoonful of dough into the mixture, put on a tight fitting lid and shake the container until the dough ball is all covered in sugar and nice and round. Put the ball on a cookie sheet pan, then repeat until you have a pan full of dough balls. Bake in preheated 350°F oven for 8 min, and watch them carefully. They should spread a little, then just start to puff up and crack a little. If you leave them in until they fully puff up and dome they will be cakey instead of gooey inside. Still good, but I prefer them moister inside. Watch the last 30 seconds carefully.
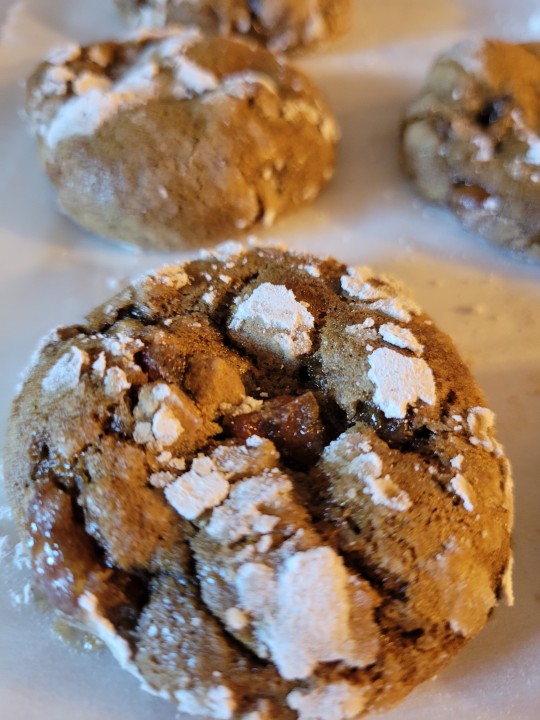
This is what you are watching for. See that little glisten inside? perfection.
Let it cool at least a little-- the molten dates stay hotter than the cookie part.
#molasses#molasses cookies#food#recipe#delicious#kosher#pareve#non dairy#cookie#cookies#cooky#sweets#desserts#easy recipe#Thanksgiving#Thanksgiving recipe#dessert#comfort food#cozy#cozy core#tea and cakes#cinnamon
15 notes
·
View notes
Text
Banana Cake with Cream Cheese Frosting 🍌🎂

Banana Cake with Cream Cheese Frosting 🍌🎂 Indulge in the irresistible combination of moist banana cake and creamy cream cheese frosting with this delightful recipe. Made with ripe bananas, sour cream, and a hint of vanilla, this cake is a perfect treat for any occasion. Ingredients: For The Banana Cake:
2 cups all-purpose flour
1 tsp baking soda
¼ tsp salt
½ cup butter, softened
1 ⅓ cups sugar
2 eggs
1 cup sour cream
1 tsp vanilla extract
4 medium bananas, mashed (about 2 cups) For The Cream Cheese Frosting:
8 oz cream cheese, room temperature
½ cup butter, room temperature
1 tsp vanilla extract
3 cups powdered sugar Directions:
Preheat the oven to 350°F and spray two 8-inch cake pans with non-stick spray.
Banana Cake:
In a large bowl, beat butter and sugar together until creamy.
Add eggs and beat until combined, then beat in sour cream and vanilla.
Add flour, baking soda, and salt, and beat just until combined.
Stir in mashed bananas until well combined.
Pour the batter equally into the prepared cake pans and bake for approximately 35-40 minutes or until a toothpick inserted comes out clean.
Cream Cheese Frosting:
In a medium bowl, beat cream cheese and butter together until combined, then add vanilla.
Gradually add powdered sugar and beat until smooth and creamy.
Once the cakes have cooled, frost with cream cheese frosting and enjoy! Prep Time: 30 min | Cooking Time: 35-40 min | Total Time: 1 hr 10 min | Servings: 12 | Calories: N/A
#Banana Cake with Cream Cheese Frosting 🍌🎂#Banana Cake#Banana#Cake#Delicious#Eat#Recipe#Cooking#Good#Happy#Sharing The Happinesses#Very Happy Very Happy!!!!#Very Delicious#Very Good#Very Happy#Warmhearting~#Heartwarming~#Happy Eating~!!!!#Delicious Banana Cake#Delicious Cake#Very Happy Very Happy Very Happy!!!!!!
2 notes
·
View notes
Note
im the sponge cake/baking amateur anon and omg thank you so much for your words and recipes!!! i will definitely start making little things and try not to freak out and instead embrace this new hobby with all its fluctuations…i will definitely keep coming back here for questions and recipes if you don’t mind 🫡🫡🫡
Of course, anytime. Don’t worry, just start with the basics and build from there. It gets easier and more intuitive every time you do it—and there are SO many types of things you can bake, you’ll never get bored. Don’t like baking cookies? Pivot to cake, pastry, pies, bread. Think about what flavors you like and find recipes that highlight those flavors.
Oh a couple more pieces of advice:
1. ALWAYS read through the ENTIRE recipe at least 2x before starting.
2. Mise en place! Gather all the ingredients together before you begin—so you don’t get halfway through only to realize you’re out of baking powder.
Here’s my recipe for Chocolate Velvet Cake. It’s a deep, dark, rich chocolate cake. Pictured here with Whipped Cream Cream Cheese Frosting, one of the only frostings I have ever liked.
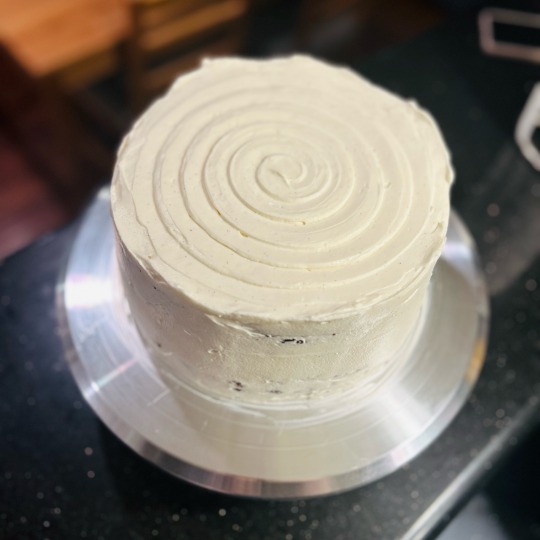
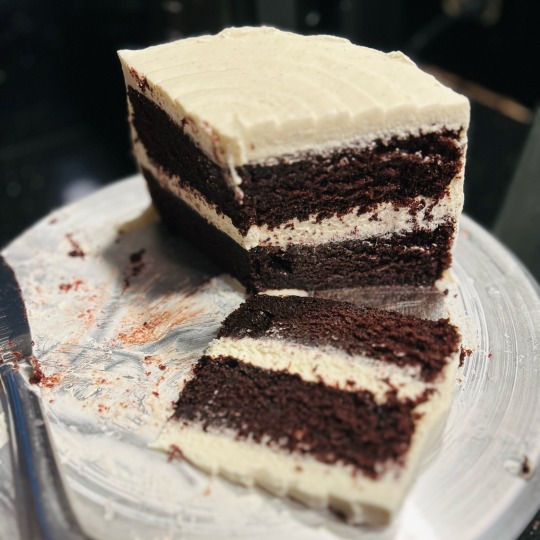
CHOCOLATE VELVET CAKE
makes 2 x 8-9” cake layers
INGREDIENTS
2 cups (240g) AP flour
1 cup (200g) white sugar
1 cup (200g) dark brown sugar, packed
2 tsp baking soda
1 tsp baking powder
1 tsp kosher salt
1 cup (227g) buttermilk* or sour cream
1 Tbsp white vinegar
1 cup (200g) neutral oil
2 eggs
1 Tbsp vanilla
1 cup (240g) freshly brewed steaming hot coffee (or 1 cup boiling water + 1 Tbsp instant coffee/espresso powder)
3/4 cup (60g) Dutch-process cocoa powder
*To make buttermilk: 1 cup milk + 1 Tbsp white vinegar or lemon juice. Stir together and let sit 10 min to curdle and thicken.
DIRECTIONS
1. Preheat oven to 350°. Grease 2 x 8-9” cake pans and line with parchment paper rounds.
2. Bloom cocoa: Measure cocoa into a large liquid measuring cup (for easy pouring later). Add 1 cup (pre-measured or by weight) hot coffee in increments, whisking in between, until mixture is smooth. **If you add coffee all at once you’ll get lumps. Add a little, whisk to a smooth paste, then add rest.
3. Mix dry ingredients: Sift flour, sugars, baking soda, baking powder, and salt into a large bowl (or bowl of stand mixer). Whisk thoroughly to combine. **Sifting really matters here. The final batter is very thin and if you don’t sift you will get lumps of flour.
4. In a separate bowl, whisk together buttermilk, vinegar, oil, eggs, and vanilla until smooth. While whisking, pour in coffee-cocoa mixture. Whisk until smooth.
5. Pour wet ingredients into dry and mix with a rubber spatula until just combined, scraping bottom and sides of bowl as needed to catch any dry pockets. Do not overmix. Batter will be thin.
6. Divide batter evenly between cake pans. Bake 30-40 minutes until a paring knife inserted in the center comes out moist but clean. Start checking at 30 minutes to avoid overbaking.
7. Cool in pans 15 minutes (no longer), then turn onto a wire rack to finish cooling. Let cool completely (1-2 hours) before frosting.
NOTES
- Cocoa: Dutch-process cocoa powder = the ultimate dark-as-night chocolate cake, but natural (regular) cocoa powder works just as well.
- Usually you can sub greek yogurt for buttermilk/sour cream, but not here. It doesn’t have enough fat.
- Buttermilk/sour cream + a little added vinegar react with the baking soda and cocoa powder to make a fluffy but velvety soft crumb. (Think baking soda volcano, but cake.) You cannot taste the vinegar at all.
65 notes
·
View notes
Text
Delzoun "Tide-Me-Overs"
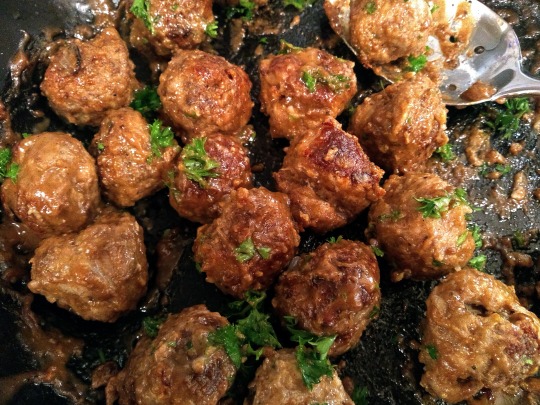
“While these are customary consumables at Hornmoot, the traditional human-dwarven trading festival that marks the dawn of Spring, there isn’t a holiday on the eventful dwarven calendar that doesn’t feature these scrumptious meats on the menu.” - Heroes’ Feast, p. 90
Personally, you’d be hard-pressed to find a more dwarven food than the good old-fashioned meatball.
Heroes’ Feast’s Delzoun “Tide-Me-Overs” bring dwarven kitchens to life with these extremely tasty and juicy meatballs! Leagues better than anything you’d buy at the grocery store, I would absolutely suggest making these yourself.
This recipe is also ridiculously forgiving. Once, I doubled nearly all the ingredients by accident, aside from the meat, and they still came out amazing!
If you don’t eat pork, no worries! They’re just as tasty using only beef!
Check out below for tips and tricks when making this yourself! Get Heroes’ Feast here: https://dnd.wizards.com/heroes-feast
Prep: 15 mins Cook: 1h 30 mins Total: 1h 45 mins

Ingredients:
¼ cup (60 ml) heavy cream*
1 egg
2 slices dark bread (such as rye), crusts discharged, remainder torn into pieces**
3 tbsp. (43 g) unsalted butter
1 small onion, finely chopped
Kosher salt
¼ tsp. (2 g) ground allspice
8 oz (225 g) ground pork
8 oz (225 g) lean ground beef
Freshly ground black pepper
2 tbsp. (8 g) all-purpose flour
1 ½ cups (350 ml) low-sodium chicken broth
1 tsp. (4 g) light brown sugar
1 ½ tsp. (7 ml) soy sauce
½ tsp. (2 ml) fresh lemon juice
3 tbsp. (12 g) finely chopped fresh dill or parsley
* I’ve used both heavy cream and half-and-half with no issues.
** I used Vienna-style Pumpernickel Bread, cut into standard ½ -inch sandwich slices at the thickest part of the loaf.
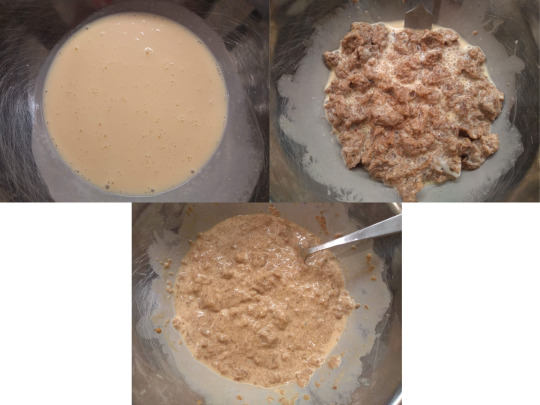
In a large bowl, whisk together the cream and egg (top-left).
Add the bread, mix well, and set aside, stirring occasionally, until the bread is softened, about 20 minutes (top-right).
Using a fork or sturdy spoon, mash the bread into a paste and set aside (bottom).
NOTE: Apparently, the bread is not what binds the meat/other ingredients together, but works with the milk to give the meatballs moisture and texture! The eggs are the only binding ingredient.
In hindsight, this makes sense, since in baking eggs are a binder…
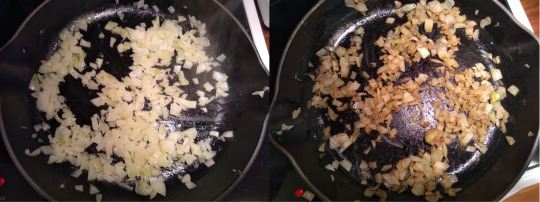
Meanwhile, in a skillet over medium heat, melt 1 tbsp. (14 g) of the butter. Add the onion and ½ tsp. (3 g) salt and cook, stirring, until softened, about 4 minutes (left).
Add the allspice and cook, stirring, until fragrant, about 40 seconds (right).
Remove from heat and let them cool to room temperature. Laying mine in a single layer in the skillet, it took about 10 minutes.
TIP: Don’t be afraid to eat some of the onions to see if they’ve softened enough.
TIP: Cooling my onions in a single layer in the skillet took about 10 minutes.
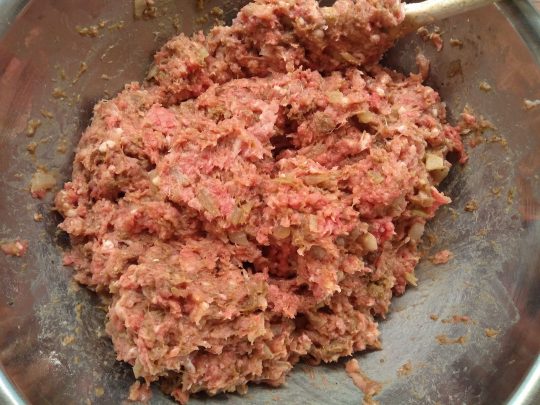
Preheat the oven to 475℉ (245℃) with a wire rack in the middle of the oven. Coat a large wire rack with nonstick cooking spray and set it in a large, rimmed baking sheet.
Add the cooled onion mixture, pork, ground beef, baking powder, 1 tsp. (5 g) salt and ½ tsp. (1 g) pepper to the bread paste and, using a large spoon or your hands, mix until well combined and uniform.
TIP: To save yourself time when doing the dishes, line the baking sheet with aluminum foil so you don’t need to scrape any burned bits off.
NOTE: Personally, I didn’t run into this problem while making mine, but it’s important to only mix the meat mixture until everything is just combined. Overmixing will result in stiffer, tougher meatballs.
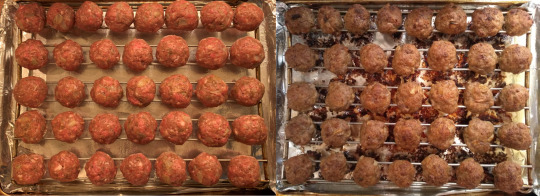
With moistened hands, form the mixture into generous 1-tablespoon-sized balls (left).
Arrange the meatballs on the rack in the baking sheet and bake until lightly browned, about 20 minutes, rotating the pan halfway through (right).
NOTE: I had to make double the amount of pork/beef meatballs since 8 oz packages of each ground meat were not available. Expect about half the amount of meatballs that you see here if making this yourself.
NOTE: The meatballs will sag through the wire rack a little bit when placed, this is fine!
NOTE: The ones shown above are the size Heroes’ Feast recommends. I wanted them to be a little bit larger the second time I made them, so I went for golf-ball sized. The cooking time stayed the same, but I found the weight of them might have been a bit too much and they lost way more structure than the smaller ones.
However, that was also the time I accidentally doubled all the ingredients aside from the meat, so I’m sure there was more at play there. Just something to keep in mind. They still came out great though! In fact, they’re the ones shown in the final picture.
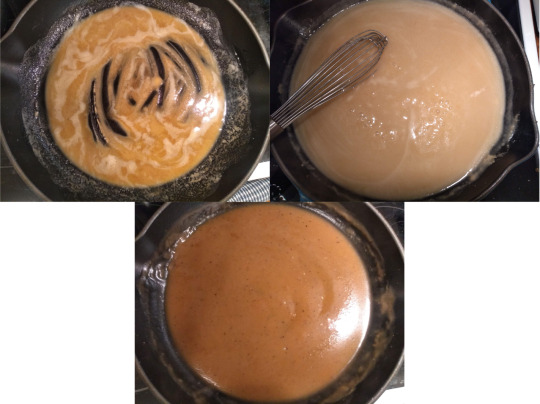
Wipe out the skillet used for the onions to remove any stray onion bits, set it over medium heat, and melt the remaining 2 tbsp. (28 g) butter. Stirring constantly, cook until fragrant and a shade darker, 1 to 2 minutes.
Add flour and cook, stirring constantly, until golden, 2 to 3 minutes (top-left).
Switch to a whisk and, whisking constantly, gradually add the broth. Continuing to whisk often, cook for about 2 minutes (top-right).
Add the brown sugar, soy sauce, lemon juice, and ¼ tsp. (0.5 g) pepper and continue to whisk and cook until thickened, about 2 more minutes (bottom).
NOTE: The Heroes’ Feast “cook’s notes” mentions that the sauce will thicken quickly as it cools, and to add extra chicken broth to loosen the consistency.
They’re absolutely right! It’s more obvious in the next pictures but the sauce thickens a lot. It’s also a lot darker than what’s shown in the preview image in the book, so I’m not sure how much extra broth they had to add, but it seems like quite a bit.
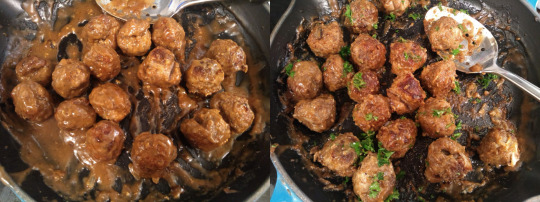
Add meatballs to the sauce and simmer, stirring occasionally, until heated through, about 4 minutes (left).
Stir in most of the dill or parsley and taste and adjust the seasoning with additional salt and pepper, if necessary (right).
Transfer to a serving dish, sprinkle with remaining dill or parsley, and serve hot.
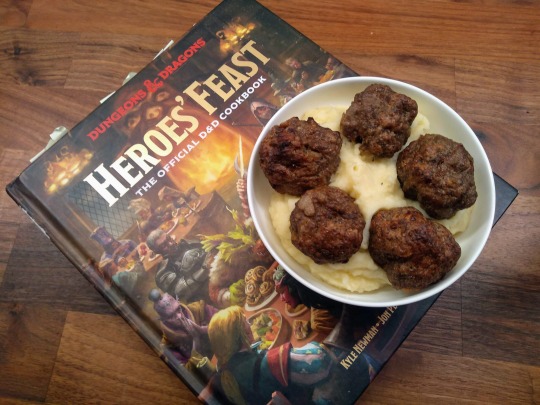
Overall, I would give this recipe a 5/5. It was a little daunting since the ingredients list was so long, but once I got started making the meatballs it was actually remarkably simple! They’re really juicy, have great texture, and the allspice-seasoned onions are so tasty!
The sauce is a little awkward to make, but it does add amazing flavour. But, again, the meatballs retained so much moisture you don’t really need a sauce to enjoy them!
Honestly, if you have the time and are sick of store-bought meatballs, definitely give these a try.
Finally, as I mentioned earlier, you can totally make these with only beef (shown in the final picture above)! They’ll still retain quite a bit of moisture and be super delicious.
#these are also S-tier eaten cold#heroes' feast#heroes feast#dwarven cuisine#delzoun tide-me-overs#heroes feasting#dnd#dungeons and dragons#dnd cookbook#dnd cooking#heroes feast cookbook#fantasy#homecook#homecooking#cooking#dinner#lunch#food#recipes#foodblr
52 notes
·
View notes
Text
here are some random things about my subtitling job instead of actually subtitling because im tired
for prerecorded media it takes 8-10 mins to subtitle 1 min of content and that's what we aim for not even how long it always takes
there are so. many. rules. about colours and line position and sound labels
we have to make sure subtitles are ideally under 300 characters per minute or at the absolute max 350 charas per min so it's readable, or 250-300 for kids
we have to avoid covering the speaker's mouth as much as possible so deaf/hoh viewers can lipread if they want/need to
live subtitling is so intense and fast-paced, it's basically like interpreting into a foreign language but the target language is computer-friendly speak like voice commands for changing colours, line position etc. also loads of voice commands for punctuation and vocab
we have a cool-ass keyboard for live subtitling and there's a DUMP button lol
weather is the worst because they talk in one endless stream and it's almost impossible to tell where the start and end of their sentences are
i get a bit annoyed when people mock live subtitles now because they don't realise someone is doing this (for min wage probably) and dealing with 274948284 things at once to produce those subs
peepeepoopoo
20 notes
·
View notes
Text
Grandma's Apple Pancakes
-5 Macintosh apples, cut into wedges
-2 tbsp brown sugar
-1 tbsp butter
-½ tbsp lemon juice
-¼ cup water
-¼ tsp. nutmeg
-¼ tsp cinnamon
Put everything in an large unlidded pan and cook 22 min. on medium low until apples are golden
In bowl, mix
-2 eggs
-½ cup milk
-½ cup flour
-1.5 tbsp sugar
-sprinkle of salt
Set the oven to 350 F around 10 min. before apples finish cooking
Scoop apples into an 8’’*8’’ square dish
Pour batter over apples. Cook 22 min.~ just until batter is cooked
Makes 2 portions
4 notes
·
View notes