#(or I should say the blending of those 2 colors)
Note
What is your favourite colour?
To me it is the most perfect warm and embracing, soothing gentle rose tone ever ♡
#do you remember when#Pantone#color of the year#was#(were)#rose quartz#and#serenity#(or I should say the blending of those 2 colors)#the most perfect combo ever#if you ask me#I think it was back in 2016#thank you for asking lovely anon#answered
25 notes
·
View notes
Text
somewhat pleased to announce that in case someone wanted to know, and i really don't see why they wouldn't, the cameras that atz use in the cawaii men photoshoots are
fujifilm simple ace p&s camera (for taking photos), and
most probably? pentax spotmatic (the one hj, sh and jh pose with)
#YOUNG PEOPLE NOWADAYS!!! they're wasting film like pros :''')#shrimp thoughts#actually this is terribly artificial behaviour. i was not organically possessed by the urge to check what kinda camera are they posing with#but i DID think it would be funny if i did and then acted like it's a completely normal thing to do. hence.#i should learn up on hj's photography... he did have an exhibit a while ago after all#i'm curious about the pics the guys took with the fuji cameras! what % of them was unsalvageable lol#i know it was probably cold/late/both outside and that they were on a schedule but yknow what they say#or maybe they don't. but anyway the person who picked up THING three seconds ago acts like they know everything there is to know about#THING. and so. as this very person. i'd like to say the pics would probably be better if they could take them outside? you can see#the p&s all have flash but still! oh also that reminds me of my minor gripe w/ atz photoshoots namely. they're All Indoors#well not ALL all but sooo many of them are and it pains me because i love outdoorsy photoshoots#like the one in the diary ver of fever 3 or the second part of the fever epilogue diary ver#...and fever 2 diary ver too. wait are diary versions just More outdoorsy/less Studio Photography? HM#but anyway! i just like when models can interact/blend in with their surroundings. it's always much more interesting when there's something#Else going on in the photo than just one color background/the walls of a room. this is why i loved l**na's predebut album photoshoots becau#*because each was in a different location! several different locations even! sometimes you'd even get a photo that has no people in it#simply because the surroundings are so pretty!#oooh now that i think about it d-day is like that too. yoongi heard me grumbling abt how much i hate those empty pages in bt/s albums#and went Not On My Watch lol#anyway. sorry i'm rambling for no reason gkhsfgkjfsf
4 notes
·
View notes
Text
My Favorite Cheap Art Trick: Gradient Maps and Blending Modes
i get questions on occasion regarding my coloring process, so i thought i would do a bit of a write up on my "secret technique." i don't think it really is that much of a secret, but i hope it can be helpful to someone. to that end:

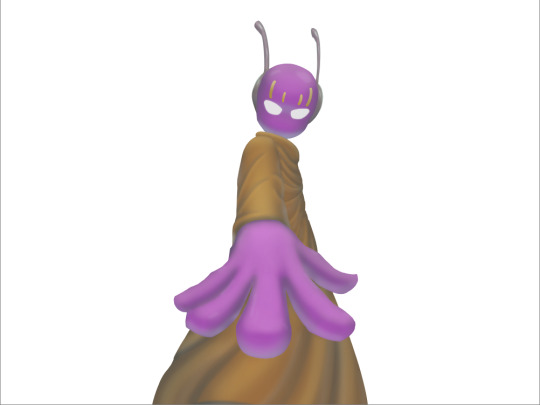
this is one of my favorite tags ive ever gotten on my art. i think of it often. the pieces in question are all monochrome - sort of.

the left version is the final version, the right version is technically the original. in the final version, to me, the blues are pretty stark, while the greens and magentas are less so. there is some color theory thing going on here that i dont have a good cerebral understanding of and i wont pretend otherwise. i think i watched a youtube video on it once but it went in one ear and out the other. i just pick whatever colors look nicest based on whatever vibe im going for.

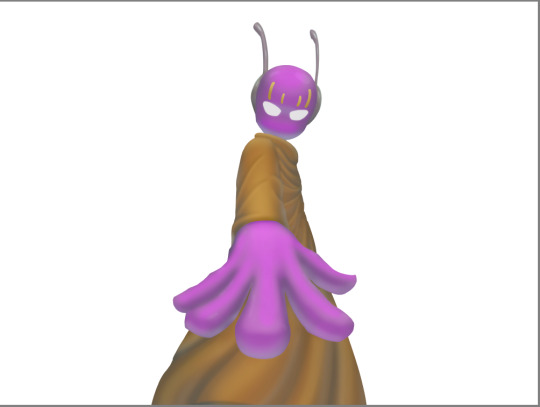
this one is more subtle, i think. can you tell the difference? there's nothing wrong with 100% greyscale art, but i like the depth that adding just a hint of color can bring.
i'll note that the examples i'll be using in this post all began as purely greyscale, but this is a process i use for just about every piece of art i make, including the full color ones. i'll use the recent mithrun art i made to demonstrate. additionally, i use clip studio paint, but the general concept should be transferable to other art programs.


for fun let's just start with Making The Picture. i've been thinking of making this writeup for a while and had it in mind while drawing this piece. beyond that, i didn't really have much of a plan for this outside of "mithrun looks down and hair goes woosh." i also really like all of the vertical lines in the canary uniform so i wanted to include those too but like. gone a little hog wild. that is the extent of my "concept." i do not remember why i had the thought of integrating a shattered mirror type of theme. i think i wanted to distract a bit from the awkward pose and cover it up some LOL but anyway. this lack of planning or thought will come into play later.
note 1: the textured marker brush i specifically use is the "bordered light marker" from daub. it is one of my favorite brushes in the history of forever and the daub mega brush pack is one of the best purchases ive ever made. highly recommend!!!
note 2: "what do you mean by exclusion and difference?" they are layer blending modes and not important to the overall lesson of this post but for transparency i wanted to say how i got these "effects." anyway!
with the background figured out, this is the point at which i generally merge all of my layers, duplicate said merged layer, and Then i begin experimenting with gradient maps. what are gradient maps?
the basic gist is that gradient maps replace the colors of an image based on their value.

so, with this particular gradient map, black will be replaced with that orangey red tone, white will be replaced with the seafoamy green tone, etc. this particular gradient map i'm using as an example is very bright and saturated, but the colors can be literally anything.

these two sets are the ones i use most. they can be downloaded for free here and here if you have csp. there are many gradient map sets out there. and you can make your own!
you can apply a gradient map directly onto a specific layer in csp by going to edit>tonal correction>gradient map. to apply one indirectly, you can use a correction layer through layer>new correction layer>gradient map. honestly, correction layers are probably the better way to go, because you can adjust your gradient map whenever you want after creating the layer, whereas if you directly apply a gradient map to a layer thats like. it. it's done. if you want to make changes to the applied gradient map, you have to undo it and then reapply it. i don't use correction layers because i am old and stuck in my ways, but it's good to know what your options are.

this is what a correction layer looks like. it sits on top and applies the gradient map to the layers underneath it, so you can also change the layers beneath however and whenever you want. you can adjust the gradient map by double clicking the layer. there are also correction layers for tone curves, brightness/contrast, etc. many such useful things in this program.
let's see how mithrun looks when we apply that first gradient map we looked at.

gadzooks. apologies for eyestrain. we have turned mithrun into a neon hellscape, which might work for some pieces, but not this one. we can fix that by changing the layer blending mode, aka this laundry list of words:

some of them are self explanatory, like darken and lighten, while some of them i genuinely don't understand how they are meant to work and couldn't explain them to you, even if i do use them. i'm sure someone out there has written out an explanation for each and every one of them, but i've learned primarily by clicking on them to see what they do.
for the topic of this post, the blending mode of interest is soft light. so let's take hotline miamithrun and change the layer blending mode to soft light.

here it is at 100% opacity. this is the point at which i'd like to explain why i like using textured brushes so much - it makes it very easy to get subtle color variation when i use this Secret Technique. look at the striation in the upper right background! so tasty. however, to me, these colors are still a bit "much." so let's lower the opacity.

i think thats a lot nicer to look at, personally, but i dont really like these colors together. how about we try some other ones?

i like both of these a lot more. the palettes give the piece different vibes, at which point i have to ask myself: What Are The Vibes, Actually? well, to be honest i didn't really have a great answer because again, i didn't plan this out very much at all. however. i knew in my heart that there was too much color contrast going on and it was detracting from the two other contrasts in here: the light and dark values and the sharp and soft shapes. i wanted mithrun's head to be the main focal point. for a different illustration, colors like this might work great, but this is not that hypothetical illustration, so let's bring the opacity down again.

yippee!! that's getting closer to what my heart wants. for fun, let's see what this looks like if we change the blending mode to color.

i do like how these look but in the end they do not align with my heart. oh well. fun to experiment with though! good to keep in mind for a different piece, maybe! i often change blending modes just to see what happens, and sometimes it works, sometimes it doesn't. i very much cannot stress enough that much of my artistic process is clicking buttons i only sort of understand. for fun.
i ended up choosing the gradient map on the right because i liked that it was close to the actual canary uniform colors (sorta). it's at an even lower opacity though because there was Still too much color for my dear heart.

the actual process for this looks like me setting my merged layer to soft light at around 20% opacity and then clicking every single gradient map in my collection and seeing which one Works. sometimes i will do this multiple times and have multiple soft light and/or color layers combined.
typically at this point i merge everything again and do minor contrast adjustments using tone curves, which is another tool i find very fun to play around with. then for this piece in particular i did some finishing touches and decided that the white border was distracting so i cropped it. and then it's done!!! yay!!!!!
this process is a very simple and "fast" way to add more depth and visual interest to a piece without being overbearing. well, it's fast if you aren't indecisive like me, or if you are better at planning.

let's do another comparison. personally i feel that the hint of color on the left version makes mithrun look just a bit more unwell (this is a positive thing) and it makes the contrast on his arm a lot more pleasing to look at. someone who understands color theory better than i do might have more to say on the specifics, but that's honestly all i got.

just dont look at my layers too hard. ok?
2K notes
·
View notes
Note
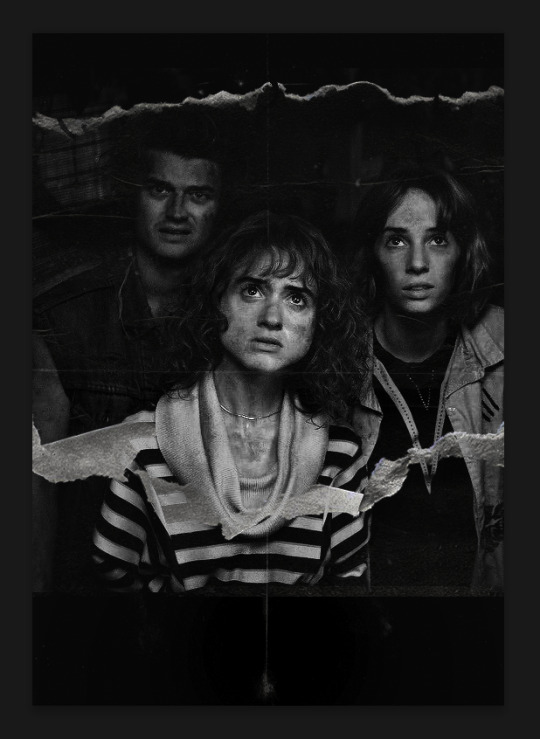
hello! I love your edits and I wanted to know, for the "Steve Robin and Nancy" Gif you posted.. How would I go about doing something like that? More specificly, the bottom two where it says "Height Difference" and where it labels them as "Princess, Jock and Loser"
Thank you! Sorry this took a while to answer. I finally had time to sit down and write this. Link to original post.

Quick notes:
I'm using Photoshop 2021 on Mac and working in video timeline. Must have basic gifmaking skills and know how to use layer masks. This is primarily a gif layout and text tutorial.
Fonts used in first gif:
Pea Wolfe Tracks — link here
King & Queen — link here
Fonts used in second gif:
Kiera — link here
Post — link here
Ellianarelle's Path — link here
Heina's hurry — link here
I used a light leaks/film texture, ripped paper textures, folded paper textures, and transparent pngs (arrows + post-it notes + smiley face).
We'll start with this gif.
Make your gif! The gif here is 540x600px. I color and sharpen it to my liking. Go to image > canvas size > change height from 600 to 770px. I left the anchor in the middle, though it doesn't really matter.
I drag and drop my folded paper texture and change the layer order so it's under my gif. Then I change the blending mode on my gif to Screen so the texture shows through the gif, but I keep the texture at 100% Opacity and Fill.
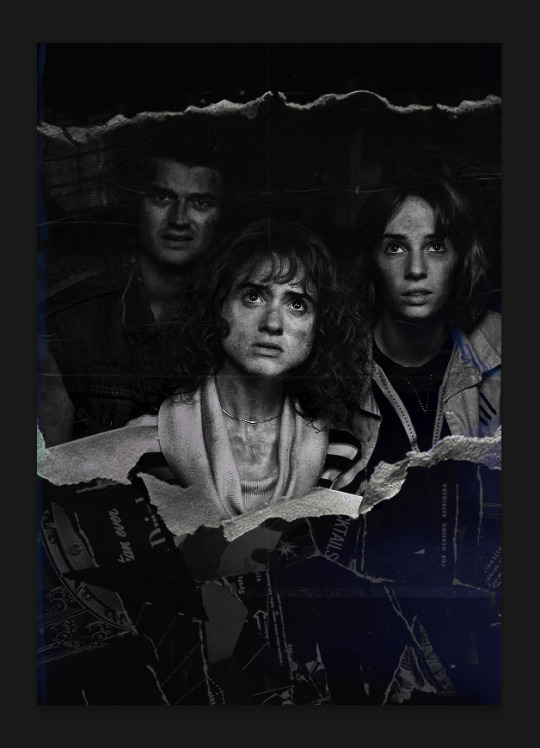
Now I move my gif around and add my ripped paper textures. I wanted to give it a sort of poster-like feel to it, so I made more room on the bottom for my main text and ended up with something like this. Blending mode is set to Lighten for the ripped paper textures.
I then use layer masks to hide what I don't want shown and add my light leaks/film texture. Blending mode on light leaks/film texture set to Pin Light, Opacity: 50%, Fill: 70%.
I use Levels and Brightness/Contrast adjustment layers to darken the gif up a bit more, then I add a patterned paper texture. Blending mode for patterned paper texture set to Lighten, Opacity: 100%, Fill: 75%. Result:
Now on to the text!
I'm going to be honest here, a lot of this was clicking around until I settled on something I liked. There's three layers to create this text effect. The font used here is King & Queen.
For the first text layer, the font color is set to black (#000000), font size: 87 pt, leading: 80 pt, tracking: 25.
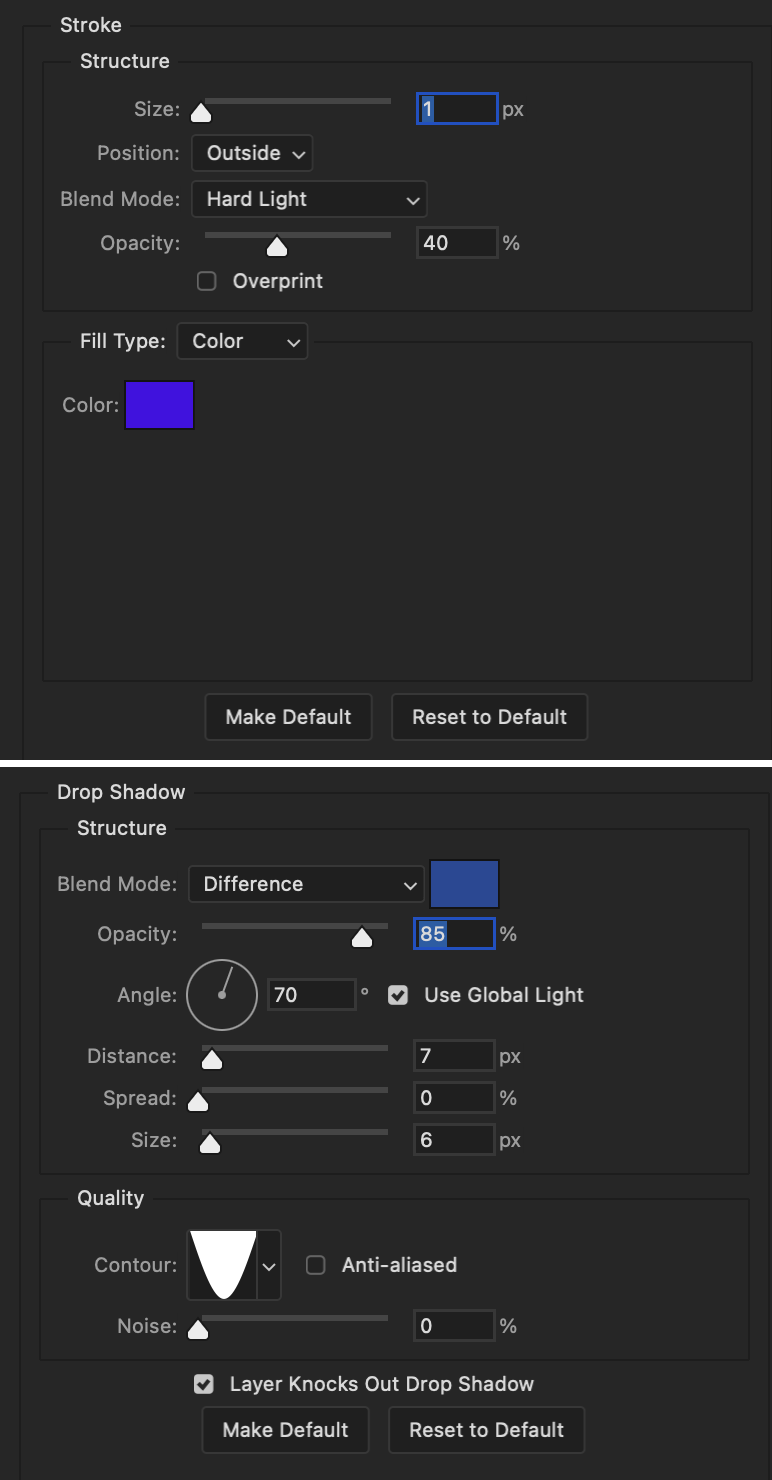
Layer styles used here are stroke and drop shadow.
Text Layer 1
Stroke settings:
Size: 1px
Position: Outside
Blend Mode: Hard Light
Opacity: 40%
Overprint: unchecked
Fill Type: Color
Color: #5911ed
Drop Shadow settings:
Blend Mode: Difference
Color: #2d5ba8
Opacity: 85%
Angle: 70°
Use Global Light: checked
Distance: 7px
Spread: 0%
Size: 6px
Contour: Cone - Inverted
Anti-aliased: unchecked
Noise: 0%
Layer Knocks Out Drop Shadow: checked
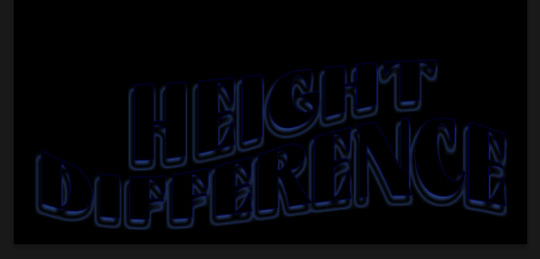
Blending mode for text layer set to Overlay, Opacity: 100%, Fill: 85%.
Warp text settings:
Style: Wave
Horizontal: checked
Bend: +60%
Horizontal Distortion: +10%
Vertical Distortion: 0%
With all those settings applied, the first text layer looks like this:
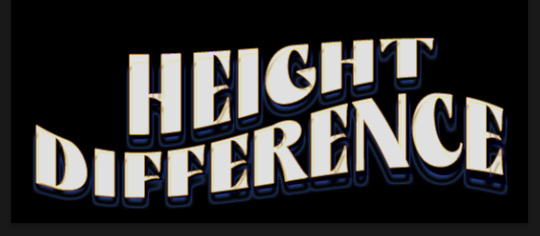
Duplicate the layer, clear all layer styles, and change the color for the second text layer to white (#ffffff). All other text settings (including warp settings) should stay the same. The only layer style then applied to this text layer is stroke.
Text Layer 2
Stroke settings:
Size: 1px
Position: Outside
Blend Mode: Difference
Opacity: 100%
Overprint: unchecked
Fill Type: Color
Color: #d48f16

Blending mode for the second text layer is set to Difference, Opacity: 90%, Fill: 100%. Nudge the second text layer a bit so the first text layer is a little more visible or move to your liking.
With both those layers active, it looks like this:
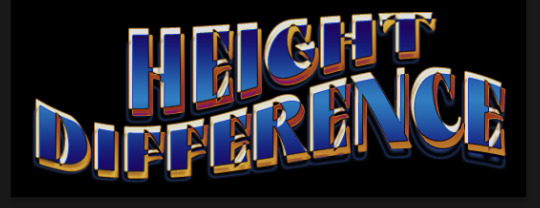
Duplicate the second text layer, clear layer styles, and change the color of this third text layer to a dark grey (#1a1919). Again, all other text (and warp) settings should stay the same.
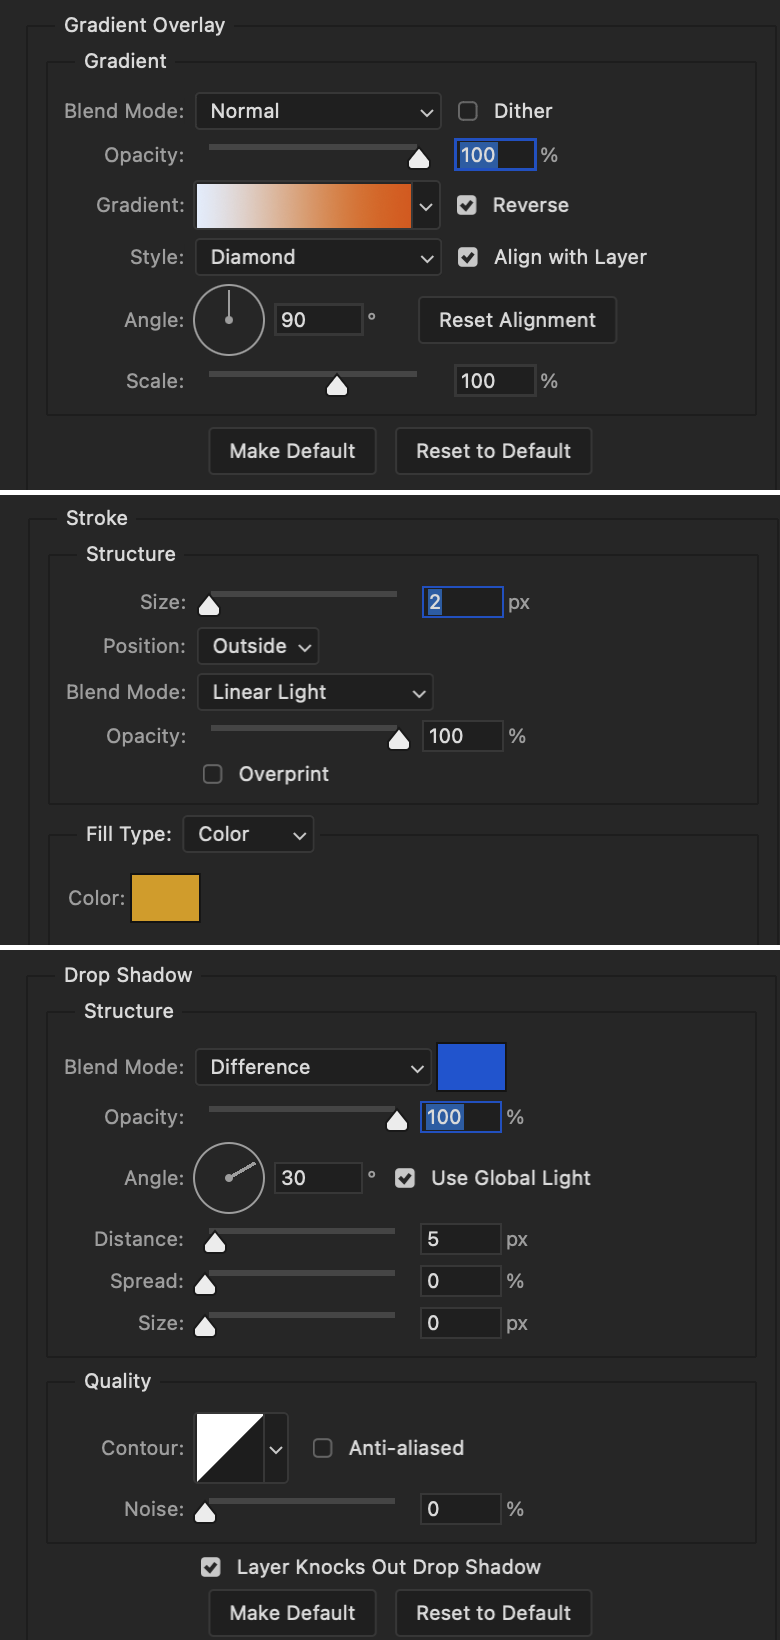
Layer styles applied to this layer are stroke and gradient overlay.
Text Layer 3
Stroke settings:
Size: 1px
Position: Outside
Blend Mode: Difference
Opacity: 100%
Overprint: unchecked
Fill Type: Color
Color: #d48f16
Gradient Overlay settings:
Blend Mode: Difference
Dither: unchecked
Opacity: 100%
Gradient: #cd3f00 > #ffdb5d
Reverse: unchecked
Style: Reflected
Align with Layer: checked
Angle: 90°
Scale: 100%

Blending mode for the third text layer set to Exclusion, Opacity: 100%, Fill: 100%. I also moved the third text layer around, down and to the right a few pixels to give it that 3-D Word Art effect.
With all three text layers active:
Next are the arrows.
Take your transparent pngs and place them to your liking. Blending mode for these is set to Difference, Opacity: 100%, Fill: 100%.
Command + click on an arrow thumbnail to select all the pixels in that layer. This is why the image must be transparent!
With that selection made and on a new blank layer, right click the selection and click on stroke. Settings for that are width: 2px, color: white, location: center. Move that a couple of pixels over.
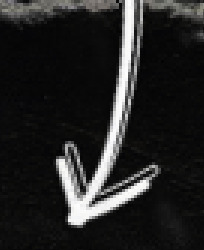
Do this for all arrows for a total of 6 layers for arrows. I group them together to keep my workspace clean, then I duplicate my arrows group with no further changes made to the second group to get what you see in the final gif.
Next is the smaller text. It's three separate text layers for each word, so I can move each of them around to my liking.
Font used is Pea Wolfe Tracks, font color: white (#ffffff), font size: 24 pt, leading: 6 pt, tracking: 25. Bold and italic options checked. I set the blending mode to Difference, Opacity: 100%, Fill: 100%.
And that's it! That concludes the tutorial for this gif!
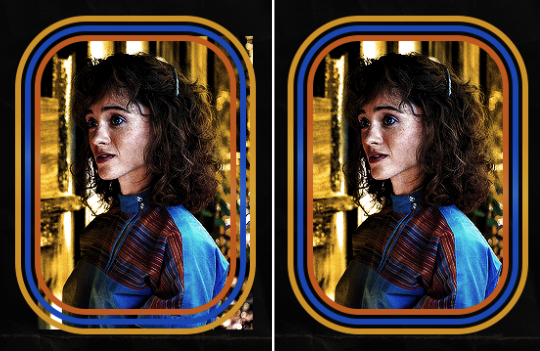
Now on to this gif.
We'll start with the background gif. There are three separate gifs. You could make them one gif, but I wanted the option to order them differently if I needed to.
All gifs in the background are the size of the canvas: 540x770px. Color and sharpen to your liking, but keep them all black and white. To get the blurry effect go to filter > blur > guassian blur. Set radius to 7.0 pixels. Add this to all three gifs.
Then I add two folded paper textures. Blending mode for one set to Lighten, Opacity: 60%, Fill: 100%. The other set to Screen, Opacity: 70%, Fill: 90%.
I found this tutorial a while back for a halftone effect. They include links to the halftone pattern used here as well as textures and gradient maps not used here.
I'm only using the halftone pattern here.
Pattern fill settings:
Angle: 66°
Scale: 8%
Link with Layer: checked
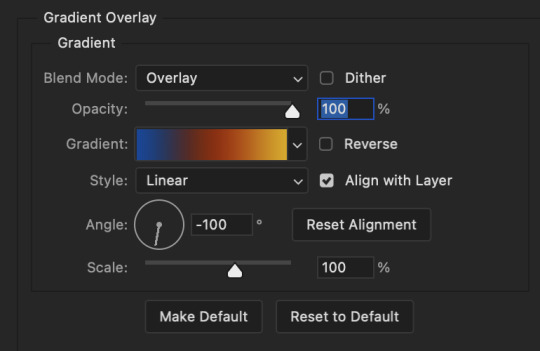
I also added a gradient overlay layer style to the halftone pattern which gives the gifs the color you see above.
Gradient Overlay settings:
Blend Mode: Overlay
Dither: unchecked
Opacity: 100%
Gradient: #0059ac > #a33600 > #e6b801
Reverse: unchecked
Style: Linear
Align with Layer: checked
Angle: -100°
Scale: 100%
Now on to the square shapes with rounded corners. In the interest of keeping this tutorial short(er), I found this tutorial on youtube that explains how to make squares with rounded corners.
I set my stroke size to 6px, stroke color to white (#ffffff), and fill to no color. I don't use the stroke layer style to make the borders of the shape like in the video! I'm only linking the video to show how to curve corners with square shapes.
Note: Be sure you know how big or small you want these to be and how they're going to fit on your canvas in order to make all the shapes and edit them. It can be tedious to change the settings.
Duplicate and resize to your liking.
In this instance, I wanted to make three squares total, so I had to duplicate twice and resize until I had something I liked.
Settings for the shapes used here are:
Innermost shape: W: 200px, H: 280px, corners: 50px
Middle shape: W: 220px, H: 300px, corners: 60px
Outer shape: W: 240px, H: 320px, corners: 70px
Once I have the size I want for all three shapes, I group them together to make a set and duplicate that group twice, then adjust each set on the canvas for my layout.
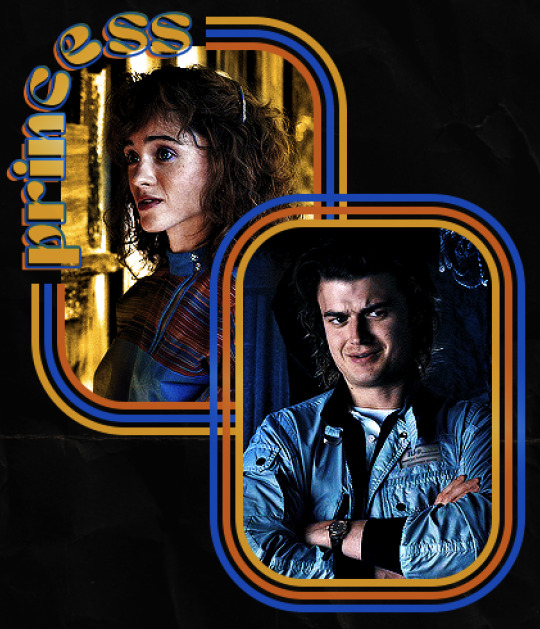
What the sets look like all together:
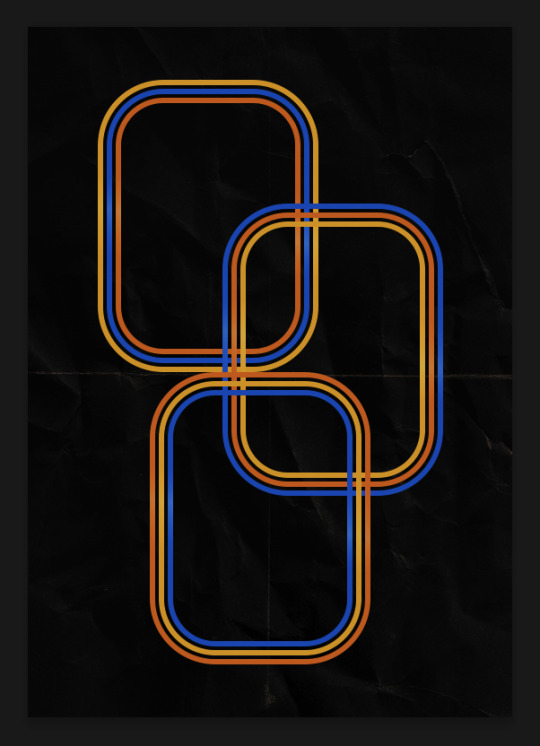
Colors used: orange #e47100, blue #0062d1, yellow #ecac00
To add color to the shapes, either change the color of the shape itself or use layer styles. I used layer styles.
Note: I didn't add the colors until the end after I knew what gifs went where and what color scheme I wanted, but I don't want to add more images than I need to here.
To keep this short, I found this tutorial on youtube that explains how to wrap text around a shape. However, I wanted the text to align on the outside where the white line is and not the green line (left image):
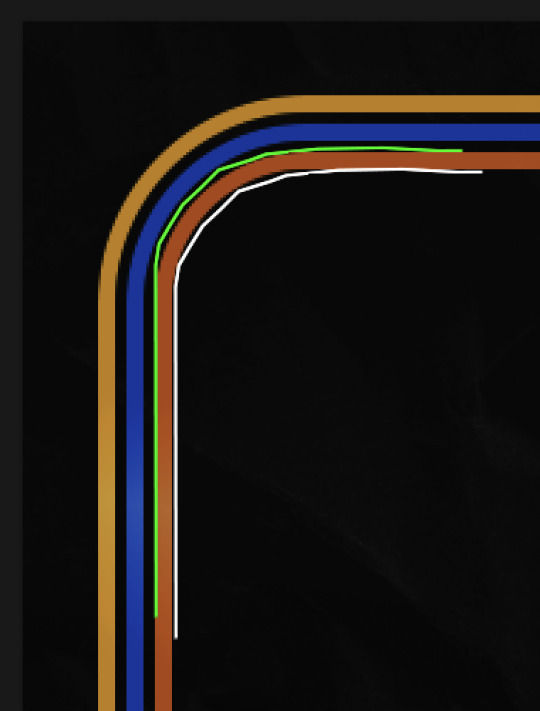
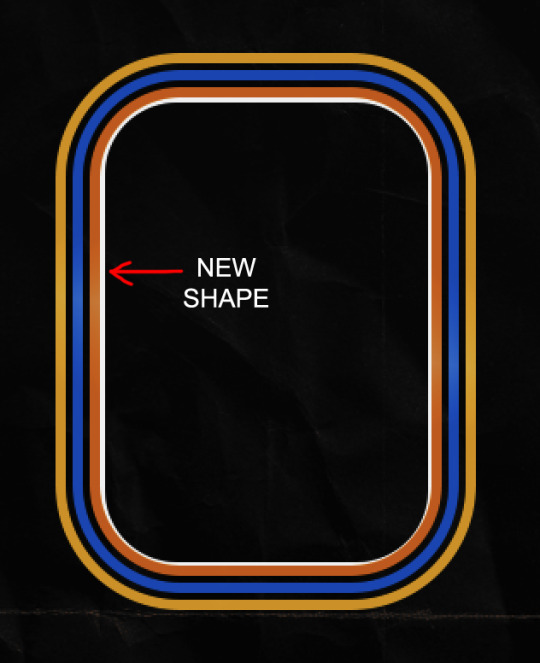
So I created another shape just inside the innermost square and used that as a path for my text (right image). Adjust the text to your liking until you have your text where you want it. Refer to the video tutorial if you need help moving the text along the path!
You don't need the shape path once you have your text where you want it, so use the layer visibility tool to hide it. You can hide your other shapes too so you can work with your text.
Do not delete your shape path!
I duplicate it once I start working with my "jock" text since all the sets are the same size. The "loser" text has to be worked a little differently, but we'll get to that later.
For the princess, jock, and loser text, there are two text layers to create the overall effect. For both layers, font used is Kiera, font color set to white (#ffffff), font size: 60 pt, blending mode set to Normal.
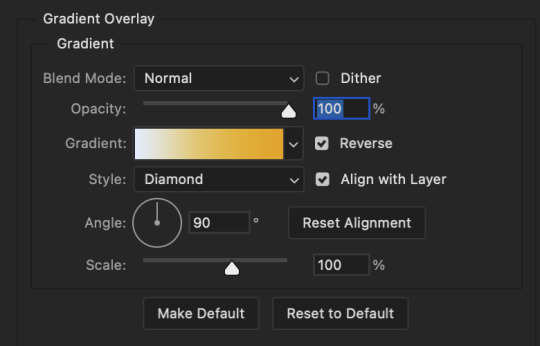
I added a gradient overlay layer style to the first text layer which I'll call the base layer. Opacity for this layer is 100%, Fill: 100%.
Base Layer
Gradient Overlay settings:
Blend Mode: Normal
Dither: unchecked
Opacity: 100%
Gradient: #f0b002 > #e7f0fd
Reverse: checked
Style: Diamond
Align with Layer: checked
Angle: 90°
Scale: 100%
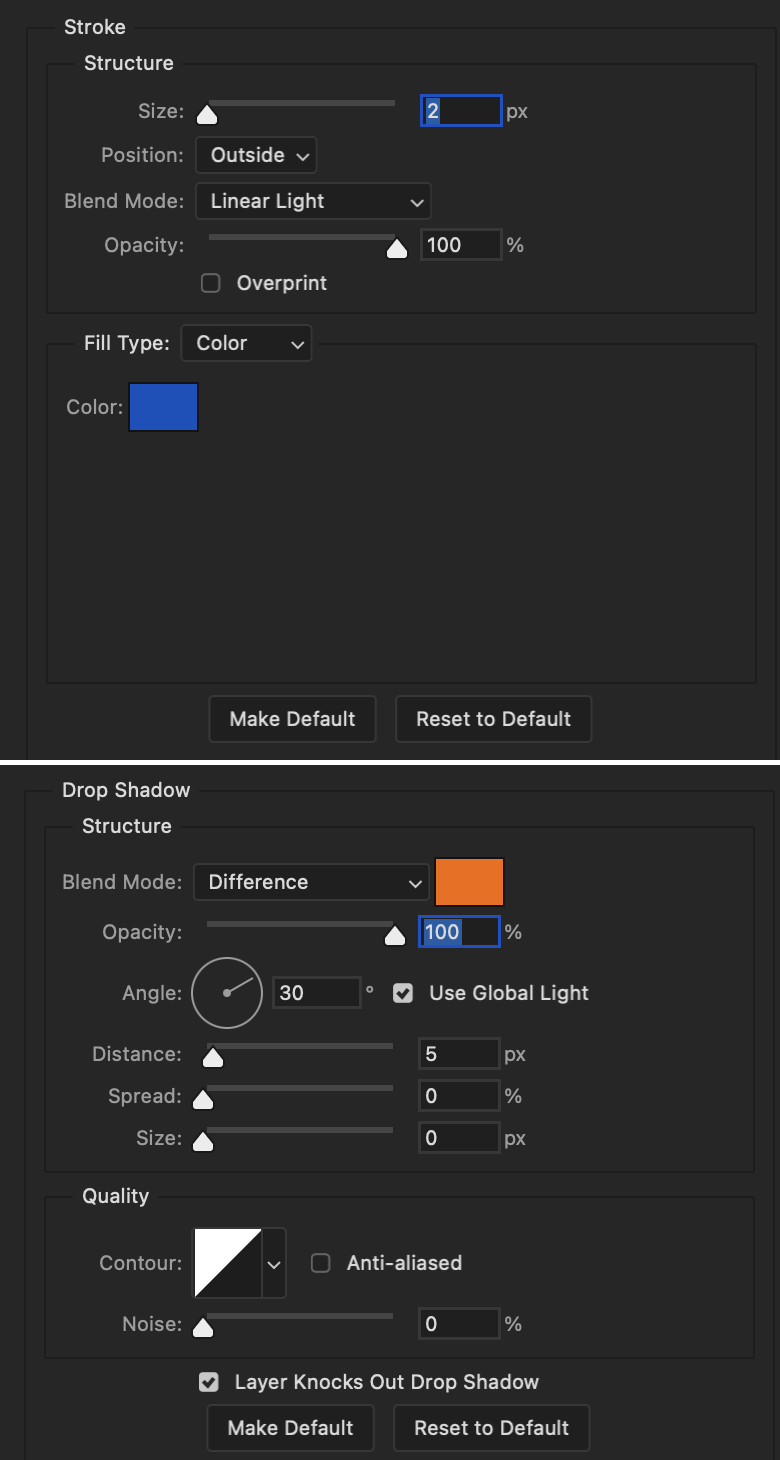
The second text layer is your stroke and drop shadow layer. For this layer, opacity is set to 100%, Fill: 0%.
Stroke and Drop Shadow Layer
Stroke settings:
Size: 2px
Position: Outside
Blend Mode: Linear Light
Opacity: 100%
Overprint: unchecked
Fill Type: Color
Color: #0064cb
Drop Shadow settings:
Blend Mode: Difference
Color: #fb7c00
Opacity: 100%
Angle: 30°
Use Global Light: checked
Distance: 5px
Spread: 0%
Size: 0px
Contour: Linear
Anti-aliased: unchecked
Noise: 0%
Layer Knocks Out Drop Shadow: checked
End result looks like this:

When I make my shapes visible again (minus the one I used as a path), I get this:
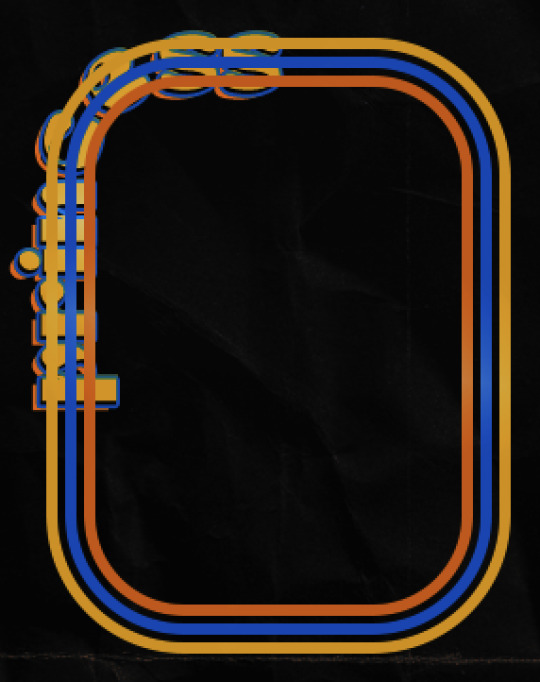
The shapes are clearly in the way of the text, whether they're above my shapes layer or under it. I use layer masks to hide what I want, so the text is legible. It looks cleaner this way and I wanted the text to be a part of the shape itself. I do that for each rounded square.
Now on to my smaller gifs. I like to crop, resize, sharpen, and color separately because my laptop and Photoshop would kill me if I tried to do it all on one canvas. I use the size of the middle shape for my gifs (220x300px), so I can have a little wiggle room when adjusting. I then use a layer mask to hide the parts of the gif that are outside of the shape.
A quick way to do this is to command + click on the thumbnail of the innermost square. With that selection made, I got to my gif layer and add a layer mask. Sometimes you need to invert it. Use command + i with the layer mask selected (not the gif) to invert the layer mask.
I repeat this process with my Steve and Robin gifs. I have to go back and forth with all the layer masks to hide parts of the gif/shapes I don't want for each set. It's kind of a long process, but not all that difficult. I label and group my layers together as I work to keep things clean and it helps me keep track of what I edited and what needs to be edited when it comes to things like this.
The picture below shows where I hid the bottom right corner of Nancy as well as the shapes that make up her set using layer masks. I also did this with the Steve and Robin sets, hiding the bottom left corner of Steve.

Similar text settings used for jock. The gradient overlay layer style for this base layer is different than that of princess because of the positioning of the text. Again, same as princess, two text layers are used here. Blending mode, opacity, and fill for both are the same as the princess text layers as mentioned before.
Base Layer
Gradient Overlay settings:
Blend Mode: Normal
Dither: unchecked
Opacity: 100%
Gradient: #007aec > move bottom middle dot to 80% > #e7f0fd
Reverse: checked
Style: Diamond
Align with Layer: checked
Angle: -140°
Scale: 100%
Stroke and Drop Shadow Layer
Stroke settings:
Size: 2px
Position: Outside
Blend Mode: Linear Light
Opacity: 100%
Overprint: unchecked
Fill Type: Color
Color: #a05700
Drop Shadow settings:
Blend Mode: Difference
Color: #ffba00
Opacity: 100%
Angle: 30°
Use Global Light: checked
Distance: 5px
Spread: 0%
Size: 0px
Contour: Linear
Anti-aliased: unchecked
Noise: 0%
Layer Knocks Out Drop Shadow: checked
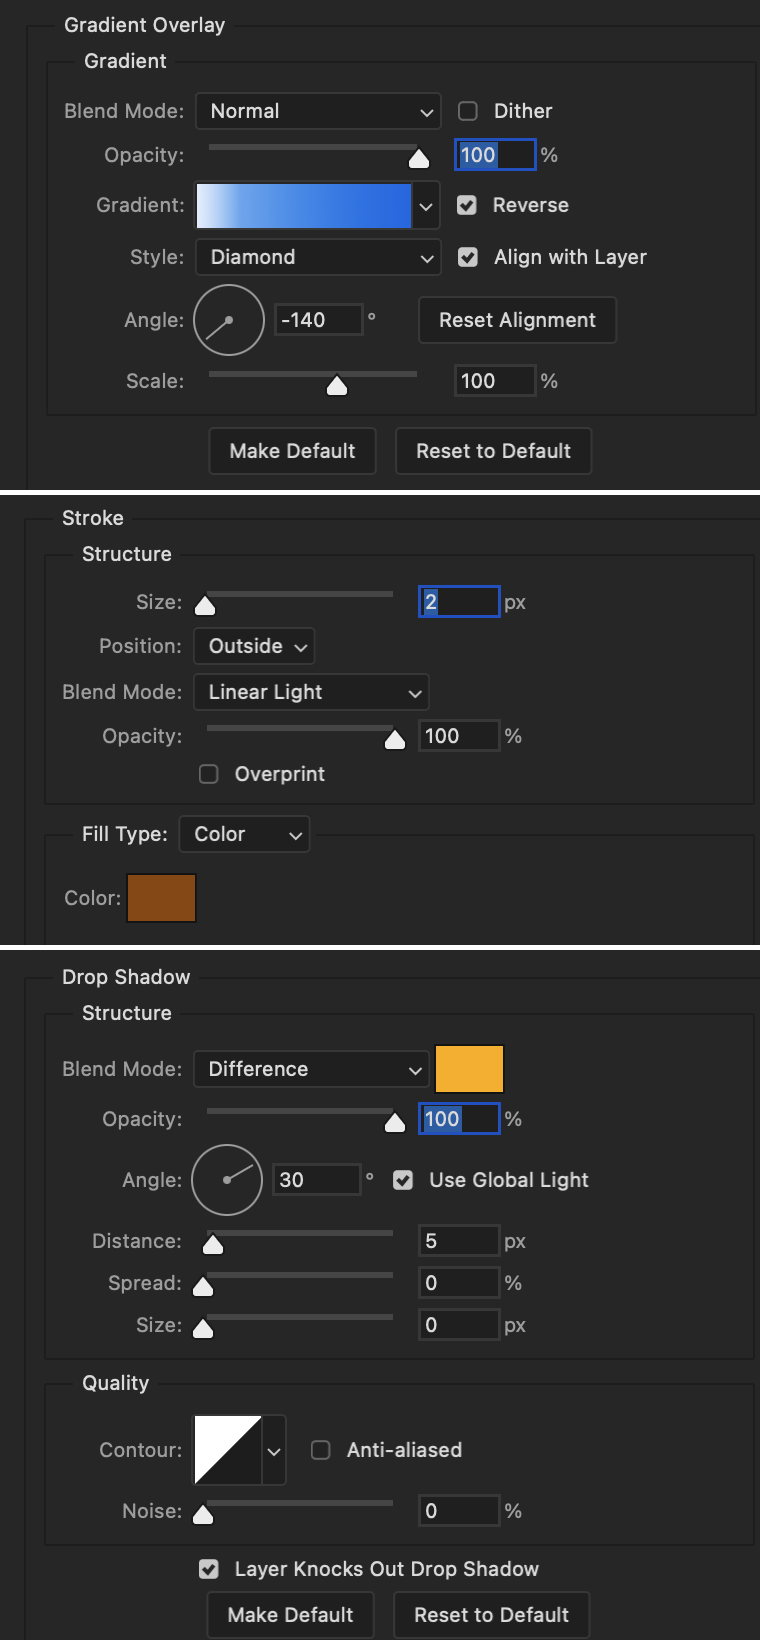
Image 1: We start with Robin.
Image 2: To make the loser text, I had to create a new path.
Image 3: I make it so the text is on the inside of the path instead of the outside. (Hint: Refer to video tutorial if you don't know how to do that.) I then adjusted the tracking between the letters in the word "loser" so they didn't look so squished together.
Image 4: Then I use layer masks to hide the parts of the shape I don't want shown.

You can then hide the path or delete it. You only need it if you want to adjust the placement of the text. I keep it (hidden) just in case.
Text settings for loser are just like those for princess. Blending mode, opacity, and fill are also the same.
Base Layer
Gradient Overlay settings:
Blend Mode: Normal
Dither: unchecked
Opacity: 100%
Gradient: #eb6400 > #e7f0fd
Reverse: checked
Style: Diamond
Align with Layer: checked
Angle: 90°
Scale: 100%
Stroke and Drop Shadow Layer
Stroke settings:
Size: 2px
Position: Outside
Blend Mode: Linear Light
Opacity: 100%
Overprint: unchecked
Fill Type: Color
Color: #e1a900
Drop Shadow settings:
Blend Mode: Difference
Color: #0068de
Opacity: 100%
Angle: 30°
Use Global Light: checked
Distance: 5px
Spread: 0%
Size: 0px
Contour: Linear
Anti-aliased: unchecked
Noise: 0%
Layer Knocks Out Drop Shadow: checked
Next are the post-it notes! This is probably the easiest part of making this gif. You just have to repeat this process for however many post-it notes you're making.
Image 1: To start, place your transparent post-it note where you want it. You can also rotate it if you'd like.
Image 2: Then create a text layer and write what you want. Font used here is Post. I wanted this text underlined to give emphasis, so I click on the underline option. I also adjusted the leading because I wanted more space between the word and the line. Rotate the text so it looks like it's written on the post-it note.
Note: It looks better if you choose a font that looks handwritten.
Image 3: I wanted another line to give emphasis to the "Dingus!!" text and make it seem more handwritten. I use the line tool to create another line.
Image 4: Then I adjust that line to my liking.

Fonts used for notes: Post, Ellianarelle's Path, and Heina's hurry
Repeat this process for all post-it notes!
That finishes the tutorial! (And I hit the 30 image limit lol.) I hope this helps. If you have any further questions, feel free to send an ask or IM and I'll try to answer to the best of my ability.
Happy photoshopping!
#ask#pcocana#photoshop#photoshop tutorial#tutorials#*tutorials#userchibi#userbunneis#uservivaldi#userriel#userabs#usertiny#useralien#useraljoscha#userfanni#userraffa#tusermona#userbess#userrobin#userroza#quicklings#janielook#usernaureen#userrlorelei#tsusermels#tusermimi#userelio#usertj#userbarrow#usernolan
227 notes
·
View notes
Text
Two Crowleys
A while ago, the wonderful mind of @noneorother posted this meta about the puppets in the magic shop.
The observation that there appear to be two Crowleys in the shot of the puppet arrangement had me absolutely scratching my head and thinking they must be mistaken somehow.
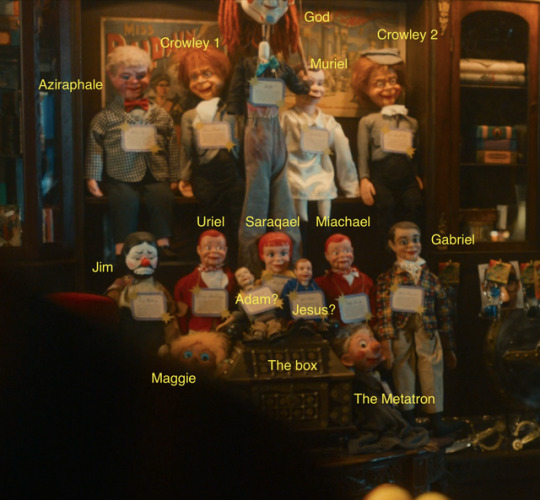
(pic from @noneorother)
But then I got my hands on some of the Amazon X-ray extras, and discovered these little gems from the album covers in Maggie's record shop:


Now, going back to our color-coding for a moment, we may not know what all the colors in Good Omens mean, and we may not have all the colors down. But we do know a few, and we know that color-coding in Good Omens does exist, and that it matters.
Auburn and vavoom yellow are Crowley's colors. They are the colors of his hair and eyes. Black and scarlet red are the colors he wears. So those four colors are Crowley-coded colors. Okay.
Thus, these two record albums from Maggie's shop are Crowley-colored. Now, notice something important? Well, two things. The first -- Raga Koboj has TWO little sharp-clawed critters peering out at us from behind blinds. I daresay they are meant to be little cartoon demons, yes? And CT Bazz: Dank Balaclava features a face in a red ski mask. People usually wear ski masks if A. it's cold as tits outside, or B. if they're trying to hide their identity. So both albums feature Crowley colors AND images of hiding -- plus one features an image of twinsies.
The other important thing takes us back to color-coding. What other color do we see here besides our well-known Crowley colors? On Raga Koboj, the auburn and vavoom yellow blend into each other -- creating orange between them. And Dank Balaclava features a cigarette being lit -- with a little flair of orange fire.
(Edit to add: The name of that first album is Raga Koboj, which is a style of Indian music. A very famous tale in India is of the Warrior Goddess Kahli fighting demons who kept replicating themselves. Every time a drop of blood would hit the ground, a new demon would spring up. She went on a rampage trying to destroy them all, and her husband had to throw himself in her path to stop her. Hmm . . .)
This leads me to believe two things: Yes, TWO Crowleys. One Crowley in hiding, the other a twin. And that orange is Crowley's secret color.
Where else do we see orange?

Yep, the pillars in Aziraphale's shop. Which we also know is painted Crowley Auburn on the outside and Vavoom Yellow on the inside. With accents of this nice saffron orange on the pillars.
Want more proof? Okay.
Several people have noted that Aziraphale and Crowley keep to each other's right and left, respectively. Aziraphale on the right, Crowley on the left. In season 1, whenever they are on the opposite sides of each other, something's up. Not wrong, necessarily, but not in proper order. As in the image-swap/body-swap. Several people have also noted that Crowley is on Aziraphale's right far more frequently in season 2. And look here:

Aziraphale looks instinctively to his left when Crowley approaches -- only this Crowley, the twin, is not approaching on Aziraphale's left. This happens in more than one scene.
And when Aziraphale introduces Crowley to Nina in the coffee shop in episode one, he says, "This is, um, Crowley." As if he's quickly deciding how to name this individual who looks like his demon but approached on his right. Aziraphale "ums" and hesitates a lot this season, but he's also lying a lot. Hesitation and "um" is one of his tells.
I believe Aziraphale knows this isn't Crowley 1.0. But he acts and talks to this Crowley as if it's Crowley 1.0, so I don't think it's an imposter or someone pretending to be Crowley who isn't. I think Crowley's split himself in two. Am I sure about that? No. But it's where I'm leaning at this moment.
But Crowley 1.0 isn't missing entirely. Look here:

Aziraphale is looking over his left shoulder for his demon, and Crowley's right there, where he should be.
So yeah, TWO Crowleys.
Now where the heck is Crowley while his twin is out walking around on Aziraphale's right side? I really don't know what he might be up to, but I think he's in contact. Reachable, at least.
Let's look at this one again. Who's this?
No, not the guy in the foreground. The guy in the back. No, not the dude wearing tartan, the other guy. The guy in front of the ORANGE pillar, the guy on Crowley-twin's LEFT shoulder.
Is that Crowley 1.0? Or at least, a way for Crowley to be in touch while he's off doing whatever the heck he's doing? I think it is.
Would you like some more proof?
Okay. How about another record album from Maggie's shop?
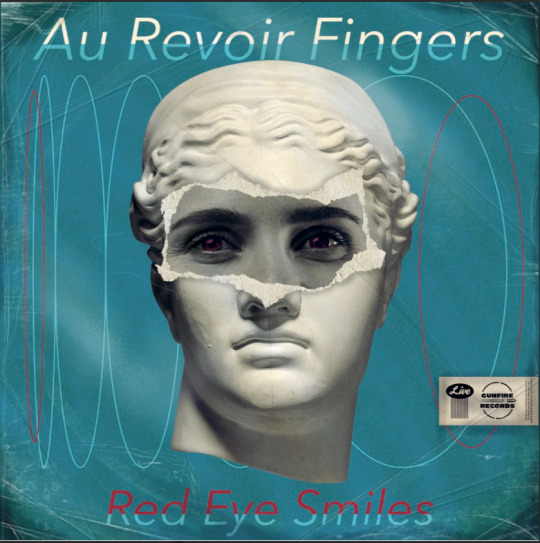
Back to color-coding again. That baby-blue/red combo seems to indicate Crowley and Aziraphale's relationship together. The baby-blue is the color of Aziraphale's shirt, while the red is one that Crowley wears, mostly around his neck, although it also appears elsewhere in his costuming.
Au Revoir, Fingers! Crowley's just a head now. But a head has ears and eyes, so Aziraphale can communicate with it. As I suspect he tries to here, before Jim interrupts:
But wait. Back to Au Revoir Fingers for a moment. Red Eye Smile?
And red eyes? Fuck me.
A very few people have pointed out that there are lots of dual red taillights in multiple shots, frequently framed rather carefully. I had dismissed it, as I usually do when something turns out to be freaking important.

Someone's watching. I think it might be Crowley 1.0.
Then there's that bit where he's driving back to Whickber street, after coming back from Hell, and he first zooms around a bus with red taillights and says, "There's only room for one of us in this lane and it's not you," then he changes a pair of red stop lights to green and says "Don't you even think about it. There, that's better." Is he arguing with himself?? Telling the Other Crowley that it's his turn right now, not his? Of course I can't find a GIF or picture of that right now, but you know what I mean, right? Neil had to cut a bunch of material out of the finished show to fit Amazon's time limit requirements. That scene would seem to be an easy cut to make -- unless the scene matters to the overall plot too much to cut.
I also suspect that Crowley might be talking to himself in the book shop at the end of season 2. You know, when he turns Aziraphale's chair around to face the right way, but when Maggie and Nina come in it's facing the center of the room again? I suspect Crowley 1.0 and 2.0 had a chat. I do not know about what. Just sharing information?
I also wonder if Crowley 2.0 might have his own POV scenes -- thus confusing the already complicated POV situation even more. The white head statue sure gets several shots where it's in center frame, as if it is the POV character in that scene.
That's what I got, my fellow brain rotters. There's my evidence.
In conclusion: Two Crowleys. Yeah, I think so. Now, for the big question:
WHY???
What is Crowley doing that there needs to be two of him? And is it just twinsies, or is that someone else pretending to be Crowley and I'm wrong? Aziraphale definitely seems to know that's NOT his original Crowley, but tells the demon important information without hesitation, so I'm still suspecting Crowley twinned himself. But what if I'm wrong? Who is it then? And why are they pretending to be Crowley? And why does Aziraphale seem to know it's not Crowley, but still talk to him like it is?
I have no answers.
Thanks for crackpotting and going nuts with me, yet again. I hope this keeps you up at night like it's done me.
#good omens#good omens 2#crowley#aziraphale#good omens meta#ineffable husbands#good omens analysis#ineffable mystery#good omens fan theory#aziracrow#crowley twin#red eye smiles#book shop statues#good omens colors#good omens color theory#good omens color meaning#good omens clues#good omens theory#good omens speculation
145 notes
·
View notes
Text
SSR Jade Leech - Platinum Jacket Voice Lines
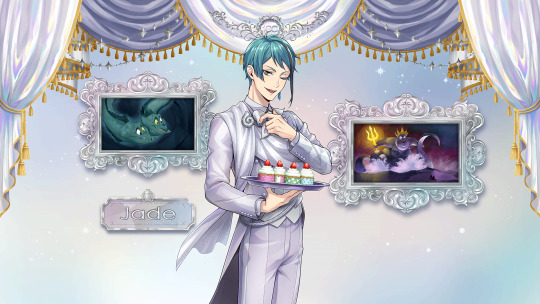
When Summoned: A museum that has been standing for 100 years is a wondrous thing. My heart leaps for joy at the prospect of encountering exciting works of art!
Summon Line: What a perfect suit to wear to such a long-standing museum. Fufu... What say you, does it look good on me?
Groooovy!!: The ocean is rife with danger. Who knows what may have befallen this happy little crab afterwards...
Home: Time to celebrate their 100th Anniversary.
Home Idle 1: I often see rather strange flora in paintings that depict the Queen of Hearts. I would love to see some of those with my own eyes someday.
Home Idle 2: Every painting of the Fairest Queen depicts her flawless beauty in such a flattering light. It's no wonder that Rook-san admires her greatly.
Home Idle 3: Down in the ocean depths, the Sea Witch's favorite lipstick is very popular. The container is even shaped like a seashell... I recall gifting it to my mother once, as well.
Home Idle - Login: If any of the paintings depicting ocean tales interest you, please don't hesitate to let me know. Perhaps I can help increase your appreciation of them.
Home Idle - Groovy: Riddle-san is even knowledgeable of the tales that come from the ocean. I should follow his example and widen my own knowledge of tales from the surface.
Home Tap 1: I've been improving my own sketching skills each day, of course, so that I would be able to more accurately describe the things I encounter in the mountains.
Home Tap 2: Sebek-kun declared that he would like to test his strength against the supernaturally strong young man that was said to be a child of a god. I know could never possibly consider challenging such a person, indeed.
Home Tap 3: I could hear Ruggie-san's stomach rumbling as he stood before a painting of some apples. They were drawn so beautifully that I can certainly understand how it would invigorate his appetite!
Home Tap 4: The paintings here on the surface are very colorful and I enjoy gazing at them very much. Colors tend to fade the closer they are to the ocean floor, you see.
Home Tap 5: You think that I resemble the moray eel that served the Sea Witch? In all honesty, I also felt a sort of kinship with them too. Especially with our mismatched eye colors.
Home Tap - Groovy: The museum shop has tea blends inspired by all these great people? Thank you for that wonderful news. I must go buy some.
Duo:
[JADE]: Riddle-san, is this not an opportune moment?
[RIDDLE]: We seem to be on the same page for once, Jade.
Birthday Login Message: Is that supposed to be a present for me? ...Ah, no need to shirk. I will wholeheartedly accept this from you. You see, there are those who would attempt to startle me with trick boxes and the like, so... I was simply wondering what it was that you were planning on giving me. Fufu, I am looking forward to opening it.
#twisted wonderland#twst#jade leech#riddle rosehearts#twst jade#twst riddle#twst translation#twst birthday#mention: rook#mention: sebek#mention: ruggie#mention: riddle
340 notes
·
View notes
Text
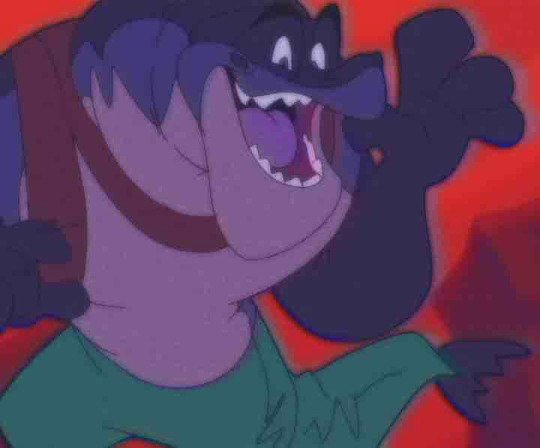
My thoughts on Hazbin Hotel as a non HH fan
Originally, I was just here to watch people criticizing Hazbin Hotel. But when the recent controversies came in, I feel like I have to step into the fandom rabbit hole.
As a non Hazbin Hotel fan, I've watched the pilot, read the prequel comics, watched the ADDICT music video, and finally the show itself. (I've watched the show on March 15th.)
NOTE: I didn't watch the show on TV so I watched it on a pirated website instead and read the transcript because no way am I watching this in front of my parents, my siblings, or Grandma. This is my personal opinion on the show.
Pilot: So Hell is basically Earth except it's painted red and inhabited by demons. The background has too much red, but not as bad that it makes my eyes bleed. I don't like how the female characters have the same color scheme except Vaggie and Niffty (pilot only). For example, Charlie, Katie Killjoy, and Cherri Bomb. The only two funny parts of the pilot is when the top hat demon says "Wow! That was s***!" after Charlie sings Inside of Every Demon is a Rainbow and when Angel pokes his head in as Vaggie is giving Alastor a warning. I didn't like the daddy joke. It just sounded bad. Also, why is there a joke about harlequin babies?
Prequel comics that are no longer canon: Basically the prequel comics focuses on Angel Dust and Alastor.
For Dirty Healings, it shows how Angel Dust first met Charlie and Vaggie. I knew that Vaggie's name was named after a uh, you know. Ugh… Why did Vivienne Medrano had to name her that? Also I hate Valentino.
As for A Day In The After Life, it just shows why Alastor is the most feared demon in Hell. Also he swears after seeing Vox.
ADDICT music video: I genuinely have no thoughts on this music video. I think this was just bait for the SA and CSA victims. Sorry for those who like the MV.
Episode 1: This is worse than the pilot. I did NOT like the beginning part. It's biblically inaccurate for multiple reasons, but I feel like a few people only talk about this one thing. Sin didn't exist until Adam and Eve ate the fruit of knowledge of good and evil. Not only that, but it's also misogynistic too because it was just Eve who ate it. What makes it misogynistic is that it implies that all women would have to bear the sins of Eve ALONE. There's rampant swearing and sex jokes. Also, isn't Archangel Michael supposed to be the leader of the Army of God? Anyways I'm siding with the angels.
Episode 2: The red is so bright that it hurts my eyes. It doesn't help the fact that Alastor blends in the background. Oh yeah, when Vox tells Sir Pentious to kill himself, it made me feel sad because it reminded me of the Shay incident. The time when the stans drove Shay to kill themself because they were uncomfortable with the large age gap of HuskerDust.
Episode 3: Why? Why is there a BDSM sex dungeon?! I know that was Angel's idea, but still. Why?! I seriously have no words. When Zestial says "What troubles thou?" I was like "Huh?". It should be "What troubles thee?". I think his Old English has grammatical errors. The Egg Boiz, Carmilla, and Zestial are bearable because they never said a swear word. Off topic, but Velvette's swirl streaks on her hair makes me think of a swirl ice cream.
Episode 4: Before the show came out, I saw SlayQueenArt's post on Twitter (X) that says Vivienne Medrano hired Raphielle II, aka R2ninjaturtle, who has a rape fetish and isn't a SA victim. As someone who is formerly addicted to porn, this episode is insulting on so many levels. I didn't watch the whole Poison sequence because of that. And don't get me started on Loser Baby. I hate this song so much. It felt like it is blaming on SA and CSA victims for being SA'd. Like it is blaming me for being addicted to porn on and off when I was EIGHT. I know there are some victims who like episode 4 so I will leave them alone. I seriously hate how Charlie behaves like a toddler at the end. No grown adult should behave like a toddler like she did because being raped isn't a silly thing to cry over. Like, hello? She is the supposed to be the main character. Oh yeah, there was NO warning for the episode when the show premiered and it triggered the victims who watched it. SA and CSA victims are not losers. Former porn addicts are not losers. Nobody is a loser. I am NOT a loser.
Episode 5: Wow, Vivienne Medrano really turned Lucifer into King George from Veggietales. I guess this is what happens when King George gave in into his obsession with rubber ducks. I didn't like Hell's Greatest Dad because of the unnecessary rivalry between Lucifer and Alastor, but at least Mimzy ended the song. Oh boy, this is where I hate Alastor now. No really, he is Vivienne Medrano's first edgelord oc. He has gone full edgelord and is basically a Bill Cipher wannabe now. His full demon form is not even scary compared to Bill's final form. He no longer stands out from the main cast even if he rarely swears. Mimzy is basically the embodiment of the hooked nose stereotype. Wow, the embodiment of a Jew stereotype. How racist.
Episode 6: That was an absolute slap in the face at SA and CSA victims and me when Sir Pentious got SA'd! Seriously, Vivienne Medrano doesn't even care for the victims at this point! What's worse is that he is based off of her old ex-friend, DollCreep. Why did she whitewashed St. Peter?! I know there are white Jews, but he was born in ancient Israel so I wouldn't think he'll be looking like a white man with blonde hair and blue eyes. How come angels don't know how souls get to Heaven?! We got the Ten Commandments! We got Jesus Christ who took our place to die for our sins so we wouldn't have to bear these sins! Emily and Sera are bearable because you know. I hate how Niffty is being treated like a child when she's NOT. What's worse is that Niffty is supposed to be Japanese because of how people INFANTILIZED Asian people, especially women.
Episode 7: My issue with Out for Love is that when Carmilla tells Vaggie that she should fight for love and not for vengeance. Well, Vaggie always fight for love and never for vengeance. In Whatever it Takes, she literally says that she'll always protect Charlie. Where is the vengeance in that? That is poor character writing. Rosie is basically the blood libel stereotype where the Jews are cannibals. Again, that's just racist against Jews.
Episode 8: I thought the finale was pointless because there were no stakes and Sir Pentious' heroic sacrifice was comically anti-climatic. Like, why did Sir Pentious's so called friends cared about him when they didn't help him at ALL in episode 6?! I'm not a fan of the CherriSnake ship because Cherri only becomes interested in him because he has two "joysticks". Not to mention he kissed her without consent and she thinks it's hot after that. The problem with More Than Anything (Reprise) is that Vaggie reassures Charlie that she changed many lives, but she only changed one. I'm so glad Adam defeated Alastor first. There is absolutely no way Lucifer slept with Eve. Oof for Lute and Adam. You both fought well until the end.
The character designs are awful. Every male character basically looks like The Once-ler from The Lorax 2012 movie except for Adam (I know Alastor doesn't have a top hat, but still gives off the vibes. Zestial is more Burtonesque.). Not to mention they are all skinny twigs except for Adam (I think). The female characters in Hell have the same color scheme except Vaggie (again). For example, Charlie, Katie Killjoy, Mimzy (though her dress is a little darker), Cherri Bomb, and Niffty (show only). They have too much pinks, reds, yellows, whites, and blacks. I love pink, but this is too much. What's worse is that they blend in the background and again it hurts my eyes. There is NO color variety and I feel like my eyes are burning.
That's my thoughts on the show.
#hazbin hotel critical#hazbin hotel criticism#hazbin hotel critique#anti hazbin hotel#vivzipop critical#vivziepop criticism#vivziepop critique#anti vivziepop
74 notes
·
View notes
Note
How do you nail that movie screencap effect thingamajig?? I'm a sucker for VHS-animation looking stuff but sometimes fiddling with blending modes, gaussian blur, noise, ntscQT etc. just doesn't feel right.
For me, I love experimenting with a mix of using blending modes and using ntscQT, but I definitely get the feeling of it still not feeling right despite using those methods!
I'll do my best with explaining how I go about achieving the look! The art software I use is Paint Tool Sai 2 (but any art software with blending modes + layers will do!). Apologies in advance if this is too wordy haha
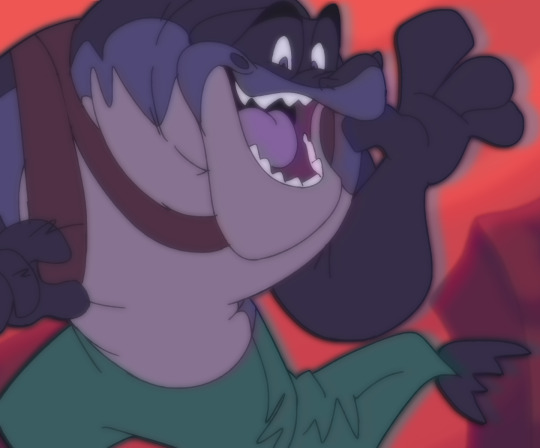
1.) I draw the usual setup- a background with a character or so. I usually flatten all the layers into one but, for this case, I just only flattened the layer the character's on:

2.) I duplicate the character layer, blur it, set its blending mode to "Lighten", and adjust the opacity as needed before merging the two layers together. I duplicate again, blur again, set the mode to "Darken", adjust opacity, and merge again!

3.) (1st pic) Once I do that, I duplicate & blur the character layer again, then move it a bit to the side (any direction is fine; for this I moved it to the right). Then I set the moved layer's mode to "Color"! After that, I add a drop shadow behind the character layer to give it the look of a traditional animation cel being used.
(2nd pic) Next, I flatten ALL the layers now into one layer, duplicate it and blur it greatly + set blurred layer mode to "Saturation" & move it in any direction before merging all layers again!! lots of duplicating and merging LOL!!!

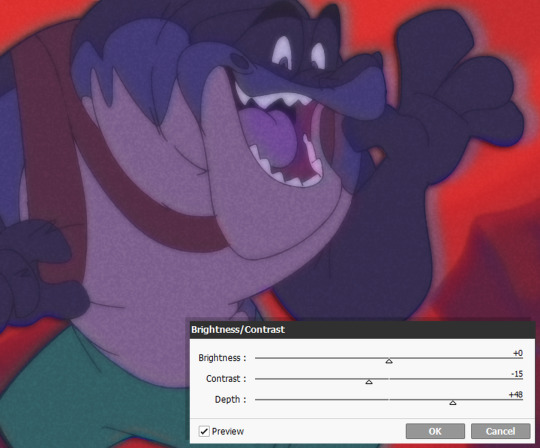
4.) OK THE LAYER DUPLICATION + MERGING PROCESS IS FINISHED FINALLY! Now we just adjust the colors!
I like to lower the Contrast and raise the Depth, though the adjustments can vary with each piece, depending on how much of a effect you want! Image on right includes the settings I used for this. (I also added a noise layer, but that's optional)

5.) And for the final step.... make the image a smaller size and save as a JPEG/JPG file!!! This should somewhat achieve the low-quality crunch look!
This step is entirely optional, but you can take the JPEG image and add it to ntscQT to mess around with different settings! Here's one I put together:

52 notes
·
View notes
Text
Hay long time no see Rwby fans

As of yesterday it seems some concept art for Ruby's design for volume four was released and I have to say we were beyond robbed
As we all know volume fours outfit is one of the most disliked it seemed outfits for Ruby and I kind of understand it for many reasons one thing I do think that is smart though on a design is the belt across the chest is someone who is top heavy myself I have had it where I've had to clip my tops especially spaghetti string straps tops closed at the front with a clip to keep certain my chest from popping out my shirts but in Ruby's case she's not that top heavy like yang ,winter,or emerald
so I don't really see a need for her having a belt across the chest and best I think she's like a a cup
Her sleeves were cute I think they were always supposed to be a representation of penny and she also Incorporated white into her look which was her partner Weiss's color showing how she's disconnected from her partner and one of her teammates I wish they had found a way to add other colors to her outfit maybe giving Ruby a bit of a sense kid look or something that add all her team colors
But that's not what we got
But then you look at the concept art of what we could have got and I think the best combination for her look would have been this


Dark brown top,the heart like corset with sharp ends brown leggings (?) ,red skirt with crosses on it, not sure but a bow sash would be a cut way to show her link to Penny and phyrra and then sone normal booths,not 12 belts
This look would seem like a good between look that's still kind of mirrors her original look but also foreshadows her next look that we get and the 7-9

But it's the same issue many have talked about is that she always has these gray and white sleeves I guess that they're trying to have it where her arms don't bleed into the rest of her outfit but they could just give her Brown mesh kind of like the brown top instead of these gray sleeves and Ruby's V4 look it didn't even look like she had a shirt on a lot of the time in the volume since the concept art and the way it was modeled in the show and colored made it look skin tone the only reason you could tell Ruby had on the top is when you get to her sleeves but there are times it's just not noticeable and when it comes to this gray top due to every character being it seems gray washed in the show where they all look pale and gray and pasty throughout the seven-8 and Atlas for some reason the gray on Ruby's top also kind of blends with her skin at times they really need to stop giving Ruby these gray tops just have her be sleeveless from now on since they're back on remnant and they're in vacuo I'm hoping maybe down the line by the final volume if we see one more big outfit change before the final fight with Salem we get an outfit similar to what we got from this concept art or maybe some other concept art that could maybe try Ruby to Elva character she's known or lost but I'm thinking Ruby maybe needs to stop being tied to character she's lost like her mother, penny and phyrra I start more dressing for herself even though I didn't like it and I don't want to acknowledge them in the Justice League crossover movies part 2 Ruby had on a leotard outfit that looks really sporty that went with her semblance that felt like it represented herself a speedster looking for enjoyment quickness and fun Ruby should possibly maybe incorporate more leotards into her look or sports like outfits those would suit her more I believe the outfits we've been seeing her the end although it's what we've been used to it feels like Ruby in a way it's been mimicking her mother's summer for the longest time and now that Ruby is starting to come to the realization that her mom isn't who she always thought she was it'd be nice if we start to see Ruby become more of herself and go into a different outfit change that still mirrored her past outfit but show more of herself and I'm hoping that's what we get in volume 10 whenever we get it
17 notes
·
View notes
Note
Ok from a transfemme to a trans woman - how do you makeup? I've been wanting to get into it for so long but the first time I tried was an absolute disaster, and I can't find any tutorials that go through the absolute beginner basics
tbh, you have to just keep on doing it even though it’s a complete disaster. i started my transition in 2020 but i was doing makeup and “cross dressing” for nearly 8 years before i considered myself to be trans. and it was years before i was able to do makeup to the point where i felt good about the way that i looked every time i did it.
that being said, there’s no guide that’s gonna be able to tell you everything you need to know but i’ll try to give as many tips and jumping points i can in order for you to try out things and figure out what to look up.
- make up is different for everyone - everyone has a different face shape, eye shape, cheekbones, jawline, complexion, etc. and the way to do makeup that looks good for you specifically is going to vary a shit ton based on those things. when you look up stuff, look up how to do makeup for a certain set of features. figure out what face shape you have, skin types for foundation, etc.
- there’s no one right way to do it - i do a bunch of things that are “technically incorrect” because i’ve tried it the “right” way and it just didn’t work for me. so i figured out something that i liked instead and make that a technique i used regularly. also even though people will say you’re supposed to do certain things, a different technique might yield a different result. as an example, conventional wisdom will say use primer, foundation, then a translucent or setting powder, then a setting spray. recently a very popular technique has been using moisturizer, then setting powder, then setting spray, THEN putting on all your other makeup and supposedly it lasts longer. there’s literally no “correct” way, it’s just whatever works.
- blend the shit out of everything. this is the one technique which pretty much applies for everyone. blend blend blend blend. i like using a beauty sponge. run it under the tap for a second (literally a second, you want it moist not wet) to wet the sponge and then use dabbing motions to blend your makeup.
- asking for help at makeup stores helps A LOT. i’ve had really really good experiences asking for help at makeup stores even though i was super uncomfortable with the idea at first. i found that a lot of people were judgement free and even very gender affirming even when i was presenting masc. and i live in the south!
okay now to more granular stuff - here’s the basics of what i would consider to go into a “full face” makeup routine - primer, foundation, concealer, highlight/contour, setting. eye makeup would add additional things - eyeliner, mascara/lashes, eyeshadow. lips add additional things as well - lipstick, lipliner. ill try to go through the entire process and add my fav products or two. (i should probably make this into a video series tbh)
1) primer - it protects your skin and makes your makeup stay longer and look better. use it.
- my fav: the ordinary - high fluidity primer
2) color correcting concealer - an optional step for transfemmes like me with darker colored facial hair. using a reddish or orangish color correcting concealer or lipstick over the areas where your facial hair shows through the skin will neutralize the shadow that shows through foundation. add a little bit, sparingly, blend with a sponge.
- my fav: la girl color correcting concealer orange
(the best one of these is made by dragun beauty who is a trans woman…but who did blackface…so don’t buy her shit)
3) foundation - figuring out your color is hard. look up a guide, ask in store, try a bunch of different ones. there’s a difference in coverages. full coverage means its made to cover everything. buildable means you need to apply and blend a few times and is good for if you don’t want heavy coverage everywhere. don’t use too much otherwise you’ll look like a plastic doll. unless you want to look like that then go nuts. blend the shit out of it so that it doesn’t cake up.
- my fav: juvias place bc it’s full coverage and actually has my skin tone as an asian person
4) concealer - this is different from color corrector and i usually do this after foundation. this is just a touch up for any blemishes, dark spots under eyes, pimples, shit like that. just use a tiny tiny dab and blend. this is also hard to get your color right so get help if you can.
- my fav: colourpop concealer, or nars concealer if you’re a fancy bitch
5) blush - i don’t really use blush much but blush is one of those things where you should look up a guide for how your face is shaped. positioning blush in different ways will help shape your face in different ways.
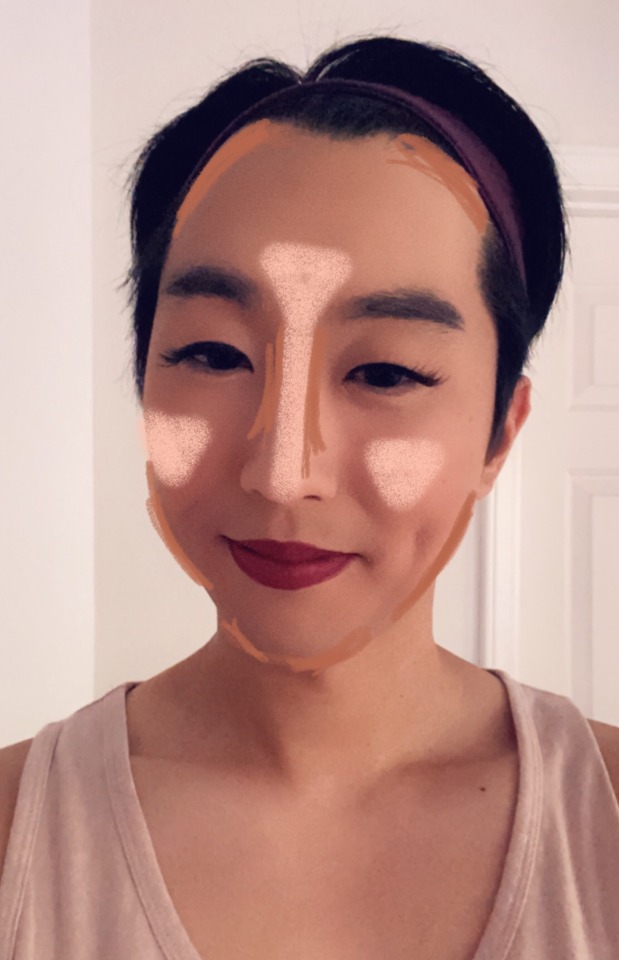
6) contouring - okay this is the hard one. i can’t tell you how to contour your face because this is one that varies a shit ton from person to person. the basic gist of it tho is that you are using a contouring stick, bronzer, or palette to add shadows to your face. when you put on foundation it makes everything an even color and makes you look flat, so contouring is basically drawing those shadows back in to contour your face. you can do this in so many ways even for your own face so imo, you experiment and see how you like it. typical places for contour to go will be under my cheekbones, on my nose bridge, sometimes under my jaw to slim the face.
- my fav: i can’t remember i’ll come back to this one
also i drew this diagram a long time ago to help myself get the idea of where i wanted to put it on my own face and i went from there. the brown was contour and the other color was highlight. i don’t do it like this at all anymore but it helped to get the basic idea at first.
7) highlight - the opposite of contour where you’re making certain parts of your face brighter to contrast the darker parts. typically goes on your cheekbones and nose.
- my fav: watts up by benefit
8) translucent powder/setting powder - okay so this one can either go after foundation, before blush, contour, highlighter, or here. basically it’s a powder that goes evenly over your whole face to help your makeup stay where it is. personally i usually do it after foundation instead of here but either works. basically you take a powder brush (the big floofy ones) and then put it all over lightly.
- my fav: nyx hd finishing powder
9) setting spray - it’s a spray that you put on last to help your makeup stay where it is. shake up the bottle real good and just mist it all over.
- my fav: tarte shape tape stay spray
okay i’m tired now and that’s plenty for now. i’ll update with lip and eye stuff later.
338 notes
·
View notes
Note
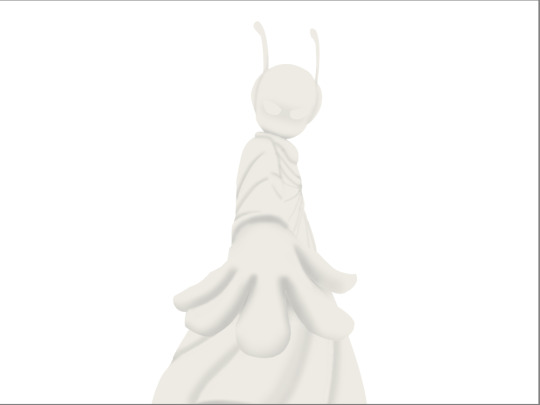
I just found this blog and I noticed that a lot of your stuff seems, well, oddly 3D. I don't mean like in a bad way but it feels like rendered but untextured 3D models? I kinda want to ask what your art process is (sorry for mini-rant)
thanks for checking out my blog! and no need to apologize for anything.
hmm, my art process. honestly i have no idea what to say, i dont know how people normally answer this question so i cant base it off anything either. i'm still kinda new to this whole art thing but i'll try and answer, super sorry if i get this completely wrong and this was all a waste of time.
i guess i'll just talk about how i draw things step by step? for the high effort pieces at least.
ok, so for starters like step 0. when it's a high effort piece, i can already see the image in my mind. i see the pose, i see the general lighting, the layout of stuff, but it's a bit blurry. if i cant see this mental image, the drawing usually comes out extremely poorly.
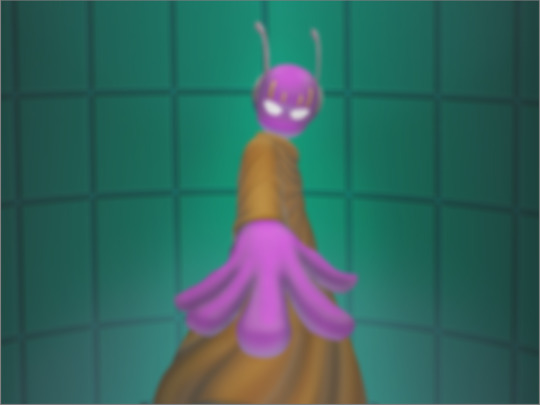
this is kind of an example of what i see in my head? this might be all useless info idk, but this is i guess where i start.
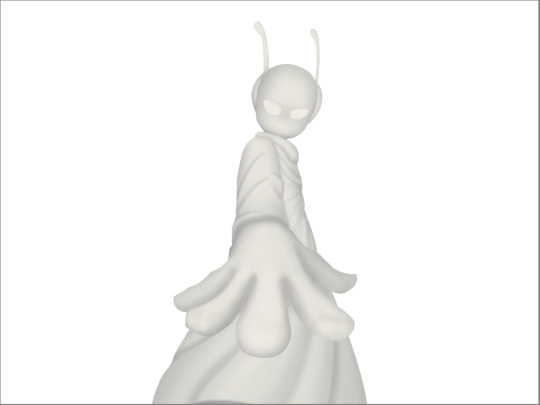
well step 1 is just the sketch and line. i start with just sketching the general shapes, then slowly refining it until it fits close enough to the image in my head. then in the line layer i'll fix any mistakes the sketch had and add more details to it. oh and for brush, it's just a round brush, like default. i dont know how much of a difference using a drawing tablet does, but i dont use one so... yeah.
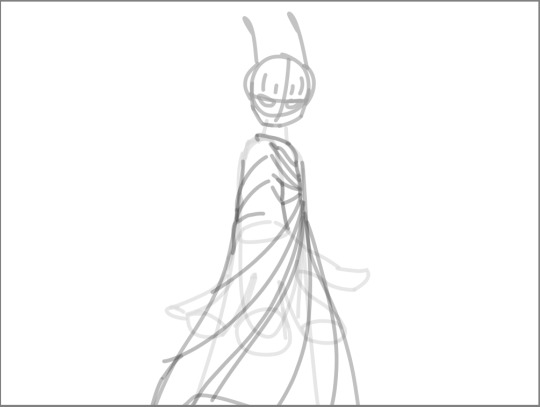
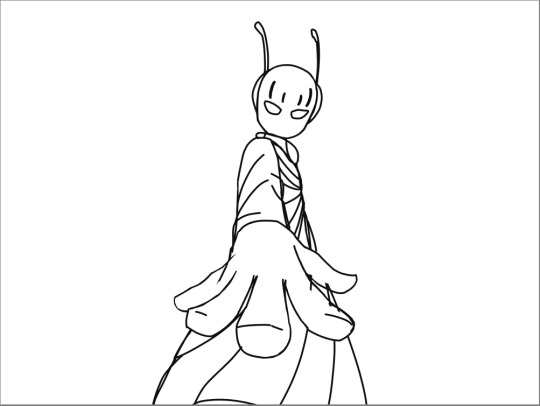
i should've put more effort into the sketch for this drawing, but i did not.
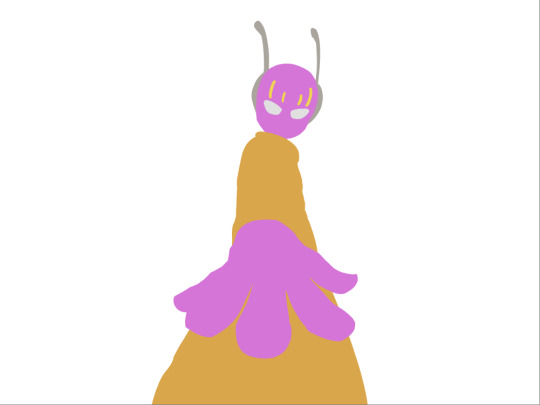
next i do flat colors. pretty simple, i just select the smart select the outside of the line layer, invert the selection and now i can't paint outside the lines. i dont really think about what colors i use, i just use whatever the characters normal colors are.
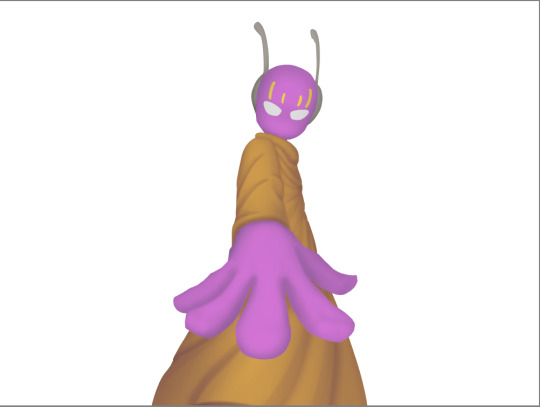
next i do the shading, but first. i duplicate flat layer and recolor it to like a cream color
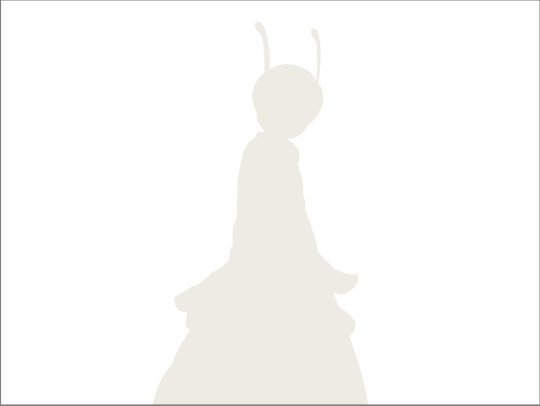
like so. for high effort pieces, i was told online to shade in pretty much black and white. now actually onto shading. there's 2 kinda shading i do, 1 from the proper light source, and 1 that's kinda just a shadow because things are close together (like corners and stuff). and i'll shade them on separate layers so i can adjust them individually however i want. oh right, i'll either use a very dark color, pretty much black and the the layer blending mode set to multiply. or i'll use a light kind of gray, tinted slightly yellow or something and set the layer blend mode to difference. then i just use a soft air brush and shade in the ways i described above. shading from regular light source, and the corner stuff thing.
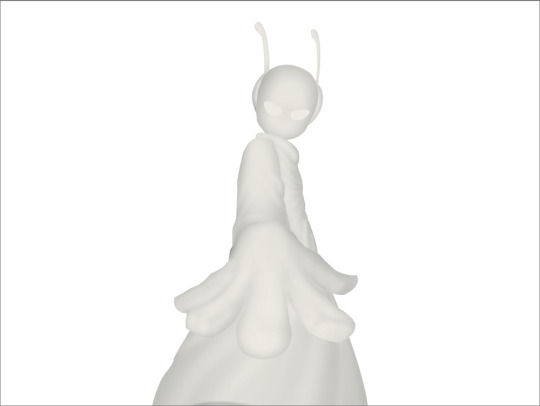
normal lightsource - - - - - corner thing
then toggle both layers on and mess with the opacity of each layer until you get what you want.
then you can toggle the normal flats layer, the one that has color and it should apply the shading decently. you can mess with the opacity again on the shadows.
next i do lighting. i just grab a very light color, usually pretty close to white and set the layer blend mode to overlay. then i use a soft airbrush and "light" it? idk i just do like the opposite of the normal shadows, lighter the closer it is to the light source

mess around with the opacity as usual. then i do pretty much the same thing if there's another light source. in this case there was a blue light kinda coming from underneath, so i did that.
now from here i would go back to the flats layer, make a copy, and mess around with different layer styles and properties and settings. sometimes just messing around is useful. in this case, i felt it was too bright and colorful, so i decreased the brightness and saturation of it.

i think it helped a little bit but who knows.
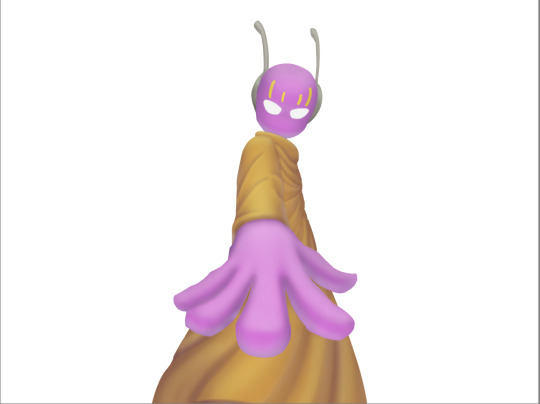
now i do some kinda highlights and details. i grabbed the colors that were in the background and used those. it was a weird pale blue. i had 2 layers for this, 1 of them was specifically for his antenna things at the top, and one was just for his "skin". anyway, the antenna layer was normal, just kinda gave it an outline with the random reflective circles you see normally in pictures, no thoughts behind them. the skin tho had the layer blend mode set to soft light, i thought it looked best this way. it was just more random things to imply it was slightly reflective.
together the layers looked like this. i think it makes him look glossier which is what i was aiming for.
next, and it pretty much the end for pebbles, i got someone to look at it and let me know if they think anything was missing. they said it looked a little unsaturated. which it does. so i made a new layer, set the blend mode to saturation, grabbed the airbrush and made it pretty inline with the lighting layer.
that's kinda it. the background i didnt really care about, just drew and colored it. blurred it a bunch and added a bunch of shadows. i did add some like, "overshadows" is what i call it, i just draw some big shadows down the screen as the top layer.

but yeah thats literally everything i did to draw this. i would like to apologize if this was not at all what you wanted to know, i'm certain i've screwed this up bigtime. super sorry for wasting your time. if there's anything i can do to help, please ask. i owe you a proper answer to your question, i'm just really dumb. sorry for rambling. sorry. and sorry if the drawing i used for example didnt showcase what you wanted to know.
also, i really like your art! please keep up the great work!
#i think i did this all wrong#i'm so sorry#i feel incredibly stupid#:I#rambling :I#now everyone get's to see how little i know about drawing
26 notes
·
View notes
Text
Mewtwo's cloning machine colored became my most popular post so I'm making a tutorial with it.
I know I only colored it but I did use some pretty important techniques when doing original art too so I'm hoping it helps.
Okay so let's say you have a sketch, or in my case an image you want to color. Rule of thumb, you don't want to leave that in grayscale.


If you have a color scheme in mind you'll want your starting point to reflect that. Most art programs have ways for you to do tonal correction.

I like using levels for cleaning up the brightness and making lines sharper, and color balance for adding colors. Gradient map works nicely too. Generally you want to pick contrasting colors for light vs shadow. I did yellow for lighting and blue for shadow because I wanted to catch that oceanic underwater feel. But you CAN do cool lights with warm shadows!
2. If you want to color under your image or sketch, set it to multiply. Lower the opacity to help you see better if you want to do linework over it, or leave it as is if you just want to color your sketch.
3. Block in your colors to get a feel for the lighting. You'll want to make sure you have a CLEAR sense of foreground/middleground/background. Which means you need to pick colors that are bright/medium/dark shades and assign them accordingly.
In this case my foreground is darkest, I chose to make middleground (the machine) my light source, so it is brightest, and background is my medium shade. You don't have to do it in that order, but just keep those rules of three in mind. Foreground, middleground, background. Light, medium, dark. Assign accordingly as your piece needs.


A great way to test your composition is to set your image to greyscale, or even remove your sketch. If you still have a clear impression of depth and where everything is, you're on the right track.
4. What's your focal point? What's the main subject of your piece? What do you want to draw the viewer's eye, to stand out, to be the whole point of what you're drawing? Because that's the part you're going to focus on rendering now.
For me it was the shell.


This was three different layers on different blending modes where I just played with textures, colors and brushes until I got an effect that I liked. In fact I liked it so much that these layers are actually above the base image, so that the texture is untouched by the manga scan texture and the yellow-tinted multiply effect.
5. By this point, if you're applying these steps to any art piece you're working on, you should have a pretty good basis. You should have your colors mapped, your composition, and your focal point for your work. You can continue to render the details, but try to stick to your composition.


None of these steps are particularly complicated. It's just a matter of coloring within the lines, staying true to your chosen color scheme, and remembering where the light source is.
6. If you have a secondary focal point, (in my case, Team Rocket) you can give it a little bit of special treatment to help it not get lost in the image.


I went as far as to copy and paste them, adjust their levels separately from the rest of the work so they looked sharper and cleaner, gave them their own colors separate from the scheme of the main peace, and only tied them into it with their shadows. I painted some rim-lighting around them true to their colors (like Jessie and James's hair) just to help them pop. They're not the main focus of the image, but they're somewhere that they aren't supposed to be, so they need to stand out a little in their own right.
7. Add some finishing touches.


This can be things like adding soft glows to your light sources (I keep mine simple, just a few strokes with a watercolor brush set to the add blending mode) and some shines to shiny objects.
And that was about it.

Coloring this piece was just an excuse for me to play with color composition and textures without having to worry about my own line work for once. But I still used some pretty important principles in illustration to catch what I saw in my head while looking at the original uncolored page. (Especially step 3!! Try that in your next work!)
14 notes
·
View notes
Text
My Tweed Coat Ricochets (Agatha Harkness x Reader) Chapter 2

Summary: After a disastrous first encounter with your new colleague, you try to settle into your new job as an archaeologist at The Westview Institution.
Word Count: 2.2K
A/N: Hi besties, here’s chapter two! We’re going for a sort of Indiana Jones and eventually Mamma Mia-ish romcom vibe. Disclaimer- I am not a historian or archaeologist. I’m a violinist. I’m just typing this up as I go along, haha. But I hope you enjoy this next chapter! I should hopefully be updating weekly, I have a pretty busy job so if there’s ever a delay that’s why :) Thank you for reading!
Chapter Two: The Last Great Archaeology Dig
There was nothing more peaceful than aimlessly wandering through a museum. With the abundance of exhibits and the stream of visitors flowing in and out, it felt as if the ancient worlds were coming to life before your very eyes. Growing up you had always looked forward to the occasional school trip to the museum, but never in your wildest dreams did you imagine you’d end up working for one of the best institutions in the world. You’d spent most of your morning getting settled in your office, making note of how you wanted to fill the space over the coming weeks.
There was an underlying sense of dread thinking about the staff meeting Stephen had scheduled. It wasn’t because you weren’t looking forward to meeting your new colleagues- you were. A crumpled white blazer you angrily tossed on the ground caught your eye, reminding you of the real reason you didn’t want to go. The mere thought of Agatha Harkness had you seeing red- and it wasn’t just the wine stain. You had encountered plenty of strong personalities over the course of your career, but none had infuriated you as much as this woman managed to within a day. You normally prided yourself on your calm disposition, but there was something about her that had you feeling emotions you never thought were possible.
You weren’t sure what it was about her, as your brain replayed your two brief, but memorable interactions. Perhaps it was her arrogance, with the way she wasted no time snobbishly judging you based on your appearance. Or maybe it had something to do with the conceited idea that you were following her, as if you would ever do something like that. The way her eyes had narrowed at you, the striking blue color seemingly darkened like an impending storm rolling into the wine dark sea. You could get lost in those eyes, and- wait a second. What were you even saying?
Pushing any and all thoughts of Agatha out of your brain, a quick glance at your watch left you alarmed to find the staff meeting was starting in a few minutes and you had no idea where it was. Stephen had sent a rather lengthy email you only half read, and you mentally slapped yourself for not paying more attention. The corridors all appeared to blend together in a rather confusing labyrinth, and you rounded yet another corner when you heard a light hearted chuckle from behind you.
Turning around, you found a woman staring at you, amusement twinkling in her blue eyes. Her dark brown hair was pulled back in a tight bun, and she looked at you with some sympathy. “You must be the new hire?” As you nodded she continued. “I thought so. Y/N, right? I remember Stephen mentioning you were joining us. I’m Maria Hill, it’s nice to finally meet you.”
She held her hand out, and you quickly shook it, pleasantly surprised at how friendly she was. Although, you guessed most people here were nicer than Agatha. “It’s a pleasure to meet you. Sorry, I don’t really know where I’m going.”
Maria gave you a sympathetic glance. “I remember my first few weeks here. It gets better, trust me.” She guided you down another hallway before adding, “How has your first day been?”
Shrugging, you thought of the whole amount of nothing you had accomplished so far. “I’m still getting settled in. To be honest, I can’t believe I’m here.”
Nodding along, Maria led you down another long hallway, and you wondered just how large this place was. “It can be a lot to take in at once, but most of the team is great. You’ll fit right in.”
You wanted to inquire what she meant by saying most of the team was great, but you’d reached the end of the long corridor which held an open doorway holding a spacious conference room. Maria entered first, leaving you to follow suit, trying to swallow the nerves building up in your throat. The room housed a large rectangular table in the center, and there were already a few people there. Each of the walls housed a variety of pictures; upon closer examination you realized they must be a collection of various excavations the team had done over the years.
Turning back to the table, your eyes scanned the room and you let out an internal sigh of relief upon seeing that Agatha had not arrived yet. Besides Maria and Stephen, with the latter setting up at the head of the table, there were three other chairs occupied. A brooding man with long black hair sat alone in the corner. He was scribbling in a brown leather journal, and gave you a brief, disinterested look when he caught you staring. The other two, a man and a woman, were sitting across from Maria and engaged in quiet conversation. The woman had long auburn hair that was braided, whilst the man wore a pair of silver glasses and had strawberry blonde hair.
Glancing around at the empty chairs, you were mentally choosing a seat when Maria waved you over to join her. Taking the seat to her right, you set your belongings down before saying, “Thanks, I wasn’t sure where to sit.”
“Don’t worry about it,” Maria reassured you. “Have you met Wanda Maximoff and Victor Shade?”
The two people sitting across from you ended their conversation, giving you their full attention. The woman, Wanda, gave you a warm smile. “It’s a pleasure to meet you. Y/N, right?”
You nodded, pleased at how they also appeared to be friendly. “Yes, it’s lovely to meet you both.”
“Well you certainly don’t look like a clumsy baboon,” Victor commented lightly, and your eyes narrowed in confusion, while Wanda whacked his arm. Clearing his throat, he held out his hand to shake yours. “Ah, right, my apologies. Haven’t had my afternoon coffee. It’s nice to meet you.”
Maria appeared to be just as confused as you, but before you could ask for clarification Wanda and Victor returned to their previous conversation. A few moments later, Agatha came trudging in, looking as unpleasant as ever, followed closely by another woman you didn’t recognize. The woman had straight jet black hair, and bright green eyes that shone like emeralds. They sat towards the end of the table, near the man with the long black hair, and you swore you could feel Agatha glaring daggers into your back. Stephen appeared pleased with the turnout as he stood up, clapping his hands together once.
“Thank you all for joining us this afternoon. I’ll try to keep things brief. First, I’d like to welcome the newest member of our team.” Stephen motioned at you, and you offered a strained smile, feeling the muscles in your lower back tighten from the anxiety. “Y/N will be an excellent addition, and I hope all of you make her feel welcome.” It appeared that his last words were directed towards one person in particular, as it appeared everyone in the room seemingly glanced at a bored looking Agatha.
Clearing his throat, Stephen continued. “Onto the last bit of business, everyone but Y/N should be familiar with our new project, being fielded by Dr. Shade and Dr. Stark, yes?” Mostly everyone, excluding Agatha, nodded. “Victor, would you like to give an update?”
“Of course,” Victor opened a large binder that was in front of him. “Tony has been overseas for the past few weeks getting the rest of our findings in order. As many of you know, my research over the past decade has been solely dedicated to locating the Tesseract.”
You were fairly familiar with Victor Shade, but had never read any of his journal articles over the years. You had, however, read more on Tony Stark. His research and findings on ancient civilizations along the Nile were groundbreaking. Victor had taken a brief moment to look over his notes before continuing. “The Tesseract was rumored to have been a sought after relic. The carvings we found appear to depict it having some sort of legendary power. Unfortunately, there is no last known location, and up until last month it was thought to be a myth.”
“In the past we always assumed the Tesseract was the only relic of its kind, but during our latest excavation we uncovered what appears to be a writing tablet with six engravings etched on it.”
Pulling an iPad out of his bag, he fidgeted with it for a moment before the flat screen tv on the far wall turned on, and pulled up a picture of the carving. Everyone peered at the screen with intrigue, even Agatha appeared to be paying attention. “Now, with all of the findings and research Tony and I have conducted since we uncovered this, we’ve stumbled across a few other clues to their locations.”
The screen changed to a 3D model of the Earth, with six glowing circles around it. “With everything we’ve put together, as well as notes from previous journals, we’ve concluded that the six relics are located within the red circles. I was made aware that Agatha is going to be leading a team in Delos next month, and since we are fairly certain that is the location of one of the relics, we thought it would be imperative to begin there.”
“You are not allowed to hijack my excavation, you high tech toaster,” Agatha snarled from her seat, and as you rolled your eyes, you swore you heard Wanda sigh from her seat. Of course.
“Agatha, no one is going to be hijacking your research,” Stephen interjected, clearly trying to diffuse whatever was going to happen next. “But bringing a few extra sets of hands to widen the search is a good idea.”
“This could very well change the way we view almost every ancient civilization throughout all of history,” Victor added, seeming unphased by Agatha.
“Thank you, Victor. Now, I know some of our team is already in Greece preparing for Agatha excavation, however with the new timeline I thought sending a few more people would be beneficial,” Stephen explained. “In addition to Agatha and Victor, I’d like to send Y/N.”
Your eyes met Agatha’s simultaneously, and you both glared at each other. Great. Agatha shook her head. “I’d rather be working with someone I know, like Hela or Loki.”
The man with the long black hair, Loki, shook his head. “I’m going to be in South America until October. Unless you’d like to trade places?”
Stephen sighed, rubbing his temple. “Agatha, you cannot pick and choose which colleagues will be accompanying you to Greece. As long as there’s nothing else, why don’t we wrap things up for today. I’ll have more information regarding the excavation later in the week. Thank you everyone.”
Everyone took their time filing out, and you noticed Stephen and Agatha quietly arguing, mostly likely about you. Returning to your office, you packed up your belongings for the day until your gaze once again fell onto the Merlot stained blazer and you suddenly had an idea. Packing the blazer in your bag, you left and passed a vexed Agatha, and you pretended not to notice how nice she smelled.
Later that afternoon you found yourself in one of your favorite coffee shops in the city. Nestled one block away from your apartment, it was the perfect stop you needed on your way home from a slightly stressful first day. Ordering your usual, you sat at a table in the corner and thought about the excavation in Greece. You still had to look over Victor’s notes, but the dig and research sounded exciting. The only downside is that Agatha was leading the excavation and sounded less than pleased at the prospect of you joining her. Your brain also went back to what Victor had said before the meeting started, something about you being a clumsy baboon? You had a sinking suspicion that Agatha had been behind that.
“Iced chai with oat milk for Y/N?” The barista called out, and you walked up the counter to grab your beverage when you saw familiar blue eyes glaring at you.
“You have got to be kidding me,” You mumbled to yourself as Agatha came up to you.
“It really feels like you’re following me,” Agatha said in a cold tone, eyeing you suspiciously. “What are you doing here?”
“I left work before you did,” You pointed out, not in the mood to argue with her. “And if you must know this is my favorite coffee shop in the city. I come here all the time.”
Agatha gave you an unreadable look before turning around and walking away. Nice to see she was warming up to you. Taking your drink back to your table, you watched the archaeologist settle in at a table near yours. The two of you ignored each other for the entirety of your visit, but once you finished your drink, you opened your bag and looked at Agatha’s blazer while a new plan brewed in your mind. Eventually she got up to get more coffee, and you discreetly dropped the blazer off on her chair with a note before leaving.
I’ll have to save up my money to buy that plane ticket to Greece
57 notes
·
View notes
Text
2: A small reprieve
Underground visitor, gn reader x monster (male drider). Sfw. Previous Next
It’s an awkward trek back toward the rocky formations. Your host for the night has underway introduced himself as Dren, and you’ve offered you name in turn. The storm is getting worse, as Dren said, wind picking up to harsher levels and rain pouring still.
Dren keeps a respectful distance, mindful not to scare you, though he still hovers behind you as if preparing to catch you should the wind cause you to fly off.
Adrenaline has somewhat worn off by the time you get back, and, now able to feel your body again, you find yourself downright miserable.
Dren quickly ushers you inside the cave, relieved of being out of the storm. The entrance is pitch black, and you note now that this open hole in the rock formation indeed stretches deeper into the ground. Instinctively you reach for your phone to get a flashlight out, but the disappointingly empty pocket of your jacket reminds you it's currently lying in a bush somewhere being useless.
You watch as Dren vanishes in the pitch blackness as he casually walk further in, dark body blending in perfectly. You hear his scuttling footsteps falter when he realizes you’re not following.
“Is something the matter?” his voice reaches you from the dark, and you can’t help but shudder when you can’t locate its origins at all.
“It’s very dark,” you tell him, staring into the gaping abyss. “I don’t know where to put my feet.”
“Oh,” the voice says. “You can’t – hold on. Stay right there, please.”
There a moment of pause where you just feel eyes on you, so you nod at the dark. You hear Dren’s footsteps receding.
The storm rages outside, and you turn around to watch the violently jerking movements of the trees and plants, watching fallen leaves rake across the night sky and the rain still pouring. This could be an opportunity to change your mind and leave this place before you enter the darkness. But what is more dangerous? The elements or the benevolent spider?
You may have to take a chance and stay put to find out.
A few minutes later you hear the clicking noises of Dren’s steps approaching and whip around. To your surprise, an actual light source is hastily coming your way.
Dren is holding an old-time lit oil lantern. It gives a decent light in the dark. He stops in front of you and holds it out to you, looking somewhat relieved you’re still there.
“I rarely get guests, and I can see fine in the dark. I had forgotten that you might not,” he explains, sheepish. “Luckily I kept this thing.”
You gingerly take it, mindful not to brush against his clawed fingers, and now you’re finally able to really get a look at your host.
His entire lower body is a pitch black spiders body, with rough hairs running along his abdomen, eight pointed legs protruding from under his upper body. Said body is a humanoid naked torso with a pudgy but strong build, chest and upper arms partially covered in the same rough looking hairs. Those on his head are long and dark, currently wet and plastered to his face. Hidden behind the stray locks you see now he indeed has four eyes in total, colored like obsidian, two on each side of his face. On top of the mouth are two fanged mandibles.
It’s hard not to gawk.
He tilts his head at you, and you realize you’re staring. “Sorry,” you say, quickly glancing away. “I’ve just never seen anyone like you before.”
Dren gives you an odd look. “..Never?” he seems somewhat perplexed. “But you’re – well. Let’s talk when we get settled in,” he nods at your drenched clothes. “I may have some spare fabrics for you as well.”
Dren leads you through a series of tunnels dug into the earth, wide enough to comfortably house his large form and you walking next to him. The ceilings are covered in webbing, and you thank the stars it’s not on the ground you’re walking on, lest you got stuck in the stuff again.
“Did you dig this out?” you ask, mostly to fill the silence.
Dren nods. “Took a while, but it was worth it. I even managed to dig out an underground water source that was connected to the main cave system,” there's a slight pride in his voice, and it’s not hard to see why.
Looking nearer, you spot multiple intricate carvings running along the walls and floors, skillfully crafted into the dirt. They run along the entire distance you walk, the circling patterns almost hypnotic to look at. It must have taken him weeks if not months to do them.
The route he leads you contains multiple twists and turns, and the tunnels branch off in different directions several times, some even vanishing up and above you, some falling further down below.
You have no idea how Dren navigates them, taking turns left and right seemingly, to you, at random. After just a few minutes walking you realize you’re hopelessly lost in the system, which does not speak well for your confidence being here.
It means you’ll have to trust Dren to lead you safely to the outside again.
You glance up at him. He’s looking ahead with a neutral expression that’s a bit hard to read, though he catches your eye and offers a small fanged smile with a tilt of his head.
You look away again.
Your host leads you into a larger room dug out of the ground. The lantern illuminates it well enough. The first thing you notice is the walls and floors here are, like the tunnels, carved full of intricate designs and patterns. Flora, fauna and symbols unknown to you decorate the surfaces all around you. Looking up, you find the ceiling here is also covered in web.
In a corner, you spot a pile of different items put side by side - clothing, blankets, both neatly folded, some skins and furs, but also cups, pots, and different kitchen utensils. Opposite that is a large table, upon which decorative wooden sculptures are set. There’s a hole dug into the further wall, perhaps acting as a fireplace judging from the shape, though it doesn't seem to have seen much use.
In the other end of the room, you spot two other entrance points, though the lantern is not powerful enough to illuminate what lies further inside.
"This is where I spend most of my waking hours," Dren says, watching you take in the surroundings. "I guess you would call it something like a 'living room'."
You put a palm across the intricate carvings in the walls, surprised at how sturdy the soil is. It almost feels like running your hand over wood. "You did these as well?" you ask him.
"I did," he nods. "Do you like them?"
"They're beautiful."
Dren rubs his arms, sheepish. "Thank you. To be honest, one of the reasons I dug out so much space is to carve the walls," he chuckles. "I get bored down here easily."
"Must be handy that you can just carve out another room whenever you want. Although, the tunnel system has me completely lost," you laugh nervously.
"I'd imagine so," Dren says, and smiles gently. "I designed them that way."
You ignore the small goosebumps on your skin. "You made them confusing on purpose?"
"Confusing perhaps if you're not the one who built the system. What kind of constructor couldn't find his way in his own home?" he replies. "It's mainly because of snatchers. A confusing system means they waste time trying to find their way around. Their wasted time becomes extra time for me to stop them."
"What's a snatcher?" you ask.
Dren laughs, but stops once he realizes it's a serious question. He gives you that same odd look. "You - you truly don't know?"
You shake your head no and shrug.
"You're really not from around here, are you?" he muses. "Well, put simply, they snatch our eggs, hence the name. Roughly your size and shape, as I mentioned. They just happen to have scales, eyes and teeth like a snake. Nasty little things.”
Dren clasps his hands together and, as if in some sort of uncanny imitation, so does the pedipalps of his lower body. “But first things first, we should get you dry."
He walks over to the pile and start picking up some of the folded clothing items, mumbling something about sizes and temperature. He glances at you once in a while, as if using you for reference.
"These should do," he picks out a beige woolen shirt, a pair of brown leather pants and some long undergarments, and hands them to you. "I was going to use these for trading come spring, though you would probably have more use of them now."
You nod your thanks. "Is there somewhere I can go change?" you ask politely, not too keen on being exposed in front of a complete stranger, humanoid spider or not.
Dren looks at you puzzled, but only briefly. "Oh - of course. I'll give you some privacy. Actually, if you would hand me the lantern-?"
You're reluctant to part with your only source of light down here, especially considering you're not entirely trusting Dren yet.
It must have shown on your face, as he quickly adds: "You can have it back, I just want to use the already lit flame to light up more around here. It would be incredibly rude to have my guest stumbling around in the dark, after all. You can get changed while I light up some of the tunnels."
You hand it to him, and he quickly gets to work picking out more lanterns from inside some hollowed out parts of the wall that must act as a storage.
Why would he have a bunch of lanterns lying around if he doesn't need them?
Dren lights them, and you watch as he stretches himself up, and grabs onto the ceiling with his legs. In one fluid motion, he brings himself up.
Suddenly seeing him climbing around upside down causes you to take a wary step back, but he merely uses this new position to more easily attach the lit lanterns to some strings in the web covering the ceiling.
Three of them are now illuminating the room nicely.
Dren crawls over you you, still upside down, and reaches out the lantern he borrowed back to you. "I will not be illuminating everything for now. That would take hours, and far exceed my supply of lanterns," he smiles. "Keep this one in case you turn up somewhere you can't see."
You take it, quietly pondering just how big this cave system must be.
"Please make yourself comfortable. I'll return in a few minutes."
With that, Dren walks across the ceiling down one of the other hallways and out of view.
Once you're sure he's gone, you hastily shrug out of your wet clothes, shuddering a bit against the cool air as it hits your exposed skin. To your surprise, the clothes Dren has selected for you fit you like a glove. They have a pleasant earthy smell, and quickly a cozy warmth spreads through your body. You wonder why Dren would have something like this as well, seeing as he doesn't exactly require pants, nor a shirt judging from his bare torso.
You fold your own wet clothes and place them on the table, unsure what to do with your hands.
A few minutes later Dren returns, and lowers himself back on the floor at the entrance to the living room.
"That should do for now," he sighs and stretches. He looks you over. "They fit you well. Are you comfortable?"
"Much better dry," you reply. "Thanks."
Dren nods, and walks over to the pile and picks out some skins. He hands you a sheepskin.
"I - don't have chairs," he says, apologetic, and motions for you to sit.
You get settled on the ground, and Dren folds his legs in and settles across from you, leaning his torso on his pedipalps and peering at your face. The casual notion of just sitting on the floor is an odd contrast to your current level of wariness.
“I am curious to where you actually are from,” he starts. “Even with their custodian it’s odd to find a sentry roaming around at night, and you have seemingly ventured out on your own. Did something happen?”
“You mentioned that before,” you note, subtly scooting a bit back in a subconscious attempt to avoid his staring. “But I’m not sure I follow. What do you mean custodian? What’s a sentry?”
He blinks. “What’s a – hm.”
He goes eerily quiet for a moment, contemplating. “I must admit I find it somewhat hard to believe you’ve never met a drider before. How come you haven’t?”
Drider, that’s the word. Your brain must have had a field day cooking up this fever dream from somewhere in your subconscious. At least it had the decency to provide the horrifying person in front of you with manners.
His sentence catches up with you. Oh. He thinks you’re lying. That’s probably not good.
How come you’ve never seen one like him before? Well, usually the forests you’re familiar with have other more comprehensive beings that could potentially chase you through the dark.
You cough. “Well, I don’t really know how to explain it. Until I met you, I had no idea anything like you even existed. I promise, I’m as confused as you are.”
He frowns at this, concerned. “Have you been isolated somewhere?” he asks gently. “Are you running away from someone? You can tell me, I won’t make you go back.”
“What? No, no, nothing like that.”
“Then what?” he prods, lower body quietly chittering. “I think it’d be in both of our best interest if you didn’t lie to me.”
You feel a bit scrutinized, suddenly finding yourself under a weirdly gentle interrogation. The slight amount of ease you’ve felt has been efficiently herded away by the calculating expression on Dren’s face.
He’s barely done a thing, and yet you suddenly feel like you’re being measured, like your response will be a deciding factor in how your stay here will go. You wonder if you’d have time to run if he decides to not host you here anymore.
Which brings another clarity.
You can’t exactly get away from here if you had to, can you?
Dren has utilized a calm demeanor to ease your tension, provided shelter and a light in the dark to lure you in. He has managed to twist and turn you through the caving system, and now you find yourself trapped in a maze you could never find your way out of with a being who could end you on a whim.
You have no control of what happens to you right now. Nothing is holding you down, yet you still find yourself caught. It brings a bad taste in your mouth, having been manipulated so easily.
But even so, nothing of this conversation so far has shown any intend to physically harm you.
Your host just wants to be sure who you are.
Right?
To be fair, if you were in Dren’s position you would probably also have a hard time believing some random person just appeared out of thin air and start making assumptions as well. Though, having already been on the receiving end of his wrath, albeit undeserved, you’re not keen on getting there again.
But what more can you do when you’re already telling the truth?
You force yourself to look at his face. He’s watching you gather your thoughts, patient as ever.
“I just – I don’t think this is my world anymore," you start, feeling the puzzle pieces fall into place. "I know how it sounds - I was just walking home. Then the storm happened, the darkness, I couldn’t see anything. I stumbled around until I found the entrance to the cave and well – that’s it. I have no idea how I got here. I promise, this is all foreign to me.”
Dren watches you for a moment, thoughtful. You hold your breath.
“'Not your world'?” he repeats slowly, tasting the words. “Truly?”
“Not anymore,” you affirm.
There’s a heavy silence for a bit where you hold his eye.
Eventually, Dren nods. “Alright then. Blue moons, no wonder you’re so confused.”
You blink at him. Just like that? “You're taking this quite well."
"If that is your truth, then that is your truth," he shrugs.
Okay. You can't tell if that means he either still doesn't believe you but doesn't want to 'pry', or he's taking your words at face value.
Or maybe he just thinks you're insane and thus unaware you're lying. Honestly? You’ll take whatever if it means you’re not about to be lunch.
You let out a breath. "I wouldn't have believed me either. To be honest, I’m not sure I’m not just dead and this is all some sort of Limbo.”
“Hah. Well, not to worry. I’m quite sure you’re still very much alive,” Dren says, glint in his eyes. “But I’m afraid I don’t have much answers to your predicament. I’m not exactly an expert in – well. Out-of-world-things.”
“That we have in common,” you mumble.
You try and think back to what might have happened. The all-encompassing darkness did seem alive somehow. And the storm kicked up rather abruptly. But normally, you would just throw that off as you being exhausted and climate change.
You wonder how you vanishing to wherever-this-is has an effect on wherever-home-is and frown in worry. What will happen to the things you left behind? And how do you get back to them?
If you even get out of this cave again.
"You took a lot of turns down here on purpose, didn't you?" you ask. It's not judgmental, just stating a fact.
Dren smiles again, seemingly pleased you caught on. "I may have tipped things in my favor. You understand I had to make sure you weren't a threat to me. I'm now convinced you're not."
“A threat to you?" you say, incredulous. "Why would you bring me here if you didn’t think I was harmless?”
“No one’s ever harmless,” he chuckles. “Your story is hard to believe, but given your strange reaction upon seeing me, your foreign clothing, your genuine confusion – well, stranger things have happened.
“Usually, if a sentry is out alone, one of two things have happened. Either their custodian is dead, or they’re running away. One leaves them fragile, the other with immense potential danger to me. I had to be sure which you were. Just odd it turns out you are neither.”
"Huh," you say. "I think I have some terminology to catch up on to understand anything of what you just said.”
Dren laughs. “Apologies. I’ll explain what I can. Shortly put, a sentry is a being such as yourself. You only exists few and far between here. It is exceedingly rare to see one. I'll count myself lucky.”
You shake you head. “Sorry to disappoint, but I’m a human,” you tell him. “A sentry is like a position in a job.”
He shrugs. “I assume that’s your word for your kind, but you're very much the same. But I suppose you could look at it as a job. You keep watch, after all. Mostly when the custodian is asleep or otherwise incapacitated.”
“And the custodian..?”
“In return for their watchful eye, the custodian provides shelter, protection,” Dren elaborates. “Since you’re very rare, most tend to become a little overprotective. There’s a lot of competition. It’s not unheard of that one custodian will fight the other for their sentry.”
Your brow furrows. “They fight? For us? Why?”
Dren nods, and counts on his fingers as he speaks. “For one; you're capable of creating and maintaining a bond with custodians that other species simply cannot - You connect differently.
"And two, no less important, you don't hibernate. Most custodians are attacked and killed when they’re at their most vulnerable during this time,” he frowns momentarily, focusing on you. “Having a sentry to keep watch through winter is almost guaranteed survival.”
Huh.
You guess that explains Dren’s previous mistrust of your confusion if he thought you were one of those things and related to a 'custodian'. It seems there’s a very intricate balance between the two. You wonder what one of them might look like.
“But then – why would a sentry run? If they're supposed to work together?” you ask.
Dren’s eyes darken. “Not all custodians do their jobs well.” It hangs heavy that he chooses not to elaborate. “I was worried that was what had happened to you.”
“Oh. Well, no worries. I just fell out of the sky,” you jest. “Not any of the .. other business.”
He chuckles. “While that is also hardly a satisfactory situation, I am glad to hear you haven't gone through an overly aggressive custodian.”
You nod mutely. This is all a lot to take in and you get the feeling there’s way more for you to learn about this place. This dynamic seems odd at best, though what he has told you does spark some hope.
If humans and sentries are indeed the same, it must mean that there are other people like you out there. Maybe there’s a reason you’re a rarity in this world – maybe someone else got here the same way you did? Could someone else have found a way to get back?
But even if so, where would you even start looking?
“You look exhausted,” Dren notes gently, his voice bringing you out of your thoughts. “I can set up a place for you to rest? We can talk more in the morning.”
“That obvious?” you sigh. “That would be nice. Thank you.”
Dren gets to his feet and starts collecting some more furs and skins from the pile. He ventures toward one of the tunnels he vanished behind before. “This way.”
While you’re hesitant to traverse even more of the huge labyrinth that makes up Dren's home, thankfully he doesn’t lead you far from the ‘living room’. The (now lit) tunnel takes an easy right, and opens into a medium sized room with different sized pockets dug out of the earth.
Dren carefully deposits his pile of soft items into one of them – thankfully one close to the ground, you note – neatly putting things in place. He turns to you.
“I hope this is – adequate, for now,” he fidgets, “I don’t have things your kind usually use.”
“At this point I could sleep on a boulder if I had to,” you joke, and peer inside the makeshift nest of furs he’s made for you. It looks cozy enough, for a literal hole in the ground. “I’ll be fine.”
Dren nods, but keeps looking at you for a moment. “If you need water, just exit again and turn left instead. You’ll come across a stream,” he says, listing off things like you would to politely inform a house-guest back home and cover their basic needs. He turns, and heads toward the exit. “I’ll let you rest.”
“Dren?” you call just as he’s about to vanish.
He looks over.
“I know we had a – rocky start,” you snort, “but, I’m grateful for all this. Thanks for letting me crash.”
He frowns in worry. “Crash?”
“Oh – uh. Stay. Thanks for letting me stay.”
His look softens as he smiles. “Sleep well.”
His footsteps recede as he vanishes down the tunnel.
You try and settle in under the unfamiliar covers. The furs have a quite potent musky scent to them that you'll need to get used to, though they prove quite warm and soft. They provide decent padding on the hard ground, but it's still not the most comfortable place you've settled in for some rest.
Is it okay to fall asleep here? You don't know if you can. So much have happened in such a short amount of time, and you're not sure how to exactly process everything. Some part of you is still holding out hope you'll wake up and find yourself awakening from a coma in a hospital bed.
What are you going to do if that's not the case?
You were lucky enough to at least find some shelter for now, though you still don't exactly trust your host for a multitude of reasons. Is going to sleep with him still roaming around to do whatever when you're out cold really a very safe option? For all of Dren's hospitality and his seemingly friendly disposition, you can't forget he's still made sure you can't find your way out if you so did desire. Does that make you a captive?
Maybe it does. You're honestly not sure.
Fact still remains, you're exhausted. What's done is done. You're better of figuring all of this out with a clear head.
You reach over and turn off the lantern. The darkness envelopes you immediately, and the first thing to notice here is just how silent the dark is. Your previous residence has accustomed you to the occasional sound of muffled voices from your neighbors, the passing of a car outside your window, the faint creaking of the walls settling.
Other than an occasional drip from condensed water or the gentle hum of the cavern echo, there's no sound down here at all. Without the lanterns on it's like being in a sensory deprivation chamber. There's just nothing. How Dren hasn't gone completely mad down here seemingly alone in the dark is beyond you, but maybe that's a spider thing.
You clutch the furs covering you a bit tighter and curl up. It's going to be a long night.
#colderwriting#monster x reader#drider#gn reader#monster lover#monster boyfriend#drider x reader#exophilia#fun fact Dren's name was initially just a placeholder until I figured out something else#and now nothing else I try suits him
133 notes
·
View notes
Text
Sunny's unnofficial rendering tutorial because idk why but people say they like how I color
Hey kid. So you got your drawing, right? And you have your flat colors, now you gotta render 'em, right? Then you find that BAM, you have no idea how to make it look cool? Neither do I! But here's what I do (I've been told that my coloring is cool)
1. Place your flat colors
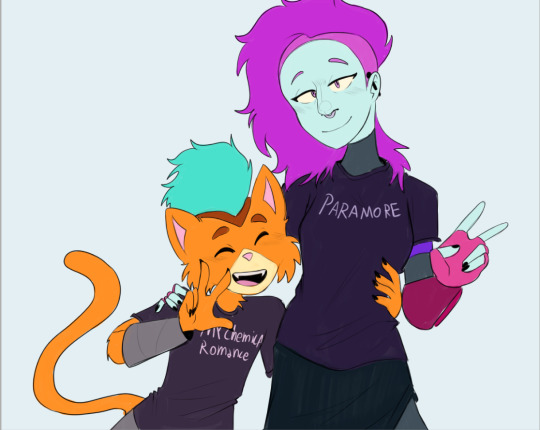
Imagine these are your flats. A few things: you want your base colors to be all around the same hue, that way they look better together. See how all the blacks, greys and whites are purple/blue-ish? That's on purpose babey! But how do you acheive this? idfk. jk, you have to stay on one (or two) areas of a hue wheel.
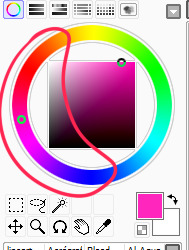
This way, all the colors look like, nicer around each other. You're not FORBIDDEN from going outside an area you picked, but you should still try to make sure everything is in the same hue so you have to do less overlay layers later.
(FYI: I do this because it saves me time on rendering. I don't think it's mandatory, there's no rules to art. Go crazy!)
2. Shading
I think shading makes or breaks a drawing. Personally I don't have a lot of rules about it, but there are still tips I can give.
So here's what you gonna do. You're gonna pick a color that's somewhere on the opposite of your main hue, alright? Here, my hue is mostly cold colors, so I'm going to pick a warm tone. You're gonna make sure it's dark enough so it's like, a shade, but not enough so it becomes black when you set the shading layer to multiply.
(Note: I never get this right on the first try)
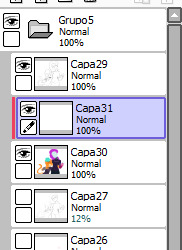
(Another note: as you can see, I have the entire drawing, including the lines, inside a group. Don't worry! I'll explain this later)
Personally I like to use a paintbrush-esque brush because I like the look of it being hand-painted that it gives my art. Mine is the default paint tool sai brush, but I'll leave the settings down here just in case.
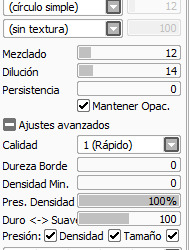
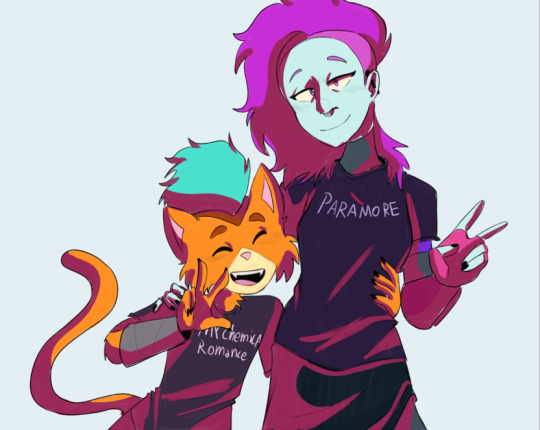
I don't. Really know how to explain the way I shade, I mostly follow the lines I already placed in the lineart phase, and give them depth. I guess my biggest tip would be to FOLLOW THE CLOTHING FOLDS!!!

Idk how to explain this. But people always tell me that they like how I shade the clothes, it's because I follow the fold lines I place on the lineart phase! Not only does this give the clothes depth, it also makes shading a lot easier. Follow your lineart, idk what else to tell ya.
Now you're gonna set the layer to multiply...
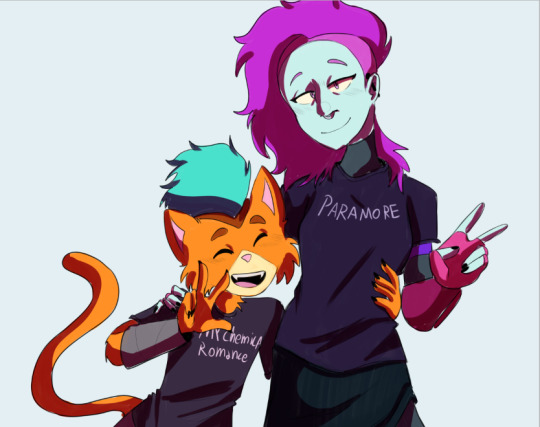
And lower the opacity as much as you want until it looks good. No real rules to this, it's kind of depending on the vibe you want your piece to have.

Now, and stay with me here, grab a blending tool, okay? This is the one I use, I have a textured version for when I'm feeling brave, and a regular, flat version (the one I use the most) Here I'll use the flat version.
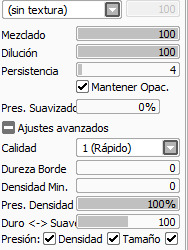
And. Stay with me here. I want you to blend the FUCK out of this. Just absolutely destroy those borders. Okay? Trust me. If it looks messy you're doing it right. You're gonna want to follow the shape of the shadows tho, this way you don't lose the shape of the objects you're shading.
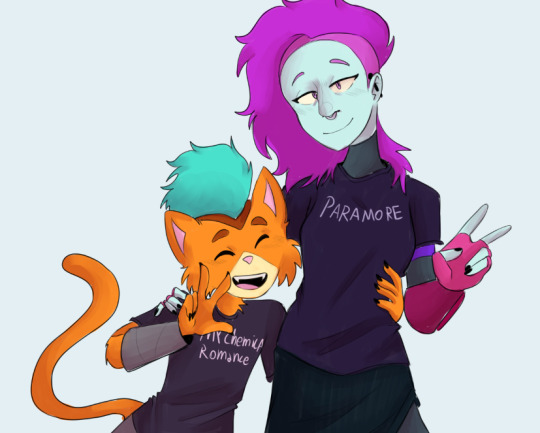
Woah! Suddenly everything has depth! Let me go back to the clothing folds, because holy shit, the clothing folds.
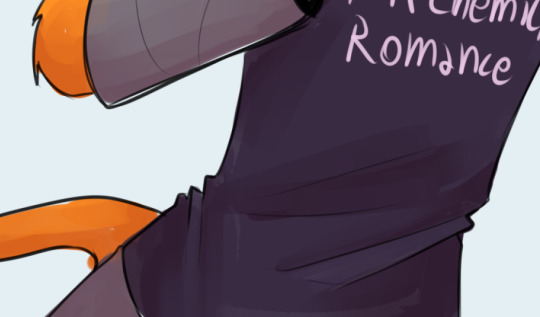
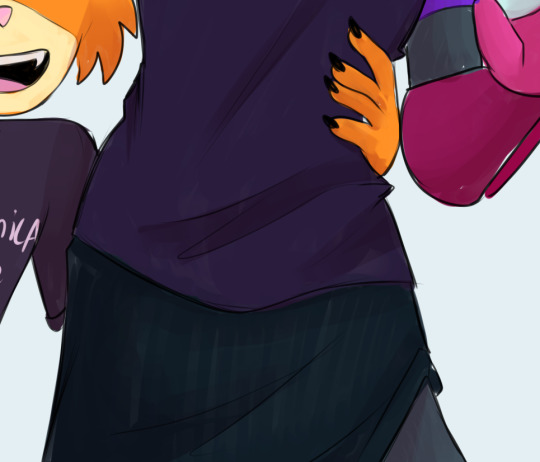
See how I'm adding depth to the shadows I placed by kinda. Following the line I drew and blending the outside? Idk how to explain this. You blend whatever isn't touching the line, okay? Trust me.
3. Lighting
Ok. I'm holding your hand gently. You have to do lighting on your art, okay? You have to. It adds depth to the shapes and also is sososoososo easy. Here's how. It's so easy.
Grab your airbrush tool. Yes, that one. Hear me out okay?
Pick a light, warm color between yellow and orange.
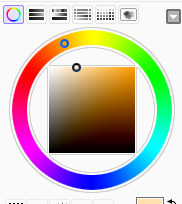
Stay with me. Make a new layer, set it to whatever lighting mode you prefer. I use luminosity because I live dangerously.
Now.
Airbrush everything that the shadows aren't touching. Yes. I'm serious.
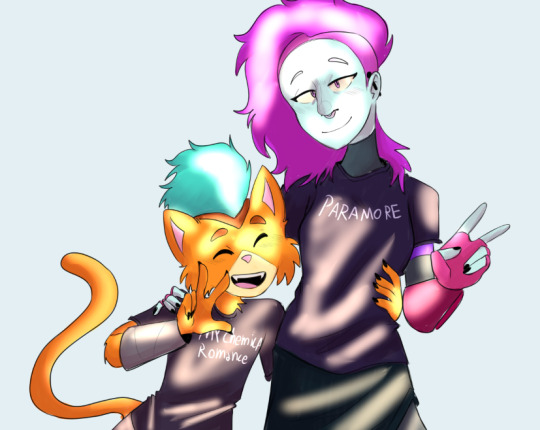
It's gonna look ugly as shit. DON'T BE ALARMED. This is part of the process. I want you to take the blur tool. And blur the ever loving fuck out of this. Just go fucking ham.
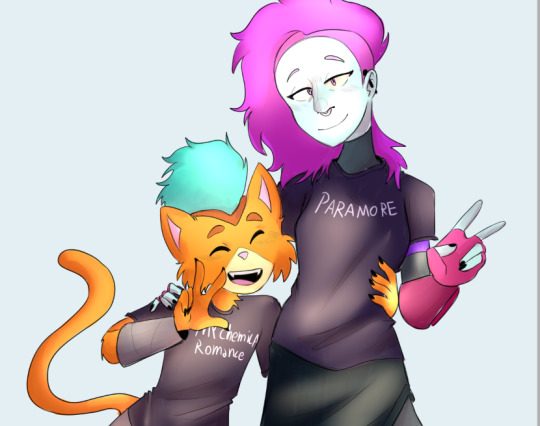
Good. You're doing so well. You're being so brave. Now lower the opacity as much as you want, until you like the way it looks.
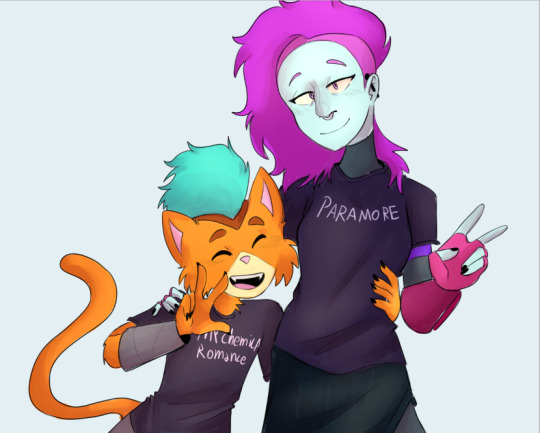
Like so. I also like to add a few brush strokes and blend them on an up-and-down motion for the hair and certain details, but this is optional. Same as before, you're gonna take a (slightly warmer, but still bright color) and make a new layer on luminosity mode.
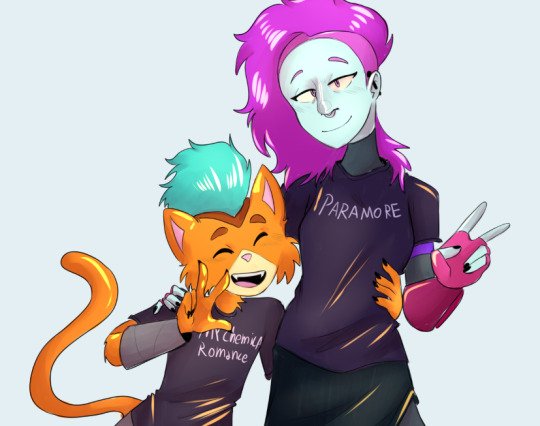
Take the blending tool and make it small, only slightly bigger than the brush strokes, and blend these lines until they look nice. Adjust the opacity, and voila!

Now, I could stop here. But I'm extra so I keep going.
4. The pizzazz
AKA, "Ah fuck the colors don't look the way I wanted them to!"
Do not worry! I have a solution that's almost never failed me.
Overlays. Just a whole fuckton of them. I don't really have a method to this, I just kinda try colors and layer modes until something looks good.
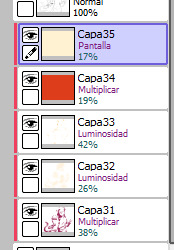
For this one, I felt like I wanted the colors to be warmer, so I picked a warm color and overlayed it on multiply. Then, I noticed that the darker colors came out darker than planned, and you couldn't really tell them apart, so I picked a light warm color and overlayed it on screen.
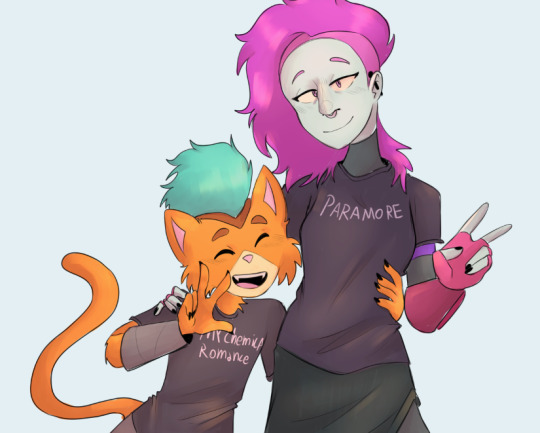
Voila! We're not done! There's one more thing I like to do, and here's where the layer folder comes in!
Remember how I said I keep everything, including the lines in a folder? This is why!
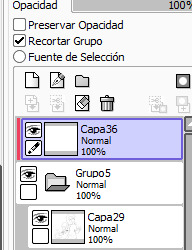
Make a layer that's on top of everything, like this. Pick whatever color you want, make sure it's bright. (Personally I like using pink). Take the airbrush tool again and airbrush whatever edges you want to give a little more pizzazz to.
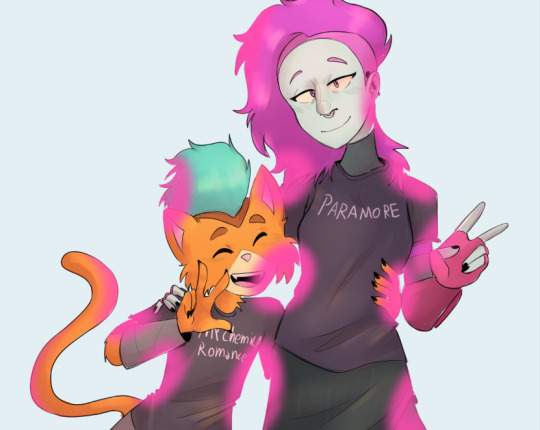
Blur it as much as you'd like...
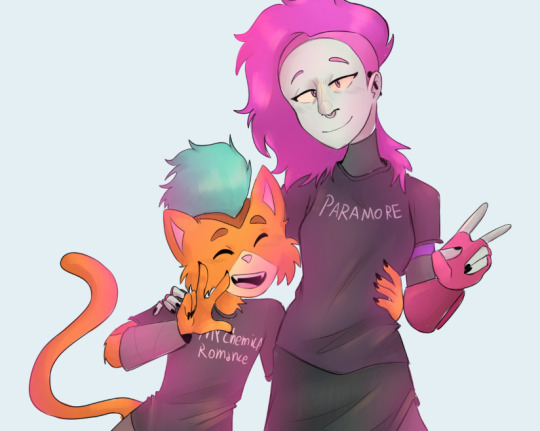
And adjust the opacity and layer mode however you like!
5. And done!
Sometimes I add white highlights. Sometimes I add more shading, or more lighting. It depends! But this is the method I use in a nutshell.
Hope you enjoyed it, or at the very least realized idk what the fuck I'm doing!
21 notes
·
View notes
Text
SSR Jade Leech Broom Birthday Personal Story: Part 3
"Happy Birthday"
(Part 1) (Part 2) Part 3
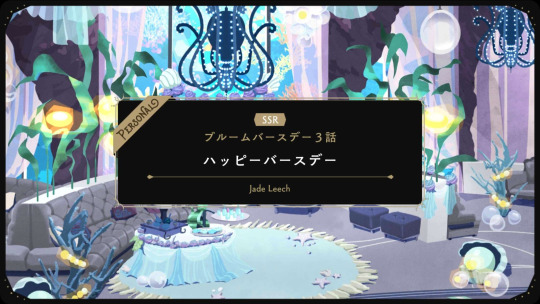
[Octavinelle Dorm – Birthday Party Venue]
Kalim: Oh, the next one's the last question. Okay, I'll finish this strong…
Kalim: “How do you spend your days off?”
Jade: My days off, hm… Well, the way I spend it may differ depending on the day, so I'm not sure what exactly I should start with.
Kalim: Are you really always doing something different?
Jade: Why, yes. There are so many things here on land that captures my attention… There's not enough time in the world to experience everything.
Kalim: Cool, so, what did you do during your last day off?
Jade: During the most recent weekend… Oh yes, I blended some tea.
Kalim: Oh! That's neat, I do that sometimes, too. It's pretty fun!
Jade: Indeed. Even if I were to blend the same ingredients, by changing the quantity of the ingredients, the aroma, flavor, and color can differ when pouring the tea…
Jade: Oftentimes the result is not what I was expecting. I find that blending tea leaves is rather profound.
Kalim: I totally get it! Whenever I throw in the wrong amount of tea leaves, sometimes it gets really bitter, or it's not as fragrant.
Jade: Just so. Of course, I do find it entertaining that it doesn't necessarily come out as I was hoping.
Kalim: What kind of tea leaves do you use for your blends?
Jade: I don't particularly care as to where or when they were harvested, or even the grade of the leaves. The adventure itself is the key to success, I believe.
Jade: I've used some unusual flora that I've collected during my Mountain Lover's Club activities before, as well.
Jade: Even those flora that are considered weeds can be used as ingredients once dried and roasted.
Kalim: Eh, you use weeds!?
Jade: Fufu, surprising, isn't it? Moreover, I've found that the same weeds can have different flavors depending on where they were harvested.
Jade: Only by preparing my own ingredients am I able to enjoy such subtle differences.
Kalim: Woow, that sounds fun! Maybe next time I'll start with collecting the ingredients, too.
Jade: Yes, please do so. When it comes to flora available on campus, I would recommend trying thyme or cleavers.
Jade: Recently, just those flavors haven't been enough for me, so I've been cultivating my own plants for my tea.
Jade: The flowers I collected a few days ago looks as though it will bloom soon, so I am hoping to add them for fragrance.
Kalim: Wow, you go that far!? That's amazing, your tea blends are really intense.
Jade: Well, it does seem like once I gain an interest in something, I am the type to pursue it until the very end.
Jade: Ah, yes, and once I concoct a blend of leaves that I am satisfied with, I plan on making it available at the Mostro Lounge.
Jade: I would love it if you would come and drink some when that time comes, Kalim-san.

Kalim: I feel like I learned a ton about you today. Thanks for talking to me about everything!
Jade: Of course, thanks to you, I was able to have such an enjoyable time.
Jade: After the interview, I am to fly on the birthday road, yes?
Kalim: Yeah! Here you go, here's the broom that's been prepped for you.
Kalim: It looks so fabulous with all those blue and white flowers on the end of the broom. It suits you!
Jade: Fufufu, how nice of you to say.
Kalim: 'Kay, you gotta take this broom and go nyooom in front of everyone else! Time to get your celebration on!
Jade: Yes. I shall "go nyooom" and accept everyone's warmest sentiments.
Jade: I cannot say I would like to fly in front of so many people, but… I shall do my proper duty as the birthday boy.
(Part 1) (Part 2) Part 3
#twisted wonderland#twst#jade leech#kalim al-asim#twst jade#twst kalim#twst translation#twst birthday
101 notes
·
View notes
Last Seen Blogs

beezycinco
Your Friendly Neighborhood Deadpool

oredhobbit
Red Hobbit

ossielv
Ossiel V

squires-finance-limited-w1
Squire’s Finance Limited
imanine
Untitled