#step by step
Explore tagged Tumblr posts
Visit Tumblr Blog
Explore Tumblr blogs with no restrictions, modern design and the best experience.
Last Seen Tumblr Blogs


Fun Fact
69% of Tumblr users are millennials.
Text


I really love Gravity Falls and time to time do some stuff :3
82K notes
·
View notes
Text
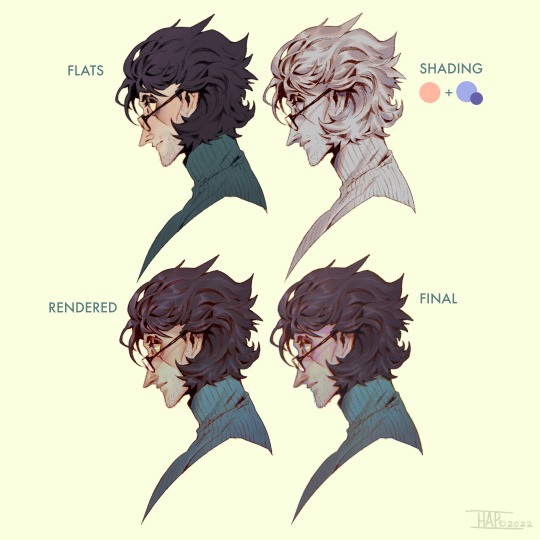
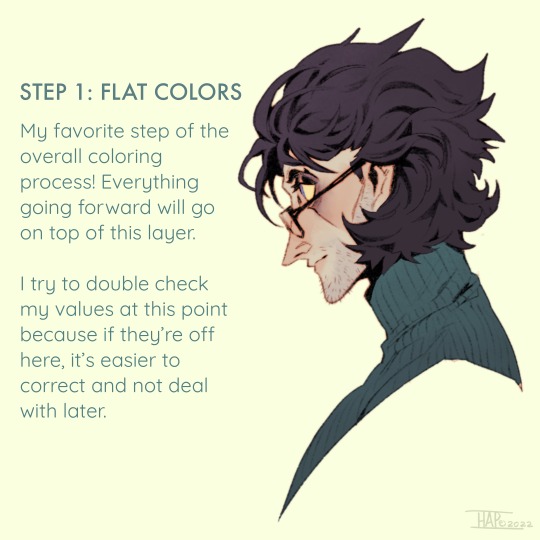
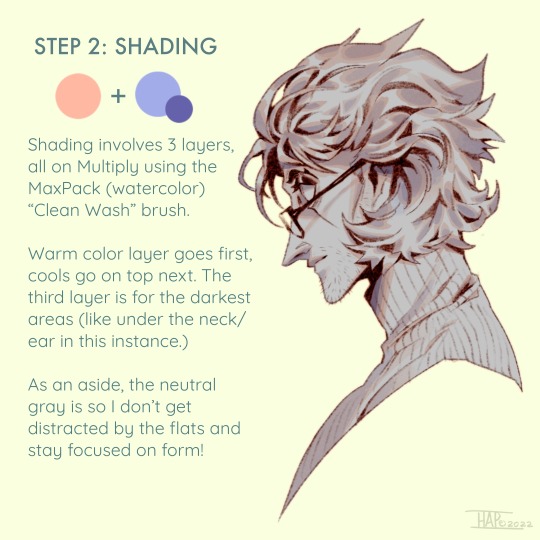
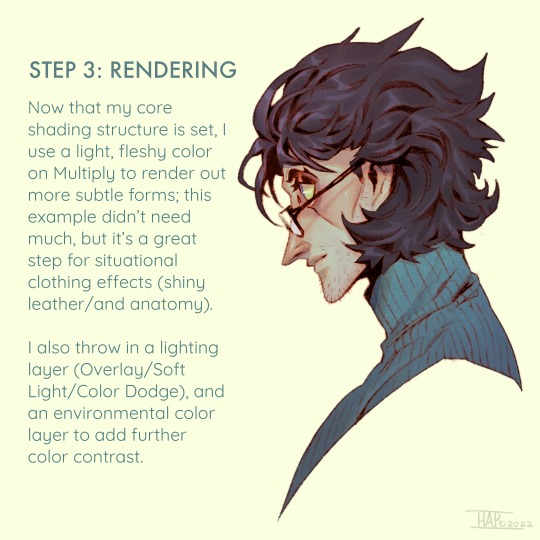
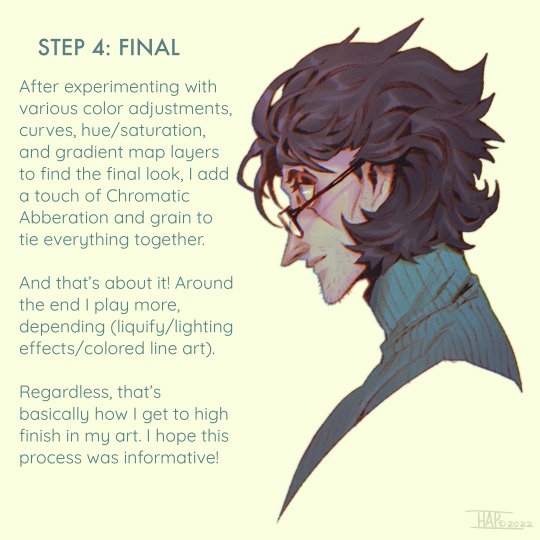
Rendering step-by-step (2022)
#kodasea#own art#2022 art#digital artwork#procreate art#art#artists on tumblr#art tutorial#step by step#shading tutorial#rendering tutorial#drawing tutorial#cold case crew#own character#cold case detective#lawrence#Still follow this basically! Although recently I've been playing with inching back the realism in the light logic/shadows a bit
4K notes
·
View notes
Text

I actually took photos of my process this time! I always look for these when i try to learn the medium, so here you go! Details on the process is in the alt text!
6K notes
·
View notes
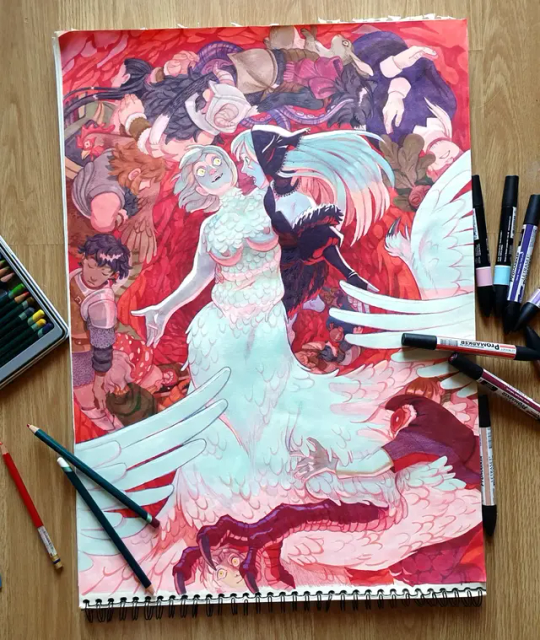
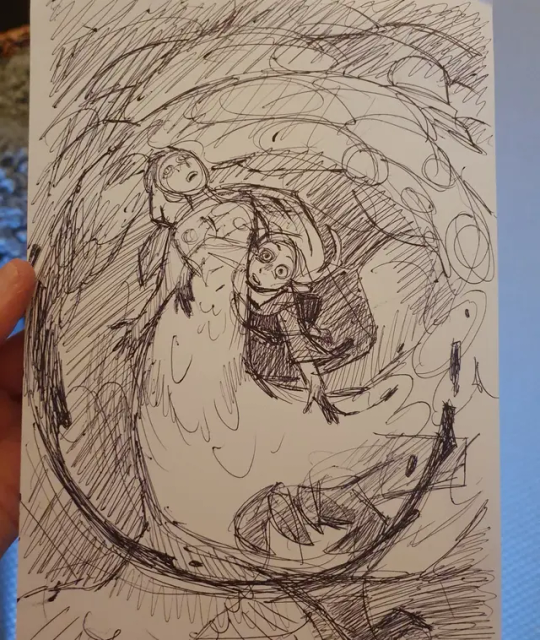
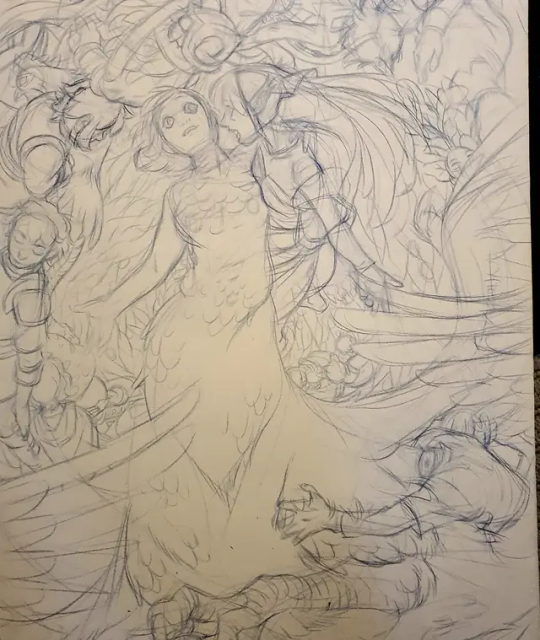
Text


the steps of my latest work I like when authors are posting their wips and as well like looking at my own, but I forget to not merge everything in one layer every time
2K notes
·
View notes
Text
Good evening friends, Thank you so much for all the love on my previous Disco Elysium animation! 🙏💖
I’ve gotten a lot of really good questions in the comments wondering “what is the process like?” “how did I made it?” and so forth.
I did the pre-production rotoscope in procreate, then exported them as PNG files for post-production edit in After Effects 🌟
I hope this video can shed some light into the multi-step approach of 2D animation.
In the meantime take care! I’ll catch you all in the next post 😄✨
#behind the scenes#2d animation#animation#rotoscope#step by step#animators on tumblr#artists on tumblr#art video#disco elysium#disco elysium fanart#harry dubois#fan illustration#digital painting
871 notes
·
View notes
Text
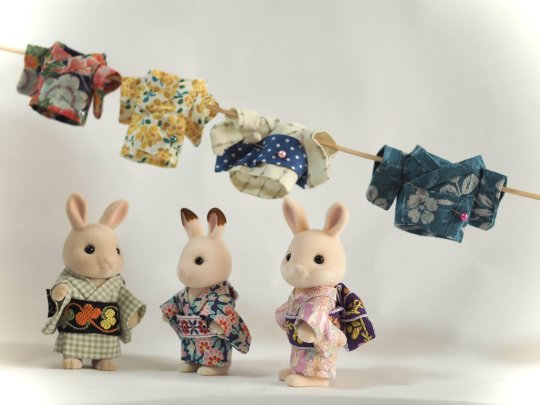
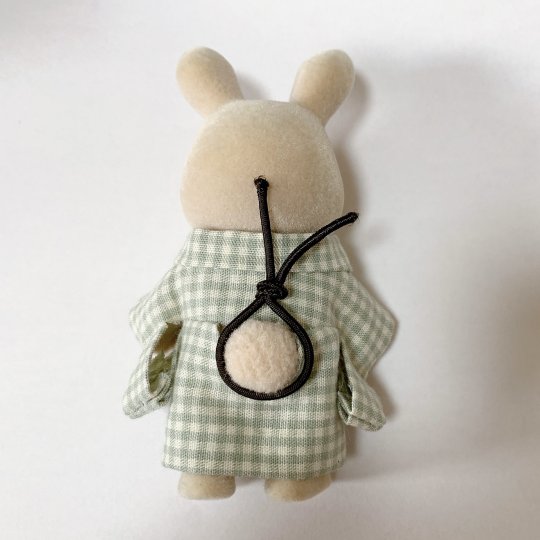
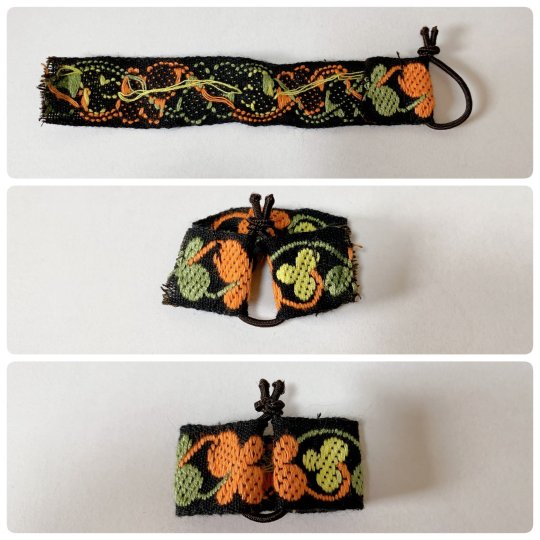
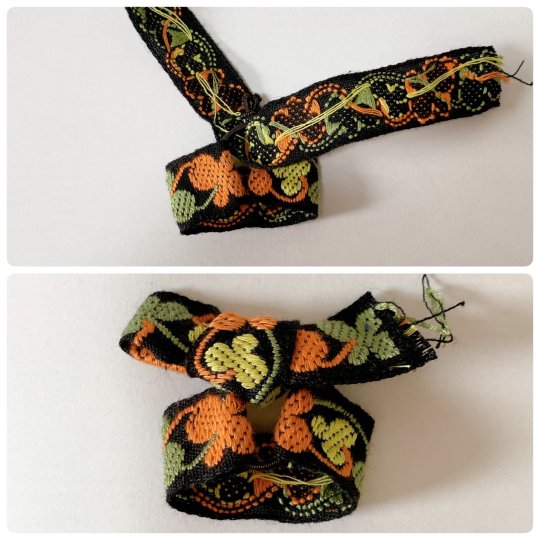
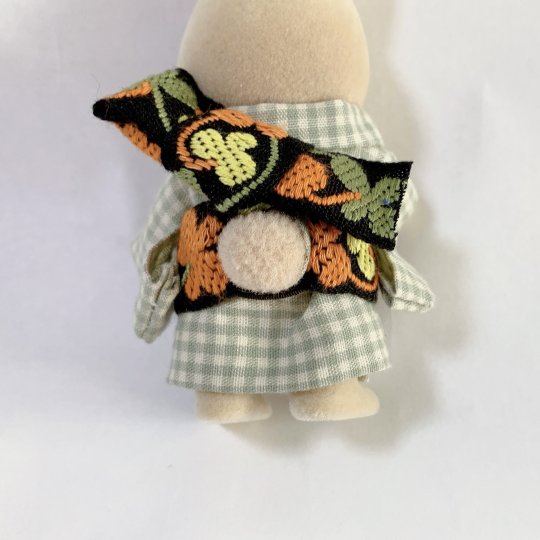
To complete past diy kimono dressing for Sylvanians Families/Calico Critters I shared before (see 1 / 2), here is a new step by step by @haluchobin to create cute easy to put on obi :
Tie a thin elastic into a loose loop around the tail
Slip both ends of a ribbon through the loop and sew into place
Tie another ribbon around the elastic covering the knot. Style it into a bow, you can try to mimic real musubi if you want
Put on the finished obi and enjoy!
#japan#art#craft#sylvanian families#doll#figurine#doll clothes#sylvanian family clothes#diy#step by step#tutorial#kimono#obi#着物#帯
1K notes
·
View notes
Text


Here are some painting tips, as promised. I hope they will help beginner artists!
Composition
Position of characters on the sheet
Choose the location of your character to be beneficial to the appearance of the art in general, you can accentuate the important places where the viewer should look first by using perspective and composition.
Tone sketch
Set the lights based on references, but adjust to your own, favourable lighting.
Contrasts come in many forms. Contrast in color (warm and cold), values (dark and light), shapes soft and hard, straight and curve, etc.
Less is better. Work on the details of the most important part of your work while cutting down everything else. If you do strong detail in one place, don't forget to add looser detail in another so the viewer's eye can rest. For example: If you are detailing a portrait, don't detail the background as much. Next to a place of high detail, there should be a place of low detail so that the picture does not look overloaded.
All in all, you can twist and break perspective, anatomy and shapes to convey your idea better. No rules are made of steel, they should support your imagination, not restrict it
Anatomy
Break down objects into simple shapes to arrange them in space.
Check references! plasticity comes first, then structure (muscles are important, but proportions and line of movement come first).
Take a photo of yourself, you will be able to understand how to perform your pose naturally. Color/light.
Light is part of the composition, put it in a way that highlights the important things. Air perspective
General rules of composition. From the general to the particular, first prepare the general scene, correctly place contrasts and accents, make everything important in contrast, and take the unimportant into an aerial perspective. (aerial perspective, or atmospheric perspective, refers to the technique of creating an illusion of depth by depicting distant objects as paler, less detailed, and usually bluer than near objects.)
When all the points are ready we can start working out the details.
When all the details are finished again it's back to the overall picture, looking at it from a distance. Check if the accents you wanted to draw attention to are working. They should have the highest contrast. Check if the contrast is not created by objects on the edges, where you don't want the viewer to pay attention. For example, if you are painting a portrait then the focus should be on the face and not on the details of the clothes or details in the background. (You can always convert the image to black and white and check the contrast)
Save the stages of your work to check against the initial idea and see what things have changed for better or worse!
#digital art#art tips#beginner artist#small artist#digital artist#art advice#art tutorial#art guide#step by step#drawing basics
695 notes
·
View notes
Text

Whelp....Egghead has been nuts.... 😶🤩
Anyway, here are the boys all nice and colored and lighted and such. And now, just to dig my own grave...I want to draw the WHOLE STRAW HAT CREW 😶🌫️
#my art#digital art#step by step#anime art#anime and manga#manga art#anime#coloring#line art#manga#op#one piece fandom#one piece#one peice fanart#opfanart#one piece art#one piece luffy#one peice sanji#one piece zoro#one piece anime#one piece manga#roronoa zoro#vinsmoke sanji#straw hat luffy#straw hat pirates#straw hat crew#monkey d. luffy#sun god nika#gear 5 luffy#gear 5th
935 notes
·
View notes
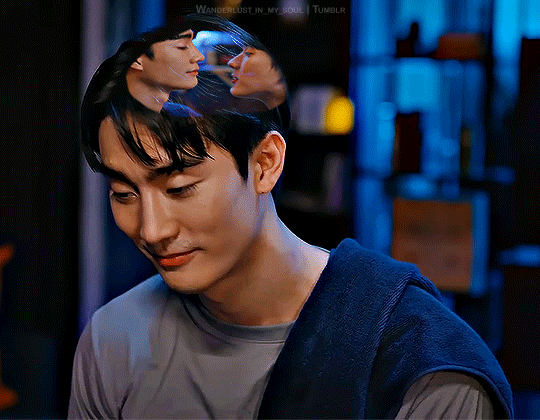
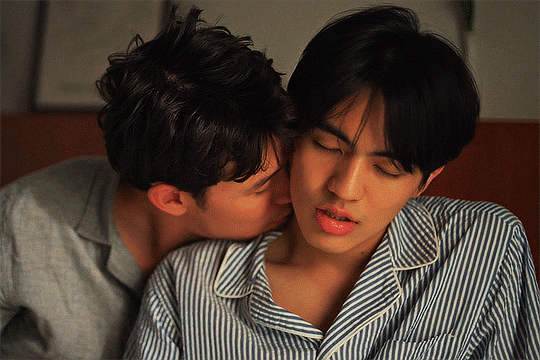
Text
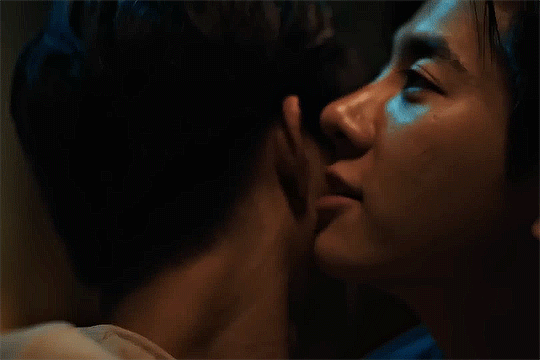
Day 27 - 15 Days Days BL Challenge
Day 27: Top 3 15 BL Kisses?
You're not the boss of me!!!! I do what I want!!!!!!
please don't hate me, I just couldn't choose only 3 kisses
... sorry #NotSorry
So here are my 15 favorite kisses in no particular order!
Since I couldn't add EVERY single GIF of how these kisses happened and progressed, you should all go check out the full posts these GIFs are from, so you can experience the kisses in their full glory ✨
These 1-3 GIFs really only show a fraction of how good these kisses are.
Brave Boys
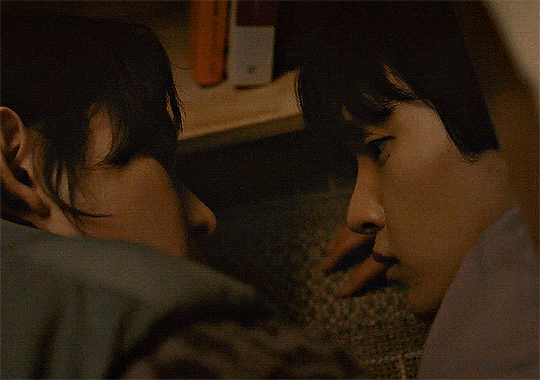
Second Chance


Time of Fever

Kinnporsche the series

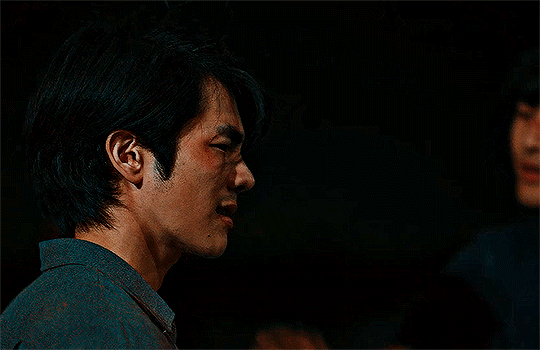
The Eclipse


Love in the Air

Choco Milk Shake

Secret Crush on You


Never Let Me Go


Love Class 2

Step by step

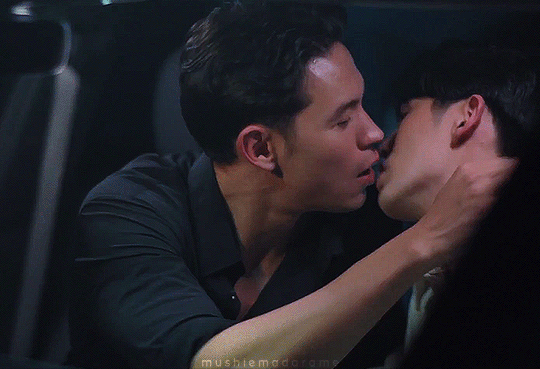
Monster Next Door
Just ignore that this is from the pilot trailer and not actually in the show.


City Boy Log

Semantic Error

I feel you linger in the air
I recommend pretty much every single of these shows so if you want to know more or just where to watch any of these, shoot me a message!
Good kisses need good chemistry so you're guaranteed that in every single one of these shows.
And finally an honorary mention: Dai and Shun from The Boyfriend, who's first kiss could have been straight out of a BL 🤯
The original challenge is here and part two here.
#blchallenge2k24#Sofs BL Challenge 2024#monster next door#city boy log#semantic error#i feel you linger in the air#step by step#step by step the series#love class 2#never let me go#never let me go the series#secret crush on you#secret crush on you the series#choco milk shake#love in the air#love in the air the series#lita#the eclipse the series#the eclipse#kinnporsche#kinnporche the series#the time of fever#second chance#second chance the series#brave boys
692 notes
·
View notes
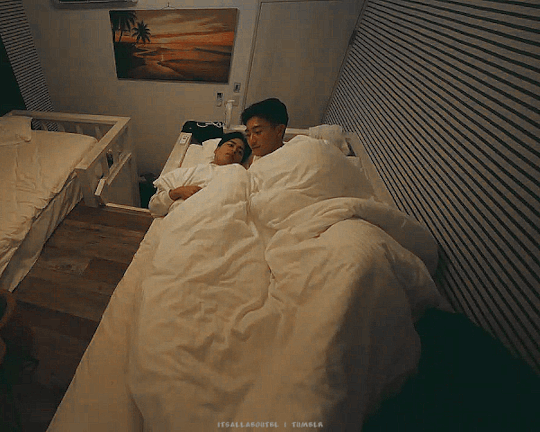
Text


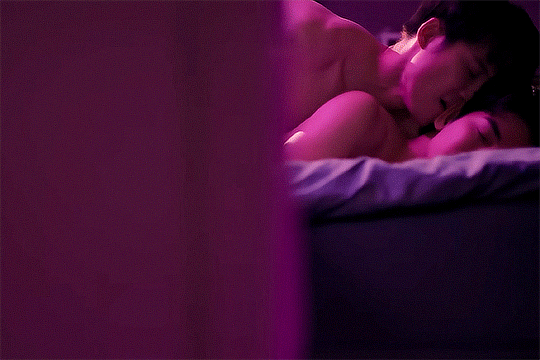
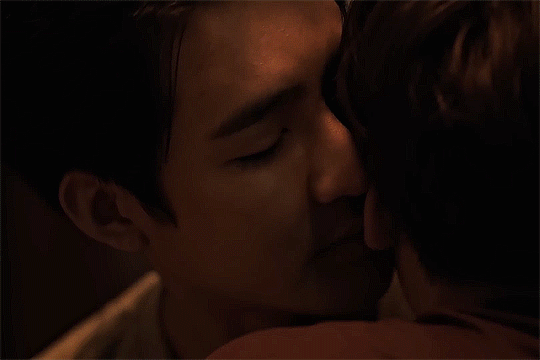
Just a little more time...
6K notes
·
View notes
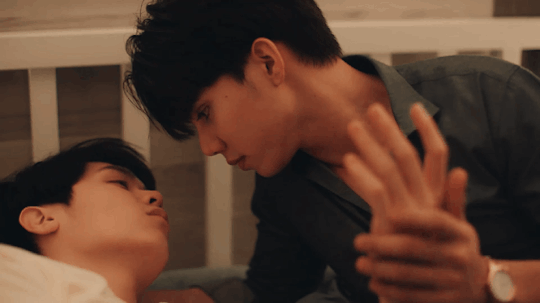
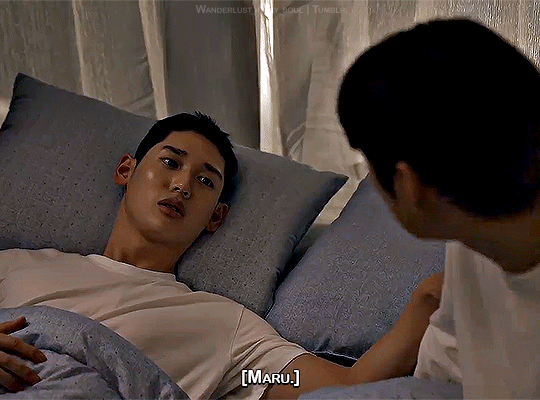
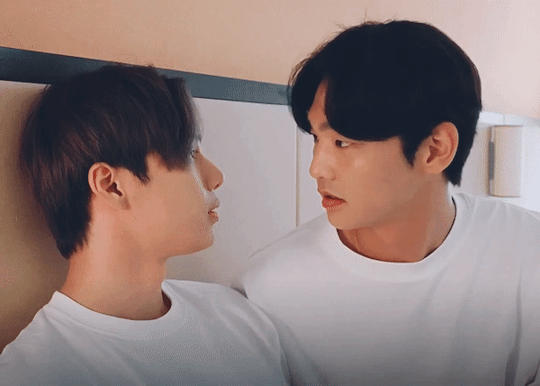
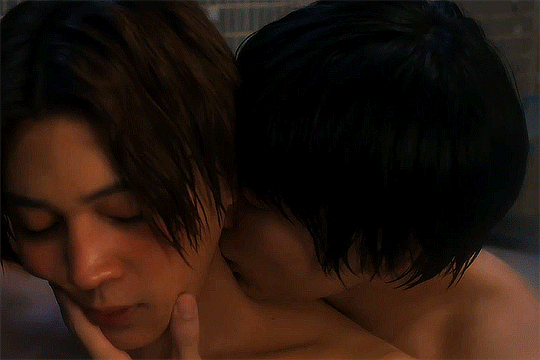
Text


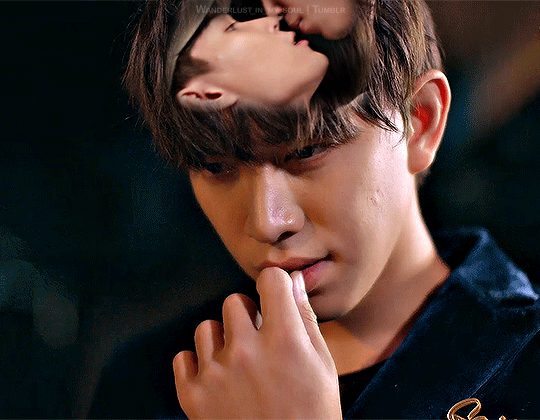


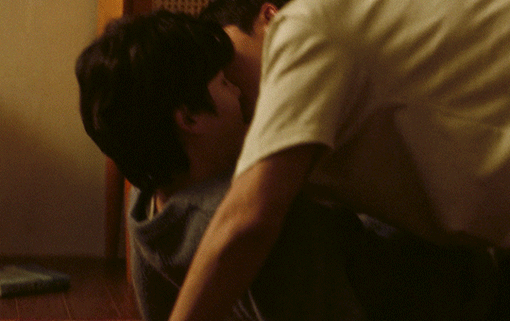
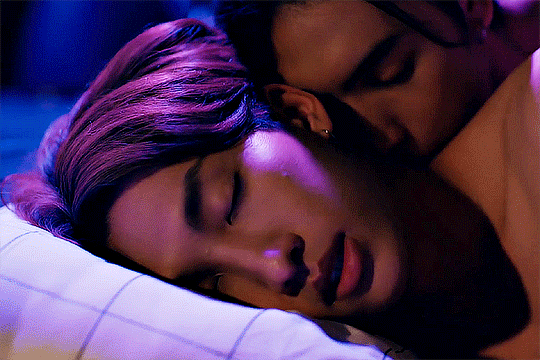
The touch of your lips still lingers upon mine. (Part 2/?)
A Boss And A Babe
Step By Step
Minato Shouji Coin Laundry Season 2
At 25:00 In Akasaka
Deep Night
Moonlight Chicken
Last Twilight
Unknown
This Love Doesn't Have Long Beans
Bad Guy My Boss
My favorite bl-tropes-collection.
#multi bl#multibl.edit#bl tropes#bl series#bl drama#myedit#yourtouchlingeronmylips#a boss and a babe#step by step#minato shouji coin laundry 2#at 25:00 in akasaka#deep night#moonlight chicken#last twilight#unknown the series#this love doesn't have long beans#bad guy my boss
411 notes
·
View notes

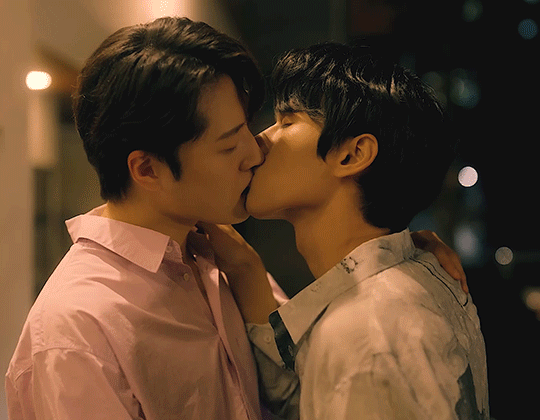
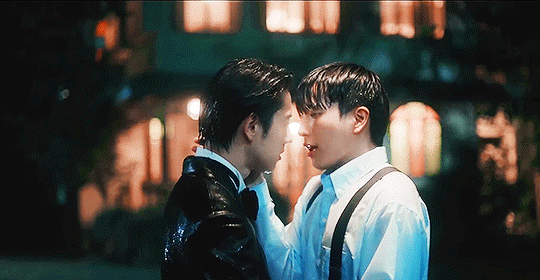
Text
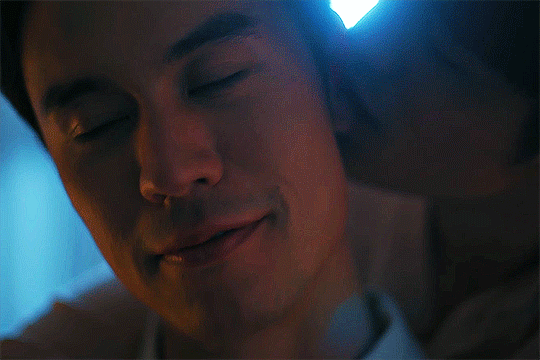
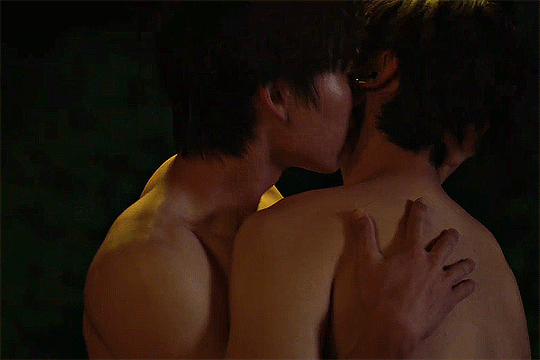
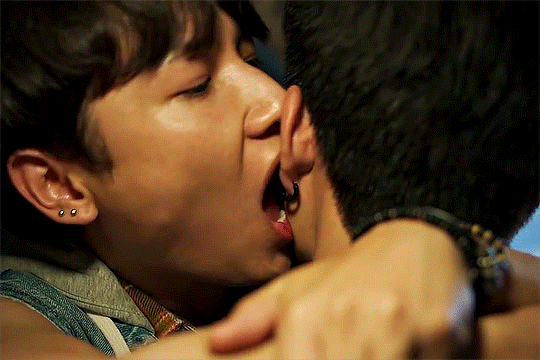
#ear (+ sometimes neck) kisses my beloved
#step by step#my beautiful man#utsukushii kare#wedding plan#not me#love in the air#the sign#moonlight chicken#parallels#raemakes#s:multi#userspicy#mjtag#userjap#user25shades#userrlaura#usersasa#userlinnea#tuserhidden#usertaeminie#tosunset#nothing like a good compilation to end the night
1K notes
·
View notes
Text
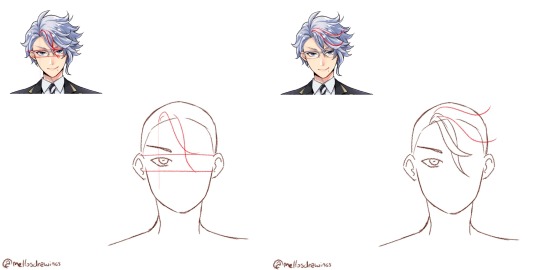
Alrighty, let's tackle the second part of this request!
Here's a tuto on how to draw the nightmare that is Azul's hair!
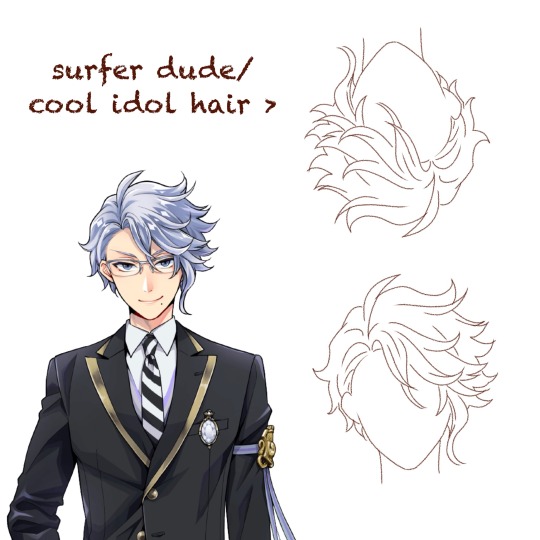
First, a few observations.
Contrary to other characters like Jamil, Riddle, or Sebek, Azul's hair doesn't immediately tell you everything about his personality. For someone as calculating and (trying to be) mature as Azul, you'd expect his hair to be slick and and each strand to be at it's proper place.
It's the contrary here. Azul has wavy, almost curly hair that is completely all over the place.
It's because that's his own struggle that is shown here. Azul has always fought against himself, being his octopus nature, his weight, or even his hair that won't stick down. That boy is just cursed to forever have something about himself that doesn't fit his aesthetic.
(Personally whenever I look at Azul upside down, I really feel like it'd be the kind of hair for a cool extroverted guy in an Idol gacha game)
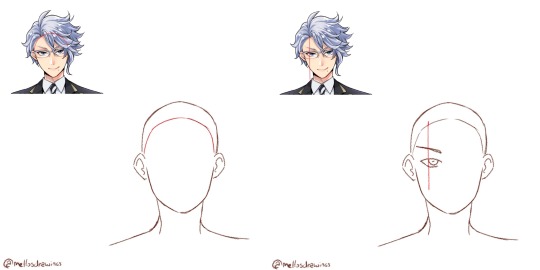
Step 1. Hairline
Azul has a simple round hairline so simply draw an arch.
Step 2. Hair root
Azul's hair all comes from a point right above the left side of his left iris, so I would suggest you draw Azul's face (and even glasses) first.
Step 3. Bangs
Azul has two strands that fall between his eyes, just a bit to the right. Start from the root point you placed earlier, and draw two wavy lines intersecting. The first will stop at the upper rim of his glasses, above his right iris area. The second will stop at the lower rim of his glasses, below his right iris area.
All of Azul's hair will be made with soft waves that fork back up, so train yourself to do that move flowingly. You're not done using it.
Step 4. Front hair 1
There are two strands that seem closer to us and frame the other bangs, so let's draw them first. In my example I drew the lower strand a bit too high, it should come right above Azul's right eye. The upper one thought will almost be horizontal. Both of those will reach the area above the right ear.
Once more, waves.
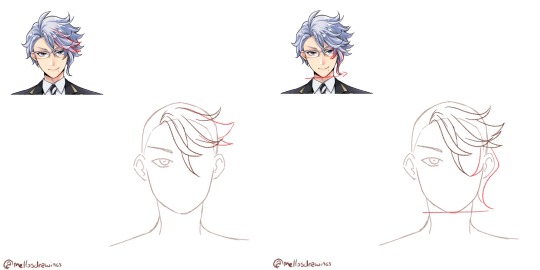
Step 5. Front hair 2
Now the two strands between the last two. They will go further than the ear.
Step 6. Side strand
Azul's tentacle-like strand. It is composed by the only strand of hair that forks towards his face, instead of outward. It goes around the eye and reaches lower than the middle strand.
The second part is the actual tentacle. It hides the ear entirely and reaches down to Azul's chin level.
Still, always a wave that forks outward.
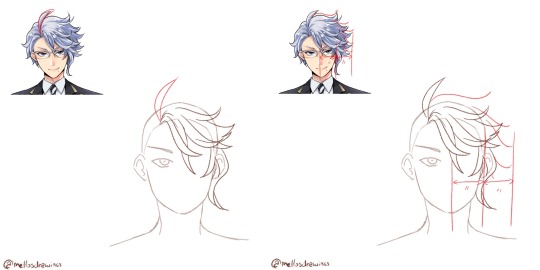
Step 7. Ahoge
Yup. "Mature" and calculating Azul has an ahoge. That might be the only part of his hair that does indeed reflect his personality. Azul can be quite immature and stupid at times. (For those who don't know, "ahoge" literally means "stupid hair" and it's usually used on stupid or immature characters)
Simply make it start at the root point. It's about the size of Azul's hairline to eyes, but globally just make it go up above where the rest of his hair would go.
Step 8. Right side
That is the part that people (even Yana if we trust the notes she made) struggle with. There is a volume here that can't be too fluffy or not big enough. It's actually just the size of half his face. Put your mark and do your best to fill it without going further.
From there, draw about 4 or 5 waves. Connecting each tip should make an arch, with the further point being the strands at Azul's eye level.
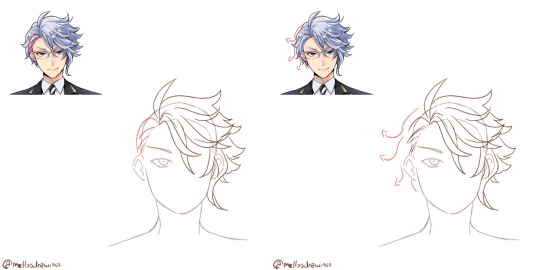
Step 9. Behind the ear
The only part of Azul's hair that is well groomed is those few strands of hair, that look like they were pushed behind his ear. This is also the only part (alongside the ahoge) that isn't made using a wave.
Step 10. Left side
And we're back to drawing waves, this time forking left. There is about 3 waves to do. These strands won't be as fluffy as the right side, sticking closer to the skull, but still add some volume. Wavy/curly hair just can't stick to the skull (I'd know it *sigh*)
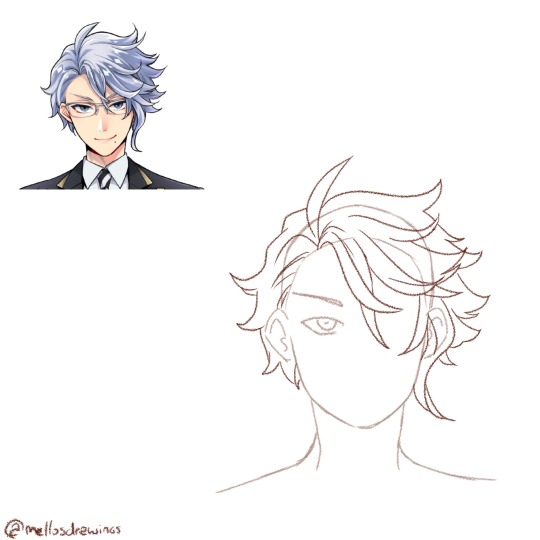
Step 11. Details
Time to check your proportions, add a few lines within the strands, add more lines at the roots to show that his hair go from here.
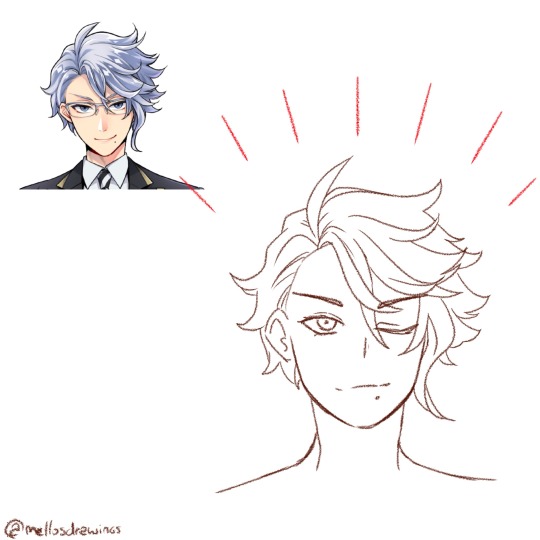
Finished!
So. Idol!Azul when? (One day. One day I'll do that Housewarden Idol AU)
(Last note: he does have an undercut. I'll forever go crazy about Azul of all people having a fuckboi (/affectionate) haircut)
(Official pic from the Magical Archives)
#this one got long#but I spent so much time dissecting Azul's chara design#have I told you dissecting and analyzing character designs wa my fav pasttime?#mello's drawings#twisted wonderland#twst#azul ashengrotto#my art#ask me anything#analysis#art tips#step by step#tutorial#tuto#drawing tutorial
391 notes
·
View notes
Text


the process is short this time, cause i deleted half of it where i started from black n white rendering to color and didnt like it still like the original sketch tho Very interested in how many people checked the song mentioned, cause I thought a lot about bingge thinking he is in love with sy but actually just trying to fill the hole in his heart that is an obsession with shen qingqiu. He thinks this time it`s different, cause he found the kind shizun TM, but it will end up the same.
385 notes
·
View notes