#sims 3 how to
Explore tagged Tumblr posts
Text


Tutorial : How to make roads with car parking space
When I first started using the create a world tool, I immediatly wanted to make roads with car parking space. The only world where I had seen these types of roads were in Boroughsburg by potato-ballad-sims. So, I searched up the internet as one would do when you don't know how to do something and nothing until I found this post by krrank on their forum. I already knew how to make roads at that time. In fact, it was only when I saw her showcase of dirt roads, that I saw how there was a way to make roads larger to then add cars parked on the side. Now, because I haven't found a proper tutorial on how to actually do that, I decided to make my own tutorial and share how I managed to do it. It's not as perfect as Boroughsburg in term of sidewalk intersections (because I'm not the best at texture editing) but enough to have the look of parked cars, which can make a town look so much more lively.
What I'm assuming before this tutorial :
You're familiar with the CAW tool
you know how to place roads
you know how to create roads using textures provided by EA or CC road textures
You know how to add custom content for CAW (only applicable if you don't own the university EP)

The downside
The only downside with these roads is that sims will walk/run through the cars when going somewhere because we're basically using the sidewalk as parking space. To balance that out, I suggest using hybrid roads in your world : normal roads with normal sidewalks and roads with parking space.
On the left we have a road with car parking space
On the right a normal road with sidewalks


Step 1 : Choosing your road textures

Example of what it should look like :

Possible question #1
" Okay but there's no sidewalk now, what do I do ? " : Simple ! Place independent sidewalks on the side. A bit like this (ignore the fact that this is not completly aligned to the grid) :


Step 2 : Placing cars on the road
I highly suggest using cars that are meant for decoration and aren't high poly. If you're using super CAW do not use the drivable cars that can be bought in game. In my case, I used the debug cars from the university EP meant for decoration and lowered them until it hid the parking curb. If you don't have the university EP, the world CC from Boroughsburg includes deco cars used for the purpose of parked deco cars !
Do not put too many cars on the roads (I only do it because I do not care since I'm making my own personal world, but if you intend to share the world you're making, limit the cars that you put on the streets)
How to hide the parking curb (for university cars) :
Lower your car's position (Y axis, green line) to : 15,4 - (Good enough height to hide the concrete curb and only hides a tiny bit of the car's wheels)

Don't forget to rotate (Y axis) the cars to the right direction. In fact, to be 100% accurate in the rotation placement of your cars, you can write the exact degree in the board that appears when you select an object. So, basically : 90 / -90 OR 180 / -180
Possible question #2
"In what direction should I rotate the cars ?" : Here's a reminder of traffic directions in game :


And that's about it. Hope this will be useful to anyone who was wondering how to make larger roads and add cars parked directly on the street :)
#ts3#sims 3#the sims 3#sims 3 tutorial#ts3 tutorial#sims 3 caw tutorial#sims 3 caw roads#sims 3 caw road tutorial#sims 3 parked cars#sims 3 cars#sims 3 how to#ts3 how to#sims 3 blog#sims 3 simblr#simblr#sims caw#ts3 caw#sims 3 create a world#ts3 create a world
300 notes
·
View notes
Text

Tutorial - Extracting the assets from Shining Nikki for conversion for Sims games (or anything, really)
Finally! In advance I'm sorry for any errors since english isn't my first language (and even writing in my actual language is difficult for me so)
And first, a shoutout to The VG Resource forums, where I found initially info about this topic 😊 I'm just compilating all the knowledge I found there + the stuff I figured out in a single text, because boy I really wanted to find a guide like that when I first thought about converting SN stuff lol (and because there's a lot of creators more seasoned than me that could do a really good job with these assets 👀)
What this tutorial will teach you:
How to find and extract meshes and textures (when there's any) for later use, and some tips about how stuff are mapped etc on Shining Nikki.
What this tutorial will not teach you:
How to fully convert these assets for something usable for any sims game (because honestly neither I know how to do that stuff properly lol). It is assumed that you already know how to do that. If you don't know but has interest in learning about CC making (specially for TS3), I'd suggest you take a look at the TS3 Tutorial Hub, the MTS tutorials and This Post by Plumdrops if you're interested in hair conversion. Also take a look on my TS3 tutorials tag, that's where I reblog tutorials that I think might be useful :)
What you'll need:
An Android emulator (I recomend Nox)
A HEX editor (I recomend HxD)
Python and This Script for mass editing
AssetStudio
A 3D Modeling Software for later use. I use Blender 2.93 for major editing, and (begrudingly) Milkshape for hair (mostly because of the extra data tool).
Download everything you don't have and install it before starting this tutorial.
Now, before we continue, a little advice:
I wrote this tutorial assuming that people who would benefit from it will not put the finished work derivative from these assets behind a paywall or in any sort of monetization. These assets belong to Paper Games. So please don't be an ass and put your Shining Nikki conversions/edits/whatever behind a paywall.
The tutorial starts after the cut (and it's a long one).
Step 1:
Launch Nox, then open Play Store and log in with a Google account (if you don't have one, create it). Now download Shining Nikki from there.
After downloading the game, launch it. It will download a part of the game files. After that, log in on the game, or create a new account in any server (the server is only important if you want to actually play the game. For extracting it doesn't really matter since the game already has the assets for the upcoming events and chapters. It also doesn't matter if you actually own an item in game, you can extract the meshes and textures even if you don't have it in game). If you're creating a new account, the game will lead you through the presentation of it etc (unfortunately there's no way to skip it).
After that, click on that little arrow button on the main screen. There, you can download the actual clothing assets. Wait for the download to finish (at the date I'm writing this tutorial, it is around 13GB). When finished, close the game (not the emulator).
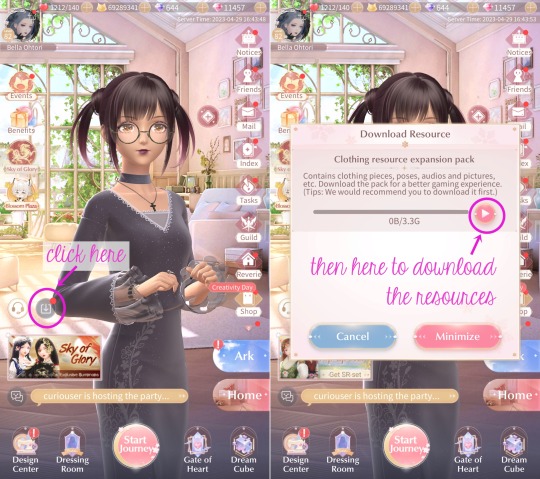
Step 2:
Now we're going to copy the assets to our computer. Click on Tools, then on Amaze File Manager. Navigate to Android > data > com.papergames.nn4.en > files > DownloadedBundle > art > character. This is the folder where (I believe) most of the assets are stored.
Now, where the stuff is located respectively:
Meshes are on the meshes > splitmeshs folder
Textures are on the textures > cloth folder
Tip: Want to really data dump everything? Just select the folders you want and copy to your PC! 😉
Click on the three dots on the side of the wished folder, then in copy. Then click on the three lines on the left upper corner to open the menu, and then click on Download. Now just pull the header of the app to show the Paste option and click on it. It might take a while to copy completely (the cloth folder might take longer since it's bigger, so be patient).
If you're confused, just follow the guide below:
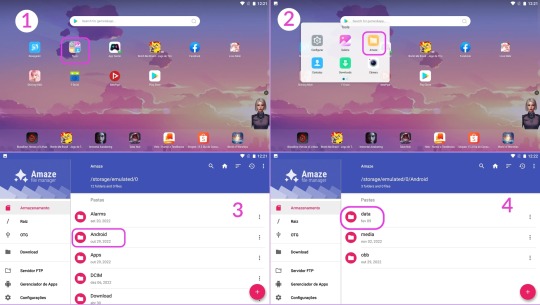
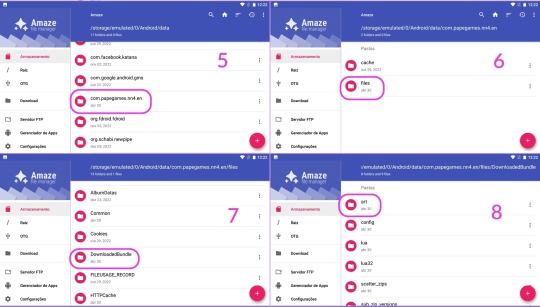
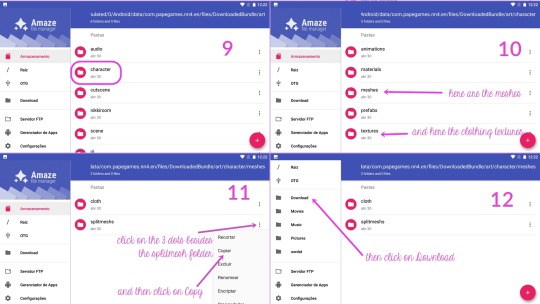

The copied folder will be located at C:\Users\{your username}\Nox_share\Download
Step 3:
Now that we got the files, we need to make them readable by AssetStudio.
For this, we need to open the desired .asset file on a hex editor, and then delete the first 8 bytes of the file, and then save.
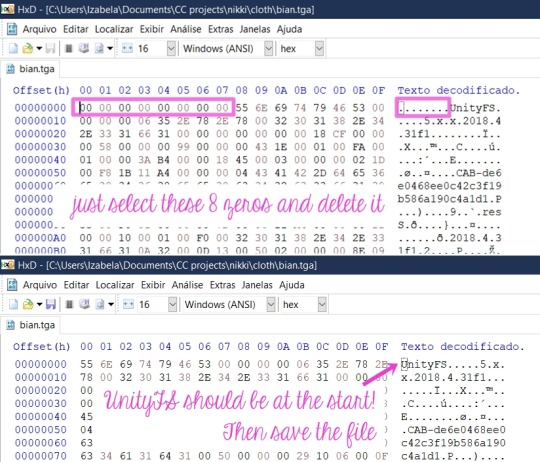
You can see it is a pain to do that manually to a lot of files right? This is why I asked my boyfriend to create a script to mass edit them. (I only manually edit when I'm grabbing the textures I want, because afaik the script won't work with .tga and the .png files, more about that forward this tutorial)
How to use the script:
Make sure Python is already installed, grab the nikki-fix-headers.py file and place it on the folder where you copied the folder from the game (mine is still the Nox_Share Download folder).
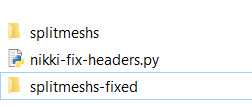
It should look like this, the meshs folder and the script.

Let's open the Command Prompt. Hit Windows + R to open the Run dialog box, then type in cmd and hit Enter.

Now follow the instructions pictured below:


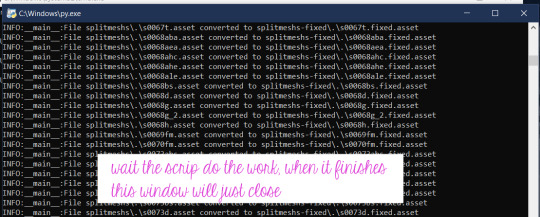
The folder with the edited files will be at the same location:
Now, we finally can open it all on AssetStudio and see whats inside 👀
Step 4:
Open AssetStudio. Now click on File > Load Folder and select the folder where your edited meshes are (mine is "splitmeshs-fixed"). Wait the program load everything. Click on Filter Type > Mesh, and the on the Asset List tab, click twice on the Name to sort everything by the right order, and now we can see the meshes!
To extract any asset, just select and right-click the desired groups, click in Export selected assets and select a folder where you wish to save it.
Stuff you need to know about the meshes:
Step 4-A: Everything is separated by groups.
Of course you'll have to export everything to have a complete piece. Only a few pieces has a single group. When exporting, you have to select every group with the same name (read below), and the result will be .obj files of each group that you have to put together in a 3D application.

Step 4-B: The names are weird.
They're a code that indicates the set, the piece, the group.
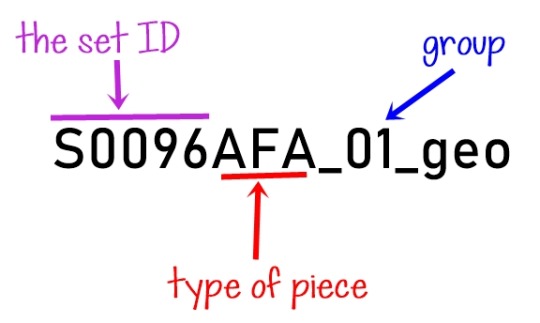
Items that doesn't belong to a set won't have the "S...something", instead they'll have another letter with numbers, but the part/piece type and group logic is the same.
As for the parts, here are the ones I figured out so far:
D = Dress
H = Hair
AEA = Earrings
ANE = Necklace
BS = Shoes
ABA = Handheld accessory
AHE and AHC = Headpieces/hats/hairpins
AFA = Face accessory (as glasses, eyepatches, masks)
(maybe I'll update here in the future with the ones I remember)
Step 4-C: The "missing pearls" issue.
Often you'll find a group that seems empty, and it has a weird name like this:

I figured out that it's referent to pearls that a piece might contain (as in a pearl necklace, or a little pearl in a earring, pearls decorating a dress, etc). The group seems empty, but when you import it to Blender, you can see that it actually has some vertices, and they're located where the aforementioned pearls would be. I think that Unity (SN engine) uses this to generate/place the pearls from a master mesh, but I honestly have no idea of how the game does that. So you'll probably have to model a sphere to place where the pearls were located, I don't know 🤷♀️ (And if you know how to turn the vertices into spheres (???) please let me know!)
Step 5:
Now that you already extracted a mesh, we're gonna extract the textures (when any). Copy the textures > cloth folder to your PC like you did with the splitmeshs folder.
Open it, and in the search box, type the name of the desired item like this. If the item has textures, it will show in the results.

Grab all the files and open them in HxD (I usually just open HxD and drag the files I want to edit there), and edit them like I teached above. Then you can open them (or load the cloth folder) on AssetStudio, and export them like you did with the meshes.
Stuff you need to know about the textures, UV map, etc:
Step 5-A: The UV mapping is a hot mess (at least for us used to how things works in sims games).
See this half edited hoodie and the UV map for a idea:
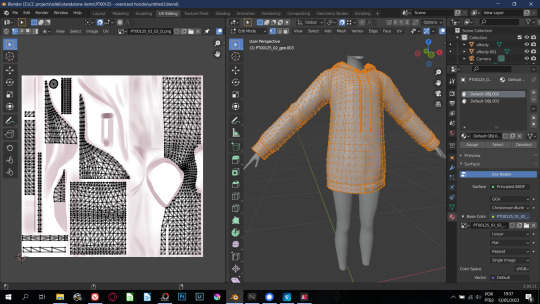
So for any Sims game, you'll have to remap everything 🙃 Also, stencil-like textures all have their own separated file.
As for hair, they all use the same texture and mapping! BUT sometimes they are arranged like this...

Here's the example of a very messed one (it even has some WTF poly). Most of them aren't that messy, but be prepared to find stuff like this.
Shining Nikki just repeat the texture so it end up covering everything, for Sims you'll need to remap, and the easiest way is by selecting "blocks" of hair strands, ticking the magnet button to make your seletion snap to what is already placed (if you have familiarity with blender, you know what I'm saying). Oh, some clothes are also mapped with the same logic.
Regarding the hair texture, I couldn't locate where they are, but here is a pack with all of them ripped and ready to use. You can also grab the textures from any SN hair I already converted :)
The only items with a fine UV map are the accessories, at least for TS3 that the accessory has a UV map independent from the body.
"But I typed the ID for the set and piece and couldn't find anything!"
A good thing to do is to search with only the set ID and edit all the files with it, because some items (especially accessories) share the same texture file. But if even then you can't find anything, it means that there's no texture for this particular item/group because Shining Nikki use material shaders* to render different materials like metal, crystal, some fancy fabrics, etc. So you'll have to bake or paint a texture for it.
*I believe that those shaders are located on the other cloth folder in the game files. This one is way bigger than the other one and once I copied it to see what it was, AssetStudio took ages to load everything, almost used all my 16GB of RAM, and then there was only code that the illiterate me didn't know what it was 🤷♀️

So that was it! I hope I explained everything, although it is a little confusing.
If you have any questions, you can comment on this post or send me a PM!
#sims 3 tutorial#converting stuff for sims#honestly idk what else to tag#reblog so your fave cc creator sees this!#sims 3 how to#sims 3 cas tutorial#sims 3 clothing tutorial#sims 3 hair tutorial
31 notes
·
View notes
Text
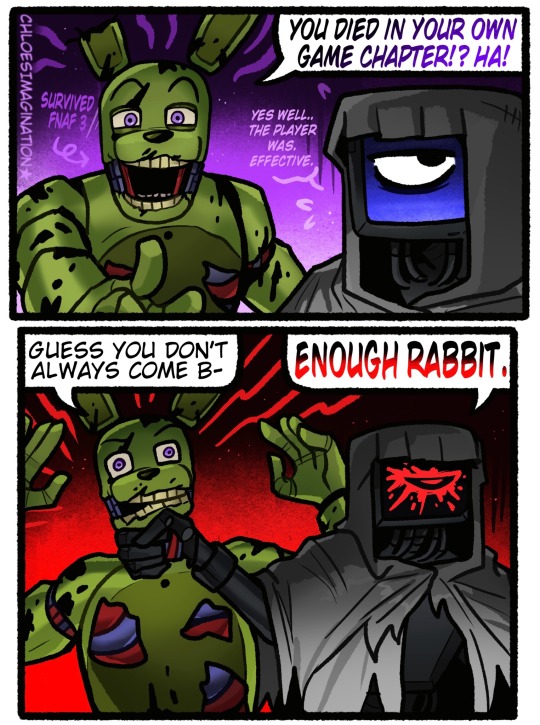
Poppy playtime should have more Harley Sawyer ngl
#myart#chloesimagination#comic#fnaf#five nights at freddy's#fnaf fanart#springtrap#william afton#harley sawyer#the doctor#SawTrap#fnaf 3#poppy playtime chapter 4#the doctor ngl desvered to live past his chapter#or at least be introduced before it#cause he’s genuinely such an interesting aspect it’s a shame we didn’t get more of him#poppy’s writing habit of killing off all the characters they introduce is such a shame#you just know William would brag so bad how long he was able to survive#BAHAH LIKE HES the guy who always come back#but he did live through FNAF 3#he got got in pizza sim then sent to super hell BUT DETAILS#I like to think the doctors lil screen changes colours based on their emotion#so will pissing him off LMAOO
5K notes
·
View notes
Text
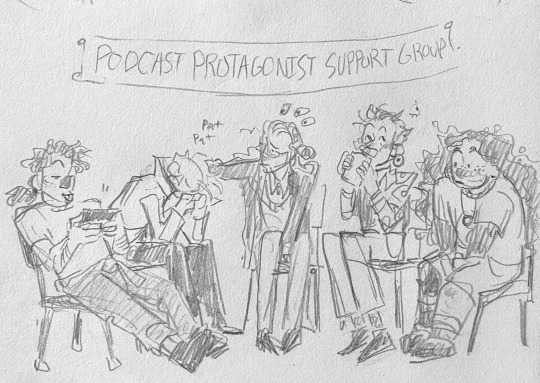
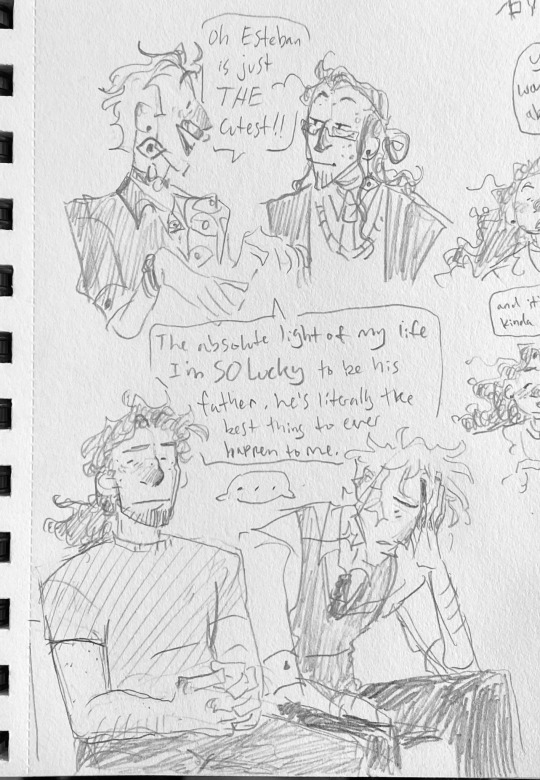
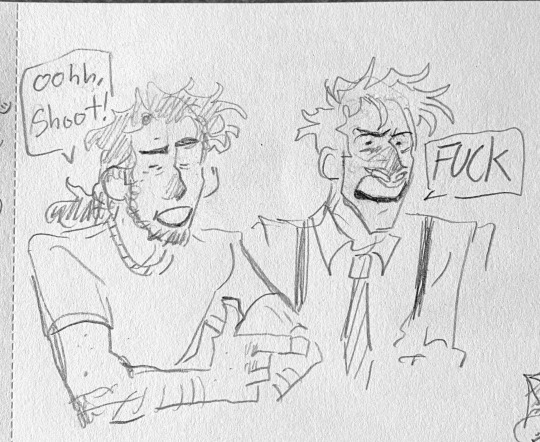
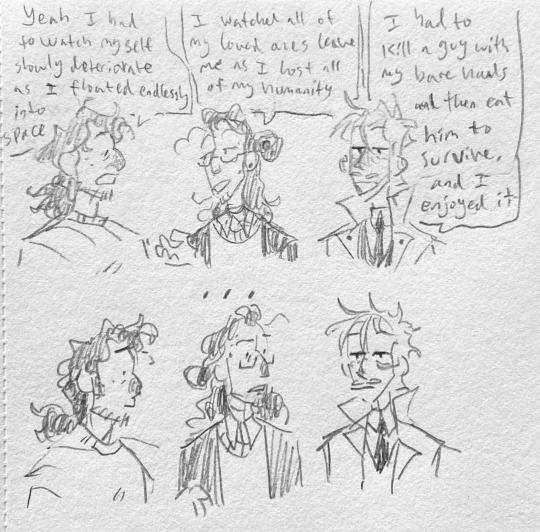
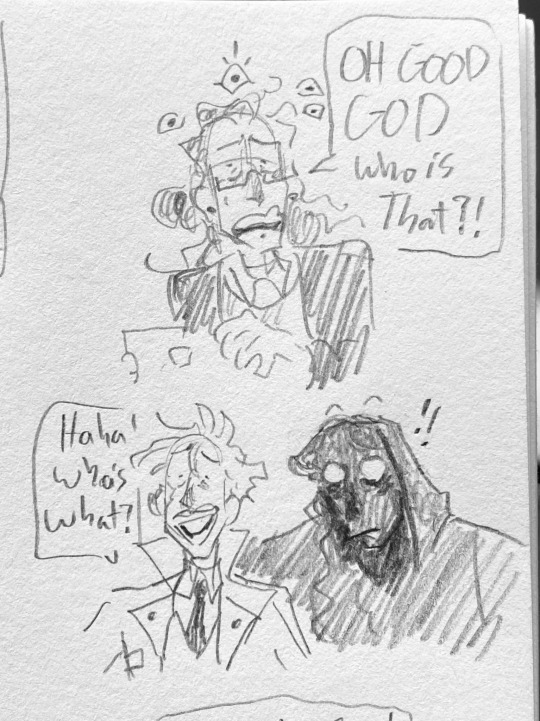
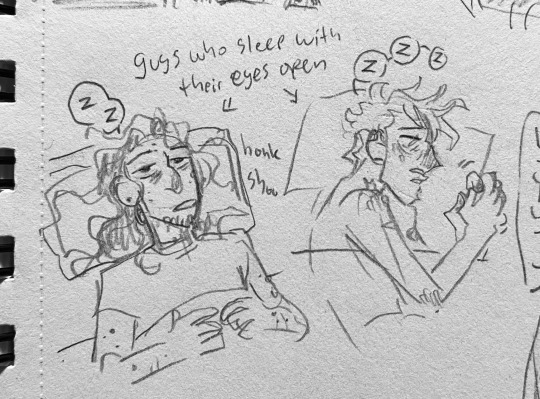
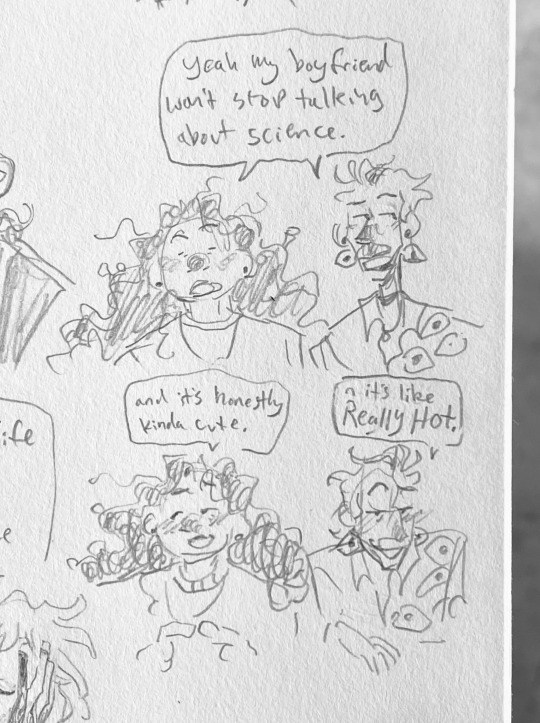
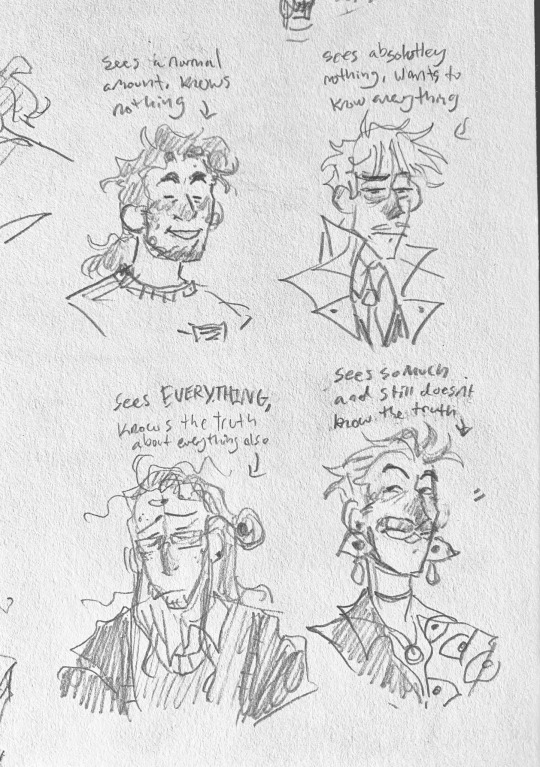
put all the podcast guys in a room together for group therapy
#pic 2 Cecil how about we talk about something else for a bit#also pic 3 is the whiplash of how freely the malevolent characters can curse compared to other podcasts lmaooo#artists on tumblr#wolf 359#w359#doug eiffel#malevolent#malevolent podcast#arthur lester#john doe#the magnus archives#tma#jon sims#jonathan sims#welcome to night vale#wtnv#cecil palmer#camp here and there#podcast protagonist support group#sydney sargent#chnt
9K notes
·
View notes
Text

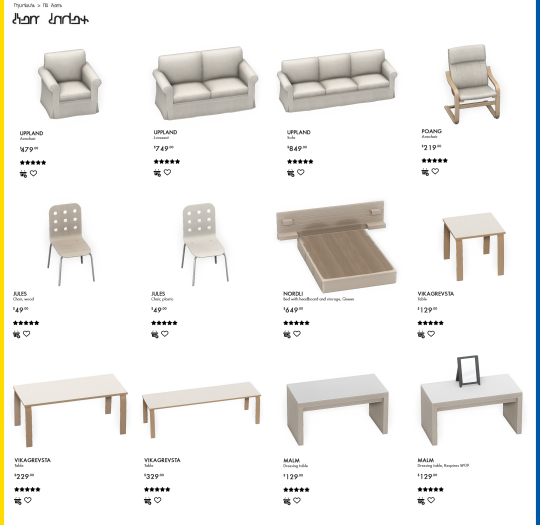

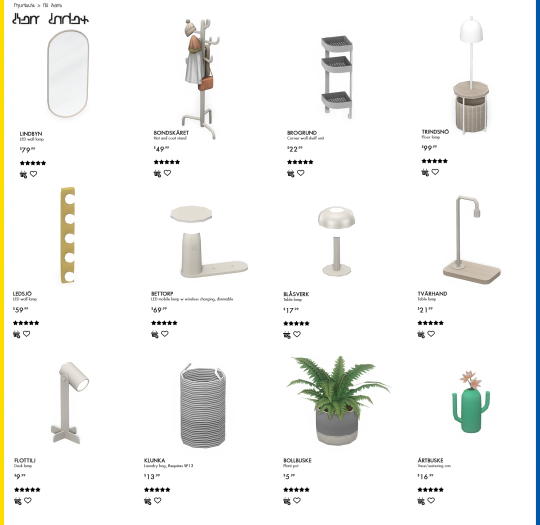
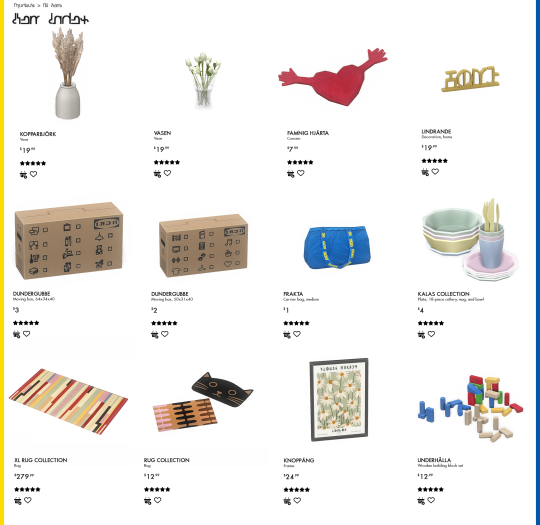
i'm a huge fan of simple yet stylish furniture and ikea does it for me every time! this collection is based on a few items i've added to my cart (and never purchased) over the years lmao i hope you like it! 💛
all items are base game compatible (unless stated otherwise!)
this collection includes 51 decor and functional buy items!
uppland armchair - 19 swatches
uppland loveseat - 19 swatches
uppland sofa - 19 swatches
poang armchair - 19 swatches
jules dining chair (wooden) - 11 wood swatches
jules dining chair (plastic) - 19 swatches
nordli bedframe - 11 wood swatches + black & white
vikagrevsta dining table (1x1) - 19 swatches
vikagrevsta dining table (2x1) - 19 swatches
vikagrevsta dining table (3x1) - 19 swatches
malm dressing table - 11 wood swatches + black & white
malm dressing table (with mirror) - requires sp09 vintage glamour, 11 wood swatches + black & white
malm dresser - 11 wood swatches + black & white
lack side table - 11 wood swatches + black & white
lack tv stand - 11 wood swatches + black & white
lack coffee table - 11 wood swatches + black & white
lack wall shelf - 11 wood swatches + black & white
olivblad plant stand - 11 wood swatches + black & white
jattesta shelf - 11 wood swatches + black & white
ekenabben shelf - 22 wood swatches + black & white
lappland tv shelf & storage - 11 wood swatches + black & white
aurdal closet unit - 11 wood swatches + black & white
ikornnes floor mirror - 11 wood swatches + black & white
enhet cabinet (with mirror) - 11 wood swatches + black & white
lindbyn mirror - 11 wood swatches + black & white
bondskaret coat stand - 10 swatches
brogrund corner wall shelf - 1 swatch
tridsno floor lamp - 13 swatches
ledsjo wall light - 5 metallic swatches
bettorp led mobile lamp - 19 swatches
blasverk table lamp - 21 swatches
tvarhand table lamp - 19 swatches
flottilj desk lamp - 20 swatches
klunka laundry bag - requires sp13 laundry day, 1 swatch
bollbuske plant pot - 19 swatches
artbuske watering can - 1 swatch
kopparbjork vase - 20 swatches
vasen vase with lillies - 6 swatches
famnig hjarta cushion - 20 swatches
lindrande home scuplture - 8 metallic swatches
dundergubbe moving box (large) - 1 swatch, 4 variations
dundergubbe moving box (medium) - 1 swatch, 4 variations
frakta carrier bag - 1 swatch
kalas collection (plate, bowl, mug, cutlery) - 25 swatches
xl rug collection - 36 swatches
rug collection - 20 swatches
knoppang photo frame - 7 swatches
underhalla wooden blocks (toddler toy) - 6 swatches
s/o to @nucrests for not only testing everything but also encouraging me to continue when i wanted to give up and scrap this entire project. 😭💜
download on patreon!
#the sims 4#ts4#sims 4#s4cc#ts4cc#i don't wanna talk about how long it took to make these previews#(3 days)
7K notes
·
View notes
Text
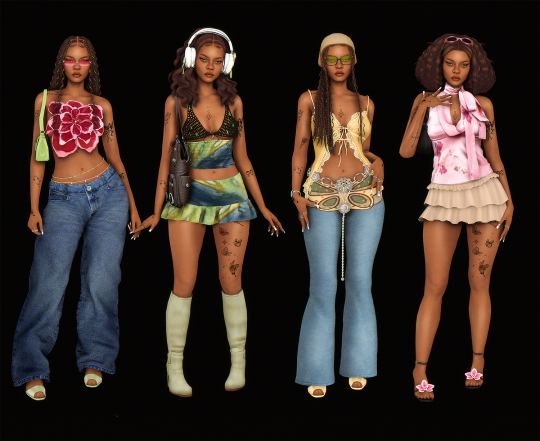
cole street style 🦋🕶️🌺💿
eta cc creators:
hair: @daylifesims @imvikai @dogsill
clothes: @yuyulie @fukkiemon @backtrack-cc @babyetears @simstefani @joliebean
acc: @aharris00britney @arethabee @serenity-cc @oppasims @tina-sims @greenllamas @flowermilksims @caio-cc
#how i imagine her dressing during the first few weeks of botb <3#ts4#sims 4#ts4 edit#sims 4 edit#interactive fiction#infamous if#ts4 lookbook#sims 4 lookbook#lush.ts4#lush.chars#mc: cole myers
3K notes
·
View notes
Text
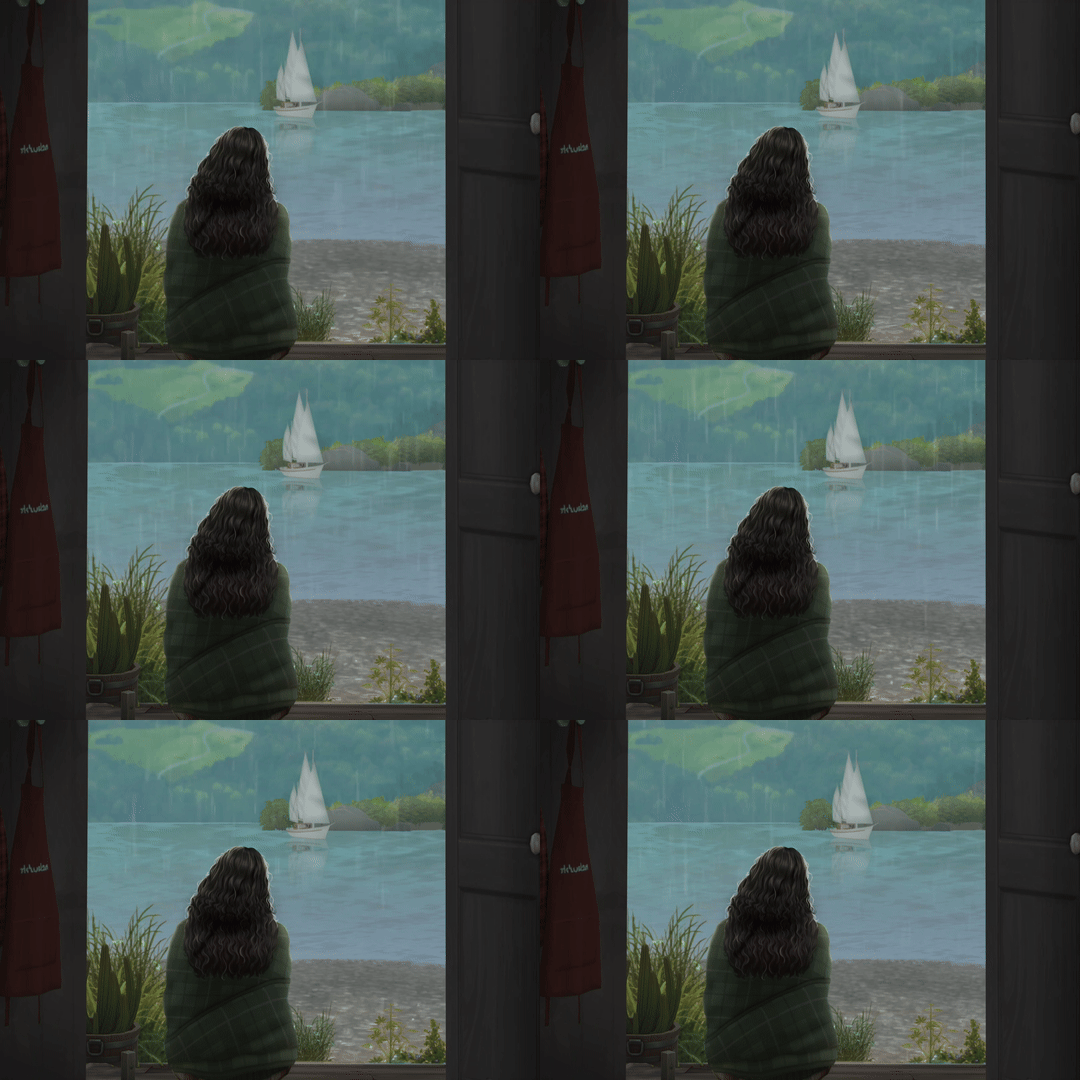


Save me indie films & muted color palette…….
#yes I'm BACK hello Hi#how do I do this thing again 🧍🏽♀️🧍🏽♀️#juggling them btw cyberpunk & 80s because I have no consistency#zoey*#claire*#Insp bones and all <3#ts4#the sims 4#sims#simblr
2K notes
·
View notes
Text
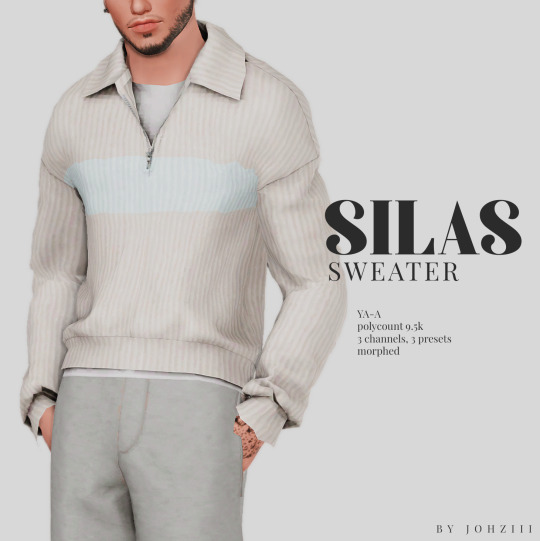
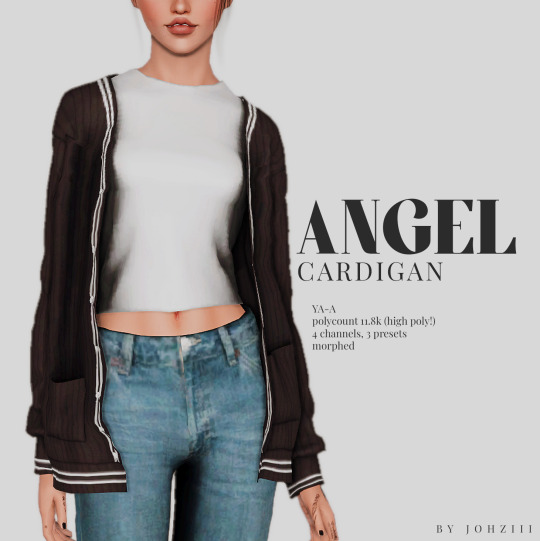
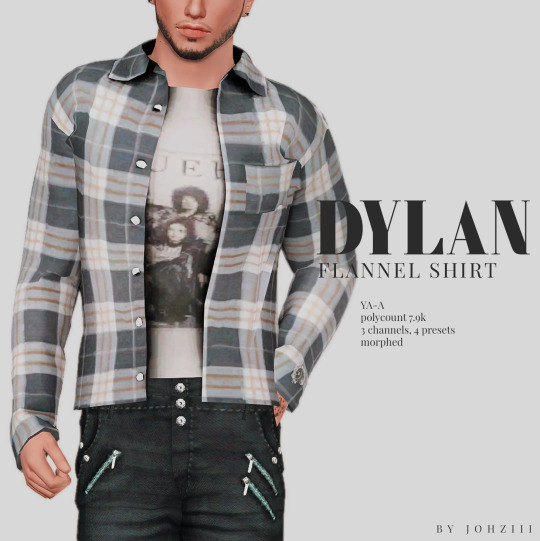
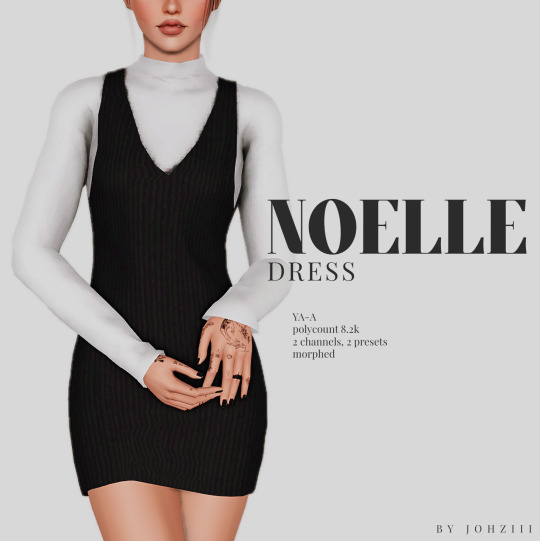
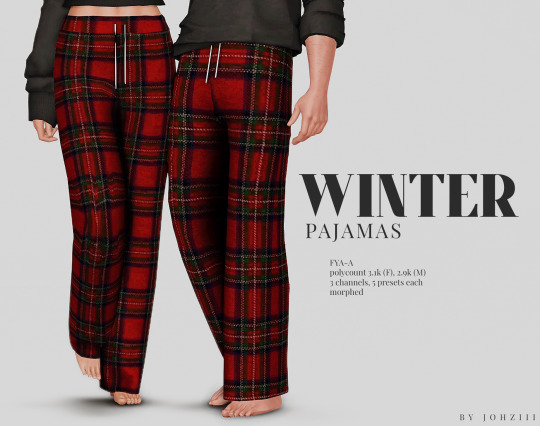
COMFY HOLIDAYS SET - christmas 2023
here's a gift for you <3 merry christmas and happy holidays to you all!
pls lmk if there’s any problems & feel free to tag me if you use them in your gameplay and post to tumblr! <3
TOU ♥ CC PAGE ♥ MY KO-FI ♥

sfs | google drive
#ts3#sims 3#ts3cc#s3cc#sims3cc#johziii's cc#first male clothing ive ever made#proud of how they turned out tbh :D#dl:clothing
5K notes
·
View notes
Text
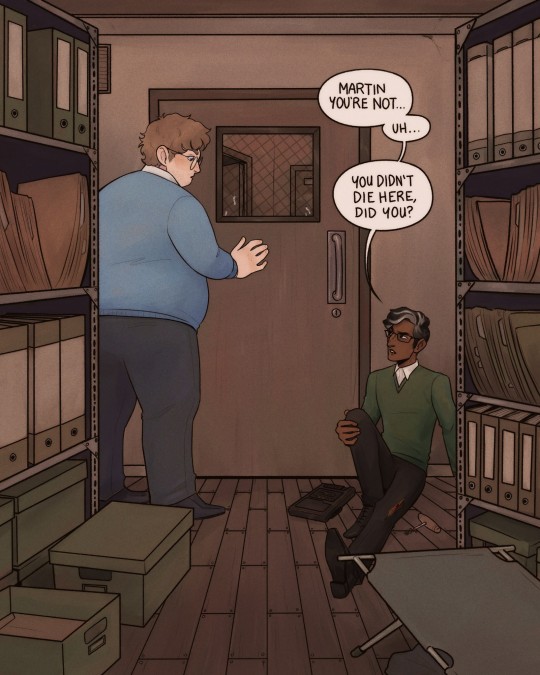
[ID: A digital illustration of Jonathan Sims and Martin Blackwood from The Magnus Archives. They're in the archives' document storage room, Martin is stood facing the door with his head turned to look at Jon, who is sat on the floor. Jon has one leg outstretched with a tear in the fabric of his trousers and a slightly bloody corkscrew on the floor next to him on the right and a tape recorder on the floor to the left. He is looking up at Martin with a slightly suspicious expression and saying "Martin you're not... uh... You didn't die here, did you?". A few small silver worms are crawling on the glass on the other side of the door's window. End description.]
"What? Wh-what - no! What?!"
#jonathan sims#martin blackwood#my art#the magnus archives#tma#tma fanart#comparing this piece to the last time i drew something for this scene is making me feel pretty proud about how much my art has progressed#turns out 3 years can make a lot of difference even if i don't always notice it
1K notes
·
View notes
Text

Toddler set - TS3
Not much to say, just needed these and thought to share. Both the tops has visions without stencil. Any issues please let me know- Enjoy ദ്ദി •⩊• )
2 tops, one bottom and 2 bags - Toddler // Unisex
only packages & is compressed = merged & unmerged visions
Credit: Animal Crossing: New Horizons for the bags. And EA for clothes
Don’t remove credits, and don’t upload to paysites
Download: mega // simfileshare


Sweater moth - 1.2K poly
Life and Death Top - 1.2K poly
Life and death bottom - 498 poly


Butterfly bagpack - 794 poly
Bear Bagpack - 800 poly
476 notes
·
View notes
Text
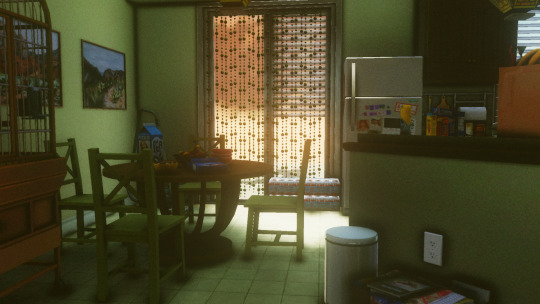
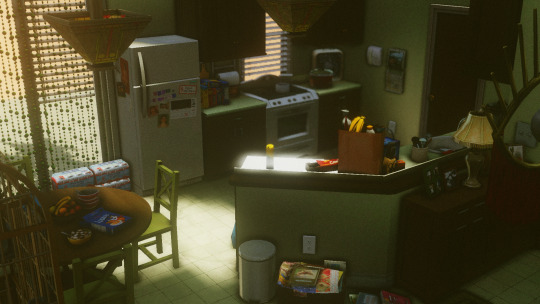
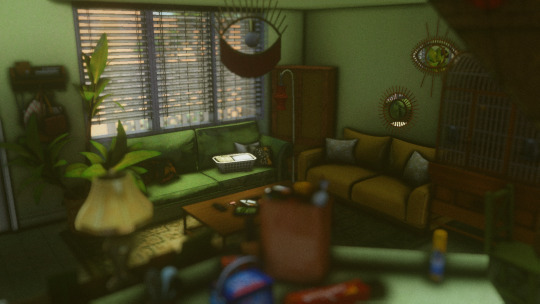
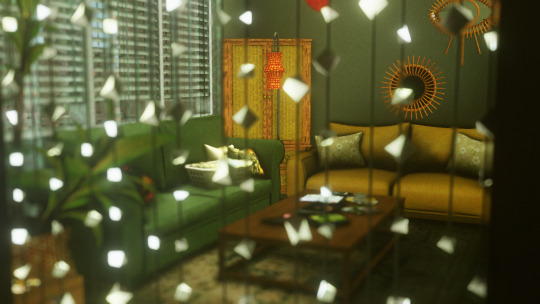
something different from what I usually do
#sims 3#ts3#sims 3 screenshots#sims 3 build#ts3 build#ts3 screenshots#black simmer#black simblr#i cannot stress enough how much this is the sims 3#it's been a while since i last decorated something#i was so uninspired for so long that i barely even opened ts3#i'm so glad that i was able to do something creative again#even though i posted that iHop and the stores for christmas i wasn't as inspired by those as I am with this
721 notes
·
View notes
Text

this is what happy feels like
#the sims 2#sims 2#ts2#sims 2 aesthetic#asethetic#irl#beach#no idea how to tag this#sims 2 moodboard#i also took a sims 3 pic but my laptop almost set on fire
691 notes
·
View notes
Text
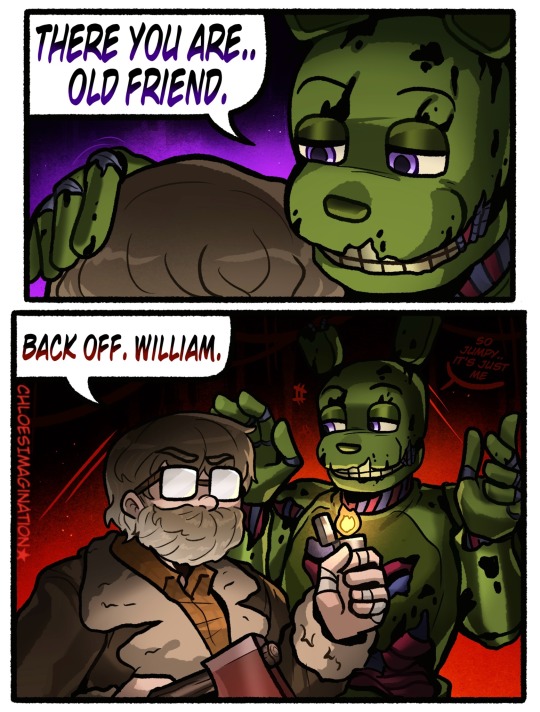
What if Henry found Springtrap first in FNAF..
#myart#chloesimagination#comic#fnaf#five nights at freddy's#fnaf fanart#henry emily#william afton#springtrap#fnaf 3#I sometimes think about how Henry was looking for animtronics too#I focus a lot on Michael but in canon Henry is the one who sets up pizza sim#so I wonder sometimes what he was up to for years#considering what if he found William first#or had any run ins with him#how that look the concept is just really interesting#so this is my small stab at it#neither afraid of each other but both wanting to fight each other too#shout out to toxic old man yaoi lmao
6K notes
·
View notes
Text


For Day 6 & 7 yay theyre hugging
@jonmartinweek
Bonus: live reaction of me finding out that john was canonically ace
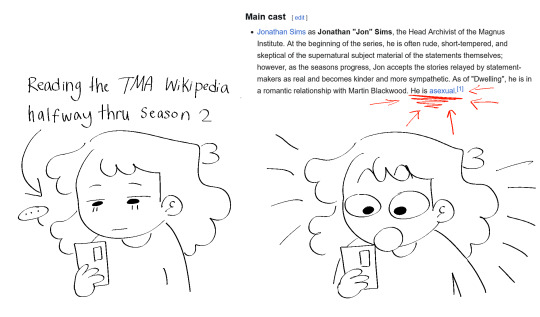
#my doodles#also ive been so freaking busy i havent had time to post any other art for days 3 4 or 5#ive drawn stuff im just not happy with how they look yet#I'll polish them soon I think and just post them late :p#the magnus archives#tma#jonmartin week 2025#jonmartin#teaholding#jonathan sims#martin blackwood#happy asexual day yippee#EDIT: oops i marked this for 5 and 6 i meant 6 and 7
308 notes
·
View notes
Text
Main Menu Mods
Hey all :-) while updating my UI mods and playing around with the new main menu file, I got a couple ideas and decided to put up a new post since I'll be separating the main menu overrides from my UI recolor mods, as well as putting up smaller mods for you to download.
UPDATE 30/01: all RemoveClutter mods and main menu overrides have been updated to remove the dynamic background that was added on 28/01 so you can use custom backgrounds again. Thanks to LunarBritney for providing the mod to do so, which I used as a base :-)
Small Mods
most of these can be used with other main menu overrides!
#1 - Hide News in Main Menu

So I figured out a way to permanently hide the news section from the main menu while also keeping the picture of your sims and DLC store page intact. Since I didn't edit the main menu file (gameentrylauncher gfx), this can be used with other overrides that did not remove the news section themselves ^^ Can be used with any main menu mods.
#2 - Remove Clutter from Main Menu (w/ several options)


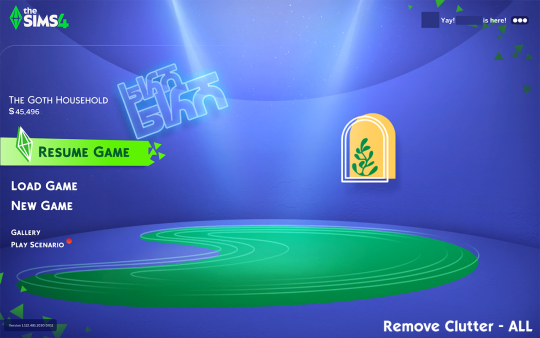
Remove things you don't want to see in the main menu with this mod :-) Can work with any main menu overrides if they only add custom backgrounds. It will however conflict with any overrides that include/edit the gameentrylauncher UI file.
#3 - Sketchy UI
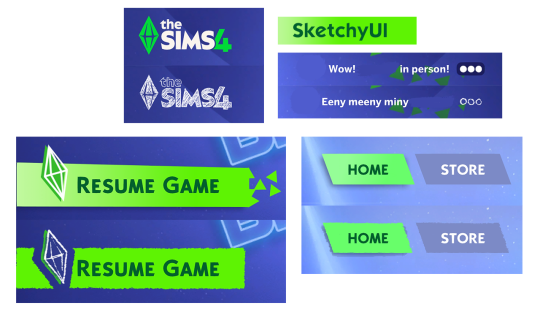
A redraw of the plumbob icon, The Sims logo, and some UI elements :) Also part of my Chalk'd main menu mod.

Main Menu Overrides
// Chalk'd UI


comes in two versions: with and without board. Matches with Chalk'd loading screen mods.
// Sims 2 UI


comes in two versions: v1 inspired by TS2 loading screen, v2 by the world selection menu. Matches with Sims 2 UI mod screens. (one extra override still in the works :-))
~ more on the way (will have its own post when i upload more :-))
📂 download & file details @ patreon
#ts4 mods#ts4 overrides#ts4 main menu#the sims 4#ts4#my dl#I did end up figuring how to remove the news section And a couple more extras lol#still kept the yeeted version though <3
574 notes
·
View notes
Text
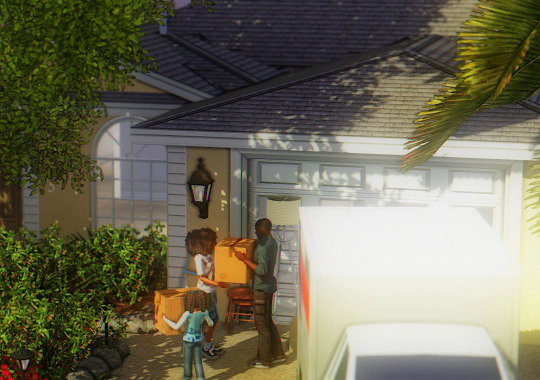
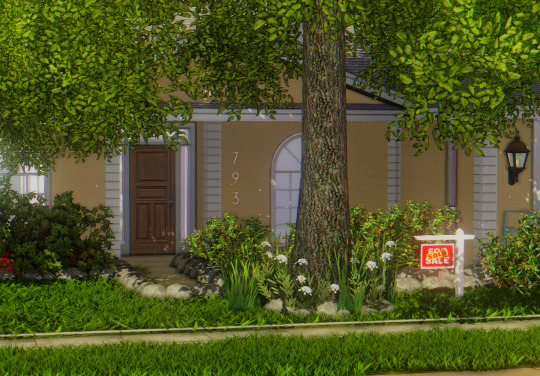


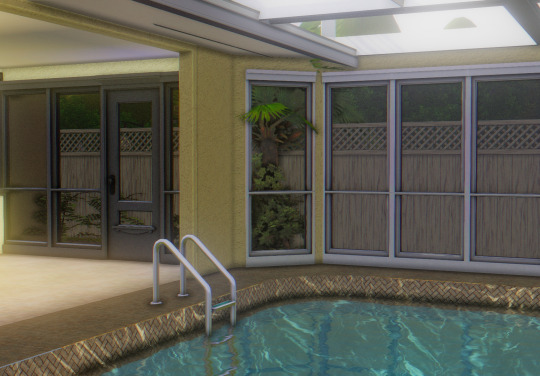
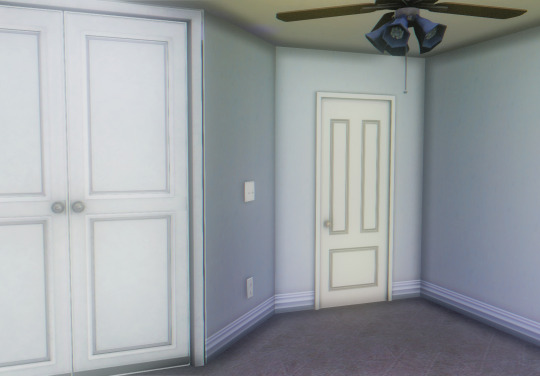
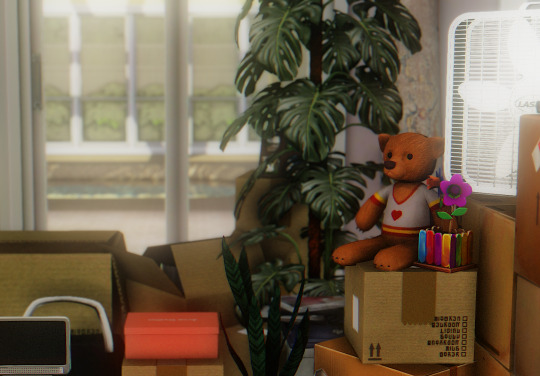
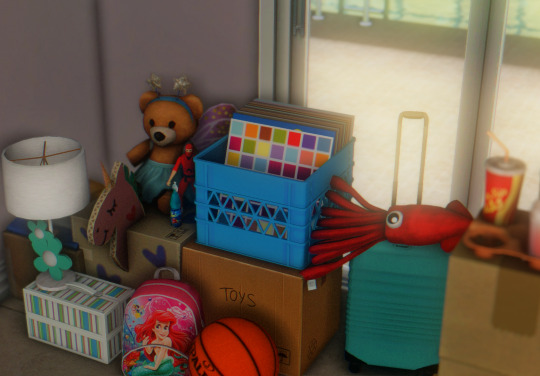
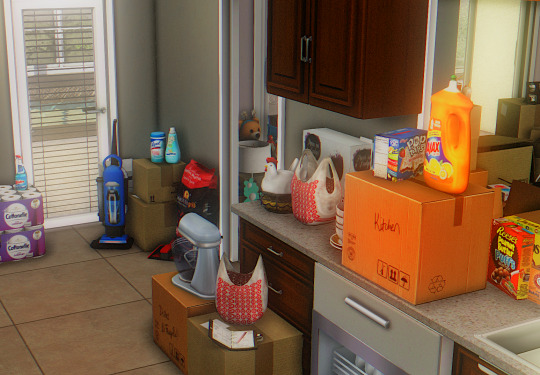
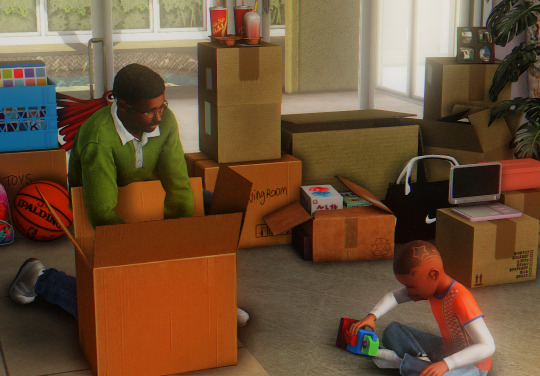
Move in day 🚚🏠📦
ft. another florida house from yours truly
#ts3#the sims 3#sims 3#black simblr#black sims#im actually so proud of this house#the pics themselves are kind of meh#but the house EATS#like its literally SOOOO florida#like the covered porch pool area!!! what it#it's so real#no one understands#how happy i am#its a 4 bed 3 bath#i might show the layout in another photoset#bc i need ppl to see how realistic he floorplan looks#this family has been around for a while but i only just posted them all together#they used to live in the other Florida house i made but i lost that one so here's a new on#which i am much more happy with#i cant wait to decorate it#bye
835 notes
·
View notes