#mood sew
Explore tagged Tumblr posts
Text
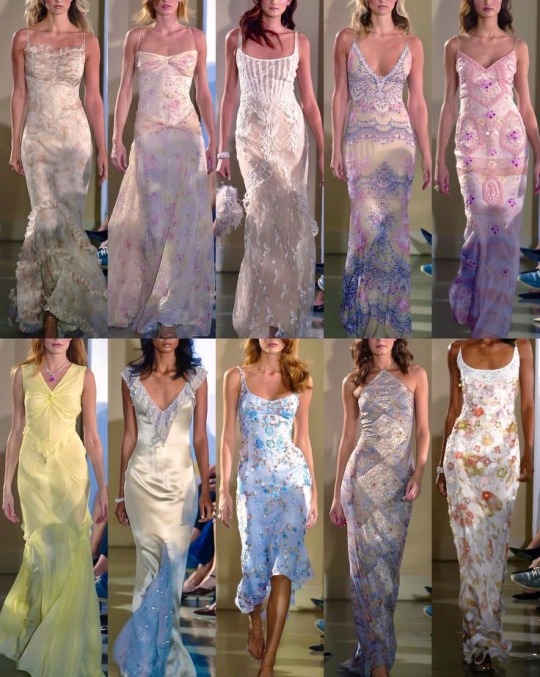
#clothes#clothing#fairycore#fashion#fashion designer#vintage#vintage fashion#personal style#cowboy boots#coquette#pinterest#moodboard#70s#mood board#runway#sewing#1970s#2000s#90s#90s fashion
498 notes
·
View notes
Text
Free Sewing Pattern: Janet Vest via Mood Fabrics


Written by Shavonne Cruz for Mood Fabrics, this vest pattern is modeled after Janet from The Good Place. The pattern is offered free via email subscription, and the tutorial provides detailed instructions. You can check it out here!
The CovidSafeCosplay blog and its admin are unaffiliated with the patternmaker or Mood Fabrics, and are simply sharing the resource. Blog admin has not personally tested this pattern. Please thoroughly read the pattern and tutorial for full instructions.
Do you have a favorite free pattern resource? Share in the comments or via a reblog! Bonus points for those that are free, include image descriptions, or contain detailed tutorials for newbies to follow.
#the good place#cosplay#sewing patterns#sewing pattern#free sewing pattern#free sewing patterns#vests#vest#the good place janet#janet the good place#sewing tutorials#mood fabrics#id in alt text
145 notes
·
View notes
Text


little j 🖤
#jenny humphrey#gossip girl#dark aesthetic#fashion#eyeliner#makeup#dark#black makeup#vogue magazine#runway#pinterest#lorde#mood board aesthetic#pinterest moodboard#moodboard#fashion model#design#sewing#clothes#clothing#baddie aesthetic#early 2000s#late 2000s#new york#city life#new york city#night city#night life#black and white#gray
61 notes
·
View notes
Text
The last thing I managed to sew in 2024 was the silly pair of ahistoric Viking/Rus-inspired that I patterned and cut out back on December 15th, while I was letting my silk velvet gown hang in case of bias stretch issues. It turns out that the silk velvet had no bias stretch whatsoever, and given how pressed I was for time by the 20th and 21st, in retrospect I would have been better off focusing on the next steps for the dress in that ~40 hours. I didn't end up finishing these pants in time to wear under my dress -- and my knees were in fact cold despite all my layers -- but I'm glad to have them finished now.
Like I said in the post on the 15th, I drafted the pattern for these based on the winter fleece pants I sewed at the end of 2023, shortening the inseam to end slightly below the knee and widening the outside of the leg significantly. Then I drafted a lower leg portion using the length from the bottom of my knee to the top of my foot, and the width at the widest part of my calf and the narrowest width I can get my foot through with non-stretch fabric. Here's the pattern with the back and front pieces laid on top of each other, and the lower leg portion below:

I used a pattern for pajama pants that I drafted back 2022 or 2021 to get the placement of the hidden pocket on the outside seam, just swung out wide to create that extra width at the knee. I cut out all six pieces basically immediately after I drafted them, out of the bolt of burgundy cotton flannel that I bought to coordinate with the silk velvet.

I got as far as pinning the first seams together before turning back to the dress, and when I got back around to this project a week or so later, it came together really easily. The cotton flannel is an easy fabric to work with, especially after so many hours with the velvet. I had the upper legs completely assembled and the waistband turned down, and the lower legs hemmed and then sewn into tubes by the end of Jack's last day of work on the 23rd. I ran a simple gathering stitch along the wide lower curved edge of the upper part of the pants right before the family video call on Christmas day, and got both legs gathered up and attached to the lower legs during that call and some one-on-one family calls the next day.
Sewing the gathered lower edge of the upper leg to the wider end of the lower leg was basically the last step to get these pants-shaped, and then I just ran a length of elastic through the waistband and stitched it closed. They are very comfy and soft, and I've been wearing them under dresses and skirts pretty often since then.
I drafted the length of the upper portion based on the height of my daily-wear Doc Marten 1914 Triumph boots, but made the lower leg portion long enough that I could also wear knee-high boots without the gathered portion getting stuffed into the boots. I did get the chance to wear these on a sunset walk the other night, under a dress and skirt and tucked into my Doc Martens, and they were wonderfully warm and cozy and comfy.


I've worn these pretty exclusively under skirts and dresses at this point, but I do have the option to either let the upper portion of the leg hang long and the lower portion accordion in on itself (on the left above), or pull the lower leg to its full height and let the upper leg balloon out a bit more (on the right above). Both ways work, though the latter seems to be slightly more accurate to the way that I see historical reenactors wear this style of Viking/Rus pants.
Of course, like the rest of my historically-inspired every day wear lately, these aren't really meant to be historically accurate to the level that reenactors would actually want -- no more than my Solstice dress from last year is actually a cotehardie. The shapes are there, the ideas are there, but the fabric and the dyes and the seam placement are all wildly ahistorical. Totally fine for my purposes, but worth calling out just so no one thinks I'm actually trying for historical accuracy.
My whole look recently is sort of medieval historybounding by way of the Victorian Pre Raphaelite interpretation of medieval fashion, as done up in very modern fabrics with modern details like in-seam pockets, and I think these pants fit in with that well. Generally I'm happy with the pattern, though if I change anything in second go at these, it would be to add just a little bit of length to the top portion of the leg (they can pull ever so slightly at the knees when I sit down sometimes), and add a similar amount of flaring to the inseam as well, to eliminate some of the drag lines from the outer hip to the inner knee currently happening on this pair.
I do have some other fabric I might make these up in as well, maybe for a pair meant to be worn without skirts and dresses over top, more for walking around the neighborhood to see our murder of crows. For that pair I would add a bunch more pockets (for important things like phone, keys, and lots of peanuts for the birdies), and maybe that extra width as well. But I think my next project may be another layering option or two with this same dark red fleece, since I've got the fabric out and the sewing machine prepped for it. My one real concrete goal for 2025 is to turn all the fabric I have lying around into actual wearable items, and either something with the flannel or another pair of these pants would be a step towards that goal.
28 notes
·
View notes
Text

Spice In, Time Out!
— ☆ —
Wanna read a semi-crack fic about Beef Boy hanging out with a bunch of puppets? Maybe even do a little ramen challenge with his little blue fuzzy nerd friend? You're in luck, 'cause I wrote 6500 words of exactly that!
Among those thousands of words are a bunch of cool stuff such as:
Puppet shenanigans! Two of them may have planned to kill their friends (disclaimer: that murder will not be shown in the fic)
Actual history??? Yeah that's right you're gonna get hit with a Puppet History-style question so STUDY UP ON THE HISTORY OF RAMEN (or not) 👹
God being the worst! Again! They may have actually killed someone (disclaimer: that murder WILL be shown in the fic)
God/Professor allegations. Whether those allegations are true or not will be up to you
Overall a (hopefully) funny and wholesome bonding time between everyone at this table. They're all friends! :]
If all of that sounds like a jam to you, you can read the fic via clicking here, clicking the title, or searching up "Spice in, Time Out!" by crispycreambacon on AO3.
I hope y'all will enjoy this fic! I'm pretty proud of how it turned out especially since I was honestly not feeling it at the start and even contemplated not publishing it at all. Even if you don't read it, I hope you enjoy the art (bonus doodles down below btw!) and I hope you'll have a schmaculous day!

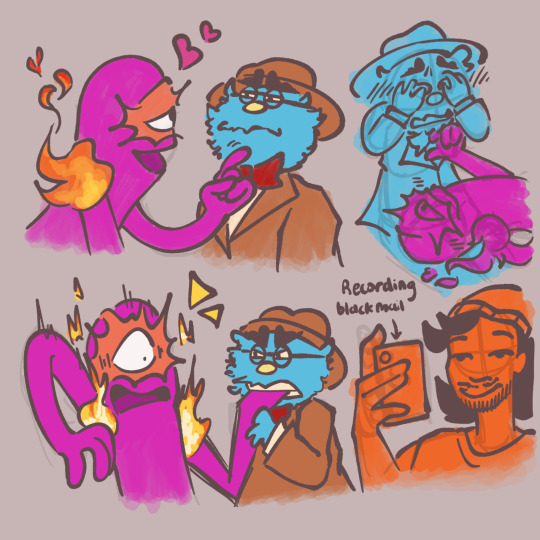
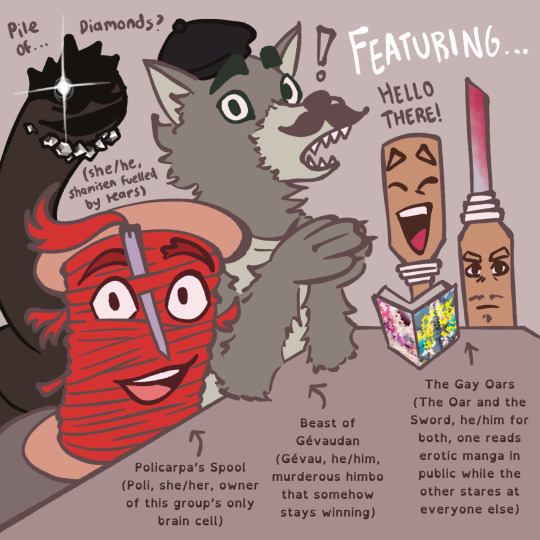
#bonus points to whoever can guess what the Oar is reading (however I will be putting you on my watchlist)#currently writing this at 1 AM#i'm lowkey in what can only be described as a “disasterous mood”#my life is lightly falling apart as I fall behind on so many of my responsibilities#but it's okay I got this I'm gonna get through this aNYWAYS omg new fanfic y'all!!!#these were so fun to draw#[blasts you with my trans puppet headcanons]#[and also whatever tf is going on with God and the Professor#i haven't figured that out and I probably never will and that's fine!]#puppet history#puppet history fanart#ryan bergara#ryan beef boy bergara#the professor#the professor puppet history#fuck it lemme tag all of them#god puppet history#policarpa's sewing spool#beast of gevaudan#pile of diamonds#the gay oars#GAIDHWODBW#watcher entertainment#watcher#watcher fanart#art#artists on tumblr#chris p fried art#chris p fried writings#fanart
81 notes
·
View notes
Text
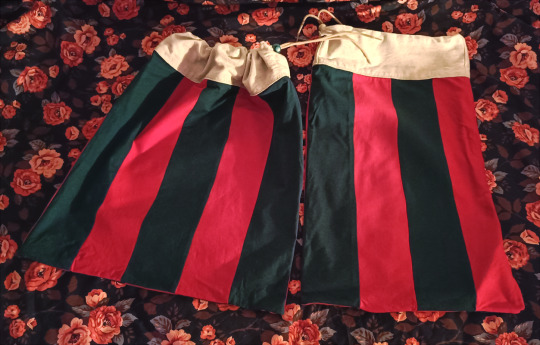
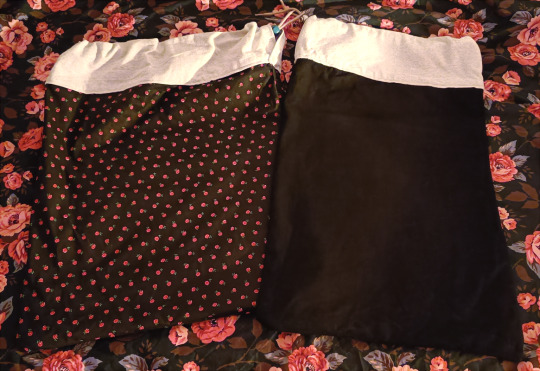
I do enjoy wrapping Christmas presents in theory, but just thinking about what a waste of paper that is (if you're not using like, old newspapers as wrapping paper) kinda kills me inside, because I have Stupid Hangups about Minor Things
So, using some old fabric scraps I put together two extremely janky reusable giftbags for the Crimbus Season, wheee
I guess these are technically reversible bags, but yes the red-and-green striped side is meant to be the outside.
I just had some red fabric scraps from some ancient sewing project I can't even remember anymore, while the green scraps where leftovers from when I recently reclaimed one of my dad's old shirts, one he had NEVER worn (and did not want), to make a basic pillowcase/covering for a bolster pillow (one my mom had previously made a hideous and unpleasant-to-touch crochet covering for, which was also filthy and could not be removed to be washed without being cut into. Yeah I did not feel bad getting rid of that covering, but I needed a replacement, and the old, fresh shirt was gonna do just fine)
Both are knit fabrics, which, y'know. Absolutely not ideal for this kinda project. Main issue I had to deal with while making these bags is that I don't really have anything I could use to temporarily draw on these softer fabrics (y'know to give myself guidelines when cutting and sewing). Like just trying to draw on them would make the fabric stretch in objection without leaving any marks on the fabric. So although my goal was to make nice even stripes, actually cutting the fabric pieces and then pinning them down evenly wasn't actually do-able. I did my best to measure the stripes out but yeah they're a bit wonky and janky and uneven. Fortunately I did not have that problem with the rest of the fabrics I used for these bags. If I hadn't made the outside patchwork then I obviously wouldn't have bothered with lining them, but it was the only way to really clean-up the insides of the bags. And, as a bonus, the lining also added more structure to the stretchy ass knit fabrics, which is super nice.
I didn't really have many big fabric pieces laying around I could us for this project, definitely not in colors I would've liked to use (like I had some bright yellow but... I don't think that really fits the Crimbus-y vibes), so for the first and the bigger bag I used some very stiff but thin cotton (possibly the very type of cotton you'd reccomend to use with patchworking??) with a widdle floral pattern on it, while the other was a much thicker cotton plain black fabric (like I'd use this one to upholster a stool or something it's so thick and stronk). And for the top of both bags I used some natural white woven cotton/linen (it's from my mom's stash, I don't know what it is), quite strong and fairly thick. IDK I'm happy I was able to use up some of these scrap fabrics I already have instead of letting them sit around collecting dust.
Last but not least, I grabbed some cord locks/toggles from my mom's stash to make them into drawstring bags, and for the cord/rope/whatever... I don't really have anything fitting for this kind of project already in stash, but I have a bunch of unused, ancient shoelaces. And y'know what. I'm not gonna use those lightbrown shoelaces for anything else. By the time my current pair of shoes needs to have its shoelaces replaced, the shoes will need to be replaced too, and I'm gonna get free shoelaces with the new shoes if/when that happens. I might as well use these spare shoelaces here. Why the fuck not.
But yeah, just a little project. Again, the bags are turbo janky, but they don't have to be fancy, they just need to hold Crimbus gifts once a year before I yeet them into storage until next year.
#Moon posting#Yarncraft Diary#Sewing#Sewblr#For the record yes these bags are for close-family members only#Haven't actually done much crafting recently. At least nothing really worth showing#I have one like crochet shawl/thing I started with leftover yarn but I ran out and just. Put the thing aside because I wasn't in the mood..#...to order more yarn (I did finally get it though so I can crochet while watching Crimbus movies with family)#I used some random scrap fabrics to make myself some sleeping masks to replace my disgusting and ancient sleeping mask#Very comfy very janky but you don't need to see that#I had some hoodie years ago where the hood was way too tight around the neck to the point it was impossible to wear/put on#So years ago I chopped the hood off and kept the fabric for some. Reason. Anyway I turned the hood into a balaclava#But. Yeah it's not an impressive thing or anything so no point in showing that off#And as usual I'm resizing old t-shirts because everything is too god damn big for me. Not worth showing.
12 notes
·
View notes
Text
Fursuit reveal lol


And now I present *dadadadaaaa* one from my fursuits!!! This is Friken and she is a dragon muhehehhe She is my second fursuit ragh X33
(Ik her hair is kinda messy, im gonna brush her laterr ;33)
#tumblr fyp#furry fandom#furry#furry art#furry oc#sfw furry#fursuit making#fursuits#fursuit#dragon furry#dragon fursuit#furry dragon#sewing#i made it#yayyy#sillyposting#so silly#silly goofy mood#silly
34 notes
·
View notes
Text


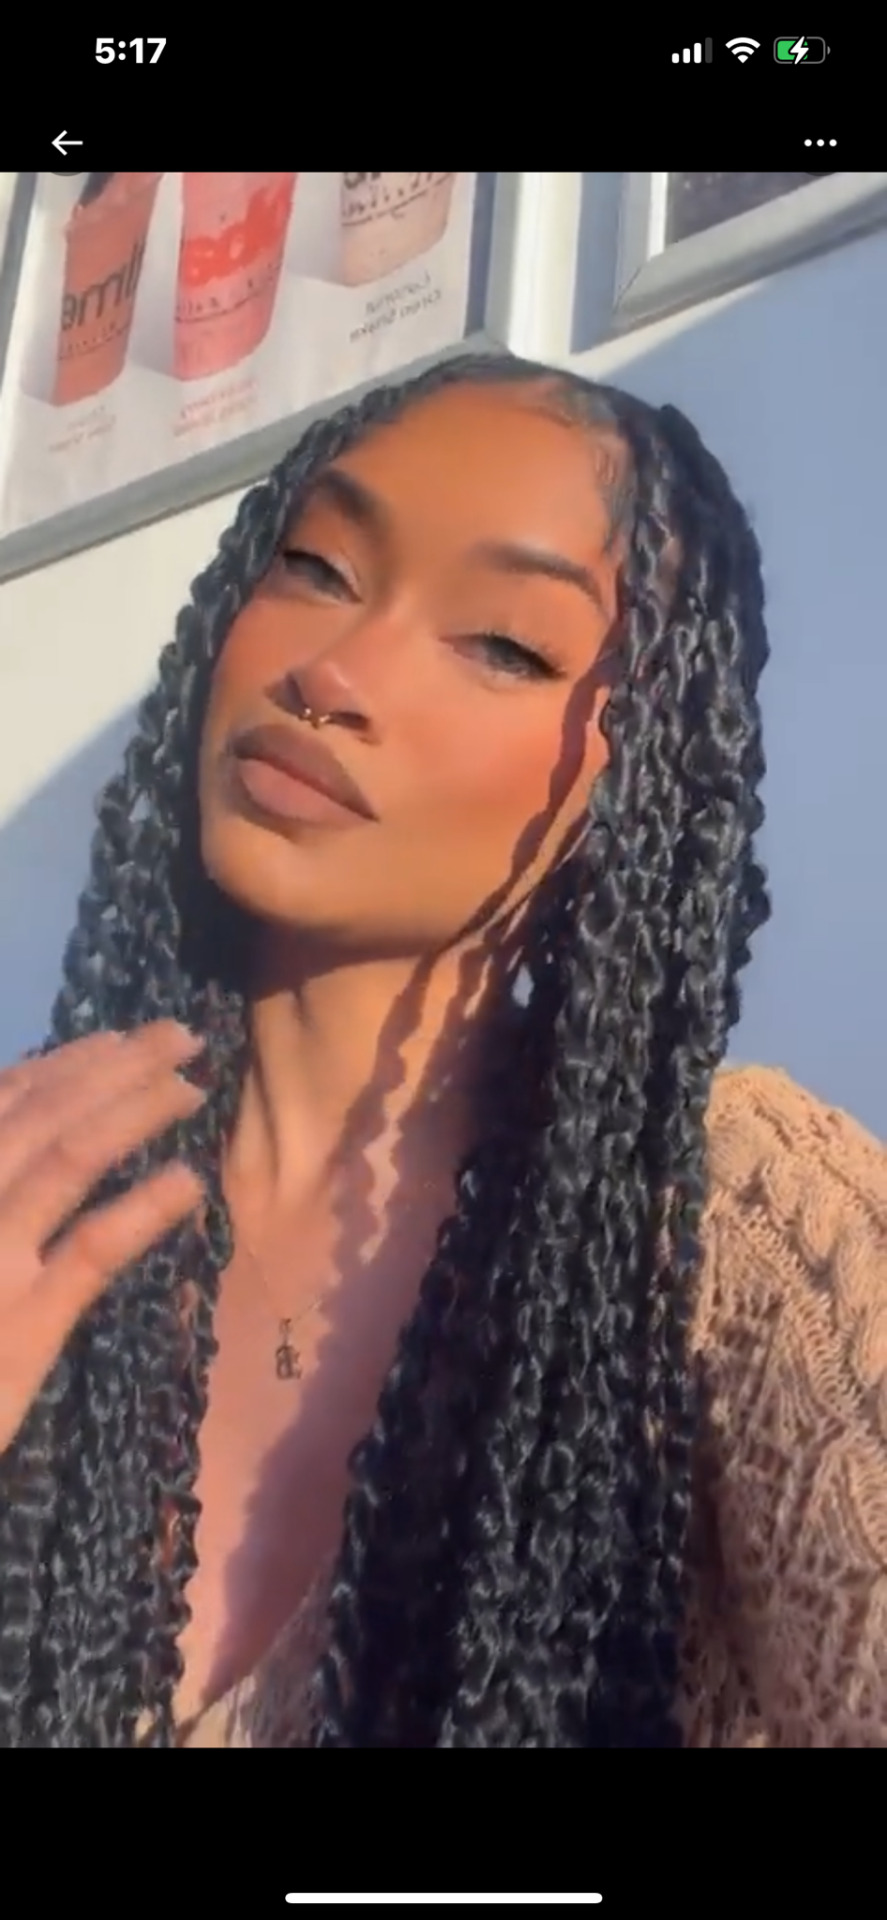
hairstyles i want to try 🧚🏽♀️✨
#black women#black beauty#black fashion#fashion#fashion aesthetic#black femininity#beauty#aesthetic#blog#hairstyle#sew in#braids#black hair#black hairstyles#hair inspo#hair inspiration#moodboard#mood#black girl moodboard
41 notes
·
View notes
Text
Some light Nendoroid sewing this weekend ft. The dollar tree clothes that I'm altering.

This one the top needed to be fitted and I noticed that the skirt is pleated on one side but not the other, so that needs fixing.


It's only fitting weird because it's sewn in this weird bat wing like shape. So just marked with a pen and sewed along that line. Now the sleeves actually look like sleeves.

Repeated the skirt and attached and all better! It fits perfectly.

Next is this yellow dress. I just hemmed the top and bottom since they were unfinished.

The camera wasn't picking it up, but the yellow fabric was actually pretty sheer and anything I added to the top would be seen. So I just added a layer of white lining.

Then I sewed on some ribbon on the waist and a loop around the neck for straps.

And now it's ready to go! ✨
#i was jsut in the mood to sew#might craft soem accessories later#nendoroid#nendoroid doll#nendodoll#sewing#doll#dolls#doll clothes
6 notes
·
View notes
Text

Glamxbrit on insta. Flower makeup!
#clothes#clothing#fairycore#fashion#fashion designer#vintage#vintage fashion#personal style#cowboy boots#coquette#makeup#pinterest#moodboard#70s#mood board#runway#sewing#1970s#2000s#90s#90s fashion
349 notes
·
View notes
Text


life as a coquette seamstress 🎀🩰
Credit : Pinterest
#coquette#mood board#sewing#cute#pink#pinterest#white#style#fabrics#seamstress#pink bows#adorable#fashion
15 notes
·
View notes
Text
It's been almost two weeks since my last sewing update, but I have been making progress on a couple different projects, thankfully. I mentioned in my last post that I was hesitant to cut into a king-sized 100% linen bedsheet that I've been hoarding for 10+ years. I knew I wanted to make an apron, but I also knew that it wouldn't take up anywhere near the whole sheet, and I had the thought that I might be able to get two projects out of this one sheet (and the remnants of the matching fitted sheet) if I was careful about how I cut out all my pieces. Possibly a gathered tiered skirt/petticoat, along with the apron.
I measured the two long sides of the flat sheet that had identical ~1.25" deep hems, and I found that each side was 112" or just over 3 yards long, not counting the top and bottom hems. That meant if I did side seams, I could get a 6 yard wide bottom tier for the skirt and not have to do a hem at all, just use what was already there. Not the widest hemline on this kind of skirt (I have a purchased skirt with a 25 yard hem, and years ago I made a 26 yard tiered skirt out of muslin), but with this heavy weight linen it felt like 6 yards at the hem would be plenty.
Gathered tiered skirts are really just rectangles and a bit of simple math. Since the sheet's side hem determined the size of the lowest tier at 224", I figured I would do 2-to-1 gathers and make the next tier up 112" wide, and the third tier up 56" wide. A fourth tier at that 2-to-1 gathering ratio would have been only 27" wide, which wouldn't have fit over my hips, so the skirt would have 3 tiers.
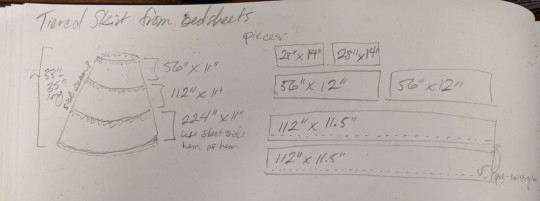
I'm a short girl at not quite 5'2" and I like to wear my skirts pretty low on my hips for spoonie comfort issues, so after measuring a purchased skirt whose length I like, I decided that between 30" and 33" inches in total length would be ideal. With three tiers that length could easily be divided into tiers that are each 10"-11" tall. I added a half inch for seam allowance (but no hem allowance on the lowest tier, since I was re-using the existing hem) to get the exact measurements for each of the pieces I needed for the skirt.
I was able to tear most of my pieces, since the linen bedsheet was nicely on the grain and tore relatively cleanly, thus saving my hands from cutting all those long pieces. I had meant to cut the top tier at 14" tall so that I'd have room to turn under a nice thick waistband too -- and then I totally forgot and cut it at 12" just like the middle tier, lol. I was able to get one of the middle tier pieces and both of the top tier pieces out of the remains of the matching fitted sheet, so I only needed one middle and two bottom tiers from the flat sheet. That left me with plenty of flat sheet left over for the apron, but I'll talk more about that in my next sewing post.
With my pieces all cut out, it was time to start the most annoying part of making a gathered tiered skirt: gathering all those tiers. I'm trying to sew with cotton thread more often these days, but for the gathers I switched back to polyester thread just for the strength. For the two bottom tier and two middle tier pieces I ran two lines of gathering stitches along the top edge, placed pins to divide each panel into quarters, and got to gathering and pinning.
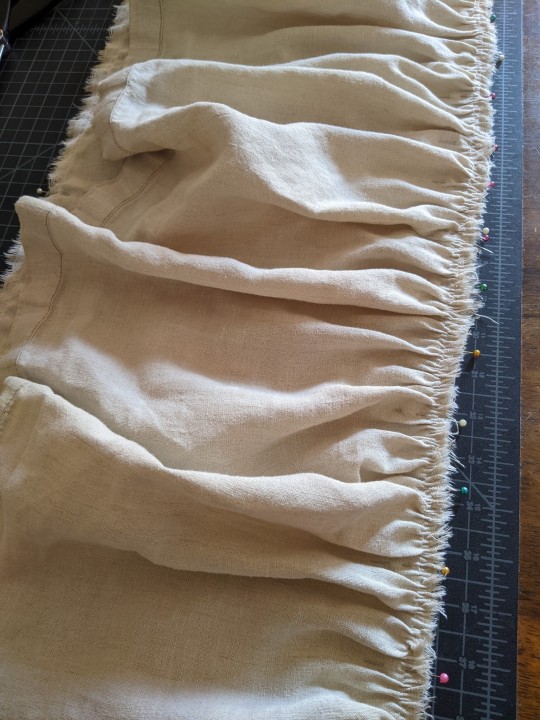
With tiered skirts I really prefer to work from the bottom up, so that I'm always attaching a gathered piece to a completely flat piece of fabric, and save side seams for last. So the bottom tier pieces got gathered up and attached to the middle tier pieces, then the middle tier got gathered up sewn to the top tier.
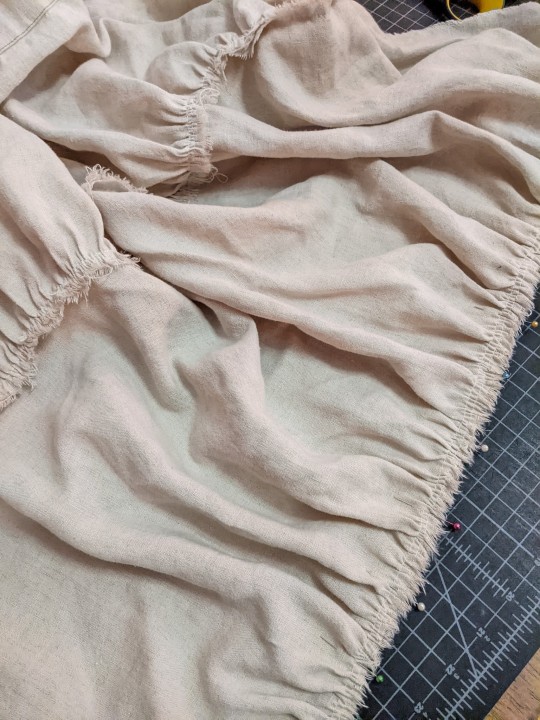
Since I accidentally cut my top tier pieces shorter than I'd meant to, I did play around with adding a separate waistband for the top tier to be gathered onto. But I couldn't do a full 2-to-1 gather if I wanted the waistband to pull on over my hips, and the waistband made the proportions look weird, like the top tier was too long. So I ended up cutting the waistband off after I sewed it and actually shortening the top tier even a little bit more. After turning under the top edge to enclose the raw ripped edge and then turning under 3cm (~1.2") for a waistband casing, that top tier ended up being about 9" tall, and the proportions of that look much better for some reason.
Before I sewed the side seams, I decided that this skirt needs to have pockets, of course. I knew I was planning to do French seams to protect the raw edges against unraveling, so I put the pockets in with a French seam as well.
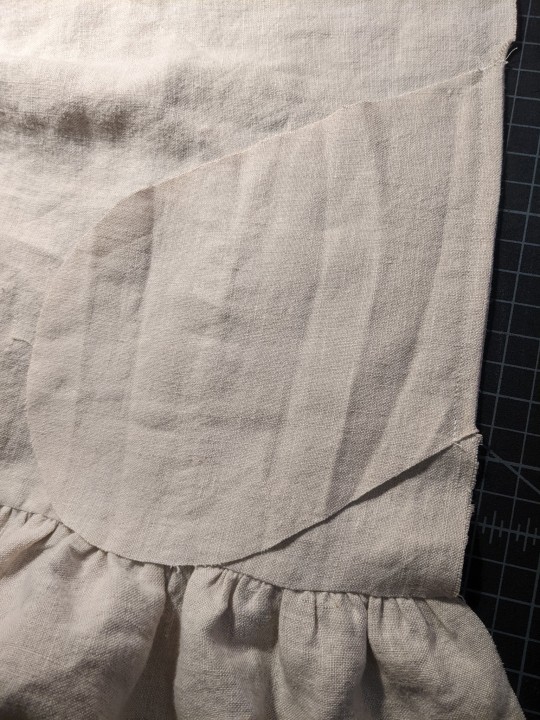
With the pockets in place, the next step was to do the side seams (including the pocket bags), being careful to match up the height of the hem and each of the tiers so everything was nice and clean and square. Then I was able to turn under that waistband casing and sew it in place -- my original plan had been put in three separate channels for narrow elastic that would result in a bit of a faux-cartridge pleating look, but actually getting the elastic strung through there turned out to be more of a pain than it was worth, so I ended up picking that out and just using a single 1" wide elastic band in the waistband casing instead.
And with that, the skirt was technically wearable, and with some fabrics I might have been happy to leave it there. But the raw ripped edges at the seams between each of the tiers worried me. I've had well-loved sewing projects just shred after many wears and washes because I left the seams unfinished, figuring I would be the only one to see the inside. Ideally I want this skirt to be in my rotation for years and years, so I decided to make the effort to finish those seams too.
My original plan had been to cover the raw edges inside with 3/4" herringbone twill tape. For some reason I was convinced that I had a bunch of it left over from a Wasteland Weekend project from 2018, only to discover that I actually only had ~3 yards left. So rather than ordering more and waiting for it to arrive (and then inevitably having some of that left over too), I decided to just make some 3/4" tape from the linen sheet itself. Since this whole skirt is rectangles on-grain and the tape wouldn't have to go around any curves, I made the tape from on-grain rectangles too, rather than bothering with proper bias tape.
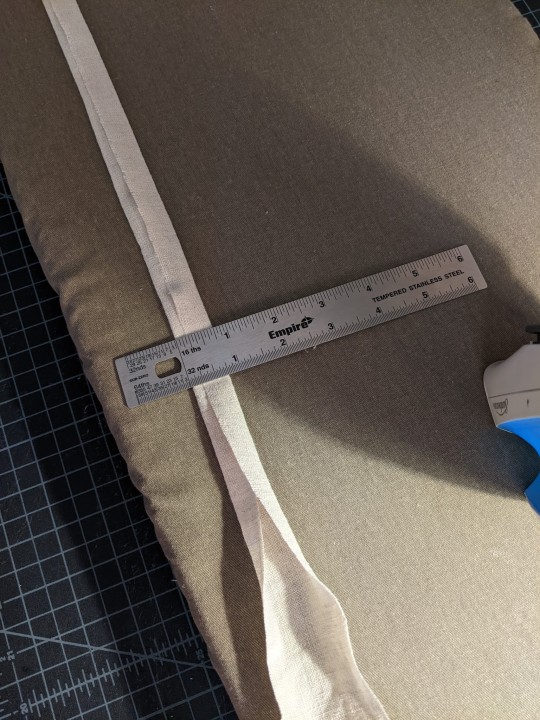
With the hem and the waistband already cleanly finished, I just needed tape to cover the ~3 yard seam between the bottom and middle tier and the ~1.5 yard seam between the middle and top tier. I tore nice straight strips, trimmed off the frayed edges, and ironed the raw edges under to give me that 3/4" width. It's three layers thick in the middle but only 2 layers thick on the sides, since it isn't a proper double-fold tape.
Then it was just an issue of pinning it over the raw edges inside the skirt -- first from the inside in roughly the right place and then from the outside to make sure it lined up with the seam well.
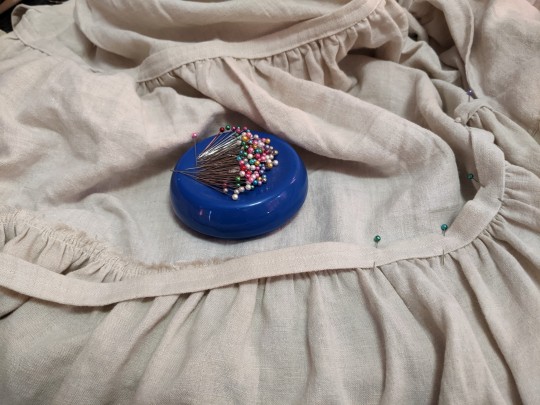
I stitched-in-the-ditch from the outside right where the gathers met the next tier up, and then went back and did another line of stitching just slightly up from that, using the width of my machine foot (~1cm) as a guide. That covered all the raw edges inside and reinforced the seam, and gave it a nice neat appearance from the outside.
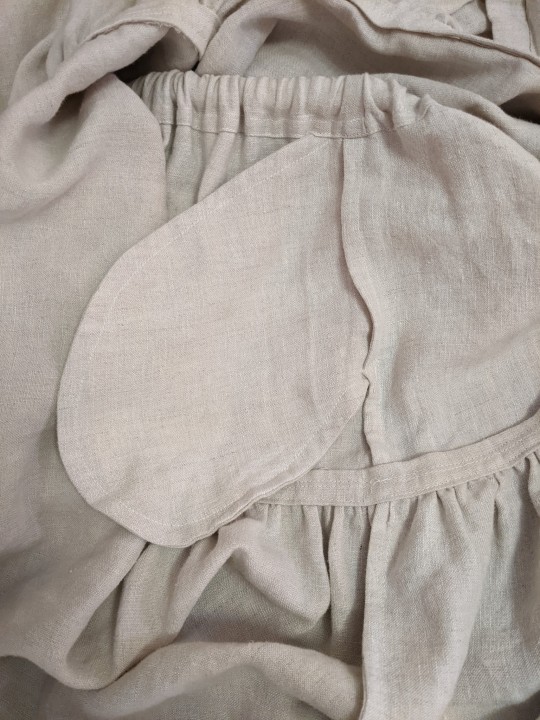
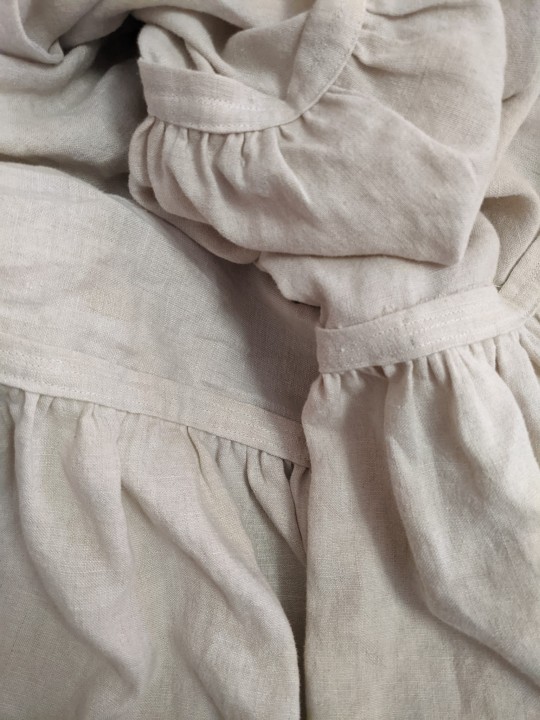
It also had the added benefit of behaving almost like cording on a corded petticoat -- the gathered seems have a lot more body and stiffness now than they did before, which gives the finished skirt a really lovely lofty structure.
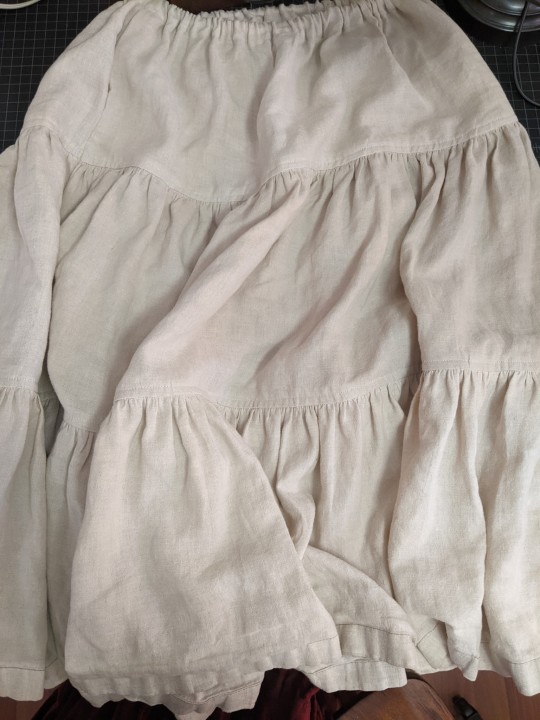
The whole skirt ended up being about 31" long, right in that 30"-33" length I had originally aimed for, and when I wear it low on my hips where it's most comfortable, it just brushes the tops of my feet.
My plan is to wear this mostly under other long skirts and dresses, more as a petticoat than a skirt on its own (tho it is heavy enough and neat enough to be worn on its own, if I want). That lofty structure from the seam finishes adds a lot of floof to my other long skirts, just barely peeking out the bottom of the purchased green skirt I originally measured to figure out the length for this one, and hiding completely under my purchased 25 yard burgundy skirt but giving it enough extra volume that it doesn't drag on the ground quite so badly.
As the colder weather sets in I'm sure this will get a lot of wear under skirts and dresses (including the several dresses I'm still planning to sew in the next couple months!), but even now in the last heat of summer it's quite comfortable to wear, since it's linen. Jack commented that it seemed like a lot of work for a skirt that won't be seen (and it did manage to remind me how much I dislike gathering long lengths of fabric), but as long as it's functional and gets used often, I feel like all the effort was worth it.
While I was putting this together, I also cut out and started assembling the apron project from the same bedsheet. Even with all those pieces cut out, I still have enough linen left over for at least one more, maybe two more projects. Next up I'm going to get to all the finishings on the apron (which will be getting its own post once it's done) and keep trucking along on the handsewn eyelets for the Lengberg Castle Bra-thing. And once those two are done, I think I just might be ready to finally start on all the dresses I want to make with my new fabric.
#sewing#tiered gathered skirt#peasant skirt#bellydance skirt#if you can sew a straight line on a sewing machine you can make this skirt#I wouldn't recommend trying to sew it by hand but it's a good beginner sewist project#the math is really easy and you can work upwards from the hem like I did or downwards from your waist measurement if you want#gathering in a 2-to-1 ratio (so the final piece is half its original width) is pretty standard but you can also do 3-to-1#bedsheets and quilting cotton are excellent options for this kind of skirt#and if you're careful with re-using hems like I did or using the finished selvedge edge of the fabric you can avoid hemming it entirely#long post#my sewing#2024 mood#linen petticoat project#linen apron project#which is actually all assembled and just needs all the hems and finishings. but that'll probably take me most of this next week I think#post on that coming eventually#and then: DRESSES
9 notes
·
View notes
Text

✧You shine like the stars You light up my heart ✧
#baekhyun#byun baekhyun#exo#exo art#exo fanart#bbh#my art#mine#cos i was in the mood to draw even though i should REALLY be working on my con costume T.T#my friend invited me super last minute so i have to come up w a costume by next friday. while also working like 10 hours a day lol#im gonna be taking my sewing on the tram -.-#anyway baekhyun was calling to me so. im always down to make decisions that make life for future me harder skdfhjsdf#finn.txt
94 notes
·
View notes
Text
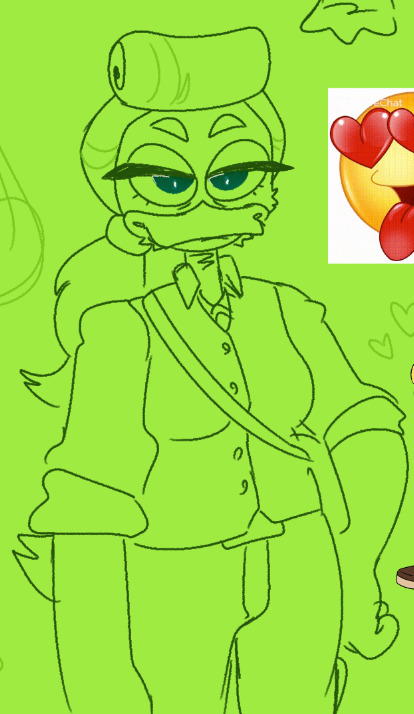
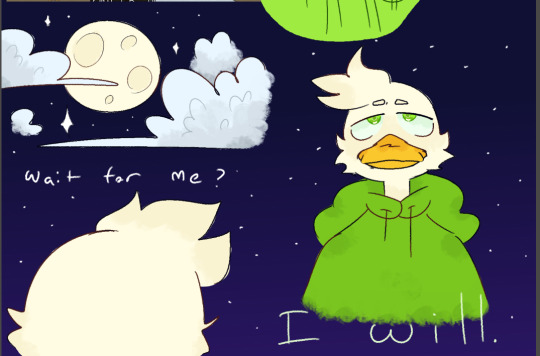
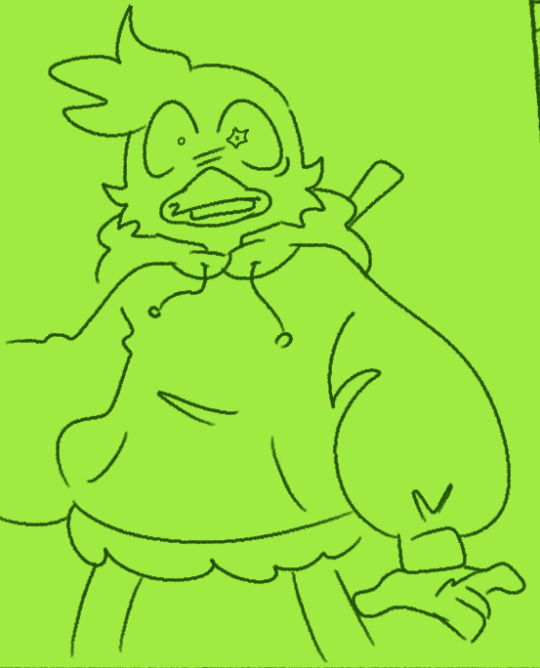
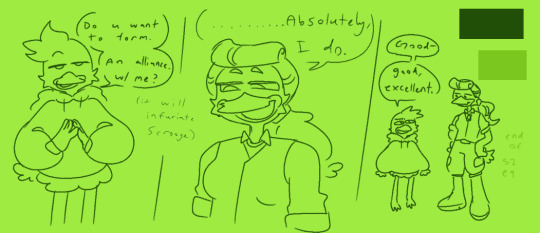
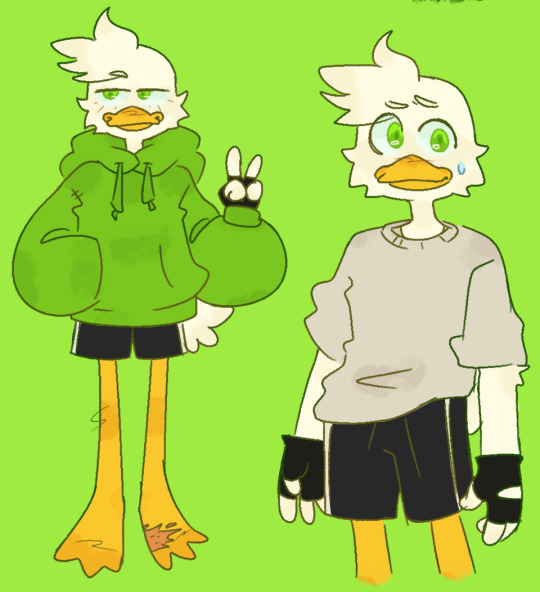

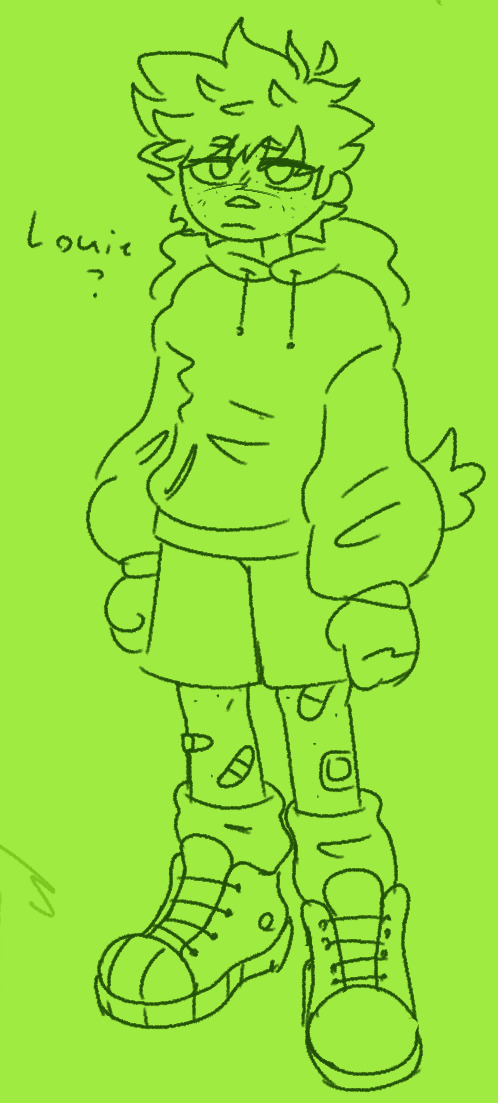
super random selection idk. I think im both in a weird art slump and in a post to tumblr mood so. here u go !! strange combination of old and new idk
#ducktales#ducktales 2017#Goldie o'gilt#Louie duck#Lena sabrewing#webby vanderquack#this is a strange collection but im like scraping the sides of the barrel. not the bottom but I just wanna post ? idk.#i reallyyyy really wanna post something nice and finished but I cant really think of anything to finish other than little doodles#I do think tho that its partially bc im more in a sewing mood recently#so maybe ill post those at some point#theres a lot tho
111 notes
·
View notes
Text
Dog for scale

When you have a 100+ pdf print pattern to assemble I am reminded how fortunate I am to have a large living room XD
Aurora pattern is a free download from @moodfabrics!
6 notes
·
View notes
Text

Started my spring break with returning to my Mood Fabrics Shirley Dress, a project that has been going on since November. But I’m hoping to have the most of if not all of the dress before the week ends
2 notes
·
View notes