#macport
Explore tagged Tumblr posts
Visit Tumblr Blog
Explore Tumblr blogs with no restrictions, modern design and the best experience.
Last Seen Tumblr Blogs


Fun Fact
Tumblr Inc. has $15.1M in annual revenue.
Text

I fond it on Pinterest if someone know the artist x)
#hetalia world series#hws hetalia#hetalia#portmac#aph macau#aph portugal#aph netherlands#i love them#macport
23 notes
·
View notes
Text
#aph#hws#hetalia#poll#aph portugal#hws portugal#engport#spaport#fraport#nedport#macport#romaport#itaport
6 notes
·
View notes
Text
trying to make anything work on mac makes my head hurt. I had to update my laptop to make my myPaint work but now GIMP is so laggy and I can't get it to update. I only took basic programming classes don't do this to me o|<
#text#macports PLEASE#I swear I just installed the dependency you need#what's wrong now ;-;#crow drivel
2 notes
·
View notes
Text
Syncthing, installazione e uso
— Fonte: JJ Ying su Unsplash. Descrivere in generale un software complesso come Syncthing è utile, ma ancora più utile è arrotolarsi le maniche e provare ad usarlo, verificando in pratica se fa davvero al caso nostro. Caratteristiche principali Quali sono le caratteristiche principali che differenziano Syncthing rispetto a strumenti più diffusi come Dropbox, Box e così via, ma anche rispetto ai…

View On WordPress
0 notes
Text

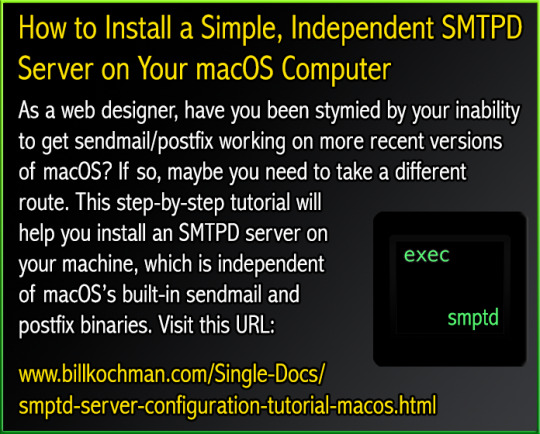
How to Install a Simple, Independent SMTPD Server on Your macOS Computer As a web designer, have you been stymied by your inability to get sendmail/postfix working on more recent versions of macOS? If so, maybe you need to take a different route. This step-by-step tutorial will help you install an SMTPD server on your machine, which is independent of macOS’s built-in sendmail and postfix binaries. Visit this URL: https://www.billkochman.com/Single-Docs/smptd-server-configuration-tutorial-macos.html https://www.billkochman.com/Blog/index.php/how-to-install-a-simple-independent-smtpd-server-on-your-macos-computer/?feed_id=98114&_unique_id=653c7969c488b&How%20to%20Install%20a%20Simple%2C%20Independent%20SMTPD%20Server%20on%20Your%20macOS%20Computer
#All_Posts#Science_Tech#macos#bill_kochman#binaries#binary#gmail#google#install#installation#macports#mail#postfix#send#sendmail#server#simple#smtpd#transfer_protocol#tutorial
0 notes
Text
More on Using a Mac Mini as a Secondary Computer
Remote Access, RSS, and Storage and Backups
Last November, I started using an M4 Mac Mini as a secondary computer. I’m still pleased with it! And I wanted to provide a little update with some more things I’ve learned.

Remote access
Using the Mini, has been pretty simple. I’ll usually use Continuity, via my MacBook or iPad, if the TV the Mini is connected to is on. And I’ll use Screen Sharing if not.1 (I can recommend keeping something like an integrated keyboard and trackpad nearby, if you have the space – which I don’t.)
But I’ve also figured out something else! And I get that this is very basic for many of you, but probably not for all.

On the Mini, I’ve gone into System Settings → General → Sharing → Advanced → Remote Login, and turnet it on. Now I can paste in something like this, in my Macbook’s terminal: ssh [email protected]
The terminal instance, on the MacBook, will now be like if I was running it locally on the Mini. This allows me to reduce the number of times I have to control the Mini directly – as it’s nicer to just use the MacBook.
I also think this is an important setting – even though it’s not as secure:

This means you can’t have FileVault turned on – but it makes it so the Mac will log in (and start all login items) on a restart. This is important to keep services running – but if there’s another (more secure) way of doing this, I’m interested in hearing about it.
RSS
Speaking of things I’ve done in the Terminal…
My Feedbin plan, for $50/year, was up January 10th – and I wanted to see if I could cancel it and run it from my Mac. I noticed that my RSS client of choice, Lire (and several others), had support for something called Miniflux, so I wanted to install that.
With the help of Claude (via Raycast AI 🖇️), I managed to install it via MacPorts. I also had to create a database, and user, with postgresql. Quite quickly I got Miniflux up and running locally – but I struggled much more to get access remotely.2 Because, you obviously don’t want to be able to just type in a public IP and get access to what the Mac is serving.
Classic LLM problem…
Claude suggested Cloudflare as a free option. I do have a couple of domains I could use, but I would rather not move them over to Cloudflare. However, Claude said I didn’t have to with their Zero Trust service. I then spent 6(!) hours trying to make it work, before I learned that, no, it doesn’t work without moving the domain. 🤦🏻♂️
Tailscale <3
The reason I didn’t use Tailscale, is that I thought the cheapest option there was the $6/month plan – which is more than I paid for Feedbin. However, it turns out that there is a free plan for personal use!3 Setting this up, and thus getting remote access to my Miniflux instance, was ridiculously easy.
I also had to follow this guide, to activate both the Miniflux API and something called Fever API (within Miniflux). I was then able to add Miniflux as my syncing service in Lire.4 (But Lire for Mac has an annoying bug, where you can’t paste into the login window. So I had to type everything, including a long and complicated API key, manually…)
Exporting an OPML file from Feedbin, and importing it to Miniflux worked like a charm – and I only miss one feature from Feedbin: Miniflux supports folders, but not tags – and I prefer the latter. But still, I’ve been more than happy with the experience and performance so far.
Storage and backups
I recently wrote about being annoyed because it feels like Apple is forcing me to pay for much more iCloud storage than I need. I already have a lot of Dropbox storage, so I wish I could only use that. My photo library takes up the largest portion of my 200 GB plan, and it’s annoying how hard it is to reduce how much I use, and that the next option is 2 TB.
iPhone (and iPad) backups
One way I’ve tried to reduce my usage, is to store my iPhone backups on my Mini, instead of in iCloud. And connecting the phone with a cable, finding it in Finder, and turning this on gets me somewhat along the way:

However, I can’t find a way to have the backups happen automatically!
Apple has made a way for you to access your iPhone via your Mac.
Here they’ve made a way to back up the entire phone,
and also sync (which is not as complete as backups) the iPhone and Mac.
They’ve also made a way for the sync to happen automatically (when locked and connected to power),
But they’ve not made a way for the backups to happen automatically.
When you know that iCloud backups can happen automatically, it’s hard not to think that Apple’s motivation for developing the same for Mac backups is being hampered by that sweet, sweet service revenue…
Internal vs. external storage
My current setup is only 256 GB of internal storage, but 2 TB of (quite fast) external storage. And one thing I don’t think I mentioned in my original post, was that why I chose not to move my Home folder to the external drive.
The thing is that, it can create numerous problems – so it has to be worth it. And with the way I use my Macs, a minimal portion of my storage use has to be in the Home folder.
All of these are on my external drive:
Apps larger than 1 GB (from the App Store)
Steam games
iCloud Photo Library
My Dropbox folder (which is most of my stuff)
Most backups, including Time Machine backups of our family’s two MacBooks.
Annoyingly, one of the things taking up the most space on the internal drive, is the aforementioned iPhone backups. Because, of course, Apple isn’t allowing those to be placed on an external drive…
By the way, I know that I don't adhere to every backup principle under the sun – so I don't need emails about that, thank you. But [other emails](mailto:[email protected]) are welcome!
More cold storage
While the amount of internal storage works OK, I’ve learned that I could use more external. But that doesn’t mean I wish I bought more than 2 TB for the Thunderbolt enclosure (even though I do intend to upgrade that down the line). I’ve just learned that I want a bunch of slower storage as well.
As mentioned, I’ve placed my photo library on the external drive, and asked it to download everything (about 150 GB). And then I’m currently using ChronoSync Express (via Setapp 🖇️) to create an extra copy of the library every night (and not to not delete files, even though they’re removed from the original).
That means that the two copies take up a bit over 300 GB.
The Time Machine backups take up about 500 GB each,
and the Dropbox about 450 GB.
That means I’m pretty close to the 2 TB – and I wish I could have an extra copy of my Dropbox folder. So I want to add another drive, with slower and cheaper storage. (Suggestions are welcome!) In addition to apps, games, and media for Jellyfin, I think I might want to keep the Time Machine backups on the faster drive. And move more of the “extra” stuff to the slower drive. Here I’m also planning on keeping a remote backup for a friend of mine.
If you’re considering going down this road, I can still recommend it! I’ve also had fun playing the Mad Max game, and UFO 50. 👌🏻
Neither are 100% stable – but works well enough. ↩︎
You also need to make sure everything starts on login. ↩︎
You also need to make sure everything starts on login. ↩︎
PSA: The server in Lire wound up looking like this: http://100.66.12.345:8080, with the IP being my Tailscale IP. That address is also how I now can access Miniflux from everywhere. ↩︎
0 notes
Text
"Common Causes and Solutions for the 'sudo: port: command not found' Error"
Encountering the "sudo: port: command not found" error can be frustrating, especially when you're trying to install or manage packages on macOS using the MacPorts package management system. This error indicates that the 'port' command, which is an essential component of MacPorts, is not recognized or accessible. In this blog, we will explore the common causes behind this error and provide effective solutions to resolve it.
One of the primary reasons for the "sudo: port: command not found" error is an outdated MacPorts installation. Over time, new versions of MacPorts are released with updates and bug fixes. If you're using an outdated version, it might result in compatibility issues, leading to the error. To resolve this, ensure you have the latest version of MacPorts installed on your system.
Incomplete or incorrect installation of MacPorts can also trigger the "sudo: port: command not found" error. It's crucial to follow the installation instructions carefully and verify that the installation process completes successfully. Additionally, double-check the PATH variable configuration to ensure it includes the necessary MacPorts directories.
The PATH variable is an environment variable that contains a list of directories where the system looks for executables when executing commands. If the PATH variable is misconfigured or does not include the path to the MacPorts binaries, the 'port' command won't be recognized. To fix this, update the PATH variable to include the correct MacPorts directory.
Sometimes, the "sudo: port: command not found" error occurs due to shell initialization problems. If the shell initialization files (such as .bash_profile or .bashrc) are incorrectly configured or not sourcing the necessary MacPorts initialization script, it can lead to the error. Review and modify the shell initialization files to ensure the MacPorts initialization script is properly sourced.
Permission problems can also contribute to the "sudo: port: command not found" error. Ensure that you have the necessary administrative privileges to execute the 'port' command using sudo. If you're encountering permission issues, consider using the 'sudo -E' option, which preserves the user environment variables.
Encountering the "sudo: port: command not found" error when working with MacPorts can be frustrating, but with the right understanding and solutions, you can overcome it. In this blog post, we discussed the common causes behind this error, including outdated or incomplete installations, PATH variable misconfiguration, shell initialization problems, and permission issues. By following the suggested solutions, you can resolve the error and continue using MacPorts seamlessly.
At GetThatTech, we understand the importance of addressing and resolving software errors like the "sudo: port: command not found" issue. Our blog aims to provide valuable insights and solutions to help users overcome this error and make the most of their MacPorts installation.
0 notes
Text
everytime i think yeah okay maybe this unit will be okay i have been bumping into little roadblocks. had to make a git account. they want me to add the student benefits okay. first they can't access my location and firefox didn't tell me that it was bcos i needed to give it permission in my computer's settings. then i have to upload proof that i'm a student. but i can't just upload a file no they want a photo and i don't have a student id bcos i never applied to have one sent to me so i have to take a photo of my academic record on the computer with my front facing camera on my phone bcos it wouldn't work with the back one??? and now that i have the account i have to actually install git on my computer. only my computer is old so will it work??? like it's not an issue with like my hardware but i'm on osx 10.15 and cannot upgrade any higher and homebrew was like no! no git for you! so now i'm waiting for macports (?) to install and who knows if it will work any better through that. like i do not want to have to buy a whole new computer for this i only have 4 months left!!!!!
#frustrated rambling#i will not drop out of uni with just two units to go i will not drop out of uni with just two units to go i will not drop out of uni wi
0 notes
Text
I tried macports but after installing I can't find it anywhere on my computer? I tried again and it didn't say there was a redundancy. Where'd it go? I'm worried that's suspicious, or maybe the installation just failed for some reason but it returned it as successful
First wine stopped working and now playonmac? :(. It wouldn't open so I redownloaded and then got past the malware blocked and it still won't open :(
1 note
·
View note
Text
Portugal x Macau mutuals, if you read this, I need more Portugal simps and more Portugal x Macau mutuals.
#aph portugal#hws portugal#aph macau#hws macau#macport#portmac#aph macport#aph portmac#hetalia mutuals#hetalia
20 notes
·
View notes
Text
#aph#hws#hetalia#nyotalia#aph portugal#hws portugal#aph nyo portugal#hws nyo portugal#aph macau#hws macau#aph nyo macau#hws nyo macau#portmac#macport
3 notes
·
View notes
Text


macport and its that one scene from my fanfic
"https://archiveofourown.org/works/39111198"
#hetalia world stars#sorry the face is tilted :((#MacPort#PortMac#hws#fanart#forgot to tag but#part two of my macport propaganda#aph macau#aph portugal
5 notes
·
View notes
Text
Oktober 2022
Yak-Shaving für Astronomen
Als Yak-Shaving bezeichnet man iterative Prozesse, bei denen man, um ein Problem zu lösen, immer erst ein anderes Problem vorher lösen muss, das wiederum die Lösung von noch einem anderen Problem erfordert, und so weiter. Mein Ausgangsproblem: Ich habe ein Bild aus einem Teleskop und will einen Katalog der Sterne in diesem Bild machen. Dafür gibt es eine Reihe von vorgefertigten Programmen, ich muss das nicht selbst programmieren. Eines der gebräuchlichsten heißt “SExtractor”, kurz für “Source Extractor”, und, ja, der Scherz war vermutlich mal für drei Minuten lustig, damals, als SExtractor das Licht der Welt erblickte, also circa im Jahr 2000. Ich habe genau dieses Programm schon damals verwendet, es war mit Abstand am einfachsten und schnellsten für diese Aufgabe.
Aber damals hatte ich auch noch einen Linux-Computer, der von einem IT-Experten gewartet wurde. Die Software-Installation beschränkte sich für mich darauf, eine Email an diesen Experten zu schicken. So war es auch 2005, als ich meinen ersten richtigen Job antrat, und auch 2007, beim zweiten: Ich bestellte beim Arbeitgeber einen neuen Rechner, und sagte gleich dazu, welche Software ich benötige, fertig. Diese Zeiten sind vorbei, heute sind wir alle System-Administratoren und Software-Yak-Shaver. Astronomie machen wir auch noch.
Mittlerweile ist SExtractor in der Version 2.19.5, und existiert nur als Quellcode, wie so oft bei Spezialsoftware für Astronomen. Man kann es aber einfach auf jedem Rechner kompilieren, der Linux-kompatibel ist, also theoretisch auch auf Macs, solange alle nötigen Libraries schon da sind. Sind sie natürlich bei mir nicht. Diese “Dependencies”, also Software, die andere Software voraussetzt, die wieder andere Software voraussetzt, die Versoftwarung von Yak-Shaving, sind ein generelles Problem unseres Software-Ökosystems, und jeden Tag huldige ich Programmen, die einfach so laufen. Topcat! DS9! Seid umarmt. Zum Glück gibt es zum Management dieser Dependencies wieder andere Software. Ich erfahre von Macports, das nach der Installation auch beinahe sofort läuft, und Macports weiß schon, wie man SExtractor installiert. Eine Weile geht alles gut.
Dann teilt mir Macports mit, das es noch eine vollständige Installation von XCode benötigt. XCode gibt es beim Apple Store, und es dauert auch nur eine Viertelstunde, bis ich dort Zugriff habe – der Account zeigt auf eine uralte Emailaddresse, und die Sicherheitsfragen sind verwirrend. Mein erster Lehrer? Wer sollte das gewesen sein? Dann finde ich heraus, dass die angebotene Version von XCode nur auf einem Betriebssystem läuft, das ein paar Versionen jünger ist als meines. Jetzt gibt es zwei Möglichkeiten: Entweder das Betriebssystem auf den neuesten Stand bringen, was zur Folge haben wird, das diverse andere Software auch neu installiert werden muss, und eventuell nicht mehr geht. Oder einen Developer-Account kaufen, und damit Zugriff auf alte XCode-Versionen zu haben. Beides rote Linien in meiner Yak-Shaving-Philosophie.
Oder aber das ursprüngliche Problem mit einer ganz anderen Software lösen. Oder es überhaupt nicht lösen, ein viel zu selten benutzter Problembewältigungsansatz.
(Aleks Scholz)
#Aleks Scholz#yak shaving#Astronomie#SExtractor#Linux#Dependencies#Macports#XCode#Sicherheitsfrage#Betriebssystem
5 notes
·
View notes
Text
How to Install a Simple, Independent SMTPD Server on Your macOS Computer As a web designer, have you been stymied by your inability to get sendmail/postfix working on more recent versions of macOS? If so, maybe you need to take a different route. This step-by-step tutorial will help you install an SMTPD server on your machine, which is independent of macOS’s built-in sendmail and postfix binaries. Visit this URL: https://www.billkochman.com/Single-Docs/smptd-server-configuration-tutorial-macos.html https://www.billkochman.com/Blog/index.php/how-to-install-a-simple-independent-smtpd-server-on-your-macos-computer/?feed_id=92038&_unique_id=6529d64cb9167&How%20to%20Install%20a%20Simple%2C%20Independent%20SMTPD%20Server%20on%20Your%20macOS%20Computer
#All_Posts#Science_Technology#macos#bill_kochman#binaries#binary#gmail#google#install#installation#macports#mail#postfix#send#sendmail#server#simple#smtpd#transfer_protocol#tutorial
0 notes
Text
Macports mingw icu

Macports mingw icu how to#
Macports mingw icu update#
Macports mingw icu windows 10#
Macports mingw icu code#
res files) can be copied to that location to provide new locale data or conversion tables etc. If a path is set, then single data files (e.g. dat package file makes the opposite trade-off: Platform-portable (except for endianness and charset family, which can be changed with the icupkg tool) and modifiable (also with the icupkg tool). This is convenient because it requires no install-time or runtime configuration, but the library is platform-specific and cannot be modified. dat file: By default, the ICU data is built into a shared library (DLL). Note: The ICU test suites can be compiled with this setting. Use of any of these macros should be replaced as noted in the comments for the obsolete macro. Beginning with ICU 60, you should define U_HIDE_OBSOLETE_UTF_OLD_H to 1 (via -D or uconfig.h, as above).
utf_old.h: All of utf_old.h is deprecated or obsolete.
Note: The ICU test suites cannot be compiled with this setting. Beginning with ICU 49, you should define U_NO_DEFAULT_INCLUDE_UTF_HEADERS to 1 (via -D or uconfig.h, as above) and include those header files explicitly that you actually need. All of utf_old.h is deprecated or obsolete. Often, none of them are needed, or only one or two of them.
utf.h, utf8.h, utf16.h, utf_old.h: By default, utypes.h (and thus almost every public ICU header) includes all of these header files.
Note: The ICU test suites cannot be compiled with these settings.
Consider marking the from- const char* and from- const UChar* constructors explicit via -DUNISTR_FROM_STRING_EXPLICIT=explicit or similar.
Consider marking the from- UChar and from- UChar32 constructors explicit via -DUNISTR_FROM_CHAR_EXPLICIT=explicit or similar.
Beginning with ICU 49, you should do the following: This can lead to inadvertent construction of a UnicodeString with a single character by using an integer, and it can lead to inadvertent dependency on the conversion framework by using a C string literal.
UnicodeString constructors: The UnicodeString class has several single-argument constructors that are not marked “explicit” for historical reasons.
+++ source/common/unicode/utypes.h (working -160,7 +160,7 UCONFIG_NO_CONVERSION source/common/unicode/utypes.h (revision 26606)
Macports mingw icu update#
You could temporarily (until you have more time to update your code) revert to the default “using” via -DU_USING_ICU_NAMESPACE=1 or by modifying unicode/uversion.h:
Macports mingw icu code#
If your code relies on the “using namespace icu ” that used to be in unicode/uversion.h, then you need to update your code.
Namespace (ICU 61 and later): Since ICU 61, call sites need to qualify ICU types explicitly, for example icu::UnicodeString, or do using icu::UnicodeString where appropriate.
Note that C99 compatibility is now required.
Macports mingw icu how to#
How To Build And Install On The IBM i Family (IBM i, i5/OS OS/400)ĭepending on the platform and the type of installation, we recommend a small number of modifications and build options.z/OS (Batch/PDS) support outside the UNIX system services environment.How To Build And Install On z/OS (OS/390).Running The Tests From The Command Line.How To Build And Install On Windows with Cygwin.Skipping the UWP Projects on the Command Line.
Macports mingw icu windows 10#
Re-targeting the Windows 10 SDK for the UWP projects.
Building with other versions of Visual Studio.
Running the Tests from within Visual Studio.
Running the Tests from the Windows Command Line (cmd).
This site uses Just the Docs, a documentation theme for Jekyll.
Updating MeasureUnit with new CLDR data.
1 note
·
View note
Text
Macports el capitan

Macports el capitan install#
OS is highly recommended, except for Snow Leopard where the last free version, 3.2.6, is recommended. Using the latest available version that will run on your Site, on your Mac operating system installation CDs/DVD, or in the Mac App Store. Snow Leopard, or 3.1 or later for Leopard), found at the Apple Developer
Macports el capitan install#
Please note that in order to install and run MacPorts on macOS, your system must have installations of the followingĪpple's Xcode Developer Tools (version 13.1 or later for Monterey,Ĩ.0 or later for Sierra, 7.0 or later for El Capitan,Ħ.1 or later for Yosemite, 5.0.1 or later for Mavericks, 4.4 or later for Mountain Lion, The public key to verify the detached GPG signatures can be found under the attachments section on jmr's wiki page. MacPorts installed and wish to upgrade to a newer release.Ĭhecksums for our packaged downloads are contained in the corresponding checksums file. The selfupdate target of the port(1) command, for users who already have.Git clone of the unpackaged sources, if you wish to follow MacPorts development.Tar.gz one for manual compilation, if you intend to customize your installation In source form as either a tar.bz2 package or a.Procedure that most users should follow after meeting the requirements listed MacPorts version 2.7.2 is available in various formats for download and installation (note, if you are upgrading to a new major release of macOS, see the migration info page): Install MacPorts for your version of the Mac operating system:.Agree to Xcode license in Terminal: sudo xcodebuild -license.Install Xcode and the Xcode Command Line Tools.
0 notes