#i had to use the html editor to make this format right
Explore tagged Tumblr posts
Text
COLORED TEXT MADE SUPER EASY

So, I promised a friend that I would make this tutorial. It shows you how to create colored custom text without having to keep going into HTML to do it. You will only need to do HTML a single time, and then after that, just going into your drafts and copying will give you the same effect! Like / Reblog / Comment if you find this helpful.

go to this website
write some words or even use the symbols you wish to use in your replies in certain colors. ● for example, ❝ ❞

Highlight the text

click what is circled in blue then pick your color

go to SOURCE and copy the html.

go to tumblr
click a new text post
click the little gear shift

go to the text editor section and select HTML editor
paste the HTML that you had copied from the roleplay formatted.
hit preview
save this to your dafts. Open your drafts back up

copy the text and move it to whatever response you are trying to use this color. You can then put your cursor at the end of the word. Hit the triangle keys on your keyboard that go left to right.

Once the word is highlighted like this you can then edit that section to say whatever you want it to say

go about your reply like normal!
Please be mindful that not everyone uses the same dashboard colors, and some can't read colored text. I use colored text minimally
29 notes
·
View notes
Note
i feel sooo dumb asking this but how do u make the text a color gradient on ur posts / a color you actually want?? i feel like the colors we have available are soooo drab

aw no don’t feel dumb for asking,, we all start somewhere & i’m super happy to help ૮꒰ྀི⊃´ ꒳ `⊂ྀི꒱ა !! ( as i was once in your shoes as well & had to figure it out all on my own with a bunch of v v v helpful posts from like 5-6 yrs ago T^T )
this is gonna be really long bc i wanna be as transparent & as helpful as possible so be warned pfftttjsfhdjh

but yes i so agree w/ you that the very minuscule, very . . . neon . . . colours aren’t really to my tastes either T^T so for colour picking i normally find a picture to use for a general ~vibe~ ( ie. the gif in my pinned, i took a still and uploaded it to this website [https://imagecolorpicker.com] & individually picked a light to dark green gradient i was happy with ^^ )
however you could also generate a gradient you’d like from this website [https://coolors.co] & randomize it until you get a colour scheme you fw (˶˃ ᵕ ˂˶)
oooooor you could just manually go through various pinks, blues, greens and purples on this website [https://htmlcolorcodes.com/color-names/] & pick a light to dark gradient all by yourself ദ്ദി ˉ͈̀꒳ˉ͈́ )✧

as for actually colouring the text, this website has been my holy grail for like a year now [https://www.stuffbydavid.com/textcolorizer] and it’s v straightforward. just input what your text is in the textbox, pick the gradient effect ( for my post I used the three coloured gradient ) , input the hex codes of the colours you selected going from light to dark ( or vice versa if you wish )
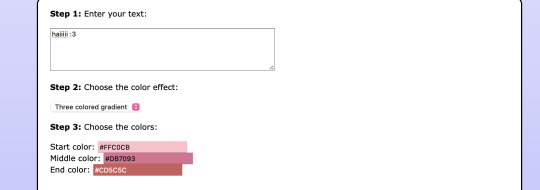
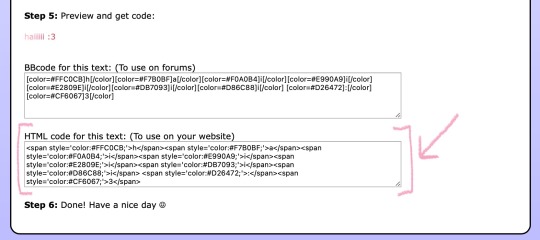
do not bother with anything from “step 4”, look at the preview of the text and if you’re happy with it , copy the entire box from the HTML code section.
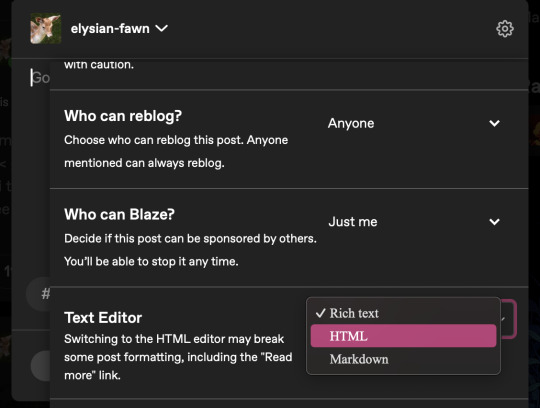
then you’re gonna open tumblr and create a new post but instead of directly pasting it on, you have to click the gear icon on the top right to toggle settings and go to text editor and click the ‘HTML’ option which will bring you to the coding ( i think ? T^T )
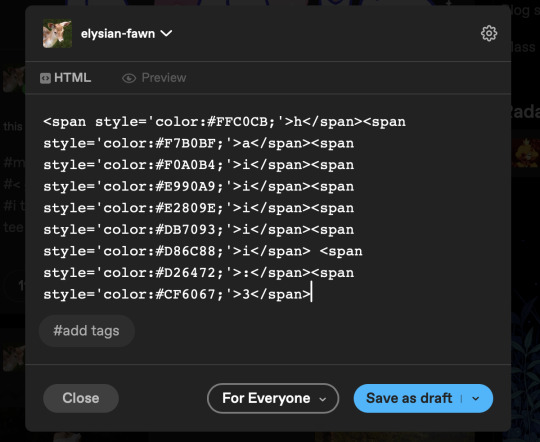
& that’s where you’ll want to paste what you copied earlier , and if you don’t want to change the font you can click “preview” and see if you’re happy w/ it & save the draft and add to your post as normal once you toggle back to "rich text".
& the final result should look like this : haiiiii :3

however, if you are like me, and want that extra little flourish, you can literally just search up " font copy and paste " and like go to the first site or wtv & type in your text and copy the font you wish.
however it gets a little convoluted and time consuming in regards to pasting it (if you use a gradient), because you have to individually replace each standard font letter with the desired font letter like so until the entire word is replaced w/ ur desired font ^^
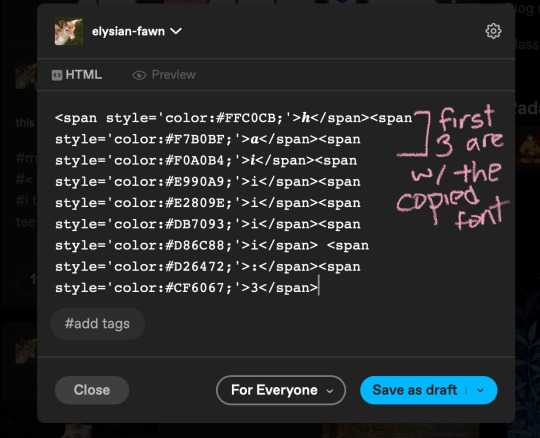
& the final result should look like this : 𝒉𝒂𝒊𝒊𝒊𝒊𝒊 :3
but, if you only do a solid colour it's much easier to replace the text as in the html side it'll look like " <span style='color:#DB7093;'>haiiiii :3</span> " & you can easily replace the whole text [ in this example "haiiiii :3" ] in just one easy paste [ with "𝐡𝐚𝐢𝐢𝐢𝐢𝐢 :3" in its stead ]

ALSO ! my biggest tip would be to make two separate drafts bc it gets so confusing for me personally when i see the coding for the large text wall on the rest of my post. so what i do is just make a separate draft of the coloured text, copy the final result then paste it onto the draft i'll actually post ₍ ᐢ.ˬ.ᐢ₎
very slight disclaimer though, i majority use tumblr/format my posts on the desktop version, so i'm not entirely sure if this is applicable on mobile ( in regards to the html toggle on tumblr ). regardless i hope this was straightforward & easy to follow nonnie ,, here's to gracing tumblr w/more visually appealing posts 2025 o( > ᗜ < )o ₊˚⊹ ᰔ


#⠀ 𐔌 ⟡ 𝒾𝗇𝖻𝗈𝗑 .ᐟ ᘏ⑅ᘏ ꒱#this is a very imperative skill set to have when writing fanfic so you can have a visually appealing layout#. . . speaking from experience . . . don’t ask ໒꒰ྀི๑﹏๑// ꒱ྀིა
29 notes
·
View notes
Note
Hey. I’ve been looking at your posts about posting your fic on Ao3, and I just wanted to be sure— you do know that you can post your fic without having to use HTML mode, right? Like you can post it without having to type a “<p>” and “</p>” before and after every new paragraph, or use “<em>” “</em>” to make sure something in italics is recognized by the website as italics? Just look for a button on the left right above the box you’re going to be writing in that says “Rich Text” and press that. It should be right next to the button saying “HTML,” which is the default button selected, but you only have to press Rich Text to change that.
And none of your work is lost if you switch buttons. But Rich Text mode gives you a version of the posting box where you can write normally and just press the return key for a new paragraph like normal, and there’s a little menu on the top where you can choose if you want to write in bold or italics or change the spacing or whatever. I just felt like you ought to know in case you missed it and had to write the hard way.
I can't do that because the site I write on and store my fics on strips the formatting out of the document—italics, bold, etc—if I copy/paste it anywhere I've tried (all my other word processor apps, other websites, and yes, AO3's rich text editor) EXCEPT FOR tumblr, for some bizarre reason I don't know. Copy/pasting from the site I use into tumblr and copying tumblr's text to paste into AO3's editor is the only workaround I've found for this issue aside from reformatting every italicized/bolder word by hand. And I use a lot of italics.
I could copy/paste the rich text off tumblr and paste it into AO3's rich text editor, but since tumblr's stupid-as-hell post editor only allows you to select one paragraph at a time, my options are: copy/paste one paragraph at a time; manually force past tumblr's stupid-as-hell inability to select more than one paragraph by selecting the first paragraph and manually scrolling all the way down to the bottom to select the whole thing; selecting the whole chapter by going to the finished post and scrolling down to select the whole thing (which is finicky as hell if you're on a tablet, which I am); or, using select-all in tumblr's HTML format and then just quickly deleting the author's note when I paste.
As you can see, using select-all in HTML format is the fastest and least human-error-prone way to transfer text from tumblr to AO3
Every time I post a new chapter I paste the text to AO3's HTML editor and then switch to the rich text editor to insert that chapter's art.
#anonymous#ask#about my writing#(incidentally the format stripping issue also happens when I paste text INTO the site I use)#(for some reason if I manually add <i>html tags</i> to my text & paste it into the site... it removes the html & auto converts to italics??#(would kill to see what that website's backend looks like)
29 notes
·
View notes
Note
Hello i hope your having a good day! I was wondering what you use you draft your stories or if you use anything to check for mistakes?
Sorry if its an odd question, I'm just curious since a lot of people talk about different apps, websites and add ons.
Hey! Thank you! I wish I had a more interesting answer for this question.
For writing, I use google docs. I know, google docs sucks. But the thing about it sucking is its reliable, and I have never, ever lost work while using it.
I used to use microsoft word and even with their autosave feature, I still sometimes would lose hundreds or in bad cases, thousands of words.
I tried using open office, and I immediately lost a hundred words or so.
So until there's a reliable cloud service word processor that isn't google docs I'll keep using it. I have my eye on Ellipsus right now and I'm hoping things work out for them.
For 'checking for mistakes' I don't use anything but spellcheck and myself as an editor. The spellcheck on google docs is getting worse and worse due to AI, so with fanfiction I often end up doing a second spelling pass on AO3 when I upload.
The other tool I use is a website called html-cleaner (.com) which strips out the unnecessary html formatting from google docs work, and makes it so I can more reliably set the spacing between lines and paragraphs on AO3.
Basically what I do is this:
past the rich text from google docs into html-cleaner
click the 'clean-html' button
take the cleaned html from the site and paste it into my text editor (I use notepad++)
Do a find/replace searching for linebreaks (\br) and replacing it with paragraph breaks (\p) instead.
take the results and paste it in html-cleaner and click the "clean-html" button one more time.
past THAT html into the html area on my AO3 chapter and hit publish.
That process makes sure my chapter doesn't have any wonky formatting and especially not the giant "double spaces" between paragraphs that sometimes happen.
#on writing#writing#writeblr#writblr#fanfiction#fan fiction#fanfic#archive of our own#ao3#fandom#ask answers#friend mail
14 notes
·
View notes
Note
hi!!! i love for custom blog theme,, do you have a link to the code or creator 0:?
ya!
so my theme is actually a heavily modified version of redux edit #1 by lopezhummel (current url: holyaura). i always remind users that most tumblr themes are old and that you'll need to replace all instances of "http://" in the code with "https://" so tumblr will save the theme. i had to do it with this one
these are the modifications i made to the theme. i edited this theme over the course of at least a year or so and don't quite recall how i did all of these things. but to the best of my ability:
i moved the "left side img" to the right side of the screen. i also made this element "responsive" so the image will never get cropped when you resize your screen. this was a bitch and a half to figure out and i truthfully do not remember how i did it
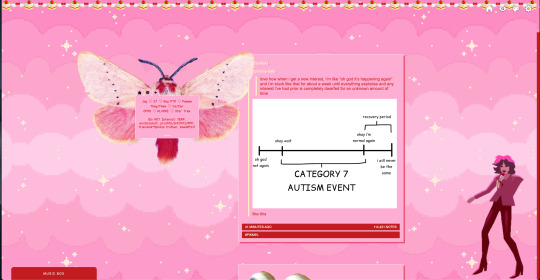
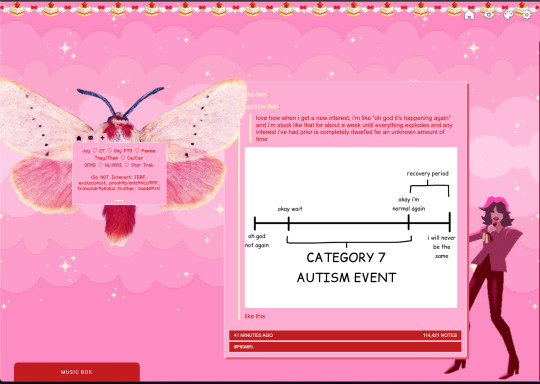
i deleted the text in the drop-down navigation so it appears as a little line that is otherwise not noticeable. this type of theme, the "redux edit," used to be very popular because having a drop-down menu let you cram a bunch of links that lead to sub-pages on your blog. i've done away with my sub-pages, but i still like the format of the "redux style" tumblr theme, for its minimal UI and for its customization options.
i separated my mobile description from my web description for formatting reasons. basically, most elements in tumblr themes are connected to specific text fields and toggles. i simply went to the section that was connected to my blog description and deleted it. the web description has to be manually typed inside of the CSS/HTML editor when i want to change it. whereas my mobile description is whatever i type in the "description" box of the normal tumblr theme editors.
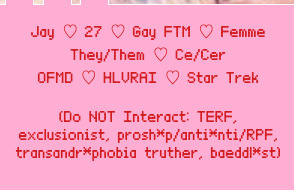
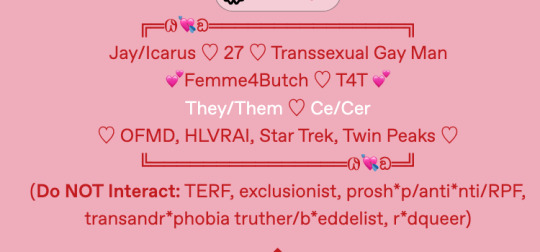
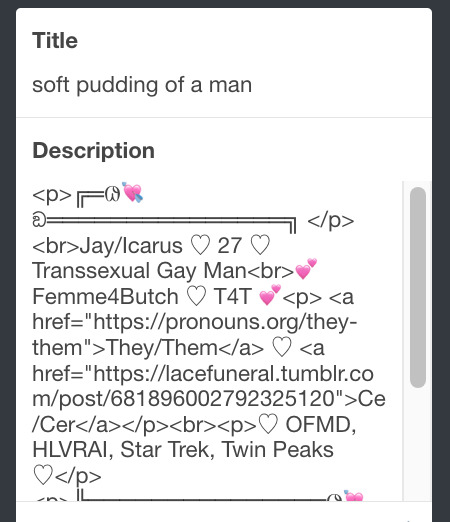

i added code someone else made ("NoPo" by drannex42 on GitHub) which allows you to hide posts with certain tags on them. i did this to hide my pinned post, as it looks bad on desktop.
i replaced the tiny pagination arrows at the bottom with images that literally say "next" and "back" because the arrows were far too small/illegible. i know they aren't centered in the container i'm not sure how to fix that lol

i added a cursor

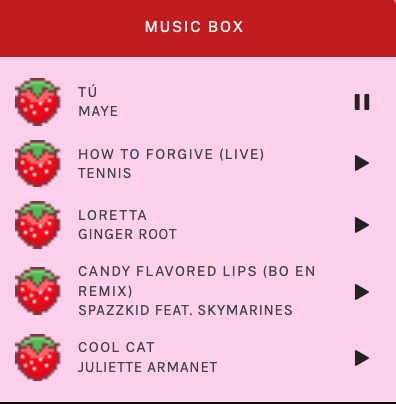
i installed a working music box ("music player #3" by glenthemes), and then added music by uploading MP3 files to discord and then using the links of those files as the audio sources. iirc i also had to make this element responsive and i aligned it so it would sit on the left side of my screen. i made the "album art" for each one the same strawberry pixel art
the moth is just a PNG i added and then moved around so it was behind my sidebar using the options that came pre-packaged with the theme
if you want something like the strawberry shortcake decoration at the top (called "banner" in the theme) your best bet is to google "pixel divider"
theme didn't support favicon so i added that in so i could have a little heart

ALSO:
this theme is. really weird about backgrounds. any background that i have ever set for it, i've had to do weird shit in photoshop. like making the background HUGE, mirroring it, etc. - because it would crop the image weird, or there would be a gap where there was no image. idk man, it's haunted. i'm sure there's a way to fix this but i am NOT tech savvy enough. anyway, patterns are probably your best friend. and if you DO want something that isn't a pattern, it's going to take a lot of trial and error. but i love this theme so i deal with it 😭
the sidebar image and the floating image do not scale. if your image is 1000 pixels, it will display at 1000 pixels. you'll either have to edit the code so that the theme scales the image for you, or resize any images before you add them
my white whale of theme editing (aside from the Weird Background thing) is that i cannot get infinite scrolling to work. i have tried every code out there. all of them break my theme. it makes me sad because like. i have music there for a reason. the idea is that people would listen to it while they scroll. unfortunately, the way it's set up now, the music will stop every time someone clicks "next" or "back" 💀
anyway sorry for rambling but i hope you enjoy the the theme and customizing it in the way that you want to!
23 notes
·
View notes
Text
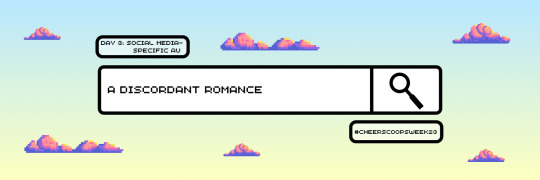
@cheerscoopscentral's cheerscoops week 2023 | day 3: social media-specific AU
Title: A Discordant Romance Pairing(s): Steve Harrington x Chrissy Cunningham, some background Gareth x Will Byers if you squint Tags: Stranger Things (series), fluff, modern AU, streamer AU, chatfic (set in Discord) Word Count: 5.7k Summary: When Eddie Munson gathers all his streamer friends from all the walks of his life, sparks fly for two in particular. A/N: I don't know why I thought making a chatfic based in DIscord was a good idea, but formatting this was a nightmare lmao. Still, I think it paid off. Other than the fact I've had to replace the usual @-system with "@." in the preview so that this hellsite doesn't' tag random blogs, even when I explicitly remove their tag links from the HTML editor. Love that sooo much.
read on ao3 here! preview under the cut:

Server: eddie’s minions - #general
EddieTheBanished @.everyone figured instead of wasting a good server for a one-time event, i’d keep this up in case people wanna stream together again
aguywhohatesparties really? that’s what you came up with?
EddieTheBanished it’s my server i can name it what i want to 🙂
madmaxmay making a new server where everyone’s equal, who’s in [☝️13]
EddieTheBanished 🙁
Server: better name pending - #general
EddieTheBanished there, is that good for now?
madmaxmay i actually kinda dig it permanently
CallMeTheFreak Same. Should also be our next album name.
madmaxmay i want writer royalties
EddieTheBanished why?!
CallMeTheFreak Deal. [🤝3]
EddieTheBanished et tu with the reacts, @.GarethTheGreat @.JeffWithAJ? what is this mutiny
madmaxmay lol you guys are great. you should come back on tud sometime
lilmisschriss ooh, could a certain bat-wielding orc also make an appearance there?
kingsteve oh no
madmaxmay OH YES
you’ve been watching us?!
@.JaneTheEleventh !!!!!!!!!
JaneTheEleventh i am glad you are watching @.lilmisschriss. i like watching your streams too, with max. you are very friendly with your chat and it’s very nice. [❤️4]
madmaxmay pleasepleaseplease join a campaign with me and el!!!!!!!!! @.lilmisschriss
lilmisschriss you girls are so sweet, but i don’t know the first thing about this, i’m just learning as i’m watching and there’s so much to catch up on!
madmaxmay i’ll teach you everything. if we can get @.kingsteve to play through a whole oneshot without his character dying, we can do anything
ToothlessBard sorry, remind me, who is this WE you’re referring to? because i’m pretty sure I’M the one who taught steve everything he knows
kingsteve you know i can still read that, right? [🤷1]
okay fine. i’ll do another one of your stories ONLY if @.lilmisschriss does it too. and if henderson gets off his high horse
madmaxmay @.WiseWilliam GET WRITING, WIZARD BOY WONDER [🫡1 🧙1]
#cheerscoopsweek23#cheerscoops#harringham#stissy#steve x chrissy#chrissy x steve#steve harrington x chrissy cunningham#chrissy cunningham x steve harrington#*myfics#fic: cheerscoops
10 notes
·
View notes
Text
How to Format on AO3
Random thought that popped into my head, but sometimes, when I read stuff on Archive of Our Own (AO3), I see stories with extra lines between paragraphs. Have you ever seen that in your own work, those huge gaps? You don't need them, and it adds excess space to the work.
If you have seen them, then there's an easy way to get rid of them, and add a little polish on your story's readability. Here's how.
You'll need is access to Microsoft Word, whether it is the program you use to write your work, or if you use writing software like Scrivener where you can compile a Word document. Whether Google Docs works out with this method, I don't know.
Once you go to Post New Story/Chapter page of AO3, fill out everything you need, and then go down to the Work Text section. Then follow these steps.
Make sure the Work Text section is set to Rich Text Editor.
Copy your story's text from Word into the Work Text section. Do NOT post the story yet.
Switch from the Rich Text Editor to HTML
Select everything in the Work Text section (now in HTML form) and cut it out.
Open up a blank Word document and paste the text there. You will notice that between each of your story's paragraphs, there is a set of empty paragraph tags, or < p > < / p >. I had to put extra spaces inside the angled brackets to keep it from being invisible. I think there IS a space between the opening and closing tags. Copy one of these sets just to make sure you have it exactly.
In Word, go to "Replace" (You will find it on the top right). Use it to find all instances of those empty paragraph tag sets and replace them with nothing.
Copy the text and paste it back into AO3 (still set to HTML).
Those empty paragraph tags are automatically generated by the site. Once you get rid of them, you will reduce those excessive space between paragraphs into normal spaces, presuming you put a single empty line between paragraphs, which YOU SHOULD.
I know it sounds like a lot, but it's really quite simple and easy. It literally takes a minute or two. Trust me, I've done this a lot.
I should also add that there could still be a hiccup or two. Paragraphs that end in italics can result in a set of empty paragraph tags mixed with an italics tag, so you should give your story a quick readthrough to see if there are still any extra spaces between paragraphs, and fix those manually.
That is all.
#AO3#Archive of Our Own#How to Format on AO3#Fixing Extra Lines Between Paragraphs#Quick Fix#This is so easy#writing
1 note
·
View note
Text
So over the course of about a week, I had extracted the game roms from the various Virtual Console games I had bought on the Wii, 3DS, and Wii U over the years when their online stores were still up. (Well actually, my brother had bought Final Fantasy 1, Circle of the Moon, Minish Cap, Phantom Hourglass, A Link to the Past, and Super Metroid, but whatever. We shared the consoles.)
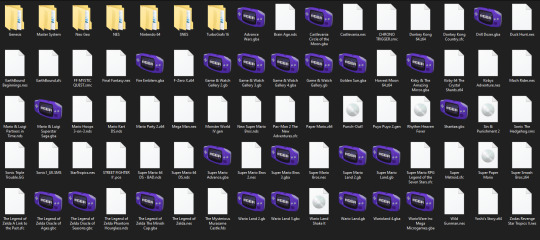
Now I can do whatever I want with these roms, whether that's using them in an emulator, or putting them on a flashcart or some other rom loader to play them on authentic hardware.
Some of these were easier to get than others. For the Wii U Virtual Console games, I used the Dumpling homebrew application to dump all of the games, and from there, it varied depending on the game. For N64 and DS games, I just had to find the files and rename their extensions. For NES, SNES, and GBA games, I used a program called wiiuvcextractor that converted the proprietary formats they used to more common formats used in emulators (.nes, .sfc, .gba). It was pretty easy to use. And then for the Wii games, I used a program called nfs2iso2nfs to stitch the files together to make an ISO. It was easy enough to use once I knew what I was doing by reading a guide a bit more carefully.
The 3DS Virtual Console games were a bit more complicated to do. I had to go through GodMode9's file explorer to go through the files for each VC game to export the roms. The Game Boy and Game Boy Color games were easy enough to deal with (just had to rename the extensions). The one Game Gear game I had bought, Sonic Triple Trouble, I had to decompress with an application called mdfTools. I don't remember whether or not I just dragged and dropped it or used a command prompt, but it wasn't hard either way. And then there's the one NES game I had on 3DS, The Mysterious Murasame Castle. It was a Famicom Disk System game, and hoo boy, was it quite a doozy. First of all, I had to use a hex editor to copy and paste the actual game data without the filler data to a new file labeled .qd, and then I had to download Python specifically so that I could use a specific Python script so that the .qd file could be converted to a regular ol' .fds file.
It was quite a hassle, and technically, it would probably be the hardest one to do, given that some very basic hex editing shenanigans had to be done, but somehow, I found extracting the roms from the Wii Virtual Console games to be far more infuriating.
After some trial and error trying to extract files from the .wad files I had extracted from my Wii (with mixed results), I had found out about a Python program called vcromclaim, which streamlined the whole process, but I had to provide a NAND dump to use it. So after some more trial and error trying to find a program that could create a proper NAND dump, it took even more fiddling to get it to work because I have a monkey brain, but eventually I was able to get it to work... except I wasn't able to extract the one Neo Geo game I had, The King of Fighters '98, because it used a specific kind of compression. According to the readme on github, I would've needed some Python thing called PyCryptodome installed. I don't know what it did, but if I wanted to get every Virtual Console game I owned, I would need to install it. This took several attempts, but I had to reinstall Python outright because it turns out I didn't install it right the first time, but eventually, I got it to download, and got King of Fighters '98 properly extracted, too. And as an added bonus, I got all of their respective digital manuals as html files, so that's pretty neat.


So I know what you might be wondering after reading all of this, because I've come across the same comment trying to look up guides and tools for this whole process.
"Why go through all of this hassle just for a couple of game roms? Wouldn't it just be easier and faster to just go to [INSERT ROM HOSTING SITE HERE] and download the same games?"
To which I say:

Anybody can go onto the internet and download game roms. I should know. I've done it plenty of times myself. But it was never about the games. It was about wondering if it was possible and seeing if I could do it myself. Life's a journey, not a destination.
#video games#gaming#nintendo#virtual console#nintendo hacking#nintendo homebrew#nintendo modding#some of these roms actually have differences from their original releases#as an example: The Legend of Zelda 1 has a better translation for the opening text#late night rambles
1 note
·
View note
Text
Posting Fic - How to prep your writing to display correctly on AO3 (via LibreOffice)
So I've seen guides online about how to convert your fanfic for AO3 after writing it in Google Docs, because a lot of people use GDocs to do their writing (which is a decent option, since it saves it in the cloud and all that). I'm not planning on repeating that here.
But I don't do my writing in GDocs, I do my writing in LibreOffice Writer, because it emulates an older version of Word (which is what I grew up on and am most used to), and because I can have more robust spellchecking than on GDocs. And when I was first considering finally posting my work to AO3, I'd heard lots of commentary about how often pasting into the rich text editor sometimes loses formatting, or what hoops people had to jump through to make sure everything looked good.
So I'm here with the actually-pretty-darn-simple method I use to post to AO3 for anyone who needs this, because I want to be helpful.
Please note: this is largely for the basic formatting one might use on AO3. I haven't tested it with fancier things (not even smallcaps yet, though I'm hoping that won't prove too difficult when I finally get around to a chapter that needs that functionality). Also, these instructions are for Windows, which is what I use.
The first step is, obviously, to write up your story in LibreOffice Writer. I have some formatting standards I prefer because it makes my works look like they're publication-ready, which helps me stay in the "I'm actually writing fiction here" groove.

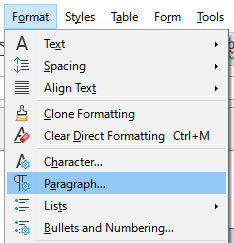
Once you're done writing, you need to make sure the file is ready to save for AO3. With how I write, the only thing I change is that I remove that first-line indent across the whole document. This is easy enough. Select everything, and then go to Format > Paragraph.
Once in that dialog, change the first line indent to 0. If you don't see a number there at all, just enter the number in there.
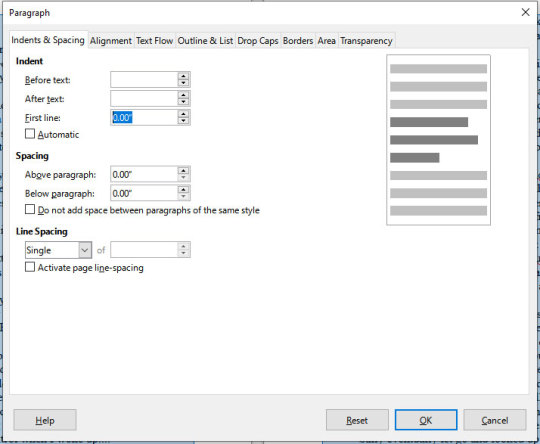
Then press "OK." This will realign all the paragraphs, including their first lines, to the left margin.
Note that I haven't changed the spacing between paragraphs at all. It's still single-spaced, and that's fine, because the next step can handle that.

DON'T SAVE OVER THE ORIGINAL.
What you want to do at this point is select "Save As" and make sure to save it as an html file, not whatever file format you normally use. LibreOffice will probably ask if you want to do that or use its native format, and you can just tell it "use html format."
You should now have an html file wherever you saved it. If you double-click it, it will open in your default browser, and you can check that the formatting carried over properly if you want. It should look ready for posting, complete with the internet-standard single empty line between paragraphs. LibreOffice knows to wrap each paragraph in html paragraph tags, which is what AO3 likes, and AO3 (and generally the rest of the internet) reads that as the extra empty space between paragraphs, just like you should see here on Tumblr.
Now you need to navigate to where you have the file on your computer via your file manager of choice (I'm on Windows, so I use File Explorer, which I can reach just by right-clicking on the Start button, but I also have a shortcut to it on my taskbar). Right-click on the file, and "open with" Notepad. You can also just open Notepad and open the file from within the program.
You should see the html code for the file.
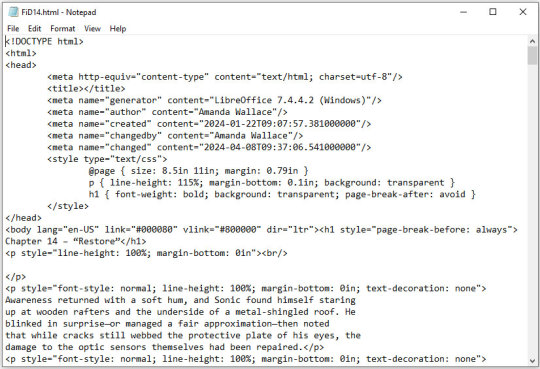
This is all set and ready to go. Copy everything between the "body" tags in the file (I also skip the lines that are for the chapter title, because I can enter that in a different spot on AO3).
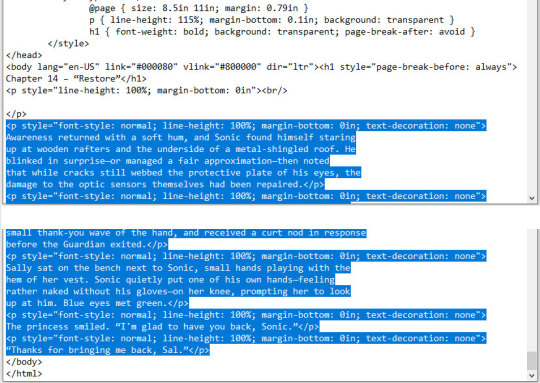
Copy the selected code and paste it into the HTML editor on AO3. If you want AO3 to do a bit of cleanup for you, you can click over to the Rich Text editor, then back to HTML, and it will clean up extra carriage returns and such, but this isn't necessary. Double-check that everything looks good by clicking "Preview," and if you're happy, click "Post."
This even preserves smart quotes, which I don't bother to change to straight quotes, though I suppose you could do so if you wanted.
But honestly, that's how easy it is. Save the file as html, copy the html over to AO3, and done. No scripts, no file converters, no worrying if your formatting is going to survive being pasted into the Rich Text editor. Just LibreOffice and Notepad.
0 notes
Text
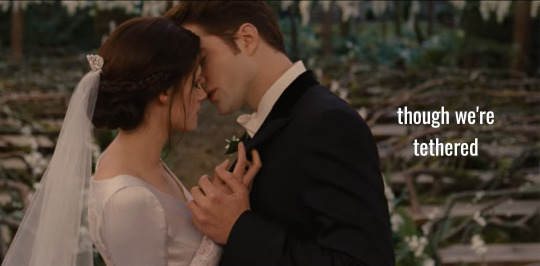

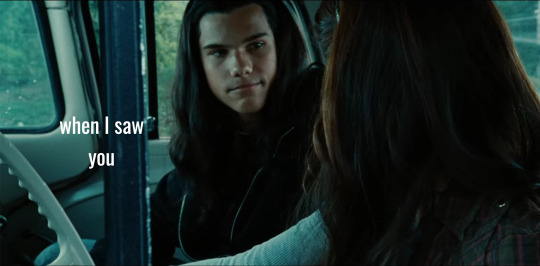
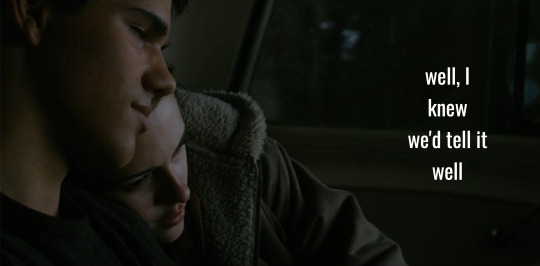
If i had only known how it feels to be yours...
#hello my name is lee and my life goal is to steal all of edbella's songs and use them for j/b#lee's wild scribbles#twilight#twilight saga#team jacob#jacob x bella#bella x jacob#blackswan#swanblack#i had to use the html editor to make this format right#this isn't the top secret project btw rewatching just made me remember it#i made this like.... a year ago? then couldn't decide how to put it together#font used is oswald
54 notes
·
View notes
Text
New AO3 Script / Screenplay Tutorial
Some time back I posted a tutorial for how to format CSS and HTML for a screenplay on AO3, but since then I have improved upon it and I wish to now share with you all the (hopefully somewhat better) new version.
I previously had a significant problem with the spacing of certain elements, which would end up breaking the formatting. So recently I spent two days studying and trying code after code until I got it right.
Note that though this formatting makes the screenplay look authentic enough on a computer monitor or on mobile in landscape mode, it does not (in my experience) tend to show up well in portrait mode. This version is at least readable in portrait mode, however, whereas the old version was not. Still, you might like to make an author’s note mentioning that readers in portrait mode may need to use the “hide creator’s style” button, which will take away the formatting:
Okay, let's get to work! First you are going to have to create a new AO3 work skin. Name it whatever you like, then insert this code:
#workskin p { font-family: "Courier Prime", Courier, monospace; text-align: justify; text-justify: inter-word; }
#workskin p { margin-left: 5%; }
#workskin p { margin-right: 15%; }
#workskin .indented { padding-left: 15%; padding-right: 25%; text-align: justify; text-justify: inter-word; }
#workskin .par { display: block; padding-left: 15%; padding-right: 25%; }
#workskin .character { display: block; padding-left: 25%; }
You can adjust things like the margin and padding percentages to fit your own style, of course!
Now comes the fun part. After you have written your script, make a new draft using your screenplay skin. Then get onto the HTML editor.
The SHOT, SCENE HEADING, and ACTION elements will be left alone. The only tagging necessary for them is < p > (close up the < and >, of course... Tumblr is giving me a hard time about showing it as it really should be) for paragraph transitions. But do be sure to use the < p > tag, or it will break the formatting.
Next are the CHARACTER, PARENTHETICAL, and DIALOGUE elements... which are a bit more involved.
Before blocks of character/parenthetical/dialogue, you need to put the following tag (with closed up < & >): < div class="indented" align="left" > . Note that if there is more than one Character involved with no action breaks in between (in other words, if there is a conversation going on), you do not need to put the tag between each character, just before the first one. Like so:

And be sure to close it back up after the blocks of conversation with < /div >
Next up is CHARACTER, which, as you can see above, is tagged: < p >< span class="character" > CHARACTER NAME< /span >
Notice that there are no line breaks between the < /span > and the dialogue. Due to the nature of < span > if you try to put a line break in there it will turn it into a paragraph break, which doesn't work well for the screenwriting thing. I am sure there is a workaround, but that's what I got for the time being!
Now we come to PARENTHETICALS, which are the bits of action within dialogue:

To tag those, once again do not make a line break, but simply insert this: < span class="par" > then close it after inserting the parenthetical with < /span >
It might be easier to simply visualize, but note that as a personal preference I tend to italicize my parenthetical elements with < em >... you don't have to, that's just my style:

And that is basically it! If you would rather just look at the code than to try and figure out what I was trying to explain (I am not sure I did a good job of that!), here is a basic visual:
This:

Should get you this:
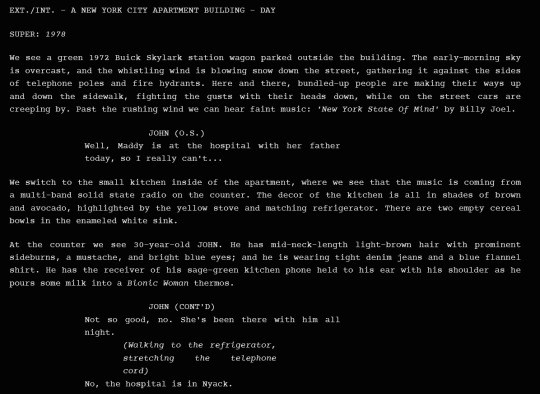
Or something similar, anyway. It may vary on your screen. If you would like to see a live example of how it will look on your monitor or with your device, you can click below to get to a small fic I have formatted this way (it isn't the story sampled above, however, since that is a WIP I have not posted anywhere yet!)
If I have made any mistakes or anything is in need of clarification, let me know! I will do my best to fix it!
#ao3#fanfic#ao3 tutorial#tutorial#writing#writeblr#screenplays#screenplay format#screenplay tutorial
37 notes
·
View notes
Text

ah! well you see, it's just a little bit

and all you have to do is


and presto!
\•/ i am the color yellow and also in tumblr
actual instructions below lol
/// on mobile! y'know where emojis are? go there. if you have google keyboard, or another similar one, there'll be this smiley off to the right side brimming with cute lil guys to use right away... or to SCRAP FOR PARTS. ✨ there's a ton of categories of them. scroll horizontally on the "Emoticons, history, Classic, Smiling, Love, ..." bar to see them all. im always using the Animals tab to steal the wide ╱ ╲ lines from the big spider one. table flip guy is a recent find for high, short lines ¯ the rest of it is experience: ive picked up many lil guys from my time on the interwebs, o7 _o/\o/\o_ :3 ovo :) and so can you! O(-( /// on PC! you have kaomoji too! ...plus any symbol you could ever want actually ⨞⨈⨮⨝⨠⨿©™µÜ¹²⁸⅝Ⅷↈ∑∆∇∞∬⋱⋰⋱⋰⋱⋮⋯§⁕‱♪♪♪ on Windows, press down WINDOWS_KEY and period at the same time to type them anywhere. idk about other machines, you'll have to look that up yourself. on browser-tumblr, you can use any HEX color you can think of! (how i learned this) but you'll have to find the Text Editor settings in the top right of the editing panel. BEWARE: the HTML editor is not lying about breaking some post elements. i had to rebuild this entire work like three times bc i decided to edit some colors part way through (in my experience it deletes extra spaces, extra newlines, image arrangements, and Read More lines, which are ofc reparable but irritating). now, it's going to look frightening hilarious weird when you swap to pure HTML. don't panic ! all you have to do is FIND YOUR SYMBOLS... or text... or whatever... (note most fancy symbols will have aliases like •... i recommend comparing the HTML readout to your Rich Text draft on another tab) and set up a span style around them by typing, <span style="color: hex_of_your_color"> on the front of the text you want changed, and </span> on the end. then you can scroll all the way to the top, click Preview to return to Rich Text, copy some colored text within your post, paste it somewhere else, arrow-key towards it until your insertion point (this blinky ->|) changes color, and bam! now you're typing with color. (that's also how all formatting works on tumblr - arrow-key towards formatted text to continue typing with its formats) (another fun browser trick: SHIFT+ENTER to make smaller newline line spacing. you can backspace big spaces to replace with smaller spaces, and vice versa! good for... idk, text art or whatever... ~)
⠀
edit: oh yeah also
this -> [⠀] <- (the character inside the brackets)
is my secret weapon. without it, tumblr will make lone emojis HUGE, and destroy a lot of extra spaces. paste it wherever your ascii art has holes! ^^ <3
⠀
_-O_|╱ ⊰ ⊹ฺ
/\`O !!! (/\ \
⠀ 🔥 🔥⠀
⠀ 🔥 ✧ 🔥⠀
⠀ __O_ノ🔥 🔥 ⠀ ᐟ\/ ⠀ /
💥
⠀ ' '
⠀ | | 🔥⠀
⠀ ‼️ ⠀ ⠀ O__|ᐠ︵ 🔥 ⠀  ̄🔥🔥 🔥 🔥
⠀
⠀ 🌀 ⠀ ╬O 🍾 🌀 (╲\⚔️__•ᐟヘ_/¯ ノ | ./
⠀ ..•_•ᐟ.O_••`. ⠀ ノ(¯/' | ¯/ ̄ ╲ _/' ⠀ l.\\\| |/ .l ./
801 notes
·
View notes
Text
am building WOBSITE
the visible parts are almost all placeholder text right now, so I'm not linking it, but I'm having a ton of fun.
i looked at wordpress, but it wants everything to be boxes you drag and drop, which does not sound conducive to fiddling with it on my phone between customers. also you have to pay for an "ad-free experience" and i wasn't clear if i was being advertised *to* or having ads put *on* my site, but neither of those sounded fun. also as far as i can tell it's still fundamentally a blog (probably?) and if i wanted a blog i understood the construction of i'd just make another dreamwidth
then i went and looked at neocities, which is a name i have heard Around. apparently they were created originally for people to import their geocities sites onto, when geocities was in the process of going kablooie, and their goal is to provide a way for people to build that kind of real simple website with html and css mostly.
and it turns out they are EXACTLY what i was looking for!
(1) not a blog. they give you an index.html homepage and you can do whatever from there. completely flexible.
(2) they promise never to put ads on your site.
(3) very not gatekeepery. when you create a new html page for your website, they helpfully format it for you with all the machine-readable header shit so that it will display like a website rather than raw code, and connect it to a basic css stylesheet so you can use things like headers, and even include some basic code like "This is a paragraph! Here's how you make a link! Here's how you add emphasis and strong tags! Here's how you insert a picture! (placeholder picture of their logo)" They seem quite enthusiastic about wanting everybody to have fun making little wobsites. They have a bunch of tutorials too, which I haven't really dug into because most of what I actually need to brush up on is specific googleable questions like "how do I put an internal anchor link to a footnote again"
(4) In-browser HTML editor. This is the one that really sold me on it. I was using Gdocs for the convenience factor of being able to make quick gameplay notes at work. Now I can make notes the same way, but organized and cross-referenced and *flappy hands*
(5) You get a gigabyte of storage for free, and a certain amount of bandwidth. If you subscribe at $5 a month as a "supporter" (their only paid tier), you get 50 GB of storage, custom domain name options instead of being only at [name].neocities.org, the ability to create multiple websites with one login, and some other stuff too.
(6) I have currently used about 75 KB of my gigabyte. That's so little that it's still showing as 0.0% usage. It's also, slightly horrifyingly, roughly 15,000 "words" at the typing-speed standard count of 5 characters per word. I know I booted up my laptop after work and did a bunch of template building, so I can make all my listings and stuff consistent, but... that's almost three hours of straight typing at the speeds I use at work. I didn't think I'd been doing *that* much hunt-and-peck coding on my phone. Weekends are so busy too.
(7) Oh, they have a handy button for "Download your entire website" on your dev page too. And another one for "Mount your website as a drive on your computer", which I have no idea what I'd do that for, but that's the kind of open source mindset I like to see. The kind where they provide (usable, helpfully documented) tools to create shit, and then make it easy to take your shit wherever you want.
(8) I strongly doubt I'm going to use up this gigabyte anytime soon, especially if I stick to just HTML and don't start hosting pictures of all the item drops like a wiki, but I might subscribe anyway if I haven't burned out on this project in like a week, because it really is providing me *exactly* what I was picturing for the platform to build this wobsite on, and I had no idea that existed, so I would like it to continue to exist.
(9) I like their terms and conditions too. Anti-censorship, a statement that by using the service you agree that you might run across any type of the crap people put on the interwebs (including sexually explicit material, specifically called out) and the site isn't responsible for censoring any of it that isn't illegal. Standard provisions for determining what content is legal according to the laws of the state of Oregon specifically [which is considered a very permissive place for the US and is probably pretty unlikely to outlaw queer content in the near future], strict provisions against knowingly collecting any personal information from anyone under 18, and a *lot* of strict provisions against using the service to spam, hack, DDOS, or otherwise commit cybercrimes. I approve of these priorities.
(Also, my HTML is still at least as fluent as my Latin, which pleases me.)
4 notes
·
View notes
Note
elek :O smal question if i’m allowed, could you possibly teach me how to make specific colored text like in your navi? i hope you know what i mean, i’m not exactly sure how to phrase it 😭
sure !! it confused me for awhile too, but i figured out that i had to edit the HTML (from the old post editor on desktop) for it. it makes the whole experience quite inconvenient. i recommend that, once you are finished with editing the colours, you should copy the HTML and save it somewhere in case you accidentally click the wrong thing and lose it. i'll break it down a bit more because i had to figure this out completely on my own, idk why nobody talks about it huahah it's very confusing at first. [feel free to reblog this, but it might not stay true since tumblr is always being updated. it would be neat if they made this easier haha ^^]
1. i made the text without any formatting, just what i wanted it to say. i'll be able to add links or bold or italics later.

2. i switch modes so that i can add the colour. i go in and find the text i want to change and next to it put in <span style="color:#HEX">[text]</span>. the words i want to change, i'll move into "[text]".


3. now i can change the colour and put the correct text in the space. i'll find my colour code -- in this case, it'll be a gold tint.


4. i'll save draft, and here's the tricky part — now, i have to open the draft on my phone. you'll have to save draft from there so that when you open your post, you will be able to be in the beta editor on your desktop. after using the old post editor, i can't edit it in the new one. you need the new one for the colour to stay. if you open the draft in the old editor, you'll lose your progress with the HTML.
i'll open the draft on mobile and then just save it and set my phone aside again. i don't need it.
5. now, to protect yourself from accidentally opening it in the wrong editor, you have to go to any other draft and switch modes so that when you open your post, it will automatically be the right mode. you cannot switch from within that draft because you'll lose progress.


(^ this must be switched on by the time you're editing the post !! do it from another draft, and it will automatically use that mode in the first one.)
6. now, i can open the draft and it will be in the new post editor, and my text will still be coloured. i can make parts of it bold or change the text size or add links or whatever it was i wanted to add on top, and it's good. these edits can be made from the HTML to save time (?) but i find that it's much more confusing that way.

keep in mind that there are many ways to achieve this, and i only figured out how to get this to work through excessive experimentation. i am not a tumblr whiz amwlhawjk
(the post, for you to enjoy)
80 notes
·
View notes
Text
How to Customize Your AO3 Writing HTML Format & More!
Okay! So you want to know how to customize your AO3 HTML writing format/how to navigate AO3 in general—well you’ve come to the right place!
Here I’ll be addressing common errors that happen when navigating AO3 as both a reader and primarily as a writer. I’ll also be giving out some great tips and tricks on navigating AO3—especially when it comes to customizing your AO3 writing. I’m mainly making this because when I was trying to simply publish my stories on AO3 with indentation on my writing format; it was such a HASSLE. Especially going through countless blogs that were really freakin’ old and youtube videos that weren’t at all helpful and/or very confusing. Hopefully today I’ll be able to help you try and alleviate that confusion.
I’m also going to make a youtube video on this in the near future as well as my tumblr guide( if you want to learn how to customize your Tumblr blog(theme, linking things on your bio, navigating certain functions) go ahead click here.
Alright! So let’s say you already have your chapter ready and prepped to be pasted onto the HTML writing format. Here are a few things you need to know before pasting that long written chapter onto the HTML format.
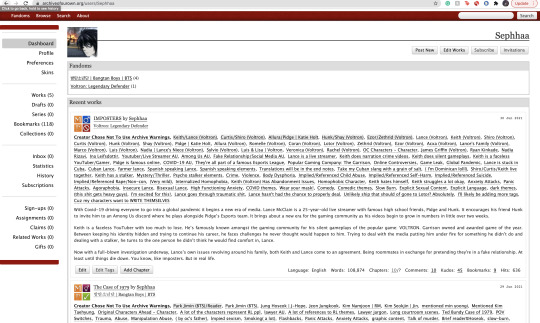
If you have a bunch of indentation on your chapter and go ahead and paste that onto AO3 HTML format—it’d immediately remove all that indentation.
Indentation:
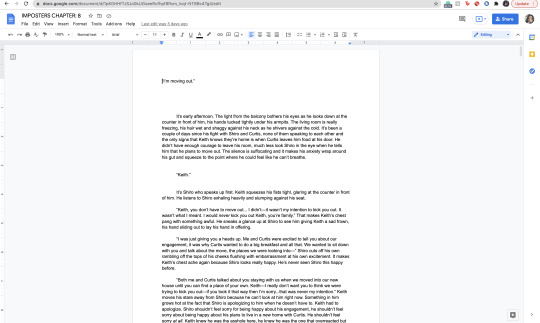
No Indentation:
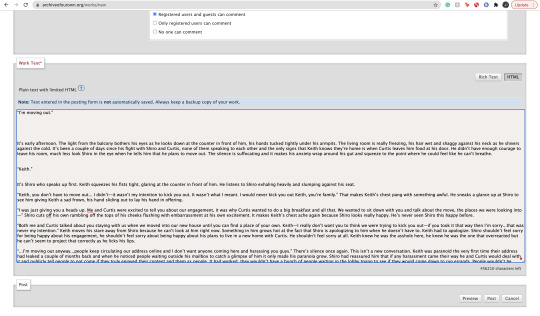
This is going to happen no matter how much spacing you put in that text on HTML. It’s primarily because HTML is meant to be a bunch of code in between text. There is no code suggesting to create indentations on your text. So you might be asking yourself, well how do I create indentions Seph? Here is how:
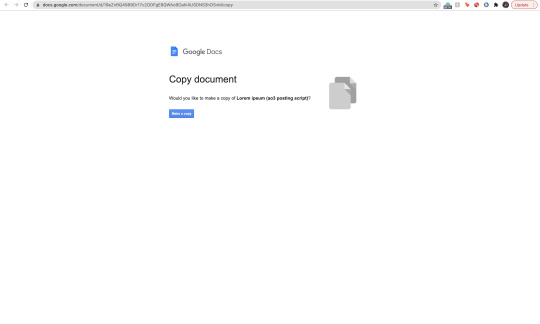
^ here is my secret weapon hehe~
Now, before I came across this holy grail of a website(after going through long hours of searching through youtube videos and articles etc) I was manually typing out all of my code onto my stories. It was literal hell(especially because I write very LONG chapters(20k-60k) so I had to physically scroll through my own writing to put code in between text that sometimes didn’t even work when I finally published my story/chapter. The website I’m going to link to you—it’s a website where you paste your work onto the google doc and it’d put the code in FOR YOU. So you don’t have to sit there for hours implementing your own code for indentations, bold text, etc. Here’s how to use the website:
Website link: https://docs.google.com/document/d/19eZnBQ4989Dr17v2ODFgE8QWAo9Oahi4USDNS3hOSvM/copy (as far as I know this website doesn’t have a name but imma just call it the HTML holy grail lolll)

* You’re going to click, “make copy.”
Make sure before you’re clicking, “make copy,” that the gmail you’re signed into is the same one your browser is signed into. So when you go through the process of selecting a google account to sign into—you don’t select a different gmail. If you don’t write your stuff on google docs and for example—use Word—just copy your writing from your Word document and paste it into the website’s google doc. You’d just have to sign into an email anyway lol.
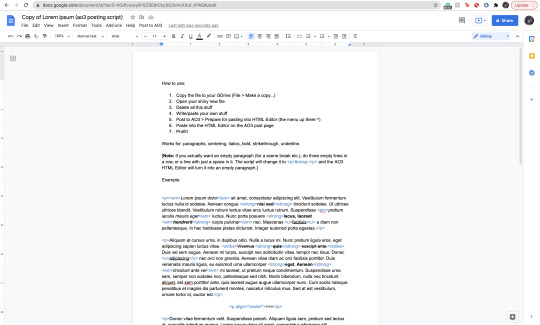
Now when you click, “Make copy,” it’d open to this page. This page has a bunch of instruction you don’t need to read. What you’re going to do is delete all of this text and paste your writing on it. To select all the text:
SHIFT+CMD+A (MAC)
SHIFT+ALT+A (Windows)
Then hit:
Delete (Mac)
Backspace (Windows)
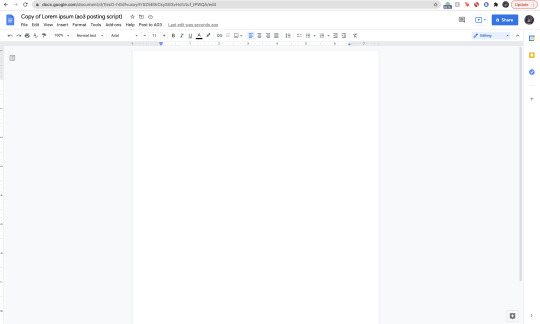
Now that it’s empty, you’re going to go ahead and copy your story:
SHIFT+CMD+A & then CMD + C (MAC)
SHIFT+ALT+A & then ALT + C (Windows)
and paste it to this document.

Now it’s going to look very similar to your own google docs page where you copied your writing from. What you’re going to do next, is click/look for the text that says, “Post to AO3″ which can be found on taskbar above the writing functions next to, “Help.”

When you click this, it’d ask you two things:

and:

Obviously, we want to select, “Prepare for pasting into HTML Editor.” Click that and it’d immediately start running. It will ask you to sign into a google account as well:
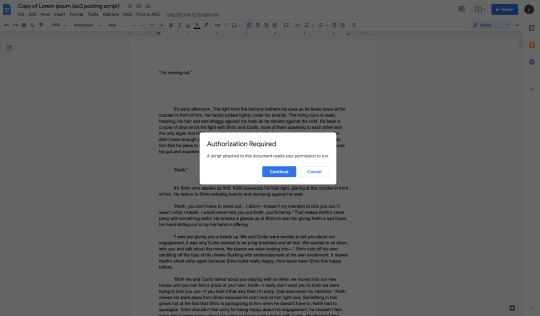
Click continue (this is where it’d ask you to sign into a google account):

Here choose your gmail account (for obvious reasons I won’t be showing my email lol):

It’d ask for permission, select— “Allow” below.
It’d immediately run the script and it should look like this:

Everything highlighted in blue is your code. This coding will make your indentations for you as well as make the coding for bold text, italic text, so on and so forth.
Now, you’re going to copy all of this text:
SHIFT+CMD+A :then: CMD + C (MAC)
SHIFT+ALT+A :then: ALT + C (Windows)
and paste it into your HTML editor on AO3 (ofc, delete all the text already on your ao3 editor):

Now all of your writing should look like this—all code and text.
Keep in mind, when you click, “Preview” your indentations/italics/bold text won’t appear. Idk why it doesn’t (ao3 is just wack like that) but when you publish your indentations/bold text/italics, text WILL appear. I guarantee it.
Alright so adding tags/editing your work is very simple:
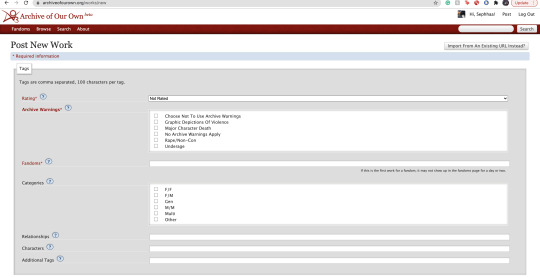
Here is where you’re going to tag all of your work. As you can see, you have a lot of options:

Here is where you start rating your fic. It runs from Not Rated to Explicit. This is primarily to let readers know what type of fic they’re reading before actually clicking on it. It lets younger audiences know not to click it if it’s too mature or too explicit. This also makes it easier for readers to search up stories under whichever rating you choose.

Now the Archive warnings are just extra EXTRA warnings that are more specific. So if your story falls under any of these specific warning tags go ahead and put them—you can also choose not to use the warnings.

The fandom tag is pretty self-explanatory. If you’re confused then you clearly don’t know what AO3 is LOLL. Ao3 is commonly known as a fanfiction site where people will upload fanfics in relation to the fandom they’re writing for. So let’s say I made a fanfic for the anime Death Note, I would type, “Death Note” onto the fandom tag:

Now the categories tag is very self-explanatory as well, choose the tag pertaining to the relationship of your main characters. For example:
I’m going to use Death Note as my example: both of my main characters and/or ship is L/Light Yagami depending on how both characters identify their genders, in this case both characters identify as male in my fanfic. I would choose the “M/M,” tag. Another example:
If I wrote a BTS fanfic and it’s a x-reader X Park Jimin fic, the x-reader for my fic identifies as female, while Park Jimin identifies as a male in my fanfic so I would choose the “F/M” tag.
If the fanfic you wrote has characters that are nonbinary for example, you can choose the “other” tag.
The trend here is knowing what your characters identify as in your fanfic and applying that tag here.

The relationships tag is where you’d put the main ship tag. So again:
If I wrote a Death Note fanfic, and my main romantic pairing or sexual pairing was L/Light Yagami I’ll type that pairing onto the bar and depending on how popular that ship is, it’d pop up for you.
The characters tag is where you’d put all of your characters by name onto the bar. So going back to the Death Note example, I would put L, Light Yagami, and Misa Aname as my characters. You also have the option to add OC characters as a tag (OC—Original characters.)
Additional tags is just that—additional tags. Here is where you’d list specific tags/concepts pertaining to your fanfic. So my tag list will look something like this:
*Gore
*Violence
*Explicit Sexual Content
*Fluff
etc.
Here is where authors commonly put a bunch of random thoughts/writing. You have to keep in mind—if you want to write your thoughts, for example, “L totally rims Light cuz we all know Light is king of the bottoms” you can’t make your thoughts EXTREMELY long. If your thoughts end up being very long—ao3 won’t let you publish your fanfic unless you fix the tags.
Onwards!

Now, here is where you’re going to put your story title, summary, add any co-creators, beginning notes and end notes. All very self-explanatory. Though, I will come back to beginning notes/endnotes later.

Here is all the extra stuff that I don’t really find a lot of authors using. The only one that has a lot of relevance is the “Language” tag which is very important for obvious reasons. Though the small list of tags/buttons to click on—hold some value. If you have a fanfic that is a series, as an example, you can select this box. If you have a fanfic that has multiple chapters, you’d check off the mark that says “this work has multiple chapters.” When you click this, it’d ask you how many chapters. If you don’t know how long your fic will be, you can simply put a question mark. If you selected the option where your fanfic is part of a series, it’d ask you from what series in your works and/or let you make a new series (if your first work is the first book to said series.) The last option, “Set a different publication date,” is an interesting feature on ao3. This feature lets you prep your works in advance and if you know what exact date you plan on publishing your fanfic, you can put an exact date on that fic for when you want to publish it.
Now work skins, or, “Skins,” is a feature I don’t find a whole lot of people using. I had ended up using it because again—I wanted to create indentations to my work on a HTML format and upon some research I found that someone recommended to use skins and apply them to your work to create those indentations.
You may be asking yourself, “What is a skin/work skin?”
A work skin/skin is a body of code you can customize in a separate window. I don’t know the exact details on how to successfully make this code since I forgot how to properly do it (also I mainly don’t want to go into extreme detail how to make a work skin lol) this work skin can be applied to your writing and modify it in a way where you don’t have to manually add certain features. For example:
I wanted to make indentations for my fanfic on the HTML format. At first I used a work skin with code to do the indentation for me:
Here’s a link where you could learn how to do that: work skin indentation
The issue I found when creating this work skin and applying it to my writing, it made it look really wonky. Now I’m sure you can go ahead and change the settings to the work skin in terms of sizing/spacing etc. But to be honest, that sounds like a lot of work I don’t wanna be doing. If you find yourself successfully using work skins (and you know your way around advance coding) by all means, use work skins to your advantage. As far as I know, work skins also have different functions but I do not know those exact functions. I have the holy grail google docs to make indentations/coding for me lol. Moving on!

Last but not least, we have the privacy section where you’d obviously make your selections based on your preferences. Registered users are users who have actual ao3 accounts. Guests are users who don’t have ao3 accounts. Pretty self-explanatory. You can choose where you want a specific audience to read your fics, register users or guests. Or choose both. Or none at all.
START NOTES/ENDNOTES:
Remember how I mentioned that I would be coming back to beginning notes/endnotes? Here’s why:
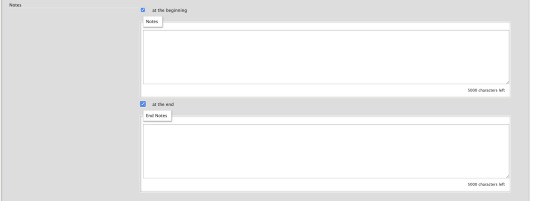
Let’s say you successfully publish your fanfic and it’s a multi chapter fic. A common problem I found myself having and A LOT of other people, when you have multiple chapters and you add endnotes to a specific chapter, your first chapter endnotes appear on that latest chapter you’ve created different endnotes for.
Let me make this clearer:
Let’s say my fic is 10 chapters. In the very first chapter, I added specific endnotes that look like this:

The text: “Leave a comment if you enjoyed the first chapter! Chat with me on my <a href="https://sephhaa.tumblr.com/" rel="nofollow">tumblr</a> Chat with me on my <a href="https://twitter.com/Sephhaa" rel="nofollow">Twitter!</a>” <— this is my endnotes I put for my first chapter.
Now if I go ahead to check my chapters outside of the editor page and then check my latest chapter (in this case is chapter 10):
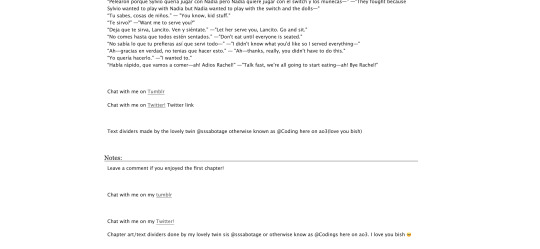
Both my endnotes for that chapter (chapter 10) and my endnotes for the very first chapter appear on my 10th chapter when only my endnotes for, specifically, chapter 10—should be the only one that readers SHOULD see. My readers should only be seeing chapter 10 endnotes. NOT chapter 10 endnotes AND chapter 1′s notes.
Now you may be asking yourself, “Well, how do I get rid of my first chapter notes on my chapter 10 endnotes? When I go to the editor page, to chapter 10, my endnotes look fine and I don’t see my first chapter endnotes there?” Here is how you get rid of them:

Now, I want you to pay attention to this screenshot. This is a screenshot of my ao3 editor page for my latest fic, “IMPOSTERS.” The reason why I want you to pay attention to this screenshot because I want you to notice a very alarming detail we all gloss over.
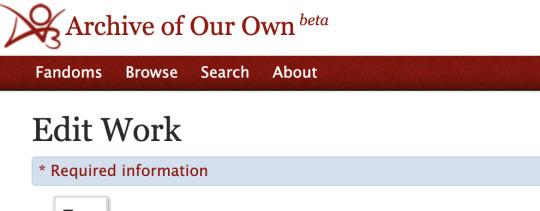
We are in the, “Edit Work” page. We are NOT on chapter 1.
Let me break this down:
You know how your first chapter’s endnotes keep appearing on your latest chapters? Yeah, that’s because they’re appearing on every other chapter because you’ve pasted your first chapter’s endnotes on the, “Edit Work” editor page instead of putting your endnotes to chapter 1 and ONLY chapter one.
What you’re going to do is scroll down to your endnotes
*Copy them if you want
*DELETE! the endnotes on the, “Edit Work” page by selecting this little window:


*Make sure to un-click the little blue check mark so it deletes the endnotes.
Go over to your first chapter by selecting the chapter number on the above taskbar:


*Scroll down to your endnotes
*Paste those endnotes you copied in the endnotes box (now these notes will only appear on chapter 1)
And BOOM! No more first chapter endnotes to your latest chapter endnotes:

Keep in mind: what commonly happens is if you see your first chapter endnotes and then you go and publish chapter 6, just know that if you had written notes in the editor page instead of the chapter, will now naturally move on to the next chapter until another update —it’s because your first chapter endnotes will move onto the latest chapter you post. Those first chapter endnotes won’t be applied to every single chapter of yours.
HITS/KUDOS/COMMENTS:
Now, Hits, Kudos and especially comments are very self-explanatory but here are some things I really do love about each feature:


HITS:
Hits are something I really do enjoy about ao3. Main reason being it’s so different compared to every other writing platform for example—Wattpad.
Now I’ve been, up until recently, on Wattpad for 8 years, I started as an original novel writer and then transferred into fic writing (which is hilarious cuz a lot of writers start as the very opposite.)
In saying that, Wattpad is famously known for clicking and rising the amount of views/reads on a story based on the amount of clicks you give that story. What I didn’t like, even as the writer to my own work, if I click my own stories—Wattpad would count those clicks and mark them as reads. So whenever I edit or check my own work, my reads would go up simply by me—as the author— clicking my own story/chapters. It would be extremely hard to know who was actually reading my story and how many of those reads were actually me just clicking my story.
AO3 doesn’t do this. Since you are the author of that fanfic, it doesn’t count you as a reader when clicking your own story.
This is super great and it just gives me an idea of how many people actually went to give my fic a hit.

KUDOS:
Kudos is a great function and I like it a lot because ao3 doesn’t have the option where people can dislike a fic. Ao3 and many writing sites don’t have a “liking” system like Instagram and Facebook. And that’s mainly because ao3 is NOT a social platform. You cannot make social posts on ao3 and while it’d be nice to notify my readers about x, y and z you can just link your social platforms in your end notes. Which is something I’ll get into in a second.

COMMENTS:
Comments are just that, comments. A good feature on ao3 tho is, you as the author can filter comments. I see authors, unfortunately get a lot of hate for x and y ship and/or concept. It happens a lot and it’s complete BS—especially when authors end up orphaning said story so they can get a little peace of mind.
Ao3 has a pretty good filtering system where you can choose to allow certain comments underneath the story/chapters. The only downside to this, you as the author have to manually read through all these comments (which are commonly hate comments) and it can put a mental toll on you. Ao3 has yet to figure out a way where we can block certain users so they won’t be able to comment/read your fic. So if you are someone who has recently came out with a fic and you are receiving some kind of hate—maybe get a friend or close family member to log into your account and filter your comments for you. Otherwise, you’d have to grow a backbone and can take the hate and filter through your own comments.
In saying that, please please be aware to not take every comment personally and surround yourself with good people. What people say doesn’t matter as long as you were happy writing that chapter/pairing/concept. If it means you’d need a minute away from the internet or not check your inbox at all—both options are available to you and you as the writer don’t have an obligation to respond to hate if you don’t want to.
LINKING YOUR SOCIAL MEDIA IN NOTES:
If you had came from my tumblr guide (which I highly recommend if you’re trying to navigate your tumblr) the coding used for adding links to your tumblr bio in that guide is extremely similar to the coding we will be using today in the AO3 beginning notes/endnotes:
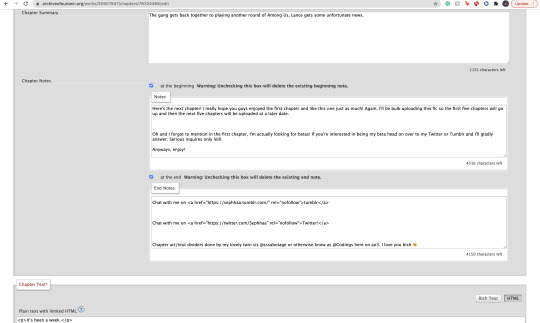

Now here is my social media links in my endnotes. You can add social media links to both beginning notes and endnotes (I find they’re placed more commonly in the endnotes) the coding we will be focusing on is:
<a href=“
that is:
<a SPACE href= QUOTATION MARK ( “ )
(really familiar yeah? lollll shoutout to y’all who came from my tumblr guide)
Now, you’re going to want to type this out in your notes window, and then go grab a social link (I’ll just go ahead and use my Twitter social link) simply copy whichever social platform link you want to copy and paste it right after the quotation mark. It’d look a little something like this:
<a href=“https://twitter.com/Sephhaa”
and end it with a quotation mark( “ ) again.
Right after that we need to write more coding and that coding is:
ref=“no follow”
that is:
SPACE ref=QUOTATION MARK( “ ) no SPACE follow QUOTATION( “ )
So your link will now look a little something like this:
<a href=“https://twitter.com/Sephhaa” ref=“no follow”
Now more coding, but this time, we need some type of text so it just doesn’t look like some long ass link in your notes. Here is the code we’re going to use:
> - beginning
</a> - end
that is:
(start) > TEXT </a> (end)
(my text in this case is going to be “>Twitter!</a>”)
(together ofc, for the sake of the example I’m spacing it) Your link should look something like this:
<a href=“https://twitter.com/Sephhaa” ref=“no follow”>Twitter!</a>
Now you can do this with every social media you have to convert it into a link inside your notes/endnotes.

You can tell whether it worked or not if it’s underlined and highlighted.
ADDING IMAGES TO YOUR HTML FORMAT:
Alright! Adding images to your fic is great! Especially if you want to feature some fanart and you want everyone to see it etc. I personally use this feature to add text dividers. Text dividers is what separates my text, for example, if I’m going from one POV to another—I can add a text divider. I’m going to teach you how to add images to your HTML format since it’s a bit complex and takes a little trial and error—especially when it comes to sizing.

Alright so the coding you’re going to use here is this:
<img src="
that is:
<img SPACE src= QUOTATION MARK ( “ )
After that we’re going to use a website that can convert our images into a link:

Postimages.org!: Website Link.
Here is where you can choose an image, the website will convert it and then you can copy the link of your image and paste it to your code:

After converting your image of choice—you’re going to copy the direct link.

Now, once you have copied the direct link you will go back to your coding and paste it after the quotation mark. It should look like this:
<img src=“https://i.postimg.cc/kGfmV3hQ/C6-CF33-E3-8-D9-E-4-E92-B63-F-1-EE2-B5-FA00-AF.jpg" alt="
and make sure you end it with another quotation mark.
Here is the next set of coding:
alt=“
that is:
alt= QUOTATION MARK ( “ )
Then:
width=“100%” (or whatever number you want to put, here I will just put 100)
that is:
width= QUOTATION ( “ ) 100% QUOTATION MARK ( “ )
height=“50%” (or whatever number you want to put, here I will just put 50%)
that is:
height= QUOTATION MARK ( “ ) 50% QUOTATION MARK ( “ )
Your code should now look like this:
<img src=“https://i.postimg.cc/kGfmV3hQ/C6-CF33-E3-8-D9-E-4-E92-B63-F-1-EE2-B5-FA00-AF.jpg"alt=“”width=“100%”height=“50%”
Now you’re going to end the code like this:
/> </p>
that is:
/> SPACE </p>
Now your official image link should look like this:
<img src=“https://i.postimg.cc/kGfmV3hQ/C6-CF33-E3-8-D9-E-4-E92-B63-F-1-EE2-B5-FA00-AF.jpg"alt=“width=“100%”height=“50%”/> </p>
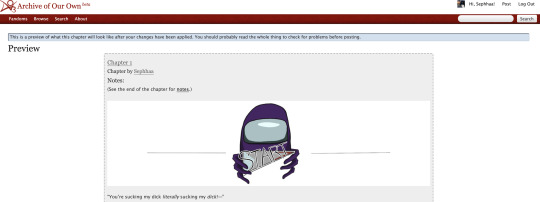
If you select “Preview,” in your HTML editor you can see your image in that window and you can adjust the sizing of the image as much as you like. My image looks something like this when I go to preview:

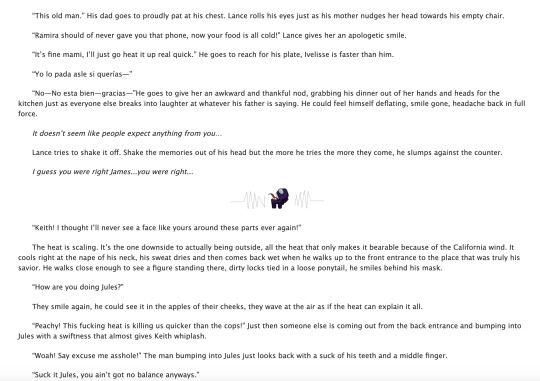
This sizing is pretty great for fanart sizes. You can use this to also make text dividers but in smaller sizes. Like this:
(I have to fix the spacing but you know what I’m trying to get at lollll)
my text dividers look like that and I use a sizing of 30% for both my width and height. You’d simply use the same steps as the first image. Just change the sizings on width and height and adjust it to a much smaller image so it can appear as a text divider. These images are also set to “center” immediately. I don’t know the the coding to make images not centered(if you want your image on the right/left sides) but if I find them all add them to this guide.
Now I don’t really have a whole lot of tips and tricks but some tips I can give you if you are someone trying to gain some attention to your story.
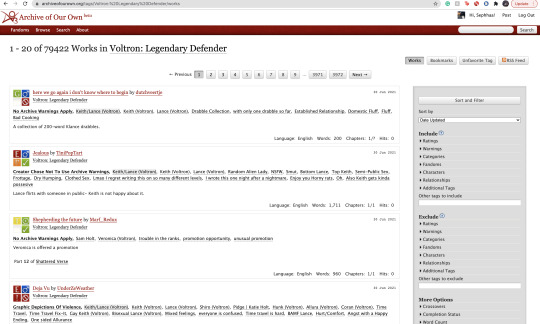
1). Within your fandom pay attention to which fanfic gets the most hits and look at their concepts/tags. Now I pride myself on originality and you should too but sometimes just seeing what tags/concepts ppl use can give you an idea of what readers are trying to read.
I find that in the VLD fandom, the top grossing ship is Klance therefore if I make a fic with them as my main ship, I know I can except some hits. Ships alone can make readers click on your stories. If you write an uncommon ship, it’s likely you won’t really get a lot of hits but honestly you should write for your own enjoyment and not for the hits. This is coming from a person who makes fanfics that I MYSELF want to read and anyone else reading it is reading my own indulgence lmaoooo.
2). Look at concepts.
Think of yourself as a reader and not a writer when looking at concepts. What are concepts YOU seek out. This could be anything from smut to explicit content. To enemies to lovers, to murder and violence. Fantasy AUs and Touch of Life AUs. Me personally—I always seek out stories that have explicit content, primarily smut cuz I know if the story has smut sometimes the story is written to my unhealthy standards of mature content/explicit content. I also look for uncommon concepts, violence, and my favorite concept is anything with crime.
Those are my preferences as a reader and if you are a writer and writing content that you yourself would like to see in a fanfic, there’s a chance other people like those same concepts too. If you don’t know what concepts you’d like to write or what concepts are out there—look at your favorite fic writers and what concepts they write as a reference. You can also just sit yourself down, in front of a google doc, and think about a fanfic you would like to scroll by and think, “OOO That’s def something I wanna read/add to my bookmarks.”
3). Now, I don’t use this tip/trick that often (cuz again, I don’t really care THAT much about hits/kudos etc.) but it is daunting when you put so much time in a fic and it’s not getting as much hits/kudos as you thought it would. If you think it’s a fic worthy of some attention and you’d like to get your name out there more than use this tip/trick:
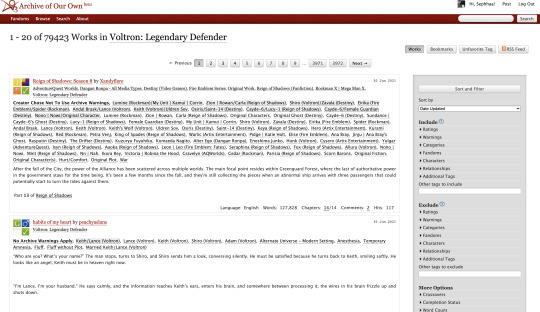
AO3 functions in a way where if you publish a fanfic to your designated fandom, it’d appear on the front page of that fandom tag. This is where readers will scroll through and find fanfics they want to read. Since there is so many people who publish their fics daily everywhere in the world—your fic won’t stay on the front page for a long time. Unless it’s a fic with A LOT of hits (I only really see this in the BTS fandom tag, all stories with thousands of hits are on that front page lol) So here is a little secret way to keep your fic on the front page for a much longer time:
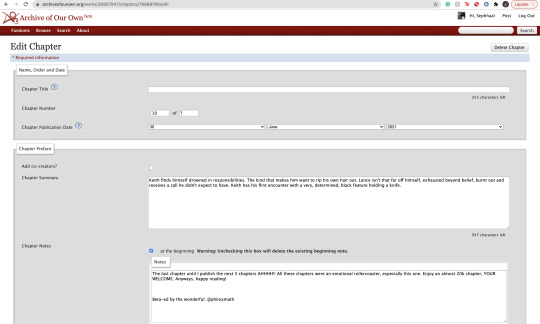
Go to your latest chapter on any of your stories or any story in general.
In order to get your story on the front page again, you’d need to copy everything in this chapter. I’m talking about summary, notes, and the entire written chapter. I suggest separating your chapter summary/notes in one google doc and the chapter text in the work section in a different google doc. Mainly cuz it’s easier to use the
SHIFT+CMD+A (MAC)
SHIFT+ALT+A (Windows)
keys. So go ahead and copy everything, paste them to their separate google docs and delete that entire chapter.
Yes. You heard me. Delete the chapter.
It physically hurts me to do this, especially if something goes wrong. Good thing I keep a copy of all my work—AND YOU SHOULD TOO WTH.
Anyway, go ahead and delete the chapter and then go ahead to your story Edit Work and add a new chapter where you’d be re-publishing that specific chapter.
Step 1: Saving Chap Summary/Notes

Step Two: Saving Chapter 10:
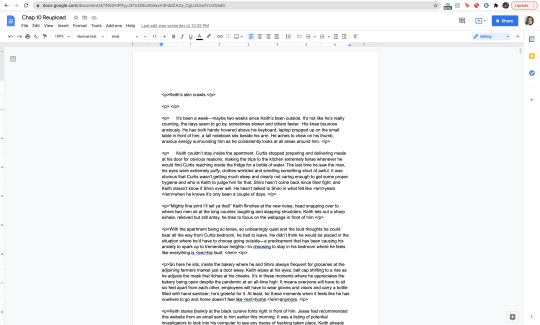
Step 3: Deleting Chapter/Latest Chapter on AO3:


(As you can see above, I only have 9 chapters when originally I had 10)
Step 4: Re-Publication:


Step 5: Publication/Post:

You can also take your time and preview it to see if everything looks good.
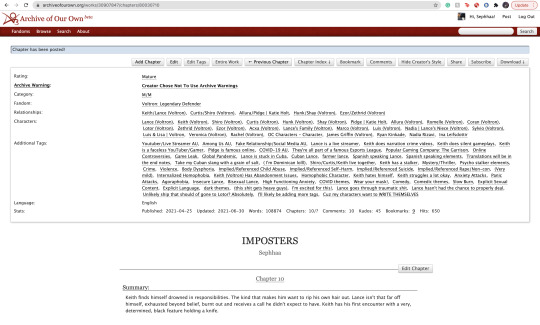
As you can see my chapter is posted and it looks good! Now if you click on your fandom tag underneath your fic title—it’d take you to the front page of the list of fics posted. You should be able to see your fic on the front page.

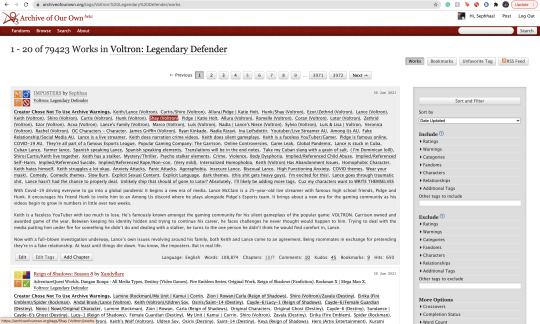
As you can see, my fic is the very first one on the list of fics and on the front page of my fandom fic tag.
Some things to keep in mind:
1). While this is extremely helpful in getting people to click on your fic since your fic is on the front page, the downside of using this tip/trick is the fact that the original date you published this chapter will change. So let’s say you published your fic in the summer of 2020 and have long since finished the story and decide to use this trick and republish your work again in order to get on the front page—the date will instead be 2021 on whatever season or month you decide to republish. It feels kind of weird to republish a chapter and/or story when you’ve finished it a long time ago and it will give an impression to readers that you have only JUST finished the book. Now, if the readers decide to follow your social media and know that you had actually finished the series a long ass time ago—then it’d be written off as you editing/revamping the chapter.
In a lot of cases, it’s just you editing/revamping a chapter in the case that the chapter didn’t upload right etc.
2). Depending on your fandom: this tip/trick might not entirely work. While I’m in the VLD fandom and it’s fairly easy to appear on the front page again—I’m also in the BTS fandom and I find that the process is extremely different. While re-publishing my story in the VLD fandom tag I can easily get my story back on the front page—I cannot say the same for my BTS fandom tag primarily because BTS fics are not sought after by how recent fics have been published but by the amount of hits your fic has. The larger amount of hits you have on your BTS fics—the greater your chances are staying on the front page of the BTS fandom tag list. Since my BTS fic has a good amount of hits (499-500) I appeared on the front page but for a very short period of time. Sometimes that’s enough to garner the attention of 1 or 2 readers. And that’s enough for me.
3). Again, I don’t use this tip/trick often (mostly a trick honestly lol it kinda feels like cheating the system a bit) and you should use this sparingly. Not so much to NOT give your fics the attention you want them to have but on your mental health. Numbers are numbers at the end of the day and it matters more to actually like the stories you write and reach out to a few people instead of thousands upon thousands who probably don’t even interact with you as an author. Start small and build your way up. It’s more genuine that way and you can learn how to maneuver things smoothly when you start off small. That and you have more room to make mistakes and get the chance to learn from them instead of receiving hate for them early on.
Welp! That is all for my AO3 guide. I’m sure I’ll come across another tip or trick or SOMETHING and add it here lolll. I’m still fairly new on ao3 (in terms of publishing my own work) and I’m bound to run into errors etc. But I hope this was helpful for you. I really wish there was a guide like this one (updated to at least 2019 or something cuz LORD all the articles/blogs I came across were old as shit and I didn’t even know if their tips/information were still relevant to the new ao3 format etc) So at least I did a service to younger Seph a year or two ago trying to navigate ao3.
If you found this helpful, I also have a tumblr guide on how to customize/navigate tumblr and all things tumblr (in terms of adding links to your bio, how to make a masterlist etc) so if you’d like to see/read that, head on over here. I’ll also be making youtube videos on both these guides in the near future, just for the peeps that need that extra visual and who don’t want to read through this VERY long guide.
If you like this or me, check out some of my work! I am a fanfic writer—I write both anime and BTS content ( primarily VLD(Voltron) fics but I do plan on writing something for Death Note & Inuyasha (cuz there isn’t enough SangoXMiroku content and that’s a crime in of itself) I also plan to write for the MHA fandom soon too! If that’s something you’re interested in head on over to my Masterlist.
Until my next guide!
#How to Customize Your AO3 HTML Writing Format/Navigate AO3#AO3 guide#How to: AO3#AO3 tutorial#How to: Add A Link To My AO3 Notes#How to: Get Rid of First Chapter Endnotes To My Latest Chapter#How To: Make Indents in AO3 HTML Editor#AO3 Tips#AO3 Tricks#Newbie AO3 Friendly#Fic Writer Friendly#How to: Add Images to Your HTML AO3 Format
32 notes
·
View notes
Text
Anonymous:
Do you have any advice on how to start an rp blog? I feel like there's so much to do and so many specific things, it looks intimidating, but I really want to get into it (and your blog seems like a safe space to ask as a baby in the matter)


Hi! Thanks you for asking and for trusting. I do admit that rping on tumblr can look daunting and there is a series of things that are considered “etiquette” that might not be obvious for newcomers. And the only way to learn is to ask, right? As I’m not sure if you would like something more specific or a step-by-step, I’m going to go through the whole process.
note: this is a repost from an ask in a more reblog-friendly format
1. Setting up the blog
You might want to make a new e-mail account for each blog you want. I recommend making a gmail/google account, so you may be able to use other services and associate them with your blog. I’ll go into more details in a minute.
Some people would rather have a personal blog and then making the RP blog as a side-blog. Or a “hub” blog and many side-blogs so they have everything centralized. The downside is that you can’t follow people with side-blogs, only the main – and some rpers are a little suspicious of personal blogs, so if you intend to go this route it might be a good idea to state somewhere in your blog that you have a RP blog.
Tip : It isn’t said too often, but I recommend saving your blog’s e-mail and password somewhere, maybe a flashdrive or even google drive. This way, if something happens you will be able to retrieve your account.
When picking the URL, for a very long time tumblr had problems tagging URLs with a hyphen ( - ). I’m not sure if it has been fixed or if there are still some issues, so I recommend only using letters and maybe numbers. Other than that, pick anything that sounds nice to you!
Themes are nice, but not entirely necessary. Not everybody has photoshop skills and all that. Some people do have commissioned themes, but if you want to try your hand at it my first stop is usually @theme-hunter or @sheathemes . They reblog many themes from many creators, so there are always many options that might suit your needs. Some creators offer very newcomer-friendly themes that you can configure a lot of things without much hassle but some might require basic HTML knowledge – a few creators have guides on how to properly set up their themes and are willing to and answer questions, so don’t be afraid to contact them! You can also send me an ask, I’m not a specialist but I can certainly help walk you through the basics.
Tip: @glenthemes have very good themes and a basic installation guide here.
When fiddling with the options, try to pick colors that have nice contrast and are easy to read. If you are bad at picking colors or have problems in finding the code for them, I recommend trying this link. There is also this one that auto-generate palettes.
Tip : If you mess with your theme, remember there is the Theme Recovery.
Tip: If you use Chrome or Firefox you can set up different profiles and associate each with a different blog, so you don’t need to log out from any of your accounts.
There are two pages that I recommend having: one is an about your muse. If they are an OC, it is always a good idea to have at least some information out there to make things easier. If they are from a canon source, not everybody is familiar with the material so it might be a good idea to state. For example, if you are going to roleplay as Altria/Arturia, it is a good idea to have a “RP blog for Saber (Altria Pendragon) from FGO/FSN “ somewhere visible. The other page that is a good idea having is a rules/guidelines page. This one can be a little intimidating, but it is usually a way to communicate important things. For example: are you comfortable writing violence? Do you have any personal triggers? There is something you absolutely won’t write? There are things you may figure out along the way and it is absolutely ok to fine-tune this session every now and then. Some people also credit source for their icons and graphics in general in their rule/guideline page.
If you are using the tumblr default themes, when you create a new page you can turn on the option to show a link to the page. If you are using a custom theme, most of the time you will have to link it manually.

Oh, and if you are planning to do a multimuse, it might be a good idea to list which muses you have. The same goes for a hub blog; list the muses and link to the pages.
Icons aren’t necessary but are considered commonplace. You can find some icons I’ve done here but there are plenty of other sources. If you want to do your own icons, keep in mind to don’t make them too big, as a courtesy to your mutuals.
Tip: Anything larger than 300 pixels will be stretched to fit the post. As of today ( 4/29/2021 ) the posts are currently 540 pixels wide. This can be useful as making banners for your blog.
Tumblr allow users to “pin” posts. This mean that they will always visible if you access your blog, even on dash/mobile. You can use this to set up a post with basic links for mobile users or something else. For example, if you are out on vacations and won’t be able to do replies, you can pin a hiatus notice and then remove the pin once you are back.

2. Introducing yourself
Time to officially join the fun! (insert a “Hi, Zuko here” joke) Don’t worry if you don’t have a fancy promo graphic or anything, most people make their initial introduction with a simple post.
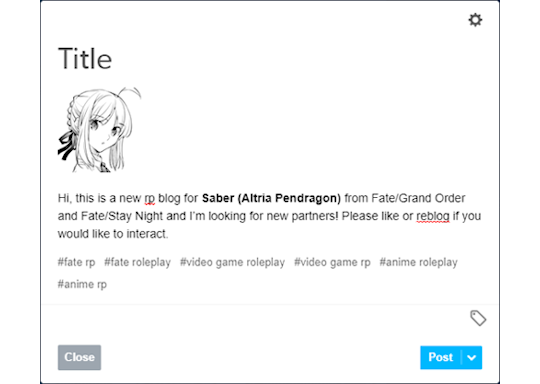
(as you can see, I’m not very good at saying ‘hi’)
Try to introduce yourself in a few lines, but make sure to state which muse you RP as. Some people also like adding their pen name/alias and establishing a brand. Follow as many people as you want that reblogged or liked your post, and tumblr is going to start recommending other blogs that are related to the tags you use normally or have any relation to the people you follow. You can put as many tags as you want, but tumblr will disregard more than 6 tags in their system. Try tags like “<fandom> rp” and “<fandom> roleplay” along with the media, such as “movie” “video game”, “anime” and so on.
It might also be a good idea to follow a few RP memes blogs. They often have options to break the ice, like one-liners that your mutual can send you.
Tip: Don’t forget to turn on the asks and the anon
3. Practical advice
Alright, now that you have a few mutuals, it is time to get to some general tips:
Tumblr can be a little “iffy”, and a great quality of life extension for RPers and navigation in general is installing the New Xkit extension. They offer a number of options to enhance your tumblr experience, but the ones I consider essential are the “editable reblogs”, “quick tags” and “blacklist”. Get it for Chrome or Firefox.
As a rule of thumb I recommend writing your RPs using Google Docs before posting or replying. By doing this you can do some spell check and if your browser crashes for any reason you can easily recover your work. You can also use Word, Open Office, or any text editor you feel like.
Because I’m a bit of a perfectionist, I also have Grammarly ( Chrome / Firefox ) installed for an extra layer of spell/grammar check. There is a subscription option, but the free one works perfectly fine.
To make things easier to locate, always tag the URL of your RP partner when doing a reply. There are other useful things you can tag, such as open starters, memes, and such.
Risking being obvious here, but when you are not interacting as your character it might be a good idea to tag as “ooc” or “out of character”.
Some people like making google docs with basic info and other useful stuff for easier access on mobile. It is a recent trend, it might be easier to edit as opposed to going through tumblr page editor and dealing with the HTML. You can find some templates here and here.
Tumblr’s activity can be unreliable, so don’t be afraid of contacting your partner to see if they have gotten your reply after a few weeks. However, some people also enjoy using the RP Thread Tracker in order to be on top of things. It might be a good idea to check it out.
Because of Tumblr shadowbanning and shenanigans, it isn’t unusual for people to have NSFW sideblogs (sometimes referred as ‘sin blogs’). If you want to write smut, it might be a good idea to consider making one.
Some people don’t like replying to asks, as Tumblr won’t let you remove the initial ask. It has become common to see people making new posts to reply to asks. This is a simple example:
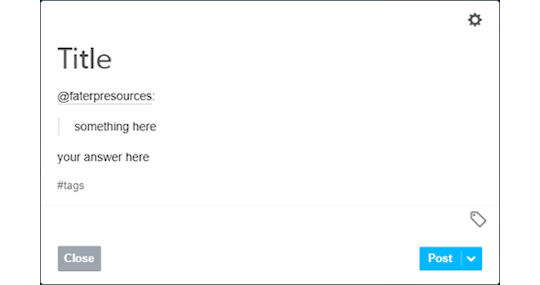
As you can see, I used the mention to have the RP partner notified then I copied and pasted their question on my post and used the quote to indicate it. You can also have fancy graphics, like a line to separate the contents, just do whatever you feel like with the formatting or keep it simple.
To make sure your partner got the answer, I recommend copying the link to the post and pasting on the ask and then replying it privately. An example sent to my rp blog:
4. Basic Etiquette
Ok, this is a little subjective most of the time but here are a few things that are considered universal courtesy.
Never reblog someone else’s headcanons. If you enjoy it, maybe it should politely contact the author and ask if it is ok to write something based on their original idea but you should never downright copy or lift something from another creator. It is considered rude, or even theft in some cases.
Don’t reblog threads you are not involved with. It is ok to leave a like, but never reblog. This is because Tumblr can mess up the notifications and disrupt the flow of the RP.
Don’t copy other people’s graphics. It is very rude and sometimes they commission (aka: paid) for it.
Trim your posts. What does that mean? Every time you reblog with a reply, the post tends to get longer and longer, and it can cluster your and your mutuals’ dashes. This is why the New X-Kit’s “editable reblogs” is an almost must-have tool. If for some reason you can’t install X-Kit (if you are on mobile for example), then remove the previous post or ask your partner to trim for you.
Never take control of your RP partner’s muse. This is called “godmodding” and it is heavily frowned upon. It is ok to control your muse and the possible NPCs that you inserted, but never seize someone else’s character. Likewise, it can also be very upsetting if you use what people call “meta-gaming”, applying knowledge that your muse shouldn’t know about the other. For example, let’s say your RP partner’s muse is a vampire, but they have never disclosed that information to your muse, who also doesn’t have an excuse to know that (for example, being a vampire hunter) so it can be quite jarring sometimes. When in doubt, contact your partner.
This should go without saying, but RPing sexual themes with users under the age of 18 are illegal. It doesn’t matter if the age of consent in your location is lower, once you join Tumblr you are abiding by their user guidelines and the law of the state they are located in. If you are an adult, don’t engage minors with these topics, maybe a fade to black would be a better option. If you are a minor, don’t insist or you might cause a lot of legal problems for others.
Try to tag anything triggering. Violence, gore, NSFW. Both Tumblr and the New Xkit have options to block keywords.
When picking PSDs or graphics for your blog, you should avoid templates that change the color of the skin of POCs muses and try to pick the right race/ethnicity of the muse you are going to RP as. I won’t go through a lot of details, as it is a rather lengthy subject in an already lengthy conversation but keep this in the back of your mind.
Some RPers don’t like when you reblog memes from them without sending anything. Try to always reblog from a source or to interact with the person you are reblogging from, it can be rather disheartening to be seen as a meme source rather than a RP blog. This isn’t a rule and some people don’t mind, but it is always a good idea to try to do this.
This might be more of a pet peeve of mine than proper etiquette, but it is ok to use small font. What is not ok is use small font + underscript. Some people have disabilities that might make it harder for them to read it, so it might be a good idea to refrain from using it. Maybe if you feel like doing something fancier every now and then, but I wouldn’t recommend making this a habit.
Mun and Muse are different entities. Remember that it isn’t because a muse does something (especially a villain one) that the mun condones something. Never assume anything about the mun, when in doubt talk to them.
Be mindful of your partners and treat them the way you would like to be treated.
As a rule of thumb, always talk to your RP partner. It is only fun as long both of you are enjoying it.
5. Closing Words
This got longer than I expected.
Despite all of that, don’t be too worried about not being very good at first. I assure you that you will get better with time, so don’t be afraid of experimenting as long you feel comfortable. And don’t be afraid of saying “no” if something bothers you.
My inbox is always open to questions and ideas, so feel free to contact me anytime!
I would also ask my followers: there is advice I missed/overlooked? Anything you would like someone have told you when you first started? Add your thoughts so I can update this.
Happy RPing!
17 notes
·
View notes