#formatting tutorial
Explore tagged Tumblr posts
Visit Tumblr Blog
Explore Tumblr blogs with no restrictions, modern design and the best experience.
Last Seen Tumblr Blogs


Fun Fact
In February 2021, Tumblr had 518.6 million blog accounts.
Text
COLORED TEXT MADE SUPER EASY

So, I promised a friend that I would make this tutorial. It shows you how to create colored custom text without having to keep going into HTML to do it. You will only need to do HTML a single time, and then after that, just going into your drafts and copying will give you the same effect! Like / Reblog / Comment if you find this helpful.

go to this website
write some words or even use the symbols you wish to use in your replies in certain colors. ● for example, ❝ ❞

Highlight the text

click what is circled in blue then pick your color

go to SOURCE and copy the html.

go to tumblr
click a new text post
click the little gear shift

go to the text editor section and select HTML editor
paste the HTML that you had copied from the roleplay formatted.
hit preview
save this to your dafts. Open your drafts back up

copy the text and move it to whatever response you are trying to use this color. You can then put your cursor at the end of the word. Hit the triangle keys on your keyboard that go left to right.

Once the word is highlighted like this you can then edit that section to say whatever you want it to say
go about your reply like normal!
Please be mindful that not everyone uses the same dashboard colors, and some can't read colored text. I use colored text minimally
29 notes
·
View notes
Text
New Mature Content Warning Overlay (And How to Get Rid of It)
More fun community label "features"! Unlike the new mandatory label for #NSFW, this one is a bigger deal to me because it affects my entire blog and it can't be avoided by just using a different tag.
Apparently on custom blog layouts, if you happen to post or reblog even a SINGLE post that's been flagged with the mature content community label, a full-page warning overlay will appear blurring out your entire blog that must be manually clicked through every single time the page is refreshed. At first I thought this was just a bug due to my older layout but I've come to realize it's not. It's a feature (as confirmed by this recent changes post) that affects all custom themes. The formatting will vary based on your own theme but here's what it looks like on my blog:

I don't know about you but I find this is stupid and annoying. If it could be dismissed once and never seen again that might be one thing, but that's not the case. The vast majority of my blog is not "mature" enough to warrant such an aggressive and invasive warning. I also think pop-ups are obnoxious in general and I'll be damned if tumblr's going to force me to have one on MY blog.
After some desperate googling for a known workaround and being unable to find even a single mention of it, I decided to take on the challenge myself. I'm not a theme coder, so apologies if there's a better way to do this, but luckily it only took me like 10 minutes to figure out a simple fix, which I'm now sharing with anyone else who may want it:
.community-label-cover__wrapper {display: none}
Just copypaste that somewhere in your CSS (<style> tag) and goodbye pop-up!
If you're not sure how to access your theme code, check out this help article. You can also add the code via the Advanced Options menu, which is actually even better (if you can get it to work, it depends on how your theme was coded), because it will then automatically be reapplied to a lot of themes without having to remember to manually add it every time if you change your theme in the future.
Obviously this will only remove it from your own blog for anyone who may visit it. If you never want to see this warning again on other people's blogs you can also add this custom filter to your ad block:
tumblr.com##.community-label-cover__wrapper
Unfortunately I do not have an easy tutorial on hand for this one as the method will depend on your specific ad block app or extension.
Some additional notes:
After adding the theme code and saving the changes, give it a minute to update as it sometimes takes a little while for the page to refresh.
The warning overlay only seems to appear if a "mature" post is on the FIRST page of your blog, which is still annoying and makes the whole thing even more pointless and stupid because what if someone visits any other page of your blog, and oh no, happens to see "mature" content they weren't warned about?!
The warning also appears on direct links to "mature" posts.
This hack has NOTHING to do with entire blogs that have been flagged as NSFW. It only works for non-flagged blogs with custom themes that happen to have individual "mature" posts.
#I'm not letting my entire blog be penalized for a couple rare singular posts that may or may not even be 'mature' enough to warrant it#tumblr may force us to use community labels#and they may have full control over the new blogview#but MY custom blog layout has always been and always will be MINE to format and present however I want#that's the whole point#psa#tutorial#my words#tumblr#tumblr themes#tumblr hacks#wendy's help desk
17K notes
·
View notes
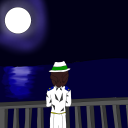
Text
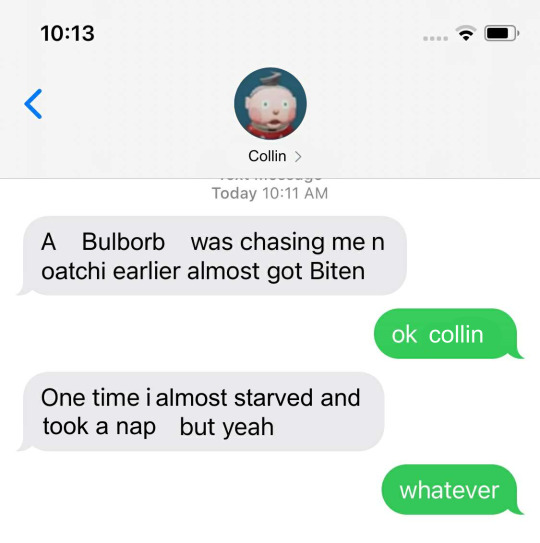
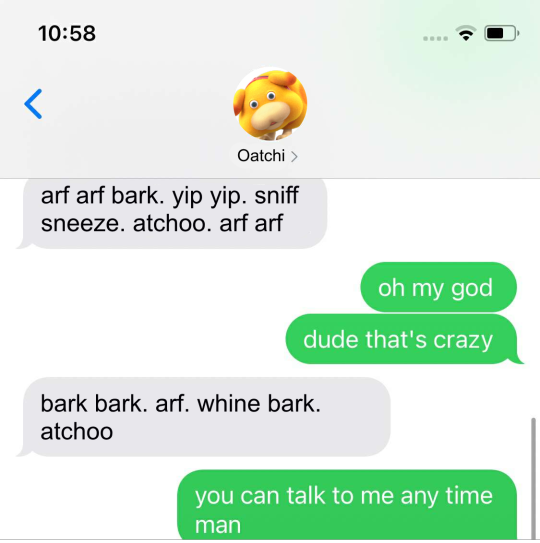
#was talking to a friend and she was talking about how she didnt like how disruptive the tutorial of the demo was#since she wanted to look at the pretty environments without the distractions#and this is what popped into my braine#ive had the gumby pokey format in my brain since the demo but i didnt know whod fit the gumby slot#sorry collin.#i personally didnt mind the tutorial (from watching a stream of the whole demo) but i can see how it could be frustrating#:) i like oatchi#edit: for further clarification im not shitting on collin. i just didnt have much other choice. collin im so so sorry.
1K notes
·
View notes
Text
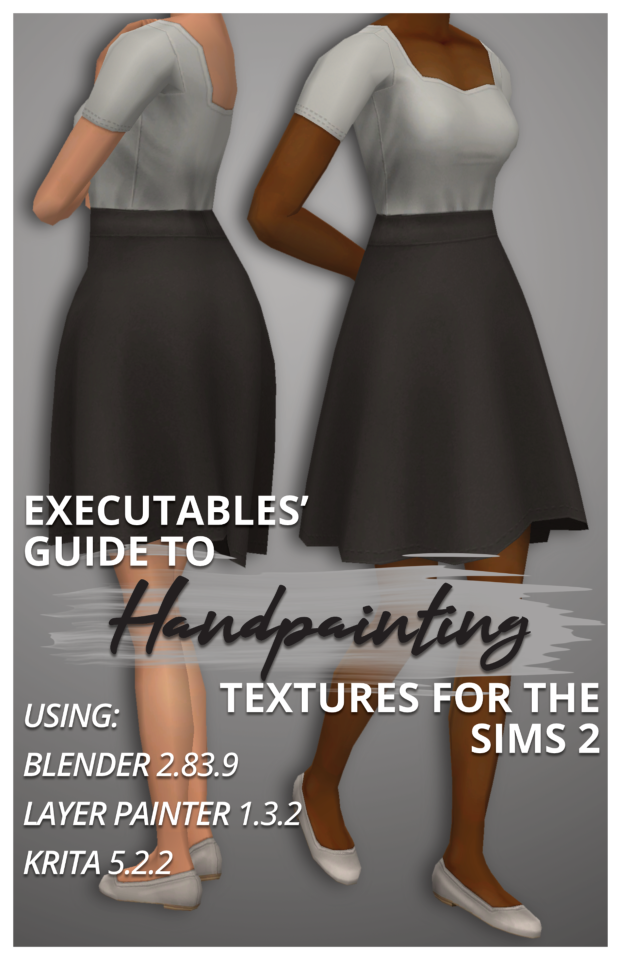
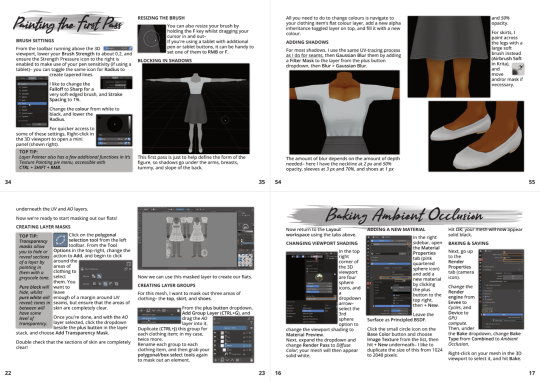
Executables' Guide to Handpainting Textures for The Sims 2 | Download PDF (67 pages)
Have you ever wondered how to paint clothing textures from scratch?
I've been using paid software like Milkshape, Photoshop, and 3D Coat Textura to texture Sims 2 models for years, but I've managed to translate my process to completely free open-source software!
I've broken down the entire process from start to finish for complete beginners (who may never have made a clothing recolour package before), but more experienced CC creators can skip around as needed using the PDF bookmarks.
You don't need a graphics tablet– but you may want one once you've played around with this! :)
The clothing shown on the cover is also downloadable through the document.
Hope this inspires you to make something! :D
#The Sims 2#TS2 Download#Tutorial#PDF#If you'd prefer video format tutorials let me know! Everything is already captured :)
313 notes
·
View notes
Note
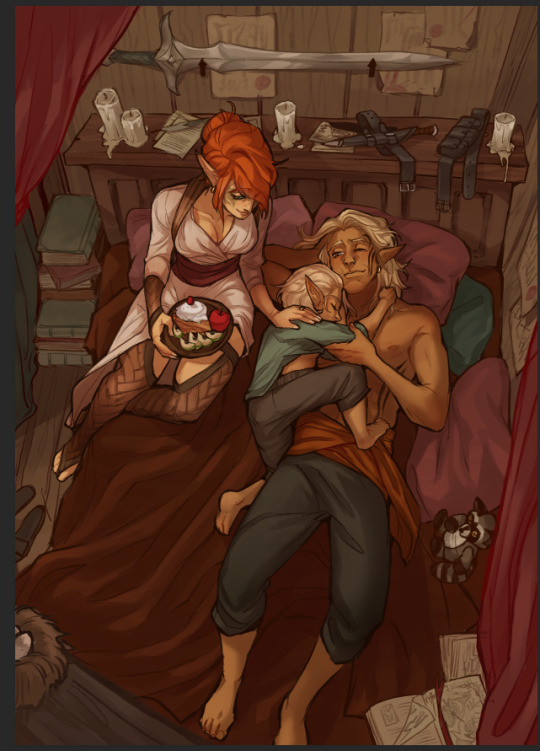
Heyy I love your DA art so much! I just want to ask if you don't mind especially on your family DA piece. Do you render first before putting the lighting/effect or do you do the opposite? I always struggle when drawing illustration like that because I just can't get the lightning right after I put the main shadow
Thank you and no problem!
My process was honestly rather sporadic because I'm not used to work on big pieces like this, especially those with warm colors (like browns, oranges, gold, etc) so it was honestly a challenge.
It's gonna be a long answer so im just gonna put the whole process below this cut
I tried doing everything in base colors first. No shadow no nothin. At this stage im trying to make sure that the base colors are all in the same, warmish tone so nothing felt out of place (left)


I was absolutely stuck on how i should do the shading, so i asked a friend for advice and she painted it over a little to give me an idea (right) (sorry the quality is ass cus its a tiny thumbnailing thing)
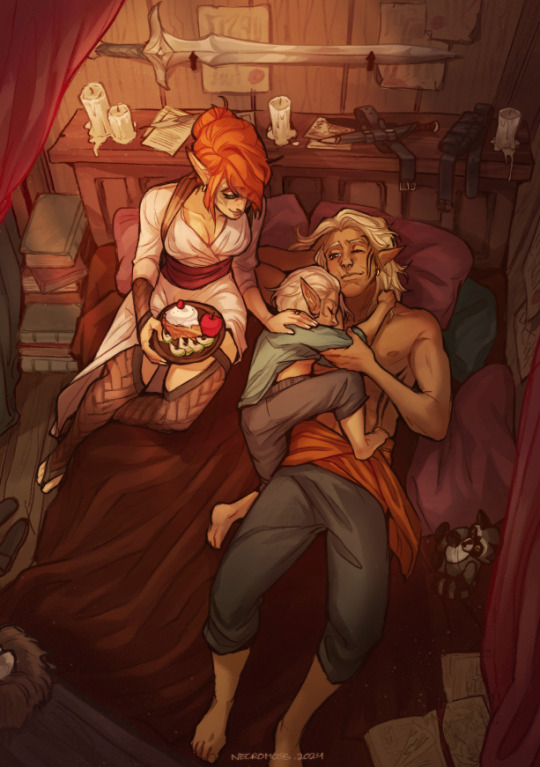
then i focus on the main subjects, i dont entirely shade them yet i just give some discoloration and color details like blush, dirt, subtle ones. I colored the lineart too (but i suggest you do this later after your shading)

then the shading, i carve it out from the multiply layer (as my friend suggested, lighting came from top left so i follow that suggestion)

added more contras (multiply & overlay) to add more depth and pop some more color

now that im done with the main subject, I got a good glimpse on what tone I should do for the rest of the artwork. Dark red for areas i need darker, and something of a gold/orange for the brighter spots.
i shade the background manually without using multiply, since im worried itll be muddy (easier for me to control too).

once everything is shaded, check on your artwork using a B/W layer. Everything still feel flat to me so I know i need to add more contras in the light & shadow
At this point im just throwing in Mulitply layer (reddish, green sometimes) to darken some areas outside of the focus and Overlay layer (yellow, orange, whites) to highlight the important parts and to emphasize where the light is coming from.
Check it again in the B/W layer, and it feels way better!


and there it is!
I added a few personal effects at the finishing, copying the lineart and gaussian-blur it, add speckles, add noise, color balance it a little. Poof. We're done :D
Hope that helps!
78 notes
·
View notes
Text
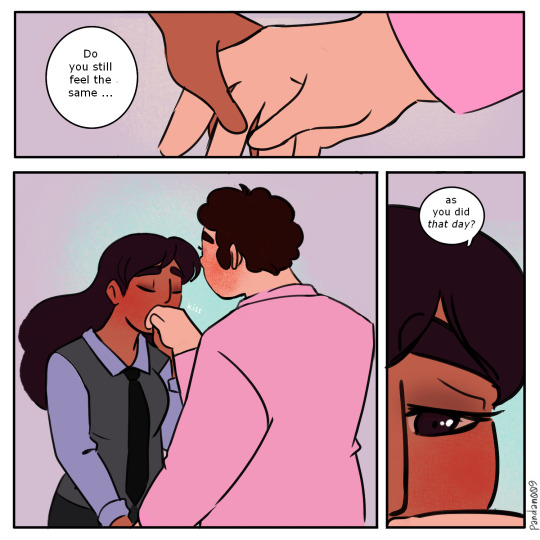
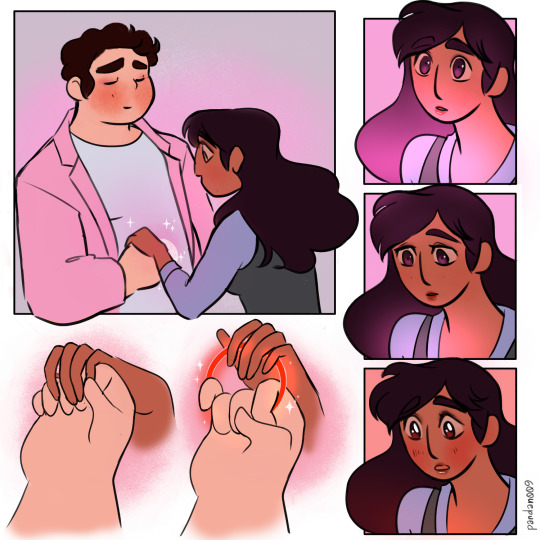
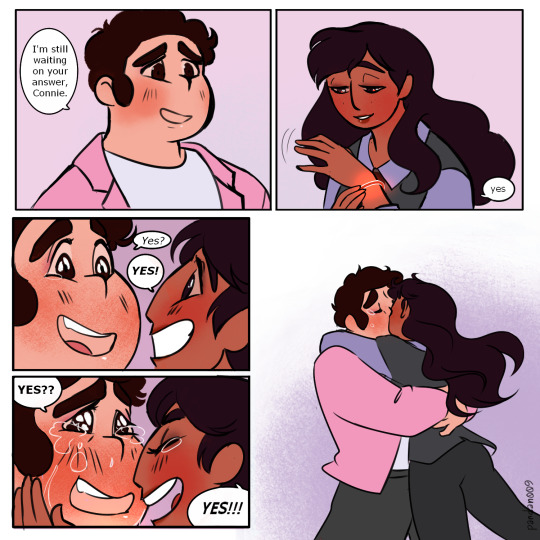
Something to post for the meantime that I can't draw anything new! This patreon request from 2022! They have a little more anime-ish facial features for some reason. (Must be my inspiration at the time.)
They're dressed up because of some important event. It was Connie's day, (a promotion? Idk what specifically tho.) but she just wanted a simple makeup so Steven toned down his own to hopefully not take the attention away from her.
Page 2 might be confusing. There's a headcanon that Steven can store a couple of things in his gem, and here he positioned their hands over his stomach to place the glow bracelet.
To disclose!! (if I'm using the word correctly?) , there's a NSFW continuation of this. So be warned.
#I completely lost interested in finishing that continuation. ^^;#connverse#Connie Maheswaran#Steven Quartz Universe#my shiz#my comics#patreon request#Man I sucked stinky buttcrack on that whole Patreon thing. 🤦🏾♀️ It just isn't for me.#comics#SU comics#steven universe#I remembered this after looking back at my last post. I have had considered making a fanart for “Chiptune” in this format.#Wow I kinda draw hands better back then. I mean it's not the best but I'm sure I drew them in only a few times.#You kno what... I think I got worse with hands after watching tutorials in how to draw hands???#SU#🤔A thing I woul've changed if I actually wanted to. Is the pacing or at least the framings on the third page.
351 notes
·
View notes
Text
thinking about my frustrations with the current system we live under and realizing my experiences (constantly having very little money, thus preventing me from buying things except once in a blue moon unless there's a free option available) are not universal. however i am charging headlong down making a mobile game, and while i probably will put ads into it bc im a broke bitch i refuse to let it be just another of the hundreds of half-assed tutorial projects with a quadspillion ads in them apiece
but this leads me to a conundrum.
i want to have cute little skins for the player character that can be "bought" through one of two things: achieving a cumulative score high enough to unlock it, or by watching a certain number of ads willingly. notably, i refuse to use the ones that interrupt the gameplay out of nowhere and do nothing except pay me, even if they technically pay app makers more than any other kind of ad.
i'm just not sure exactly how to implement it:
should the "unlock via Playing The Game" skins be completely separate from the "watch x number of ads" skins?
should the "unlock via Playing The Game" option be available on the same skins that have the "watch x number of ads" option?
should the "watch x number of ads" thing be reworked into just "watch an ad to add x amount to your current spendable score"?
should i go the scummy route and implement flat-out in-app purchases for if someone doesn't want to watch an ad to get a skin??? does anybody actually do that????? i'm too broke to comprehend the existence of that kind of person but they have to exist if half-assed apps (and tbh whole-assed apps) keep on acting like they're real
should i forfeit my dignity and integrity and do lootboxes
#rosie babbles#gamedev#like. mobile apps with in-app purchases seem to REALLY like going all 'buy ingame currency with Real Money!'#but i just refuse to do that regardless. you get to purchase the skins or what have you directly if i wind up going that route#i'm desperate not dickish#on the other hand i'm half-tossing the idea of using 'ads watched' as a 'currency' of sorts. like.#you could choose to watch a few ads in a row. then you could 'spend' one of those ads on a cosmetic. then say two days later you want a#Fancy Cosmetic that costs two ads. luckily you'd watched enough ads beforehand that you can spend more of them on the Fancy Cosmetic#like. those wouldn't 'expire' or some shit like that.#idk. i'm just very tired in multiple senses of the word#just. please believe me when i say#i'm not doing 'popular game format clone number 10 quadspillion' or 'basic-ass unity3D tutorial with ads slapped on'#if i do this thing i wanna do this thing RIGHT.#nightblogging#random polls#my polls#polls#tumblr polls
20 notes
·
View notes
Note
You gave me some writing advice a while back, and I published my first fic!! :D I knew writing was difficult, but I didn't really expect myself to struggle with something that wasn't even 5k words. I truly gained more respect for fanfic authors, and I really want to focus now I'm developing my writing skills since I'm still pretty mediocre. Also I didn't expect to be so confused when it came to publishing on AO3 lol but I'm learning everyday. Tagging is hard...

that's awesome !!! but don't put yourself down - i think there's an important distinction in thinking to yourself "my work is mediocre" vs "i'd personally like to develop my work in X ways" - in my own experience, framing things in the later way helps keep motivation and joy in what i do.
EITHER WAY THOUGH CONGRATS !!! i hope you enjoyed it and that it can be a fulfilling hobby for you :>
#ao3 has lots of cool tips and tricks#for tagging and also formatting and etc#lots of tutorials out there if you ever want to know more!!#anyway thank you for coming back to let me know you reached the finish line - that's awesome!!#nyoomerr ask
30 notes
·
View notes
Note
hiii, I am writer 2 and I wanted to know how to get my colors like that, to fade and look different like yours
hello angel! I use this website (click the word 'this' it'll take you to it) you pick your colours, type out your words and click generate colour faded text. then you're gonna wanna go ahead and copy the long link in the box it generates. when you switch back to tumblr, create a post and click the little settings button. here, you can scroll down to text editor and change "rich text" to "HTML" and only then do you paste your long link. click back to rich text and everything should be perfect!! 🩷
#ellie williams x reader#lesbian#bisexual#straight#jason todd x reader#lgbtqia#dick grayson x reader#carl grimes x reader#daryl dixon x reader#vi arcane x reader#spencer reid x reader#steve harrington x reader#eddie munson x reader#text format#writers#poet#young writers#faded colour tutorial#faded colour text
100 notes
·
View notes
Text
INDIE ROLEPLAY SET UP :
You must give credit if you take some or all of my set-up pieces as your own. This doesn't include the templates that I didn't make. But if you use the same templates, tagging, format, etc as me or some of the mixed bags (not just templates alone) then crediting me is mandatory as you didn't come up with the mixed bag.
some of the templates I used in my set up are NOT made by me. There is credit linked for everyone to grab them if you want.
if you have any questions please feel free to message me
PINNED POST


URL HERE a BLANK TYPE OF BLOG written by ALLIAS ( PRONOUNS / PRONOUNS, +AGE, TIMEZONE ). All triggers are tagged extensively. All muses are canon divergent, influenced by their source material. this blog doesn't adhere to strict canon. STARTED ON 00 / 00 / 0000.
guidelines . . . muse list . . . navigation . . . meme tag . . . writing sample . . . interaction call . . . promo . . . blogroll . . . credits . . . spotify . . . pinterest . . . sideblog
used this header psd by carestuff but edited ● font I used was Blackadder ITC for the top, Forte for the bottom
used this website for a fancy font ( I used the font called "BOLD FONT" )
Casual reminder that if you link a Google doc or to Spotify, that it will show your name, so make sure you are using a roleplay / burner based account so no one has access to your personal information, such as your real name.
TAGGING SYSTEM

I created this section in Google Docs for every single one of my muses. Below is a link to the symbols I used.
❥ . . . ( tester | tester )

ARC VS VERSE : every single character gets both an arc and a verse that is undecided. Since you can search by both ARC and VERSE, I felt this would make the most sense. A verse is the overreaching section, so for example, SUPERNATURAL is a show, so it gets its own verse. Now for an ARC, I would be putting different sections in for, say, I want Hope to have a soulless arc, then that would be where that would go. Or say I want Hope to have an arc that she has her humanity off, it would fall under the arc section. It's not a big enough theme for me to make it a whole verse.
I can use the tag of no humanity in an arc repeatedly. Combined with, say, searching my Queen of Nola verse and the arc of no humanity, it should give you all of the information written about her no humanity time in said verse. Above picture shows you how I format my verse posts.
CHARACTER ID: This is an overreaching tag that covers pretty much anything written by me for that character, so answered asks, interactions, headcanons, drabbles, etc. all fall in line with this. You could also add it to your visage and musing tags, but I personally don't find that helpful.

This is an example of my tags underneath a reply of mine. More will be explained soon about what everything else means.

This is what I used to tag all the different types of calls I make. So someone can click on, say my meme call, and get to like a call for them to be sent memes.

Any reblogged content went here minus the ask memes, but you could very well put ask memes there as well.

This section is anything related to my set up. Now, I have two different blogs (more to come on why I do that later). This kind of shows you how I break things up.

The extra section is really anything that I couldn't figure out where it might go. So promos, scheduled posts, dash games, etc.

This one feels very self-explanatory. Anything that I personally want saved goes here

This section is anything created by me or something I agree with strongly. Graphics are different than my adventures in ps. The first for me is like character edits, while the second one is maybe asking for opinions or showing people what I am excited for.

I'm not a huge talker in the tags person. However, I do find a few things helpful to point out like when something might be triggering, if one should look at a link I put in my replies, making sure that people know to send the whole prompt not just the symbol (in case it takes me a moment to get it done and I need to know what the instructions for the meme was to prevent deleting a meme because all I see is a symbol or word and therefore have no idea which meme it is attached to. Sending the whole sentence is helpful and doesn't require a two-step process like asking for the meme and the link simultaneously. It is also beneficial to tell people to tell me what muse things are for as well, so that way I am not playing a guessing game.
The potentially triggering topic for me is an overall tag for triggers. I do also break it down into say " clowns tw " as well just for blacklisting purposes. However, the blanket tag covers so that say I forget someone is triggered by something and I forgot to tag it, there is a possibility that this might save it a little bit.

This section of tagging is where I get an overview of things. So, say you aren't looking for any muse's writing in particular that you want to see, but you want to see if we are a good fit to write together. Then you might want to see all my writing, which has answered asks, headcanons, drabbles, and interactions in it. Or maybe you only want to see thread interactions, so you'd go to all replies.
Since there might be a lot of tags (depending on if you are a multiuse or not), I recommend using a Google Docs or a draft post to hold all of your tags for easy keeping.
FORMATTING

The two dividers are from two different sources. The thin one was made by theresourcedhunted, and the thick one was made by dividing by underesources. However, I edited it to remove many of the fancy pieces as I wanted something a tad simpler.
To make my gifs centered without editing them, I use THIS blank space / image.
❝ ❞ is what I use for my dialogue around spoken words. ● A tutorial on making adding coloring to your replies faster without going into the HTML, but a single time. You could always use the few colors tumblr has built in for simplicity.
There are about 4 to 5 spaces between my dialogue and the rest of my text. I'm still trying to figure out what I like personally in that department.
To simplify things, if you use a Windows computer to hotkey and streamline some things, I use aText, a Microsoft Store application. All I have to do is enter a specific combo of letters and words to get a unique key or spacing that I set up myself.
【 ✉️ 𝐂𝐇𝐀𝐑𝐀𝐂𝐓𝐄𝐑 𝐍𝐀𝐌𝐄 】 : this is for any sent messages by my muse. Again, the fancy font is the same one I used in my pinned post. You could use fancy emojis and things. I colored the text of the name and bold it. The actual text is in a small-sized font along with regular normal Tumblr font.
【 📩 𝐂𝐇𝐀𝐑𝐀𝐂𝐓𝐄𝐑 𝐍𝐀𝐌𝐄 】 : this is what I tend to use for messages that my message receives. So, if I am writing a reply that my muse is talking to their friend, but my muse's mother texts them, and I want to show it, that is how I do it.
I personally like to link in headcanons in my replies and things for others to read if needed, share links to songs that might be heard in a reply, or pinterest links to images of maybe the muse's style that is relevant to a reply. I mentioned this in my rules so others know that there will never me links to malware or anything else and is always in good faith.

My formatting doesn't really change for headcanons. I use bolded fonts for the header of each headcanon. Then, bullet points might make it easier for others to find information and read.

every post that I make that isn't a starter tends to follow the same spacing that I mentioned being between my dialogue and using the same bolded font that I always use and was linked above.
Now onto another important thing being what all do I make headers for?
photoshop adventures
liveblogging tv shows
out of character posts
biography post
links section
arcs section
lore post
headcanon post
locations post ● pretty much anything that I think of that could use a title gets a header

You can find my stats template HERE
To show dead pets, siblings, parents, etc. I tend to use ✞ for deceased family and pets

the icon template that I made (without the fade to black)
fade to black ( photoshop action ).
This is what I am currently working on icons for my blog.

gif made by me. could use any template from HERE
my dash icon is currently from HERE, but you could use anything from HERE
MUSE LIST


This is what my muse list looks like. All of my stats go to my sideblog. My sideblog's pinned post looks like my pinned post on my main blog. For the title of all fandoms, they are in the same bold heading that I have done thus far.
OPEN . . . means accepting memes & starters without plotting SEMI SELECTIVE . . . means accepting memes & starters without plotting but will be slower to respond SELECTIVE . . . means accepting memes & starters but would prefer plotting with this muse and I will be slower to respond PLOT BASED . . . means that I don't accept memes & starters for this muse without plotting first. If you ignore this, then your request / meme will be denied. EXCLUSIVE . . . means that this muse is for only a certain number of people. click the link on their name to figure out who this meme is for.
These few things explain what my muse list is like regarding organization.

RULES
𝐀𝐁𝐎𝐔𝐓 𝐓𝐇𝐄 𝐀𝐃𝐌𝐈𝐍 . . .
𝐖𝐑𝐈𝐓𝐈𝐍𝐆 𝐄𝐗𝐏𝐄𝐑𝐈𝐄𝐍𝐂𝐄 . . .
𝐀𝐆𝐄 𝐑𝐀𝐍𝐆𝐄 . . .
𝐏𝐋𝐎𝐓𝐓𝐈𝐍𝐆 . . .
𝐒𝐏𝐄𝐂𝐈𝐅𝐘 𝐓𝐇𝐄 𝐌𝐔𝐒𝐄 . . .
𝐌𝐔𝐋𝐓𝐈𝐌𝐔𝐒𝐄 . . .
𝐒𝐌𝐔𝐓 . . .
𝐌𝐔𝐒𝐄 ≠ 𝐌𝐔𝐍 . . .
𝐀𝐒𝐊 𝐌𝐄𝐌𝐄𝐒 . . .
𝐓𝐀𝐋𝐊𝐈𝐍𝐆 𝐈𝐍 𝐓𝐇𝐄 𝐓𝐀𝐆𝐒 + 𝐋𝐈𝐍𝐊𝐒 𝐈𝐍 𝐑𝐄𝐏𝐋𝐈𝐄𝐒 . . .
𝐐𝐔𝐄𝐔𝐄 𝐁𝐀𝐒𝐄𝐃 . . .
𝐑𝐄𝐏𝐋𝐘 𝐋𝐄𝐍𝐆𝐓𝐇 + 𝐖𝐀𝐈𝐓 𝐓𝐈𝐌𝐄 . . .
𝐀𝐈 𝐌𝐀𝐓𝐄𝐑𝐈𝐀𝐋 . . .
𝐃𝐎 𝐍𝐎𝐓 𝐈𝐍𝐓𝐄𝐑𝐀𝐂𝐓 . . .
𝐏𝐄𝐑𝐒𝐎𝐍𝐀𝐋 𝐁𝐋𝐎𝐆𝐒 . . .
𝐓𝐑𝐈𝐆𝐆𝐄𝐑𝐈𝐍𝐆 𝐂𝐎𝐍𝐓𝐄𝐍𝐓 . . .
𝐓𝐀𝐆𝐆𝐈𝐍𝐆 𝐒𝐘𝐒𝐓𝐄𝐌. . .
𝐒𝐇𝐈𝐏𝐏𝐈𝐍𝐆 . . .
𝐌𝐀𝐈𝐍𝐒 & 𝐄𝐗𝐂𝐋𝐔𝐒𝐈𝐕𝐄𝐒 . . .
𝐑𝐄𝐒𝐎𝐔𝐑𝐂𝐄 𝐁𝐋𝐎𝐆 . . .
𝐁𝐀𝐍𝐍𝐄𝐃 𝐅𝐀𝐂𝐄 𝐂𝐋𝐀𝐈𝐌𝐒 . . .
𝐁𝐀𝐍𝐍𝐄𝐃 𝐅𝐀𝐍𝐃𝐎𝐌𝐒 . . .
𝐑𝐄𝐒𝐄𝐀𝐑𝐂𝐇 . . .
𝐒𝐓𝐄𝐀𝐋𝐈𝐍𝐆 . . .
𝐆𝐎𝐃 𝐌𝐎𝐃𝐃𝐈𝐍𝐆 & 𝐏𝐎𝐖𝐄𝐑 𝐏𝐋𝐀𝐘𝐈𝐍𝐆 . . .
𝐃𝐈𝐒𝐂𝐎𝐑𝐃 . . .
𝐂𝐎𝐌𝐌𝐔𝐍𝐈𝐂𝐀𝐓𝐈𝐎𝐍 . . .
𝐇𝐀𝐑𝐃 𝐍𝐎'𝐒. . .
𝐂𝐀𝐋𝐋 𝐎𝐔𝐓 𝐂����𝐋𝐓𝐔𝐑𝐄 . . .
𝐔𝐍𝐅𝐎𝐋𝐋𝐎𝐖𝐈𝐍𝐆 . . .
𝐅𝐎𝐋𝐋𝐎𝐖𝐈𝐍𝐆 . . .
𝐌𝐔𝐓𝐔𝐀𝐋𝐒 𝐎𝐍𝐋𝐘 . . .
𝐃𝐑𝐀𝐌𝐀 . . .
𝐃𝐑𝐎𝐏𝐏𝐈𝐍𝐆 𝐓𝐇𝐑𝐄𝐀𝐃𝐒 . . .
𝐅𝐎𝐑𝐌𝐀𝐓𝐓𝐈𝐍𝐆 . . .
𝐁𝐋𝐀𝐍𝐊 𝐁𝐋𝐎𝐆𝐒 . . .
𝐌𝐔𝐒𝐓 𝐇𝐀𝐕𝐄𝐒 . . .
𝐁𝐋𝐎𝐂𝐊𝐈𝐍𝐆 . . .
𝐆𝐄𝐓𝐓𝐈𝐍𝐆 𝐓𝐎 𝐊𝐍𝐎𝐖 𝐌𝐘 𝐑𝐎𝐋𝐄𝐏𝐋𝐀𝐘 𝐏𝐀𝐑𝐓𝐍𝐄𝐑𝐒 . . . ● I used the same unique font and bolding/coloring as usual for everything. Then, I did everything else in the regular Tumblr font. ● Some of these sections might not be needed in your case, or you might find you need to add more sections. Do whatever works for you.

Alright, here is a tip. If you have several tags and want to narrow down, say, a certain verse that has headcanons about it, as long as you know what the tag names are, you could enter both tags separated by a + in the middle to get all the posts between two tags (and possibly more, but I have not checked that out). So, if you are really organized tag-wise, then you can easily filter things out.
35 notes
·
View notes
Text
I finally got around to emptying out my Google Docs in just another step of un-shittifying my digital writing life. I uploaded my docs to Proton Docs, which has improved so much from the last time I tried it out that it's almost identical to GDocs now. Minus the AI and lack of privacy.
Here's a tutorial if you'd like to do the same.
Moving Your Fics from Google Docs to Proton Docs
You will of course need a Proton account for this. Please note that the instructions below are performed on desktop.
Part One: Getting Your Stuff Off Google
1. Navigate to your Google Drive.
2. Under the big Search bar, you'll see a dropdown menu called Type. Click it and select Documents. This will display all of your documents.
3. Click on one document to highlight it, then hit CTRL + A to Select All.
4. Right click and select Download.
5. Your documents will download into a zip file. Unzip the folder and extract your files to another folder on your computer.
NOTE: Google uses its own file format to handle documents. When you download your documents, they will be Word (.docx) files.
Go through your downloaded documents and make sure they're all there before deleting them from Google. You can delete by selecting all using the method above, right clicking, and hitting Remove.
Part Two: Upload Your Fics to Proton
1. Navigate to your Proton Drive (proton.me/drive). It comes free with your Proton email.
2. On your PC, highlight all the documents that you want to upload and simply drag and drop them into your Proton Drive.
3. You're ready to rock and roll.
NOTE: When you upload your documents to your Proton Drive, they will retain the .docx file type described in the above note. Once you open a .docx file in Proton Docs, a copy will be made of that file. You will see this when you navigate back to your Proton Drive. You may delete the extra .docx file and continue to use the Proton document instead (recommended).
Additional: You can download the Proton Drive app for mobile and enjoy the same cross-device reading and editing capability as Google.
#google docs#proton docs#tutorials#writers on tumblr#fanfiction#writing programs#google alternatives#it currently has its limitations but i'm hoping with time it will soon have all the features of gdocs#now to see how well the formatting works when copy/pasting into ao3
32 notes
·
View notes
Text
MY THESIS DEFENSE WENT REALLY WELL 😭
Arven would pick me up and twirl me around and make a big deal of smothering me in kisses. He’d cook me something special and we’d go have a picnic to celebrate 🥹🥰
Maybe I’ll see what I have around and have lunch or dinner outside today like it’s alittle picnic date with Arven 🙈
#my committee members told me my thesis was ‘beautifully written prose’ and they really enjoyed reading it?????? HELLO?#I knew I’d probably feel silly for being so nervous once I was done and I do but it was just so much adrenaline#and then when it came down to it I just sat and chatted with my committee about what I wrote and my thoughts#laur speaks!#self ship gushing#picnic kisses#god…. CRYING#like genuinely I might cry I’m so happy excited giddy#my committee’s gonna send comments and I’ll have to make a few revisions before I submit but they said any notes they have are small#also shout out to the one professor on my committee who reminded me I actually need to add page numbers… whoops. would’ve forgotten#thanks bestie#it is genuinely that I fucking hate formatting page numbers in word. grrrrr. I’ll look up a tutorial for the way I need to do it#and/or ask my partner bc he knows things
13 notes
·
View notes
Note
hi, can i get a tutorial on how to put tags as a link? i wanna do mine for my blogs 😞
sure! i assume you're referring to this sort of thing i do in my masterlist and at the bottom of my posts to point readers toward similar content--
more Price / more Gaz / masterlist
how to make tumblr tags into links
first, and this may go without saying, but make sure you have at least one post on your blog with the tag you intend to link.
first method: desktop (recommended)
1. navigate to your blog on the left-hand sidebar.
2. then, on the other sidebar--right side--select "view blog." you should be seeing your blog the way any other user would, including its custom colors, header image, etc.
3. navigate to the post with the tag you want to turn into a link.
4. go to the post's tags and right-click the one you want (or command-click; whatever it takes to bring up the menu).
5. copy the url from there. the url should look something like "https://www.tumblr.com/[yourblogname]/tagged/[thetagyouwant]." alternatively, left-click the tag and let it take you to the "[...]/tagged/[thetagyouwant]" page itself, then copy that url from your address bar.
6. now, wherever you want to add it (like in a new post), type out the text you want to display--
all my homemade posts
7. --highlight it, and and use tumblr's hyperlink function to link the "[...]/tagged/[thetagyouwant]" url to that text.
8. click the linked text you made just to be sure. you should end up with something like this:
all my homemade posts
second method: mobile
this method is more roundabout. i haven't found a way to do this solely through the app, so you'll need to use a combination of the tumblr app + your phone's browser.
1. navigate to your blog in the tumblr app .
2. navigate to the post with the tag you want to turn into a link.
3. select the arrow at the bottom of the post to send/open the link in your browser of choice. alternatively, select the meatball menu (•••) in the top-right corner of the post, copy the link, go to your browser of choice, and open that copied url.
4. in your browser, go to the tags of your post and select the one you want.
5. copy the url from there. the url should look something like "https://www.tumblr.com/[yourblogname]/tagged/[thetagyouwant]." alternatively, select the tag and let it take you to the "[...]/tagged/[thetagyouwant]" page itself, then copy that url from your address bar.
6. now, wherever you want to add it (like in a new post), type out the text you want to display--
all my homemade posts
7. --highlight it, and and use tumblr's hyperlink function to link the "[...]/tagged/[thetagyouwant]" url to that text.
8. you should end up with something like this:
all my homemade posts
and you're done. happy hyperlinking! b( ̄▽ ̄)d
#i am a technical writer by day so please excuse me if i sound like an instructional booklet here#mine#tutorial#writing help#formatting help#formatting#writeblr
22 notes
·
View notes
Text
My friend and I made our Math Projects Limbus themed and he put several inside jokes our teachers would definitely not understand but I love this screenshot too much to not share it
#limbus company#limbus sinclair#lcb sinclair#context: he was using don and kromer as an example for a formula and Sinclair made a cameo for a few secs before leaving because...Kromer#also we both formatted our videos to be a limbus tutorial even though only our teachers will be watching it...still it was a fun project
76 notes
·
View notes
Note
Also unintentionally getting people to look over at your website has me so happy, I'm gonna go look over at it now actually bye
Haha, thank you, I hope you enjoy browsing! There isn't much to see right now other than my gallery—once upon a time I had a fanfiction archive (pre-AO3 days, different software), but the software was abandoned years ago and soon became obsolete—but I hope to one day build it into something bigger. Maybe resurrect my old Invision Power Board forums or install some oekaki software, put up some javascript games for people to enjoy. Of course, I've been saying this for years lol.
For now, though, it's a good place to store my art, especially in these days of extreme censorship and fandom hostility. I've always got a backup. There's also the added benefit of not having to sign up for an account just to be able to view it. (Though there's quite a substantial DP and Pompep community growing on Bluesky.)
#asks#websites#personal#if you're interested in trying out the decentralized website format check out neocities#it's fun and they offer all kinds of tutorials to help you learn how to build your own website from scratch#bonus points for nostalgia :)
16 notes
·
View notes
Text
one thing i appreciate about the sadnesses is how they're so polite. like if i'm talking to my friends they'll just stand there and wait instead of continuing to chase me. i know this probably wasn't intentional and is just a side effect of cutscenes but it's still so funny bc today we were yapping and this sadness was behind us right. when we left the convo it just ran in the opposite direction instead of chasing so it looked like it wanted to join the conversation but got too scared and ran off instead...
anyways sadness ocs when!!!
EDIT: googled it and YEEAHH ODILE coming in clutch they're actually the remnants of people defeated by the king so yeah this idea actually makes sense (kind of)
#should i not impulsively make a stupid oc based on this? probably#will i? maybeee#in stars and time#i don't think this is a spoiler really just something funny i noticed while playing#guys half conscious sadnesses would be so cool hear me out#like aren't they frozen people??? i forgot where exactly sadnesses come from but it could prolly make sense#and even if it doesn't it's still funny#also another thing i like about the game is how the relationships are already established like this is happening by the END instead of the#beginning#so they're already friends and have been for who knows how long#they've been able to get through it all together#i really love how they make the tutorial scene still work#by having it be that mirabelle's just nervous so they go over formation to make her feel better#they're such good friends and it makes me :)#why am i hiding this part in the tags? because i'm evil
11 notes
·
View notes