#How to: Add Images to Your HTML AO3 Format
Explore tagged Tumblr posts
Visit Tumblr Blog
Explore Tumblr blogs with no restrictions, modern design and the best experience.
Last Seen Tumblr Blogs


Fun Fact
There are dozens of funny blogs to kill time on Tumblr.
Text
Random AO3 Tips
I have a list of resources on my pinned post, but I don't really have a place for the simple miscellaneous tips and tricks, so here's this!
I didn't know most of these existed for probably far too long, so this post is mostly to spread awareness for new users or those who may not have heard of them before <3
I'll update this post if I learn of any other handy tricks. If you know any, let me know and I'll add it here :D
Basic HTML codes for A/Ns and etc
Note: Screenshots of the HTML "codes" at work are shown under the cut!
Center Text <center>TEXT</center> Clickable Link <a href="LINK">TEXT</a> Hideable Information <details> <summary>SHOWN</summary> HIDDEN </details> Insert Image from Link < img src="LINK" alt="IMAGE DESCRIPTION" width="100%" align="center" />
Italicize/Slant Text <i>TEXT</i> Line Breaks <br>TEXT</br> Paragraphs <p>TEXT</p> Strikethrough Text <strike>TEXT</strike> Underline Text <u>TEXT</u>
Single-post AO3 Guides
short guide on how to tag your own fics
short guide on how to title your fics/stories
how to embed images and links on AO3 [via Rich Text]
how to sign up for AO3-based exchanges (ft. @trafficteamsupportexchange)


Note: This is for formatting with HTML for the work, and for the authors notes where you Rich Text doesn't exist/work. Rich Text, on the other hand, should transfer most of these from whatever document resource you're using, but I've personally had issues with strikethrough not transferring from Google Docs copy-pasted to AO3 Rich Text, so just double check those areas!
#rain's tips#ao3 help#html#html coding#ao3 html#ao3 guide#ao3#archive of our own#ao3 writers#ao3 author#how do i even tag this
27 notes
·
View notes
Text
A Tutorial On Typesetting In Affinity (With Template)
This is an semi-abbreviated guide to typesetting in Affinity Publisher, using the template I posted here.
While this is not a comprehensive tutorial, I tried to be as detailed as possible, and hope this help folks with their typesetting journeys! Note: there are different ways to to do this, these are just the ways I've used personally. (And by 'used', I mean all the features and functions I've bashed my head against till something readable came out). Second Note: these steps do apply specifically to the template I posted. This is the template I use to save time when typesetting, as it already has all the Paragraph and Character Styles and text boxes and margins I've made in previous works. Warning: wall of text below the break!
Part 1
Importing your text into Affinity. First things first, this step all depends on where you are getting your text from. If you are typesetting something from Project Gutenburg or a similar site, copy and paste the text into Google Docs. If you are typesetting from AO3 or a similar site, download an html file of the text, then copy and paste that into Google Docs. Once in Google Docs, download the file as Rich Text Format (.rtf). Open the .rtf, and copy and paste that into the Affinity Template. Just stick it into any of the body pages on page 9 or up. It'll 'flow' automatically to fill the pages. Whew. Okay. Now, you can actually work on your text in the template.
Document size (optional). So the template I made is for half letter (letter folio). Letter is the size of the page I would be printing on, and folio is the imposition (which means if I was making it into a physical book, I would fold that page in half. Folio = the page is in halves. Quarto = page is in quarters. Octavo = page is in eighths etc.). You want your document size to be the size of one single page in your book. - Now, again, the template I have is all set up for a single page size equal to half letter. If you want to change the size, you can go to File -> Document Setup -> Dimensions. If you change the size, you will have to go in and change the text boxes and margins I have left in the template to fit your new dimensions.
How to Auto Flow your text. You will notice that the template only has 50 pages. Chances are, you can't see all your text. To get it to automatically appear, just hold down Shift and click the red triangle on the right of one of the text boxes with your body text in it. It should automatically generate the pages you need with your text. - If you need to manually get your text to flow from one text box to another, just click the little triangle on the right of the text box your text starts in, and then click the text box you want it to flow into. Bonus: To make a text box, click the image of the T in the white square on the left, and draw it on the page. This is the Frame Text Tool, or the text box maker, To add a picture, click the rectangle with an X through it. This is the Picture Frame Rectangle. Draw a frame, then go to File -> Place, and add your image.
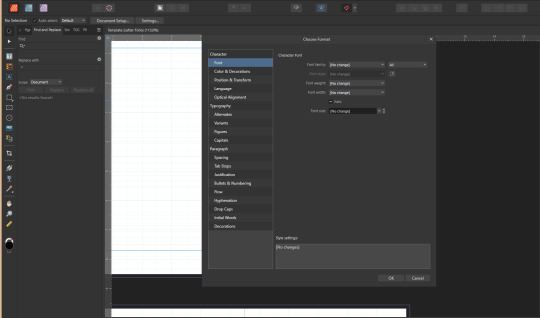
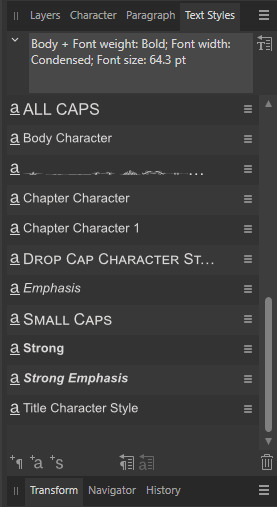
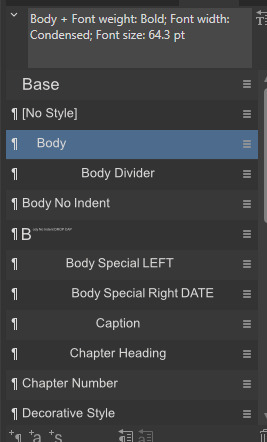
Your text is in the template. Time to get it dressed. Okay, now you need to set up your Text Styles. Text Styles should be located on the right hand tool bar. Text Styles are essentially how you tell Affinity how you want the different parts of text to look like. You can change your fonts, spacing, justification, etc, by playing around in the settings of a Text Style (to do so, just click the three lines next to the text style's name, or create a new one by clicking one of the + symbols at the bottom of the Text Style tool bar. Now, there are two types of Text Styles: Paragraph Styles (have the backwards 'P' looking symbol) and Character Styles (have the underlined 'a' symbol). Think of these like jackets and shirts for your text to where. The Paragraph Styles go on over the Character Styles, but you can still see the Character Styles underneath. - First thing to do is go to Find and Replace. It should be next to the left hand tool bar. - Click the cog to the right of 'Find'. Then click 'Format'. This should bring up the screen below. - Click the box next to Italics so it turns into a check mark. Now hit Ok. This will now allow you to find all Italics in your text. - When you find the Italics, you can now Replace them. Hit the cog next to 'Replace with'. Click Character Style. Click Emphasis. -Find and Replace all.
This will save all your Italics while you work on the text. Note, do NOT select all your text and use a Character Style on it. It will override and remove your Italics. You can only have one Character Style and one Paragraph Style applied to specific text. Because of this, I don't really use any Body Character Styles, and make all my changes usually in Paragraph Styles. Part 2
Chapter Headings. Find and Replace is one your best friends in Affinity. After I have Italics saved, I do the Chapter Headings in the text next. I Find and Replace the Chapter Headings if I can, or manually select them. Then I apply the Chapter Character Style to them. Now, if I ever want to change them en mass, I can just Find them using that Character Style to apply a new Paragraph Style or whatever I want to them.
Body Text. Now is the time to finally use a Paragraph Style. I select my text, and apply the Paragraph Style labeled Body to it. While I have it selected, I can change my font type, size, and leading to whatever I want. If I change leading, I do have to go in and edit the Paragraph Styles to have the same leading across all of them. The template is setup for 11 pt font and 140% leading. - To change leading in a Paragraph Style, click the three lines to the right of the Style -> Edit 'Name' -> Spacing -> Leading. - If you change font size/leading, you will need to change the Baseline Grid. Baseline Grid is the underlying grid that your text will snap to (you can disable this in a Paragraph Style, but I like to use Baseline Grid to make sure the Body Text is all lined up the same). To change Baseline Grid, click the button in the top middle of Affinity that looks like an A with blue lines behind it. Then go to Grid Spacing. I usually set it to whatever is my body text leading equal to.
Back to Chapter Headings. At this point, I usually use Find and Replace again, and Find the Chapter Headings with their Character Style. I use Replace to apply the Paragraph Style 'Chapter Heading' to them.
Other Styles. Okay, so Chapter Headings are set. Body text are set. But there's still text that need different formats, like where there's a body divider/dinkus, or the start of a chapter where there's no indent. From here, I manually go through the text, and start setting the little things that weren't covered by the Body or Chapter Heading styles. I use Body No Indent Drop Cap (Paragraph Style) for the first paragraph of each chapter. I use Body Divider (Paragraph Style) wherever there's a section break. I use Body No Ident (Paragraph Style) wherever there's a new paragraph after a section break. And I use Body Special as needed, if there's unique bits of text in the work, like letters, or poems, or songs, to make them stand out more. - This part of typesetting is a lot of me just going through manually, while scrolling through and checking the original text I am typesetting to see if there's any places that need special attention or different paragraph styles. Lot of side by side scrolling and comparing how the original author/publisher had the fic looking, and making sure my typeset matches in a way that I like.
More on Body Dividers. You can check out my book of dinkuses for potential fonts for section breaks/dividers. Once I find the dinkus I like, I copy and paste it into my text, or use find and replace. Just make sure that the Body Divider Paragraph Style is applied to whatever you put. - Now, you may need to adjust the dinkus because it's not centered or spaced how you like. To do this, click the three lines to the right of Body Divider under the Text Styles tab on right hand side of your screen. This brings up the Text Style Editor Box (see the picture below). - To get the divider looking how I want, I go to Paragraph and then adjust the Leading, Space Before, and Space After until the Body Divider looks how I want. Sometimes you might want a section break with a lot of space, sometimes you might want it narrower. This is the place to do it.

Part 3
Next step: Working in Master Pages. Master Pages are great. You can apply them to your text to make your text look uniform. Whatever the Master Page is, the other pages must follow. -To apply a Master Page, right click the page you want on the left sidebar under Pages. Then click apply Apply Master. Then choose what Master to apply. The body text pages all have the Master Body text applied to them already, but you may need to change one because it's the start of a new Chapter. -If you want different margins in your text, this is where to do it. I have mine set up for .8 outer and inner margins, and slightly narrower on the top and bottom margins to account for leading. If you want to change this, just drag the text box to whatever size you want to fit your margins.
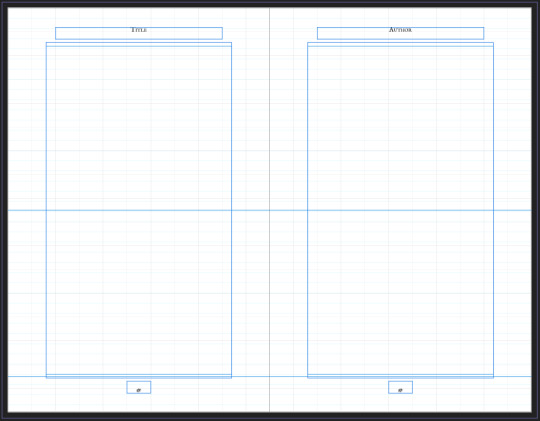
Headers/Footers. In the Master Page titled Master Body, you can change the placements and formats of the headers/footers. I usually just have these all centered, but you can put them and size them however you like here, and it will apply to all the main body pages of your text. - The template is setup so you can just fill in your title name and author name in the header locations of the Master Body pages. Click the text boxes and type in whatever you want. If you don't want to use these, you can delete them on the Master Pages, and they won't show up at all.
Master Chapter Heading. The Master Chapter Heading pages are not applied to the text. In the template, you will see that page 9 does not have the Master Body applied to it. This is because I like to play around with different text box sizes and chapter heading designs here, then copy and paste them into the Master Chapter Heading when I have one I like. Then, I can just apply the Master Chapter Heading to wherever there is the start of a new chapter.
Part 4
How to add a Table of Contents. Okay, once all the Chapter Headings are formatted and everything is on the page they should be on, you can put in a table of contents. To add a table of contents, put a text box down wherever you'd like your table of contents to be located. This is usually on page 7 of the template for me, but it may be different for you based on your text or how you do your front matter. - Click in that text box. Then, click Text (on top of your Affinity Screen, towards the left). Go to Table of Contents. Then Insert Table of Contents. - See the picture below. Your screen should look similar to this. - On the left, you can see we are in the Table of Contents tab now. Under Style Name, check the one that says Chapter Heading. Now, everything that had the Paragraph Style Chapter Heading will be in our Table of Contents. - Click the three lines to the right of where we checked Chapter Heading. You can then check Include Page Numbers here.
Part 5
Alright! Now we have pretty much everything done. Almost. There's just the front matter to do now. These parts are pretty much just pasting/typing in your information. The front matter in the template I made is set up for Project Gutenburg public domain stuff. When I typeset things from AO3, I put the stats here instead.
Front matter. What is it exactly. The front matter included in the template is as follows: bastard title page (just the name of the book), blank page, full title page (title and author; you can include publication/imprint info here as well), copyright page, book bound by page (this is not an official thing, just something I decided to add to my templates since mine as free to use), blank page, table of contents. Sometimes a text has a preface or dedication. You can add these pages to the front matter, and if you need more pages to add them, just right click on the left hand side under Pages wherever you would like the new pages to go, then click Add Pages. I use Master A for front matter pages. These are just plain, blank pages with nothing on them.
Title Pages. Title pages. You can pretty much do whatever you want here. I've posted links before to places you get free to use images/art, but you don't need to include any images/art at all. It's all totally optional, I just like to have a bit of fun on my title pages and put in little extra bits.
Anyway, hope this helps and I didn't ramble tooooo much (this started as a short post to just talk about how to import text). If you're looking for more detailed help, I do recommend joining the Renegade Binder discord. I learned how to use Affinity Publisher from someone's tutorial there. I can also try to make more posts in the future further explaining things.
#Typesetting Tutorial#typesetting template#typesetting#book design#typesetting tips#free to use#affinity publisher#this should have been a google doc#I don't know if this was actually helpful but
42 notes
·
View notes
Text
Ao3 HTML/Coding Resources Part II
This is the HTML/Coding for Website mimicking resources in Archive of our Own (Ao3). To find Part I where I go over the Basics, General Text HTML and some Fancy Formatting (images, dividers, columns, photos, tabs etc. CLICK HERE!
Other Websites:
Texting
-How to make iOS Text Messages on Ao3 by CodenameCarrot, La_Temperanza
-A Quick Generator for Embeddable iOS Text Messages by 221b_ee
-imessage Skin by Adzaema
-Retro imessage by Adzaema
-Basic Text Message Work Skin by ProfessorMotz
- Bubble platform [workskin] by Khashana
-Chat Log HTML by deathbymistletoe
-LINE Messenger/Chat by imperiousmarshmellow
-IDOLish Rabbit Chat Workskin by associate
-Replika workskin by FaeriMagic
-Texting Workskin to match light/dark mode by irrationalpie
Tumblr
-Tumblr style CSS Tweaks by Aposiopesis
-Ao3 Workskin Testing and Tutorials by junietuesday25 tumblr DM
-How to make Tumblr Posts on Ao3 by phyyripo
-Plain Text Social Media Platforms by anubisms
-Tumblr Post Work Skin by tsukinosaugi
Twitter
-Repository - Twitter by gadaursan
- How to mimic Social Media in an Ao3 work by aerynevenstar
-Twitter Work Skin Template by etc e tal
-Twitter Workskin: Tweets and Profile by starskin
-Twitter Mock-Up by TheBrookesNook
Ao3/Fandom
-How to mimic Authors notes and Kudos/Comment Buttons by La_Temperanza
-How to mimic AO3 Comments by bittermoons
-How to add mobile Ao3 in your fic by DemigodofAgni
-How to make a fanfic style header Ao3 style by ElectricAlice
-Template for adding post chapter content by SpookyTesting
-CSS based full Ao3 fic integration (Header/Overview, Comments, Title, Summary & Buttons) by deciMae
-How to Mimic LiveJournal Posts and Comments by cursedcuriosities
-Dreamwidth Entries & Comments Work Skin by folk_melody
Facebook/Instagram/Whatsapp
-Whatsapp Group Chat builder by FestiveFerret
-How to make Facebook Messenger Chat on Ao3 by ran_a_dom
-Whatsapp Work Skin Template Revamped by etc e tal
-Whatsapp group chat skin by ovely
-Instagram DMs for Ao3 by monarch_rhapsodies
-How to make Instagram DM mockup by xslytherclawx
-Penstagram chats on ao3 by deciMae
Snapchat
-Snapchat skin by Azdaema
-Snapchat Template for Ao3 by starskin
Reddit/Forum
-UPDATED Reddit Skin by diamine
-2020 Reddit Work Skin by timstokerlovebot
-Reddit Work Skin CSS & HTML by knave_of_swords
-How to mimic Social Media in an Ao3 work by aerynevenstar
-template Reddit Skin by spookedcroon
-template:Subreddit page by ireseen
-Ao3 workskin for Forum Thread by fencesit
-Ao3 workskin for Forum Thread [Expansion Pack] by AMereDream
-How to mimic 4chan posts without just taking screenshots of 4chan
Twitch/Youtube
-Mimicking Twitch Chat for fics by Ultraviollett
-Twitch Chat Work Skin by cherrari
-Workskin testing by tohmas [Youtube comments]
-Youtube Work Skin by 1864s
-Youtube Comment Section Workskin by LupaMoe
Discord/Slack/Zoom
-2023 Discord Theme Workskin by TrojanTeapot
-Discord Work Skin by unpredictableArtist
-Discord (Dark Theme) Workskin by Heterochromia_Mars
-Skin for Recreating Discord’s Server Member List by SpookyTesting
-Ao3 Workskin Testing and Tutorials by junietuesday25
-Slack Workskin by Khashana
-Zoom inspired Ao3 skin by mystyrust
Wikipedia
-Fake Wikipedia article about a TV show: Work Skin by Anonymous
-Wikipedia article work skin by styletests
-SCP Wiki Style Workskin by thesnager
Working Games in Ao3 Tutorials
Logic Grid Puzzle Work Skin & Tutorial by BookKeep
The Case Of The Clickable Murdle by VThinksOn
Review Sites:
Yelp Reviews by kiwiana
Amazon Reviews by kiwiana
Rate My Professor Work Skin by BookKeep
Video Game Dialog Mimics
-Dialog [workskin] by Clover_Zero
-Dialogue Workskin (with parallax BG effect) by mystyrust
-My S Ranks--System Windows by unpredictableArtist [computer dialog workskin]
-Tutorial: Ace Attorney Work Skin by QuailFence
-Among Us Ao3 skin by mystyrust
-How to Mimic Undertale Fonts on Ao3 by La_Temperanza
-Tutorial:Rain Code Work Skin by faish
-Balder's Gate 3 Documents Work Skin by Professor_Rye
-SpookyTesting has SOO many Nintendo based ones
–Mimicking Minecraft for some fics by Ultraviollett
Runescape Right Click Menu Formatting by fennfics
How to put Z skits in your Tales fics by wingedcatgirl
How to make Honkai: Star Rail Messages by html_hell (jihnari)
Hold-hands inspired Texting skin by cursedcuriocities(SetsuntaMew)
Simple Linkshell Ao3 Work Skin by Pent – Final Fantasy XIV mimic
Homestuck Chat Clients by 77angel-skins
Workskin: Slay the Princess by ASpooky
Slay the Princess: Updated Workskin by Lilto
Misc. Sites
--How to mimic Deadpool Thinking boxes by La_Temperanza
--FetLife Skin [Work Skin] by Khashana
--Disco Elysium workskin by SarunoHadaki
--StarTrek PADD workskin by duskyspirit
--MDZS-themed letters by allollipoppins
--A Newbie's Guide to Podficcing by Adzaema [skin for podfics]
--Skin for making Character Intro Cards by SpookyTesting
--Kpop Photocards by legonerd
–OVR System Workskin by unpredictableArtist
-How to make Stylized CSS Card Links for your fics by buttertartz
-vroom vroom kachow: Formula1 Race Results Workskin by mackerel_cheese
Bonus: Ever wanted to see how crazy HTML can be on AO3? Try playing But can it run Doom? or Tropémon by gifbot
Happy Creating!
Last updated: Feb 8 2025 (Have a resource that you want to share? My inbox is open!)
View Part I with HTML Basics HERE!
#archive of our own#html coding#fanfiction#fanfic#fanfic writing#fic writing#fanfic help#ao3 fanfic#ao3 author#ao3 writer#ao3fic#ao3#ao3 link#ao3feed#fanfics#fanfic coding#fanfiction writer#fanfiction author#fanfiction crossover
35 notes
·
View notes
Note
Hi!! I just reed the last chapter of EMC and by the gods!!! I LOVE IT!! The newspaper format?!? FUCKING AMAZING!!! I do want to ask how you did it? I knew you could do many things in ao3, but that?! You're so creative!!!
🥰🥰🥰
Thank-you so much!! As the texts in ECM would probably suggest, I really love mixing up the narrative with these kinds of things (I did something similar in my other fic, A Permanent Fixture).
I used Work skins and CSS for the formatting - nothing ground-breaking! Just fonts. That and using the H1, H2 and H3 headings in AO3's html. I will not claim anything more than slightly above average skills at this stuff!!
This is the CSS I used for the fonts with the work skin:
#workskin .News-name { font-size: 200%; font-family: Old English Text MT, Copper Plate Gothic Bold, Rockwell Extra Bold, serif; }
#workskin .font-serif { font-family: Georgia, Cambria, Constantia, Palatino, serif; }
Here's AO3s guidance on work skins
Here's a bunch of tutorials on the amazing things you can do with skins!
Honestly it took me ages! Mostly because there was a lot of hit 'preview', check, hit 'edit', change CSS/HTML, rinse and repeat while growing increasingly more irate.
I tried a billion times to do something with the images: I wanted them aligned with the text, but also needed the caption to float with it. However my abilities are relatively limited and AO3's HTML coding is equally limited so in the end I gave up and just added the captions onto the image in paint lmao. Paint these days lets you save with transparencies, which is a nice thing to know! But that's why the font in the captions is big and looks a little funny.
If you want to know how to get text to wrap around an image, then you do this:
<img src="IMAGE URL" alt="TITLE OF YOUR IMAGE" width="x" height="Y" align="right/left" />
(the underlined bit is what you add to put in the alignment)
It's not perfect: the text sticks tightly to the image when it wraps, which is why they're both aligned to the right so it was harder to notice, but it works well enough. I know you can use CSS and work skins to give the image a bit of a border, but by that point I was getting the shits and figured it was good enough lol.
I would note that skins sometimes don't work on things like phones (for instance, on my phone the Old English font doesn't appear for the name of the newspaper)!
Hope this is helpful!
#existential crisis mode#work skins ao3#they're cool#but also very conducive to me tearing out my hair
19 notes
·
View notes
Note
Could you please make a tutorial on how to add pictures to ao3 chapters ? Phone version please 🙏
hey anon, sure thing!
i actually did the whole 7 days of bagginshield week on computer as i find that easier but here's how i updated the epilogue through my phone ˙˚ʚ(´◡`)ɞ˚˙
1) your image
if it's an existing image on the internet that you want to add (hopefully with the permission of the owner), you can skip to the next step.
if it's an image you created, upload it somewhere that can be accessed publicly (blogs, websites, etc). if you want to maintain its quality, i would not recommend social media platforms because they're notorious for ruining em.
i uploaded mine here on tumblr. if you're using phone, you can upload yours via the app and save the draft but you will need to open tumblr in a browser for the next step.
2) grab the image link
it's also called image location, image address or image URL. because you can't upload images directly on ao3, you need this to add your image to your chapters.
long press on your image and something like this will pop up
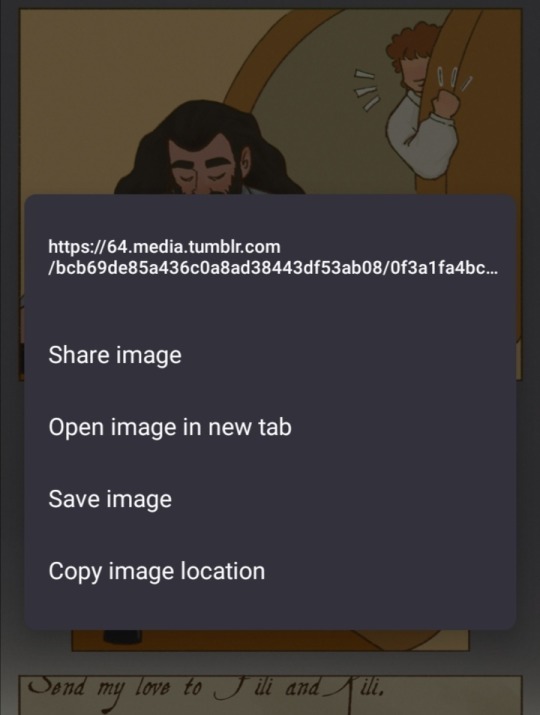
tap on "copy image location" or the equivalent for you.
you can also tap on "open image in new tab" and the URL in that tab usually is also the image URL. you know it's the right one if it has "media" or your file format (jpeg, png etc) on the URL somewhere.
i think tumblr app can't do this which is why you need to open tumblr via browser to grab the URL. (i could be wrong tho! ✿)
3) add to ao3
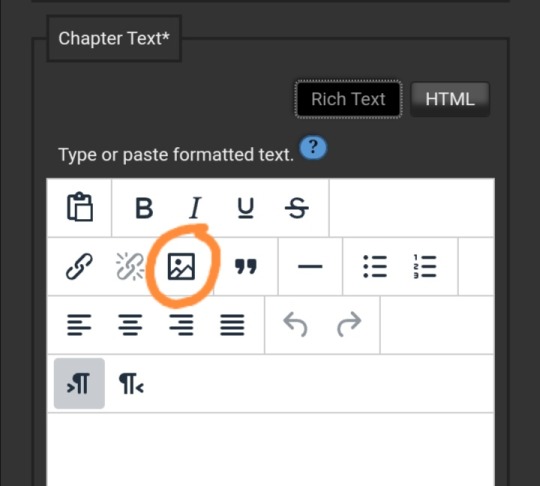
tap on "Rich Text", not "Html" and then tap on the photo icon below
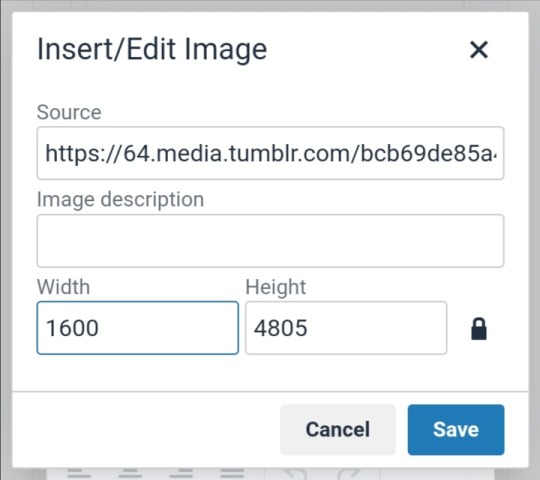
add the copied image URL to "Source", add image description if you like, then change the dimensions to your desired size. for the comics i put their full size (1600x4800). then tap "Save".
i'd recommend going back to Html for the next paragraph if that's easier on phone but that's it!
hope this helps! (❁´◡`❁)
2 notes
·
View notes
Text
AO3: Comment Formatting and Preview
What it does: Above the comment textbox, adds buttons which will insert HTML code to format text (italics, bold, underline, etc), to insert links or images, or even custom text. It also shows a preview of the comment.
Found at: GreasyFork by escctrl
Typing HTML by hand is a drag. Especially if you're just trying to get your squee on in the comments. That's something the Comment Formatting Options script addressed wonderfully, by letting you insert the HTML at the push of a button. But it hasn't been updated in years to make fixes or improvements, such as the ideas its author dusty had noted on its GreasyFork page.
Recently, a different script was published, which takes dusty's to the next level and adds several nifty features.
Install ⇒ AO3 Comment Formatting and Preview
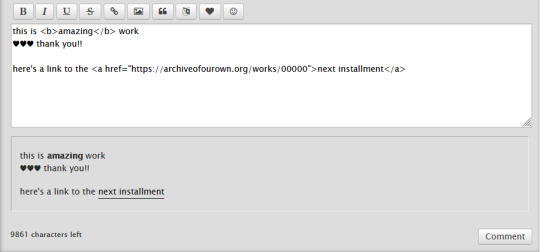
The smaller new features are additional formatting buttons for lists and paragraphs. As before, you can highlight text within your comment and then click the button, to insert the HTML around it.
And the buttons now show reliably on Inbox messages, while replying to comments, and while editing comments.
The more noticable addition is that there's a GUI for configuration!
Go to any page that has comments, for example by opening a work, or viewing your Inbox (if you have an Ao3 account). In the top menu, there'll be a "Userscripts" option, with a "Comment Formatting Buttons" entry.
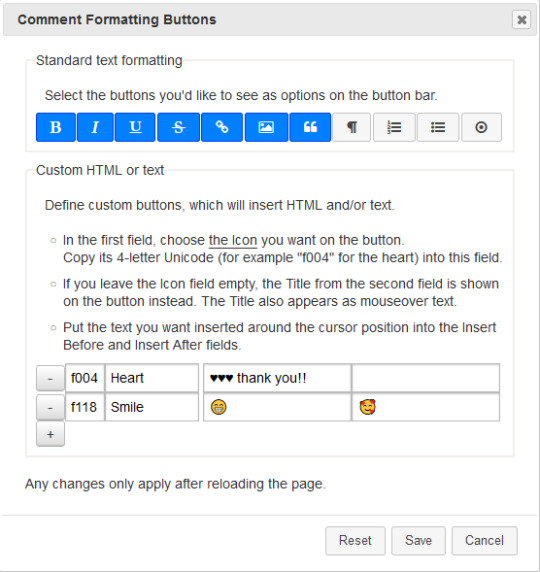
In the top section of the GUI, you can pick which of the buttons you want to see or hide, if there are some you'll never use anyways.
At the bottom, you can add your own custom buttons. Follow the step-by-step guide in the GUI. One thing to remember when you pick the icon is that this only works with Font Awesome v4 (which has a limited set of icons available), not with the new v5. So make sure to stay on the v4 page when you pick something.
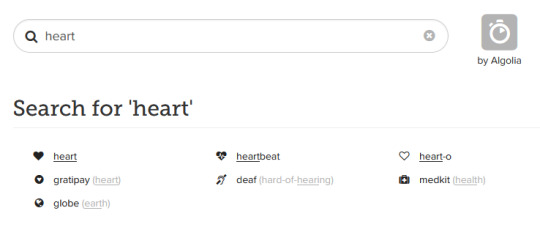
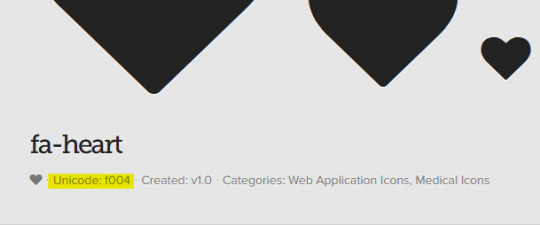
When you chose an icon, copy its four-letter Unicode into the first field in the script GUI. Then it shows up on your custom button.
The other obvious new feature is that you'll have a Preview field, which'll show how the comment will look like once it's been posted.
... And as far as I can tell, it works nicely on mobile devices. \o/
If you use and enjoy this userscript, also consider giving its author some feedback!
3 notes
·
View notes
Text
Honestly it was a post like this that made me realise that those ✨ artistic ✨ line breaks were breaking the flow more than visually for some and made things inaccessible, so I took three seconds to find out how to insert a line break in ao3.
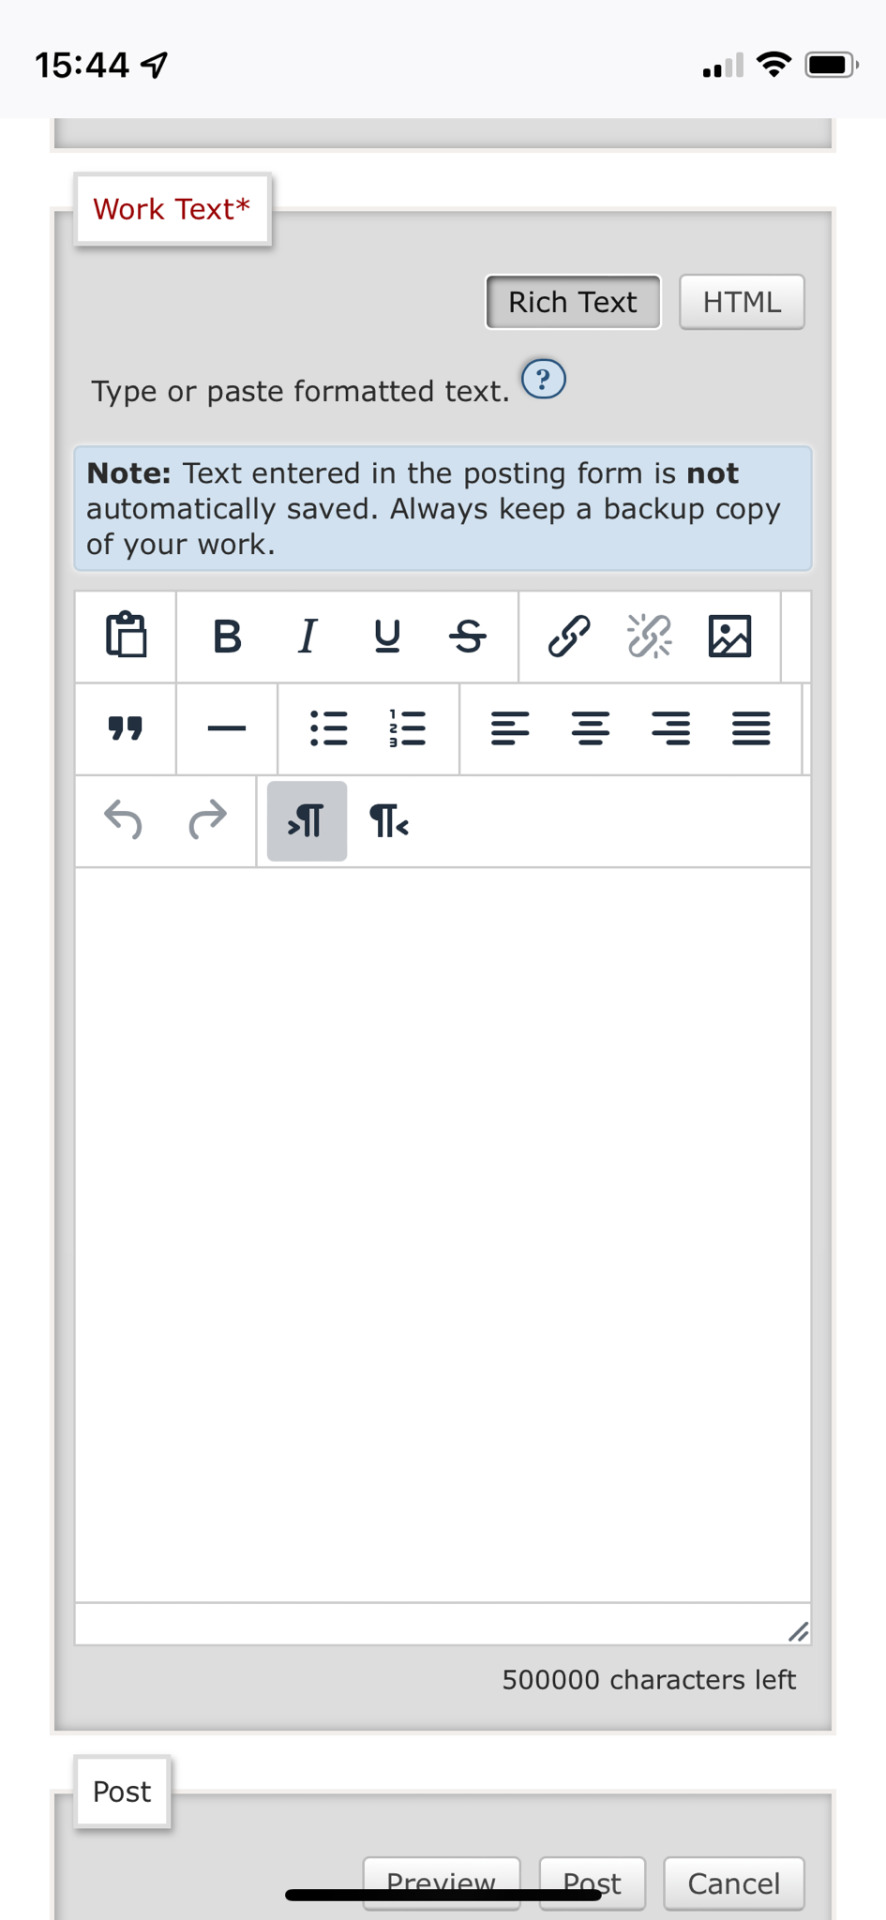
So to make things easier for people to add it in themselves when they see this and care about accessibility to their works, here is a picture of the rich text thing on ao3.
That button under the “B” for bold in this image that just looks like a large dash? That’s the line break button. Just click it and it will appear where your cursor is in the text box below.
I’d say ‘like magic’ but that’s just like normal code for formatting that you could probably see if you toggled over to the html side of this section, same for any of the other changing buttons.
Your artistic line breaks deter a large group of people from giving your story a shot. Is a fancy squiggle pattern worth turning people away? Because I’ve read some fantastic stories that have had weird line breaks, and since I was made aware of this issue it pops into my head every time.
Just… think on it. Should you be in need of it one day for whatever the reason, would you want your beloved works to become exasperating?
Man, it always sucks when I’m listening to a fic and the screen reader goes “doubleyou ach ay tee eye ess why oh you are eff ay vee oh are eye tee ee see oh ell oh are doubleyou ach ee are ee dee-”
And I pause it like what the fuck, then find my phone to look at the screen and I see “whatisyourfavoritecolorwhered-”
Like, bro, please, why would you do this?
Or when it starts going “EXEXEXEXEXEXEEEXEXEXEXEXEXEXEEXEXEXEXEXEXEXEXEXEXEXEXEXEXEXEXEX!!” Because somebody didn’t use the code for a line break. At least just make it one dash, please.
Like, it’s your fic and your writing it for free and that’s cool, so if you see this and you’re like, “mmmm, nah, still gonna do it my way” then that’s chill.
Just know that it’s really difficult for people with screen readers to read some of these fics. Me personally, when I find a fic that does this, I don’t give it a chance no matter how good it is.
947 notes
·
View notes
Text
How to Customize Your AO3 Writing HTML Format & More!
Okay! So you want to know how to customize your AO3 HTML writing format/how to navigate AO3 in general—well you’ve come to the right place!
Here I’ll be addressing common errors that happen when navigating AO3 as both a reader and primarily as a writer. I’ll also be giving out some great tips and tricks on navigating AO3—especially when it comes to customizing your AO3 writing. I’m mainly making this because when I was trying to simply publish my stories on AO3 with indentation on my writing format; it was such a HASSLE. Especially going through countless blogs that were really freakin’ old and youtube videos that weren’t at all helpful and/or very confusing. Hopefully today I’ll be able to help you try and alleviate that confusion.
I’m also going to make a youtube video on this in the near future as well as my tumblr guide( if you want to learn how to customize your Tumblr blog(theme, linking things on your bio, navigating certain functions) go ahead click here.
Alright! So let’s say you already have your chapter ready and prepped to be pasted onto the HTML writing format. Here are a few things you need to know before pasting that long written chapter onto the HTML format.
If you have a bunch of indentation on your chapter and go ahead and paste that onto AO3 HTML format—it’d immediately remove all that indentation.
Indentation:
No Indentation:
This is going to happen no matter how much spacing you put in that text on HTML. It’s primarily because HTML is meant to be a bunch of code in between text. There is no code suggesting to create indentations on your text. So you might be asking yourself, well how do I create indentions Seph? Here is how:
^ here is my secret weapon hehe~
Now, before I came across this holy grail of a website(after going through long hours of searching through youtube videos and articles etc) I was manually typing out all of my code onto my stories. It was literal hell(especially because I write very LONG chapters(20k-60k) so I had to physically scroll through my own writing to put code in between text that sometimes didn’t even work when I finally published my story/chapter. The website I’m going to link to you—it’s a website where you paste your work onto the google doc and it’d put the code in FOR YOU. So you don’t have to sit there for hours implementing your own code for indentations, bold text, etc. Here’s how to use the website:
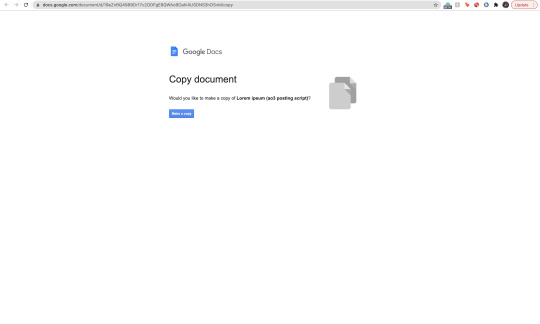
Website link: https://docs.google.com/document/d/19eZnBQ4989Dr17v2ODFgE8QWAo9Oahi4USDNS3hOSvM/copy (as far as I know this website doesn’t have a name but imma just call it the HTML holy grail lolll)
* You’re going to click, “make copy.”
Make sure before you’re clicking, “make copy,” that the gmail you’re signed into is the same one your browser is signed into. So when you go through the process of selecting a google account to sign into—you don’t select a different gmail. If you don’t write your stuff on google docs and for example—use Word—just copy your writing from your Word document and paste it into the website’s google doc. You’d just have to sign into an email anyway lol.
Now when you click, “Make copy,” it’d open to this page. This page has a bunch of instruction you don’t need to read. What you’re going to do is delete all of this text and paste your writing on it. To select all the text:
SHIFT+CMD+A (MAC)
SHIFT+ALT+A (Windows)
Then hit:
Delete (Mac)
Backspace (Windows)
Now that it’s empty, you’re going to go ahead and copy your story:
SHIFT+CMD+A & then CMD + C (MAC)
SHIFT+ALT+A & then ALT + C (Windows)
and paste it to this document.

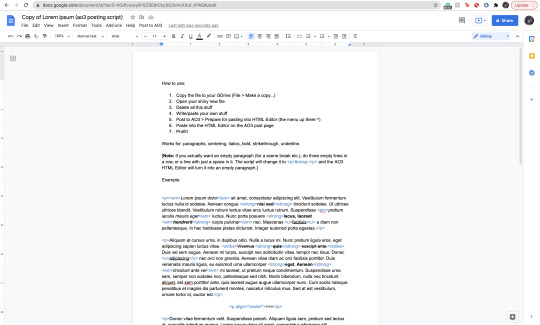
Now it’s going to look very similar to your own google docs page where you copied your writing from. What you’re going to do next, is click/look for the text that says, “Post to AO3″ which can be found on taskbar above the writing functions next to, “Help.”

When you click this, it’d ask you two things:
and:

Obviously, we want to select, “Prepare for pasting into HTML Editor.” Click that and it’d immediately start running. It will ask you to sign into a google account as well:
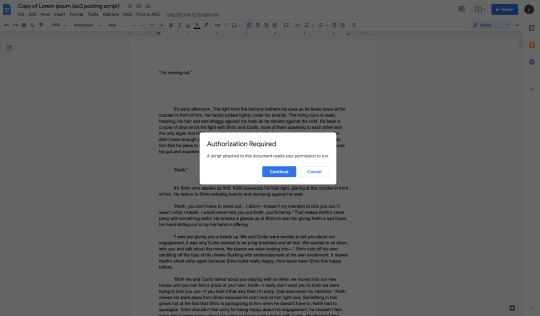
Click continue (this is where it’d ask you to sign into a google account):

Here choose your gmail account (for obvious reasons I won’t be showing my email lol):

It’d ask for permission, select— “Allow” below.
It’d immediately run the script and it should look like this:

Everything highlighted in blue is your code. This coding will make your indentations for you as well as make the coding for bold text, italic text, so on and so forth.
Now, you’re going to copy all of this text:
SHIFT+CMD+A :then: CMD + C (MAC)
SHIFT+ALT+A :then: ALT + C (Windows)
and paste it into your HTML editor on AO3 (ofc, delete all the text already on your ao3 editor):

Now all of your writing should look like this—all code and text.
Keep in mind, when you click, “Preview” your indentations/italics/bold text won’t appear. Idk why it doesn’t (ao3 is just wack like that) but when you publish your indentations/bold text/italics, text WILL appear. I guarantee it.
Alright so adding tags/editing your work is very simple:
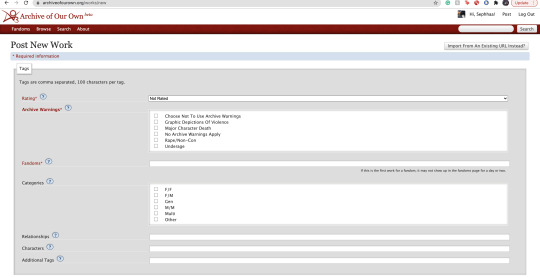
Here is where you’re going to tag all of your work. As you can see, you have a lot of options:

Here is where you start rating your fic. It runs from Not Rated to Explicit. This is primarily to let readers know what type of fic they’re reading before actually clicking on it. It lets younger audiences know not to click it if it’s too mature or too explicit. This also makes it easier for readers to search up stories under whichever rating you choose.

Now the Archive warnings are just extra EXTRA warnings that are more specific. So if your story falls under any of these specific warning tags go ahead and put them—you can also choose not to use the warnings.

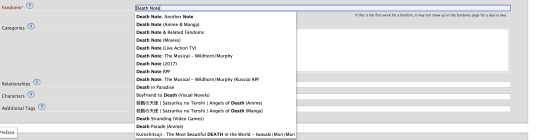
The fandom tag is pretty self-explanatory. If you’re confused then you clearly don’t know what AO3 is LOLL. Ao3 is commonly known as a fanfiction site where people will upload fanfics in relation to the fandom they’re writing for. So let’s say I made a fanfic for the anime Death Note, I would type, “Death Note” onto the fandom tag:
Now the categories tag is very self-explanatory as well, choose the tag pertaining to the relationship of your main characters. For example:
I’m going to use Death Note as my example: both of my main characters and/or ship is L/Light Yagami depending on how both characters identify their genders, in this case both characters identify as male in my fanfic. I would choose the “M/M,” tag. Another example:
If I wrote a BTS fanfic and it’s a x-reader X Park Jimin fic, the x-reader for my fic identifies as female, while Park Jimin identifies as a male in my fanfic so I would choose the “F/M” tag.
If the fanfic you wrote has characters that are nonbinary for example, you can choose the “other” tag.
The trend here is knowing what your characters identify as in your fanfic and applying that tag here.

The relationships tag is where you’d put the main ship tag. So again:
If I wrote a Death Note fanfic, and my main romantic pairing or sexual pairing was L/Light Yagami I’ll type that pairing onto the bar and depending on how popular that ship is, it’d pop up for you.
The characters tag is where you’d put all of your characters by name onto the bar. So going back to the Death Note example, I would put L, Light Yagami, and Misa Aname as my characters. You also have the option to add OC characters as a tag (OC—Original characters.)
Additional tags is just that—additional tags. Here is where you’d list specific tags/concepts pertaining to your fanfic. So my tag list will look something like this:
*Gore
*Violence
*Explicit Sexual Content
*Fluff
etc.
Here is where authors commonly put a bunch of random thoughts/writing. You have to keep in mind—if you want to write your thoughts, for example, “L totally rims Light cuz we all know Light is king of the bottoms” you can’t make your thoughts EXTREMELY long. If your thoughts end up being very long—ao3 won’t let you publish your fanfic unless you fix the tags.
Onwards!
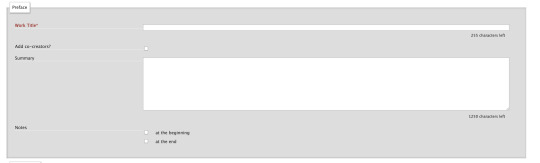
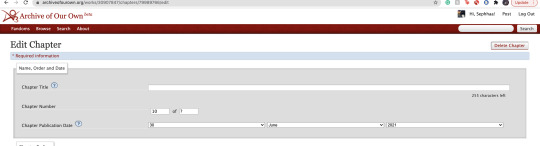
Now, here is where you’re going to put your story title, summary, add any co-creators, beginning notes and end notes. All very self-explanatory. Though, I will come back to beginning notes/endnotes later.
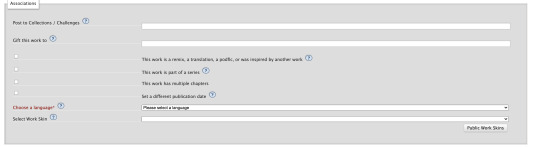
Here is all the extra stuff that I don’t really find a lot of authors using. The only one that has a lot of relevance is the “Language” tag which is very important for obvious reasons. Though the small list of tags/buttons to click on—hold some value. If you have a fanfic that is a series, as an example, you can select this box. If you have a fanfic that has multiple chapters, you’d check off the mark that says “this work has multiple chapters.” When you click this, it’d ask you how many chapters. If you don’t know how long your fic will be, you can simply put a question mark. If you selected the option where your fanfic is part of a series, it’d ask you from what series in your works and/or let you make a new series (if your first work is the first book to said series.) The last option, “Set a different publication date,” is an interesting feature on ao3. This feature lets you prep your works in advance and if you know what exact date you plan on publishing your fanfic, you can put an exact date on that fic for when you want to publish it.
Now work skins, or, “Skins,” is a feature I don’t find a whole lot of people using. I had ended up using it because again—I wanted to create indentations to my work on a HTML format and upon some research I found that someone recommended to use skins and apply them to your work to create those indentations.
You may be asking yourself, “What is a skin/work skin?”
A work skin/skin is a body of code you can customize in a separate window. I don’t know the exact details on how to successfully make this code since I forgot how to properly do it (also I mainly don’t want to go into extreme detail how to make a work skin lol) this work skin can be applied to your writing and modify it in a way where you don’t have to manually add certain features. For example:
I wanted to make indentations for my fanfic on the HTML format. At first I used a work skin with code to do the indentation for me:
Here’s a link where you could learn how to do that: work skin indentation
The issue I found when creating this work skin and applying it to my writing, it made it look really wonky. Now I’m sure you can go ahead and change the settings to the work skin in terms of sizing/spacing etc. But to be honest, that sounds like a lot of work I don’t wanna be doing. If you find yourself successfully using work skins (and you know your way around advance coding) by all means, use work skins to your advantage. As far as I know, work skins also have different functions but I do not know those exact functions. I have the holy grail google docs to make indentations/coding for me lol. Moving on!

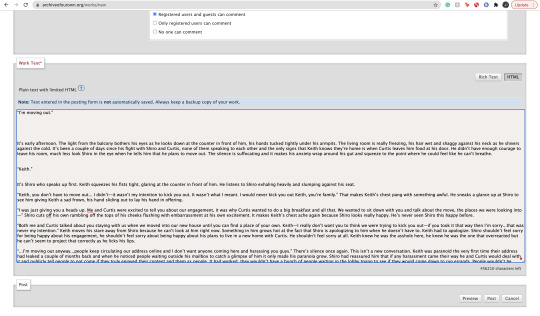
Last but not least, we have the privacy section where you’d obviously make your selections based on your preferences. Registered users are users who have actual ao3 accounts. Guests are users who don’t have ao3 accounts. Pretty self-explanatory. You can choose where you want a specific audience to read your fics, register users or guests. Or choose both. Or none at all.
START NOTES/ENDNOTES:
Remember how I mentioned that I would be coming back to beginning notes/endnotes? Here’s why:
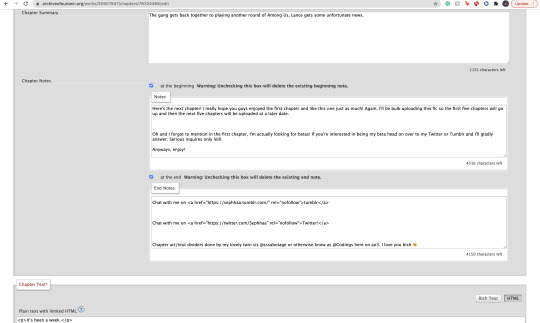
Let’s say you successfully publish your fanfic and it’s a multi chapter fic. A common problem I found myself having and A LOT of other people, when you have multiple chapters and you add endnotes to a specific chapter, your first chapter endnotes appear on that latest chapter you’ve created different endnotes for.
Let me make this clearer:
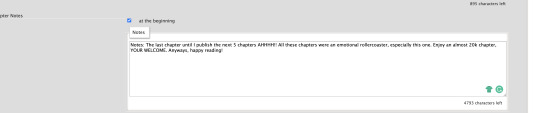
Let’s say my fic is 10 chapters. In the very first chapter, I added specific endnotes that look like this:

The text: “Leave a comment if you enjoyed the first chapter! Chat with me on my <a href="https://sephhaa.tumblr.com/" rel="nofollow">tumblr</a> Chat with me on my <a href="https://twitter.com/Sephhaa" rel="nofollow">Twitter!</a>” <— this is my endnotes I put for my first chapter.
Now if I go ahead to check my chapters outside of the editor page and then check my latest chapter (in this case is chapter 10):
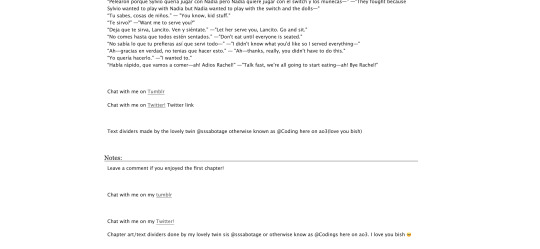
Both my endnotes for that chapter (chapter 10) and my endnotes for the very first chapter appear on my 10th chapter when only my endnotes for, specifically, chapter 10—should be the only one that readers SHOULD see. My readers should only be seeing chapter 10 endnotes. NOT chapter 10 endnotes AND chapter 1′s notes.
Now you may be asking yourself, “Well, how do I get rid of my first chapter notes on my chapter 10 endnotes? When I go to the editor page, to chapter 10, my endnotes look fine and I don’t see my first chapter endnotes there?” Here is how you get rid of them:

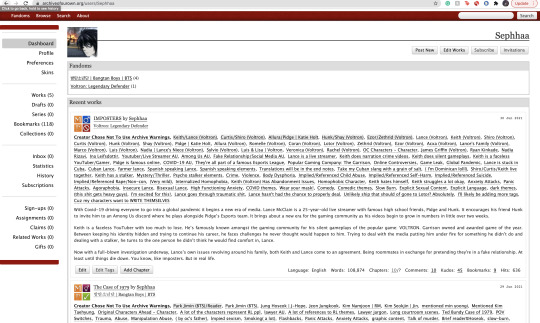
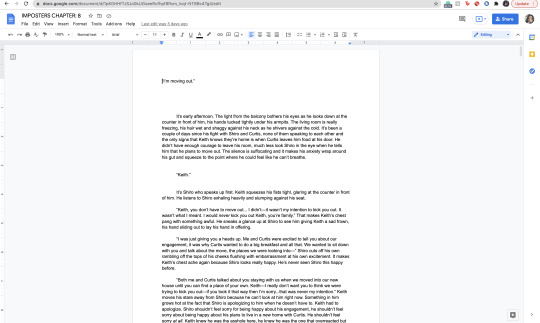
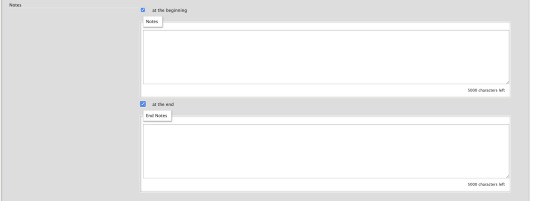
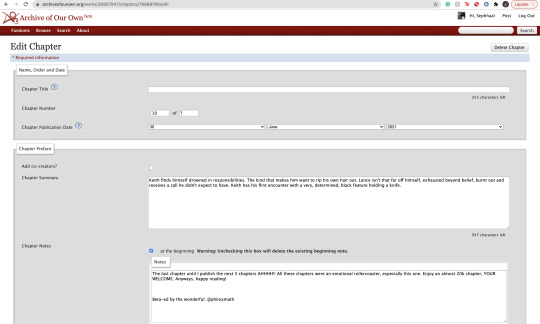
Now, I want you to pay attention to this screenshot. This is a screenshot of my ao3 editor page for my latest fic, “IMPOSTERS.” The reason why I want you to pay attention to this screenshot because I want you to notice a very alarming detail we all gloss over.
We are in the, “Edit Work” page. We are NOT on chapter 1.
Let me break this down:
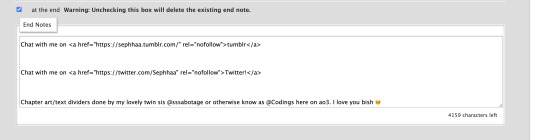
You know how your first chapter’s endnotes keep appearing on your latest chapters? Yeah, that’s because they’re appearing on every other chapter because you’ve pasted your first chapter’s endnotes on the, “Edit Work” editor page instead of putting your endnotes to chapter 1 and ONLY chapter one.
What you’re going to do is scroll down to your endnotes
*Copy them if you want
*DELETE! the endnotes on the, “Edit Work” page by selecting this little window:
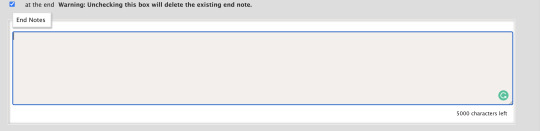

*Make sure to un-click the little blue check mark so it deletes the endnotes.
Go over to your first chapter by selecting the chapter number on the above taskbar:

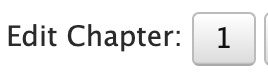
*Scroll down to your endnotes
*Paste those endnotes you copied in the endnotes box (now these notes will only appear on chapter 1)
And BOOM! No more first chapter endnotes to your latest chapter endnotes:

Keep in mind: what commonly happens is if you see your first chapter endnotes and then you go and publish chapter 6, just know that if you had written notes in the editor page instead of the chapter, will now naturally move on to the next chapter until another update —it’s because your first chapter endnotes will move onto the latest chapter you post. Those first chapter endnotes won’t be applied to every single chapter of yours.
HITS/KUDOS/COMMENTS:
Now, Hits, Kudos and especially comments are very self-explanatory but here are some things I really do love about each feature:

HITS:
Hits are something I really do enjoy about ao3. Main reason being it’s so different compared to every other writing platform for example—Wattpad.
Now I’ve been, up until recently, on Wattpad for 8 years, I started as an original novel writer and then transferred into fic writing (which is hilarious cuz a lot of writers start as the very opposite.)
In saying that, Wattpad is famously known for clicking and rising the amount of views/reads on a story based on the amount of clicks you give that story. What I didn’t like, even as the writer to my own work, if I click my own stories—Wattpad would count those clicks and mark them as reads. So whenever I edit or check my own work, my reads would go up simply by me—as the author— clicking my own story/chapters. It would be extremely hard to know who was actually reading my story and how many of those reads were actually me just clicking my story.
AO3 doesn’t do this. Since you are the author of that fanfic, it doesn’t count you as a reader when clicking your own story.
This is super great and it just gives me an idea of how many people actually went to give my fic a hit.

KUDOS:
Kudos is a great function and I like it a lot because ao3 doesn’t have the option where people can dislike a fic. Ao3 and many writing sites don’t have a “liking” system like Instagram and Facebook. And that’s mainly because ao3 is NOT a social platform. You cannot make social posts on ao3 and while it’d be nice to notify my readers about x, y and z you can just link your social platforms in your end notes. Which is something I’ll get into in a second.
COMMENTS:
Comments are just that, comments. A good feature on ao3 tho is, you as the author can filter comments. I see authors, unfortunately get a lot of hate for x and y ship and/or concept. It happens a lot and it’s complete BS—especially when authors end up orphaning said story so they can get a little peace of mind.
Ao3 has a pretty good filtering system where you can choose to allow certain comments underneath the story/chapters. The only downside to this, you as the author have to manually read through all these comments (which are commonly hate comments) and it can put a mental toll on you. Ao3 has yet to figure out a way where we can block certain users so they won’t be able to comment/read your fic. So if you are someone who has recently came out with a fic and you are receiving some kind of hate—maybe get a friend or close family member to log into your account and filter your comments for you. Otherwise, you’d have to grow a backbone and can take the hate and filter through your own comments.
In saying that, please please be aware to not take every comment personally and surround yourself with good people. What people say doesn’t matter as long as you were happy writing that chapter/pairing/concept. If it means you’d need a minute away from the internet or not check your inbox at all—both options are available to you and you as the writer don’t have an obligation to respond to hate if you don’t want to.
LINKING YOUR SOCIAL MEDIA IN NOTES:
If you had came from my tumblr guide (which I highly recommend if you’re trying to navigate your tumblr) the coding used for adding links to your tumblr bio in that guide is extremely similar to the coding we will be using today in the AO3 beginning notes/endnotes:
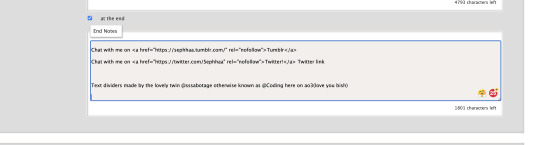
Now here is my social media links in my endnotes. You can add social media links to both beginning notes and endnotes (I find they’re placed more commonly in the endnotes) the coding we will be focusing on is:
<a href=“
that is:
<a SPACE href= QUOTATION MARK ( “ )
(really familiar yeah? lollll shoutout to y’all who came from my tumblr guide)
Now, you’re going to want to type this out in your notes window, and then go grab a social link (I’ll just go ahead and use my Twitter social link) simply copy whichever social platform link you want to copy and paste it right after the quotation mark. It’d look a little something like this:
<a href=“https://twitter.com/Sephhaa”
and end it with a quotation mark( “ ) again.
Right after that we need to write more coding and that coding is:
ref=“no follow”
that is:
SPACE ref=QUOTATION MARK( “ ) no SPACE follow QUOTATION( “ )
So your link will now look a little something like this:
<a href=“https://twitter.com/Sephhaa” ref=“no follow”
Now more coding, but this time, we need some type of text so it just doesn’t look like some long ass link in your notes. Here is the code we’re going to use:
> - beginning
</a> - end
that is:
(start) > TEXT </a> (end)
(my text in this case is going to be “>Twitter!</a>”)
(together ofc, for the sake of the example I’m spacing it) Your link should look something like this:
<a href=“https://twitter.com/Sephhaa” ref=“no follow”>Twitter!</a>
Now you can do this with every social media you have to convert it into a link inside your notes/endnotes.

You can tell whether it worked or not if it’s underlined and highlighted.
ADDING IMAGES TO YOUR HTML FORMAT:
Alright! Adding images to your fic is great! Especially if you want to feature some fanart and you want everyone to see it etc. I personally use this feature to add text dividers. Text dividers is what separates my text, for example, if I’m going from one POV to another—I can add a text divider. I’m going to teach you how to add images to your HTML format since it’s a bit complex and takes a little trial and error—especially when it comes to sizing.

Alright so the coding you’re going to use here is this:
<img src="
that is:
<img SPACE src= QUOTATION MARK ( “ )
After that we’re going to use a website that can convert our images into a link:

Postimages.org!: Website Link.
Here is where you can choose an image, the website will convert it and then you can copy the link of your image and paste it to your code:

After converting your image of choice—you’re going to copy the direct link.

Now, once you have copied the direct link you will go back to your coding and paste it after the quotation mark. It should look like this:
<img src=“https://i.postimg.cc/kGfmV3hQ/C6-CF33-E3-8-D9-E-4-E92-B63-F-1-EE2-B5-FA00-AF.jpg" alt="
and make sure you end it with another quotation mark.
Here is the next set of coding:
alt=“
that is:
alt= QUOTATION MARK ( “ )
Then:
width=“100%” (or whatever number you want to put, here I will just put 100)
that is:
width= QUOTATION ( “ ) 100% QUOTATION MARK ( “ )
height=“50%” (or whatever number you want to put, here I will just put 50%)
that is:
height= QUOTATION MARK ( “ ) 50% QUOTATION MARK ( “ )
Your code should now look like this:
<img src=“https://i.postimg.cc/kGfmV3hQ/C6-CF33-E3-8-D9-E-4-E92-B63-F-1-EE2-B5-FA00-AF.jpg"alt=“”width=“100%”height=“50%”
Now you’re going to end the code like this:
/> </p>
that is:
/> SPACE </p>
Now your official image link should look like this:
<img src=“https://i.postimg.cc/kGfmV3hQ/C6-CF33-E3-8-D9-E-4-E92-B63-F-1-EE2-B5-FA00-AF.jpg"alt=“width=“100%”height=“50%”/> </p>
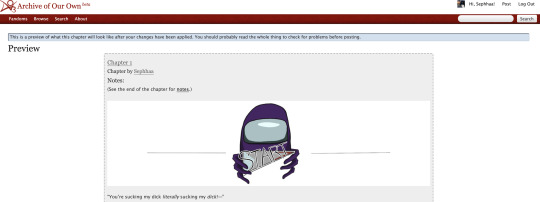
If you select “Preview,” in your HTML editor you can see your image in that window and you can adjust the sizing of the image as much as you like. My image looks something like this when I go to preview:

This sizing is pretty great for fanart sizes. You can use this to also make text dividers but in smaller sizes. Like this:
(I have to fix the spacing but you know what I’m trying to get at lollll)
my text dividers look like that and I use a sizing of 30% for both my width and height. You’d simply use the same steps as the first image. Just change the sizings on width and height and adjust it to a much smaller image so it can appear as a text divider. These images are also set to “center” immediately. I don’t know the the coding to make images not centered(if you want your image on the right/left sides) but if I find them all add them to this guide.
Now I don’t really have a whole lot of tips and tricks but some tips I can give you if you are someone trying to gain some attention to your story.
1). Within your fandom pay attention to which fanfic gets the most hits and look at their concepts/tags. Now I pride myself on originality and you should too but sometimes just seeing what tags/concepts ppl use can give you an idea of what readers are trying to read.
I find that in the VLD fandom, the top grossing ship is Klance therefore if I make a fic with them as my main ship, I know I can except some hits. Ships alone can make readers click on your stories. If you write an uncommon ship, it’s likely you won’t really get a lot of hits but honestly you should write for your own enjoyment and not for the hits. This is coming from a person who makes fanfics that I MYSELF want to read and anyone else reading it is reading my own indulgence lmaoooo.
2). Look at concepts.
Think of yourself as a reader and not a writer when looking at concepts. What are concepts YOU seek out. This could be anything from smut to explicit content. To enemies to lovers, to murder and violence. Fantasy AUs and Touch of Life AUs. Me personally—I always seek out stories that have explicit content, primarily smut cuz I know if the story has smut sometimes the story is written to my unhealthy standards of mature content/explicit content. I also look for uncommon concepts, violence, and my favorite concept is anything with crime.
Those are my preferences as a reader and if you are a writer and writing content that you yourself would like to see in a fanfic, there’s a chance other people like those same concepts too. If you don’t know what concepts you’d like to write or what concepts are out there—look at your favorite fic writers and what concepts they write as a reference. You can also just sit yourself down, in front of a google doc, and think about a fanfic you would like to scroll by and think, “OOO That’s def something I wanna read/add to my bookmarks.”
3). Now, I don’t use this tip/trick that often (cuz again, I don’t really care THAT much about hits/kudos etc.) but it is daunting when you put so much time in a fic and it’s not getting as much hits/kudos as you thought it would. If you think it’s a fic worthy of some attention and you’d like to get your name out there more than use this tip/trick:
AO3 functions in a way where if you publish a fanfic to your designated fandom, it’d appear on the front page of that fandom tag. This is where readers will scroll through and find fanfics they want to read. Since there is so many people who publish their fics daily everywhere in the world—your fic won’t stay on the front page for a long time. Unless it’s a fic with A LOT of hits (I only really see this in the BTS fandom tag, all stories with thousands of hits are on that front page lol) So here is a little secret way to keep your fic on the front page for a much longer time:
Go to your latest chapter on any of your stories or any story in general.
In order to get your story on the front page again, you’d need to copy everything in this chapter. I’m talking about summary, notes, and the entire written chapter. I suggest separating your chapter summary/notes in one google doc and the chapter text in the work section in a different google doc. Mainly cuz it’s easier to use the
SHIFT+CMD+A (MAC)
SHIFT+ALT+A (Windows)
keys. So go ahead and copy everything, paste them to their separate google docs and delete that entire chapter.
Yes. You heard me. Delete the chapter.
It physically hurts me to do this, especially if something goes wrong. Good thing I keep a copy of all my work—AND YOU SHOULD TOO WTH.
Anyway, go ahead and delete the chapter and then go ahead to your story Edit Work and add a new chapter where you’d be re-publishing that specific chapter.
Step 1: Saving Chap Summary/Notes

Step Two: Saving Chapter 10:
Step 3: Deleting Chapter/Latest Chapter on AO3:

(As you can see above, I only have 9 chapters when originally I had 10)
Step 4: Re-Publication:


Step 5: Publication/Post:

You can also take your time and preview it to see if everything looks good.

As you can see my chapter is posted and it looks good! Now if you click on your fandom tag underneath your fic title—it’d take you to the front page of the list of fics posted. You should be able to see your fic on the front page.
As you can see, my fic is the very first one on the list of fics and on the front page of my fandom fic tag.
Some things to keep in mind:
1). While this is extremely helpful in getting people to click on your fic since your fic is on the front page, the downside of using this tip/trick is the fact that the original date you published this chapter will change. So let’s say you published your fic in the summer of 2020 and have long since finished the story and decide to use this trick and republish your work again in order to get on the front page—the date will instead be 2021 on whatever season or month you decide to republish. It feels kind of weird to republish a chapter and/or story when you’ve finished it a long time ago and it will give an impression to readers that you have only JUST finished the book. Now, if the readers decide to follow your social media and know that you had actually finished the series a long ass time ago—then it’d be written off as you editing/revamping the chapter.
In a lot of cases, it’s just you editing/revamping a chapter in the case that the chapter didn’t upload right etc.
2). Depending on your fandom: this tip/trick might not entirely work. While I’m in the VLD fandom and it’s fairly easy to appear on the front page again—I’m also in the BTS fandom and I find that the process is extremely different. While re-publishing my story in the VLD fandom tag I can easily get my story back on the front page—I cannot say the same for my BTS fandom tag primarily because BTS fics are not sought after by how recent fics have been published but by the amount of hits your fic has. The larger amount of hits you have on your BTS fics—the greater your chances are staying on the front page of the BTS fandom tag list. Since my BTS fic has a good amount of hits (499-500) I appeared on the front page but for a very short period of time. Sometimes that’s enough to garner the attention of 1 or 2 readers. And that’s enough for me.
3). Again, I don’t use this tip/trick often (mostly a trick honestly lol it kinda feels like cheating the system a bit) and you should use this sparingly. Not so much to NOT give your fics the attention you want them to have but on your mental health. Numbers are numbers at the end of the day and it matters more to actually like the stories you write and reach out to a few people instead of thousands upon thousands who probably don’t even interact with you as an author. Start small and build your way up. It’s more genuine that way and you can learn how to maneuver things smoothly when you start off small. That and you have more room to make mistakes and get the chance to learn from them instead of receiving hate for them early on.
Welp! That is all for my AO3 guide. I’m sure I’ll come across another tip or trick or SOMETHING and add it here lolll. I’m still fairly new on ao3 (in terms of publishing my own work) and I’m bound to run into errors etc. But I hope this was helpful for you. I really wish there was a guide like this one (updated to at least 2019 or something cuz LORD all the articles/blogs I came across were old as shit and I didn’t even know if their tips/information were still relevant to the new ao3 format etc) So at least I did a service to younger Seph a year or two ago trying to navigate ao3.
If you found this helpful, I also have a tumblr guide on how to customize/navigate tumblr and all things tumblr (in terms of adding links to your bio, how to make a masterlist etc) so if you’d like to see/read that, head on over here. I’ll also be making youtube videos on both these guides in the near future, just for the peeps that need that extra visual and who don’t want to read through this VERY long guide.
If you like this or me, check out some of my work! I am a fanfic writer—I write both anime and BTS content ( primarily VLD(Voltron) fics but I do plan on writing something for Death Note & Inuyasha (cuz there isn’t enough SangoXMiroku content and that’s a crime in of itself) I also plan to write for the MHA fandom soon too! If that’s something you’re interested in head on over to my Masterlist.
Until my next guide!
#How to Customize Your AO3 HTML Writing Format/Navigate AO3#AO3 guide#How to: AO3#AO3 tutorial#How to: Add A Link To My AO3 Notes#How to: Get Rid of First Chapter Endnotes To My Latest Chapter#How To: Make Indents in AO3 HTML Editor#AO3 Tips#AO3 Tricks#Newbie AO3 Friendly#Fic Writer Friendly#How to: Add Images to Your HTML AO3 Format
32 notes
·
View notes
Text


THEME PACK: THE ARCHIVE
Styled after AO3, this pack includes a theme and matching pages, and was designed for writers and readers alike.
🖋️ Theme 11: Archive Of Your Own
Live preview | Static previews: index page, permalink | Code
Full-width posts in an AO3 work index page format
Sidebars with optional sections such as featured tags, updates, rules, progress bars, and more
Unlimited custom links (display on sidebar or in top navbar), plus several social links in the footer
Add a custom logo beside/replacing your avatar
Inbuilt tag filtering plugin by glenthemes
All fields editable directly in the Customize menu, no HTML required. See below the cut for a full guide
🖋️ Page 3: Archive Records
Preview | Code
A WIP page designed to resemble an AO3 work page
Add tags for ratings, warnings, fandoms, characters, and more, as well as statistics like start dates, word counts etc.
Spaces for summary, start and end notes, and the 'work' itself
🖋️ Page 4: Archivist
Preview | Code
A combined about/navigation page based on the AO3 profile page
Include user statistics or any data you'd like, plus a longer bio
Sidebar navigation with link sections - unlimited links and link groups
The theme and pages all include options for multiple color palettes (initially set to Default and Reversi), text styling (choice of Tumblr/Google fonts and casing options), and more. -
Each page includes instructions on how to edit it, and color/image variables have been gathered together to make customization easier. While not necessary, basic knowledge of HTML is helpful.
For help, check my codes guide, or feel free to send me an ask. Theme 11 customization guide and credits are under the cut.
Theme 11 customization
Regarding the simpler fields:
"Secondary title" refers to the title just above the posts, under the header and navigation. This defaults to "[Total posts] Works in [Username]" when the field is left empty.
"Filtered tags" takes a comma-separated list of tags, entered exactly as they'd be written in the Tumblr post editor but without the hashtag. E.g. the tags #politics, #red and blue, and #green would be entered as "politics, red and blue, green" (make sure there's spaces, and no comma after the last item!). The filtering plugin will then put a warning message over any posts with those tags, along with a button letting you show the post.
"[Section] title" act as the headers for the corresponding section, if provided. "Custom links title" defaults to "Pages" if nothing is entered, and is used when the custom links are displayed on the navbar.
"Featured tags" takes a comma-separated list of tags, in the same format as Filtered tags. This field will display links to those tags, along with the number of posts in that tag on your blog, in the left sidebar.
The Recent posts section displays the 5 most recently posted/reblogged posts on your entire blog, displaying in the left sidebar. If you enter a tag under "Recent posts tag", it'll instead display the 5 most recent posts in that tag on your blog. Only 1 tag is allowed.
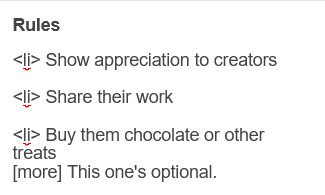
Rules and FAQ
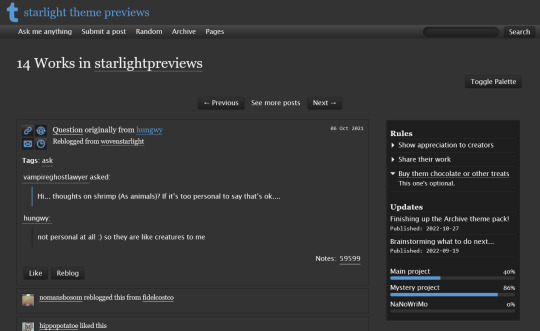
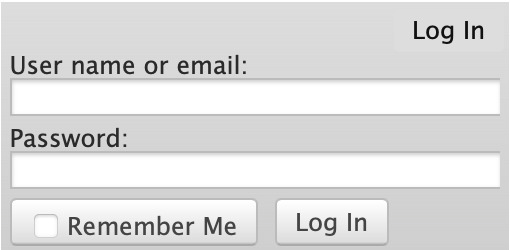
Both these sections work the same way. Each new item, a rule or a question, consists either of one statement, or a statement and some more text, usually as an answer or additional note. E.g. the screenshot below shows three rules, where the last one has more text in the dropdown.
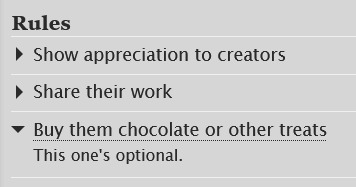
To create an item, prefix it with <li> . To add more text, create a <li> item and add a [more] label underneath, then write your extra text after that. To illustrate, here's the Customize page code for the above:
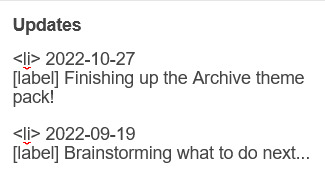
Updates
This section is similar to Rules/FAQ, though it flips the order around. After each <li>, first list the date, then add the [label] marker, then add your actual update. Again, here's an example:
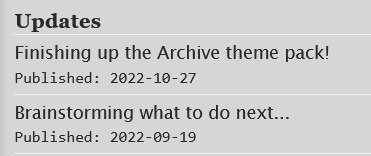
And here's the Customize page code that created that:
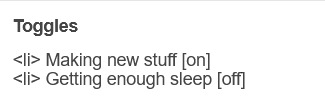
Toggles
This section displays checked/crossed-out items, and uses a simpler version of the formatting for the above sections. Use <li> for each new item, then add [on] or [off] at the end, depending on whether you want it checked or crossed off. Here's an example:
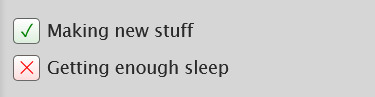
And here's the corresponding Customize code:
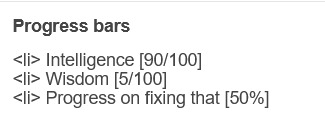
Progress bars
This section also uses <li> items, where each item has two parts: the text label, and the number(s) for the progress percentages, put inside square brackets like with the other sections. Here's an example (note how the top two use fraction values while the bottom one uses a percentage):
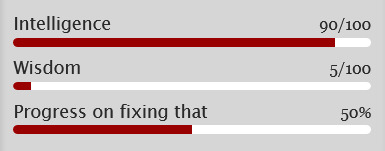
And here's the code that made these. In short, the format is <li> Text here [##/##], or <li> Text here [##%], where ## refers to any number.
Social links in footer
The footer links, aside from the email and personal website fields, take usernames or user IDs for various websites. Be sure to check you're not entering a username in a user ID field!
The Email address field takes a standard email in the format [email protected] and adds a link to let people mail that address.
The Personal website fields will generate a link in the footer's Follow section. Personal website name is the human-readable text label for the generated link, and Personal website URL is the URL that will open when the generated link is clicked. Make sure to add https:// to the start of the personal website URL so the generated link doesn't just redirect you to a different part of your blog.
Credits
Layout and design by Archive of Our Own
Style My Tooltips by malihu
Phosphor Icons
Expanded Tumblr localization and NPF photosets plugin by codematurgy
Custom audio posts by annasthms
Tag filtering by glenthemes
Palette toggle by eggdesign
Scroll to top by Fabian Lins
#code#theme#theme 11#page#page 3#page 4#coding cabin#theme hunter#free#full width#sidebar#topbar#nav text#pagination#unlimited links#header img#custom font size#tfont#gfont#unnested#responsive#npf#color mode#search#rblk buttons#timestamps#tags#group
1K notes
·
View notes
Text
How to Embed Images and Links on AO3
Note: I have a site skin so the colors might look different. Just follow along with the red arrows! Also, this is a tutorial used on the computer, and I assume mobile posting would be different.
First, open archiveofourown.org and log in if you haven't already. If you don't have an AO3 account, sign up for one as soon as possible because it takes about a week for them to verify you and give you access to your new account.

Next, select "Post" in the top right hand corner like you would typically. Set up everything you desire as you normally would until you reach "Work Text*".
Note: If you need further help, I have an AO3 Tag Guide, a Story Title Guide, a List of Random AO3 Shortcuts, and a How to Post a Work on AO3 with Step-by-Step Explanations Guide for your convenience! I also have a Foundations Writing Lesson post for any beginners or for people who would appreciate a review <333
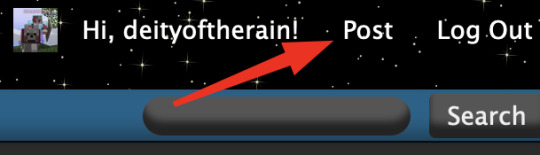
Once there, click on "Rich Text" in the top right of that section, and then select the image icon or the link icon, depending on which you are intending to make.
Note: Check under the cut for more in-depth instructions slash a continuation of this guide! There is an Image Icon Route and a Link Icon Route.
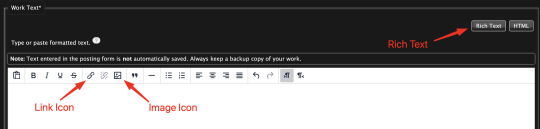
Image Icon Route
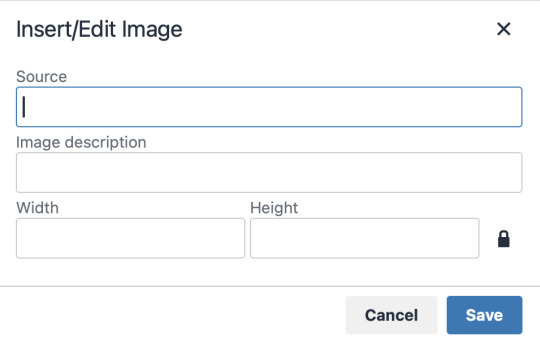
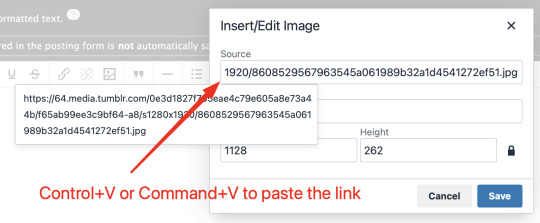
Once you click on the Image Icon, the screen similar to below should pop-up:
*Link Icon Route detour start here
The source is the link to the image you're wanting to add to your work. AO3 doesn't host images itself, but you can use an image hosting site such as postimages.org or even Tumblr itself. If you want to use Tumblr, post a draft with the desired image or locate a post with the desired image. Once you've done that, right click the desired image and Open Image in New Tab (or whatever your computer's equivalent is).
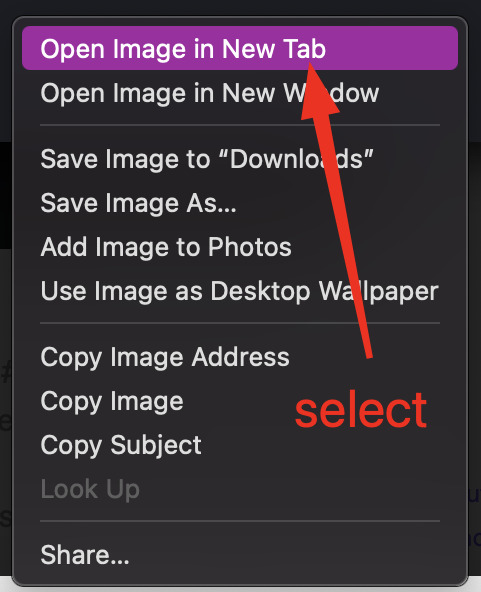
You should have a tab open that starts with "https://64.media.tumblr.com" followed by a bunch of numbers and letters. I want you to copy that link and post it in the source box.
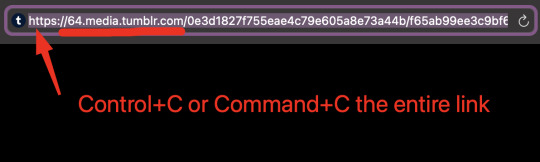
*Link Icon Route detour ends here
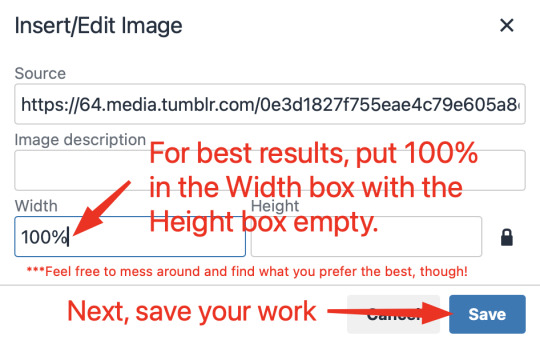
Now that the image link is in place, adjust your Width/Height boxes if desired. Feel free to add an image description as well. For best result, I suggest doing 100% in the Width box with nothing in Height, but this is ultimately a personal decision. Feel free to mess around with the proportions using the work drafts and find what's best for you!
If you prefer, you can also use < img src="LINK" alt="IMAGE DESCRIPTION" width="100%" align="center" /> aka < + img src="https://64.media.tumblr.com/0e3d1827f755eae4c79e605a8e73a44b/f65ab99ee3c9bf64-a8/s1280x1920/8608529567963545a061989b32a1d4541272ef51.jpg" alt="" width="100%" align="center" /> for this example (*excluding the plus sign at the start) to insert an image using HTML instead of Rich Text. It'll look like this:

It is always a good idea to double-check and confirm that everything is how you want it. Previewing your work also allows you to create a draft.
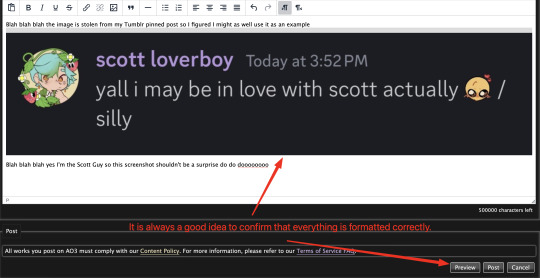

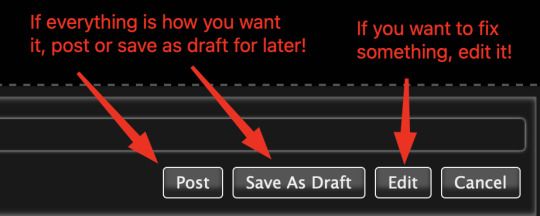
If you're unhappy with something, edit the work to fix it! If you're happy with how everything looks, go ahead and post it! You're finished here! You've successfully posted a work with an image embedded! Well done; good job :D
Link Icon Route
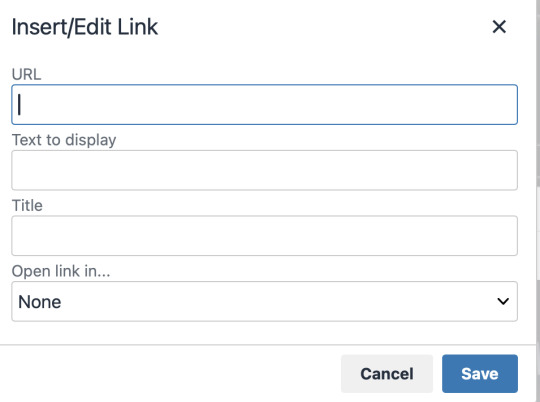
Once you click on the Link Icon, the screen similar to below should pop-up:
Go copy (Control+C or Command+C) the link to whatever it is you want to insert into the body of the work.
Note: If you're wanting to link specifically to an image and not a post containing that image, scroll up to the link icon route detour colored purple.
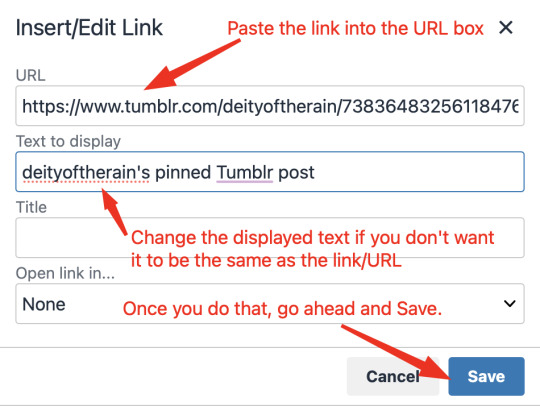
Once you got that, paste (Control+V or Command+V) the link into the URL box. If you want something other than the link to display, change the text in the "Text to display" box.
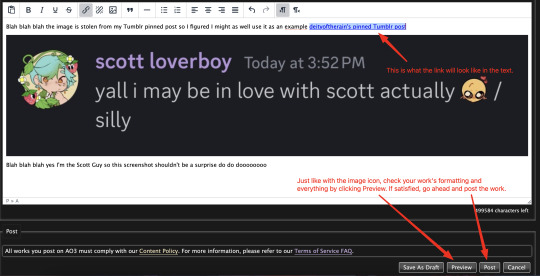
Save your work, check the formatting and everything else like we did in the Image Icon Route section. If everything is how you want it, then congratulations! You have successfully added a link embedded to your work!
If you have any questions or comments, feel free to comment and I'll respond! If this guide was helpful to you, please like and reblog! I appreciate it <333
#rain’s tips#ao3 author#ao3 help#ao3 writers#ao3#archive of our own#embedded#images#links#ao3 link#ao3 images#ao3 guide#idk how to tag this#idk what tags to use#writing help#guide
11 notes
·
View notes
Text
Limbus Company Wiki Style for AO3
Note: This post contains spoilers (... can I call it that?) for Glimpsing a Certain Mirror World.
While I was writing this story, I wrote some in-game dialogue for an identity based on the text just to get into the spirit of what I was trying to capture.
Then I thought - what if I shared that in a bonus chapter, just for fun?
Then I thought even more that it kind of looked like an imaginary wiki page.
Then I had Carmen help me present a wiki page from another reality.
Seems like readers got as much of a kick out of it as I did writing it!
Now I'll show you how to style an AO3 page to look a little bit like the wonderful Limbus Company Wiki, too!
If a CSS and HTML snippet demonstration is all you need, grab them here:
🔗HTML (Inside your story)
🔗CSS (Inside a Work Skin, made on your dashboard)
Next, I'll go over everything step by step from the beginning.
Jump into the cut for the tutorial!
(Then show me your fan identity stories when you make some, okay?)
Step 1: Create a Work Skin
After logging in, go to your Dashboard.
Then click Skins
Then go to My Work Skins
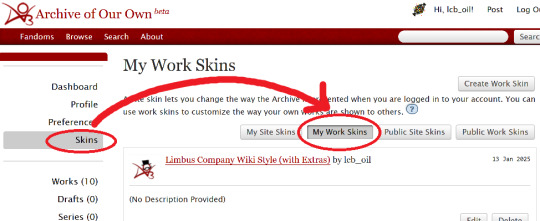
Click Create Work Skin
Give it any name and description you like
Paste the following into the CSS text area:
🔗Pastebin Link for easy copy / paste
#workskin td, #workskin th { padding: 5px; border: 1px solid #810000; } #workskin td { color: white; background-color: #1e1e1e; vertical-align: middle; } #workskin td.title-column { width: 20%; text-align: center; } #workskin div.affiliation { font-size: small; } #workskin .userstuff p.carmen { color: red; }
I will explain what this means when we get to the next step so that you can tweak it if you wish. Think of this as your starter style.
Click Submit to save your skin
Step 2: Apply the Skin to Your Work
When creating or editing a work, you can set the work skin in the Associations section.
Click the dropdown, and you'll see whatever name you gave your work skin in the first step mixed in with the default ones provided by AO3.

Step 3: Format Your Story
You'll need to add HTML to your story to see any of the new styles applied.
I'll show you a few examples of how this is done.
Change the color of text
I used red text to indicate Carmen speaking through the author's note.
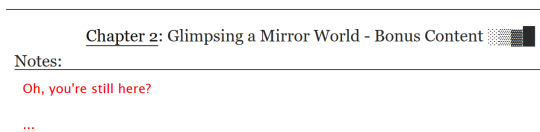
Here is the HTML I used in the Chapter Notes section to do this:
<p class="carmen">Could it be that you, too, wish to glimpse the mirror world these two envisioned?</p>
This creates a paragraph (p) with the carmen class applied.
If we look at the CSS from up above:
#workskin .userstuff p.carmen { color: red; }
The p.carmen section is called the selector. This tells the CSS that if there's a paragraph with the class of carmen, make it red!
You can copy this line to create classes with any name you wish for paragraphs so that you can have as many colors and effects at your disposal as you want.
Of course you can change the color from red to any other color you need, too.
Wiki Tables
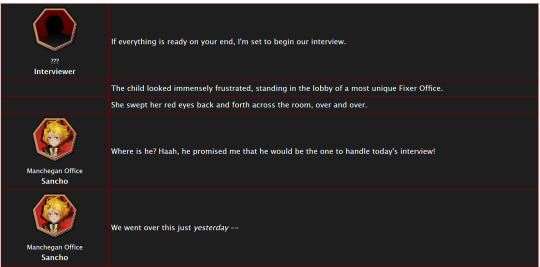
This next part is a little bit more involved. I'm not sure if there's a better way to make a table on AO3 or not, but here's a snippet to get you started:
🔗Pastebin Link for easy copy / paste
<table> <tbody> <tr> <td class="title-column"> </td> <td> The child looked immensely frustrated, standing in the lobby of a most unique Fixer Office. </td> </tr> <tr> <td class="title-column"> <img src="your image URL here" alt="Sancho Story Portrait"> <div class="affiliation">Manchegan Office</div> <b>Sancho</b> </td> <td> We went over this just <em>yesterday</em> -- </td> </tr> </tbody> </table>
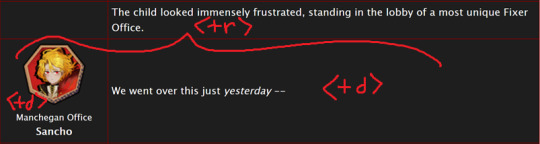
This creates a table (<table>) with two table rows (<tr>).
Each table row has two table cells (<td>).
The first cell in each row has the character image, affiliation, and name.
The class "affiliation" is defined in the style sheet to make that section of text just a bit smaller, like on the wiki:
#workskin div.affiliation { font-size: small; }
In the first example table row (<tr>) above, you can see that you can even leave it blank to allow for the narration portions of the story.
You'll need to copy the section between the <tr> and </tr> tags to create new rows for your table. Copy it once per line in your identity story and change the text and images inside as needed.
I highly suggest that you do this in a text editor on your own computer rather than on AO3, because it can quickly get overwhelming.

Just looking at this in AO3 is making me nervous 💦
(Fun side note, I originally spelled "Manchegan" incorrectly in my first draft all over that huge table... thank goodness for find and replace...)
Hosting Images
You'll see I left a section on the table template for "your image URL here".
You'll have to find a place to host your images on your own, because AO3 doesn't provide any image hosting...
I saw someone suggested https://imgbb.com/, so that's what I used. It seems to have held up so far.
Keep in mind if you link an image from Discord or Imgur, they could remove your image sometime in the future and then it will no longer appear properly in your story.
(Be sure to include an alt text in the image as shown - if the image can't be loaded some day in the future users will see that text instead so that they can understand what they're missing!)
Step 4: Adjust Away!
Once your work skin is applied and you have the right HTML classes in place, you can edit your Work Skin and see your story change, even if it is in your drafts.
You can use this to adjust other things in my CSS example, like colors and the padding in the table.
---
Have fun, and let me know if you have any questions!
“Would you care for some tea?” Yi Sang offered. The evening’s chill was somehow present, even inside his closed room. “Nay,” Don Quixote took in a sharp breath, “I was hoping that you might… assist me, with a look into thy mirror. For there is something that I have need to see.” Yi Sang creased his eyebrows. Unfortunately, this was exactly what he worried would occur. ——— In the aftermath of La Manchaland, Don Quixote asks Yi Sang for a favor. Yi Sang guides her through the process of glimpsing a certain mirror world.
Limbus Company leaves so much unsaid by not showing us what happens immediately after the end of a canto. But, that's a lot of opportunity space to play with in a story.
I've been working on this one for quite some time as I've always wanted to explore the dynamic between Don Quixote and Yi Sang, even though I find Yi Sang really tough to write for.
If you like mirror worlds and AUs, you might especially enjoy this one. I hope you like it! 🎠🪶
---
... Also, hmm, something strange seems to have happened with my upload?
This is a one shot story, but for some reason there's a second chapter? That's odd.
Well, if you check it out, I should note that it might look better on a PC or tablet than on a mobile phone -- though it will probably look ok either way.
#limbus company#lcb-oil-table-talk#tutorial#ao3#canto 7 spoilers#canto vii spoilers#I'm honestly surprised that Tumblr doesn't have support for code blocks#That's a little disappointing
43 notes
·
View notes
Text
A not-so-quick how-to for Ao3 work skins
Ao3 has some pretty powerful customization tools at your disposal - if you know how to use them. Did you know this entire time you could change your text colors, size, background colors, outlines, underlines, overlines, and even fonts of your works? It's fairly easy to do - you only need a little knowledge about markup languages to get started. The way this is done is through classes and the clever application of some simple CSS. Though I've written this guide around using my Obey Me coloring and work skin, the principles are applicable across anything you may want to do with your Ao3 styling.
I've done all the heavy lifting this time around, and have actually created a very, very simple skin that you may want for the purposes of your Obey Me fic including:
Unique colors for each character (sticking to WCAG 1:3 minimum contrast ratio for accessibility)
Heading font and size styling (separate from character colors)
Styled 'pullquotes' for written letters/passages/quotes (at 75% size)
Make sure to keep checking back for updates - I'll put word out here on my tumblr whenever I update, but I've also created a codepen (work skin CSS found in the CSS tab) with the latest version of the skin that you can use to play around in.
Just a heads up before you start: there is a bit of a learning curve, but I have tried to make the explanation as simple as possible, and hopefully provide enough tools and knowledge that you can run with what I've given you and start creating your own styles.
1. Markup: The Basics
I'm sorry - no matter how simple I try to make this work skin, you're going to need at least a little understanding of what markup languages are and how they work. But don't fret: I've had a few years experience now teaching this to absolute beginners so hopefully by the end of this tutorial you'll be feeling like a real Hackerman.
So what is Markup? A tl;dr
Markup is a set of instructions used to tell a program (in this case your internet browser) how something should behave. HTML stands for Hypertext Markup Language and is likely the markup language you'll encounter most often. Ordinary text like you would type in a word document is meaningless to a computer browser - it doesn't know how to read. You need to talk to it in a language it understands so that it can translate your wonderful words into something that appears in your browser. This is done through the use of 'elements'.
Like how you know "words captured in these quotation marks" are quotes (or text written in parentheses is related to but non-essential to the main body), elements are essentially markers that indicate how a thing should be read. In HTML, these elements are denoted through angular brackets <> containing the necessary info that your browser understands. These often consist of an opening tag <[element type]>with content within, followed by a closing tag</[element type> denoted through the use of the "/" slash. Every element that has been opened must always be closed. Common tags include:
<p></p> for paragraphs
<em></em> for emphasis (typically displayed as italic)
<strong></strong> for strong (typically displayed as bold)
<h1></h1> for your highest headline (and subsequent-level headings use 2-6)
<div></div> for generic sections or blocks
<span></span> for specific selections of text.
<a></a> for anchors (links)
<img> containing images <- this one doesn't have closing tags because it's special
and more!
Everything you see on the internet rests within tags like these. You don't see them because they're only for your browser's eyes. Even your fics are formatted with this - though Ao3 does it automatically. You can freely switch between Markup (HTML) and Rich Text Formatting up in the top right corner.
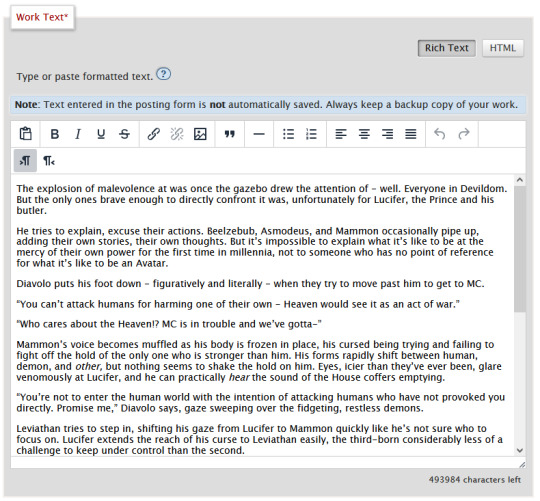
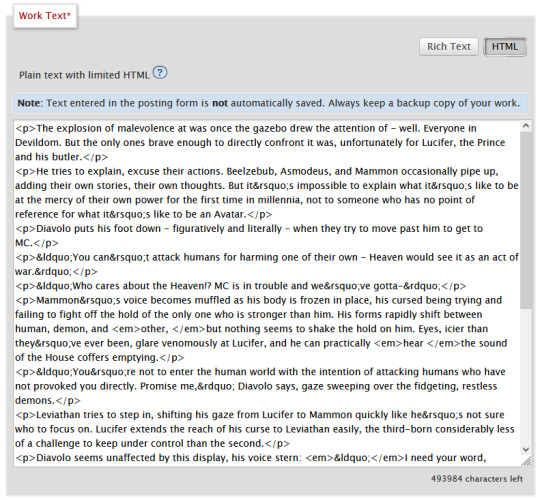
Attributes
Attributes are additional information you can add to an element. Some attributes are essential, like a href (hyperlink reference) for anchor elements. Some are additional information used to differentiate between different identical elements like a class or id. It's this latter, non-essential attribute we're going to be utilizing for our work skins.
Once you have your fic in Ao3, make sure to switch over to the html editor. From there, you are going to find the element that you want to change the look of, and we're going to add a class.
We do this by finding the open tag of an element. That will probably be a <p>. Inside those angular brackets, after the name of the element, we are going to type class=""
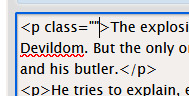
What we've done there is create a field for the class, but we haven't actually given the element a class yet.
It's always a good idea to name classes that describe the content, not what you want it to look like. You could change your mind down the line, but then you're stuck with a class called red that's really changing the color to blue. So rather than calling a class "gold", you might instead give it the name "Mammon" as it indicates when Mammon is speaking. This is known as Semantic markup.
Here's a few things you need to know about classes:
Class names cannot contain spaces. We use spaces to delineate new classes in the same element (like commas to separate tags on tumblr).
You can use as many classes as you want, as many times as you want.
They are case-sensitive.
You can add classes to all most html elements. That means that you don't have to just make entire paragraphs a particular style.
I have already specified several classes in my existing work skin. These are [Luci Mammon Levi Satan Asmo Beel Belphie Dia Barb Luke Sol Sim Heading pullQuote] - remember that these are case-sensitive. Feel free to use any one of these, or use your own! Put your chosen class name between those quotation marks I had you make earlier like so!

These don't actually do anything just yet. For that, we need to now head on over into our work skin.
2. Introducing the work skin: CSS
Now that we hopefully have our heads wrapped around the basics of elements and classes, we can start using that to make things look interesting. CSS stands for Cascading Style Sheet. HTML gives the browser structure, CSS gives the browser style.
But first, we have to create a new work skin.
Go to your Ao3 Dashboard and up in the top left underneath "Profile" and "Preferences" you should see an option for Skins. It'll land land you in "site skins" by default, so make sure to click on My Work Skins. From here you can click on Create Work Skin in the top right corner.
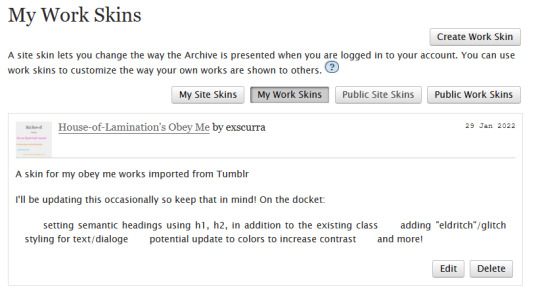
In the "About" section, make sure Work Skin is selected, and give your new skin a title!
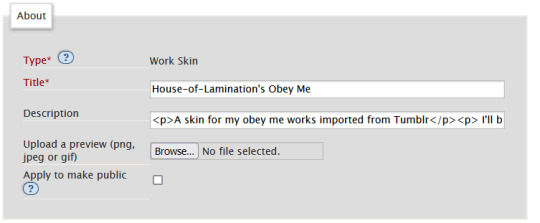
Feel free to also include a description for your own sake. Now. Onto the fun part!
Below the "About" section, you should see a box labelled CSS. In that box, feel free to copy+paste the styles below into that box:
#workskin .Luci { color: #0071ed;}
#workskin .Mammon { color: #e5a71c;}
#workskin .Levi { color: #e26600;}
#workskin .Satan { color: #00c117;}
#workskin .Asmo { color: #ff00bd;}
#workskin .Beel { color: #e80b00;}
#workskin .Belphie { color: #4f08b5;}
#workskin .Luke { color: #00c0ed;}
#workskin .Dia { color: #9b0000;}
#workskin .Barb { color: #007215;}
#workskin .Sim { color: #c1ac44;}
#workskin .Sol { color: #757575;}
#workskin .Heading { font-size: 1.25em;}
#workskin .pullQuote { text-align: center; font-size: 0.75em; display: block;}
This can also be found in the CSS section in this codepen. (disclaimer: tumblr may or may not mess with the line spacing when you copy things over. After you've copied, save your work skin and then reopen it in "edit" - Ao3 will automatically format your work so that it's nice and clean).
So what's actually happening here?
Let's read from left-to-right, top-to-bottom - because that's precisely what CSS does. Feel free to skip this part if you're not interested in creating your own styles and you're happy to just copy and paste existing work skins :)
#workskin .Luci { color: #0071ed; }
This first part here is what is called a "selector". Here, we're specifying what exactly we want to target in order to change its looks. Every character, including the spaces, symbols, and capitals matter.
#workskin .Luci { color: #0071ed; }
#workskin is specifying a unique ID within the HTML - one that encapsulates everything that you want to apply the work skin to - so basically your entire work. This is absolutely necessary in order for the work skin to actually function. We didn't create this ID in our HTML because Ao3 (will) create it for us automatically down the line.
#workskin .Luci { color: #0071ed; }
Following the work skin id, we have a space, a period, and then - hey! That's a class name! The space between the ID selector and the next part indicates we're looking for things inside this particular ID. Periods are used to indicate classes. When targeting a class, you use the period, followed by the class name. So if you're targeting your Levi class, you would write #workskin .Levi . If you were targeting a class that you created in your html, you would write #workskin .[classname] (removing the square brackets, of course).
#workskin .Luci { color: #0071ed; }
Now it's time for the fun stuff - the rules. Once we've targeted what we want to style with our selector, we use curly brackets to contain all the "rules" that we're using to make the browser appear a certain way.
#workskin .Luci { color: #0071ed; }
We start with our property - or what we want to change. In this case it's the text colour, denoted through 'color'. Yes. It's American spelling. I have no control over this. Find a simple list of css properties here! There's loads, but the ones that are probably of most use to you at this point are color, font-size, font-weight, text-align, text-decoration, and display. Make sure to put a colon after the property - that links us into the next step.
#workskin .Luci { color: #0071ed; }
Finally, we have our value - or what we're asking the property to do. In this case, we're changing the color, so the value is a hex color value. Color can also be denoted through rgb [written as rgb(0,0,0)]. Different properties will have different values. For example, text-align can have a value of left, right, or center (note the Americanized spelling again). If you click on the property in this list, it will tell you what values you can use!
You can have as many rules as you want in your selectors, as long as you end each of them with a semicolon. I cannot stress the semicolon enough. If your CSS isn't working - it's probably a missing semicolon. An example of multiple rules being used within one selector is in the pullquote styling:
#workskin .pullQuote { text-align: center; font-size: 0.75em; display: block; }
You can even write rules that override each other, though we try and avoid doing that. When this happens, your CSS will read from top-to-bottom, prioritizing the latest thing it has read (typically your bottom-most). There are exceptions to this, but that's not necessary for this guide.
So by this point you should have copied over the CSS I've written into your work skin, or perhaps tried your hand at making your own. This would be a good point to save.
3. With our Powers Combined
Right! So we have our work skin. We have our work formatted properly, resplendent with classes. Here's how we get these things talking to each other:
Once you've saved and closed your new work skin, open up or post the work you would like to apply the styling to. Down the bottom of the Associations section, there is an option to Select Work Skin. Ao3 already provides some work skins by default - Homestuck and Undertale - but you should be able to select your new work skin from this dropdown.
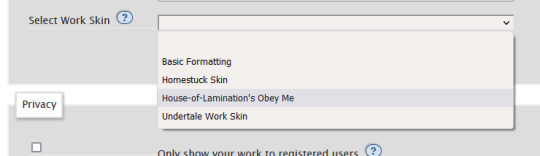
Now here's the magic. Time to check if this worked. Go through and make sure you've applied your classes to each of the elements you want to change the look of. These can be <p> elements, <em> elements, <strong> elements, or you can even make new, unique sections using <span>. Save your work as a draft and preview it - if you've done everything right, you should see the sections of text you've added classes to have changed in appearance!
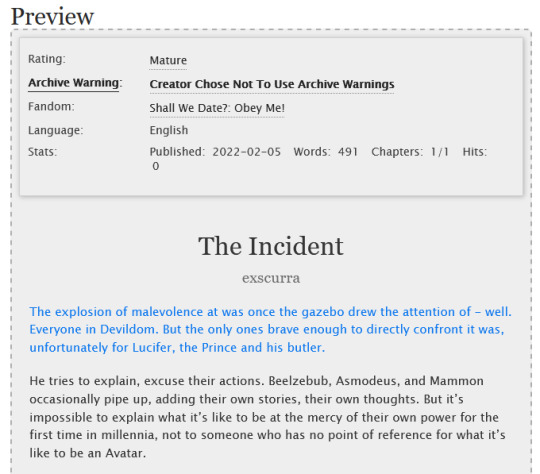
A reminder that you can add multiple classes to one element: say for example you want to create section headings unique to each 'character', you can name both classes in the class field, separated by a space. See the example below:
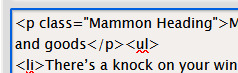

And that's about it! You can use the same work skin for multiple works - just remember that you should be using the same class names if that's the case. If you create a new class in your html, make sure to go back to your work skin and make some rules for that class!
I've created this codepen that you can play in that is using all the same classes - it also has the work skin in the CSS which you're also very welcome to mess around with.
Ao3 itself has a great guide to using work skins, explaining things just like I did here. The Modzilla Developer Network is a great resource for learning more in-depth about html and css if you want to do weirder and wonderful-er things!
I hope this has been informative and useful! Best of luck using skins in your own fics! 💛
#obey me#ao3#tutorial#omswd#writing reference#long post#cs people dont come @ me about my oversimplifications. this is for beginners! i am not here for definitional semantics!!!!#literally only one person asked for this and YET. i really enjoy writing tutorials
236 notes
·
View notes
Note
i would die for a "how to use html and css to format ao3" lesson from you 👀 no pressure but i'm genuinely in awe :)
Hello! So sorry it’s taken me ages to get to this.
It's no pressure at all! I have tried to cover the basics of HTML/CSS on AO3 here, and instead of writing very extensively about the syntax which is very Google-able, I have tried to include little tips and tricks that have come in handy for me.
This, by no means, is a complete guide but I hope it can get you started with HTML and CSS on AO3!
It got pretty long, so the answer’s below the cut.
Okay, so let’s start at the very beginning, shall we?
What is HTML and CSS?
Well, HTML is Hyper Text Markup Language and CSS is Cascading Style Sheets.
But that is something that probably doesn’t help a lot, so to put it very simply, HTML provides the structure of a webpage while CSS does the styling, that is, fixing how and where the elements should exist, how to shape them, how to space them, all so that the webpage looks great.
Something to keep in mind is that all web pages can run only on HTML but the end result is not going to be something that’s nice to look at. In fact, without CSS, the page might not even make a lot of sense. Here, take a look at Tumblr itself with all CSS disabled (there’s a very useful extension called Web Developer that allows you to do this):
Not very nice to look at, but all the elements of the page are here only with the help of HTML.
And look, this is what the above section looks like with CSS enabled:
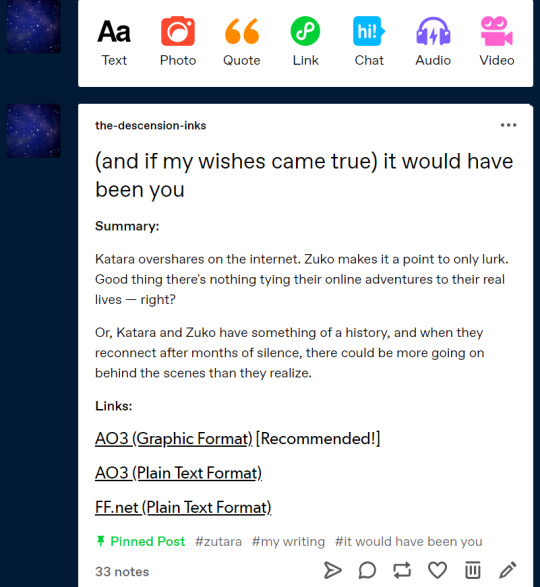
This was just a brief visual walkthrough to show what HTML and CSS really do, but let’s move on to HTML and CSS in the world of AO3.
Where does the HTML and CSS go on AO3?
The HTML part of the code is put into the text box when you post a new story/new chapter. You must have noticed the two options — Rich Text and HTML — and it’s important to have HTML selected for AO3 to identify the HTML tags that you’ll be using.
All your content goes into this textbox. Whatever text you may be writing, whatever images you may be hosting, whatever links you might want to add— everything goes here.
Now, for styling all the content that you’ve put into the textbox, you need CSS, and that happens through work skins. It’s super simple, and all you have to do is go to Skins on your AO3 panel and then to My Work Skins, and then create a new work skin where you can dump all of your CSS code.
Okay, so onward we go.
How to HTML and CSS?
I’m no expert in web design and my knowledge mostly comes from Coursera, one summer internship, one class in college, and extensive online searching. And, I’ll tell you this, the most I have learnt is from extensive online searching.
Because at the very heart of it, web design is not so much about understanding and applying concepts (as with other coding languages) but more about visualizing elements and testing them out. I must add that this is completely my opinion as a person who rather enjoys data structures and algorithms as compared to web dev, and I’m certain that seasoned web developers will disagree with my views here.
Right, so the online searching. The best in the business when it comes to explaining HTML/CSS is www.w3schools.com. They have sample code, short and sweet explanations, and an online IDE to test your code. Really, it’s a win-win situation.
Alrighty, so now you know where to look for your HTML tags and CSS properties but how do you figure out which ones to use?
HTML Tags
I’ll talk about the HTML that’s required for coding on AO3 exclusively.
But before that— every HTML document has two main parts: the <head> and the <body>. But here on AO3, we only code the <body> which, as its name suggests, holds the content that’s going to appear on the browser. The <head> part is not required for AO3 work skins at all.
Okay, so how to code HTML on AO3? Well, your best friends are going to be the container tags such as <div> and <span>, and the paragraph tag <p>. What these tags do is they create areas on your browser — you can imagine them as small rectangles and squares — where you can put in your content via HTML, and then later style using CSS.
See this? The entire shaded area belongs to a <div> which is styled by a CSS class called “tumblr” (to keep things simple, we’ll only focus on CSS classes, and not id’s. It won’t really hamper developing a workskin in any way.)
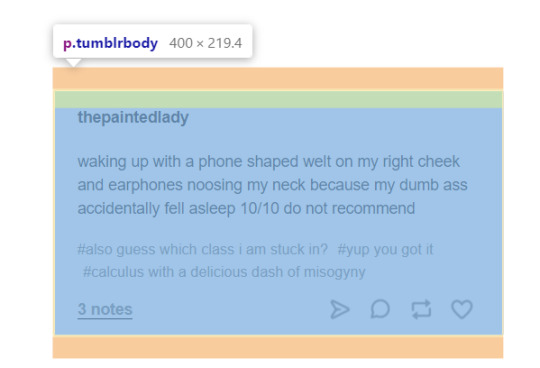
This above belongs to a <p> that is styled by a CSS class “tumblrbody”. And, this <p> exists within the <div> mentioned above.
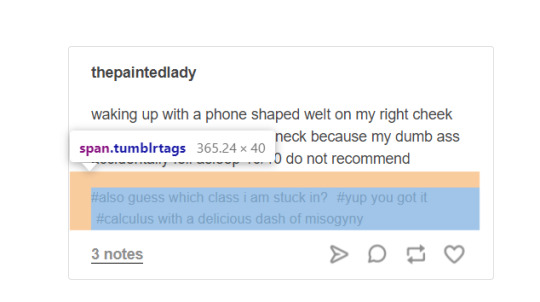
Here’s a <span> styled using the CSS class “tumblrtags”, which comes within the <div> and <p> we just discussed.
Basically, the idea is that the entire page will have to be divided into all these subsections, nested within each other if required, so that they can then be styled using CSS.
Other HTML tags that come in handy are the <a> and <img> tags.
The <a> or anchor tag is used to embed links. Want your reader to be led to a separate page while they’re reading your story? This is it. (This one’s quite common, and authors use them quite frequently in their notes to link to their Twitter/Tumblr etc.)
The <img> tag is used to embed images as the name suggests.
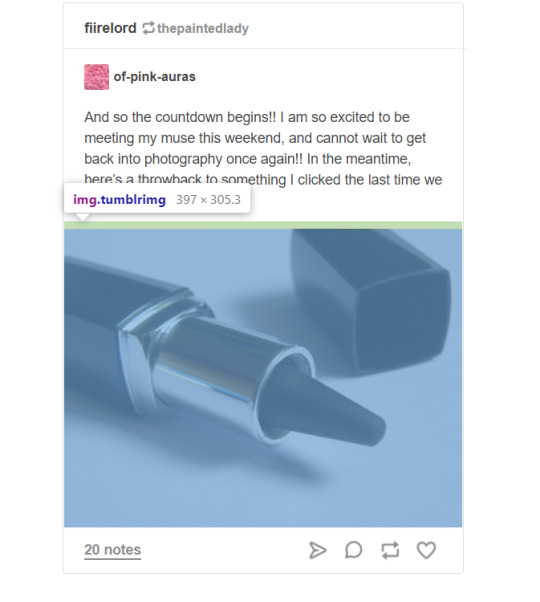
See how the picture is within an <img> tag styled by a CSS class “tumblrimg”?
Again, I’m not talking about the syntax of these tags or how they have to be written because that’s something which can very easily be found on w3schools or any other web dev tutorial website.
So, that’s pretty much about HTML. Now, CSS.
CSS Properties
So, when I talk about how most of my web dev happens through thorough internet searching, I’m mostly talking about CSS. Because HTML tags aren’t difficult to remember, they stay in memory when you keep designing web pages, but CSS properties... ugh.
But before we begin, a short note on CSS classes. To simplify matters you can look at them as labels given to your HTML container tags (<div> for example). Once you assign the label to your HTML element, you can then style that label in your CSS, and introduce properties to it which you want to see in your HTML. It basically forms the link between your HTML and CSS.
Say, I have a <div> that I want to style, then I’ll give it a label like this: <div class=”mongoosesurprise”>Your code</div>. The class name is mongoosesurprise, and when I have to style that particular <div>, I’ll have CSS code that looks like this:
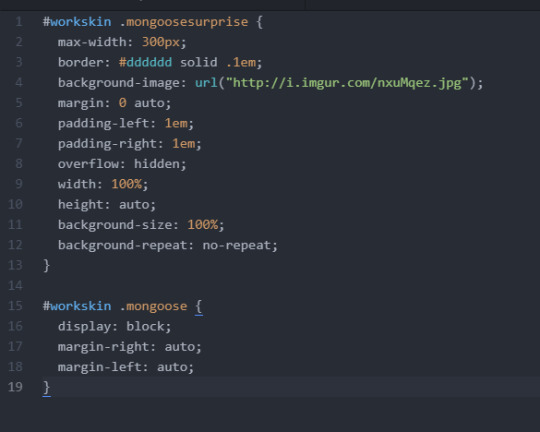
Now, about CSS properties.
You see all the words in white followed by a colon? max-width? border? background-image? That’s it— CSS properties. I can never remember if it is maxwidth or max-width, whether it’s margin-right or right-margin, whether it’s padding-right or right-padding, and that’s where the Googling comes in.
Again, like with HTML, I’ll only talk about CSS on AO3. Unlike regular CSS, CSS here always has to start with #workskin. And then, #workskin can be followed by our class name. (The class name must be preceded by a fullstop though, like in the picture above.)
My CSS design procedure is all over the place. I entirely work on the basis of trial and error. I keep adjusting properties like max-width and padding and margin to see how the elements fit best. (It doesn’t take me as long as it did four-five years ago to estimate these values and I’d attribute that to practice and inspecting a lot of web pages. On a related note, it’s great to learn web design by inspecting other pages.)
I realize this isn’t great advice but like I said, it’s always been about trial and error when it comes to CSS. What I can say conclusively is that with properties width, height, display, position, padding, and margin most of your HTML tags will be placed properly. But when it comes to styling, the list is really quite endless. From a number of font-related properties to border, there’s a lot— and, thus, Google.
And, finally, what you must know for HTML/CSS on AO3 is how to host images.
Hosting Images
If you want your work to contain images, it’s best to host them somewhere online. Imgur is a great option; it’s free and really simple to use. Once the image is uploaded, you can get the share links and put it in your HTML <img> tag (under the src attribute— again, very syntactical so I’m not getting into that), or if you want you can put it in your CSS as an attribute for the property “background-image” (like in the code above).
You’ll have to make minor changes to the share link though, that is, add the image extension (.png or .jpg) to the end of the link. Also, sometimes the image doesn’t render if there’s no ‘i’ preceding ‘imgur.com’. Here’s a sample link that works perfectly: http://i.imgur.com/aSMSztl.png.
And, I think that’s pretty much it.
This covers the absolute basics of how to code HTML/CSS on AO3. But I’d like to repeat that by no means is this everything. If there’s a particular area you’d want me to explain, please feel to drop in an ask!
Happy coding!
#antarcticasx#html/css#ao3#workskins#i'll tag this as#zutara#in case anyone else reading 'it would have been you' wants to know
419 notes
·
View notes
Text
Idol Worship (Osomatsu-san: Fujio Rock!Todomatsu x Reader) 1/4
Author: Roro (halfeviltotty)
Fandom: Osomatsu-san
Pairing: Todomatsu x reader
Category: boss x employee, romance, fluff
Rating: PG
Summary: Why is your asshole boss asking you out on a date?! Is it because you yelled at him to get his act together and now Todomatsu wants to publicly humiliate you by toying with your feelings?! Nobody is that much of an asshole - except him!!
Word count: girl stop asking its like 10k lemme alone.
Warnings: paranoia, asshole todomatsu but he's actually not that much of an asshole, it's sugary tooth rotting sweet, you will get cavities from this one my loves.
Commentary: this was my fave one to write for ao3 back in the day!! i did a deep edit today so enjoy!! more scenes more cuteness, more totty apologism!! please praise me a lot for getting this uploaded bc it was HELL fixing the formatting in multiple ways so ugh. this wasn't even one i planned to do today either and it took literally hours bc i had to do a bunch of tedious stuff since i lost my original doc and needed to use the ao3 copy with all of the stupid html markers. i then had to fix the corrupted text and THEN edit and add more stuff and THEN when uploading it i needed to delete each double spaced line. Also my baby kept hittimg me while writing this so some og the grammar is awkward. I'm reediting it now on mobile and that fucking SUCKS
| Oneshots | All Fics | Multichapter Fics |

Matsuno Todomatsu - The Cutie Fairy Prince.
As your poor luck would have it your first professional job in the entertainment industry would be under one of the biggest shitheads in the whole business.
Despite Todomatsu forcing this whole image that he’s a sweet, kind, innocent and most importantly cute prince the real Todomatsu couldn’t be further from those ideals.
The day you stood bright eyed and thoroughly optimistic that you could work with Todomatsu was the day you learned the reality of the situation wasn’t as blissful as the recruiting videos you watched on repeat.
The first words out of his sugary pink mouth were that Todomatsu wanted you to be his assistant because you're plain, unfashionable and overweight so that makes you the perfect candidate since someone like you couldn't possibly tempt him into a scandalous relationship. Any admiration for Totty - the name he insists being called by disappeared in literally 0.05 seconds in your first interaction.
As time has inched forward you have realized not only is Totty willing to abuse any smidgen of power he has, he's also extremely manipulative. You tried to grin and bared it until you understood all of his frankly juvenile tricks well enough to deflect Todomatsu's false flattery with a simple, “That is very sweet of you, but we are busy right now. "
Regretfully enough however it took some time to learn the right words to trick your selfish boss to actually do his work. You hope it’s your influence that Todomatsu stays booked and busy now closer to his solo album impeding release unlike how it was just a few months back after his first assistant quit. Todomatsu’s foul snobby attitude had him losing favor with people he frankly should have been kissing up to. The narcissistic bubble that clouded his mind so thoroughly seemed to have popped as of recent which is a relief for those who dealt with him because most of his team have their resignation papers signed and ready to be submitted before the album dropped.
You heard until the past few weeks most of Todomatsu’s team never actually believed he's trying to debut as a solo artist but instead the common theory is Todomatsu wants to prove to his five older brothers that he’s just as good as the rest of them. Most people thought Todomatsu was just bored and wasting their time since he hadn’t been taking it remotely seriously. You know first-hand how obnoxious Todomatsu is. Who the hell hears about an interview their brother aced and begs to do one on the same show only to show up three hours late and completely unprepared?! Todomatsu’s diva attitude had degraded his general support from those around him which included your own.
But you knew those words weren’t the whole truth, yes your boss is an absolue piece of shit asshole, yes once this album is out you’ll also be turning in your resignation letter along side with everyone else and will request to be assigned to another artist...but it isn’t uncommon to hear Todomatsu practicing for hours late into the night most evenings. You’ve heard him diligently do his vocal exercises until his voice strained, you’ve personally had to treat some of his callouses during bouts of inspiration and you’ve tuned more instruments than you’ve ever seen before. When you were in training and reading magazines about Fujio Rock one of Totty’s special traits was he was the most serious about music, that he played a number different instruments and was basically a music prodigy. Piano, keytar, guitar, bass, violin, drums, flute, trumpet, and apparently the harp on rare occasions. Plus Todomatsu had a natural affinity for producing and sound mixing which is what got Fujio Rock picked up with the Pierrot label to begin with when their underground EP caught an agent’s eye.
You should have known better than to meet your idols. That���s advice you’d been given time and time before you entered the entertainment business, “he’ll never live up to your expectations so it’s better not to put him on a pedestal.” You’d been told. And yet you did it anyways only to find out, yeah maybe you shouldn’t have interviewed for your favorite Fujio Rock member. Maybe you shouldn’t have followed his career as a fan since you first saw the Matsuno’s program as children. You learned his choreography and mirrored it so long ago that most people couldn’t tell the difference between Todomatsu and Ichimatsu. You were blinded by a bright and talented star with a lovely smile and sweeter voice.
Without being biased you could pinpoint Todomatsu the most skillful musician you've ever known, and unfortunately he's cute if you squint with an amazing voice, but simply he doesn't have the drive to succeed. Even a fool could see Todomatsu enjoyed playing music more than anything and that he seemed to have morphed his entire life around that fact but you get the feeling this motivation bubble is going to burst very soon. You’re not going to go down with this sinking ship when the last boat heads off. Which is why you were already looking for a new client. To be frank, you're more than sick of his shit now. It's just Todomatsu is the worst person imaginable! He makes you clean up his dirty laundry, makes you wake him up every morning, Todomatsu demands to eat with you and ugh the days he forces you to cook for him are the most repulsive. Todomatsu’s lonely, you know that for sure because you’ve never seen him with anyone else ever! He has no friends and due to Todomatsu spat with his brothers he doesn’t even have the other members to talk to. In the months you’ve suffered under his thumb never once have you seen Todomatsu interact with anyone who isn’t forced to be there with him.
Someone had to pop his bubble and remind Todomatsu he isn’t the hot shit like he thinks he is. You tell him without mincing your words to get his act together one day after an extreme amount of fussing over him and suddenly Todomatsu's demeanor towards you begins to shift, like he's eager to make you proud of him. Over the course of a few days his attitude transitioned from being almost combative to being cooperative.
Then all at once you don't have to fight to wake him up, Todomatsu's going to shoots and recording sessions with very little fussing and he's expecting compliments more but unpredictably enough he's passing out compliments like he’ll die if he can’t say something nice about you. “Oh, where’d you get that top from? It looks so adorable on you.” You typically smile and pretend to be flattered when Todomatsu references your appearance. You can’t understand why he suddenly wants to play nicely and for that reason you don’t trust his attitude change.
You leave his apartment confused every evening these days because Todomatsu now requests you by his side more than his own manager. You damn near have to fight to go home and if you were still naive you’d think Todomatsu was two seconds away from making you his live-in girlfriend rather than assistant. Even if you maintained a healthy level of emotional and physical distance Todomatsu seems more than eager to cross those boundaries. It becomes a regular part of your job to spend time with him after conventional work hours and while you enjoy the overtime pay when would you have a second to yourself to spend any of your money?! You go home to shower and sleep and then you’re back at Todomatsu’s side until you fight to go home again. “Is it apart of my job to cook and do his laundry?” You asked a higher up one day when you got the chance. You were given a grimace and told, “Your job is whatever he asks of you,” So you spend time with Todomatsu watching comedies, helping him tune that stupid ass harp, doing his dishes and light housework while Todomatsu seemingly watches you from afar as if he were lovesick. Your entire dynamic completely flips sideways one day until you realized that now Todomatsu even giggles when you have to touch him. You can’t seem to wipe that innocently nervous grin off his blushing face! Who is this guy and what has he done with your boss?!
Due to his behavior you would almost think he has a crush on you, but you remember what Todomatsu said when he hired you. You figure he's just either being genuinely nicer because of your hard work, or more likely is he's playing mind games with you. Todomatsu is definitely giving you, ‘my friend likes you, do you like him back?’ vibes.
Besides isn’t Todomatsu is a bit of a playboy? While you haven’t actually witnessed Todomatsu with anyone else sometimes you’re handed his phone. “Reply to her for me, will you?” Todomatsu would tell you before another variety show interview. “Tell her I had fun too and I wanna see her again tonight.” He’s go through hair and make up but still find the time during all of that lavish pampering to mock you. You’d type away at his phone while Todomatsu dictated what to say as if he shouldn’t be more focused on getting his appearance together for a live performance.
When you look up to hand the phone back you can see the childish malice in his big eyes, “Oh...You’re not jealous, are you?” Todomatsu’s whole expression lighting up with expectancy like for some reason he really wants you to indicate that you’re scared of losing him, “You don’t have to worry about her stealing me away, after all you’re my favorite toy.” You try very hard not to outwardly show your disgust with him. You know Todomatsu does this on purpose and you can’t understand why other than an inflated ego.
The listings for other artists get taken down too fast but you have experience so when a new solo act goes up that you’re interested in you’ll use that to your advantage. That's your mantra to get you through your days of hardship.
You're in the backseat with him and scrolling through the schedule for today. Todomatsu slowly opens his mouth to say something after a few quiet exhhales, and so you hand him a can of his favorite brand of hot honeyed teat without glancing up from your phone you. This is a common exchange between the two of you and tea is what he typically asks you for right off the bat to begin his morning routine so you don’t mind the fact Todomatsu hasn’t said a word to you during the entire forty five minute ride. You enjoy the unusual silence because you get to pretend to be anywhere else.
That insulated bag you keep on your lap for his many drinks gets heavy, but you’re slightly grateful Todomatsu's taken to carrying it for you without making a big deal of it lately.
It's nice, but also an annoying gesture because you still have to stock up on a specific brand in certain vending machines around Tokyo. The list you have on your phone with the locations gets on your nerves because they’re all so far away. Instead of sometimes carrying the bag Todomatsu could stop asking you to go out of your way to buy his stupid little sodas and teas. This thought leaves you irritated when Todomatsu gently pushes the can away and speaks to you. "Hey," Todomatsu starts off quietly like he’s suddenly nervous and you look up to examine why. "When is your birthday?”
It was last week on the day you requested off. You had a great time letting loose and your friends all said how much they missed you. You think about the day fondly because it was the first time since you took this job you’ve truly had fun.
You instantly know this is a loaded question, Todomatsu is smiling at you sweetly but you can see there's something sinister behind those big brown eyes. Of course that pensive voice was affected but you don’t understand why Todomatsu would care. You’ve worked under Todomatsu on this project for several months and until recently he never bothered to ask you about your personal life. You never requested any time off either and you showed up to work regardless of the weather. You look back at Maps app to see the distance between the two of you and the destination before replying.
Two minutes. "Last week, why?" You ask cautiously.
"Why didn't you spend it with me?" Your force a grimacing smile and since you’re already annoyed with him you’d love to yell at Todomatsu for asking such a stupid question. Why would you spend your birthday with the same guy who makes your life a living hell? You have to keep yourself from scoffing aloud and take a moment to breathe because you need to say something more flattering along the lines of, "I did not think you would want to? You are so busy and popular, I did not want to bother you with something so trivial."
"IT'S!” Todomatsu quickly adjusts his volume when he sees you flinch away, "It's no bother! I want to spend more time with you. Outside of work." Todomatsu touches your shoulder awkwardly with a bright smile. You keep your face leveled and professional. "Aw, sure. Next time I am free then." You lie to Todomatsu as if it were second nature and your face fixes to something that looks more like you’re smiling in return before you look down to glare at your phone. Inhale…exhale… you do this several times and offer the tea to him again. "We will be at the studio soon so please drink the tea, Totty."
Todomatsu for whatever reason starts to frown and removes his hand from your shoulder that you were gearing up to eventually shrug off, "You're just brushing me off!" He whines.
The driver pays for parking and Todomatsu pulls the backpack in between the two of you onto his lap. You’re hoping on hope that the process of pulling into the parking garage will speed the hell up so you can avoid the rest of this interaction. Todomatsu opens the bag while glancing up at you and the contents inside until he pulls out something large and heavy.
It's the book you've been wanting for a few months but couldn't justify buying. You recognized it instantly because it’s a special edition with all of these different and beautiful design choices. It looks better in real life! The gold trim, oh is that really iridescent?! Ahh, look how pretty the book mark ribbon is and you can imagine how your fingers will feel running down the glossy smooth spin of the book and what those textures must be like. You're keenly aware that Todomatsu is salaried now and not making a ton of money to afford to drop this kind of money on a single book. This book is very expensive and costs at least 21000 yen. "Is that for me?" You ask cautiously and Todomatsu nods quickly. You watch him for half a second to make sure those evil eyes aren’t lying to you. Instead it seems like Todomatsu’s holding his breath and in return unable to look away from you.
You’ve never been one to trust Todomatsu to the fullest extent and so when he makes no moves to mock your enthusiasm you feel ecstatic when you reach for the book with one hand cradling the can of tea to your chest. Just when the book was in your grasp Todomatsu pulls it back with a small smirk to hover it over your head. You hate him so much for playing keep-away at his big age.
"Ah, you want this book?" You glare at him when Todomatsu asks that malicious question, "Yes I do." You say simply when the car is finally put into park. You don’t react fast enough to stop Todomatsu from unbuckling his seat belt and shoving the book back into his bag. You smack your lips when Todomatsu then rudely snatches the tea right from your open hands before jumping out of the vehicle.
"I'll give it to you after we celebrate your birthday, don't worry you'll have fun!" Todomatsu cheerfully tells you while blowing a kiss your way. You scramble to follow him out of the car, "What- what will we be doing?" You ask watching him nearly skip out of the parking lot. You’re always amazed and a bit repulsed by how quickly the man can down those damn teas. The can is quickly thrown in the recycling with a thud.
"We're going on a date!" Todomatsu announces with a voice you could only describe as adorable while turning to look at you over his shoulder with his most charming idol worthy smile. You find yourself blushing despite yourself. Then you realize the consequences of this exchange, you have everything to lose and Todomatsu IS abusing his power over you.
This is a trap, you can hear the cruel words Todomatsu is going to say if you agree, ‘Haha you thought someone as plain as you had a chance with me?! Did you think I really like you? Get real! This is payback for getting arrogant, pig.’ You’re not going down like that. "Keep the book." You say resolutely, walking behind him.
Todomatsu stops in his tracks to fully look at the cloudy look on your face and you try not to be fooled when you see Todomatsu’s face shift into something openly disappointed.
"Why?" He asks like he’s on the verge of tears, and you remain silent going over your options on how to reject Todomatsu in a way both safe for your heart and job. "I'm not a toy." You say glowering at him.
"That's right, you're not!" Todomatsu's pouting as he speaks as if he's offended that you'd even say that. The nerve!
"It's okay," Todomatsu slowly bridges the distance between you and bends down in order to make eye contact with you. Todomatsu’s sing-song voice is more than convincing when he speaks to you with those usually sinister brown eyes softening into a gentle loving gaze. “You don’t have to worry so much,” He tells you sweetly.
"I would never hurt you." Todomatsu flashes another award-winning smile, "So you should let yourself fall in love with me, okay?" He even goes as far to wink at you. You feel cupid's arrow strike you thrice in the heart and its poison penetrate your very soul. You don't outwardly swoon, but in your mind you're going crazy.
"Uh!" You begin to stammer which causes Todomatsu's sugary laugh to stick in your mind. "Let's go,” He takes you by the hand and gently leads you into the building. Your head is still swimming until the second you walk through the threshold of the studio. You quickly remember your place in this hierarchy.
Todomatsu gives you a strange look until understanding sweeps his features. "Ah." He says before slowly letting your hand fall out of his own. You transition into your worksona, and fuss over Todomatsu's needs like normal. You bring his drinks, towels, and attend to his every want like usual.
Except an issue is Todomatsu won’t stop staring into your eyes lovingly and you feel disgusted with yourself for returning his lingering moonstruck gazes. When you gave Todomatsu his towel his fingers rested on top of yours a few seconds too long before taking it away from you. The contact electrified you. Same thing with his water bottles, Todomatsu kept trying to find reasons to hold on contact with your hands more than necessary.
Once Todomatsu’s recording session is over you feel yourself even more attracted to him. You were entranced by Todomatsu’s voice and the very sweet and soft love ballad that he apparently wrote himself. You were barely able to take candids of Todomatsu in the booth playing the acoustic guitar because when you’d get a good shot he’d make eye contact with the most affectionate grin you’d ever seen. You kept almost dropping your phone as he sweetly sung about being in love with a serious but kind person. When you finally can pay close enough attention to hear the lyrics there's literal quotes of things you've said to him in it so there's no mistake it's about you.
Something about the whole thing bothers you though, you're trying to figure out what his end game is with this prank! Is he gearing up to fire you in a humiliating way? Why is he going through all this trouble to do this to you? Is it a bet? Did his brothers put him up to this?
You can form the shape of the bet’s conditions in your mind, ‘Todomatsu you’re so unpopular, not even your fat assistant likes you! You’ll never make it out on your own like this.’ Osomatsu would tell him, ‘Yeah Todomatsu. You’ll never be like us, you don’t know the first thing about capturing women’s hearts.’ Karamatsu would add.
‘I do too, and I can definitely get my assistant to fall for me! Just watch, in fact I can do it within a single day if I really tried.’ Todomatsu would reply, ‘Ehh? Really? Prove it then.’ Choromatsu would bet, ‘You’re all talk, there’s no way someone like you could pull that off.’ Ichimatsu would goad on, ‘Hahaha, Totty’s unpopular!’ Jyushimatsu would happily agree. That’s what happened, definitely.
As you're waiting on the producer's side of the recording booth, Todomatsu locks eyes with you again. "Did I do good?" Todomatsu practically eagerly begs for more compliments.
Of course he did. Todomatsu is the most talented out of the six after all, and when he takes things seriously Todomatsu can’t be anything short of perfection. You give him a smile and a thumbs up.
Todomatsu doesn't even groan or complain when he has to rerecord the entire thing several more times. Each take he gets deeper into the emotions of what he's singing, and it becomes much more romantic than the first take. By the end it’s not just you who’s barely able to stand, everyone else on the opposite side of the booth seem to be swooning. His voice is so cute after all.
Your knees are jello when he comes out of the booth, he winks at you again before talking to the producer. You pretend not to notice with your eyes staring at your phone and trembling hands.
The day goes on with Todomatsu doing a photo shoot and interview. There’s a point of the session where Todomatsu gets scolded several times for making eye contact with you during the pictures instead of the camera. You're outwardly sighing to maintain an aura that you’re annoyed with him but on the inside you're half a second from fainting.
You try to do your assistant duties well into the day until Todomatsu decides he wants to stop for the day. His manager agrees that Todomatsu has worked hard enough, and when Todomatsu pulls him away to whisper something you see his manager look at his watch and then over at you.
“Is it that time already?” The manager asks incredulous and Todomatsu nods. “Aw, alright! Good luck, Matsuno-san! Have fun.” Todomatsu is gently shoved towards you with everyone wishing him luck while cheering him on. Todomatsu can’t help but laugh good-naturedly, “C’mon guys…! You’re embarrassing me.”
When did Todomatsu become so well liked among the staff? They seem to all really enjoy being around him lately, you wonder if this is because of his recent attitude change. As the work day comes to an end Todomatsu regards you with a small smile as the two of you get into the backseat of the car.
"Ready to go?" Todomatsu asks you shyly.
"Yes, I cannot wait to go home." You groan buckling your seat beat, today has been more exhausting than usual but sorta in a good way.
"Home? I thought we were going on a date?" Todomatsu asks almost rhetorically from his tone while he pulls some make up wipes out of his bag. You’re handed them and without thinking much about it you gently remove his layers of foundation and eye liner. It’s usually not an intimate affair but this evening Todomatsu loosely holds onto your wrists and tracks your eyes. You couldn’t look away even if you wanted to but when you go to wipe off the nude lipstick you hesitate. This must be his signature move, you think bitterly to yourself. The old, “Can you help me take off my make up?” Works on most but not on you. You gently pat his lips clean with a perfectly blank face and you secretly feel triumphant when Todomatsu’s disappointment is naked as his face. It’s your job to catch Todomatsu’s most breathtaking moments so you quickly snap a picture of him. This one’s going to get him a lot of attention if you post it only semi-touched up you think proudly.
But back to the matter at hand you were secretly hoping he'd mention the date again, but at the same time you're absolutely terrified that Todomatsu was serious about taking you out somewhere. A small part of you is optimistic about whatever it is Todomatsu has planned, but the practical side of you is aware Todomatsu isn't attracted to you and he has an incredible mean streak. The car pulls out and begins to drive to some destination.
"About that! I am not sure if it is a good idea." You look down at the phone you held with a gallery of Todomatsu’s portraits inside. "It would not be good for your image." Those words hurt more than you’d like to admit but they’re the truth. It would be detrimental for Todomatsu in a multitude of ways if he’s serious about this date and if he plans to publicly humiliate you that wouldn’t paint the best picture of Todomatsu either.
"I don't care about that." Todomatsu says quickly with very little emotion like it should be obvious. Both of Todomatsu’s hands find your own and his thumbs kneading the worries out of your knuckles. "All I care about is you." At these words and the little touches you feel your eyes turn into hearts, but you immediately snap out of it and drop your phone.
"What are you doing? Why are you teasing me?" Todomatsu gives you a blank look when you tug your hands free from his grasp.
"Huh?" He asks. "Teasing? You've got the wrong idea! I – I! You know I wrote that for you, don’t you? I thought it’d be obvious by the lyrics, but if you want me to make it more explicitly about you I can. I just want my feelings to get across so you understand how serious I am right now."
Todomatsu becomes a bit more desperate with each word he speaks and when you try to tilt your head away to break eye contact Todomatsu contorts his body so he can study your face.
"But why? Is this a game or something?" You gently pick up your phone from the open space of the seat and pensively toy with the textured case on your lap.
Todomatsu watches your anxious body language with a weary smile as if he's trying to pacify your concerns with the upturn of his lips. "I just realized I'm better with you around." He says quietly near your ear so only you can hear.
"It's not a game, I promise." You almost believe him when Todomatsu speaks so earnestly. "I feel whole when I'm with you in a way I've never felt before." You clamp your eyes shut for a split second and shakily exhale the breath you’d been holding.
You listen to the words critically with your eyes open and facing your company phone screen, you want to believe them with all of your heart but it’s Todomatsu! Can you trust him?
‘No, no! I’m not joking, see look Kevin really likes you! Don’t you, Kevin?’ You feel like you’re ten years old again, staring naively into your crush’s leering face.
You’re not ten however, you’re an adult who has been through this game and teased enough. You’re not making yourself an easy target again, not for Todomatsu.
"You can laugh now. This has been very amusing for you I am sure but I would like for this game to end." You say with gritted teeth. Todomatsu looks at you with so much pity from the corner of your eye that you almost want to cry.
You expect for the laughter to begin but instead Todomatsu tells you with a quiet conviction, "I'll prove how I feel on this date."
You think he'd make a better actor than idol.
The drive is awkward with Todomatsu trying to bridge the gaps of distance between you with idle conversation. Todomatsu keeps invading your personal space by placing arm around your shoulder loosely like he’s trying to be casual. When Todomatsu tries to hold your hand a few times you can feel his clammy palms in the brief seconds you don’t brush him off.
Never once has Todomatsu been so grabby at you and you really hate it because you sincerely wish he wasn’t trying to hurt you like this.
Todomatsu asks you questions and sends out more invitations to go with the one-sided chatter.
“Oh, have you heard about that new bakery that’s popular? There’s a line in the morning and I hear they’re sold out before 9AM most days. Do you want to look at the menu with me?” He asks you sweetly when sending you a link, you resent the fact that you often use the phone Todomatsu provided more than your actual mobile.
It only has his number programmed in it which meant you had to learn all of the other team member’s phone numbers and extensions by heart.
You sigh sadly, “I would not have time to get you ready and wait in line at this bakery, Totty.”
Todomatsu blinks and opens his mouth, “No! You’ve got the wrong idea! You wouldn’t have to pick them up for me. W-what I meant by that is I’d wait in line for whatever you wanted, for as long as it takes too! Even if it took hours, or it was raining or if the weather was really gross I’d wait all day if I had to.” Todomatsu tries to desperately convince you, “So please look at the menu? Would you want this strawberry tart? Doesn’t that look yummy?”
Todomatsu wiggles the phone for a second before you reply with a quiet, “No thank you.”
Todomatsu slowly continues to wave the phone in your face and you simply close your eyes. After he gets the hint, Todomatsu leans back down and removes his arm from your person.
You wanna go home, you think after a lengthy silence.
Minutes pass away with Todomatsu scrolling quickly down his phone before he speaks again, “Um...There’s a couples event being hosted by a friend you should come with me to. It’ll be really be really romantic and I promise I’ll spoil you the whole evening if you say yes.” He suggests almost pathetically innocent. The way Todomatsu says that doesn’t invoke the teasing imagery like before but more of a ‘if you do this for me I’ll be your best friend!’ Sort of schoolyard ettiequte.
You finally turn to look Todomatsu dead in the eyes, “Were you dumped recently?” That’s the only explanation that makes sense other than the whole revenge thing but those two tie together so well you’re sure they’re connected.
Todomatsu’s lips twitch and a bead of sweat rolls off his cheek. “No, I’ve been available for a while.” You watch wearily as his anxiety twists into what you’d call fool’s hope.
“Why? I’m single so there’s not an issue if we go together, right?” Why is Todomatsu so sure you’re not dating anyone. That assumption leads you to believe that he definitely doesn’t think anyone finds you attractive.
“What if I am not single?” You ask harshly.
Todomatsu gasps loudly and drops his phone, “W-who?! Is he cuter than me? What does he look like?!” Todomatsu asks quickly before he settles down, you watch him curiously when tears form in the corners of his eyes. Todomatsu doesn’t make a big show like you thought he would wiping at face, in fact it’s actually very sweet seeing him sniffle a bit.
“I’m sorry, I should've asked you out sooner then… Or is he your long term boyfriend? I-I shouldn’t have assumed you were single after all…” He manages to hiccup a few times and the car slowly begins to pull over to the side. Todomatsu exchanges a tearful glance with the driver in the rear mirror, “Can you drop her off at home?”
You sigh softly, “I apologize, Totty. I do not have a boyfriend at this time, but I will admit my feelings are hurt by the assumption that I am single.” This prank is going too far and you know it’s going to end with your heartbreak but you can’t help but feel a bit smitten with Todomatsu crying over you like that.
“C-can we still go on our date?” Todomatsu asks after wiping his eyes raw. “Yes, of course.” You say after thinking it over, if he does hurt your feelings you can at least say Todomatsu had to work for the privilege. You press your phone to your heart a bit and return a nervous smile in exchange for Todomatsu’s overwhelmingly relieved one.
The rest of the drive was just Todomatsu asking you general ‘getting to know you’ questions like he was trying to fill in the gaps of his knowledge that you only half answer. When the car pulls into Akatsuka Amusement you're a little more than baffled. You watch as Todomatsu quickly pulls off his wig and finger combs out his hair, he doesn’t ask you to put it up for him but you place it in his backpack anyways.
You feel exhilarated when Todomatsu’s hands brush against your own, “Excuse me.” He tells you sweetly with a glance at your face and then pulls out the hoodie you laundered for him the night before.
Todomatsu's eyes light up when the car is parked, and you note how different he looks in his bowl cut and pink hoodie. A lot plainer, he won't stand out even if it weren't twilight. He looks adorable with his eyes sparkling looking into yours before he exits the car. You feel sick from all of this eye contact.
You hesitate for a few moments, you're not sure if you're getting out just yet because whatever humiliation he has planned is waiting for you inside. You're deep in your paranoid thoughts until you hear a knock on the window. You jump a little before looking up at Todomatsu pulling open your door.
"C'mon, let's go." He says enchantingly sweet with a hand extended towards you. Like a prince beckoning his lover from a white carriage... Without thinking you take his hand which causes Todomatsu's cheeks to flush the same pink as the setting skies. He not so subtly cheers when you use him as leverage to exit the car, it's adorable you think while trying not to giggle.
"Be careful," Todomatsu really is putting his best foot forward with this ‘date' and you're so scared of what's going to happen when the other shoe drops. You feel guilty for yelling at him all those weeks ago, you had no idea it would land you in such a terrible mess.
Because Todomatsu can't like you, it's just not possible. If he weren't an idol, sure you could easily imagine being with an average looking guy with a stupid bowl cut. But the power balance is tipped out of your favor in reality when Todomatsu was apart of the country's biggest idol group and you're plain, unfashionable and overweight.
Though you have been working on your fashion sense, dressing a bit better but not flashy enough to draw too much attention to yourself. You’ve always been a healthy eater so it’s just genetics that your body fat is the way it is, the same with your facial features.
If this was another life maybe the two of you could've been together, if Todomatsu wasn't so cruel and spiteful and you felt better about yourself. You don't think there's really anything wrong with you per se, you just don’t fit the image of an idol's date.
And Todomatsu is aware of that fact, you think spitefully.
As you snap out of your depressing thoughts you feel Todomatsu tug on your hand, he's pointing and speaking about the amusement park. "- Before it closes!"
"Huh?" You look at Todomatsu confusedly.
"You weren't listening?" He groans, "We have to go on the ferris wheel before it closes! I'll explain everything else as we go!" Todomatsu leads you straight past the empty ticket stand with a flashing of a card, into the park. "Hmm, where's a map?" He asks looking around.
When you look down to investigate why your hand feels damp you notice Todomatsu’s hand is still wrapped around yours, and then all you can focus on is the softness of the appendage. It's warm too! You're lost in this feeling as Todomatsu finally sees the map literally a couple feet away from him. Todomatsu must actually be a bit nervous to hold hands with you, you wonder if it’s his guilty conscious.
"Okay," He starts adorably, "So we're going here!" Todomatsu points at the ferris wheel, "And then I have to make a brief appearance on stage but that should be over fairly quickly. After that it’ll -” Todomatsu tries to explain before you cut him off.
"So this is for work? It is not a date?" You interrupt sounding almost relieved, burying the vast disappointment deep within your heart. "No, it's still a date!" Todomatsu shakes his head no and smiles at your confusion. "But we are working. So, it is not a date." You feel Todomatsu squeeze your hand pleasantly.
"Just trust me, okay?" You find yourself nervously returning a smile.
But now you're filled with a new type of apprehension, one that mutates and feeds off of your paranoia and fear but when you peer into Todomatsu's loving and innocent eyes you calm down a tiny bit especially when you feel yourself sending them back. "Actually I think I'll keep the rest of the date a surprise!" Todomatsu tells you thoughtfully.
"Why?" Your voice betrays some of your actual dire emotions.
"Because," Todomatsu enunciates each syllable in that tone he uses when you're asking if the lemon tea has to be from those vending machines specifically. "I just said I want to keep the rest a surprise!" He winks at you after he notices your annoyed expression. "Let's go!"
Todomatsu is being pushy as always you think, and when he pulls your hand you almost on instinct forcefully snatch your appendage away, but you catch yourself.
You don’t want to get fired just yet.
As you walk to the ferris wheel, this time with the map brought up on your phone you feel a small sense of envy when you see families of young children walk or sometimes run by. The blur of little toddlers zooming into the arms of waiting parents after they went on the kiddie rides brings a soft smile to your lips. You feel a slight ache because kids are so cute but you wonder if you’ll ever have any yourself.
"Do you like kids?" Todomatsu's question brings you out of your reverie, "I do." Todomatsu's hand begins to tremble in yours, as he covers a portion of his face with his hood. You can see his wobbly smile and flushed cheeks from a certain angle, but he quickly covers it when he sees you staring up at him with curiosity. Neither of you say anything further.
The park at night is absolutely gorgeous now that the sun has completely set, you find yourself turning around all over to snap pictures for Todomatsu's various social media accounts.
The dreamy atmosphere is perfect and Todomatsu looks great in his casual clothes. You know this moe gap will be very popular with his die-hard fans, and the smiles he’s giving you are syrupy sweet. Taking candids of Todomatsu is second nature to you at this point, and but he's making it hard because his hand is clearly holding somebody's in most of them.
They'll be edited to have his signature hair anyways. Todomatsu even in his regular plain clothes looks lovely next to all the costume characters, and the lights create a beautiful backdrop for his smiling face. "Stop that!" Todomatsu says as if you're flattering him, "I can't look that good." He's fishing for compliments again.
Well call yourself baited, "Of course you do, Totty. You always look amazing." You reply simply. As closing time approaches more people file out of the park, leaving you two to enjoy all the sights and smells on to way to the ferris wheel.
Todomatsu keeps you from getting too distracted since he never stops for long other than to take a quick picture. He seems determined to get to the ferris wheel for whatever reason.
Plus you catch Todomatsu constantly looking for excuses to get close to you to check the map on his phone. You know it's bullshit but you frown and say, “Here you go.” when he reaches for your phone. You’re aware Todomatsu knows how to navigate the device, it’s the exact same as his own and he was the one who gave it to you. So you roll your eyes when he ‘accidentally’ clicks on the home screen to view your background or locks your phone to see the lock screen.
You picked your favorite pictures of him to differentiate this phone from your personal one. Plus despite Todomatsu being a piece of shit in some moments you do feel your inner fangirl scream happily.
It took a while for you to figure out which picture you’d make your lock screen and you really had to choose it carefully. The lock screen had to show his most charming side, but also had to be impersonal enough that nobody would assume you actually knew him from the picture alone.
So you chose a professional one from his first photobook with Fujio Rock, one that really showed off his sweet-devil nature. It’s a little boring in retrospect but it’s what inspired you to change careers a few years ago.
Your lock screen is cute but your home screen is absolutely precious. One night Todomatsu insisted on taking a selfie with you after work during dinner. It does make you smile when you remember his arm wrapped around your waist and the cheesy grin, his silly little wink and peace sign while you scramble to put your strawberry lemonade down.
“Heheh...I turned off the screen again. The passcode is my birthday, isn’t it?” Todomatsu asks for the third time as if he wasn’t sure. “Yes it is, do you not remember that you set it as such when you gave me the phone?”
It's a game dealing with Todomatsu, and if this is a huge prank you want it to be known you were aware of it the whole time and weren't playing along. "Hm, do you know where we are? How do you read this?" Todomatsu asks getting even closer to you, even going as far as bending down so his face is closer to your own. Todomatsu passes the phone back to you casually.
"I do not know, Totty. I thought you knew where you were going." He's in your personal space; practically kissing range. A sly but charmingly innocent smile crosses his lips when he notices your flustered voice. It's heart tormentingly cute. “Could you please help me with this?” Todomatsu whispers in your ear. This is definitely learned helplessness.
“I think you know where we are supposed to go, Totty. I know you can see it from here.” You tell him when you jerk your head down. You decide to put your phone up after this by shoving it into your pocket. "I wonder," Todomatsu says cryptically before turning away leading you once more without issue. You don't notice your lips upturn. When you finally locate the hard to miss ferris wheel, Todomatsu flashes a pass and you skip the already short line.
As the ferris wheel comes to its conclusion, you feel Todomatsu's hand on your lower back, ready to usher you into the small car. "Wait, Totty! I really don’t wanna go through with this." Your voice is completely undignified, and you sound like a child. You've had enough time to mentally prepare for the ride, the prank, the fallout, the looking for a new job. But you’ve wasted it. Instead you've been taking pictures of Todomatsu,thinking about Todomatsu and smiling at Todomatsu. "Ehh, why not?" He pouts, as the door opens.
"I'm scared." You're being honest to the point where you feel so terribly small. You usually speak more formally than this, but you’re not in the right head-space to translate your words into polite speech. "Scared of what?" Todomatsu presses and you answer with the thing about this that scares you the most. "I'm terrified of heights." Todomatsu doesn't outwardly react negatively instead he does a weird hand motion and lights shut off in the distance. This action catches your attention as you look off to the distance.
"Okay," Todomatsu says uncharacteristically tender, before gently pulling you aside to a bench. You feel your heart calm down as Todomatsu wraps his arm around your shoulder. "No whining, Totty? Usually you cry until you get your way." You mumble sorta relieved but mostly sarcastic.
"I don't want to make you uncomfortable, a date is supposed to be fun." You don't make eye contact with Todomatsu, instead you find yourself leaning more into his shoulder for support as your eyes trail up the ferris wheel's true height. After witnessing a go around and listening to Todomatsu's steady breathing in silence you incrementally feel relaxed enough to try to face your fears. "Okay, I am ready now." You say quietly after a few moments of slow breathing.
"Really? We don't have to!" It's impossible for Todomatsu to keep the childish excitement from his voice. The question was more rhetorical at this point than anything. You slowly stand up and steel your nerves with Todomatsu’s palms pressed against the small of your back. Todomatsu is gently pushing you forward towards the wheel while speaking, "Nothing bad is going to happen! Ferris wheels are really safe, and you can't fall out or anything."
Everyone else seems to have cleared out and left the line in order to go on the final rides before they close for the evening. This leaves just you and Todomatsu who eagerly runs ahead with a nod to the ride attendant. In your peripheral you perceive some lights switch back on far away but your focus is on the person before you.
"Are you sure?" You ask Todomatsu who enters the car as soon as the last people unload. His illuminate brightly and you want to take a picture when his hair flutters in the evening breeze. Todomatsu grins at you reassuringly, with his hand reaching out to pull you in. The imagery of a fairy tale pops back into your mind. "I promise."
With some apprehension you finally take his hand and when your foot makes contact with the floor it feels unstable. You want to run away right then and there, but Todomatsu has a patient look on his face and steadies you. The car buckles under your weight, and rocks as you fully enter.
"It's okay if you don't want to do this, I understand." You look into Todomatsu’s big eyes that are still lit up by the surrounding lights and feel entranced. You decide you want to see more of him especially his uncertain smile. ‘Nothing bad is going to happen,' replays in your head. "I trust you." You admit quietly to Todomatsu, despite your better judgement. Todomatsu gasps loudly but his face instantly darkens in color as the most beautiful smile graces his lips.
When the door is closes with a thud you end up sitting right next to Todomatsu. The car travels a little off the ground and you feel like you might black out as you travel higher and higher as the wheel is being loaded. Thankfully it only loads half way through as everyone else who would have road it went to go on the roller coasters or more exciting rides before the park closes.
You try your hardest to look ANYWHERE but the outside of the window which leaves you with two options. Look at your phone or look at Todomatsu. Despite being aware of these options, you're too afraid to make any sudden movements to grab your phone out of your pocket. Feeling like you have no choice you take in the sight of Todomatsu. He's avoiding your intense gaze, and fidgeting in his seat almost bashfully. You want to ask what's wrong, but you're becoming more accustomed to this sort of Todomatsu when the two of you are alone.
"Todomatsu." Your voice is strained and it even warbles as you speak. You have next to no patience for adhering to his rules of conduct right now. You feel yourself rise higher off of the safe ground, the ground that protects you from falling to your death. You’re two seconds away from shrieking in horror as the adrenaline quickens your heart rate. "I told you to call me - never mind. Yes?" His eyes are still shifting in every direction but your face. You take note of his far away voice, and its wistful tone.
"What are we DOING up here?!" You're not only terrified, but that very same anxiety is twisting and writhing its way into being anger. Why does Todomatsu - the person who invited you up here feel nervous about being here? It has to be unsafe! Is Todomatsu going to ruin your life now?! Todomatsu jumps at your loud question, rocking the car.
"I want to show you something." You left a shriek out for a split second and completely ignore what Todomatsu says to you. You duck your head into his shoulder and take your now trembling fingers into his. Many things swirl around in your head such as ‘I’m going to fucking die!’ with each fraction of motion that the car makes, and ‘I’m going to kill him first for putting me through this!’.
You can hear Todomatsu verbally shiver and gulp a mouth full of air, "How scared are you right now?" Todomatsu asks with a vast yet quiet affection as if he’s content that you're touching him.
"I'm TERRFIED." You exclaim, and the force of your voice shakes the car once again. You're holding onto Todomatsu for dear life at this point, and he lets go of your hands to wrap his arms around you.
You're panting from fear, almost on the verge of hyperventilating. Todomatsu hums a tune while rubbing circles around your back. You attempt to quickly regain your composure with steady breathing but can't find it in you to remove your head from Todomatsu's chest.
You inhale the scent of his detergent, and almost bitterly laugh when you remember you washed this hoodie for him today. He's got you doing household chores now to ‘spend more time with you'. Like you’re his damn maid. After a few seconds Todomatsu giddily whispers in your hair, "I want to show you something outside, you don't have to look if you're scared though."
"What!?" You mumble, removing yourself finally from his person a little. "Look there!" Your eyes follow where he points, and the car stops with your car at the very top. Your eyes nearly burn as you stare into the bright pink lights that spell out ‘Date me?' You gasp, pulling away from him completely. You instantly regret this when the car rocks, sending you back into his arms.
This is harder than trigonometry, you realize as you do calculations in your head to figure out why would he put this much effort into embarrassing you.
Todomatsu is petty, rude, vindictive and vain but he's never been this evil before. At least not to your knowledge, and not over something as so small as you yelling at him once! or a few times. Why would he want to break your heart this badly? You quickly begin stand up, nearly screaming as the car sways.
"What are you --?" Todomatsu shouts with his arms extended wide open as an invitation for you to seek refuge in them. "Where are the cameras? This has to be a prank show!" You look in the corners of the car when standing up becomes to frightening you sit on the opposite side from him.
“Where are they, Todomatsu?! Isn’t this too cruel?” You scream at him with tears burning your eyes. "No!" Todomatsu's voice is fed up, like he's tired of you and is dealing with a very hard headed child. He instantly switches to your side of the car and envelops you in a deep embrace.
"I like you! A LOT! You're so dense and paranoid, I can't believe this - I'm not so awful that I'd toy with your feelings like this. I know I'm not the nicest person, but even I wouldn't do that." He even throws in a ‘I can't believe you think so lowly of me!’ under his breath before continuing. "I just! I just want to really date you."
You almost feel yourself choke on a sob at these words. The car shakes a little coming back to life after being stalled for several minutes. Your arms snake around his body with fear when the car lurches forward with movement. Todomatsu laughs, and you feel your almost relieved that you were right! Your stomach churns with anxiety and you’re so glad the other shoe is finally dropping. Todomatsu nearly had you for a second there.
You’ll be able to leave this car with some dignity. Until he speaks. "I knew it! I knew you liked me back, nobody else has ever cared about me like you." Todomatsu nuzzles into your neck and heaves out a sweet sigh.
"What do you mean by that?" You have no idea what he's talking about, do you care for Todomatsu? Honestly, you have no idea! Your thoughts are complex; Totty was your favorite from Fujio Rock but that was before you met him, and you won’t like and say you don’t think fondly about the good moments you've had with him after a hard day's work when the two of you would veg out and watch comedy programs.
You think about how over the past couple months he's taken you to his ‘favorite secret spot' which is an oden stand ran by a friend, how when he found out you were being sexually harassed on the train he began having you get picked up in the morning! Todomatsu has done a few sweet things for you, and you suppose you've tried to show your appreciation in small ways. But do you care about him? You feel a fondness rise from your heart that bubbles out like a boiling pot. You take a moment to survey Todomatsu's appearance, the lights from the ferris wheel highlight his well taken care of dark hair in ever changing colors, and the smile on his face makes you marshmallow soft. He looks so picturesque when he speaks in this moment. Here it comes, you think. the Got You moment.
“Remember that day a while back? It made me realize you believe in me more than anyone else does. Everybody says I shouldn't have gone solo, and that I don't have the talent or drive for it but you're always pushing me to do better and be better. I want to succeed, and I know I can with you at my side. Nobody would nag me that much if they didn't care!” Todomatsu explains fondly and you actually pity him for it. You’re unfortunately awestruck when you peer into his stupidly large eyes and you blink as Todomatsu's face comes closer to yours until you can practically feel his gaze locked in on your lips. "Can I kiss you?" He asks, breath ghosting your lips.
"Okay!" That jittery voice sounds so unlike you but to be fair this whole day is wildly out of character for Todomatsu as well. “Thank you.” Todomatsu murmurs sweetly before pressing just close enough to be considered a kiss. Your eyes flutter shut and you’re still not fully convinced this isn't a huge practical joke when he kisses you.
The kiss is so romantic and gentle, you melt into it earnestly. When Todomatsu pulls away first, you linger and almost bridge the gap for another kiss. Your hesitance and complacency is a huge problem for you, you think in that moment. You kiss him this time taking matters into your hands. When you break the kiss Todomatsu licks his lips while looking you dead in the eyes. “What is your problem?” You ask with a gulp and look away quickly just as Todomatsu starts giggling. “You are.”
Your heart drops to your stomach. Finally! Finally is the moment of your life shattering. Instead of the laughter turning into vitriol barking, Todomatsu twists until he's in your line of sight again. "Oh," He starts off sensually. "Did you really think you could hide that from me forever?" You're still on guard, but you vocalize your confusion.
"Huh?" As you descend further down the on your second lap around the axis, "You're wearing my brand of lip balm." His voice is so cocky you want to die, but then he kisses you again and again until moments before the ferris wheel makes it to the bottom.
Todomatsu sneaks in one last kiss the half second before the door was opened. Todomatsu practically floats out of the car, while you're breathless and flustered trying to stumble out. As you trip over the ledge of the door Todomatsu quickly catches you. In your ear you hear him whisper ‘did you fall for me?'
As cheesy as it is you feel yourself flush further. “I think I may have.” You admit when Todomatsu releases you and walks away. You stand there dumb with an open mouth for a moment in a daze until Todomatsu playfully calls out from ahead, "Come on!" releasing you from your trance.
“Okay so we're going to the concert venue, wait in the crowd for me. Todomatsu makes no effort to pretend he doesn't know where he's going anymore and all of a sudden Todomatsu seems to be in business mode. His voice is the same strict one he uses to say ‘Give me tea.'
You frown at this sudden change, but you too switch into your worksona. "Understood." You say coolly. Then you realized something crucial.
"Wait, I’m not going to be back stage with you?" You accidentally use casual language without thinking. Todomatsu's face softens into an adorable grin.
"Because," Any pretenses gone as he sings out each syllable, "This is for our date, not work!" As you're being lead through the labyrinth of Akatsuka Amusement, Todomatsu starts a new conversation. "What did you think of my new single?" Todomatsu waits expectantly for you to praise him and his talents like usual.
You duck your head down, wishing your phone was in your hand and not in your pocket still. As you stare directly at your feet watching each foot fall your face grows hotter each second. "It was really good." You mumble.
“Do you remember what I said about it?” You want to pinpoint his voice as smug, but the emotions are much more complicated than that. “Yes...” You internally groan at how weak your voice sounds. Even you aren't foolish to think this is still a prank.
Despite every terrible intention you've known Todomatsu to have, he's never pulled a stunt like this towards anyone else before. Sure he's tripped his brothers, or caused bodily harm to them. And yes he's been known to psychologically manipulate people time to time, but this has gone from being sort of funny if you were a shitty person to being downright torture if it were all just a game to get back at you.
Even the cruelest of people would cringe in empathy for you if this were a joke! You never thought of Todomatsu as evil, which is what this would be. So you have no choice but to trust Todomatsu has some shred of humanity to his character.
“That it was for me,” Your voice is so quiet and unsure. In the back of your head there is someone screaming and scratching at the walls, begging for you to run away finally. Your own thought process informs you that running away is all that you're good at anyways. As you're debating with yourself Todomatsu slips his hand back into yours. It feels like a puzzle piece being slotted into the right place. “That's right, I wrote it for you! I'm glad you like it.” He squeezes your hand before starting to swing it a little a bit with innocence.
"It was so easy to get inspired because I really like you!" Todomatsu’s gleeful voice has you blushing even more. "You like me back, right?" All of this eye contact will be the death of you is all you can manage to think when you see Todomatsu’s heart eyes.
You laugh breathlessly, "If I did not before, I do now." You brace yourself for a split second for the mocking laughter instead you hear Todomatsu hum to himself. "Did you before?" Truthfully, as you spent more time with Todomatsu and got to know him as an artist. No.
Instead of being honest, you smile at him with a secret. "I'll tell you later, Totty." He doesn't complain when you say this.
The venue is empty when you finally finish the walk over to the back of the stage and you know he’s going to depart soon but Todomatsu's hand lingers as its supposed to let go of yours. You watch him mouth and points "Go down there!" When he gets ushered off by stage hands and other members of the park’s live show team.
As you're making your way you hear several announcements for people to come to the concert arena, it takes you a few minutes to find where you're supposed to go because you're just so much in a daze. You don’t even realize that other people have rapidly filing into the small arena until someone bumps into your arm and quietly says excuse me. Once you're surrounded in the newly formed crowd you see a lot of people on dates and small children.
You take some pictures of the empty stage so you can tweet them for Todomatsu and until you see Todomatsu step out in his full idol gear. That was fast, you think to yourself! You’ll have to praise Todomatsu for getting ready so quickly because he typically draws the entire process out.
Todomatsu’s wig perfectly styled and his outfit is surprisingly pastel. It’s incredibly princely and not at all like the edgy psuedo-bdsm style Todomatsu was known for with Fujio Rock so you briefly wonder when he decided to make the style change, but this suits him.
Todomatsu sets up his electric keyboard quickly and you snap a few pictures of it without thinking too much into it. Once everything is set Todomatsu checks his mics and some adjustments to the sound mixing Todomatsu finally addresses the crowd.
“Good evening!” Todomatsu cheerfully calls out, “Is everyone enjoying the park this evening?” The crowd cheers loudly and you can see some people get handed some glow sticks.
"Everyone, tonight is a very special night! Why? Because you're here!" Todomatsu's eyes somehow find yours instantly when he says the last three words. A few girls next to you squeal and you affectionately roll your eyes with a smile. Todomatsu lingers for a moment clearly savoring your expression before turning to speak to the rest of the crowd.
You do your duties and take pictures of him when he's looking especially cute. Not because you'd like to enjoy looking at him in this new context as your boyfriend? Todomatsu DID ask you out! You’ll need to seriously think about your answer but in the back of your throat you know if he asked you right now you would instantly agree to anything right now.
"I'm going to sing a couple of songs from my solo album for the first time live, then it'll be time for the park to close! Once I'm done please exit the park safely!" Todomatsu begins to play the keyboard while singing with a lot of emotion.
Most of his set was super cutesy "I love you, princess" songs expected of him, but there was a song that told a story about a lonely child. You mouth along because you know the words by heart, and you can hear some fans do the same for the newly released singles.
Todomatsu's voice is so sweet and gentle through most of the songs, even his energetic tunes don't sound overwhelmingly cheerful.
You hoped that Todomatsu would vaguely address you when he opened for his last love song, but you realized singling out any one person or even alluding to a person would be terrible for his image and career. Instead Todomatsu sung it with his eyes locked on yours for as long as he was able to maintain while being inconspicuous.
Todomatsu's voice conveys a sense of yearning you've never heard from him before so you soon when Todomatsu sings an introspective line about how he wonders how soft her lips are with a glance at you before continuing to the next line.
You felt flustered because you now know how soft his are. Todomatsu hasn't had a day without at least lip balm in years you assume so they're delicately soft.
You touch your lips without thinking, and Todomatsu smiles from the stage as he sings the final romantic verse. "Thank you everyone, please drive safe!" You blink and he's gone leaving you alone in the disbursing crowd of people.
You linger as people file out of the concert space, almost glued to the same spot. Something tells you that leaving now would ruin something you’re not exactly sure what but this idea is small and fragile in your heart. So you wait and wait even an hour after the shows ended and the people who assumed they'd be able to meet Todomatsu if they stayed long enough left.
After another fifteen minutes when the lights shut off for the park you begin to question your decision to wait.
You wait another five minutes before turning to walk away because Todomatsu must be really mad at you for leaving him by the car. You wonder why he hasn't come to get you, he knows where you are! or at least would be.
Right as you're exiting the threshold of the concert venue, you hear the lights shut off which for an instant reassured you Todomatsu wasn't coming back. It isn't until you hear the speakers crackle alive and a microphones feedback that you stop in your tracks.
"Wait, Y/n-chan!" Todomatsu's voice reaches you from the stage thanks to the audio equipment your head whips around you don’t exactly shocked, but feeling something adjacent.
"You weren't going to leave without me, right?" Todomatsu calls from the stage warmly; your heart is pounding like crazy in your ears as you make the trek back to the foot of the stage.
You almost couldn't believe the turn of events today you had no idea Todomatsu could not only be charming but not vindictive enough to hurt you with those charms. You were severely wrong about him.
Todomatsu provides music for your walk back to the stage which is kinda embarrassing until you reach your original spot. The piano's keys begin to transition into something more melodic and sweeter instead of the slow notes in sync with your steps.
As you stand planted with wide eyes peering up at Todomatsu with equal measures pensiveness, and lovesickness Todomatsu softly begins to sing.
Todomatsu voice is a lot closer to his regular talking pitch, the one he uses when he isn't being cutesy. You can hear the scratchiness in his throat which tells you he probably didn't take a lozenge so you think to scold him later, but you're entranced by this rawness.
The words are something you've never heard before and it's most definitely not the love song he wrote about the serious person before.
The song he's singing is a formal confession you had heard of the concept of kokuhaku previously, but never thought you'd be on the receiving end of it. Not once did you think Todomatsu would write a song about asking you to be his official girlfriend! It’s a lot to take in at once, you think unable to pick your jaw off the floor.
A recording of the other instruments begins to slowly flow in the speakers and Todomatsu leaves the keyboard. Without even thinking in a daze you mirror Todomatsu's steps forward to meet him at the end of the stage. Todomatsu gracefully kneels down still singing and reaches out to you.
The words, “I love you” are sung and your heart can't take anymore! Not when your hands found their way to Todomatsu's, not when his eyes are gleaming with affection, and definitely when the song ends and he pulls you onto the stage.
Todomatsu has a surprising amount of strength for how small his arms are, you help yourself onto the stage and fall into his open arms. He's laughing, and you can't hear your own over your heartbeat, but your face hurts from smiling for the past few minutes nonstop. “I really like you too Totty!" You're giggling with an open heart and it feels like all the negative paranoia has been cleared out all at once. You're smiling through the kiss you receive from Todomatsu like sunshine overfilling a dark room.
"Good, this was a lot to organize! You better love me forever!" Todomatsu exclaims and begins to shift which reminds you that you should probably get up. When you're on your feet, Todomatsu joins you. "Let's go home, okay?" He says chipperly, and you nod.
"Ah, wait a second. Stay right here." Todomatsu suddenly looks like he remembered something, and you do as you're told as he jogs away. A few seconds pass with you growing more anxious being left alone on top of an empty stage save for his keyboard, almost in the spotlight. Todomatsu comes back holding the book in his hands just when you were about to squirm.
"Ah, Totty!" Your lovestruck sigh more than relieved when Todomatsu holds the book out to you like it's his confession letter. "Please accept this gift," You kiss him without thinking. The book is in your hands as you pull back, and your cheeks hurt from how happy you feel with Todomatsu. Your smile conveys all the emotion you can muster. "Thank you." You can’t keep the emotion from your voice.
You press this very important book to your heart because it's the first gift your boyfriend has ever given you and you'll cherish it and him forever. Those are you last thoughts when Todomatsu kisses you again before he pulls away. “This was the hardest part to set up,” Todomatsu whispers before tilting your head towards the open sky. “I had to bribe a lot of people for this so you can’t ever break up with me. Even when I irritate you.” Just as you were about to tell Todomatsu off you witness the words “I love you!” explode across the sky in fireworks. You hate him so much, you think as you smother Todomatsu’s giggling face with his own brand of lip balm.
#osomatsu san#ososan#totty#matsuno todomatsu/reader#todomatsu x reader#todomatsu x si#roros fics#not looking at this again until next week gn everybody#Actually I am gonna fix some light typoes excuse me#I hit the character limit so I have to fix this now#idol ch 1#idol worship fic#multichapter ososan fic
10 notes
·
View notes
Text
A Guide to Making iOS Text Messages on AO3, Miraculous Style
(This is a contribution to @miraculousfanworks for formatting tips in AO3)
Writers like to experiment with different fanfiction types. And one of the most popular types are the text fics.
A text fic resembles a log of two or more characters texting each other. It may be written entirely in the form of text messages, or it may contain narrated passages. Writers often prefer to include texting between characters in their stories, for it gives the readers a deeper insight into the characters’ lives and personality. And no doubts the level of personal interactions associated with texts is what makes text-fics a popular type amidst the readers.
A story can be written entirely in texts, or even contain a minor scene where the characters text each other. Often, writers have different ways to distinguish the texts from the rest of the narration, to enable the readers to easily differentiate between the two parts.
One of the most common ways is formatting. Aligning, boldifying and italicizing the texts is a common way to highlight them in the story. However, many a times, the formatting fails to give off the necessary vibes. To rectify the same, a few writers use screenshots of text conversations between the characters in their stories.
But what if there was a way to present the text messages in the story, WITHOUT using the images? Something like this:
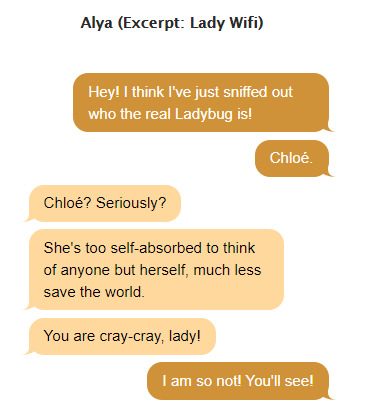
Read under the cut to find out!
How to make iOs Text Messages on AO3 (Miraculous Style)
(Note: For this article/tutorial, the reference chosen is How to Make iOs Text Messages on AO3 by CodenameCarrot and La_Temperanza.)
The tutorial does not dive into the details of how exactly the CSS for the text messages is coded, for there is a predefined skin made available for all the main characters of Miraculous Ladybug. The skin is made such that the colors of the text differ on every character’s phone (civilian and superhero alter ego).
The right side (the darker bubble) is always the texts written by the character. The left side (the lighter bubble) is always the texts the character has received.
The skin used is Messaging Miraculous and since it is a bit tedious to make it available to public use, here’s a link to the document that contains the necessary CSS for the same.
To use the above skin
Simply go to your ao3 dashboard, click on Skins > My Work Skins > Create New
Fill in the necessary details there and at the part where you have to write the code, copy paste the CSS from the document linked above! Then click on Create and your skin is created!
Now, in your work, go to Select Work Skin and choose the Messaging Miraculous work skin. (This is the name of the skin that I have on my dashboard :) )

This will import the skin in your story.
The skin has different color formats for different phones. In other words, texts on Marinette’s phone will have a different color scheme from how they appear on Adrien’s phone or Ladybug’s phone and so on. The idea behind this is that each user has a specific color theme of their choice installed in their phones :)
So, a basic thing about the CSS involved in the skin.
The messages received have an attribute of text[code] and the messages sent have an attrivute of [code]reply
Now what is this [code] thing?
The code thing is the small piece of text used to differentiate the code for all the characters.
The codes used for the different characters are:
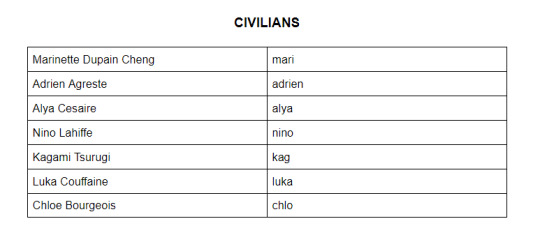

So, if I want to write a chat window for Ladybug’s phone, the received messages would be textlb and the sent messages would be lbreply
For Nino’s chat window, the received messages would be textnino and the sent messages would be ninoreply
What do these attributes mean to me? How will I use them?
These attributes are what we are going to use in our AO3 HTML editor to implement the chat format.
The usage of the skin is explained below based on a sample conversation between Marinette and Adrien from the episode Frozer, something that goes lke this:
Adrien: Marinette! Perfect timing! Marinette: Huh? You think so? Adrien: Actually, what I meant was...
It is done for Marinette’s chat window.
First of all, remove all the formatting from the chat texts that you have made. This is how your chat will start to look like:
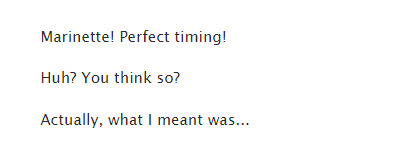
Then, go to Edit, and click on the HTML button in the editor.

The HTML editor has automatically put a series of <p> tags around your text messages. Something like this:

Remove these. The result looks like:
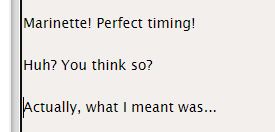
Remember: only remove the <p> and </p> tags that surround the text messages. You would not want to mess up the formatting of the rest of the story
Now, let’s get down to a little coding. Add this little code shown in the next image to the part just above the first text message.

and this little piece at the end of the last text message on the window.
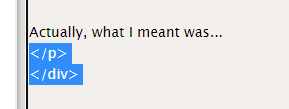
The <div> tag is what makes the editor aware that this is the place where we are using the imported worksin, and specifically, a coding that has the CSS attribute by the name “phone”.
The <p> tag indicates a new paragraph, and here it encloses all of the text messages that occur on the phone window, and the class “messagebody” tells the editor that it has to implement code for the same :)
Perfect! Now getting to the part of making the chat bubbles.
(This coding has been done for Marinette’s window. Hence the attributes used are textmari and marireply. You can similarly use the other attributes for different characters) The first dialogue is that of Adrien. So, Marinette received this text on her phone. Hence we go like:

The “span” attribute here differentiates between the different chat formats we have for the different characters. The <br> tags are for telling the editor to move to a new line :)
The next dialogue piece is of Marinette. So, she sends this text. Therefore, we go like:

The next (and last dialogue) is Adrien again, hence the code for it is like:

And now, clicking on “Preview” then “Save as Draft”, the result is:

Perfect!
(It is always recommended to preview the story before posting it. You can always check for non functional links or code errors if you find any :) )
You can make the same for other characters as well in the similar fashion! To check out the different color schemes offered by the skin, here’s the link to the document on AO3!
Miraculous Messaging Work Skin Tutorial
What if I want to boldify or italicise a certain word/phrase within the text message?
It’s simple! Enclose the certain word/phrase <b> , <i> and <u> tag for bold, italics and underline respectively! Like this:
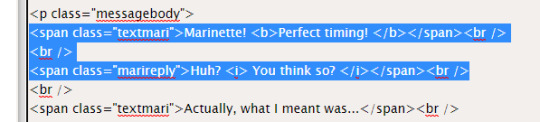
gives:
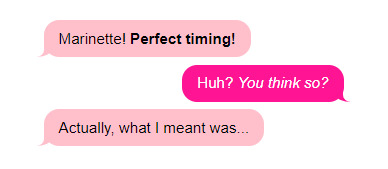
Does this skin work all the time?
As long as “Hide Creator’s Style” is disabled, yes!
But what If someone uses “Hide Creator’s Style”? Will not that ruin the story?
There is a solution around that too! You simply need to add this extra piece of code to each text message, along with the name of who types that message :)

so when you click on that “Hide Creator’s Style” button on the top, you end up with
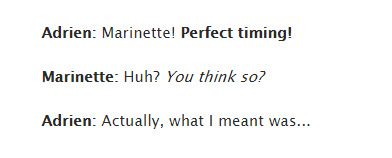
which is absolutely cool!!
Hoping this article helped explain all the doubts! For further queries or character suggestions, feel free to comment on the sample work linked above!
82 notes
·
View notes
Text
On Exchange Letters
Exchange Letters (also known as "Dear Creator Letters", "Dear (Event) Author", or "Dear Santa" for holiday exchanges) are letters created to include with a gift exchange sign up. They are sometimes used in place of the prompt/optional details field and sometimes in conjunction with.
These letters often contain more in depth information which might not fit in the AO3 Prompt field due to length; they can also be easier to include non-text information (like links and images) as the Prompt field would require basic HTML to do so. They often contain information on general likes and preferences, do not wants (DNWs), preferred formats for writing, art preferences, in depth prompts, AUs, kinks, tropes, what you like about certain ships or the fandom in general, etc. In exchanges that allow OCs (like Dragon Age Poly Exchange) letters can also contain info on OCs.
An all encompassing letter should contain everything your giftee would need to know in order to create a gift you would enjoy. A letter designed to be used in conjunction with the Prompt field is usually shorter, containing only the general information which applies to every request being made while the prompts for the specific ships or requests are placed into the Prompt field. Once written, you can drop a link to it in each request in the Letter/Additional Info field of your sign-up.
Click on the Read More for more info on what to include, where to host your letter, and how to sign up with one.
What to Include
If you're writing your first letter or are revising your current one, you might be wondering where to start. We recommend starting by scrolling through your AO3 bookmarks and want to reads and jotting down any tags you see repeated often and by thinking about what you use to filter when you're searching for something to read. For your DNWs think about what squicks you avoid, any triggers you might have, or things that just make you hit the back button and not read a fic.
You can include things like POVs, tenses, styles of writing, general tropes (fluff, angst, smut), or more specific tropes (Hurt/Comfort). If that's not helping or you feel like you're forgetting something check out the following links with lists of common tropes, AUs, and kinks/fetishes. As you scroll through them make sure to note your likes and DNWs.
It's definitely not necessary to list everything in the below lists as a like or DNW. There are certain things which are going to be rare or non-existent in the DA fandom (i.e. underage fic isn't common because most characters are adults, compared to other fandoms like Harry Potter) but there are others which are exclusive to DA (for example, MCiT - Modern Character in Thedas). It's more important that your letter hit the big points. If your giftee has questions they can always reach out to you on anon (if you have them on) OR get in contact with a moderator so we can get more details.
List of Fan-fiction Kinks, Tropes, and Clichés
AUs
Masterlist of Alternate Universes
Kink List
Note: this is an extensive kink list from a furry website intended to help furry roleplayers match; proceed with caution if this could squick you
Where to Host Your Letter
Your letter can be hosted in many of the same places as your OC content from our post: Where to Host OC Content.
Google Drive/gDocs
By far the most popular place to host exchange letters currently. Many of the same tips and tricks for OC content hold true for your letter. You can link to other docs and external sites, add images, use templates, etc. Please check out the Where to Host OC Content post for lots of details on using Google products for exchanges!
Tumblr
You can also drop your letter into a regular tumblr post or page. If you would like to keep your letter off your mutuals' dashes you can make the post private and then a few hours (or days) later make it public. It will not appear on their dash if they sort by popularity or by timeline unless it suddenly gets a lot of likes.
Livejournal/Dreamwidth/Wordpress/Other Blogging Site
Although not as widely used now as tumblr, Livejournal and Dreamwidth are still around and you can post on these sites for your letter. Wordpress or other blogging sites like Blogger are not as popular for fandom endeavors, but they can absolutely be used for a fandom letter, too.
Wix.com/Weebly.com/Other Free Webhosts
This option might be too much if you’re just doing a letter, but if you’re planning using one of the above for your OC content, you can make your fandom letter a page within that website!
Your AO3 Profile
Exchange Letters are not allowed to be posted as separate works on AO3; however, according to the AO3 Content FAQ (we recommend using CTRL+F to search for “letter” to find the right question) you can post general likes/preferences on your profile which means you could use this space for a general letter designed to be used in addition to your Prompt field. Although you can do this, we think one of the other options above is a better idea, as profile space is relatively limited.
How to Sign-Up with a Letter
We're going to be doing a more in depth guide to signing up before Sign-Ups open, but we thought we'd give you a small preview now. The sign-up form below is NOT the final version of our form, so things may look different by the time you sign-up.

8 notes
·
View notes