#i followed that tutorial!!!!!
Explore tagged Tumblr posts
Text
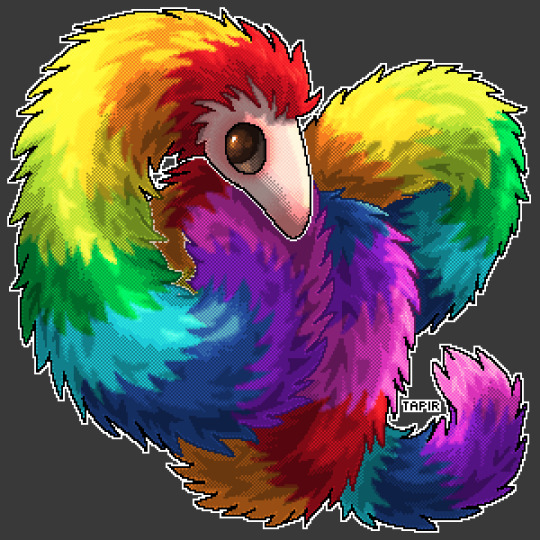
THE BOY LIVES (4x magnification) ((click for best resolution))
#i followed that tutorial!!!!!#yay look at me doing the things i said i would!#it only took me (looks at the lengths of the albums i listened to) well certainly more than three hours for fucking sure#those albums?#Attack of the Killer B-Sides (A Day To Remember)#At Mount Zoomer (Wolf Parade)#Semillero (Dengue Dengue Dengue) and then Serpiente Dorada#Veckatimest (Grizzly Bear)#now for the real question...would i do this again?#hm.......#art by tapirs (me)
6 notes
·
View notes
Text
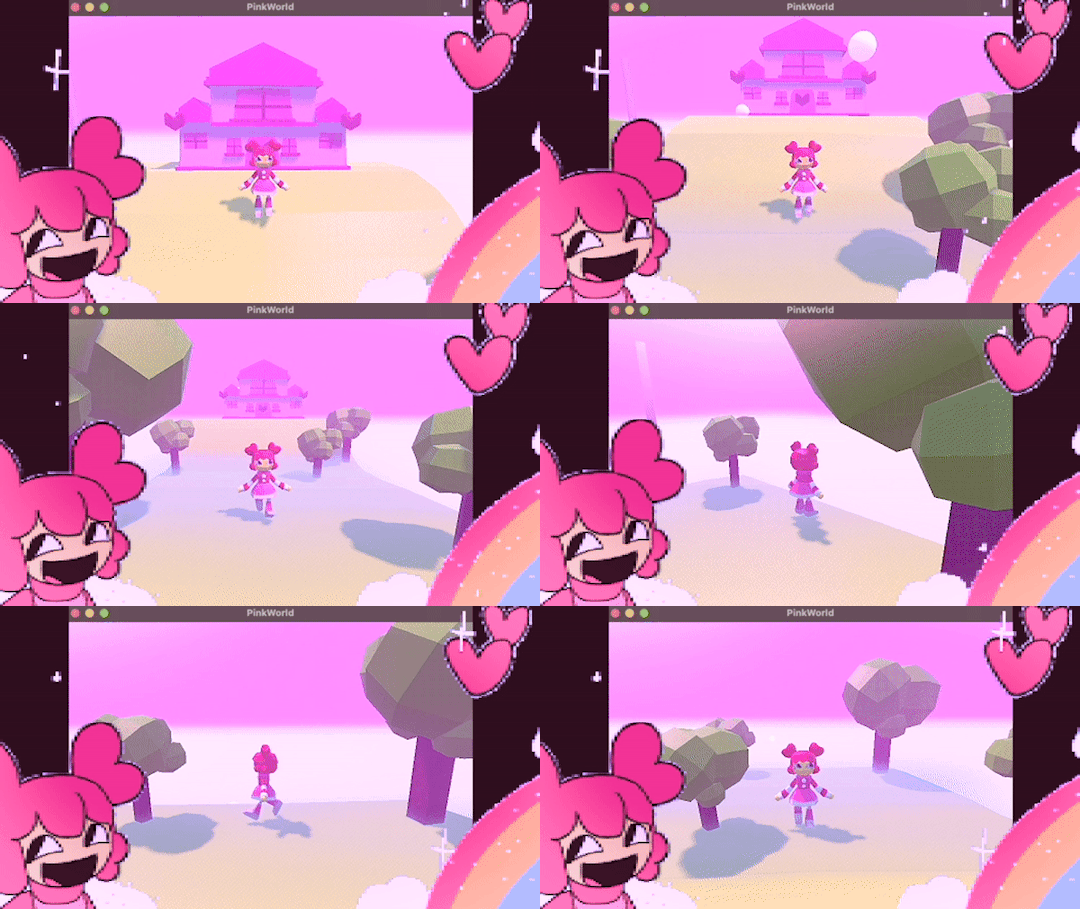
programmed my oc into a game for the aesthetic
#i hope this gives off the vibe of an old game#2 days of modeling#1 day of following a coding tutorial#i felt so happy to draw the little gifs on the screen again#im so sick of 3d (i will do it again)#oc#oc animation#oc art
647 notes
·
View notes
Text

…to the sea.
#I followed James Julier Art Tutorials’ video for the background#levi ackerman#erwin smith#aot#levi fanart#snk#attack on titan#shingeki no kyojin#aot fanart
782 notes
·
View notes
Text
hey so i tried painting a setting

rbs appreciated!
#i closely followed a tutorial from @philipsue_art on yt#this is probably the first setting ive actually tried painting tbh#my art#tmnt#tmnt mm#tottmnt#mm donnie#tottmnt donnie#donsona
290 notes
·
View notes
Text
how to grub your karkat
or you can use this for any other plush or if you wanna make a whole new plush entirely or whatever

disclaimer im not a professional in any sense of the word and theres anything technical im doing wrong or you think you can do it better by all means dont hold back
Things you’ll need
sewing machine unless youre really dedicated but doing it by hand is gonna be an agonizing feat i promise. I just used a straight stitch for everything
Fabrics: for the main body i suggest a minky or something soft, for the inner lining something in the same color as the main body and ideally with some stretch, and anything black for the legs. Less than a yard of each will do
if youre using minky or anything furry get a lint roller. Trust me
stuffing, i used polyfil
threads that match your fabrics
good fabric scissors
sewing needle for hand sewing/fixes
karkat plush (optional)

Heres the pattern i came up with! They are numbered for your convenience and pieces with the same numbers are going to be part of the same row of segments. cut everything out on the black lines (Make sure when you’re printing to fit the image to the page size.) on the left we have the belly pieces, the right is the main body, and we have the foot in between
Im using a relatively thin minky fabric, im sure you can use whatever but something with some fluffiness kinda helps to mask any imperfections in the sewing. When drawing out your patterns keep in mind what direction your fibers settle in and try to keep it consistent
On the wrong side of the fabric measure out at least a half inch seam allowance around each piece of the pattern, i used a centimeter and that worked but had me sweatin a bit.

For the main body pieces fold your fabric in half before you cut so you can have 2 of each segment that are mirrored to each other, i also extended all of the #1 pieces an additional centimeter/half inch at the top so we can fold them over at the very end. I highly suggest numbering the insides of all the cut pieces, especially in a way where you will remember what direction they are each meant to sit

After you’ve numbered all your pieces, set them aside and start making your feet!
Each of the 6 legs is made of two pieces, but i because i only had a swatch of the black minky i made up for the rest with some random black scrap fabric from an old project. Try to keep your fabric consistent if you can lol
I didnt give these pieces any more seam allowance on the fabric but i recommend adding a centimeter or half inch to the base of it to extend the length and have some more wiggle room

like so
Instead of cutting out 12 individual pieces and struggling to stitch them all together i started with 6, then pinning each piece real tight with the right/furry side down onto my secondary fabric, and slowly stitching around the shape real close to the edges- DO NOT CLOSE THE FLAT SIDE as we are going to stuff the feet through here

Now cut the shape out of the fabric and repeat till you have 6 feet

Now flip those bad boys inside out, stuff up, and if you wanna you can match them to their best pairs

now grab a pair of feeties and your #1 pieces and line them up, in this picture my belly #1 piece is shorter bc i forgot to add the extra centimeter and i recut that once i realized. Line those sides up with the right/furry parts touching and with the feet in between, flip it around to make sure everything's sitting the way you want it

Note. i didnt realize until later but i sewed my feet in upside down. save yourself the time it takes to fix it and dont make the same mistake
Straight stitch these layers together and repeat with the next two segments our good friends #2 & #3

Repeat this for the #2 and #3 sections but NOT THE #4, that part doesnt need feet! just line those edges up right/furry sides together and sew


the secret to the squish of the suit is making this inner lining from another fabric and stuffing it! I used what i had leftover from a stretchy red fabric for a kanaya skirt. For this we need to make a new pattern for each section, making sure it follows the curve of the round edge but the piece itself is shorter, almost like youre removing the seam allowance you added. Mine is a centimeter shorter on the top and on the bottom and reaches to the middle

Make one of these for each numbered segment,you only need to make half the pattern and you can fold your fabric in half on a crease and you end up with one symmetrical piece (bars)

Now you need to pin these pieces right on top of the wrong side of your numbered furry sections and line up the straight edges like so (disclaimer for LOTS OF SCARY NEEDLES !!)

Admittedly i didnt estimate how long these pieces needed to be very accurately and overshot it a bit, if you start pinning it from the middle and continue outwards on either side thatll ensure its not too lose and you can cut off any excess after
The only exception is piece #1, if you recall we gave this #1 section extra seam allowance. This is so we can sew down that excess at the neck later and hide any of the inside that might show once its all put together. Do not connect the top edge to the inner lining! Since i added an extra centimeter earlier im gonna leave that hanging and pin + sew down the inner lining a centimeter lower than the top edge. LEAVE THE CURVED EDGES OPEN! DONT SEW THEM TOGETHER! those stay open to stuff

Straight stitch the lined up edges together

Now you have all these skinned pieces of little freak and we need to connect all these segments together making sure to sew UNDER the existing stitches so we dont see those on the outside when its all put together


Inside looks like a bit of a mess but thats fine bc its not the part that matters
Now stuff it! you might need a stick or pencil or something long and thin to get stuffing into the middle bits

Now thats its stuffed you can finally close those curved edges. Try not to sew over a thick mound of stuffing, push it in a little further to give yourself some space and you can fluff it back out after everythings closed. I cut off that excess lining fabric after sewing

Ough… they filleted my boy…
Finally, match up all the edges and lines and HAND SEW them right sides together. You will destroy your machine trying to work around that stuffing i promise. You also have an excuse to get up from your work desk and sew on a couch or smth. I used a standard backstitch for a tight finish and again, make sure you sew under any existing stitches so they arent visible on the outside!

Speaking of the outside, once you stitch everything together you can very gently flip this sucker inside out

This is @hatamonu’s cat Cocaina, aka Coco. Her perfectly square figure made it into my grub files somehow so shes essential to the tutorial

Check the fit and all thats left to do is roughly baste stitch down that excess neck fabric onto the stuffed lining and youre set! I gave the thread slight tugs as i went to tighten the opening a bit put dont tighten it too much

tadaaaaa

It fits pretty snug but starts to slip a bit with motion. Heres a bounce test

If you do shake your baby make sure to safety pin the plush to the suit so he doesnt prematurely shed his exosekeleton
Now spread that baby fever and show your baby to the world


pics from the ALA 2025 homestuck meetup and supplied by para.dox.cos
Tysm for coming along this ride with me especially if you followed the prototype journey on twitter, much thanks to my more sewing savvy friend for the solution to my grub dilemma and for helping me design and build my dolorosa cosplay <3 much love and hopefully many more homestuck cosplays and meetups to come in the future!
#homestuck#homestuck cosplay#karkat plush#karkat#karkat vantas#cosplay#tutorial#homestuck grub plush#plush pattern#long post#ALA 2025#anime los angeles#dolorosa#the dolorosa#apologies if this is hard to follow or utterly incomprehensible please note i am making shit up as i go and results may vary#feel free to ask any clarifying questions and ill do my best to answer#no i will not be selling these#technically i have more minky left than i know what to do with but the cost would have to justify the pain in the ass it all was to complet#and i dont think anyone will pay that price#send me suggestions of red characters to make plushes out of
168 notes
·
View notes
Text
💧✨based off of this illustration by @passionpeachy!✨💧
video compression muted the colors, so here are a few stills under the cut


tiny bonus: happy pride!

#3d#blender#npr#video#passionpeachy#i actually finished and rendered this out at 2 am but i will schedule this for the morning 😴#thank you azul for letting me use your art!! it made me feel very smart figuring out how to replicate the black shading of the bubble#it's not perfect but it's my first model that wasn't made following a tutorial! so that is to be expected. very fun very charming :]
509 notes
·
View notes
Text
DBFZ Yamcha and Ten cookies...done!!!
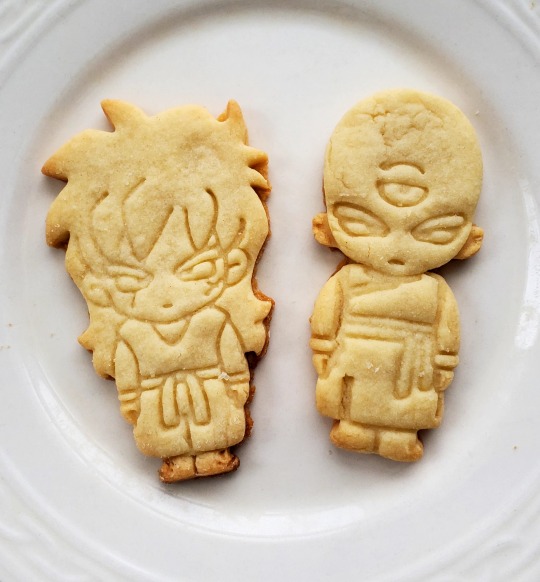
Soo I've been on a mission to recreate the Yamcha and Ten cookies from dragon ball fighterz because they're adorable...and they're finally real!! :'D process and info below! (kind of long lol)

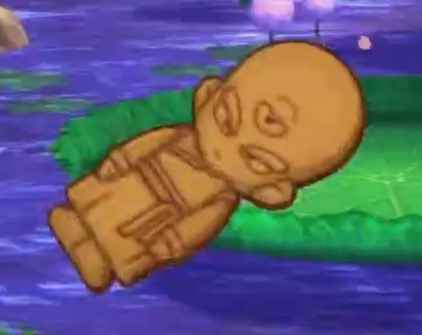
I saw someone share these screencaps from the game a while ago and as someone who never played DBFZ I was so charmed at how cute these things are. I wondered if anyone had ever made cookie cutters for them, did a quick search and didn't really find anything, so just kind of moved on.
A few months later I remembered them again and was like, man, I really would love to see these brought to life lol. And I searched again and actually found someone who made them!!... But they weren't selling them anymore. 😭💔

^Reddit post from user ShadowLord898.
So in the next few days I went into the DBFZ game files, figured out how to navigate them and locate/open the proprietary file types (took...a lot of googling), and eventually found the cookie textures!!! Which I then painstakingly traced over to create vectors.


I thought once I had the vectors, it would be easy to drop them into a 3D program and extrude them to make the cookie cutters. BOY WAS I WRONG!!! It's probably just my inexperience working with vectors in 3D programs, but I tried Blender, Fusion 360, and Tinkercad and had problems in each one before finally figuring out the right approach. (I really almost gave up 🤧 but I hadn't realized that your geometry/topology don't need to be perfect when 3D modeling for print as opposed to, like, something you plan to create a texture for.)


Tinkercad and its extremely user friendly interface, plus SVG import functionality, saved me.


Oh then I realized I forgot to reverse the design, which you have to do for a cookie cutter because of how they work. I thought I would need to flip all the vectors and re-import them, recreate the models... but thankfully there's a "flip" button in Tinkercad. Fixed.

I sent the files over to my friend @.theprocrastinatingengineer on Instagram, who has a 3D printing service, and he was able to print them out for me!

While I was waiting for them to ship I downloaded Cura ("slicer" program for preparing 3D files for print) just for fun. (I was really eager...)


And here's when I finally got them!!!

Despite choosing all the dimensions carefully, I was still surprised how dainty they were when I actually held them in my hand. I wasn't sure if they would work...
So I made the dough and everything, used some 5mm thick chopsticks as guides to roll out the dough to the thickness I wanted. I put plastic wrap over the dough to prevent the cutters from directly touching the dough due to food safety concerns. Here is my first attempt to use them:
After this my mindset quickly shifted from caring about food safety to "what's a little more plastic in my system?" / "I'm here for a good time, not a long time!!" / "welll the dough gets baked anyway so that kills the germs it should be fiiine" **I Do Not recommend others to be so careless... also important note: I was the only one eating these so I didn't have to worry about others' safety 🥴
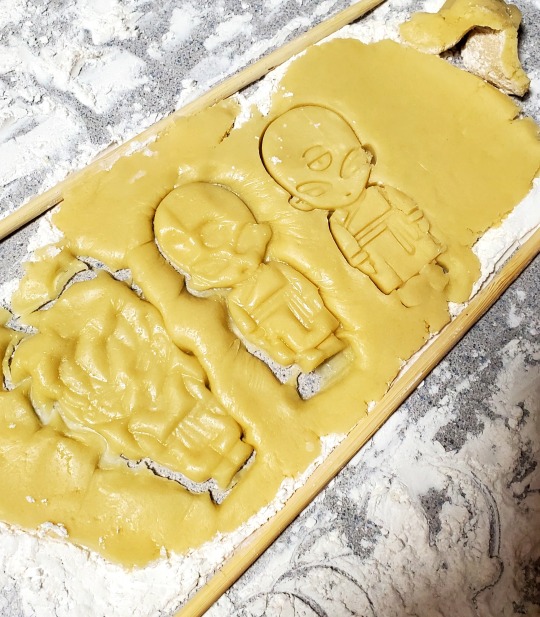
^The difference between using the cutters with and without the plastic wrap.
This first rolling out of the dough was actually a little too thick; in my design I hadn't accounted for the way the dough squishes up when you press the cutter into it. There wasn't enough vertical space at all, and the dough kept getting stuck in the cutter. It was a bad time!!! (didn't get a lot of photos of the failures here because my hands were covered in flour)
After lots of broken cookie cutouts, re-flouring the surface/cutters/rolling pin, and re-rolling the dough to be a bit thinner, I managed to get these out. I had to support Ten's head like a newborn when moving the dough onto the cookie sheet because the connection to the body was so delicate 😢
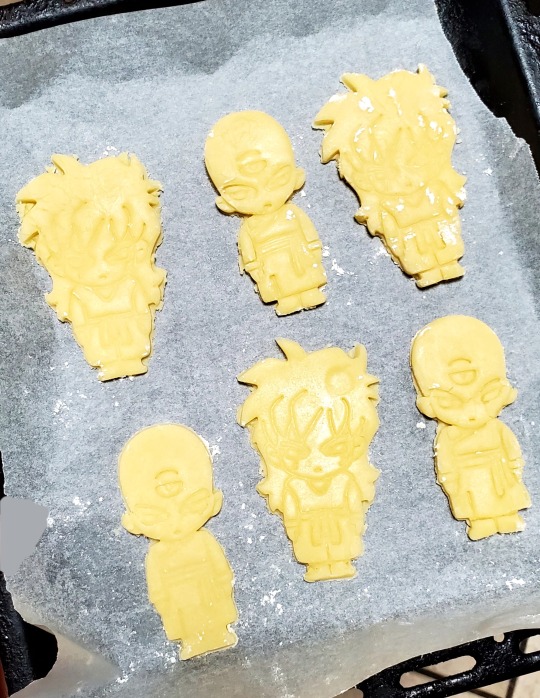
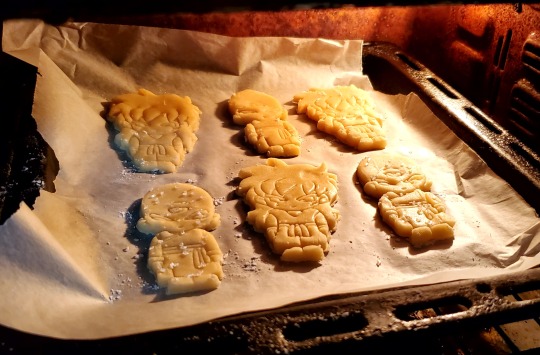
AND HERE THEY ARE...fully baked and ready 🥹
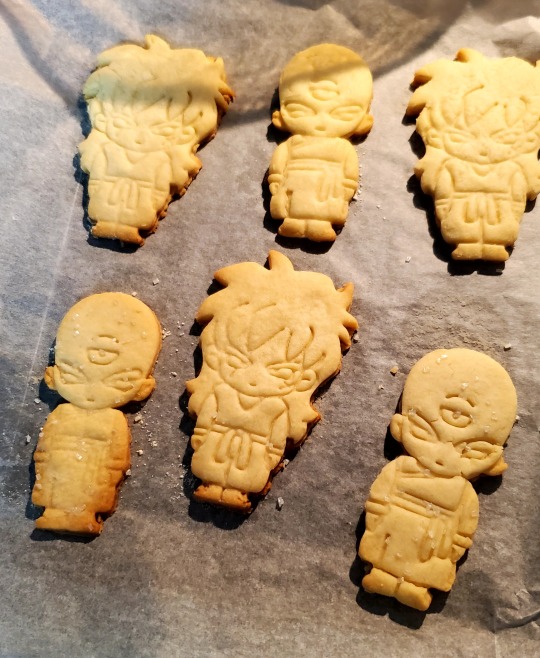
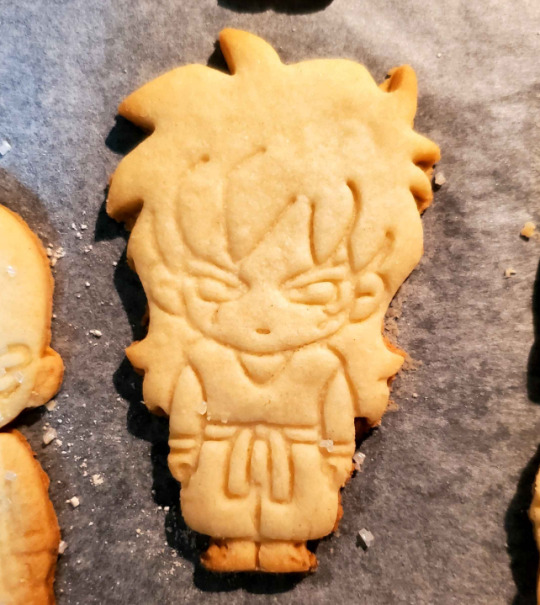
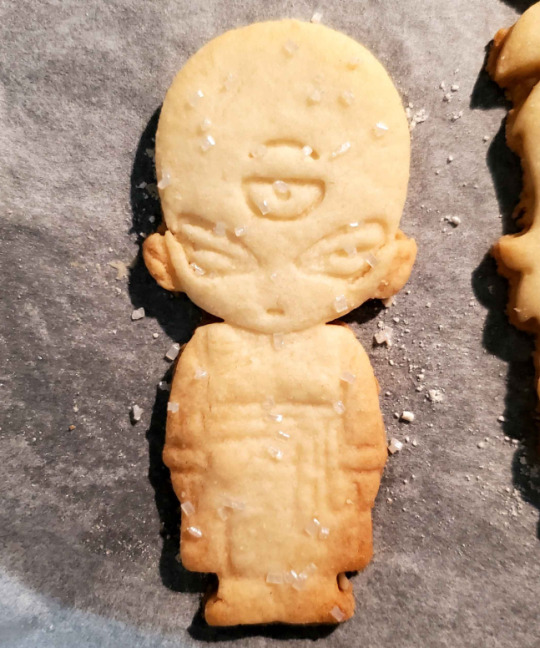
For the most part I was going to leave them undecorated like how they are in the game. But @.lamichicuenta made this really cute drawing of the cookies where Yamcha had chocolate decorations and Ten was a salty cracker, and I really wanted to try decorating some to resemble those!! Here are the photos of both versions of the cookies the next day once I was able to get some natural light for nicer pics.


(I meant to poke some holes in Ten's cookie to look more like a cracker but I forgot about it until they were already baking.)
They tasted fine...yamcha was better thanks to the chocolate. 🤭


If you read all this, thank you for following my cookie cutter journey... 😌🙏💖
Oh yeah and I made the vectors, 3D print files, and specs/info all available in a google drive folder here for anyone to use if they want! https://drive.google.com/drive/folders/1hQ7uq3leYPK64pGgt3LhFw-70IZnkYzh?usp=drive_link
OH and one last thing, i ended up revising the 3D models to hopefully fix the issue of not enough vertical space. ...turns out I hit the maximum for photos and videos in this post, but you can see it on my twitter here! https://twitter.com/freezebobs/status/1875720926840680678
I didn't get to try these revised models, but they are the ones I put in the drive folder. 😊👍
#dragon ball#dbz#dragon ball z#dragon ball fighterz#dbfz#tenshinhan#yamcha#tien shinhan#tien#yamtien#tiencha#food#cookies#3d printing#I spent a long time writing and adding all the pictures and captions so if tumblr fudges up this post i will be very sad#I realized I forgot to mention a couple things like the cookie cutter design tutorial I was following#And the way I actually created the models#When making the vectors#Make the outline its own path. And the inner/embossed details separate from it#Export the outline and the inner details as separate svg files#Import them separately into 3d program so you can extrude them to different heights for cutting/embossing#It doesn't matter if they overlap a bit. Tinkercad doesn't mind and once you join everything you still get a fine STL export for print☺️#As for the tutorial I used. The main takeaways were that I kept the 3d printer nozzle width in mind when choosing dimensions#Friend with the 3d printer said that you don't really need to do that though#Also the “bridges” or the little cross that connects the parts that float/aren't connected to the rest of the design (eg eyes and mouth)#I followed many random tutorials and things throughout this whole process#Can you tell i luv to document... (sincere)
172 notes
·
View notes
Text

It's BIG.
It's BLUE.
It's UPDATED.
Hiya Simblr, it has been a while. I have a big update today- it's one of my oldest guides on MTS, but new and blue! The changelog is in the MTS comments- but the short and sweet is that two years of learning Blender has been squeezed in there for your convenience, complete with graphics and GIF examples.
ModTheSims tutorial Google Docs tutorial Blender Templates

#on a mission to become a human tutorial hub#i follow predominantly ts2 blogs and feel like an infiltrator posting about simcethri#simblr#ts3#the sims 3#ts3 cc#ts3 tutorial#ts3 blender
178 notes
·
View notes
Text

Congratulations GemPearl for winning the trafficblr shipping poll!
this is compensation for missing the vote entirely please forgive
year of yuri off to a roar of a start!
#trafficshipping#traffic shipping#hermitshipping#gempearl#pearlgem#life series#geminitay#pearlescentmoon#shiny duo#my art#artists on tumblr#propaganda post#i swear tumblr dunked this in hot oil i promise it didnt look this jpeg-y when i uploaded it#idk what the protocol is for ship tags &whether or not to main tag this. i'll just do it &if 1 person complains I'll remove them#also added alt text. first time doing it. i followed a tutorial but im open to critique & if 1 person complains i'll change it
978 notes
·
View notes
Text

practicing gouache on printer paper and it ended up being... dizzy??!!
#art#i dont actually know how to paint properly with gouache i was just winging it.#one day i should actually follow a tutorial#guilty gear
182 notes
·
View notes
Text

Wagyu tuened freaky
#wagyu objectified#objectified fanart#objectified#objectified comic fanart#osc#osc fanart#osc art#objectified comic#body horror#horror art#I accidentally made rhe torso look like a cyndaquil I CANT DOTHIS ANYMORE#I suck so bad at drawinf meaty textures I hsf to pull up a million different referenecss and tutorials#The tutorials didnt really help modtly because I wasnt following them#Bro looks like hesayinf where mt hug at#I was going to draw bugs crawling on him but i frorgot
211 notes
·
View notes
Note
Tate why is your art the most beautiful in the world???
IF YOU WANT TO TRULY SEE THE MOST BEAUTIFUL THING IN THE WORLD LOOK IN THE MIRROR!! 😤😤😤
ajfoearoaroajeoarjeaorjaoeruar!!!

Take a sneak peek because I know how much you love rayllum and you are so sweet, thank you 💕
#want to watch lot of tutorials I gotta upgrade!!#thank you 🥺 i love all the support#everyone follow mando rn#tategaminu art#rayllum#asks
138 notes
·
View notes
Text


@yellowjacketsnetwork event 02: reunions ━ TRAVIS & JAVI MARTINEZ (insp)
#travis martinez#javi martinez#travismartinezedit#javimartinezedit#yjreunions#yellowjackets#yellowjacketsedit#yjedit#tvedit#yellowjacketsnetwork#*#usercoty#tusermich#userbecca#tuserdee#tusermiles#ughmerlin#usercleo#tuserjes#userclara#i didn't follow the tutorial i tagged like at all BUT it's where i got the insp so <3
331 notes
·
View notes
Text
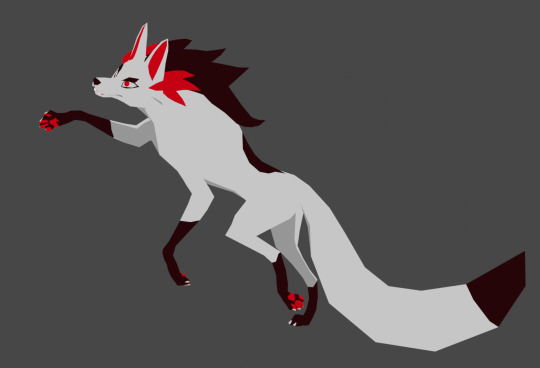
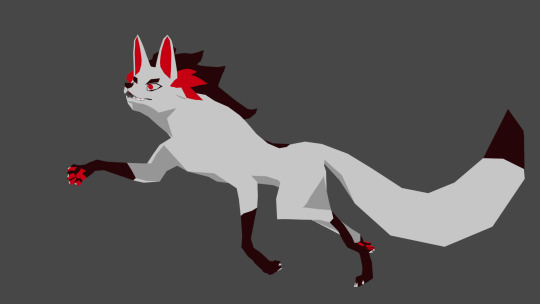
Low Polys your Mystery
#I wanted to do more with this but I can not for the life of me figure out shader and setting up a good animating rig#Im following tutorials and nothing it working#I might say screw it and just do the shading and animating in unity cause at least I can just use poiyomi#Shader nodes make me want to eat glass#Mystery skulls#Mystery skulls animated#3d model
182 notes
·
View notes
Text
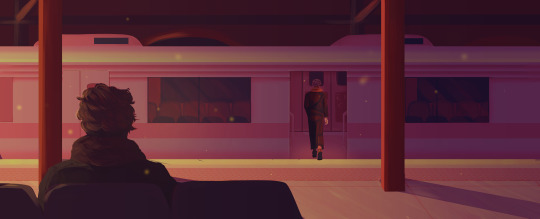
Someone has to leave first. This is a very old story. There is no other version of this story
#artists on tumblr#my art#itadori yuuji#yuji itadori#jjk#jjk spoilers#sukuna#jujutsu kaisen fanart#jujutsu kaisen#jujutsu yuji#ryoumen sukuna#I was starting to hate it so I posted it#Wanted to animate it in after effects but we have a tumultuous relationship#that is: i try to follow tutorials but i cant replicate anything and its driving me insane because idk whats different and why#the effects dont work
167 notes
·
View notes
Text

i colored a quick sketch yesterday 🪼☔️🦋
my little silly guys… my little skidoonkle bumbly dinkles..
#art#sky cotl#sky children of the light#digital art#sky children fanart#that sky game#skykid#hidden forest#oc doodles#ignore the umbrella i followed a tutorial and then stopped following midway 💀
218 notes
·
View notes