#how do you add a link to a higher quality one from tumblr what
Explore tagged Tumblr posts
Text
I might be biased because I've been using tumblr for over 10 years and never understood the point of pinterest and the like, but I really don't see why people would look elsewhere for gifs when tumblr already has many years' worth of gifs on here straight from the source to use for stimboards.
If you're new to stimboard-making or haven't been able to find/source gifs very well, I suggest trying:
searching "[insert theme/colour/item/etc here] stim" or "[insert whatever] stimboard" directly in tumblr's search bar. Sort by photo posts only if you'd like. The results should mostly be stim gifs related to whatever you're looking for.
searching for specific terms on stim blogs instead. Most of us keep our gifs and stimboards well-tagged, and our blogs are a great way to find gifs from blogs/posts that have been deleted and won't show up in a standard tumblr search.
follow other stim blogs, especially ones that actually make gifs or at least go out of their way to source the gifs they use in stimboards, so you always have a stream of new gifs to see and even use in your stimboards. Especially try to follow blogs that source from tumblr, not pinterest.
and if you really can't find the perfect gif, try looking up a video of what you need on YouTube or Instagram or the like instead, then make it a gif and post it here (with video source link) and add to stimblr's library of gifs. You can use ezgif.com to make gifs easily.
if you do still happen to search for gifs on pinterest, see if the repost has a source to a tumblr blog. You might be able to use the original higher quality version of the gif rather than the reposted one. You should still link your source to the original post and not the repost if you do.
using non-social media sites to find gifs like tenor, giphy, or imgur, which I find usually still has sources more often than pinterest that you can link back to, especially in the event the gif was posted to somewhere other than tumblr or pinterest.
And if you have any questions, want some tips or don't know how to make/source gifs, just ask. Most of us are really passionate about stimming and stimmy content which is why we care so much about sourcing gifs properly. I promise we're all super nice to anyone who asks for help and have already written numerous guides and posts like this before.
Also, reverse image search is your friend 📷
69 notes
·
View notes
Text
hi friends !! bit of a different post this time, but i wanna talk about disney and it’s place in the agere community.
i won’t get into specifics, but events in palestine r making a lot of people (including me) decide to boycott disney by not doing anything that lets them make money. if you don’t know about this, i rly rly encourage you to do ur own research (ideally while not in little space since it’s .. very rough topics) and make ur own choice on wether or not u wanna support them after knowing the full story of what’s going on n disney’s involvement.
this post is for littles who feel conflicted by the calls for a boycott!!
first of all, i know it can be scary to find out that something you’ve been giving money to for merch or subscriptions or whatever is going to a bad place. but no one is blaming you for that, and if you didn’t know then you didn’t know. but you can always change!!

"why are people boycotting disney?"
i won't go in depth to keep this post little-safe, but essentially the israeli military is currently doing terrible things to the people of palestine, and disney is helping them fund and promote it. here's a couple links that go more in-depth if you want to learn, but i'd recommend not reading them while regressed:
https://insidethemagic.net/2023/11/disney-israel-palestine-boycott-jc1/
https://www.dailygamecock.com/article/2023/12/column-why-boycotting-for-palestine-gaza-is-important-opinion-vanderhorst#:~:text=There%20are%20currently%20three%20main,financially%20or%20through%20public%20statements.
but i mostly encourage you to try n find out on your own, rather than listening to some random tumblr user about it.

“but disney is a huge comfort source for me.”
this doesn’t have to change. you don’t have to stop liking their movies n shows. you don’t have to stop loving your toys or books of disney characters. if something brings you comfort, that is sacred, and no one can take that away. a lot of disney media made me who i am today, and yet i’m still writing this post against the company, these things can both be true !!
similarly, agere is a safe space for so many people, which can be used to justify supporting things that really don't deserve our support, since people want to protect themselves by not finding out why. put bluntly, people knowing that there are problems, but choosing to ignore them, is part of the problem itself. if you feel at all capable of educating yourself, please do. it's so important.

“ok, so what can i do?”
if you’ve decided to join the boycott, that’s wonderful!! all that is being asked, is to not spend money on anything from disney. so branded food, toys, a disney+ subscription, stuff like that. if you’re used to doing that a lot, here’s some alternatives!
. :+* get disney toys second hand - they’re pre-loved!! they’ve already started a life with someone, and they’re eager to continue it with a new kid
. :+* pirate shows n movies instead !! this can be a little tricky to figure out, but it’s how i watch pretty much everything hehe, and can be a lot of fun! alternatively, you could just borrow a friend’s subscription or buy dvds second hand if you have a dvd player.
. :+* get merch from independent sellers. this way, you still get brand new things with ur favorite disney characters, but you also get to support independent creators n not support disney the brand !! also, these are often higher quality than official products too, which is like bonus points.
. :+* if you're posting about somethin disney related, add a note that lets people know that you don't support the brand n encourages ppl to find out why for themselves

it’s a tough change to make, but any help is better than no help. if you aren’t sure what i’m talking about, please do your own research. the scale of what’s happening in palestine is huge, and boycott movements like this have been proven to cause real positive change in the past. i won’t get mad at anyone for choosing not to boycott, but it’s important to me that as many people as possible consciously make that choice for themselves, instead of blindly following a company that’s using their money to hurt people.
hearing about terrible things happening is exhausting, regardless of how much you're doing to help. but try to remember that any action is better than nothing, especially with activism, and keep doing whatever you can. <3 take care of yourselves friends !!

#this is definitely the most important post i’ve made on this account#i really hope it can reach a lot of people#also to any palestinian regressors out there i see you and i hope you are safe#sfw agere#tk.txt#disney agere#disney#agere#agere advice#agere little#agere blog#agere community#age regression#sfw age regression#age regression community#age regression sfw#age regressor#fandom agere#agere activism#gold star
44 notes
·
View notes
Text
The Many Illustrators of A Tale of Two Cities 13: Ava Lisbeth Morgan

Women and the Paths of Bullets
It's a special edition for our unlucky thirteenth edition of this series - an Edition of Two Firsts!
This is our first edition so far to be illustrated by a woman (yeah I know right)...

I have no idea if that Dickens portrait was made by this week's illustrator or not, sadly.
...and it's also our first to have (allegedly) been shot with a gun! Hello!

I've had this edition for a very long time - it's one of the first editions that I ever bought off the Internet, if not the first! I simply could not resist the absurdity of what I was seeing - what a story this book could tell if it could talk!
Sadly, I never saved the link to the online shopping page where I originally found and bought it, and based on my repeated failed attempts to find it again, I think it's been taken down - so you'll just have to take my word for it that the listing claimed it was a bullet hole!
The (alleged) bullet hole was the only reason I bought it, and once I had collected this little piece of intrigue and slotted it into its place on my shelf, I left it there for years.

I knew that it had these beautiful end papers, but many editions have illustrated end papers like this, so I thought little of it, especially since none of these are explicitly A Tale of Two Cities-related.
In all that time, I didn't investigate it much further (evidently not even to take a closer look at the title page) - I just let it sit there, in the back of my mind, separated off from the collection of illustrated editions that I have slowly begun to amass over the last half-a-decade.
One day recently, though, I opened it up again for the first time in a long time just to show it to a friend who was visiting - and when I thumbed through it to show the friend the path of the (alleged) bullet, I was shocked and delighted as the path led me to a new story, a new piece of intrigue that this edition had to offer:

An entire set of six illustrations that were not only "new" (so to speak) to my collection but which I had never even known to exist, by an illustrator I had never heard of! Completely new to me!

The incredible irony of this is not lost on me - I work hard to be complete and thorough in my research, and yet, on my own bookshelf, I had glossed over an entire set of illustrations - and the first (and only so far!) in my physical collection to be illustrated by a woman!

Pondering my own lapse here in living up to my usual intentions, I started thinking more about Morgan's intentions, especially along those lines - namely that, unique among the baker's dozen of sets that we've seen so far, almost all of her illustrations feature female characters as subjects.

It makes me wonder a lot about Morgan - who she was, what her interests were, what got her into illustrating, why so little appears when you look her up, what her life was like as a female illustrator in the 1940s, how she dealt with all that being a female illustrator in the 1940s must have entailed, how much control she had over what she illustrated, what her feelings were about A Tale of Two Cities...

How would Ava Lisbeth Morgan feel seeing this post - these bizarre images of the path of a mystery (alleged) bullet through her own work in a copy of a novel that has otherwise survived for generations? How would she feel tracing its path with us as it travels out of the book just before her final illustration for the novel

of the death of Madame Defarge by her own pistol?
& the standard endnote for all posts in this series:
This post is intended to act as the start of a forum on the given illustrator, so if anyone has anything to add - requests to see certain drawings in higher definition (since Tumblr compresses images), corrections to factual errors, sources for better-quality versions of the illustrations, further reading, fun facts, any questions, or just general commentary - simply do so on this post, be it in a comment/tags or the replies!💫
#A Tale of Two Cities#AToTC#dickens#charles dickens#bookblr#litblr#literature#classic literature#victorian literature#vintage illustration#illustration#illustrators#Ava Lisbeth Morgan#1940s#my scans#AToTC spoilers#gun mention //#FINALLY ! FINALLY IT IS HERE !#I have had this copy for over four years. FOUR YEARS! and I only discovered in like. MAY. that it had illustrations in it#wild world it is. here's to ava lisbeth morgan. I hope she had a good life (or is still having! who knows!)#not much more to add here and a lot more to ponder.#I'll be delaying my next post by a day or two to space it out a bit - another good set. though a very different kind! see you then😎
10 notes
·
View notes
Text
How to make GIF's from videos
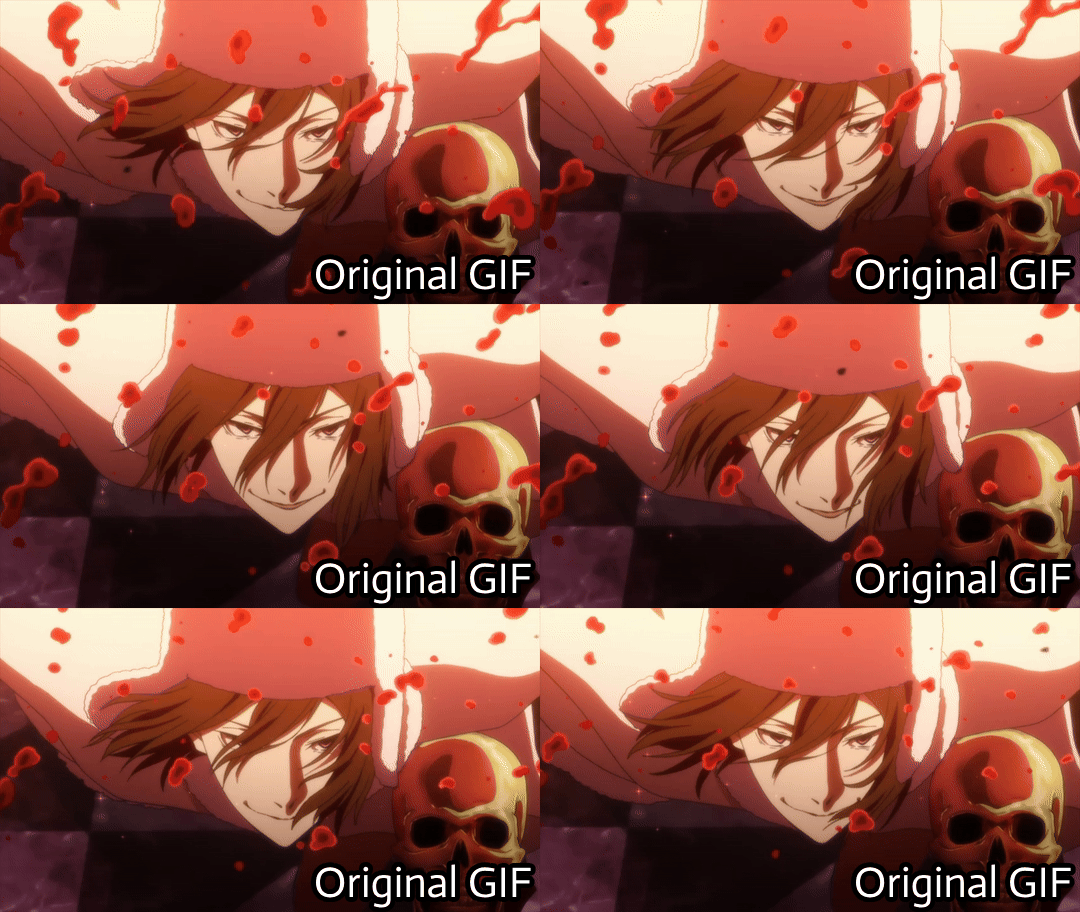

I consider myself relatively knowledgeable on GIF making, but I am not an expert. This tutorial mainly focuses on making GIF's and sharpening, for a PSD tutorial see here.
A few things to note before starting:
I struggle with sharpening GIF's- Especially real-life GIF's. For some reason I can't quite wrap my head around when/if the GIF's look too sharpened, so the tutorial part on this may seem lackluster.
I only use photopea and ezgif for GIF editing and capcut for cutting videos. I won't be able to answer questions about other software's (ie photoshop).
Tumblr has a GIF size limit of 10MB. It's the bane of my life. Always check how big your GIF is.
And with no other questions let's begin.
How to make a GIF from a video
Find the video and download it (real life)
This is a very obvious step but one that is important. I would always recommend finding videos in good quality. I often use tiktok, free videos from sites (like pixabay) and Instagram.
As for downloading them, I would recommend avoiding '[website] downloader' sites for a few reasons. A) they get shut down and replaced with spam sites frequently, thus making them unsafe to use, and B) they often times make you watch an add or remove ad blocker before giving you the highest quality download option.
I would always use cobalt.tools for video downloading.
Find the video and download it (anime)
This is more complex and I won't detail my download methods publicly. All I can say is not to use the anime watch sites to download your videos from, they're often low quality and have watermarks- Plus a lot of the sites have pop-ups ect which make them unsafe.
If you want a video tutorial I can't link you one from YouTube. This is not a YouTube tutorial. Nope.
Anyway, once you have it you will need to use capcut to shorten the video length (and potentially change the file) however you will need to make an account. Annoying I am aware, but it's the best video cutting software I know of and has caused 0 issues for me.
Not that when I first used captut the video save settings had the video at 720 pixels, however you want 1080 pixels because it makes everything smoother and higher quality. Once you change this setting you don't have to change it again.
Make the GIF
I always use Ezgif for this part. You need to use the video to GIF option and upload your video. Then choose the length of the video you want to turn into a GIF.
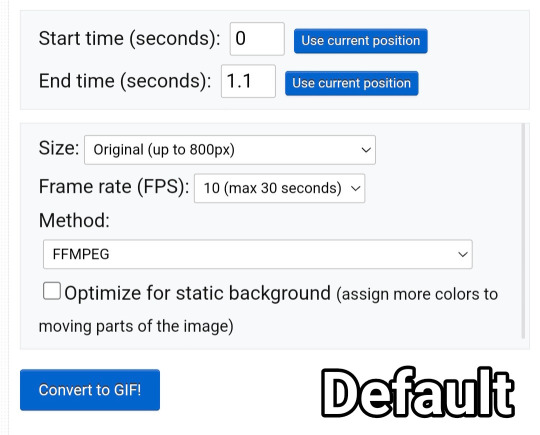
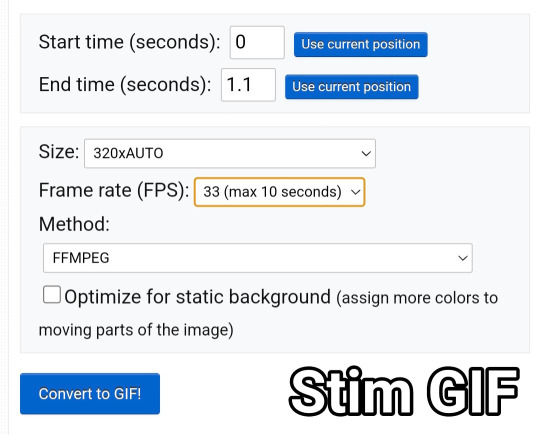
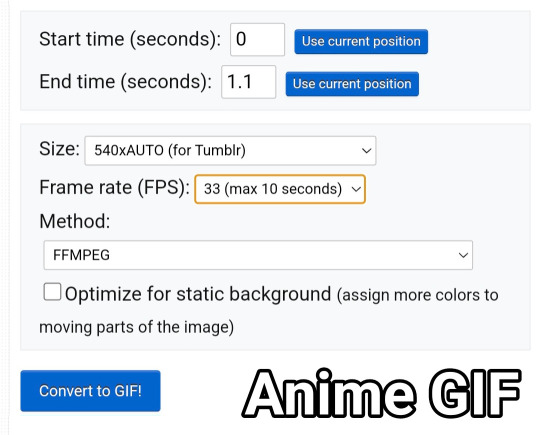
You will be met with a screen like this under the video.
Frankly I do not know what all of this means so that's why I only edit the size and frame rate.
With the size, you don't want it too big, smaller gives you more wiggle room for size with tumblrs size limit. However, with anime videos there's often less colors/detail, so they can be bigger and still look good.
The frame rate is important, the higher the frame rate the better quality it is, so regardless of GIF always have it this size
Then you hit convert to GIF and there you go.
If you need to crop the GIF use the crop tool and if there's any points of the video you don't want (ie frames of the next scene) you can use the frames tool (note that imo it's easier to use the photopea timeline for this)
Editing the GIF
You can just leave the GIF as it is, or you can make it sharper and/or add a PSD in photopea.
For stim gifs I will simply direct you to this tutorial because I can't understand the irl GIF sharpening process without photoshop's tools.
However, for anime ones you can use the smart sharpen tool, I either leave it on the default setting, or turn down the radius to 0.1-0.5
You can find the sharpening tool in filters > sharpen > smart sharpen
And here are some comparisons.


I spoke about PSD's here, but here's an example of the GIF with one and sharpened.


6 notes
·
View notes
Photo

It’s You-MAY-Choose-Your-Own-Adventure Month!

After a long week at MI6, the crew finally disperse into the city, needing to get away from Vauxhall. It’s up to you what they do!
The fancreation prompts at each location are there to serve as your guides! If you want to get brownie points, you could include the physical location in your fancreation as well. Trace a route showing the Six Squad’s weekend plans, and if you’re looking for a finish line—well, they have to be back at work on Monday! You can use the roads to plan out a path of prompts, or hop on the tube to jump around in whatever order you like.
See the Wordpress page for the full map and prompts to choose from.
Maybe Eve needs to decompress by visiting museums, but she isn’t a Turner fan; maybe Bond takes a rare trip on the London Eye to remind himself why the stress is worth it and gets flirted with by a stranger (and then he gets distracted and goes to Savile Row). Perhaps Bill and Q go out for dinner and dancing, pretending like they don’t have far too much power in the world. And maybe Mallory finally found the time to take his nieces to the zoo, only to find himself helped by an unlikely animal companion.
Tag any works you make with #MI6CafeChallenge and tag @mi6-cafe on tumblr so we can reblog your work! You can also download the map for a higher quality image.
We are also starting a new activity:
Wonderful Works for the Weekend Sign-ups
We want to facilitate you in the Cafe Community sharing fanwork recommendations with each other. These could be new works, old faves, or even your own works!
How this works:
You sign up for a weekend on which you will post your rec list. The sign-up page is HERE!
Your rec list should consist of at least 3 fanworks, 2 of which must not be your own. Tell us about the work and why you are recommending it!
Include the event banner art in your post. (You should be able to download it from the wordpress linked on the sign up page!)
Tag @mi6-cafe in your post so that we see it and can reblog it.
You can also join us for...
The Saturday Cafe: May 7th and 21st
Come join us in the fandom Slack as we write, draw, sprint, plot, brainstorm, cheerlead, and generally have a good time trying to get things done together. If you’d like an invite to the Slack, go ahead and message @castillon02 or @christinefromsherwood or @spiritofcamelot!
Long Fic Readalong, Saturdays at 9pm ET
Join us in the Discord while we read a longer fic. This is a fun chance to enjoy the fun of a weekly installment without the pain of Fleming’s writing, and we’d love to see you there. You are welcome to listen if you don’t or can’t read aloud!
We are currently reading “Red Queen to Overwatch” by BootsnBlossoms and Kryptaria. Look for the announcement posts each week to find out the current chapter if you want to catch up, or you can just show up and we’ll give ou a summary of what happened previously.
Characters of 2022
Something new!! This year we are adding a subtheme for every month. We are encouraging you to focus on one character and then give us all your recommendations and new creations the last week of the month. Unlike our monthly themes, you can find the complete list of characters for all year in the main post right here.
Your character for May is Fiennes!M! Let’s celebrate our second M this month!
Weekly events:
WIP Wednesday: You can post an excerpt of your WIP on our post or make your own post and mention the @mi6-cafe. Either way it’s a fun way to show people what you’re working on, Bond fandom or otherwise.
Weekly Bond movies: Hosted by womble every Sunday at 8am Pacific time, join us in Discord to watch one of the Bond movies. Keep an eye on the watch party calendar linked below for updates.
Want to host your own event in the Discord or elsewhere? Let us know about it so we can add it to the calendars!
Calendars
Watch Party Calendar MI6 Cafe Calendar If you need help adding these calendars to your personal one, check out this post.
18 notes
·
View notes
Text
Part 1 Here! / Part 2 Here! / Part 3 Here! / Part 4 Here! / Part 5 Here! / Part 6 Here! / Part 7 Here! / Part 8 Here! / Part 9 Here! / Part 10 Here! / Part 11 Here! / Part 12 Here! / Part 13 Here! / Part 14 Here! / Part 15 Here! / Part 16 Here! / Part 17 Here! / < This is Part 18!>
Donate to Move to Higher Ground HERE!
* Your eyes open, and your hand flies to your throat
* You’re thirsty
* You sigh as you sit up in your bed a little annoyed, you were having such a good dream too
* Only when you look to your night stand to grab your blood bottle, past it you see Edward sitting in your desk chair
* “What are you doing?” Your voice is gravely, and you don’t wait for a response before uncapping your bottle and taking a sip
* Edward fidgets, his hands tugging with the sleeves of his shirt
* “I like watching you sleep” he admits with a shrug and a boyish quirk of the lips.
* Of course the dork likes watching you pretend to sleep
* Somethings haven’t changed from the books at least
* Maybe he’s part owl or something
* “Ugh, it’s already Sunday where does the weekend go?” You mumble, it’s around 3 am right now
* To be fair you know half your Saturday went in self loathing in a tree, and the other half spent with your entire coven congratulating you and Edward on your new relationship
* “I call (Y/N) as my sibling the next time we move!” Emmett grins
* “That’s not fair, I was going to make them my sibling.” Jasper pouts
* “You already have Rosalie don’t get greedy”
* And then they all basically tried to plan out your wedding.
* So the pressure is on
* At least you still have all Sunday before you have to face everyone at school though. You haven’t even tried to look at your phone
* “Edward,” he perks up at the sound of your voice “were they really thinking vile thoughts about me?”
* His eyebrows thread together, head tilting to the side
* “Mike and Conner, you said they were thinking vile thoughts when you...came to get me.”
* It’s been bothering you for some time, Conner you can understand, but Mike?
* You feel....betrayed
* Edward averts his eyes, you’re half hoping he was lying to you and that he was just upset you were kissing other people
* “Were they thinking of r*ping me?” The second the words fall out of your lips he scampers closer, the chair screeching behind him.
* “No! No of course not-at least I don’t think so-“ His hand cups your face, the other cards through your hair. He sits on the edge of your bed carefully
* “They were thinking of taking you...”
* oh well that’s no so bad.
* “At the same time”
* So that’s a little worse
* “So they were thinking about a threesome?” Edward winces at the word but nods
* You let out a sigh of relief, a threesome is still kinda sketchy but that’s just normal teenage boy brain for you
* “At the time I didn’t appreciate their...vivid thoughts but” he looks into your eyes, like two pools of gold. “Maybe you wanted that.”
* He had acted instinctively upon seeing their thoughts, but in reality he wasn’t much better
* He had imagined that same needy expression on your face dozens of times
* Maybe... you might have enjoyed an experience like that. After all two lovers are better than one
* He’s stuck in his own self loathing until he hears you laugh.
* You’re actually laughing at him!
* He’s worried that you missed out on a vital human experience and you’re laughing!
* The nerve
* And yet, he feels his heart flutters when he see’s you smile at him
* “No, I’m good.” You laugh, and he feels himself let out a sigh of relief.
* “What about Jessica? Does she hate me now” Edward shakes his head
* “I think she might have a bit of a crush on you now.” He grins at your confused expression
* Well that’s unexpected
* You know you can’t really sleep but you feel exhausted, completely emotionally drained
* You snuggle back into the covers And pat the space on the bed beside you
* “Sleep with me?”
* Your face feels uncomfortably hot when you realize what you just said. “I just meant like-dream with me-not um no-“
* “I know what you meant” Edward says with a small smile
* He lies down on the other end of the bed, at least five feet away from you
* “You can come closer, you’re my boyfriend now, boyfriend privileges”
* Boyfriend
* He’s always thought the word was garish.
* A boy who was your special friend, how idiotic. But hearing the word tumble from your lips makes him unbelievably happy
* “What are boyfriend privileges?” He repeats carefully. Shifting so he is lying beside you
* “Normal couple stuff I guess, kissing, hugging, public affection-“
* and sex stuff
* “So I get to be as greedy with you as I want?”
* You feel your face grow warm at the thought of Edward being as greedy with your body as he wants
* The way his hands would feel as they ghost over your body, his sweet rosemary and argon scent filling the air
* You can’t manage to get out words so you just nod, and he grins
* “Let’s go out tomorrow”
* To like a hotel or?
* “We can go to the aquarium in Seattle, I think it’s supposed to rain so something indoors would be good.”
* Oh like greedy with your time
* That seems more on brand for Edward tbh
* “The aquarium sounds nice”
* You curl into his chest, breathing in his scent deeply. He feels warm, not as warm as a human, but soothing in its own right. A gentle warmth, like the warmth from a candle
* You feel so safe here with him. You feel yourself drift off into sleep, and Edward’s arms tentatively wrap around you
* Your weight is pressed against him, and he can’t help but wonder what it would feel like to have you pressed against him even more
* Your hands clawing at his chest as you plead
* “Great now I’m the one having vile thoughts” he murmurs to himself
* You both sneak out early in the morning, while all your other coven members are still preoccupied
* “Grab a couple blood bags and I’ll get some tumblrs” you nod, shoving it all quickly in his nike backpack, and you both practically jog to your jeep.
* The drive feels a lot shorter than you remember, it’s only 10 when you get there.
* You sigh as you get out, you’re wearing faded blue jeans and a black coat that cinches at the waist
* Edward is dressed in a similar fashion, faded blue jeans, white shirt and a leather jacket
* Both of you wearing sunglasses
* You don’t miss the looks you get as you walk across the parking lot. You already get a lot of attention as is with the hot pink Barbie jeep
* But you and Edward together look like something straight out of a magazine catalog
* “Did you already buy tickets?” You ask, your arm linking through his.
* “Yeah, we just have to pick them up at the box”
* It’s actually pretty busy, it is a weekend day though so it’s to be expected
* “(Y/N)?” You turn to the voice and feel like the wind got knocked out of you
* “Jessica, Bella...” and there’s someone else with them, brown skin and long dark hair.
* Well he’s kinda hot, for a human that is
* “What are you doing here?”
* They’re like the weirdest group for a Sunday hang out
* “My Dad had some tickets, he was going to come with my mom but I guess they got in a fight or something.”
* You get the feeling that there’s more to it than that, but you’re just happy she’s talking to you after you kissed her without consent
* “Oh um , this is Jacob we’ve been friends since we were kids.”
* So this is Jacob, he looks older for his age.
* “Hey Jacob nice to meet you, I’m (Y/N)” you extend your hand and you see him stiffen for a second
* Yeah that sounds about right. All humans get afraid when they first me et you, you are technically their natural predator after all. He seems to get over it and grasps your hand
* “Hey, nice to meet you”
* “Do you go to school with us?”
*You know he doesn’t, but you’ve found it best to pretend in this situation.
* You glance at Edward who hiding a twitching smile, looks like he heard something interesting
* “No I go to school on the res, I’m a sophomore.”
* Oh a sophomore, younger man is more her speed huh? And they’ve been friends for years, he’s to her what Edward is to you
* You ship it
* “Do you guys want to join us?”
* You can feel Edward’s eyes piercing you in the back. Yeah you know this is a date, and he probably wants some quality time with you or whatever-
* But it’s not like you’re f*cking after or anything
* And honestly you kinda wanna see how this whole Bella-Jacob ship plays out
* “Well I don’t-“ Bella starts
* “We’d love to!” Jessica interrupts, and then taking a nervous glance at Edward she adds:
* “That is if you don’t mind?”
* Queue everyone looking at Edward. He looks at you, a small pout bowing onto your lips and let’s out a deep sigh
* “No of course not, I’ll get the tickets and meet you at the gate.” He says with a resigned smile
* He leans down, catching your lips in his. You know you don’t have a beating heart, but you feel it stutter when he pulls away and smiles at you
* “See you in a bit daring” and then he walks towards the empty “reserved pass” line
* Darling?
* DARLING???
* (Y/N).Exe is broken
* And you would stay broken if Jessica and Bella didn’t each grab a shoulder and shake you.
* “Oh my god what was that?!?!” Jessica shrieks
* “Are you guys like...dating now?” Bella grins
* “Yeah, I guess we are?” The human part of you understands that you’ve just agreed you feel the same, and that you have just started a relationship
* But the vampire part of you, the primal part, knows it’s so much more than that
* He’s your mate
* And saving any major changes, he is yours for as long the universe will permit
* “Wait are you guys on a date right now?” Jessica asks, and it pulls you right out of your thoughts
* She’s worried she’s intruding
* “No-I mean maybe? Honestly we both just wanted an excuse to get out of the house.” You sigh
* “Are the rest of the Cullen’s not taking it well?”
* You do live together, and you’re at that age. Sure Emmett and Rosalie and together, but that seems to be under more transparent circumstances
* So imagine her surprise when you card your fingers through your hair
* “No they’re taking it too well!”
* Last night you basically rotated between coven members as they all told you how happy they were you were with Edward now
* “Honestly I thought the nerd would never find the nerve” Emmett confided in you
* “Eleazer you’ll never guess what happened....we’re going to be brothers!” You had heard Carlisle tell Eleazer over the phone before breaking down into tears
* “Carlisle stop crying, the venom is going to make a hole in the floor.” Esme shouted before turning her attention back to you
* “So what colors do you like (Y/N)? I’m partial to gold and white myself-“ she said pointing the color combination examples in her wedding book
* They were driving you crazy.
* “Carlisle keeps rotating between smiling and crying because ‘two kids are leaving the house’ and Tanya called to give me the most smug speech about it- I just need a break.”
* You sigh
* “Wait-did all of this happen after the party?” Bella asks with a smile creeping onto her face
* Before you can answer though, you see Edward walking towards you
* “We’ll talk about this later” Jessica whispers, not that it matters, going on the smirk on Edward’s lips he already heard everything
* “So Tanya called you huh?” He whispers in your ear when the others move ahead
* His breath fanning against your ear causes your stomach to flip. You’ve been around him so long, you almost started to forget how hot he was.
* “Yeah, she’s basically hoping I crush your heart so she can get revenge.”
* You’re mostly joking, but given past history, you know she wouldn’t mind if that’s how things turned out anyway
* “That’s fair.” He looks almost sad. What the hell happened between them to make him like this?
* You want to ask, but you feel like now isn’t the best time. Not when Jessica and Bella are a mere five feet away arguing about whether to see the jellyfish or penguins first
* So you do the only thing you can: You reach out and hold his hand, squeezing it slightly. Edward doesn’t say anything, he just squeezes back
* It’s a pretty nice day, Bella’s dad bought her a digital camera so you take a bunch of cheesy pictures around the aquarium
* “Oh try to get one like a shark is eating us! Like I’m in Jaws!”
* “You know they’re an endangered species and that stupid movie doesn’t help right?”
* “There is no ethical consumption under capitalism Bella”
* Edward just makes a pained expression as he holds up the camera. All he wanted to do was go on a date with his significant other
* “Girls am I right?” Jacob asks, extending his bag of popcorn
* For a second you think Edward might hate him, but instead a smile arch’s onto his face
* “You have no idea.” He smiles, taking a few kernels.
* Aw, it’s Edward’s first human friend 💖
* You kinda wish you were the one with a camera now, or at least a smart phone
* Instead you settle for a grainy picture on your flip phone. They both look at you like confused puppy's when the shutter clicks
* “Aw that’s a cute one” Jessica coo’s
* “You even got a shark in the back” Bella says pointing to a blurry gray blob in the background
* It’s a good day
* You’re almost sad when you have to part at the end
* “You sure you guys don’t want to come with us? Jessica’s dad is letting us have his reservation at the revolving restaurant in the space needle”
* You and Edward exchange a look
* “Nah it’s fine, I’m pretty sure Esme is wondering when we’re coming home”
* “She’ll be pissed if we eat there without here.” You add for good measure
* “Well alright we’ll see you at school tomorrow” Jessica says with a wave, and you smile
* “See you tomorrow”
* Looks like things are back to normal
* Edward drives on the way back
* You hold the plush sea turtle close to your chest as you watch him
* He really is handsome, chiseled cheekbones and full rosy lips. To add he has that mane of auburn hair, and that irresistible splatter of freckles across his nose
* The prettiest boy you’ve ever seen
* “I can feel you staring” he says with a smile twitching onto his lips. Oh god you want to kiss that stupid smile right off his mouth
* “What went wrong with you and Tanya?”
* Way to kill the vibe
* “I’m sure Tanya told you all about it.” He shrugs. There’s that sad look again
* “I want to hear about it from you though”
* And Edward might have denied you if your hand hadn’t found his, resting on top of it
* He grins
* You don’t play fair, do you?
* He sighs, squeezing your hand while keeping his eyes on the road
* “I just...didn’t like the way she thought about me”
* “Like you were a piece of meat?”
* He laughs
* “Like I was some charity case besides-“ he stops abruptly, looking at you before swallowing hard. “Never mind”
* “No tell me!” You lean forward cradling your hand intertwined with his against your chest and he chuckles, you really don’t play fair
* “ I didn’t-I don’t feel attraction to people unless-“
* He looks into your eyes, and you feel his fingers squirm against yours
* “Unless we’re friends first”
* Oh, he’s asexual.
*Or demisexual.
* Somewhere on the spectrum for sure
* Is he coming out to you right now?
* You give his hand a squeeze
* “I get that.”
* You want to smack yourself.
* The boy you love just came out to you about his sexuality and all you can say is ‘I get that’
* You feel so useless
* But Edward doesn’t let you feel useless for too long, he squeezes back looking at you with such warm eyes
* And again you can’t help but think that even though his heart doesn’t beat anymore, he looks so human
* He’s just pulled into the driveway at the house, the car parked. He’s about to say something when you cut him off, tugging him closer to you and placing your lips on his
* If he’s surprised he doesn’t show it, placing his free hand on your shoulder and leaning a bit closer to you
* He’s so careful and gentle...and dazzling
* He’s barely touching you but you can feel yourself seeing stars
* That thing he does with his tongue-it’s indescribable
* Are you sure he’s a virgin?!?
* You can’t help the sigh that passes your lips when he pulls away. You’re still in a daze when he pulls you into his lap, one leg straddled on each side
* His head is tilted back, an easy smile on his mouth.
* You suddenly feel shy, that look in his eyes should be illegal
* “So-“ you lean back a bit “do you-um-do you have feelings like that for me?”
* He tilts his head to the side in confusion and you gulp
* “Y’know sexually speaking”
* He actually laughs at you
* Right there, when you’re only a handful of inches away from his face
* But you’re not annoyed, instead all you can feel is a rush of affection
* His eyes crinkle at the ends, his pearly white fangs sparkling as he grins. Your hands cup his face as he looks up at you with adoration
* You can imagine the rosy blush that would light his face so clearly, the deep emerald green of his eyes. You’re almost starving for the image you see in your mind to be real
* He pulls you out of the image with a simple touch. His arms wrapping around your waist to pull you closer
* “I - like the rest of the entire student population at Forks High School- find you absolutely bewitching”
* The way he says it makes you shiver, and Edward’s hand trails up your back.
*He sits a little straighter, bouncing you slightly in his lap as he does, so you’re looking straight into his eyes
* “I find it hard to believe you don’t know that I have been dying inside everyday watching you walk around in those short shorts you love so much,” he whispers in your ear.
*“That I haven’t been dying to absolutely ravish you .”
* You gulp.
* It’s all you can do when he’s looking at you like that
* If you thought Garrett’s bedroom eyes were intense, then Edward is on an entire different level
* You feel your heart stutter, butterflies erupting in your stomach...and something else
* A certain heat you haven’t felt in a long time
* You’ve never seen him look at anything like that, like he’s hungry-
* Starving even
* His lips brush against your neck, trailing down to your collar bone and you sigh
* He really knows everything about you doesn’t he? All your sweet spots, all your stories, every one of your secrets.
* Your hand trails up his chest, entangling in his hair and a low gasp tumbles from his lips
* And then your phone rings
* You hear him groan, and you shake your head
* “Ignore it” you mumble, your mouth meeting his once more
* And you continue on for a few moments, until his phone rings
*He pulls away from you with a groan
* “Rosalie’s calling me a long list of profanities right now” he mumbles, you sigh pulling away to lean against the steering wheel
* It’s probably for the best, no point in getting too turned on when you knew he was going to say ‘you should wait until marriage’
* Like honestly, he died, and you died, and now you live an alternative lifestyle where literally nothing matters anymore
* But you’ll respect his wishes
* “Guess we should go inside” You sigh, you move to get off of him
* But just as your about to crawl off, he tugs you to face him once more
* His thumb brushes over your cheek, and those deep gold eyes bore at you with that same intensity as before
* He pulls you in for one last kiss, before getting out of the car and closing the door behind him
* “We’ll pick up where we left off later.”
* (Y/N).exe is broken
* You walk to the house slowly, like humans do
* “Are you ready?” He asks, holding out his hand
* You smile, placing your hand in his and nodding
* “Ready”
* So imagine your surprise when you and Edward get inside, hand in hand, to find the entire coven is laughing in the living room.
* From where you’re standing you can only see Carlisle
* “Ah your home! Come, I want you both to meet someone-“
* You move forward but Edward stays rooted to the spot
* Three people come into view, a woman with flaming red hair, a man -no older than 25- with rich mahogany skin, and a dazzling young man with hair the color of the sun.
* “Meet our new friends, Victoria, James and Laurent”
* You turn to look at Edward, his mouth pinched into a frown
* Well F*ck
Tags: @moonlights27 @thebluetint @the100thtwilight @awesomebooklover17 @oneofthepotterheads @smileygirl08 @imdoingathingmom @iconicgguk @yrawn @alyciaswhore @little-horror-show @wicked-watering-can @lazydreamers @ xxxmuxxx @ideas-for-you-to-adopt @poisoinedhope @maryleigh8796 @moose-squirrel-asstiel @hotmessgoodness @jaimewho @corabmarie @what-am-i-doing10 @alluring-venus @imdoingathingmom @anotheryooniverse @im-tired-not-sleepy @emmettcullenisahimbo @my-super-musical-life @smolvampiregirl @it-was-all-a-beautiful-dream @mihikaahujaaa @werewolflover3252 @teenagezombiekryptonite @shynz @reclusive-chicken-nugget @monkeyluver4546
#twilight#twilight saga#twilight fanfiction#twilight headcanon#twilight imagine#edward cullen imagine#edward cullen x reader#edward cullen headcanon#jacob black#jacob black imagine#jacob black x bella swan#bella swan imagine#bella swan headcanon#midnight sun#superhero-imagines
480 notes
·
View notes
Note
Hello Squid! I have a pressing question.
What the heck is post+. I’ve been seeing a lot of people complaining about it, and I know it has to do with a paywall, but thats about it. Mind illuminating the subject?
I've made a post on this before, but some people are still confused on it (understandably; it's a mess) and I've learned more in the past week, so I'm going to articulate it better.
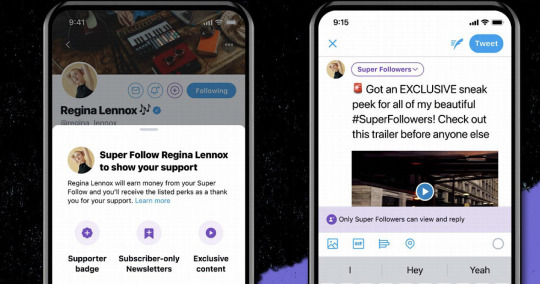
So, basically, Post+ is Tumblr trying to squeeze money out of us content creators by giving us the option to put our content behind a monthly, $3.99 USD paywall. It's a feature we can opt out of using, but one Tumblr's not giving us a choice on having.
If I were to use it (OBLIGATORY DISCLAIMER: I WILL NOT. I will ONLY ever link to my Ko-Fi), then my posts would look something like this:
The Master Sword: Determining Link's height, pixel by pixel
Link's height has been something of an unanswered question among Zelda theorists. Sure, we have our guesses, but Hyrule doesn't really have a Hylian ruler we can measure ourselves up against to the nearest centimeter.
It DOES, however, have the Master Sword. And if we compare that to Link's model in each game that contains it...

Support squid-ink-personal by subscribing to their +Posts. As a supporter, you’ll get access to exclusive content and posts.
⚠️
The feature is BAD. Not only does it prey on people who are broke or underage for a monthly fee, Tumblr also specifically encourages monitization of fandom content.

This? A flat out lie. Ask anyone that’s ever had to take down a YouTube video.
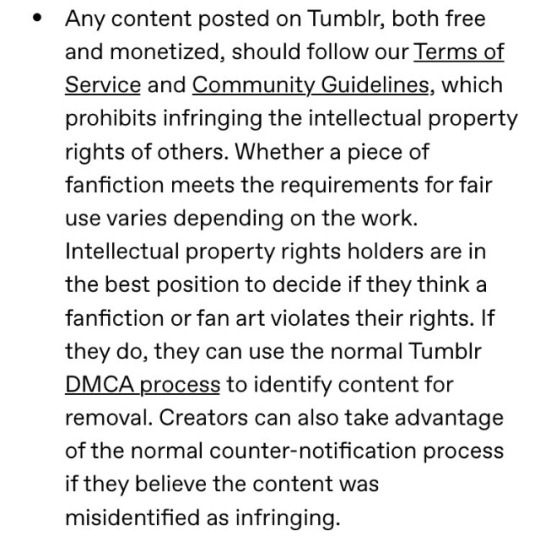
According to laws regarding hosting sites here in the USA, Tumblr’s not responsible if you get sued for selling Disney merch.
THEY get their nice little paycut while throwing you under the bus.
And if you're under any illusions that Tumblr cares for their creators' reception and wellbeing, look no further than Post+'s guinea pig.
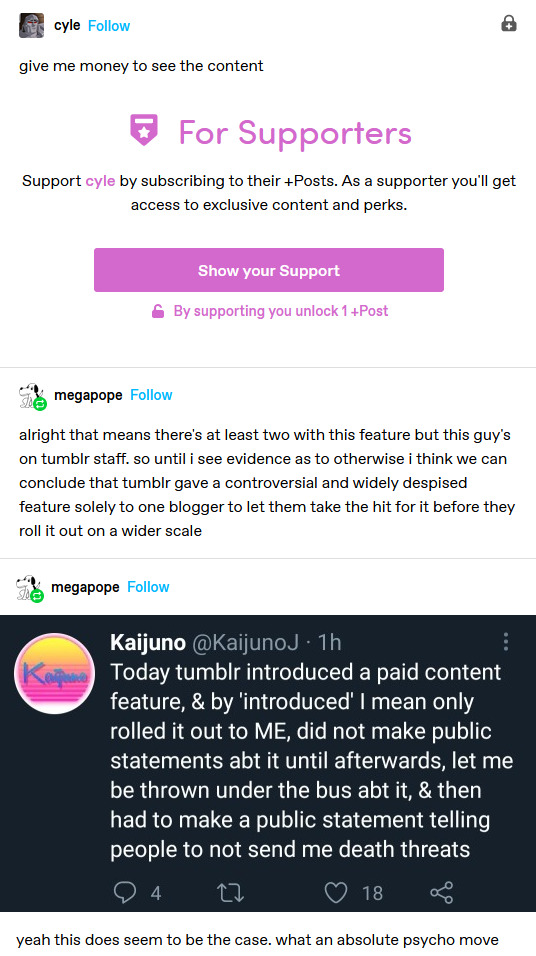
Sending death threats is abhorrent, and anyone who does so shouldn't be allowed to talk to creators. But death threats are what this site is known for. You can make even the coldest of takes and be sent a dozen anons from the same person, and staff does fuck all to punish this behavior.
The fact that the Tumblr staff didn't consider this an option when putting their pet project on the front lines means that they don't use their own site. They never have, they don't know the culture here. The most they likely know is a handful of memes that were screencapped to Reddit.
To put the cherry on this delightfully flavored cake, this site is not secure in the slightest. Rayban sunglasses haunt the echos of abandoned accounts. Bots follow on the daily, with automated messages like "22/f, hbu" or the newest wave which is mediocre sugar daddy bots. People with entry-level coding skills can dox people they don't like and send them irl death threats in the mail—that happened to user dairyisntscary.
This site is a navy blue curtain away from being open source. How many Firefox extensions are there for modifying Tumblr? How many dumb, broken ads get greenlit? How many custom themes can we add to our blogs? Who remembers John Green's palate? This site has so many bugs in its security and design it's LAUGHABLE.
Post+ is the result of a staff that is out of touch with its users, doesn't care for its creators, has no thought for its security, and wants to make a quick buck. And instead of using this site for what it is, slowly growing its user base with love and care and offering features content creators can use to improve their own content (like a better text editor, or higher image quality, or even fucking CUSTOM BORDERS), they're going the route of Twitter and Youtube and restricting the content their user base gets to enjoy.

49 notes
·
View notes
Photo
Finding high quality film/tv rips, saving the large files, and screencapping them are half the battle for gifmakers when setting out to make a gifset. Here’s a little guide on this process, including my advice on
Where to download stuff
Where to store your movies/shows
Screencapping programs
Making gifs as HQ as possible, including tips for picking out what to download when you have multiple options (not all 1080p rips of the same movie or tv episode are the same quality and I explain why)
Why screencaps of 4k movies can look weird and washed out and how to fix that
and more
✨ You can find my gifmaking 101 tutorial here and the rest of my tutorials here.
Where can I download movies and shows?
First off, I prefer direct downloading rather than torrenting stuff because it’s faster and with torrenting, there’s more of a risk. Other people downloading the same torrent can see your IP address. This means movie studios can find out you’re downloading their content and can send you a warning letter. The download speed also varies depending on how many other people are seeding it. I would only do it if it’s your only option and you have a VPN or something.
This is THE best guide for pirating I’ve ever seen. I use it for finding sites for books, music, you name it. The part of the guide you’d want to look at is where it says Direct Downloads Link (DDL) sites. My favorite place is Snahp. These ddl sites will have links to their movie/tv rips that are typically hosted on one of these two sites: google drive or mega.nz. You can download stuff from both of those sites for free, but with mega, they have a 5GB file download limit unless you have a premium account. I personally pay the $5 a month membership for mega because it’s worth it imo. You can buy a subscription through the mega app found on the iphone app store (so you’re billed through apple and it’s less scary than giving a random site your credit card info lmao) and as for androids I think mega has an app on there too.
So basically, if you go to http://snahp.it, they’ll have rips for different movies and shows.
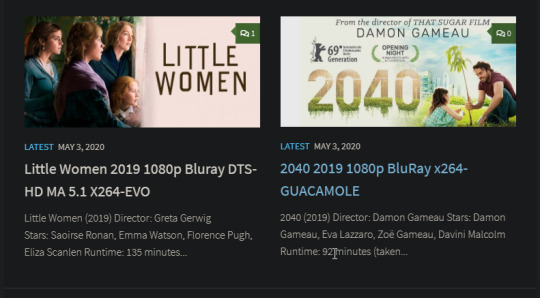
You click on the movie title and it’ll take you to a page where they have links for the video which they have uploaded on a variety of sites (including mega).

How do I make my gifs as HQ as possible?
It’s best to gif things that are 1080p. And usually the higher the file size, the better. A really important thing to note is that not all 1080p bluray rips are the same. The piracy groups that rip these files take uncompressed .mkv rips from discs that are anywhere from 10gb to like 50gb, and then run that through video converters to compress the file down so that they’re 2-8gb. Sometimes when that happens, the video quality goes down a LOT. The same goes for TV episodes. One rip could be 800mb, the other could be 3gb and both could claim to be “1080p” but the quality would be NOTICEABLY different. Your best bet is to always pick the rip with the highest file size.
I’ll show you an example with this scene from You’ve Got Mail.

I downloaded 2 different 1080p rip versions of the film. Both claim to be 1080p, but one is 2.41 GB and the other is 9.75 GB. After taking screencaps, it’s obvious that there’s a BIG difference in quality.
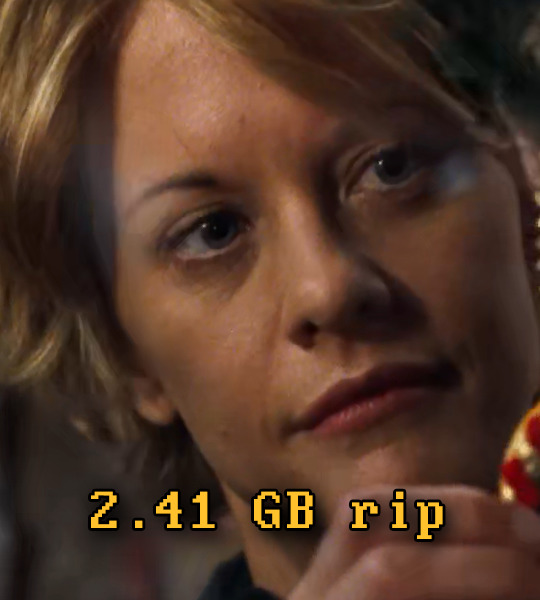
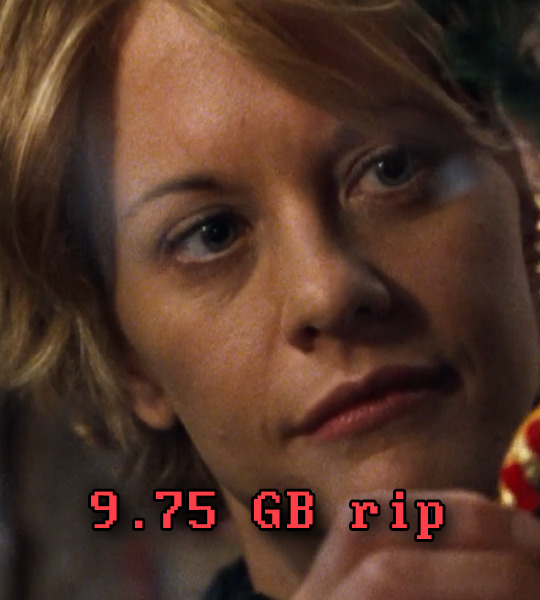
(these pictures are best viewed on desktop tumblr)
When it comes to Blu-ray rips, download remux versions of films and shows if possible. Remux means .mkv files that are uncompressed and straight from a Blu-Ray disc. Giffing remux rips cuts down on the possibility of seeing pixel-y effects a LOT in my experience. It’ll take a bit longer to download than typical 1080p rips but it’s worth it imo.
For TV episodes, if you can’t find a Blu-Ray rip, uploads with the word AMZN in it are usually the highest quality and your best bet (unless you see another upload that’s higher in file size - again: always try to pick the highest file size). 'AMZN’ means they’re from a person that ripped the episode from Amazon Prime Video.
Also, even better than 1080p is 4k (2160p). I only really recommend this though if you know you’re going to gif something up close and crop it a lot - like if it’s a big 540x540px close-up gif of a person. You’ll REALLY see the difference if it’s a 1080p vs 4k rip in that situation. I usually don’t bother with giffing 4k files unless it’s the case above because my laptop lags when taking 4k screencaps and it takes longer to load them into photoshop (4k screencaps are usually about 60mb each!)
⭐️ Another thing that’s important is making sure that when you actually make your gifs, you set them to the correct speed (.05 for movies and most shows, and .04 sometimes for reality tv and live broadcasts). Here’s my gif speed guide. Having the right gif speed is really important for making a gifset HQ. You don’t want it to look too slow or too fast.
What’s your favorite video player to take screenshots with?
MPV player, hands down. And I’ve tried a TON of programs over the years. I’ve tried KMPlayer and found that it added duplicate frames (and even missing frames) which is horrible, and I’ve tried GomPlayer which is.....I’m just gonna say it, I’m not the biggest fan of it. It’s a little overly complicated in my opinion and it has ads. If you like these programs, more power to you! Use whatever you’re comfortable using. I just like MPV the most because it doesn’t have ads, it’s simple, you can take sequential screencaps with a keyboard shortcut, and it can play 4k movies.
Screencaps I take of 4k 2160p movies look so dull and washed out, like the colors aren’t right. Why is that?
That’s because your computer can’t handle HDR 4k video files. It probably can handle SDR 4k video files, but unfortunately, 99% of 4k rips out there are HDR.

[picture source]
Now, HDR displays just fine on computers that have 4k-HDR capabilities, but most older computers don’t have this ability. Having said that, MPV - the video player I mentioned above can take a 4K-HDR video and fix the colors/lighting in real time so it displays correctly AND take screenshots of it with the fixed colors. If you have an older version of MPV, make sure you download the newest update for this. In my general gifmaking tutorial, there’s a portion on how to install this program on macs. I also just made a video tutorial on how to install it on pcs here!
High quality TV and Movie rips can take up a LOT of space on my computer. Where do you store your files?
I store them on external hard drives. External hard drives are like flash drives but they have a MUCH higher storage capacity. You just plug them into your computer via a usb cord when you need access to the files and it’s that easy. I have two of these Seagate 4TB hard drives in different colors so I can easily pick out whichever one I need. I have silver for my movies (because it makes me think of “silver screen” lmao and it’s easier for me to remember) and then I just have a blue for shows. Now, external hard drives of this size can be $$$$ but it’s worth it imo. Look out for when they’re on sale.
What’s the size limit for gifs now?
It’s 10mb! It used to be 3mb and then last year Tumblr upped it to 5mb. Some gifs initially had distortion because of Tumblr’s switch from the .gif to .gifv format, but they’ve fixed the problem AND increased the upload limit to 10mb. Just make sure not to add any lossy to a gif.
Lossy is basically a grain you can add to a gif to lower the file size down. Gifmakers (including myself) used to use this as a trick to get the file size down under 3mb. However, since the .gifv update on Tumblr, any gifs with Lossy added will look distorted like it’s a gif made on a phone app or something.
_________________________________
That’s it for this guide! Again, feel free to check out my other tutorials on photoshop, how to center subtitles, download hq movie trailers, and more ✌️
UPDATE 6/23/20 ⚠️
I’ve gotten an ask about this problem 3 times since I’ve uploaded this tutorial, so I thought I’d add this in. If you are experiencing duplicate and/or missing frames in mpv, it is a glitch with the latest version of mpv. download an older version like 0.29.0. this happened to me on my mac and downloading an older version fixed the problem.
3K notes
·
View notes
Note
i’ve never made gifs before and i have absolutely no idea where to start T-T can you share your process or is that top secret lol? and dw i’m not using you instead of google lol it’s just i’m very picky about what looks good and your gifs have such a nice frame rate and sharpness and stuff so i was wondering how you go about making them (i have photoshop which i’ve heard is what most people use i think? idk) sorry if you get this question all the time feel free to ignore!
hi!! dont worry i had no idea where to start either and it took me a while and looking at several tutorials to figure out what i was doing cus its unfortunately not something u can just google and find all the steps to lol,, but anyway no my process is definitely not top secret!! i think most people use mostly the same process and then things like sharpening + coloring are all about personal preference! but heres some things that might help u out!! 🥺
heres a couple tutorials that could help u get the hang of the actual technical process and steps of converting a video file to a gif which for most people is about the same, kookyjin’s tutorial, sugajimin’s tutorial
you don’t have to use vapoursynth but it does make the process a little easier by cropping and resizing the video for u, and it also has a denoise filter which will make your gifs look smoother, it can be a little tricky to install but heres the link for that
as for my personal way of sharpening i use smart sharpen, and sometimes unsharp mask if i want it just a little bit sharper. the basic sharpening for tumblr gifs is 500% at 0.3px, but u can use more or less depending on the quality of the video. lower quality videos (like youtube videos) usually cant take more sharpening before they start to look oversharpened so u can lower it to 0.2px. but for things like my music video gifsets where the source video file im using is higher quality and hasnt been compressed the way youtube videos are (i get them from other websites where people have access to higher quality versions of the mv), for those i’ll often use 0.4 or even 0.5px, so it really depends! i also sometimes change the opacity of the sharpening filter to fine tune it a bit more. what i like to do lately is start off at an amount thats like obviously too much and oversharpened, and then gradually work my way down until i think it looks ok! i think its just something you have to build up a sense for over time :] but yea those r just some tips
as for coloring, its even more up to personal preference than sharpening is! i personally like a really natural coloring that just brings out the colors that were already in the video. so i cant give tips about other coloring styles but if u like mine id say the most important thing is creating contrast. and the best layers ive found to do so is with levels and curves. i ALWAYS start my coloring with a levels layer and darken the shadows and brighten the highlights as much as i think looks natural. this creates a good base to make the rest of the coloring on, gets rid of the “gray cast” (you’ll notice it if you click the little eye next to the levels layer and turn it on and off and see the difference with and without it), and makes the colors in the gif look more vibrant and saturated without actually using a vibrance saturation layer. i rarely ever use a vibrance saturation layer and if i do its actually to lower the saturation. after a levels layer ive been using (in order) two curves layers (its kinda hard to explain how to use those u just have to mess around with it until it does what u want), a brightness contrast layer, an exposure layer, sometimes a selective color layer (just to darken the blacks a little which is another good way to create contrast), and a gradient layer at about 10% opacity of just the white to black one to add a little bit more contrast :)
for frame rate i also prefer it to look natural and almost as fast as the original video. i will usually do 0.01 seconds above what the frame rate was when i originally imported the frames. so for 25 fps videos i would use 0.05, for 30 fps 0.04, and 60 fps 0.03
i hope all of that made sense and u find at least some of it helpful🥺 if u have any questions please feel free to send me another ask id be happy to answer!! even if u think it might be a dumb question i probably had it too at some point and might be able to help<33 good luck i promise giffing is really fun n worth sticking thru the first little bit of confusion!! ^_^
#mail#gif help#oh and yes photoshop is what most people use i think there might be alternatives out there but everything i said here is about photoshop!
10 notes
·
View notes
Photo

✧ TEXTURES – A TUTORIAL BY EVANSYHELP.
In this (long and image-heavy) tutorial, I’ll be showing you how I make textures, as requested by a very kind anon. I use Photoshop CC 2019 but you should be able to replicate my methods on most editing software. Please like or reblog this post if you find this helpful!
Index.
Ethically Sourcing Your Images.
Finding The Right Image.
Making Your Texture.
Other Tricks I Use.
Quick Recap.
Making Textures Without Images: Speedrun.
Outro.
Ethically Sourcing Your Images.
I will be explaining a couple quick ways to make textures without any images at the end of the tutorial, but since my personal favourite way involves images and that’s specifically what the anon requested, that’s what the majority of the tutorial will be focused on.
The first step, naturally, is finding an image to use. My personal favourite site is Unsplash, but there are plenty of options out there.
What you need to keep in mind is what kind of license the images have. Unsplash is free for personal and commercial use with no attribution required, which makes it perfect for things like this. There are more sites like this in my free for commercial use masterlist (linked at the end of the post), but unless you’re using them in products you’re selling (like graphic commissions), the commercial aspect isn’t something you need to worry about. Just check the site/photographer’s rules to make sure you’re allowed to edit the images for personal use, and whether attribution (credit) is required.
Another important thing to keep in mind is that these sites typically never allow you to redistribute the images as they are. That means you can’t just go to Unsplash’s texture category, save the images without any changes, and reupload them in a texture pack on Tumblr. That’s stealing. We don’t do that.
Finding The Right Image.
Knowing what kinds of images will make good textures is a learning curve. My first couple texture packs are rough compared to what I make now, because I basically taught myself with no guidance and learned through trial and error. But with practice, I learned what worked and what didn’t.
You want your images to be HQ, either with no ‘subject’ (ie. a person) or with a large background. Higher contrast is better but not super necessary. You should hopefully be able to envision what kind of texture you want to make before you even touch the image.
Making Your Texture.
For the majority of the tutorial, this is the image I’ll be working with. Credits can be found in the link at the end of the post.

Open your canvas. You can make specialised textures, like 100px for icons or 540px for Tumblr graphics, but I personally prefer to make them large for versatility. I’m using 800px in this tutorial. Once you’ve chosen your size, upload your full-size image into the canvas. This is where the fun begins!
Drag the image around into a nice position. Or use Edit > Transform to rotate, flip, and warp the image in different ways. Or use Edit > Free Transform (Ctrl+T) to change the size or the angle more precisely. Or probably some combination of all three! With Free Transform, make sure this aspect ratio anchor is selected so you don’t butcher the quality of the image, unless you’re warping it intentionally:

This is all very individual to each image you use. You might want to flip one, shrink another, put another at a 30 degree angle. Just experiment until you end up with something you think would look awesome as a texture. For the sake of providing a good example, I flipped this image vertically, shrunk it to 80% its original size, and rotated it until it looked like the smoke/cloud was coming from the bottom right corner. This is what we have:
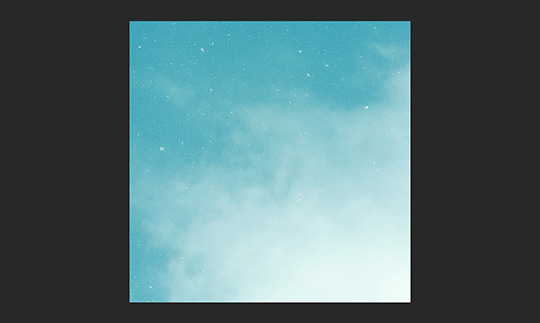
Then we move onto enhancing. Textures work best when there’s a lot of contrast because it’s easier to manipulate the blending modes. So if your image isn’t already high contrast, these adjustment layers (Brightness/Contrast, Levels, and Selective Colour) are your new best friends:

If you don’t see this on your Photoshop, go to Window > Adjustments and it should pop up. Again, just experiment, because different images will require different things. Essentially, you want to make the darks darker and the lights lighter. Something I like to do is add a Selective Colour layer and use the Black slider. Pick out the primary colour of the image, and then Whites, in the drop-down menu, and move the bottom slider (left to lighten, right to darken) until you’re satisfied. Like so:
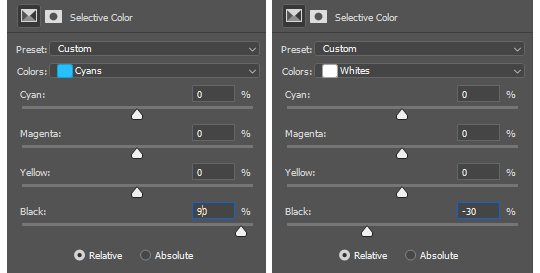
So with those Selective Colour settings and the following Levels settings, here’s the before and after of my image.


Much better contrast! If you want to end here, you can, but I personally prefer grayscale textures a lot of the time because it makes it more versatile. Instead of being forced to make a blue graphic because this image is blue, I can make any colour graphic I want with one simple black and white Gradient layer. Photoshop does have a default Black & White adjustment feature, but I prefer using Gradients.
Pro tip: if your image doesn’t have a pure black, you can keep the darkest parts of your image dark by using the left slider, shown below.


A lot of the time, I’ll also decrease the opacity of that Gradient layer, to somewhere between 80% and 95%, so just a hint of the original colour comes through. This gives it more dimension in my opinion, while still keeping it mostly neutral. Here’s 100% vs. 85%:
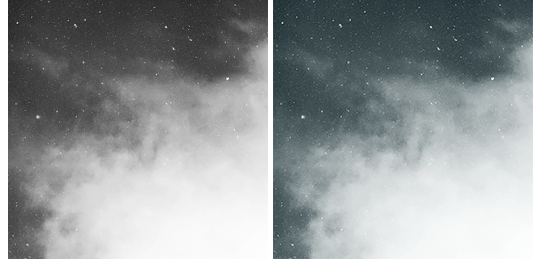
You may find that you want to add a little more contrast after. With this texture, I decided to grab another Selective Colour layer, pick ‘Black’ in the drop-down menu, and pull the Black slider up to +40. I also settled on 95% opacity for the Gradient. And here’s the final product!

Other Tricks I Use.
That covers how I make a lot of my easier textures, but here’s a quick run-through of other, slightly more complex tricks. I’ll be working with this image (again, credit at the end of the post):
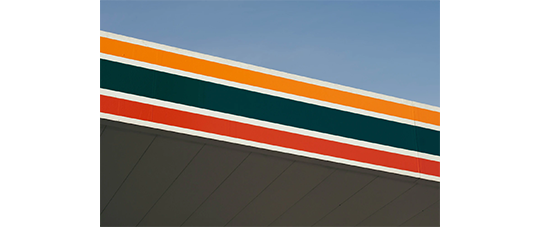
This, of course, is not as obviously texture-worthy as the previous example, but I love textures with strong lines, so here’s how the magic happens! I wanted to get rid of the detail on the bottom half, so I used the Polygonal Lasso tool to select it:

Then I used the eyedropper tool (the 4th symbol under the polygonal lasso in the image above) to select the blue of the sky and, on a new layer, painted that selection completely blue. I decreased the opacity to 90% just so it wasn’t a total block colour, but not enough that you can really see the lines. I repeated this process for the sky, so it looked more consistent with the bottom half.
Then, using the eyedropper tool again and making a new layer for every colour, I went in with a small soft paintbrush and painted out the harsh vertical lines on each segment of the stripes. I didn’t want to make them totally perfect, but I painted over the bulkiest interruptions.
I added a black and white Gradient layer, using the slider tool I showed you before to darken the darks and lighten the lights, and decreased it to 50% so that it wasn’t totally black and white but still more neutral than the original. Here’s the result:
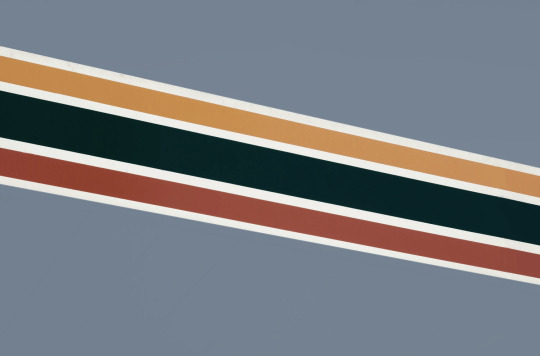
Another fun way to shake things up, which unfortunately will require Photoshop (CS6 should be fine, not sure about earlier versions), is the Filter Gallery. Go to Filter > Filter Gallery, and you’ll find a TON of effects that change your image drastically. Most of the default settings are nightmarish, but you can play around with the settings panel on the right.

Here’s just a few results that are possible with the Filter Gallery, labelled for convenience. You can view the HQ versions in the link at the end of the post.

Quick Recap.
So you don’t have to reread this obnoxiously large tutorial every time you want to reference it in the future:
Choose a HQ image.
Resize, rotate, flip, and/or warp.
Enhance the contrast.
Black and white!
Paint over problem areas!
Filter > Filter Gallery.
Making Textures Without Images: Speedrun.
We’re almost done! There are some tools built directly into Photoshop that can allow you to make textures completely from scratch, and I’ll briefly cover my favourites here.
The first is pattern fill layers. I spent too many years not appreciating the patterns feature in Photoshop, but they’re great. Go to Layer > New Fill Layer > Pattern, click ‘OK’ on the box that pops up, and another box will pop up to let you choose your pattern.
By themselves, they are UGLY. It can take a while to figure out how to use them. But if you change the scale, change the blending mode, and change the opacity, you have thousands of textures at your fingertips. And if you add two or three together? Billions of possibilities. I can do a more in-depth tutorial on patterns if y’all are interested, but here’s two examples I just whipped up in a matter of minutes, using two patterns on each:

The next feature is gradient fill layers, and the gradient tool. Go to Layer > New Fill Layer > Gradient… to select a gradient (or make your own!) and an angle, OR use the gradient tool (featured below) to drag the gradient across your canvas manually. On its own, boom, that’s a gradient texture. Paired with a pattern or put through the Filter Gallery? Even better!


The last is brushes. Brushes can be great for textures because there are so many kinds. You want to make a paint splatter texture? Paint splatter brush sets are everywhere! You want to make a smoky texture? You can get brushes that look like smoke! Smudged? Scratchy? Grunge? Halftone? Light leaks? Torn paper? Brushes have your back.

With all of these features (and things like actions, too!), your saving grace is going to be this little cog wheel shown below, and the list you’ll find under the Reset/Save/Load section. There are SO many more options built directly into Photoshop that you don’t even see right away, because you have to add them manually from this little cog wheel.

And you can download countless more patterns, gradients, and brushes from sites like Brusheezy and DeviantART. A couple tutorials on downloading and installing them can be found in the link at the end of the post, but remember, download these things ethically. If you want to sell products that use a custom brush, it’s your responsibility to find brushes that are free for commercial use. If you don’t want to credit the creator, it’s your responsibility to find resources that don’t require attribution.
Outro.
I think that’s everything, guys! If you found this tutorial helpful or otherwise enjoy my content, please consider supporting me on Ko-fi! I offer exclusive rewards, like custom graphics, to everyone who donates.
Due to Tumblr’s latest rules about links, you can find the credits list, the promised bonus tutorials, other important links, and the full-size HQ versions of the textures made in this tutorial over here.
Thanks for reading!
#rph#allresources#completeresources#itsphotoshop#chaoticresources#photoshop tutorial#photoshop resources#photoshop help#ps resources#ps tutorial#eh#eh: tutorial#tutorial#ps help#texture#*100#*250
371 notes
·
View notes
Text
The Many Illustrators of A Tale of Two Cities 11: Harry Furniss (2/2)

...& this second half doesn't actually speak for itself...
And we're back with the last 13 of Harry Furniss's 32 illustrations!
1 / 2 || 2 / 2
Unlike the first half of this set, this post actually does have a couple interesting notes on these at the end, but for now, enjoy!


Hope you enjoyed - and as promised, here are the notes!
First Note: Which Came First, the Misquote or the Drawing?
If you're someone with a strong memory for the original text of the novel and have been enjoying reading the captions in this set, you might have come across one of these and been a bit confused. Which one? This one:

most unpromising sure that sounds right, but wait, what...
The actual quote, from Book the Second, Ch. 5 "The Jackal," is this:
"Sydney Carton, idlest and most unpromising of men, was Stryver’s great ally."
...who substituted "tallest" for "idlest"?!
I, for one, am absolutely fascinated by this error. The Victorian Web source names "J. A. Hammerton" as Furniss's editor - is he the one that created the captions? And if so, did he initially misquote it and inadvertently lead Furniss to design Carton this way, or did he misquote it after viewing Furniss's design? Is there any way to ever know???
Unfortunately, I have absolutely no idea how to research something like this, and so, for now, this will simply have to remain a strange (and admittedly pretty funny) mystery...
Second Note: Artists Have Always Used References!
Let's look now at the second-to-last drawing in the series:

There's a certain quality to this one that's a bit different than a lot of the rest, namely in its particular use of that dark and smudgy shading - whereas most of the other illustrations utilizing that seemingly do so to convey energy and intensity and drama and motion, this one is very still and soft. Another noteworthy difference is that unlike any of the other illustrations in this entire series, this one bears an actual fully-written signature (in the lower-right) - all the others use initials!
So what is it that might make this one special? Well, take a look at this link!
This is pure speculation, but based on the uniqueness of this drawing in comparison to the others in the series and its similarities in composition and subject to this famed painting, Calling Out the Last Victims of the Terror at Saint Lazare Prison* on the 7-9 Thermidor 1794 by Charles Louis Müller, it seems possible to me that Furniss used that painting as inspiration and reference! * And yeah, if he did use it as reference, that means that the prison depicted in that drawing isn't even the Conciergerie but rather Saint-Lazare Prison.
Also, if that painting in and of itself feels familiar to you, that's probably because it's very commonly used as a cover for modern editions of A Tale of Two Cities, especially this Penguin Classics one! It all comes back around...
Sadly, that's it for Harry Furniss's illustrations. The next set will be much shorter and coming to you within the week, on Tuesday - and with it, we'll finally be back on schedule for this series. See you then!
& the standard endnote for all posts in this series:
This post is intended to act as the start of a forum on the given illustrator, so if anyone has anything to add - requests to see certain drawings in higher definition (since Tumblr compresses images), corrections to factual errors, sources for better-quality versions of the illustrations, further reading, fun facts, any questions, or just general commentary - simply do so on this post, be it in a comment/tags or the replies!💫
#whew this one took a lot#A Tale of Two Cities#AToTC#dickens#charles dickens#bookblr#litblr#literature#classic literature#victorian literature#vintage illustration#illustration#illustrators#Harry Furniss#1910s#goodbye harry furniss illustrations i was so excited to post thee#tallest and most unpromising of men... still so funny#I am gonna be making a miscellaneous post at some point to make up for the missed off-week#that'll be coming before Tuesday too (yeah busy week on this blog)#we'll see though I have multiple ideas...
4 notes
·
View notes
Note
hi, i was wondering how you get your gifs to be so high quality, and where how do you get your scenes? i’m still pretty new to giffing so i normally screen record my scenes, which dosent really work. i know there’s torrents i can use but i don’t know how they work (i’ve also heard that you can get copyrighted cuz they can see your IP address which i don’t want to happen) so if you could help that would be great :)
hey nonnie! thank you for your kind words! couple of things to keep in mind for hq gifs:
always use 1080p content or higher, i cannot stress this enough, it might be difficult to always get it but it's really worth the trouble!
while downloading files, keep an eye on the file size, anything below 1.5 GB is most likely not 1080p even if the website claims it is.
i'm really not the best person to ask about downloads 😅 for 911 i t*rrented all my eps, i understand your concerns tho! if you could get a vpn, that will protect your ip address from being tracked!
in case you were looking for alternative sources, this post has a list of accounts that upload tv show episodes to mega folders.
if the scenes you want are uploaded on youtube (this works well for popular content like marvel), you can use 4kvideodownloader to get them in the highest quality possible!
make sure your gifs are sized according to tumblr's limits: one gif in a row should be width 540 px, two gifs should be 268px width each and 3 gifs should be 180px width each. keep the size of your gifs under 10mb, the lower the size, the better!
make sure you use good coloring that is appropriate for your scene choices and not over saturated and stuff like that-it can add too much grain to your gifs. excessive coloring is bad, just go with something simple, especially if you're a beginner and be careful while coloring poc! i can't find the tutorial i've done, but the above link should help you too!
the right save settings are different depending on the gif, but i've found that adaptive/diffusion works best for me.
the right sharpening settings are important.! here's what i use.
i hope this helps, anon! feel free to message me if you have any more questions! ❤
13 notes
·
View notes
Text

For this gif tutorial I’m going to try to keep it as basic as possible, I may add a few tips for coloring at the end, but for the most part this is going to be how I make my basic gif. Also I’m not going to use my vapoursynth to process the video beforehand, just because I know not everyone uses it and it’s harder to learn. This is going to be just a downloaded mp4 video through the gif process. Don’t let the idea that this is a BASIC TUTORIAL fool you, I’m going to try to teach you a lot of things. It’s gonna get wordy, but i will try my hardest to keep the process easy. I’m just going to explain what things do instead of having you just copy + paste my method and not know what it means. okay? okay.
Before we start though, if you plan of giffing live stages you either need to accept the they will not be super crisp and clear OR learn how to use avisynth/vapoursynth to resize the videos without quality loss.
If you just want to gif music videos or variety shows then this should still give you HQ gifs.
Other notes:
try to ONLY use 1080p and up video if possible, maybe 720p if you’re really desperate, but anything under that... it’s not going to look good at all, so try to avoid using them.
The Photoshop I am using is PS 2020, so all my screenshots will be from that version and with my weird set up. But I’ve been using pretty much the same method since cc 2015 so other than the fact that some placements and names are tweaked, it’s the same. (If you can’t find something on your version shoot me an ask and I’ll try to help! And asks I get on this tutorial I’ll link HERE for future reference)
CUTTING VIDEO
To cut videos I’ll just use my quicktime player.
I use edit > trim to select the portion of the video I plan to gif and save that as it’s own new mov file.
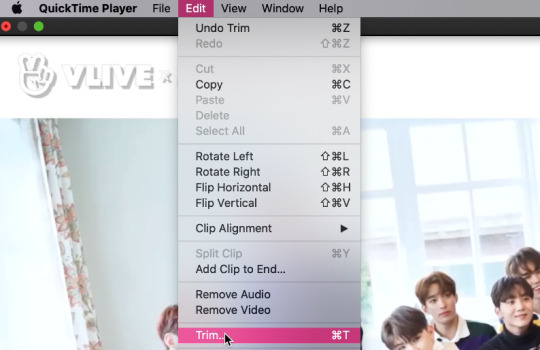
which pops up this tab

that you just slide until the part you want to gif is selected

then just save it as a new video and your done with part 1
ENTER PHOTOSHOP
Now what we’ll do is open our photoshop and import that clip into layers
FILE > IMPORT > VIDEO FRAMES TO LAYERS and select your video.
A small pop up will appear to show the clip you’re opening, you can trim it further here or just keep going by clicking okay
my setup is weird for drawing BUT you should have it looking remotely like this:
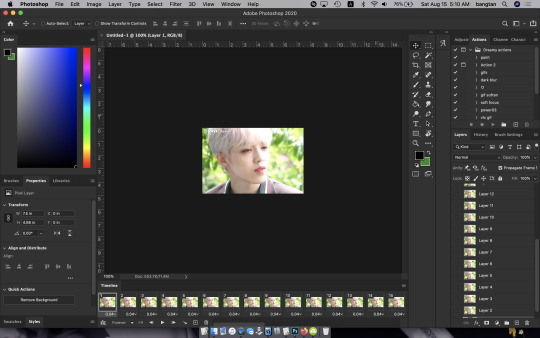
The things you will DEFINITELY need to see are TIMELINE, LAYERS, ADJUSTMENTS. If you don’t have these sections you can add them to your screen by clicking on the WINDOW tab at the very top menu bar and clicking on them

LAYERS - this is pretty self explanatory but each row is a layer in the gif. the more layers the bigger the gif will end up, the longer it plays. So bigger clips will have more layers and end up as larger gifs in the end.

TIMELINE - This is where you can edit the gifs timing (make it faster or slower)
We’ll be doing a bit of work with it so it’s important to know it well
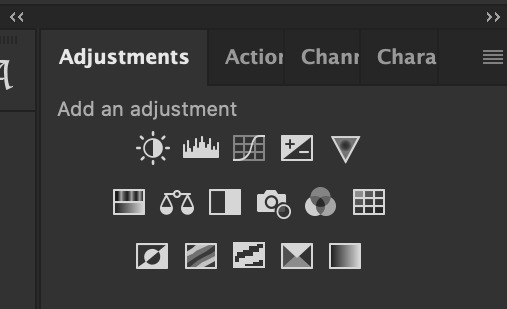
ADJUSTMENTS - Best friend and worst nightmare. this is where ALL the tedious recoloring is done. VERY rarely would you not use these. 99.9% of kpop things are filmed through a green or blue lense so you’ll want to fix that to not have ghost idols
So, Let’s make a gif
Step 1 - In the top right corner of your timeline is a set of lines, click there and then click SELECT ALL FRAMES

under each frame is a time stamp (this video’s is 0.04) this decides how fast each clip goes by, or how quickly the gif moves. Personally I prefer slower gifs, but I say anywhere between 0.04-0.06 is a decent speed.
Step 2 - with all the frames selected, click on the small down arrow next to any of the frames and change the speed to your liking. (I’m going to use .06)
Step 3 - in that same tab of lines we’ll now click CONVERT TO VIDEO TIMELINE, which will change our Timeline to look like this:

Step 4 - Back in our very TOP menu we’ll click SELECT > ALL LAYERS, then on the TOP menu click FILTER > CONVERT FOR SMART FILTERS (this might take your computer a minute since our File is still pretty large.) Now our Time line will look like this:

Step 5 - Sharpening
This one is VERY MUCH something you’re going to have to play with to get your settings to be how you like them. It’s also where I’d use topaz adjustments, BUT since I said we’re doing basic PS gif we’re just going to be using smart sharpening. SO:
in the TOP munu again, click FILTER > SHARPEN > SMART SHARPEN
A pop up window will appear and you can edit the settings to your liking. Mine:
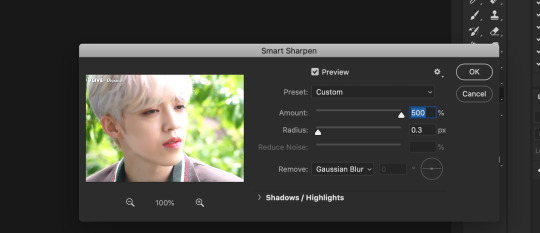
Step 6 - Resize your gif or crop it to tumblrs standards: big singal gifs have a 540px width || Two gifs use 268px || and three gifs use 177/178px
To do this we’ll use the crop tool and type in our dimensions in the menu bar:

and then crop to your liking. (this doesnt resize the gif it just crops to the correct ratio so we still have to shrink the gif)
Next, we’ll resize the gif to that size in the TOP menu click IMAGE > IMAGE SIZE a pop up menu will appear and you’ll type in your resize ratio and click enter.
Now technically thats a gif. it’s TECHNICALLY done. but mine is white washed and there are words on it that I dont want so onto the coloring and blurring.
First I’m going to show you how I blur text on gifs. because text is EVERYWHERE in kpop content and it’s hideous and I hate it. so lets kill it.
BLURRING LETTERING
First we’re going to add a new blank layer to our LAYER TAB by clicking the little box with the + inside at the bottom

Sometimes doing this can mess up the timeline’s selection but its SUPER easy to fix so lets do that.
So in our timeline we have these two bars on each side that select what part of the gif will play. this is also where you can readjust your gif if it has extra frames at the end, or it ends up being too large and you have to make the gif smaller to save it. Just click and drag the bars back to where our gif actually ends, and all is fixed!

Now on our new layer we’re gonna take a paint brush (one of the ones with a lot of fade NOT the solid circle ) and paint over where the words are like so:

MAKE SURE ITS ON OUR BLANK LAYER AND NOT THE GIF LAYER!!
I know it looks stupid but trust me okay.
Now in your LAYER tab we’re going to duplicate our gif layer by right clicking on it and selecting duplicate.
Then we’re going to drag the new gif layer so that it’s above the paint layer in our LAYER tab :
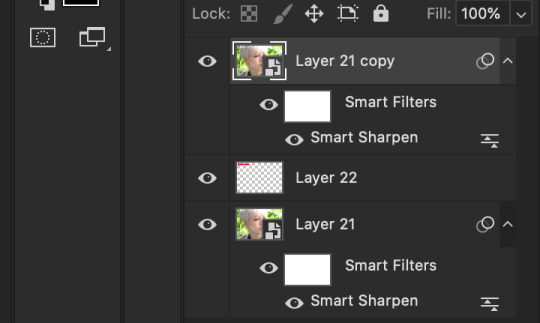
Now, right click on the top gif layer and select CREATE CLIPPING MASK. it should put a little down arrow to the left of the picture, toward the paint layer. This means the gif is ONLY visible where that paint is now.
So we’re going to click on FILTER in the TOP menu again (while we still have that top gif selected!) and Go to BLUR > GAUSSIAN BLUR. a pop up menu will appear and you can just drag the radius until the text is as blurry as you want it to be. (also IF you missed part of the text, you can just go add more paint to your paint layer and it will blur wherever you paint!)
so now my gif is like so:
So now we’ll color him, because he’s pretty washed out.
ADJUSTMENTS
This is where I’m going to be the least specific about what I do and more about what tools do, so that you can learn how to color things the way you like them!
The Adjustment tab on Photoshop has 16 options but I’m really only going to talk about 6 of them. We’ll do it in order though. All the actual adjustment tools will open in the PROPERTIES tab
Brightness / Contrast - Pretty self explanatory, but definitely should be toward the end of your coloring, as if can effect the quality a lot. Small adjustments do A LOT so don’t go crazy,
Levels - Levels is all about the balance of how dar or light your gifs will be if you adjust in the RGB layer it will adjust for the entire image, but if you change the selection to RED/GREEN/BLUE it will adjust just those colors hues. Also there are three small droppers to the left of the graph. using those you can select which part of the gif you want the image to recognize as the lightest/darkest part of the gif, and the tool will adjust the gifs coloring to that point. ( play with those droppers! magic happens i swear!)
Curves - Kind of like levels but instead of how light or dark the entire image is it works more on contrast. REALLY play with the curves options, i’m sure most things you can do with other tools can also just be done in curves if you’re patient enough to learn
Vibrance / Saturation - Vibrance will make duller parts of an image higher contract and brighter and saturation will make everything a more neon shade. or in reverse lowering vibrance will dull out the things that were already neutral and saturation will dull out the more vibrant parts of the image (usually reds)
Color Balance - Good for fixing tones. so if a live stage is SUPER BLUE!!!!! you can readjust and calm down the blues to dull them out or get rid of them completely. Again play with this its insane what it can do
Selective Color - adjusts the different colors in your image without touching the other colors. if you wanna touch the reds, make them pinker but not change the blues and greens, you do it here
If you want MORE drawn out explanations of what each of the 16 adjustment layers do here and here are actual articles you can look at. But it’s all about practice. playing with all the adjustments alone and together. Finding out what you like to do!
Now when you gif is ALLLLL colored and you’re ready to save it we do FILE > EXPORT > SAVE FOR THE WEB and a whole new window of options pops up. I’ll give you two examples of how to play with those options and then we’re done!

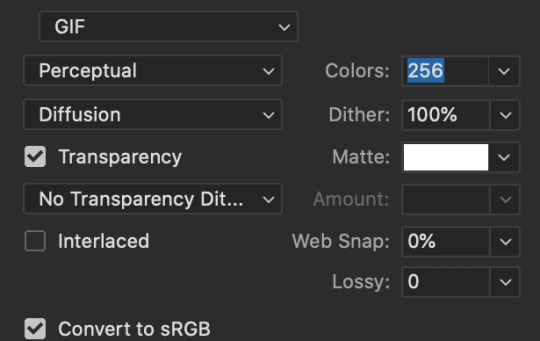
keep in MIND tumblr’s gif limit is 10MB which is pretty huge now, but still watch your gif size!!!!
AND SAVE your done!

I hope this was helpful! Let me know if you have any questions,again I’ll have an ask tag for it and it’ll get linked HERE if people end up needing help!
Happy giffing!!!
#drm.pst#drm.txt#Gif tutorial#this is LONG okay please be aware of that before you open it#als i did NOT reread it because it took me 3 hours to type out so it's probably a grammatic nightmare#BUT i'm JUST under a new milestone so i'm gifting this early because i had the patience to do it today lmao
106 notes
·
View notes
Text
Ai yah, I really have to respond to this post again, huh?
Well, for starters, I apologize for a mistake I made in my original post. In the OP, I insinuated that the Princess Zeldas we see in the series could have possibly had a role in the atrocities committed by the royal family. This is incorrect, and it was poor wording on my part. I should have clarified my intentions when writing that particular passage; however, I felt it was unimportant, given that the point wasn’t solely about Princess Zelda, but how the addition of the Goddess Hylia and the Demon King Demise not only invalidates Ganondorf’s character up to that point, but adds much greater weight to the terrible actions committed by the royal family, especially towards the Sheikah.
Given that tumblr user lorelylantana is the third person to make a reply by discussing the reincarnation cycle, rather than the actual point of my post, perhaps I should have proofread and double checked my post before sending it out into the world to cause problems on purpose.
With that said, after I read lorelylantana’s response, I felt it necessary to make a proper reply of my own. It’s going to be a rather lengthy reply, as I have many things to say and many images to post.
However, I’m going to do all that I can to avoid discussing fanon or fan theories. I don’t mind them, but adding fanon wasn’t the point of my original post, and it shouldn’t have been the focus of the responses I received. I want to stay as close to the canon Nintendo laid out as possible. Thusly, my sources will strictly be drawn from the games, game manuals, Creating a Champion, Hyrule Historia, and Hyrule Encyclopedia. Despite the latter two being dubiously canon, they were approved by Nintendo, so they’re worth mentioning.
So, without further delay, let us begin.
- “The original post seems to be based on the idea that Zelda and the royal family of Hyrule are synonymous, which is questionable for reasons I’ll get into later.”
For all intents and purposes, yes. Zelda and the royal family are synonymous, as she is the face of the royal family in almost every Zelda game featuring her. Even if she isn’t the ruler of Hyrule in that particular moment, she is our figurehead for the monarchy, by all means.
- “The games don’t hand wave the actions of Hyrule’s royal family, they just don’t go out of their way to hold a young girl personally responsible for the actions of kings […]”
While the actions of the royal family are briefly acknowledged, as is the case with the Shadow Temple and the Arbiter’s Grounds, the monarchy has never had to answer for their actions. Even in the case of the Sheikah’s massive exile 10,000 years ago, the royal family never answers for this, nor are they ever portrayed being in the wrong. In fact, the event in question is only mentioned by a single member of the Sheikah in Breath of the Wild, Cado.

Image credit goes to YouTube user Macintyre.
The royal family’s actions are never directly described as “these were horrible things that happened.” Instead, it’s simply, “yeah, it happened.” There is no acknowledgement that the Yiga was created by the royal family’s own hands, nor is there any emphasis placed on the impact any of these acts have.
For example, the exile of the Sheikah wasn’t even the first instance of the royal family of Hyrule mass-exiling a group of people and displacing them from their original homes.
After the events of Ocarina of Time, Ganondorf is captured and executed for his crimes leading up to the events of the game and presumably the events of the Adult Timeline, given Young Link’s testimony. (I’ll get into why the King of Hyrule believes Link over Zelda later.) After Ganondorf was executed, the Gerudo were forced out of Gerudo Valley and banished from the Haunted Wasteland. Even during the events of Twilight Princess, the Gerudo Desert is completely abandoned. Once again, there is no discussion concerning the royal family’s actions, with the narrative instead being that the Gerudo, some of whom were actively against Ganondorf’s actions and many of whom were hypnotized during the events of OoT, are entirely at fault and have to atone for their sin of… having Ganondorf for a leader, I suppose.

Source: Creating a Champion, p. 405
Source: Hyrule Encyclopedia, p. 46
The royal family gets to punish an entire people for the actions of one man. Rather than the act being portrayed as negative or even discussed, it’s hardly even mentioned.
While I’m aware Encyclopedia’s canonicity is dubious at best, its material was still approved for publication by Nintendo. Thusly, I feel it worthy to discuss.
To summate, the royal family did bad things, and very select few acknowledge it.
Next point.
- “I think that the Zelda/Hylia = good Ganon = bad situation serves a narrative purpose that justifies the black and white nature of the games because it highlights the shades of gray in between installments…”
The Legend of Zelda is almost thirty-five years old. This series should have long evolved beyond the black-and-white-morality narrative, especially when the side we’re supposed to sympathize with literally used the Sheikah to commit war crimes. You don’t have to have stark white and pitch black in order to see shades of gray.
- “… And trying to assign Zelda a dark side is kind of missing the point, especially when no one seems to question Link’s morality even though he’s constantly stealing people’s stuff.”
Examples of Consequences to Link Stealing People’s Stuff
1. In Twilight Princess, stealing from Trill will result in the bird branding you a thief and pecking you every time you come near him, which will only cease when you finally pay up.
2. In Link’s Awakening, stealing from the old man’s shop will result in instant death the next time you enter his shop. If you steal, your name is changed to THIEF for the rest of the game.

Furthermore, Link is controlled by the player; thusly, his actions have no consequence to the story or Link’s character. Zelda, on the other hand, is an active participant in the story, whose actions and whose family’s actions weigh heavily on the games. That’s not to say Zelda is ever evil. However, as much as she is a victim of her own family’s history, she still has just as much power to change it.
- “If the games wanted to gloss over the sins committed by the royal family[,] they wouldn’t have designed entire dungeons around them.”
I reiterate: the sins of the royal family were mentioned once, and then immediately dropped shortly thereafter. It’s not there for you to dwell upon, merely window dressing as if to say, “Yeah, that happened.”
- “I believe The Legend of Zelda series is a critique of the Divine Right of Kings”
Until the events of Skyward Sword, the Hylian Royal Family wasn’t a divine lineage. A thirty-five-year-old series can’t be a critique of a concept that it barely even acknowledges. The only emphasis placed on the “goddess blood” part of the royal family is in Breath of the Wild, in relation to Zelda having to unlock her sealing powers. Despite the massive repercussions the revelation of the royal family’s lineage tying back to divinity should have, it’s barely even mentioned,let alone discussed.
As a side note, the divine right of kings specifically denotes that the monarch is chosen by God to rule. In contrast, the Hylian Royal Family continues to rule by, presumably, claiming lineage to the Goddess Hylia, which is closer to traditional practice in feudal Japan.
- “If the Divine Right of Queens is indeed present, does that justify a hereditary monarchy? As far as the Legend of Zelda is concerned[,] the answer is no.”
The Legend of Zelda series never questions the validity of the royal family’s rule.
- “Isn’t it funny that the Kingdom of Hyrule seems to be perpetually stuck in the dark ages?”
Ocarina of Time has neon lights, jukeboxes, and canned goods. The lakeside doctor’s chemistry is advanced enough that he is able to synthesize eyedrops. Given the newspaper articles strewn about shops, Hyrule also has pictoboxes in OoT.
By Wind Waker, pictoboxes have evolved to print in color. In Phantom Hourglass, Linebeck’s ship is steam-powered.
In Twilight Princess, pictoboxes now print higher quality images. In addition, with the introduction of Malo Mart’s Castle Town branch, TP is confirmed to have fully functional electrical lighting in some places. Cannons are so safe, you can get launched out of one for fun. Pyrotechnics have grown advanced enough that explosives can function underwater, and Death Mountain has become a functioning, refined mining facility stable enough for Hylians to safely walk in. Also, Auru has a bazooka.
SPIRIT TRACKS HAS TRAINS. THEIR AESTHETIC DIRECTLY REFLECTS THE INDUSTRIAL REVOLUTION.
Hyrule is hardly stuck in the dark ages. It’s high fantasy.
Next point.
“For starters, I want to establish that I don’t agree with the assumption that what the Hyrulean Royal Family does = Zelda/Hylia would do. I don’t think it’s a mistake that almost every text in the OP explicitly mentions that it was a King that committed those acts, not Zelda herself.”
Once again, that was an error on my part. It wasn’t my intention to imply Zelda had any part in such actions. However, Zelda learns how to rule from her father, or her mother, or whomever holds the throne in that particular moment. These acts are never questioned in canon beyond “Yeah, that happened,” and the most conflict we have is the issues between Zelda and her father in Breath of the Wild boiling down to how to confront the Calamity—science vs. sealing magic— rather than anything else.
It’s a personal issue, and Rhoam treats Zelda terribly, essentially alienating himself from his own daughter and treating her as little more than a pawn. I agree that it’s absolutely terrible. However, that’s merely a personal issue. She’s complicit in how Rhoam addresses the Sheikah, possibly even fully aware of the anti-aging rune Purah was developing to force retired soldiers into battle against the Calamity, and from what we’ve seen in Age of Calamity, she doesn’t have an understanding of the Yiga Clan other than the snide remark Urbosa gives:

Image credit goes to YouTube user BeardBear.
It’s up to Zelda to develop a deeper understanding of her country’s history; not to take personal responsibility, but to understand where those who are suffering are coming from.
That said, acting with the Hylians’ best interests at heart is exactly something Hylia would do.
In the prologue to Skyward Sword, the Demon King and his army attack the Hylians, slaying many and throwing the world into despair. Thus, the Goddess Hylia saves the Hylians by sending a chunk of land up into the heavens, sparing them from the war to follow while she gathers every other race to fight alongside her.

So… How come Hylia only saved the Hylians?
I understand many were wiped out by demons, but if Hylia was fully prepared to spare people from violence, why not also send small numbers of every other race? Why only save the Hylians, her chosen people, while essentially dragging everyone else into battle with her? Furthermore, when Hylia’s immortal body suffered grave injuries, she opted to take advantage of this by choosing to be reborn as a person. Not only is it explicitly stated that Hylia reincarnated in order to utilize the Triforce’s power, as she could not do so as divinity, but she knowingly chose to be reborn as someone who would become close with her chosen hero, in order to influence him to follow her plan without hesitation.
Hylia used Link.
That much is certain, and it’s laid out clearly by Zelda shortly before she takes Hyrule’s longest beauty nap.

It must be noted that while Zelda states she is Hylia reborn, and has regained Hylia’s memories by this point, she still sees herself as a separate entity from Hylia. While she herself is immensely guilty and apologizing over and over for what she’d done in her previous life, we have no way of knowing if Hylia herself would react the same way.
In fact, according to a fan-translation by ZeldaUniverse user Yamikawa, Demise goes as far as to describe Hylia as “brave and so-prideful,” hinting that even a being who loved her chosen people so much to save them still saw them as beneath her, if being reborn as human is seen as such a drastic extreme contradictory to her supposed character. Now, this is merely reflection on the inner workings of the Demon King, so his word can’t be taken as gospel. But, like all things, I find it interesting.
From what I can gather, however, Hylia certainly cared more about the Hylians than any other being in the land of Hylia, not dissimilarly to the royal family.
- “I also don’t think that every princess Zelda is a Princess of Destiny or Representative of Hylia, I think that she reincarnates just about as often as Link and Ganon(dorf) do, because the logistics don’t really work out otherwise. This leaves hundreds, if not thousands of years where Zelda/Hylia isn’t on the throne.”
This is merely speculation. Moving on.
- “There’s a notable trend of the King of Hyrule getting in the way of Zelda’s attempts to save the kingdom. First[,] he doesn’t take Zelda seriously [in] Ocarina of Time, forcing her to rely on Link […] I don’t know why the King of Hyrule was willing to listen to a random boy claiming to have been from the future over his own daughter but whatever I guess.”
The King of Hyrule believed Young Link because he came back to the Child Timeline with the Triforce of Courage. Up to that point, the whole Triforce was supposed to be safely locked away in the Sacred Realm, which was supposed to be completely inaccessible without the spiritual stones and the ocarina of time, neither of which Link had. I’d listen to the kid’s story too if he came back with a God Dorito on the back of his hand.

- “And then again in Breath of the Wild when Rhoam bans Zelda from ancient tech research despite the fact that he has absolutely no reason to believe his pray the incompetence away method is the right one.”
The tapestry showcasing the events from 10,000 years ago depicts a princess possessing the blood of the goddess using her sealing magic in order to seal away Calamity Ganon. Link can swing the Master Sword at Ganon or whack him with ancient arrows or light arrows all he wants. Without the ability to seal away the darkness, as shown at the end of Ocarina of Time, all of this preparation and planning would have been for naught. That is why Rhoam is so harsh on Zelda. That’s why so much emphasis is placed on unlocking her power. Without it, defeating Ganon would be impossible.
On that note, Rhoam also had no idea what he was doing. Zelda’s mother was the one with the sealing magic, not him. She was supposed to be the one to train Zelda, but she passed away before she got the chance to even start. He puts so much emphasis on prayer rather than ancient technology because he genuinely doesn’t know what else to do.
I can’t believe this post forced me to defend Rhoam of all people I’m gonna have a stroke—
- “Also, this is purely speculation, but [I’m] pretty sure there’s an implication that King Daphnes Nohansen caused the flooding of Hyrule in Wind Waker […] This sounds like a wish on the Triforce that backfired[,] but I digress.”
Daphnes couldn’t have made a wish on the Triforce before Wind Waker because, when the Hero of Time left the Adult Timeline, that timeline’s Triforce of Courage shattered into eight pieces and scattered throughout the land—er, ocean. Even if he had Wisdom on him, Ganondorf still possessed the Triforce of Power when he was sealed away, and he wasn’t going to let go of it when he broke free.

Besides, if Daphnes did wish on the whole Triforce, it would have disappeared. There would have been no Wind Waker.
- “When she saves Hyrule in spite of interference…”
I’m not even going to finish the quote because the entire paragraph is too much for me to unpack. I’m assuming they’re saying that Zelda is never the one truly in power, and the royal family takes advantage of one Zelda’s good deeds to get brownie points.
However, concerning the first line…
In Ocarina of Time, Zelda going behind her dad’s back to try to “save Hyrule” leads Ganondorf straight to the Sacred Realm. Even though a time paradox leads to everything turning out okay in the end, the bleak future was created because Zelda wanted to play hero and pulled Link along with her. Even if Ganondorf managed to wrench the spiritual stones away from the Zora and Gorons, he wouldn’t have been able to access the Sacred Realm if Zelda didn’t send Link there to pull out the Master Sword, which Ganondorf would have never been able to touch. By all means, Ocarina of Timehappened because a little girl was in over her head and tried to take matters into her own hands when her dad didn’t believe her.
Aside from Breath of the Wild, there’s no other “interference” from the royal family that Zelda has to face.
- “Zelda is the representation of a deity, so it makes sense that people would worship her to some extent, and having a goddess on the throne [probably] blesses the land. So[,] while the kings of Hyrule have a tendency to screw things over, [it makes sense] for Hyrule to be a monarchy because Zelda’s power as the goddess incarnate is needed to defend against Ganon and other threats, [r]ight?”
I acknowledge the author is attempting to portray the royal family’s possible justification for their rule. However, until I reached the succeeding passage, I believed it was the author making this justification, given how the entire paragraph preceding this was pure speculation. Once again, this passage is speculative, as nobody in Hyrule has ever explicitly given any notable opinion concerning the royal family. Why try to justify your rule when nobody’s criticizing it?
Since the author brings up Zelda being a representation of Hylia, however, it does bring to mind a particular problem I have with the royal family suddenly being goddess-blood.
It completely recontextualizes the relationship between the royal family and the Sheikah.
According to Creating a Champion, the Sheikah have a deep devotion to the Goddess Hylia. Since the royal family is descended from the goddess reborn, the Sheikah thusly are deeply devoted to the goddess Hylia.
Source: Creating a Champion, p. 372
Now, the royal government using a minority group of people to do your dirty work is already scummy enough when you’re just a normal royal. In this case, however, the Sheikah are so devoted to their goddess that they will do anything for you. Whether it’s because certain monarchs are a “representation of a deity” remains to be seen, but the point is that they’ll do anything for you.
And the royal family takes complete advantage of a group of people unconditionally loyal to them, bidding them to do unspeakable things in the name of their religion, which for all intents and purposes is the royal family.
That’s absolutely deplorable, and it’s a wonder nobody’s brought attention to it yet, whether in-canon or in-fandom. What’s more, given how Impa is always Zelda’s attendant, this relationship is never questioned or criticized, whether it be by the Sheikah or Zelda herself.
And that’s terrifying.
- “The reason Ganon is always an antagonist is because he’s the vessel for the curse of Demise.”
Demise was introduced in Skyward Sword. Demise is the root of all evil, the creator of monsters and conjuror of demons. He is pure evil in every sense from the word, the Zelda series’ version of Satan. Naturally, he’s as simple as you can get in terms of character. Barebones characterization, providing only just enough to tell the player exactly what they need to know:
He’s evil, he’s powerful, and he wants the Triforce. You have to stop him.
Ganondorf existed before Demise. Ganon had over twenty years of development before Demise brought his progress to a permanent flatline.
Who was Ganon before Demise?
Allow me to remind you.
In The Legend of Zelda, first released on February 21st, 1986, Ganon is simply described as “the Prince of Darkness,” and steals the Triforce of Power when he invades Hyrule. After the Triforce of Wisdom is shattered, he kidnaps Zelda.
He’s evil, he’s powerful, and he wants the Triforce. You have to stop him.
Although Ganon doesn’t physically appear in Zelda II: The Adventure of Link, released in 1987, his presence is still felt as his minions pursue Link in order to revive the Prince of Darkness. In fact, the game over screen is the successful revival of Ganon.

Now, given that these are the first two games in the series, it’s perfectly alright for Ganon to be as barebones as he was. After all, many villains at the time were the same way, with the most notable of Ganon’s counterparts being Bowser from the Super Mario Bros. franchise.
However, with innovation of technology comes innovation of narrative, and it’s with the release of A Link to the Past in 1993 on the SNES that we begin to see Ganon develop as a character. In the prologue to ALttP, Ganon is revealed to have once been human; he is given the name Mandrag Ganon—or Ganondorf Dragmire, as we now know him—and he was once the leader of a band of thieves who sieged the Sacred Realm and took control of the Triforce after murdering his own followers.


Source: A Link to the Past SNES game manual
Ganon is still irrevocably evil, but in this case, we begin to learn more about him. We begin to see a character starting to form. One who isn’t just mindlessly evil, but who has the charm and wit to infiltrate Hyrule Castle and earn the King of Hyrule’s trust in the guise of Agahnim. Ganon was also a very capable leader, having successfully led his band of thieves straight to the Triforce. Even after wishing upon the Triforce and corrupting the Sacred Realm, Ganon’s power attracted followers in the form of greedy, power-seeking people. He’s powerful not by brute force alone, but through his cunning use of intellect.
Ocarina of Time served to further develop Ganon in little ways. For example, this is the first game wherein, for the majority of the game, Ganon is seen and referred to by his human form: Ganondorf. Ganondorf is shown to be powerful enough and stealthy enough to infiltrate the homes of the Zora, the Gorons, and the Kokiri, and send dangerous hazards their way in an effort to seize the Spiritual Stones. At the same time, he is first seen at an audience with the King of Hyrule, as if there for diplomatic reasons.
Although Zelda sees Ganondorf as evil because of her prophetic dream, the King of Hyrule doesn’t believe her. Because of this, we can infer that Ganondorf has enough charm and charisma to, if not win over the King of Hyrule, not be seen as suspicious despite the horrible acts he’d committed, not just in the past, but at that very moment. He’s also shown to be highly cultured, shown at the end of Link’s ascent up Ganon’s Tower. Not only is Ganondorf playing his own theme, but he’s doing so on the pipe organ, which is notoriously one of, if not the most difficult musical instrument to master.
Once Ganondorf seizes the Triforce of Power, the kingdom of Hyrule is subjected to seven long years of his rule. During this time, normal people such as Ingo succumb to their greed and follow Ganondorf’s influence in pursuit of power and riches. Although Malon is naïve enough to believe Ingo was somehow under Ganondorf’s control, it’s clear to players that he was completely in control of his actions, and that Ganondorf’s rule brings out the worst in seemingly average people.
Image credit goes to YouTube user ZorZelda.
Even a Hylian knight can fall under this influence, with it highly inferred that the knight who once guarded a room of pots for Link to smash is now a twisted poe collector, the man even stating that he likes it better this way.
In Wind Waker, we finally see a more introspective side to Ganondorf. While he’s just as ruthless and fully ready to murder a child in the name of accomplishing his goal, he reveals the reason that started him on his path of darkness:
His people were suffering, and he wanted for his people what Hyrule had. He believed that taking Hyrule and taking the Triforce meant that his people could finally live freely, away from the harsh desert.
Now, I’ve seen this challenged time and time again. Was Ganondorf lying to distract or manipulate Link? Was he telling the truth? Is this what Ganondorf has convinced himself to believe, after so much time sealed away and in isolation? We will never know, and that’s part of what makes the game so interesting. Ganondorf’s portrayal is a large part of why so many people love Wind Waker, and it’s not hard to see why.
Perhaps the darkest the Zelda series has ever gone in terms of the Triforce’s power was in Twilight Princess. After freeing Lanayru, the Light Spirit warns Link of the dark power he seeks, the Fused Shadow. In order to do this, she explains the history of the Triforce, and the bloodshed brought by its allure to the darkness in the hearts of men. Before the construction of the Temple of Time, many battles were fought, and one of them was the “Interloper War” that inevitably resulted in the creation of, not only the Light Spirits, but the Twili and the Twilight Realm.

It’s important to note that Lanayru’s cautionary tale highlights that Link, the hero of the story, could succumb to the allure of the Triforce and dark magic just as easily as any other person. In this particular case, anyone could have fallen down the same path as Ganondorf. If anything, this tale is one of the most important bits of lore to take into consideration when discussing the series.
Anyone could have been in Ganondorf’s shoes. It could have happened to anyone.
Then, in one fell swoop, Skyward Sword ruined it.
In a single game, every bit of progress on Ganondorf is lost. Once again, we’re dragged down to the baseline characterization from the original game.
He’s evil, he’s powerful, and he wants the Triforce. You have to stop him.
Suddenly, everything the previous games had built up no longer matters. There’s no longer a need to question whether what Ganondorf did was solely out of greed, but also out of what he felt was necessity. There’s no need to wonder if Ganondorf was once a rational man, who succumbed to the irresistible pull of the Triforce like so many before him.
Ganondorf is, purely and simply, the reincarnation of Satan, so there’s no need to go any deeper than that.
And that’s why I hate this “vessel of Demise” thing. It completely undermines everything Ganondorf once was and reduces him to a single, cardboard cutout of a villain.
Moving on, before I get sad.
- “This curse is specifically tied to Hylia’s bloodline and the Link’s soul, which is pretty specific…”
Demise’s curse is essentially dooming the earth with a never-ending rebirth of his hatred; his malice, if you would. The wording of his curse is specifically “people like you,” which could mean that it isn’t Link and Zelda’s exact souls that are tied to his hatred. Rather, people possessing the blood of the goddess and a heroic, courageous soul are doomed to deal with this curse.
However, my thoughts on this matter are pure speculation.
Also, Demise specifically targets his curse at people like Link and Zelda because they were the ones to kill him in the first place. That much is obvious.
- “… [So] why do the clashes with Ganon always throw the fate of Hyrule into disarray? Because Zelda’s bloodline runs the country.”
Ganon would attack Hyrule even without Zelda’s family in charge. His pursuit of power and domination of the Triforce/Hyrule is therefore closely tied with the fate of Hyrule. Goddess blood on the throne has nothing to do with it.
- “If Zelda came from a small town the curse would probably manifest in peril for that one region which isn’t great but it’s better than an apocalypse.”
Firstly, this is a run-on sentence. Secondly, I reiterate: Ganon would attack Hyrule as a whole, regardless if Zelda’s bloodline was on the throne. It wouldn’t matter if Zelda’s whole family suddenly moved to the countryside. When Ganon inevitably comes back, he’s still gonna go straight for the Triforce or to conquer all of Hyrule. Goddess blood isn’t even part of the equation for Ganon. And if goddess blood isn’t there to stop him, then that’s even better.
Alright, so I’m not even going to bother gratifying the last two paragraphs of the response with an answer, because it’s all rambling that has nothing to do with the original argument. Relinquishing the throne would do nothing to right any wrongs dealt to the many people who were hurt, and evil doesn’t care about a single princess with goddess blood or a boy with a pointy stick.
In conclusion, the addition of Hylia made it so that the royal family’s power dynamic with the Sheikah is even more critically imbalanced than it originally was, making the exile of the Sheikah 10,000 years ago even more heinous than it originally was. Yet, because Hylia is portrayed as wholly good and incapable of doing wrong, despite in-game evidence to the contrary, the royal family, and Zelda by extension, will never be criticized for any wrongdoing. In fact, doing so may well be heresy, if the responses to my original post are anything to go by.
By comparison, the addition of Demise diminishes Ganondorf’s character, rendering him down from the makings of a complex, human character—where anyone could have easily been in his place and had the same greed and ambition for power—into simply the reincarnation of the literal devil, where of course he’s evil, and you don’t have to do any digging beneath the surface. Ganondorf is the reincarnation of Demise, or his hate, or his vessel, so he’s pure evil and nothing more.
And that’s the greatest disservice Nintendo has ever dealt to The Legend of Zelda.
#legend of zelda#ganondorf#princess zelda#breath of the wild#botw#loz#tloz#ocarina of time#twilight princess#zelda#link to the past#alttp#wind waker#ganon#the legend of zelda#hylia#goddess hylia#demise
46 notes
·
View notes
Text
detailed giffing + basic coloring tutorial for beginners
so a lot of gif/coloring tutorials are pretty outdated or not that detailed & i wanted to put my own out there! in this:
how to get the screencaps for your gifs
how to make a general gif
basic coloring (no psds here, it just gives you a basic idea for making colors pop and look nice. you can look up how to use psds, but i prefer making my own for every gif as it’s much more personal, gratifying, and creative. there’s nothing wrong with using psds as long as you don’t claim them as your own, it’s just not my personal thing)
how to save a gif
we’ll be going from this:
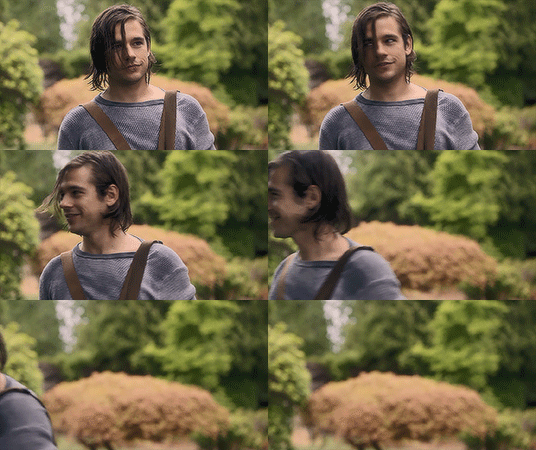
to this
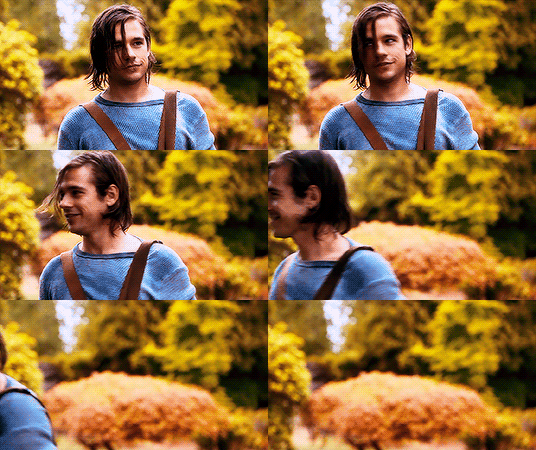
what you need:
photoshop (cc 2019 is what i’m using, but this works with any version of photoshop really as long as you download a version with the timeline feature) i won’t add download links here since i don’t want this deleted, but you can look some up on tumblr or use the pirate bay (current url is pirateproxy.blue as of 4/29/2020) & follow the instructions there.
for windows: potplayer/kmplayer (both use literally the exact same instructions) this tutorial uses potplayer but kmplayer uses like literally the same instructions, it just doesnt work right on my computer
for mac: mplayer. this tutorial does NOT cover this so find a tutorial on tumblr on how to take screencaps with mplayer & then skip to the “how to make a general gif” section. though, again, i’m on a pc so i have no idea if this is entirely accurate for mac.
if you’re downloading from youtube: clipconverter
if you’re Definitely Legaly torrenting: utorrent + the pirate bay (again, current url is pirateproxy.blue as of 4/29/2020) or another torrent site + you should really consider getting a VPN when torrenting (i use privateinternetaccess but you can find one that suits you)
note: download an adblock of some kind, disable automatic downloads on your computer, & download an antivirus program if you want because some sites are sketchier than others! this is ESPECIALLY crucial on sites like piratebay. keep your computer safe babes.
1. screencapping
there’s several ways to get screencaps on photoshop, but this is the easiest imo and i’ve never done the whole convert video frames to layers thing. like i said, you’ll need potplayer or kmplayer. i’m using potplayer. important note: don’t accidentally download viruses here! read each screen carefully & make sure you’re not hitting accept to download any secondary programs.
1. download your .mp4/.mkv. you can go to youtube & find a clip/scene/whatever and use clipconverter to download it. just make sure you download it at 720 (or higher) as anything lower than that will give you a poor quality gif. you can also download using somewhere like the pirate bay, but for this you need utorrent & i would HIGHLY recommend using a vpn if you live in a country where torrenting copyrighted content is illegal, as your internet provider may flag your ip address if you don’t & you torrent too often.
2. download potplayer/kmplayer & get it set up
3. create a screencaps folder. i always put mine on my desktop. in your screencaps folder, make a folder for however many gifs you want in your set. i just have one for mine so:
4. open up your .mp4/.mkv
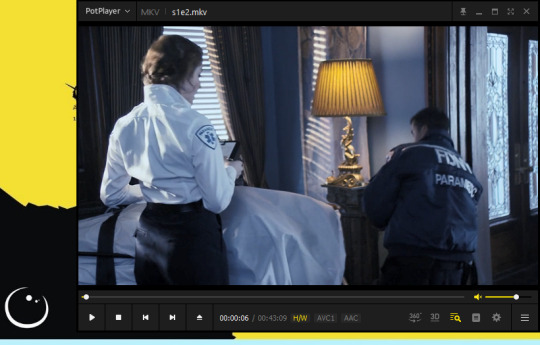
5. hit ctrl + g to bring up the screen capture pop-up & set your settings to these. click the button w/the three dots next to the storage option & select the folder you created for your first gif
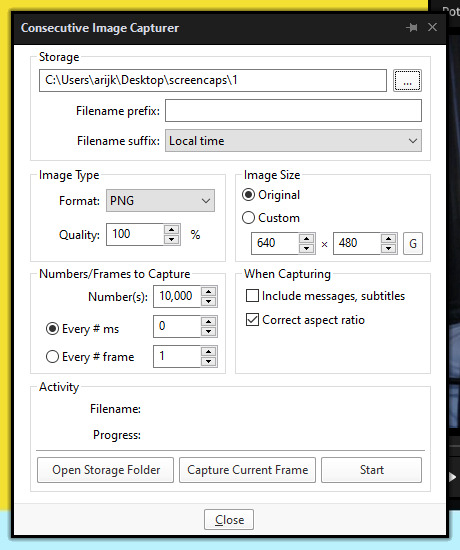
6. navigate to the scene you want to gif. when you’re there, pause it and hit the start button on the consecutive image capture screen, then play the video. how many screencaps you need depends on the size of your gif. for larger gifs (so like 540px wide gifs), you’re probably going to want to keep it below 30 frames. for smaller gifs (268px wide or less) you can maybe stretch it to 60, depending on how much coloring you add. you can always delete screencaps later though in photoshop, so don’t worry about it too much. for this gif, i only had 17 frames because the scene was really short lmao
7. go to your screencap folder you made & delete any unnecessary frames. it’ll look like this:
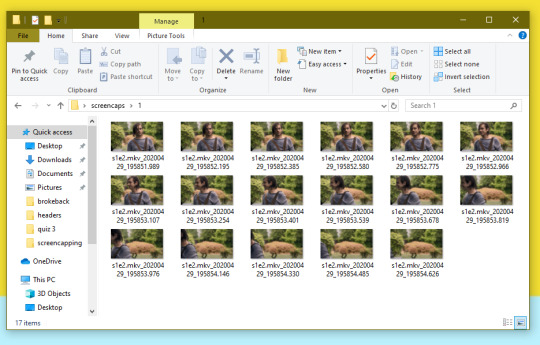
8. repeat the process for any other gifs, making new folders in your “screencaps” folder, numbered for however many gifs you’re making. make sure to change the folder you’re loading the images into on the image capture pop up though so they don’t all go into folder 1.
2. making a simple gif (+sharpening)
1. first, you need to load your screencaps. when you open up photoshop, go to file > scripts > load files into stack
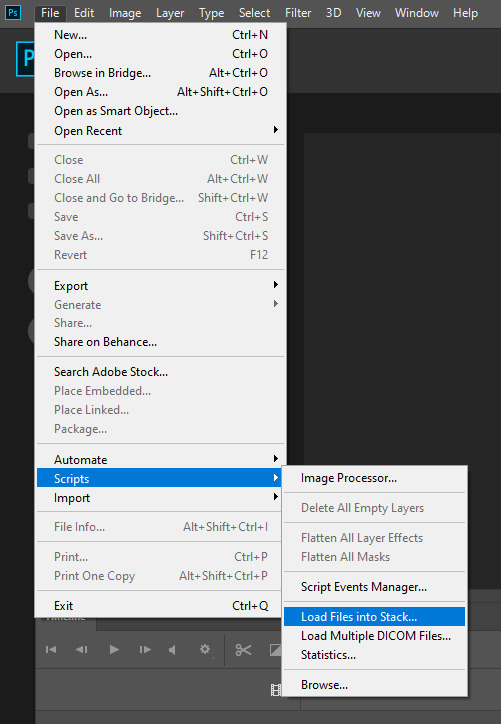
2. when the window pops up, switch the “file” option to “folder”
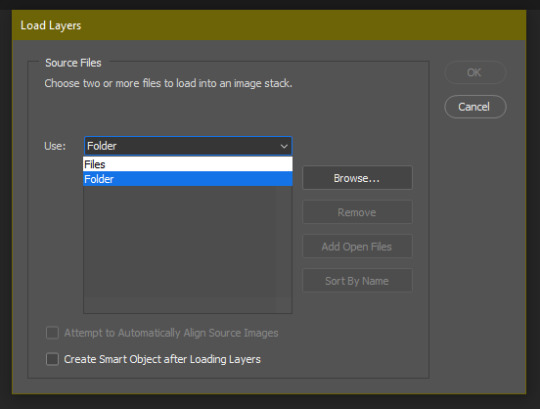
3. click browse and find your screencap folder for your first gif (in my case, desktop > screencaps > 1) once it’s all loaded, click “OK”
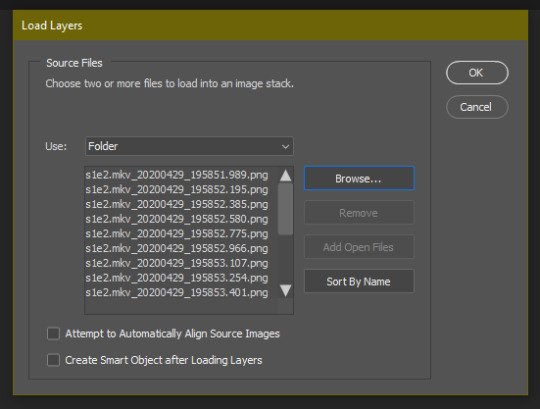
4. it’ll take a minute to load all your screencaps into photoshop. when they do, go to the upper bar on photoshop > windows > timeline
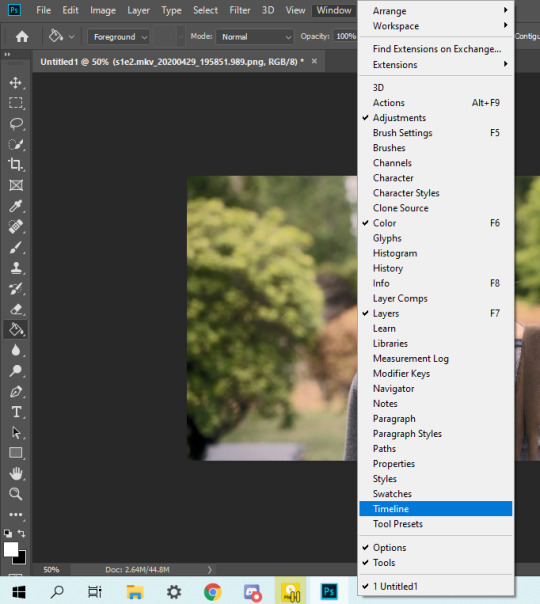
5. when the timeline bar shows up, click “create frame animation”

6. hit this button and click “make frames from layers”

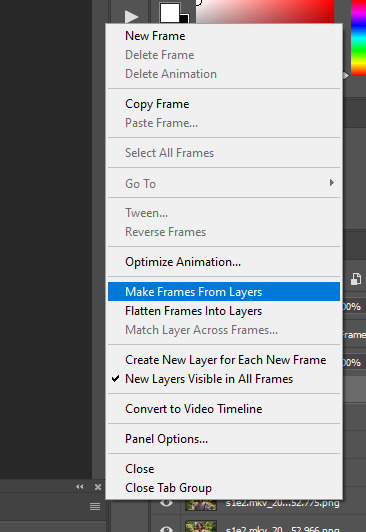
7. hit the button again and click “reverse frames”
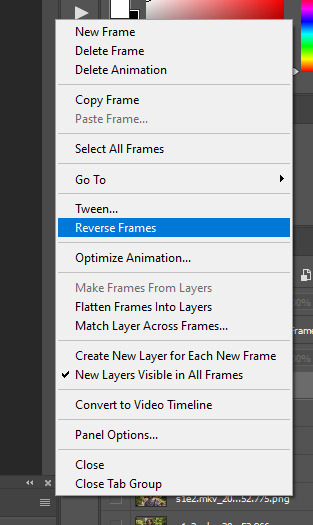
8. click back onto your first gif. then select the rectangular marquee tool and set it to whatever gif size you want. the width for 2 small gifs next to each other is 268px, the width for full size gifs is 540px. most people use 268x150 px for gifsets of 4+


9. use the marquee tool to select what area you want for your gif, like this. it’s up to you how to crop it! get creative!
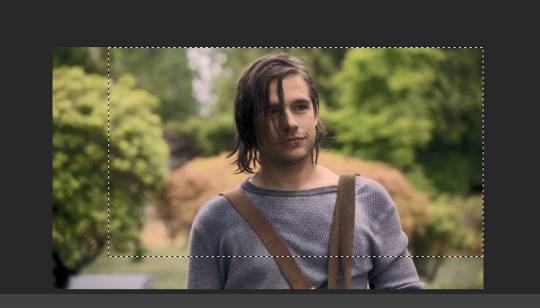
10. go to image > crop
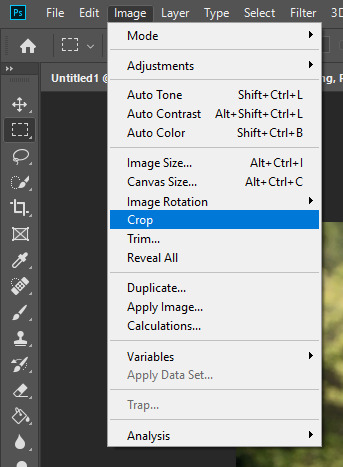
11. now that your image is cropped, go to image > image size. change the size to your desired gif size (in this case 268x150). hit “OK”. then make sure it’s zoomed in to 100%
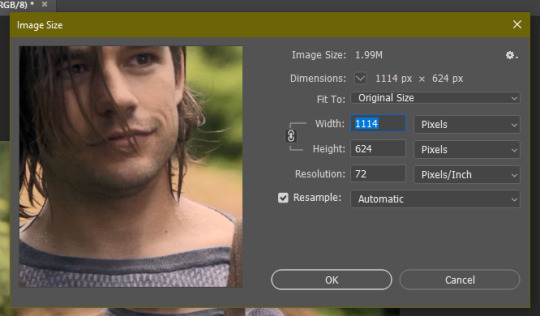
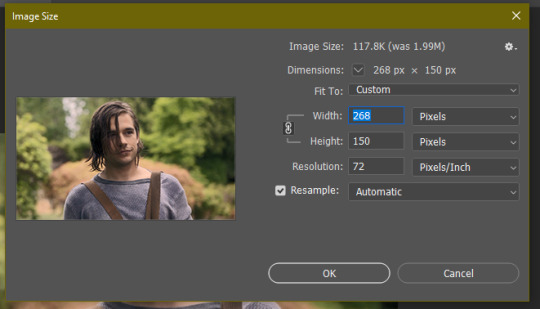

12. now, you COULD just save this gif, but they look way better sharpened. so you need to convert this to a smart object. to do so, first select all your layers in the righthand layer window. to select all the layers, click on your top layer, hold shift, and scroll down to your bottom layer & click on it as well while still holding shift
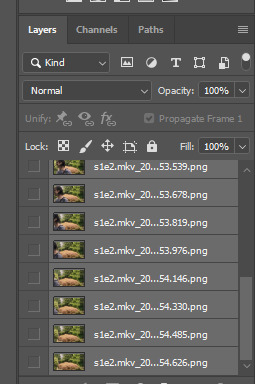
13. next, you need to select all your frames. go back to the options button from part 6 > select all frames
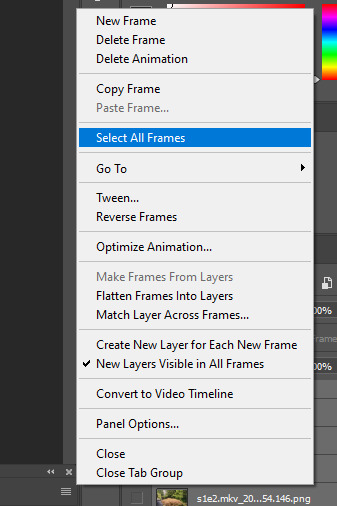
14. next, we’re going to create an action to make your life 100x easier when it comes to sharpening gifs in the future. to do so, go to the actions icon (may look different on different versions of photoshop, but basically just find the actions window)
15. create a new action with this button. name it something. i named this one “sharpen tutorial” and hit “record”
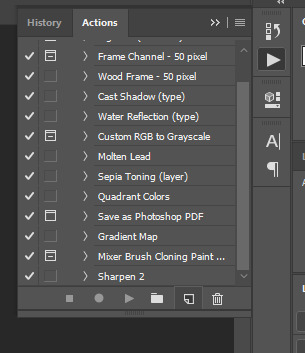
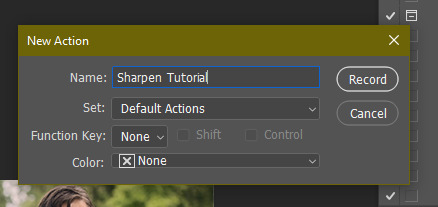
16. click this button to convert to video timeline
17. go to filter > convert for smart objects
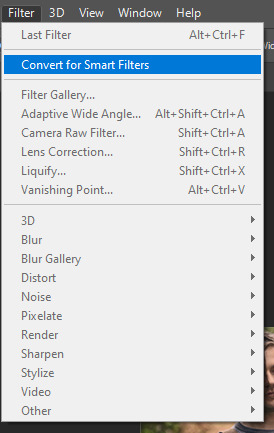
18. go to your single created layer and right click and click duplicate layer. this helps get rid of the transparent border around the gif.
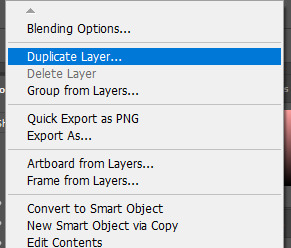
19. go to filter > sharpen > smart sharpen & use these settings
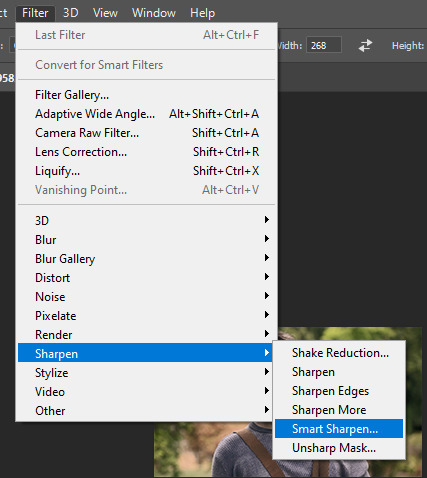
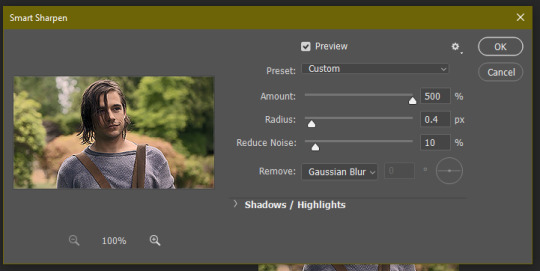
20. go to filter > blur > gaussian blur. set it to these settings.
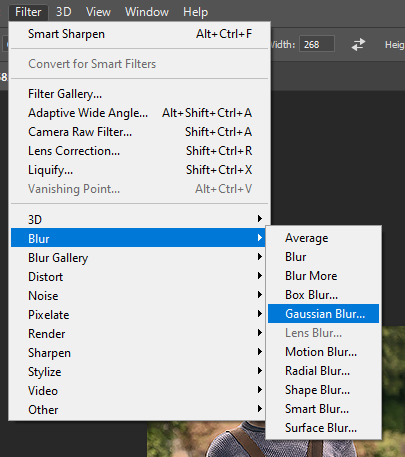
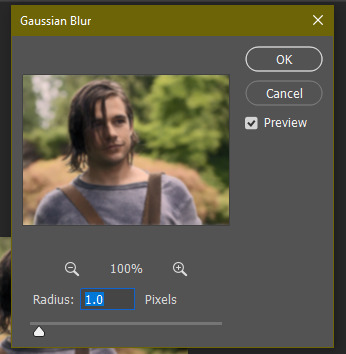
21. go to your second layer with the filters on it & right click on the gaussian blur filter to select “edit smart filter blending options” and set the opacity to 50%. you can mess around with this for different levels of sharpness. the closer to 0%, the sharper your gif will be.
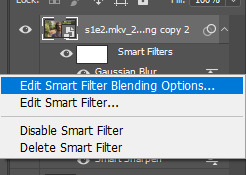
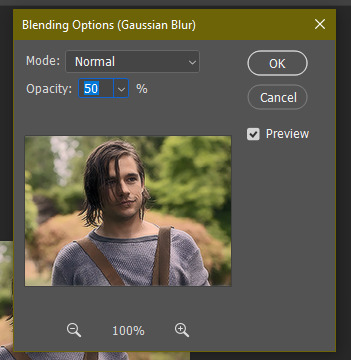
22. hit the stop recording button on your sharpen action. now you’ll have an action to use next time you make a gif! after you’ve followed all the steps 1-13 you simply go to actions, click on your saved sharpening action, and hit play instead & it’ll do steps 14-21 in a few seconds. here’s a pic of the stop button on the actions window
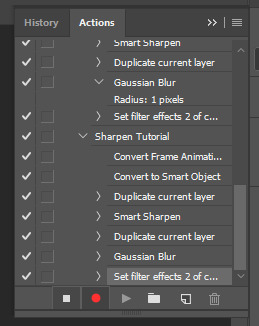
23. our gif is now sharpened! you can end with this & skip to the saving a gif section, or you can continue to coloring. here’s what we have so far.

3. coloring
now on to coloring. this is pretty basic coloring and it probably won’t work if you follow my numbers exactly, as every single scene is different color + lighting wise. but this is just an example of the kind of thing you could do. basically, if you’re making vibrant gifs, you want to up the brightness + contrast + vibrance and make the colors already present pop. if you want anything more complicated (pale gifs, changing the colors to make, say, quentin’s shirt in these gifs red instead of blue), you’ll have to find other tutorials or experiment on your own. learning how to color & finding your style takes time! you can download psds if you want, but imo those kinda take the fun out of making gifs? that’s just me though.
after each step, i’ll show you what the gif looks like.
1. i usually start with a curves layer. i usually don’t mess with the color curve options, just this one:
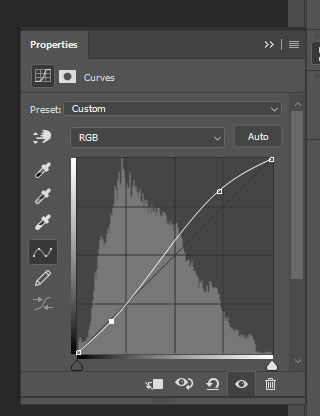
2. next, i do a brightness/contrast layer
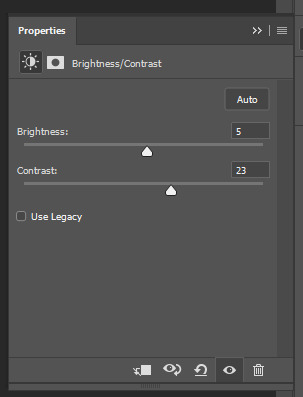
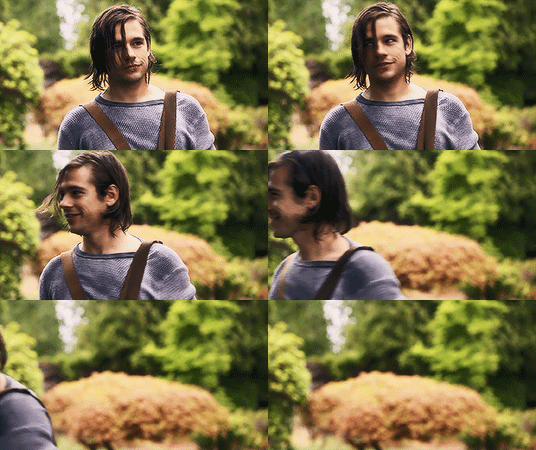
3. next, i do a vibrance layer. make sure not to make it TOO saturated or it’ll look bad.
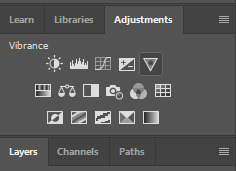
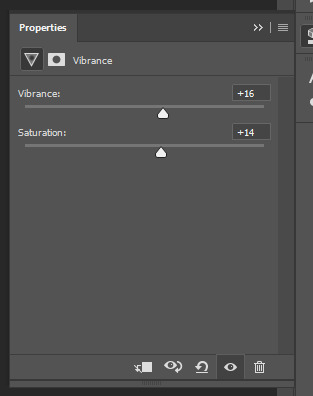
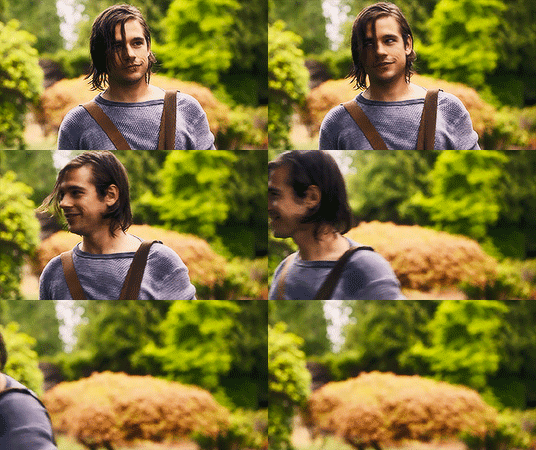
4. next i do a color balance layer. this is where it really starts differing depending on what color you want your gif to be.
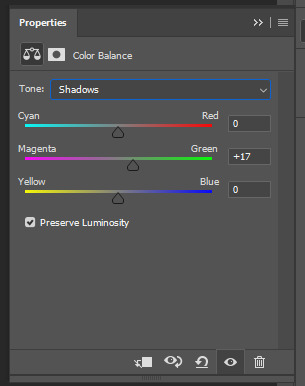
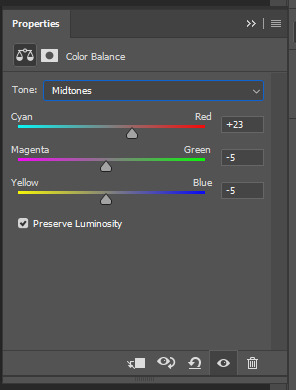
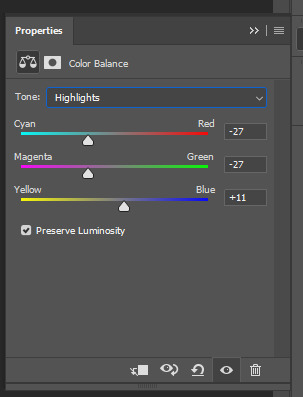
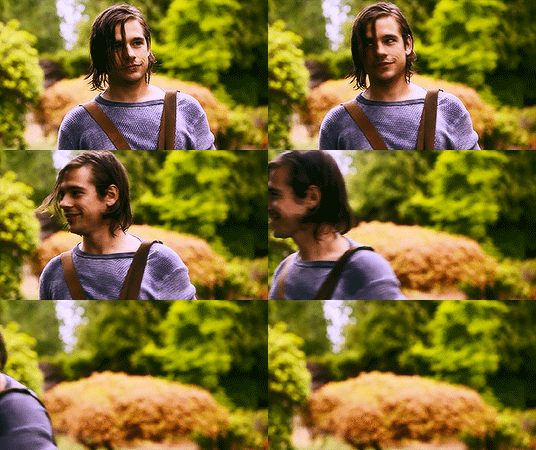
5. next we move to the selective color layers, which are arguably the most powerful. here you can make colors pop, change colors, etc. it’ll take lots of practice & messing around with, but here’s what i did with this gif. this one is making yellow + blue pop
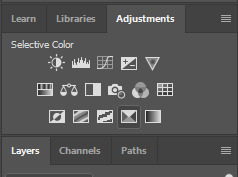
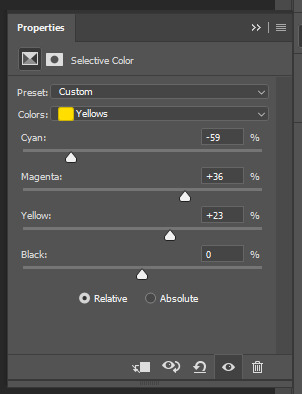
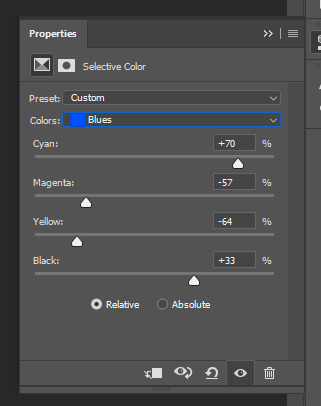
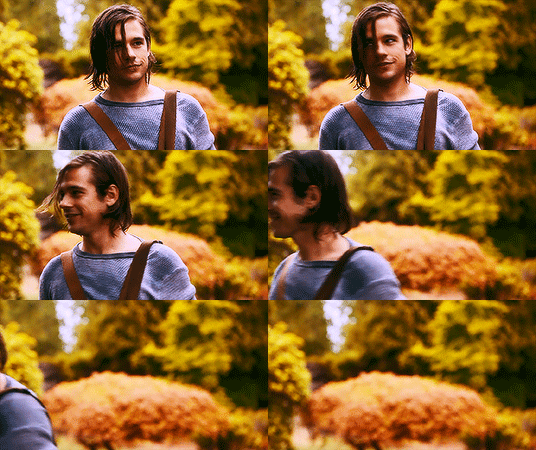
6. next, i did two more selective color layers editing the blue tab to make the blue pop even more
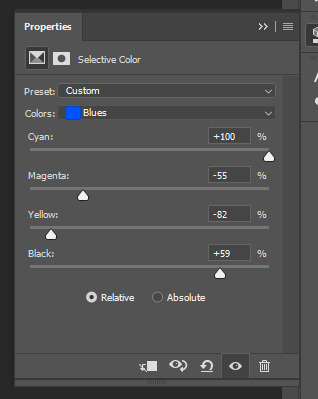
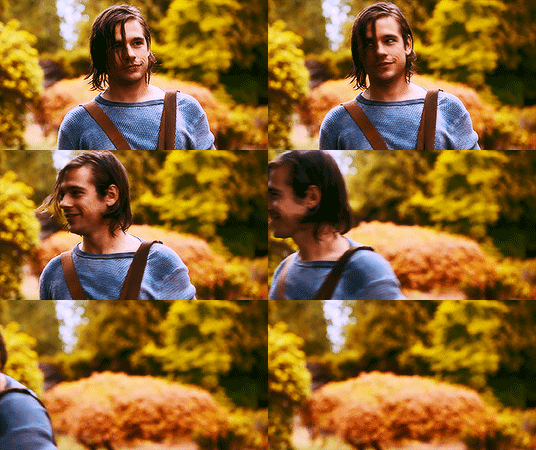
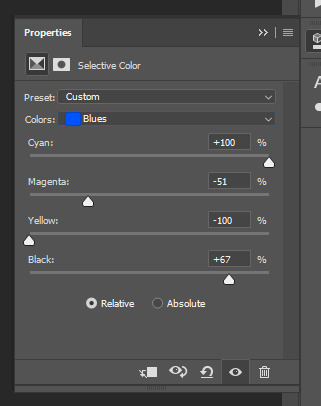
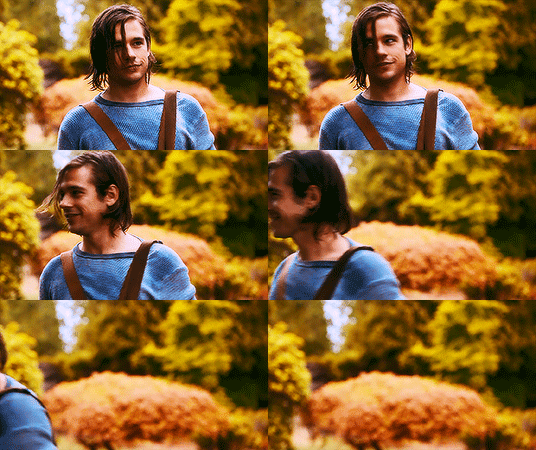
7. i still wasn’t quite happy with it, so i added another selective color layer to edit the blacks + neutrals + greens
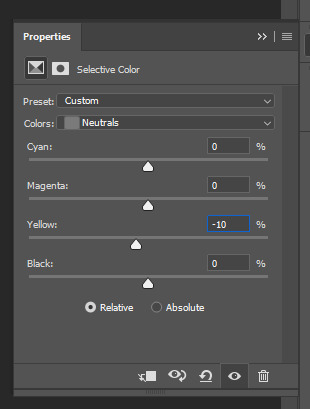
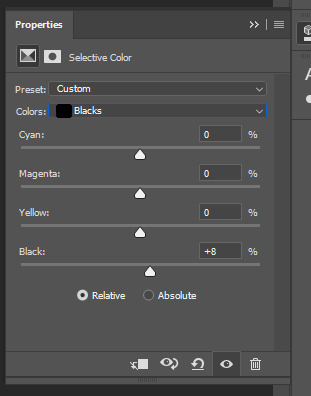
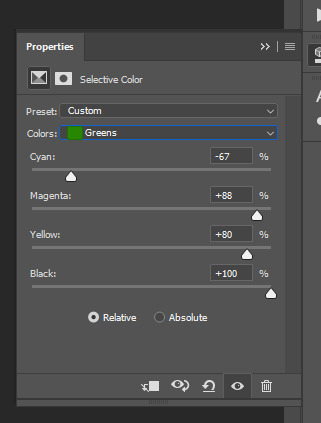
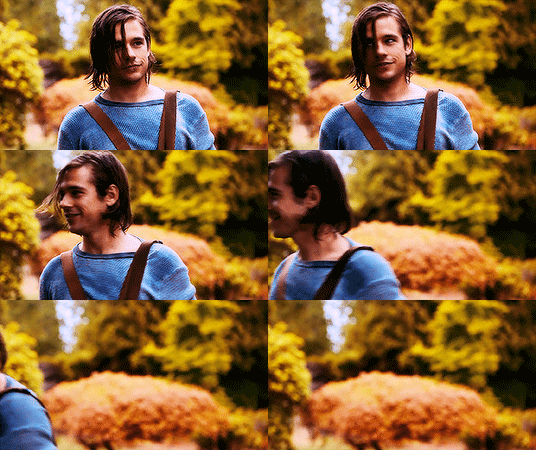
8. for good measure, i added one more brightness/contrast layer
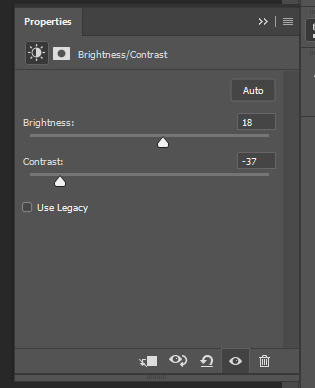
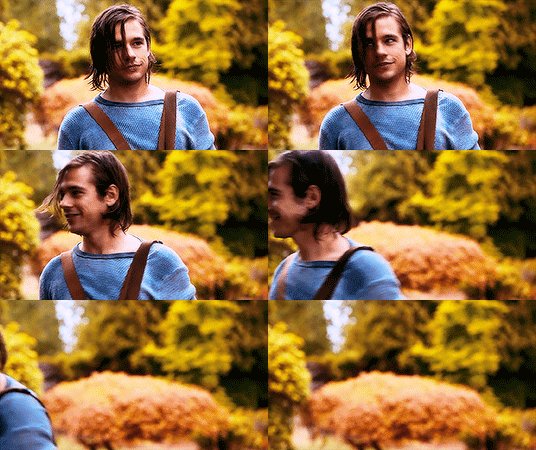
9. and the gif is done! however, you can play around with various adjustment layers until you’re happy. again, this is just an example of how to do basic coloring. it’s a skill like any other & takes practice. to keep consistent coloring in a gifset,
9b. you may want to make a psd of this coloring. to do so, you need to put all your adjustment layers in a folder, delete your frame layers, and click file > save as. save it as a .psd. then you can open it and drag it onto any other gifs you make, adjusting the coloring accordingly but still with the same vibes. you don’t have to do this, but it makes life easier. here’s how to use your saved psd, though obviously you’re using your own in this case and not a downloaded one.
4. saving your gif
1. on photoshop cc 2019, you go to file > export > save for web (legacy). for other versions, you can just go to file > save for web. use these settings. the gif size limit is 3mb per gif, so make sure your file size is under that. if it’s not, you’ll need to delete some frames or some adjustment layers.
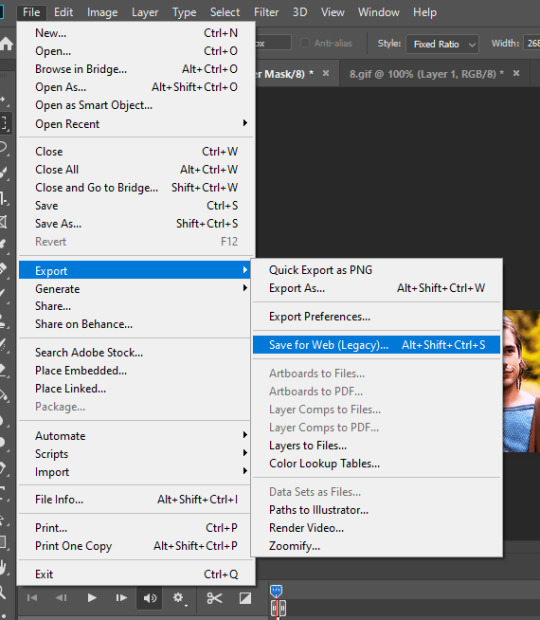
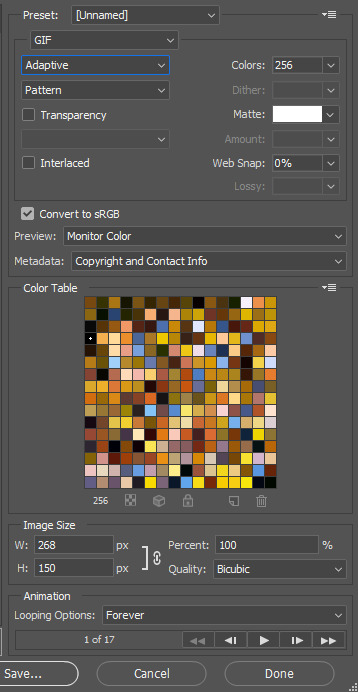
2. now, photoshop is a bit of a pain & this gif timing will not be right. so you need to open your newly saved gif. then you hit this button + select all frames


3. click this button & select “other”. tumblr gifs are typically .05-.08. my photoshop is glitchy and i have to set mine to .1-.15 or they’re WAY too fast. but usually, go with .05-.08 unless yours ends up glitching too.

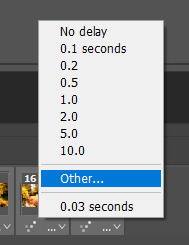
4. save it like you did the first time and ta-da! you’ve made a gif!
#gif tutorial#photoshop tutorial#edit tutorial#coloring tutorial#yes im using the magicians its my hyperfixation and i get to choose the gifs
164 notes
·
View notes
Text
GIFFING TUTORIAL
As requested by an anon yesterday, here is my abridged version of how I make gifs. Instead of going through every detail, I’ve decided to include my photoshop actions which will make the gif process much faster and hopefully smoother and easier. If there are any issues, feel free to ask me about it. And this is purely just the gif making after the screencaps, but I’m up for making a tutorial for that if needed.
Here’s the gif I ended up making in this.

What you’ll need is:
- Photoshop. I use Photoshop 2020, but as long as it has the video timeline you should be good. - Very high quality video. Preferably 1080p, but 720p can be tolerated. Not the compressed versions either. The bigger the file size, the higher the quality. - Screencaps where you’ve screencapped every frame. Skipping frames makes the gif look kind of laggy.
Anyway, here we go!
FIRST STEP: INSTALLING ACTIONS
Here are the download links.
ACTION 1 (Sharpening) ACTION 2 (Giffing)
So these are the actions I’ve created to make my giffing go by faster. The first one includes my sharpening settings. It’s in two parts. You must have these installed in order for the second action to properly work. The second does the majority of the giffing process for you. After you’ve cropped and resized, the action converts the timeline, sharpens, converts the timeline back and sets the frame delay among other things, etc etc.
Here’s the full break down of what it does. I created this myself and have tried it on two different versions of Photoshop. So hopefully it works for you too.

To install, make sure you have the actions panels open.

Once in the actions panel, you click on those little lines that are stacked on top of each other on the left.

Click on load actions. From there, just open the two action files from wherever it is that you saved them. Gif Sharpening and Giffing are what they’re called. Remember you need both in order for the “giffing” action to work.

After they are installed, they should appear like this.

SECOND STEP: GIFFING
Now I use the screencapping method. I have a Mac so I use MPV Player. But I’ve also giffed on a Windows and I used KMPlayer for that. Once I’ve got my screencaps all organized for my gifsets, I go to load layers. If you need a screencapping tutorial, feel free to hit me up for that too.
Under File go to Load Files into Stack.

Then click browse and look for your screencaps and select them all and add them.

Once the layers are loaded, it should look like this.

From there, I convert the timeline at the bottom into a video timeline. So click that “create video timeline” button.


After that, we crop! Cropping is completely up to you in regards to height, but here’s a link to a breakdown for the proper Tumblr dimensions.

This is where you change the size to whatever you have cropped.

After that, all you need is to click on the action and the rest is done for you. On the right side, click the actions panel.


Then click on the action I titled as “overall”

Click that play button at the bottom.

And boom. It should look like this. After that you just add your coloring on top of the “gif base” folder.

THIRD STEP: COLORING THE GIF
So I don’t use PSDs for my gifs because every scene is different even within the same movie or show. So my coloring is always different, but I do follow a general outline each time I gif a scene.
I start with curves always.

Here’s an excellent tutorial on how to use curves.
Some little extras I do in curves, however, is I darken the shadows by five. Sometimes more, sometimes less depending on the footage, but five is my go to starting point. (That little block on the left hand corner of the graph)

I also brighten up the highlights a bit. This one is fully dependent on how dark or bright a scene is. Sometimes I don’t move it at all if the scene is bright enough. (That little block on the upper right hand corner of the graph)

Before/After


After that, it’s playing around with the adjustment layers. The ones in the screencap above are the ones I commonly use in that order. But the link I provided above has some useful tips on how to color after the curves layer. But I’ll provide my settings in order for this particular gif.
Selective Coloring


Another curves to remove some of the reddish tint and to brighten it up some more


Color balance to make further adjustments to midtones and shadows


And a little vibrancy to bring up the colors more

FOURTH STEP: SAVING THE GIF
Here we go to save for web.

And these are the settings I use to save my gifs. There are times where I do some changes, but for the most part, this is what I use and have always used. And I believe the gif limit is 8mb? Or it was the last I heard of it.

I hope this made sense and was helpful in any way. If there are any questions, my ask is open.
201 notes
·
View notes