#graphicsrules.sgr
Note
hey, it's me again regarding cinematic mode!
ok so this took awhile! i am actually using their videocamera but i redownloaded it and it seems to work fine now so far! but now i do have an issue with graphicrules (i'm using this instead btw) now since i didn't use theirs ever since their update (which was faulty at that time), when i moved it and the setters into the configoverride folder as instructed, i kept getting this error: "Unable to start: There was an error processing the startup configuration script."
i've look around for answers like this and basically i can't use s4s' graphicrules and the setters in the configoverride... so i removed them from the folder to leave it blank and replaced the default graphicrules in the bin folder with s4s' instead which it still pops up the same error. i think i've seen you using this overhaul before, did yours happened too? i'm not sure where to contact s4s either since they're not active online...
So what happened with a recent patch was maxis overhauled the graphicsrules.sgr file with some new stuff in there, so old ones stop the game from starting, or produce weird results like super pixelated Sims, because they're no longer valid. What you have to do is take a copy of the new vanilla version and edit the parts of it you want to change. You can't just pop an old edited version in there, it won't work.
I was previously using Simp's alt clipping version without the setters file, just the straight up graphicsrules.sgr file, alongside my own camera files edits. What I've done now is compared side-by-side the old edited file and the new vanilla file, and edited the values in the new version to match what had been previously edited in the old version. Then I've placed that directly into the Bin folder (keeping a backup of the original vanilla file).
The main downside to this is that whenever the game is patched the sgr file in the Bin folder will be overwritten with a fresh vanilla one, so you have to keep a backup of your edited one somewhere, or remember to take it out before you update, and pop it back in again afterwards. Placing anything at all in the configoverride folder at the moment seems to make the game not start (except for graphicscards.sgr, which I have edited to add my graphics card since it wasn't originally listed).
If you're editing the file yourself (which is easy to do, it just takes a little while and some patience), you also need to keep in mind that from time to time maxis will add new things to the graphicsrules.sgr file. So it's a good idea to periodically compare a new vanilla file with your current edited one and see if there's anything new, and if there is start the process again of transferring your edits over to the newer version.
20 notes
·
View notes
Text
Misc Tech Stuff
I thought I'd share, I just followed this tutorial to try and keep an automatic Win 11 update from happening unless I want it to, since it kept threatening. Hopefully it works. I'm not the most tech savvy person so this might be a "well of course" situation for some, but I'm just out here doing my best :P
On the topic of programs, I had to do a fresh reinstall of the game and used a utility I remember seeing on this video by the always helpful @acottonsock, and it worked amazingly. It's called The Sims 3 GPU Add-on Support by alfa1295 on Nexus Mods. Now, NexusMods does require registration to download mods and whatnot, but I already had one because pretty much most Stardew Valley mods are there, and I don't just use mods for the Sims, ha.
Cannot recommend this enough though. It updated my GraphicsCards.sgr and GraphicsRules.sgr automatically, and saved old versions of both files. Yes, I did go through and check them to make sure it was done correctly it absolutey was. I think the only "usual" things I actually had to do manually for the reinstall was to change the cpu level numbers in GraphicsRules and limited FPS in my graphics card control panel.
13 notes
·
View notes
Text

If you've been feeling burnt out or are just overall not enjoying the look and feel of your game, this guide is meant for you! Coming from someone who started out with The Sims 3, I've had to do a lot of adjusting to find what I like to do in The Sims 4 and I think I've finally figured it out. In this guide, I'll go over Graphics, Essential Mods, and Gameplay Ideas to help you make your experience more enjoyable!
Graphics✨
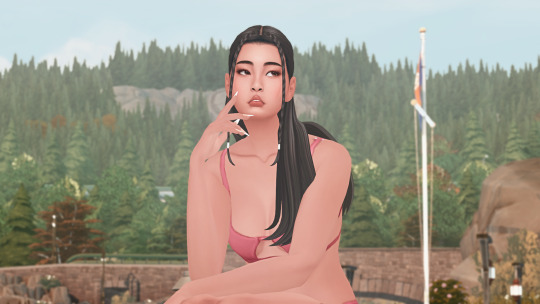
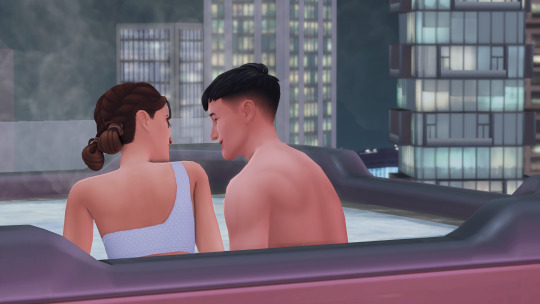
The Sims 4's biggest asset over previous iterations is its graphics/aesthetic and more importantly, its versatility in this regard. You can make this game look more realistic or more cartoony depending on what you prefer thanks to ReShade and GShade. While there is controversy with the latter, I think having these kinds of tools added to your game will really help with making the game better to look at. I personally recommend these presets:
@bojanastarcevic's Boho (left) and Light (right) presets

@neecxle's Boho Dreams

@pixelglam's Pearl

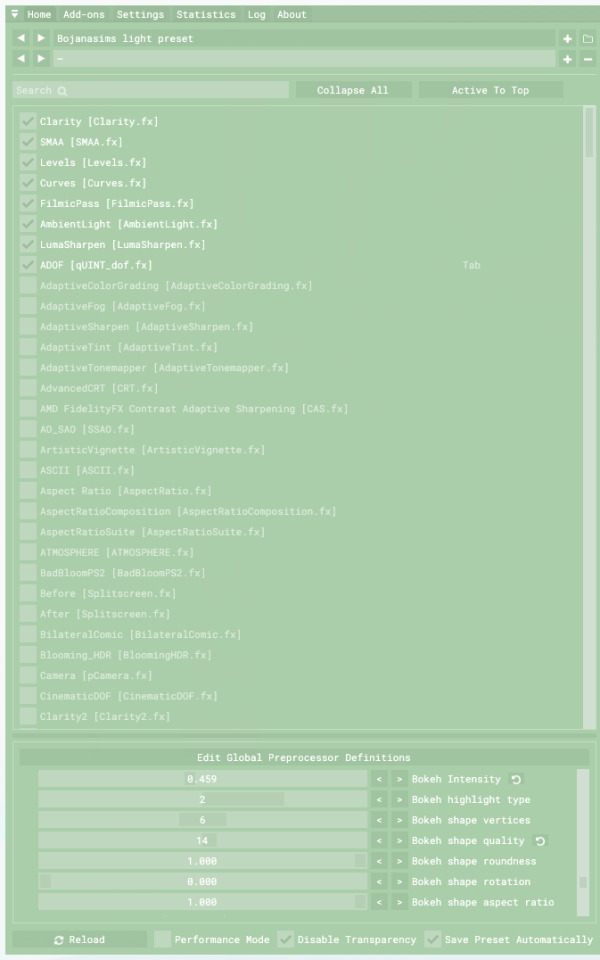
As you can see, using these enhancements can add a lot of great atmosphere to your game but knowing how to tweak these to your liking will make all the difference. When installing and using presets, ensure that 1) you have edge smoothing in game turned off 2) you have SMAA or FXAA turned on through ReShade or GShade and 3) you've adjusted ADOF [qUINT_dof.fx] to suit your gameplay.
These are my settings (apologies if it's hard to see) but what gives my screenshots more of a cinematic quality is having the "bokeh" settings adjusted like so. I also have the ADOF hotkey set to "tab" so that it automatically turns on and adjusts the depth-of-field when I want to take a screenshot.
BUT WAIT, THERE'S MORE! While all of these shader presets are extremely important to the look and feel of your game, there's an extra couple of steps you can take.
@plantyl-m's GraphicsRules.sgr makes those in-game shadows nice and crisp! It's a relatively small tweak, but I feel like it makes such a huge difference to the quality.
@softerhaze's Sunblind Lighting Overhaul. The pictures speak for themselves!
@northernsiberiawinds's Better In-Game Lighting is another great option for lighting tweaks (there's also lighting adjustments for CAS that I love to use)
And that pretty much wraps up my segment on graphics! Now, don't feel compelled to use all of these if your computer can't handle it. While these tweaks are nice, they don't make or break the game. Use what works and don't mind what doesn't!
Essential Mods🔧
I'll be the first to admit that without mods this game can be a bit- or a lot- dry. Depending on what kind of gameplay style you prefer, you may not need or want certain mods but I think there are some core mods that EVERY simmer can make use of.
@deaderpoolmc's MCCommand Center is a must-have. I personally use it most often to add relationships between sims for storybuilding, changing how long certain actions like doing homework takes, and changing my Game Time Speed to make my days last longer (more on this later)
Weerbesu's UI Cheats for quick adjustments to household funds, motives, and more.
@twistedmexi's EVERYTHING, but if I had to narrow it down T.O.O.L Mod, Better Build Buy, and All Cheats are the ones I get the most mileage out of.
TurboDriver's Wonderful Whims. In addition to all the features you might be familiar with, you can also use it for posing and animations. It has a positioner as well that makes placing sims so easy!
@bienchien's Whim Overhaul to make what your sims want to do more sensible based on their personality, aspiration, and environment.
For mods that add more gameplay, try out these:
Basemental Drugs to add effects from consuming substances
@utopya-cc's Passionate Gifts for more romantic interactions
@zerbu's Turbo Careers to make more active careers
Lot-51's Collection of Mods for various tweaks and features including functional hotels, internet service, and rentable movies.
There's plenty more mods, too many to list in this post but at the end of the day, enjoying your gameplay involves you!
Gameplay Ideas 💭
I love longer gameplay, that was my favorite thing about The Sims 3. But I often felt like managing a longer gameplay in The Sims 4 didn't feel as rewarding. It can be easy to feel like your save has become stagnant, especially if you're only playing with one sim in a household. And I realized why this happens. The Sims 4 has a lot of features, more than I thought, and they're overly available. Right off the bat, I can take my sim anywhere, to any world and do almost anything. And somehow, that makes it feel less impactful. I don't like following structured challenges or scenarios, so this is what I do to make get myself more invested in my sims and their lives.
Create Your Sims Intentionally
What does this mean? Create your sims with room to grow the longer you play! Maybe you want a sim to become a famous actor, but they're socially awkward. Now not only do they need to gain fame, but now they're also working to overcome their awkwardness and develop more charisma. Give your sims room to grow, to adjust. Let them have negative traits or dislike things that they might be naturally better at so they have to work harder at what they do like. Another tip: when making your sim in CAS, choose their aspiration based on what bonus trait you'd like them to have then change their aspiration in game. This way, you get an extra trait that may add more to your sim's character.
Give Your Sims a Context to Exist In
Because they didn't just fall out of a coconut tree, give your sims other sims to bounce off of. Maybe they have a strained relationship with their parents so they avoid them all the time. Or they had a falling out with an old friend so when they run into each other, it gets super awkward and makes them tense or uncomfortable. Using MCCC or other cheats to give your sims a little more of a backstory when you start playing makes them feel more real as you go forward.
Lengthen Your Game Time Speed
When I realized I could do this, it changed everything! Sims take a long time to do pretty much everything. So days and days pass and it feels like you aren't really getting much done. Using MCCC, I changed my Game Time Speed to "30" and that lets me actually stop and think about what I want to get done throughout the day instead of solely focusing on filling their needs. For example, my sims can actually have a full morning routine like going for a walk, making breakfast, and showering before going to work. Having more time in the day lets you focus on all the smaller details and lets you notice that there's actually a lot you can do.
Make or Place Multi-Use Lots and Use T.O.O.L. Mod
If you own a decent amount of packs, having multi-use lots is a must to get a lot of bang for your buck. For example, country clubs, movie theaters, restaurants, etc. are going to add to what your sim is able to do. Look at CC made by Cepzid for more functional objects to add variety to what you can do. Also, if you use T.O.O.L. you can place any object in the world to add more activities and make your surroundings feel less like set dressing.
Limit the Worlds You Play In
If your sim can go anywhere, at any time, then what is the point of going anywhere at all? I like to limit the worlds that I can visit by using "travel" to around 3 or 4 depending on region. That way, when my sims go to worlds outside of the region, it's more exciting because I'm not constantly seeing it. For example, my current family The Fords live in Brindleton Bay. I'm American so I think of Brindleton Bay as being The Hamptons, which is North East Coast. So I think, what other worlds would be reasonably close and easy to visit? I assign regions like this:
- North East: Brindleton Bay, San Myshuno, Newcrest, Britechester
- The South: Willow Creek, Magnolia Promenade, Forgotten Hollow
- Northwest: Evergreen Harbor, Copperdale, San Sequoia
- Southwest: Del Sol Valley, Oasis Springs, Strangerville
-Europe: Tartosa, Windenburg, Henford-on-Bagley
- Central America: Selvadorada, Ciudad Enamorada
- Pacific Islands & Asia: Sulani, Mount Komorebi, Tomarang
Playing with these regions in mind, it adds a challenge to my gameplay. If there's a world I want to visit, I need to set aside time in my sims schedule to actually visit it (such as requesting vacation time). Also this allows me to have long-distance relationships which can add to slow burn dynamics! Case in point, Darcy and Lopez or Caleb and Natty.


6. Let Your Sims Have Their Autonomy Back
Okay, I'm guilty of micromanaging. But sometimes, it's okay to sit back and let your sims try different things. Obviously, the autonomy isn't always super logical so definitely nudge your sims in the right direction but a lot of the enjoyment of the game for me, especially when playing with families, is to leave them to their own devices. With The Fords, I primarily focus on Natty which leads to a lot of hilarious moments that wouldn't have happened if I was stressing over everyone acting perfect.
For example, when Caleb came to the Ford house I had Natty make them iced tea to drink on the porch and while she was inside, Alan (her dad) came out on his own and started talking to Caleb which didn't go that well. Let your sims do what they want sometimes!


7. Most importantly, find what YOU like to do!
Comparison is the thief of joy, that's totally true. What one simmer likes to do, you might hate. For me, decorating is like pulling teeth. I'll do it every once in a while, but I mostly find builds from other amazing builders. I also don't really care much for challenges and like to create stories with my sims. The point is, we all have our thing. But it's important to experiment and find what your thing is. I happen to really like the actor career, which a lot of people don't find enjoyable. So don't let others opinions impact what you have fun with. Of course, if my advice works for you then I'm happy but if not, there's no love lost. Do what makes you happy!
Well, that's all I've got. I can definitely make some follow-up posts if my tips change or I discover something new. But for now, I hope this post helps or gives you some ideas!
#sims 4 simblr#sims 4#the sims 4#simblr#sims#sims4#the sims#the sims community#the sims tips#gameplay tips#sims 4 maxis match#reshade#gshade#sims 4 graphics
4 notes
·
View notes
Text
How to enable sun shadows in TS3, on Parallels for 64-bit Macs
Disclaimer: Back everything up. I can't take responsibility if you mess up your game files and the game doesn't run. Make a pristine copy of any file before you edit it. All that said...
Who is this tip for?
TS3 doesn't recognise Parallels' simulated GPU. This means that even if you set all your graphics settings to max, sun shadows (shadows cast by objects outdoors) are not rendered.
An example of sun shadows being successfully rendered:

If you have no sun shadows, your game will not look like the above pic. You will see a drop shadow (dark circle) under the trunk of the tree but no detailed shadow. If that is the case, read on for...
How to Fix It
Go to Programme Files (x86) > Electronic Arts > The Sims 3 > Game > Bin.

Copy GraphicsCards.sgr and GraphicsRules.sgr to a new location.
I recommend copying each file twice, with a copy of each in two folders marked 'Original' and 'Edited'. Then you have a spare copy of each under 'Original' that you can put back in the folder if you mess up.
Next go to Documents > Electronic Arts > The Sims 3 and open DeviceConfig.log.

Scroll down inside the log and copy exactly the values from:
Name (database):
Vendor
Chipset: Vendor: and
Chipset: Device:
to a new note for later.
You may have no Vendor at all, or it may be Parallels. Your graphics device may be Parallels Display Adapter (WDDM) or it may simply be Parallels Display Adapter. I've seen a few variations of each name online from various people Parallels VMs; it seems to be a bit random.
For example, my Vendor name is empty, and my graphics device Name (database) is Parallels Display Adapter (WDDM). My Chipset Vendor is 5404c42, and my Chipset Device is 0000.

Now open your new copy of GraphicsCards.sgr saved outside of Program Files. If you're not used to editing code I recommend downloading Sublime Text which is free, and changing syntax to C# under View which will allow you to check your entries more easily.

Go to the very bottom of the file, add a new line under the final end, and add the following:
vendor "" 0x
card 0x ""
end
Use tab to indent the 'card' line like in my screenshot above. Take a look at the note you made earlier:
Add your Vendor between the first set of quotes
Add your Chipset: Vendor: value after the first 0x.
Add your Chipset: Device after the second 0x.
Add your Name (database) between the final set of quotes.
Check your spacing matches the above screenshot. Save and close GraphicsCards.
Open your new copy of GraphicsRules.sgr which you saved outside of Program Files earlier.
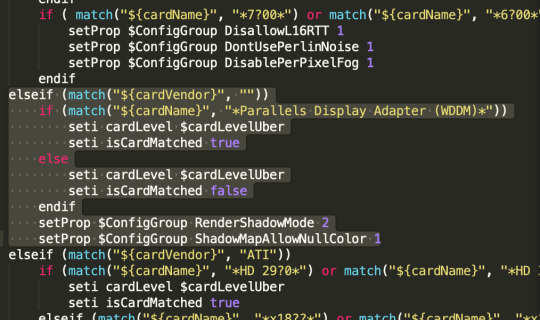
Search for 'ATI' to find the right location.
Make a new line directly above elseif (match("${cardVendor}", "ATI")) and paste the following:
elseif (match("${cardVendor}", ""))
if (match("${cardName}", ""))
seti cardLevel $cardLevelUber
seti isCardMatched true
else
seti cardLevel $cardLevelUber
seti isCardMatched false
endif
setProp $ConfigGroup RenderShadowMode 2
setProp $ConfigGroup ShadowMapAllowNullColor 1
Make your indenting match the above screenshot. Again, referring to the note you made earlier:
Add your Vendor between the first set of empty quotes
Add your Name (Database) between the second set of empty quotes
Save the file and close it.
Now, copy your newly edited GraphicsCards.sgr and GraphicsRules.sgr files to Programme Files (x86) > Electronic Arts > The Sims 3 > Game > Bin.
When asked if you want to replace the files, select yes (make sure you have a backup copy of the originals first!)
Check it has worked
Open TS3 and check for sun shadows.
If you have CAW, the quickest way to check sun shadows are rendering - without waiting for all of TS3 and a save to load - is to make a new small map, place a few trees then open Edit In Game. You need to open Edit In Game - this method doesn't fix sun shadows in CAW itself. Zoom right in to your trees and check for sun shadows.
If TS3 (or EIG) doesn't run, or crashes on loading, there is a problem with your syntax or with the values you've pasted in. Put your backed-up original GraphicsCards.sgr and GraphicsRules.sgr files back into Bin and ensure the game runs, then go back to try and find your mistake.
All credit to
The tens of people, too many to link, who have experimented with varying degrees of success with how to fix this issue across Reddit, EA Forums, etc. I simply amalgamated the working advice and added that you must copy your own values from your own DeviceConfig file.
14 notes
·
View notes
Text
K’tar reverts to 1.67: Some notes...
So in the wake of EA forcing everyone to update from the Origin App to the EA App, which sporadically seems to cause even more problems than the Origin App for many TS3 players, I decided it was finally time to take the plunge and stop playing on 1.69. Below the cut, What I did, how I did it, issues and questions I ran into, and some notes.
First, I started off using this tutorial here:
https://sims3tutorialhub.tumblr.com/post/176328544696/installing-sims-via-torrent
Simply using the NoCD mod would not have worked for me, as I only own a few of the TS3 expansions and stuff packs via disc, and own most of them digitally. By the time I realized this might be an issue for me later, I already owned them all, and I don’t believe in paying for an entire franchise a second time just because game companies like EA will bleed you dry if they can.
Question #1: Do I need to uninstall first?
After backing up the EA folder in my docs folder and the everything in the program files folder as well, per the suggestion in the above tutorial, and having already downloaded all the needed files, this was the first question that popped up for me. I don’t actually know the answer, but I decided that since my current installation was in Origin, which I hope not to use again (at least for TS3), I would uninstall everything from Origin, so I did so.
After that, I abandoned the above tutorial and instead followed the instructions that came with the downloaded files. They’re fairly concise and easy to follow. I went back and checked eventually and they’re basically the same as the ones in the above tutorial, except you’ve no need for further downloads, because everything is already included in what you’ve downloaded. If you are following the above tutorial to download the 1.67 super patch, be aware that you may have to copy and paste the link into a new browser tab to get the download to work. (I did.) This took me to having completed step 7 in the above tutorial.
Next, a step that isn’t mentioned in the tutorial, or the instructions in the download. Copy over your GraphicsCards.sgr and GraphicsRules.sgr from your old Program Files x86/.../Bin folder to your new one. This way your game will still recognize your graphics card and any changes you previously made to the graphics rules will remain.
Then I installed the proper version of @lazyduchess ’s Smooth patch into the same Bin folder. Thanks again for making it work with 1.67! I had a bit of trouble editing the TS3Patch.txt file, because the Bin folder properties had been set such that it wouldn’t let me edit the file directly. I ended up creating a copy of the file on my desktop, editing that, deleting the one in the Bin folder, and then moved the edited file into the Bin folder and gave the admin permission confirmation required.
As a last step, I installed the Nraas No CD mod to my mods/packages folder with the rest of my nraas mods and discovered that all of my game folders were still present, complete with logs, saved games, mods, everything. I wasn’t expecting that, as I thought everything would have been deleted when I uninstalled things, but nope. Everything was present and accounted for and I didn’t need to retrieve anything from the backup I’d made of that folder.
My game started up just fine. Nothing was missing, all mods seem to be working fine and are present. The game seems to take just a tad longer to start up than what I’ve been used to lately, but it’s like... maybe an extra minute, which is completely worth no longer having to deal with Origin and/or whatever online DRM crap EA may come up with in the future. Now I can play... with NO INTERNET. FREEDOM! My graphics were perfect, I didn’t need to adjust any settings at all, and everything was good to go.
Edit to add: If you’ve only ever played on 1.69, be aware that 1.67 does not have a built-in easy way to enable/disable expansions and stuff packs. However, someone shared with me this link to a mod that someone created to do precisely that! You can find it here: https://modthesims.info/d/499140/sim-game-selector-3-0-support-for-quot-into-the-future-quot-and-quot-movie-stuff-quot.html
Of course, your experience may vary... I’m running on a desktop computer with Windows 10, with all expansions and stuff packs installed, nearly 25k individual pieces of CC installed via CCMagic, plus a couple hundred other un-merged script mods and default replacement files installed in my Mods/Packages folder. (In case that helps at all.)
Cheers! I’m off to play my game!
#ts3#sims3#not gameplay#ts3 no cd installation#ts3 1.69 to 1.67#I've been meaning to do this for years#so thanks EA for finally giving me the push to do it
28 notes
·
View notes
Text
HQ download anyone?
Hey! Just trying to put my game back together, does anyone have the HQ mod file download? I can't find my modded graphicsrules.sgr file anywhere!
Thanks x 1000000
8 notes
·
View notes
Note
Hi Phora! I hope you're having great week! Have you tweaked your graphics settings or added a mod to have high-quality textures for clothing and furniture? I've been watching your streams for a few months now and Journee's everyday set has super high-quality knit texture and Coochie Pounce's cat scratching post looks fuzzy and realistic too! Or is it only the reshade making the textures look realistic? If so, could you share just the setting that makes that effect not the whole preset? Thanks <3
Hey!
Thank you, I hope your week is going great as well! You're so sweet!
Yes, I have tweaked my graphics settings. I am also using a Reshade preset that one of my friends made for me. Unfortunately, the preset is not available for download, so I cannot provide too much information on that. (It could be combination of my settings and preset making my game look hella realistic).
However, I can tell you that I tweaked my graphics settings in the GraphicsRules.sgr file. And, I have a video coming very soon on how I did that because everyone has been wanting to know how my game looks the way it does. I guess I made my own HQ mod? LOL.
I appreciate you for the support though. I hope you're enjoying the content. 💗
4 notes
·
View notes
Note
"If you use the HQ switch: The following paragraph did work for some time but now has stopped working again (08-02-2023). We will keep it here in case it will work again in the future." So, basically, this mod is currently doesn't work?
The mod is working, but you cannot just put it in the ConfigOverride folder (at least as of now). Instead, you have to replace the GraphicsRules.sgr in your game folder with the one that comes with the HQ switch. It's just less convenient for now, but it works. We hope that EA will allow the ConfigOverride folder to be used again -RS
Update 2023-03-16: it's working again
5 notes
·
View notes
Note
Hello! I see you’ve been answering a few questions, so I wonder if I may ask, could you tell us the difference between the GraphicsRules file found in the ConfigOverrides folder under Documents > Electronic Arts versus, the GraphicsRules file found under The Sims 4 > Game > Bin? If we edit them, do we edit both or just one? I hope that makes sense! Thank you!
Hi anon!
The one in the Bin is the official file, the one that gets updated each time you patch the game. If there's one in your configoverrides folder, that has been put there by you at some point.
Anything in the configoverrides folder takes precedence over any other file, so you can use that to keep your edited file and it won't get overwritten or updated when you patch the game. The game will read the one in the configoverrides folder and not the one in the Bin folder.
If you want to go back at any point to the original, official, vanilla graphicsrules file, all you have to do is remove the one in your configoverrides folder, and the game will start to read the one in the Bin folder again.
I hope that makes sense!
10 notes
·
View notes
Text
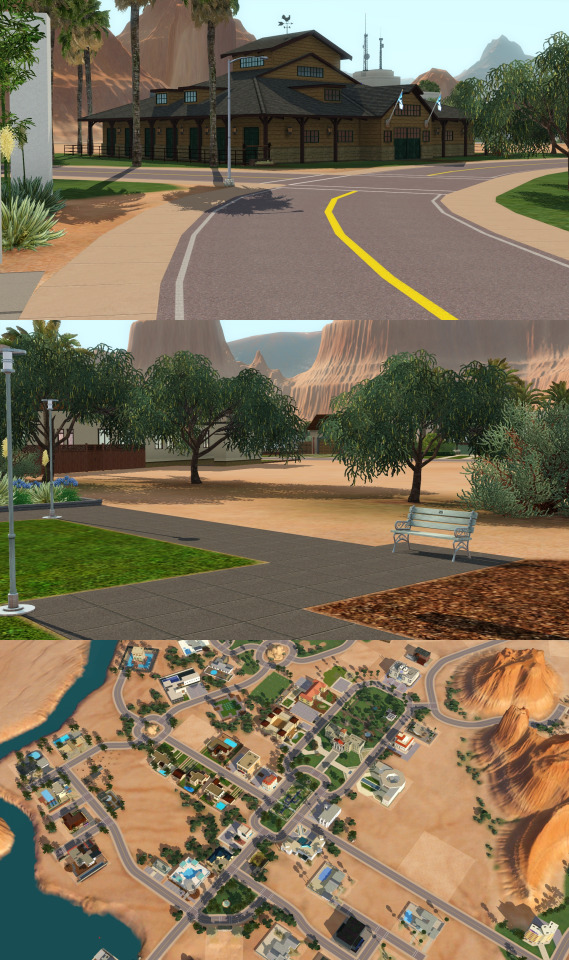
[TS3] Shadow Extender
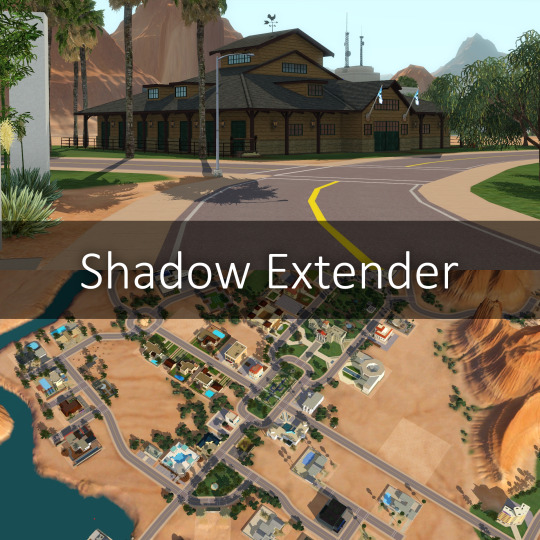
Overview
This mod increases the draw distance of shadows and in addition improves the look of map view by making trees and other miscellaneous deco cast shadows, when they previously did not.
Download
SimFileShare | Patreon
Source Code: Github
Pre-Requisites and Installation
Extract the attached .zip file into your (Sims 3 Installation Folder)/Game/Bin
Included is a "Presets" folder with configuration files I've made for different shadow map resolutions, such as 2k (2048), 4k (4096) and 8k (8192) resolution shadows. Also an "Unmodded" version that looks like unmodded TS3, in order to provide a base for your own customization.
You can of course use a preset that is meant for lower resolution shadows than you have in your game if you want the shadows to look higher resolution.
You can replace the "ShadowExtender.cfg" file in Game/Bin with any of these, and configure it further on your own if you wish.
If you don't know how to change shadow resolutions, SimsCommunity has an article on it. It's necessary to get this mod to look good.
Origin
If you're on Origin (1.69) you will need my Custom Launcher for this mod to work, and make sure to check the "Load ASI Mods" box in it.
Drawbacks
It's been reported that reflections and objects might appear lower quality with this mod enabled. If this happens to you, try opening your GraphicsRules.sgr with notepad, scrolling down to "option TreeQuality" and adjust the LODDistances to bigger numbers. This won't fix reflections, but it should help with object quality.
Comparison Shots using the 8k Preset and 8k Shadows
Before:
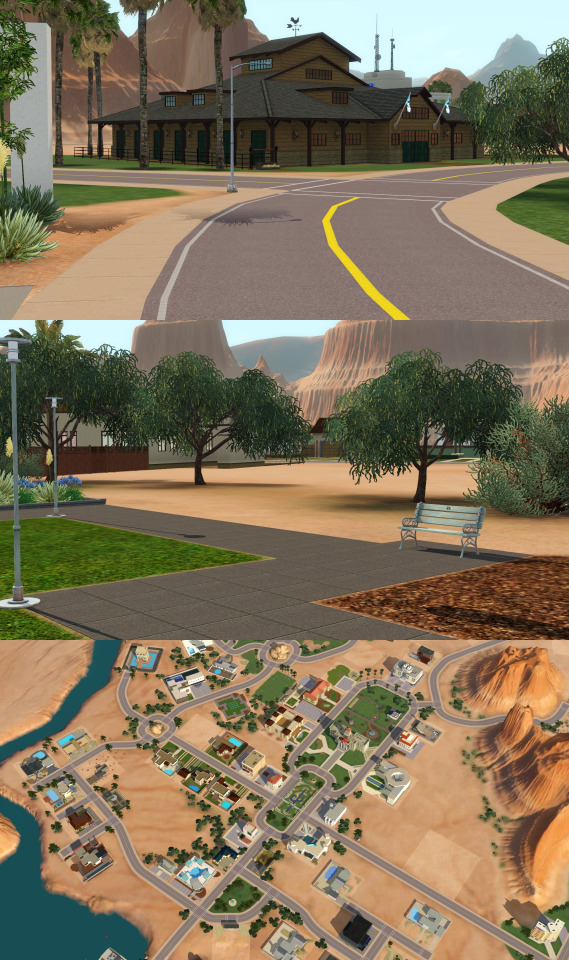
After:
594 notes
·
View notes
Text
TS3, & Improving Graphics
Some of this is solely focused around NVIDIA GPUs, but AMD can use most of these too!
Some of these suggestions are probably on the more advanced side.
Updated 2/10/22.
Programs:
NVIDIA Inspector
---
My GraphicsRules.sgr - I updated some information about seti TextureMemory on its page.
If you prefer to edit your own GraphicsRules: Sim Quality, Shadows, Remove Bloom, Texture Memory (Step 7. Scroll to “Making The Game Use the correct Amount of Vram“. There’s a lot of other good performance settings/fixes in there too!). Update: See this too for Texture Memory!
@lazyduchess‘ Shader Tweaks, and Shadow Extender.
Change your NVIDIA GPU settings using NVIDIA inspector. - Replaced link with archived link!
Reshade. Most of my favorite presets are all by @pictureamoebae. I am currently using Thatched. You can see a preview of me using it in TS3 here. You can also find more reshade presets here, or here.
If you have an RTX NVIDIA GPU (20 series / 30 series / 40 series) you can try out DLDSR. Direct link to the settings image found in this post. Here is a video by Linus explaining what it is. You may have to update your drivers to take advantage of this as it was only recently released back in January.
All of these suggestions I have used at one point or another.
What I am currently using are as follows:
My GraphicsRules. 2K with 8K shadows.
Shadow Extender.
Reshade.
DLDSR. 2.25x DL - I have just recently turned this on. I haven’t tested how much of a difference it truly makes in TS3.
You’ll probably have to fiddle around a bit to see what works best for your system, as everyone has different specs. I would probably consider my computer high-end, or at least mid-range.
221 notes
·
View notes
Photo

@littledica has found a way of enhancing in-game textures that was capped with one of the recent updates. Head over to his post HERE on patreon to edit your GraphicsRules.sgr to let it go back to how it was before the update! NOTE this blurry texture also happens when you play on ultra!
ALL Credits (including pic above!) to @littledica if he decides to make a separate post abt it on tumblr i’d gladly reblog that one to safely store here on Tumblr for future reference! (and delete this one)
2K notes
·
View notes
Note
Hiii, I’m obsessed with the lighting and shadow in this post https://at.tumblr.com/cerubean/694117133121093632/5ts2g89dx6w4 any tips I can get my game to look that aesthetically pleasing 😭 gshade/reshade doesn’t work for me. I saw a post about editing graphics card to increase shadow but I don’t remember how😭
hey ty! the lighting and shadows (ex. trees on the bed, etc.) is mainly from having my lighting settings up to 'very high' and from getting lucky with a lot that gets really good lighting throughout the day!
actually someone made a guide a couple years ago of which lots get the best lighting depending on the time of day. it hasn't been updated for the new worlds, but it's still pretty helpful
also, i think you might mean editing the graphicsrules file that's in the bin folder (?) i could be wrong, but from what i found there's no way to increase shadows by editing graphicsrules
this is gonna be long bc i overexplain things so im gonna put the rest under the cut
for the most part, configuring graphicsrules is for doing things like turning off ssao
"Ambient occlusion in Sims 4 stimulates some shadows (For example: Where the floor meets the wall, there will be a shadow there, In Sims 4 that is handles with Ambient Occlusion).
I recommend you google it since I'm bad at explaining.
All I can really say for sure, is that the SSAO (Screen Space Ambient occlusion: basically means simulating ambient occlusion but in real time) Is really subtle in Sims 4 and personally I do not think it is that worth it. Especially if you use the AO on reshade ( A post processing program)" (FlowerSimFactory on Sims4Studio)
if this is something you might be interested trying, pictureamoebae explains it some more as well, and also provides a tutorial!
unfortunately, the only way to get those harsh shadows along objects and sims is reshade/gshade and it's mainly the work of shaders like mxao.
but! there are some things you can try to achieve more dynamic lighting in your game:
graphicsrules overhaul by simp4sims: helps your game run faster, essentially does all the graphicsrules.sgr file editing for you!
shadows for days by pictureamoebae: removes the glitch of shadows disappearing when tilting the camera
also lighting mods are your best friend!
luumia's noblu v2/ noglo v2: removes the ugly blue shadow tint indoors, could not imagine my life w/o it (i use darker)
noglo enhances the lighting on your sim when they're indoors; i recommend using both together
credits to luumia for the image:

this is a bit more complex in terms of installation, but definitely worth giving a shot if you’re comfortable!
softerhaze’s milk thistle lighting mod: changes the lighting outdoors, adds beautiful looking sunsets/sunrises
credits to softerhaze for the image:

kinda embarassed i wrote a whole book but hope that helped somewhat <3
#i swear my brain retains sims 4 information better than anything else i cant stand it!!#cant remember to eat breakfast but i can def tell you when and where i got a top from 2015 and who made it#e#s#replies#wcif#sims 4
32 notes
·
View notes
Text
Sims 3 Performance Guide
Lately I have found the direction of The Sims 4 to be rather lackluster. Let’s face it. The game is boring. Still looking for that “Sims Fix” I found myself going back to playing The Sims 3. The Sims 3 can be tricky to get running correctly on modern computers so I figured I would share what I learned over the years. I made this guide a few years ago for another forum so I’m always open to new suggestions/edits etc. Some things may work well for others while some may not make a difference at all. I have applied all of these fixes in my own game and I still experience lag so this is by no means a guide to completely eliminate the lag in the game but a guide to perhaps help your game run a little bit smoother. All of these tips have been gathered from all over the internet and also some things I have picked up on my own over the years. I own a legit copy of the Sims 3 and have never owned a pirated version so I can't say whether or not these settings will work with a pirated version of the game. I also only have a PC so I don't know if any of these settings will effect the Mac version of the game. If anything I hope this guide brings people back to The Sims 3 or allows people to give the game another chance. The guide will be pretty extensive and I take no responsibility if you mess up your game :P
Limit Game FPS - This one has been a godsend. I was experiencing major lag especially in build/Buy mode. My computer is way over spec for this game much like most computers today. What would happen is that while in Build/Buy Mode my FPS would spike into the 200's! During these spikes the game would almost be un-playable.
To fix this issue:
Download this file: https://rd.nexusmods.com/skyrim/mods/34]https://rd.nexusmods.com/skyrim/mods/34
I know it says it's for Skyrim but it will also work for The Sims 3. After downloading it unzip the antilag.cfg and d3d9.dll into X: > Program Files (x86) > Origin Games > The Sims 3 > Game > Bin if using Origin. If you have the steam version of the game use : X: > Program Files (x86) > Steam > steamapps > common > The Sims 3 > Game > Bin . By default it is set to limit the game to 30FPS. I have been using this and it works fine. You can change it to 60FPS if you want by opening the antilag.cfg using notepad. I haven't had a chance to test the game at 60FPS but its not like The Sims 3 is a First person shooter or anything so IMO its probably not necessary. Run the game and your FPS should be capped at 30.
Alternately you can try turning on Vsync in either Nvidia Control Panel or AMD Catalyst software however I wasn't able to get it working. I'm using a Geforce 1080 and the latest Nvidia drivers. When I turned it on in the control panel it did nothing in the game.
After installing this fix I no longer experience massive lag spikes while in Build/Buy Mode the whole game also seems to be running a little bit smoother as well. Unfortunately there isn't much we can do about EA's terrible coding of the game so there will still be lag but this one has helped my game more then any of the other fixes as of yet.
**It also must be noted that FPS fix uses the same file as Reshade, d3d9.dll. I haven’t tested if this works using the d3d9.dll file from Reshade but I can assume it probably doesn’t. I do however believe there is a frame limiter built into reshade which should accomplish this same thing as this mod.
In Game Settings
1. Graphics
Resolution - You should always play at the native resolution for your monitor. Most monitors today use a native resolution of 1680x1050 or 1920x1080. If your game is struggling at this resolution you should always lower the graphics settings not the resolution.
Windowed? or Fullscreen? - This one is something that you will have to test. Some people say that the game runs better for them in Fullscreen and some say it runs better in Windowed Mode. My personal game runs better in Windowed Mode.
Object Hiding - Enabling this can help to increase performance especially if you have a large house. Essentially what this does is that the game renders every object on the lot you are in even if you aren't on that floor. So if you are playing on the first floor the game is using resources to render the items on the second/third floor etc.
Reflection Quality - Setting it to Mirrors and Water will work well for most people but adjusting this lower can offer a slight performance increase.
Edge Smoothing - I personally have not noticed much of a difference in performance adjusting this setting but this is the Anti Aliasing settings for the game. Try lowering it and see if it makes a difference in your game.
Visual Effects - According to the game "Controls the quality of particle effects on objects, Sims, and the town" Medium would be the recommended setting for Visual effects. It offers a happy medium between performance and visual quality.
Lighting and Shadows - Adjusts the shadow quality in the game. I run this on high in my game as there isn't a noticeable difference in performance between medium and high settings. Turning it to low will give a slight boost in performance but the shadows will be ugly.
Tree Detail - Keep this setting on high as there really is no difference in performance between settings. All you end up with are some ugly trees and no real boost in performance.
Enable Animation Smoothing & Enable Advanced Rendering - Both of these items should always be checked. Enable Animation smoothing makes no difference in performance and Turning off Enable Advanced Rendering can actually decrease performance.
Draw Distance - Keep this on high as it does not effect performance.
High Detailed Lots - With this turned up all the way I noticed a fair bit of stuttering in my game. I have mine set to 4 lots but this is a setting that should be tested to see what works for you.
Texture Detail and Sim Detail - Most computers should be able to handle both of these settings maxed for a small boost in performance you can lower the texture detail to medium. Sim Detail should always be set at Very High as lower this setting has only a very small boost in performance that probably wouldn't even be noticeable.
2. General Settings
Enable Shop Mode - This will disable the Sims 3 Shop from In-Game. Turning this off can help with stuttering.
Enable Lessons - Turning this off can possibly help with performance. I haven't noticed a difference but at this point we all know how to play The Sims.
Memories - Disabling Memories can offer a boost to performance and reduce in game stuttering.
**Alternately you can try using this mod if you don’t want to completely disable the memory system in The Sims 3
No (or fewer) automatic memories by velocitygrass on Mod The Sims
https://modthesims.info/d/446281
Enable Interactive Loading Screens - Turning this off has been said to reduce some in game stuttering. Besides nobody wants to play that stupid game anyway.
3. Online
Keep Me Logged In & Enable Online Notifications - Turning off both of these settings will help game performance and reduce stuttering.
4. Advanced Demographics Options
Enable Story Progression - Turning this off will reduce stuttering in the game. If you like this setting you can use the NRASS Story Progression explained further in this guide.
Advanced Settings
I will try to guide as best as I can with these but always MAKE BACKUPS of every file modified in this section.
In order to make this process easier be sure that "Hide extensions for known file types" is unchecked in the Windows Folder Options. In Windows 10
Click on View > Options > Change folder and search options. Switch to the view tab and under Files and Folders uncheck "Hide extensions for known file types"
Edit GraphicsRules.sgr - This setting will help the game run smoother and make for faster clothing changes.
1. Got to X:\Program Files (x86)\Origin Games\The Sims 3\Game\Bin
2. Copy the GraphicsRules.sgr file and back it up in either in a safe location or even in the same directory just name it GraphicsRules.sgr.orig. Click yes when prompted with the rename.
3. Now Open GraphicsRules.sgr with notepad (not the copied version)
4. You will see four lines that look like this:
seti cpuLevelUber 4
seti cpuLevelHigh 3
seti cpuLevelMedium 2
seti cpuLevelLow 1
5. Change the four lines to this:
seti cpuLevelUber 4
seti cpuLevelHigh 3
seti cpuLevelMedium 3
seti cpuLevelLow 3
6. Save in Notepad and close Notepad.
Edit Sims3.ini - This is how you force the game to use more then 2GB of RAM. I noticed a massive improvement in both CAS and Build/Buy mode with this. Clothing,Objects etc load almost instantly when this is changed. The Origin version of the game has already been patched to use 4GB of RAM however adjusting this value to reflect your systems total ram amount if above 4GB can be beneficial. If you currently have 4GB total of RAM and are using the Origin version of the game you can skip this step. It’s questionable whether or not this makes a difference in the game as The Sims 3 is a 32 bit game that only uses 4GB to begin with but it seems to actually make a difference in my own game.
1. Go to X:\Program Files (x86)\Origin Games\The Sims 3\Game\Bin (same as GraphicsRules.sgr)
2. Backup the Sims3.ini in the same method as the GraphicsRules.sgr
3. Open Sims3.ini in Notepad
4. Under [ResourceSystem] you will see this:
MemoryUsageLimit = 20000000 ( 10000000 for legacy/disc versions)
5. Ignoring the zeros this is showing that the Sims 3 is only using 4GB of ram (2gb for Legacy/Disc versions of the game). Depending on the amount of ram in your system you should change it to half of your total amount of ram.
Examples:
8GB Total Ram MemoryUsageLimit = 40000000
16GB Total Ram MemoryUsageLimit = 80000000
32GB Total Ram MemoryUsageLimit = 16000000
**Be Sure to only change the first number not any zeros. For 32GB+ its the first 2 numbers. Putting this too high could cause your system lock up or crash and possibly do damage**
Modding
First go here and follow the instructions on this page to set up your Mods folder:
https://www.carls-sims-4-guide.com/forum/index.php?topic=9187.0
1. Must Have Mods - Even if you don't plan on putting any CC in your game these Mod is highly recommended if not needed in order to keep the game running Smoothly.
NRAAS Master Controller -
https://www.nraas.net/community/MasterController
This mod is a must have. It fixes many of the errors in the game and helps immensely with game lag and stuttering.
Under Modules Download: (Not Required but useful)
MasterController Cheats - Adds "cheaty" functions to Master Controller.
MasterController Expanded Tatttoo - Expands the number of locations provided in Tattoo CAS
MasterController Progression - This mod adds progression related interactions to the "Master Controller" menu. Addition to Story Progression (below)
MasterController Integration - (Must have if you install a lot of sliders) This mod replaces all the CAS interactions in the game with the one managed by MasterController, including the "Create-A-Sim" button in "Edit Town".
Now go to this Page and download these other “Must Have Mods” by NRAAS
https://www.nraas.net/community/Mods-List
Overwatch - (Important) Contains error correction and periodic game maintenance/clean up to reduce issues and improve game longevity.
Error Trap - (Important) Core-Mod that performs save-game corruption cleanup, while catching and reporting unhandled script errors.
Traffic- (Important) Controls autonomous vehicular traffic such as the Food/Ice Cream Trucks, and provides some minor vehicle routing settings.
Saver - (Important) Adds autosave function to the game.
Register - (Important) Replaces the EA Role Manager with a custom version that corrects several bugs and allows for greater flexibility.
Other Useful Mods at NRAAS (Optional) Same page as above:
Story Progression - Basically a less buggy, less performance heavy replacement for the EA story progression in the game. Be sure to tick off “Story Progression” in the In Game options as stated above. (Install all the optional modules as well)
Decensor - We all know what this does
Dresser - Adds automated outfit control for inactive sims, adding accessories, and restricting CAS parts.
WooHooer - Alters the romance and woohoo interactions, provides greater flexibility and attraction scoring.
Retuner - Provides fine tuning of many settings in game like autonomous settings, pricing etc. This one can seem daunting at first but there are plenty of Returner settings to be found out there and its really isn’t that difficult to change the settings in game albeit time consuming.
Be sure to look over the other mods if you see something you like download it. Any of these mods should be safe to add to your game with little to no performance impact.
After that extract the files you just downloaded into \Documents\Electronic Arts\The Sims 3\Mods\Packages\Overrides
If you don't have an Overrides folder create one. The “Overrides Folder” is essentially a priority folder. Mods put into this folder will be loaded before any other package files you may add to the game.
In-Game NRASS Settings
These are just some settings to change to improve game stability. This is by far not comprehensive. For Retuner settings I would suggest a Google search of other users settings or consulting the NRASS help section for explanations of how to use this mod.
Click on the Town Hall in Map View
Under NRASS
Traffic
Ice Cream Truck - I hate that creepy Ice cream truck so I change everything to false and set Max Ice Cream Trucks to 0. If you like having it around still change the Max Ice Cream Trucks to 1
Routing
Allow Performance Career Limos - False (Limos create a lot of lag in the game)
Allow Use of Cars During General Routing - True (if disabled your sims will only use cars when you tell them to)
Always Use Taxis for Inactives Lacking Vehicles - False (Townies will no longer use Taxis)
Register
Allow Immigration - False (Random Townies wont move into your town keeping the population down and helping to keep performance from decreasing as sims move in.
Animal Control - Change the settings below for a performance boost
Maximum Deer - 2
Maximum Raccoon - 2
Maximum Stray Cats - 3
Maximum Stray Dogs - 3
Maximum Unicorns - 0 (Sorry Wild Horses and Unicorns add a good deal of lag to the game)
Maximum Horses - 0
Custom Content (CC)
Much like any other Sims game moderation is key. The more CC you download and put in you game the slower your game will perform. I'm not going to go into detail about how to install CC in The Sims 3 in this guide. These are just a few important tips to take into account when installing CC,
Try to install Sims3Pack files as much as you can. Sims 3 automatically merges these files and this leads to better game stability.
Merge you package files. Girl Meets Pixels made a great guide here:
https://www.youtube.com/watch?v=jIZ2LdoT-HY]https://www.youtube.com/watch?v=jIZ2LdoT-HY
Keep an eye on the size of your Sims 3 Folder in /Documents. It may seem crazy to imagine but massive CC shopping sprees can lead to a massive folder to the tune of 30GB+. Skins and Hairs are a killer. These files are usually rather large sometimes in excess of 80 - 100mb. My suggestion would be to find a default skin you like and just use that. Don’t install any non default skins. Also go easy on the hair. You don’t need 20 different variations of the same ponytail in the game. Clothing is usually fine but pay attention to the size of the CC. That cute dress you found on Tumblr that’s 65mb more then likely has way too high of a poly count and will just lag and be slow to render in the game. Sure it looks great in screenshots but it wont be practical in game. I’m not sure of the exact cut-off for CC but eventually the folder gets too large for the game to handle and it will lead to issues like save corruption or in some cases not being able to save the game at all because the game has run out of memory. Sadly if this happens there is no fix for this and you will lose all of your progress and possibly your save file as well.
Advanced
World Fixes EA left many routing issues in a lot of their worlds that are known to cause lag and often times crashing as Sims bunch up in broken routing areas on the map.
All the World Fixes can be found on Ellacharmed's Wordpress page. Follow the instructions very carefully and install the fixes for all the worlds you have installed in your game.
https://ellacharmed.wordpress.com
Other Useful Tips
Delete your cache!! This one can't be stressed enough. I delete mine before every game play and never have issues starting the game up. A guide can be found here:
http://simswiki.info/wiki.php?title=Game_Help:Sims_3_Delete_Cache_Files
Turn off Origin In Game - This will give a noticeable improvement.
Close all other programs running in the background.
Turn on Game Mode or Silent Mode on your Antivirus
Useful Sims 3 Programs
s3pe
http://www.simlogical.com/ContentUploadsRemote/uploads/189/
Sims 3 Dashboard Tool
http://modthesims.info/download.php?t=387006]http://modthesims.info/download.php?t=387006
CC Magic
http://modthesims.info/download.php?t=461888]http://modthesims.info/download.php?t=461888
Delphy's Sims 3 Pack Multi-Extractor
http://modthesims.info/download.php?t=364038]http://modthesims.info/download.php?t=364038
Save Cleaner by Kuree
http://www.simlogical.com/ContentUploadsRemote/uploads/1532/
673 notes
·
View notes
Text
ts2 edited graphicsrules.sgr + patched executables
since @vidcunds deactivated their simblr, which had a great tutorial on how to edit the graphicsrules.sgr file by hand to make it (hopefully) work with modern PCs, I uploaded my personal graphicsrules files (for both the game and body shop).
this contains the following changes:
disableTexMemEstimateAdjustment set to true
enableDriverMemoryManager set to true
dirtyrect dynamicRenderStrategy set to 0 (to make reshade depth functions work in case you want to use them)
also included are executables for both ts2 and body shop that have been 4gb-patched.
download and more important info under the cut.
DOWNLOAD LINK
pre-requisites:
your graphics card added to your videocards.sgr (you can either edit by hand, or use graphics rules maker to automatically do this step)
how to install:
replace the graphicsrules.sgr files in both tsdata\res\config and tsdata\res\csconfig in your last expansion pack folder with the ones you downloaded.
important note: make sure to edit the line that starts with `seti textureMemory` to the maximum amount your dedicated graphics card has. to get an accurate number, check the section on how to accurately determine how much graphics memory you have.
how to accurately determine how much graphics memory you have:
in my experience, neither graphics rules maker, nor dxdiag give out accurate numbers (the former gives a number too high, the former too low). to get an accurate number, download and run gpu-z.
the memory size number is the number you want to set your texture memory size to

485 notes
·
View notes
Last Seen Blogs

nohairisbesthair
No Hair Is Best Hair

rum-138
RUM 138


gggamer25
GG_Gamer

mujereslatinashermosas
Mujeres Latinas Hermosas