#goth diy tutorial
Explore tagged Tumblr posts
Text
DIY Goth flare pants


Somehow, I never posted these when I made an altered clothing masterpost. I made these YEARS ago, and they're still so fun to wear. They swish around my feet like a skirt, but they're PANTS. I like wearing them with a corset belt and a bell-sleeve top.
SUPER easy to make. Black velvety polyester pants from the thrift store, cut the legs at the calf, add a lace panel to the leg parts you just cut off, sew lace trim on the bottom, reattach to pants. I had excess fabric that I used to make the bows, which I got after taking in the legs to tighten them for a more extreme flare.
#goth clothing diy#diy advice from your local goth#gothgoth#goth diy#goth subculture#goth#goth clothing#goth diy tutorial#mine
11 notes
·
View notes
Text
Soda tab flower tutorial post! 🌻🌼🌸 lots of pictures included. ****This is part one, check the reblogs for the other half!! *****
****also this is not my idea. It's been done before and I got inspired by pinterest where I saw really similar diys****
What you'll need: scissors, yarn or string (any color) and soda tabs. 6 tabs for one flower (or 7, but I use 6 personally)
Step 1: take 2 tabs and lay them over each other so that the hole on the bottom of one lines up with the hole on the top of the other, like this-


And tie them together. Then cut the short end of the string sticking up to get rid of the excess. You'll want to tie it with the back of he tabs facing up so the knot will be on the back side. Make sure to tie it tightly so the knot doesn't slip around when you're wrapping the tabs with the yarn
Step 2: wrap the side edges of the 2 tabs 3 times. You'll want to do it relatively tightly, but not as tight as possible. The tension is a little tricky to figure out because you want the flower to keep its shape well but also be loose enough to bend into a flower shape with ease. This takes practice.


Step 3: On the 3rd wrap, add another tab under the 2nd tab, like this-


And pull the string through the back of the new tab you put under the 2nd tab. And wrap 3 times to attach it to your other tabs. Pulling the string over the edges to the back, through the lined up holes, and pulling it out towards you. On every 3rd wrap, add another tab the same way until you have 6 tabs wrapped together like this-

#solarpunk#punk#solarpunk diy#punk diy#solarpunk fashion#solarpunk aesthetic#punk fashion#diy#fashion#tabistry#soda tabs#upcycled jewelry#goth jewelry#jewelry making#jewelry#punk jewelry#goth diy#goth#goth fashion#hatchet makes stuff#tutorial#long post#crafting#art#recycling#recycled jewelry#hopepunk#ecopunk
380 notes
·
View notes
Text

Orange Sun Granny Square crochet pattern, now available on my Etsy, RoseOfMayGreece! Easy instructions in US terms with photos of every step!
#crochet#sun#sunburst#solar#sunbeam#granny square#crochet tutorial#easy crochet#gothic#goth#pagan#witchy#stained glass#orange#beautiful#whimsical#whimsigoth#symbol#sunny#applique#patch#square#tutorial#RoseOfMayGreece#etsy#ravelry#onewomanbusiness#small business#forest#diy
82 notes
·
View notes
Text
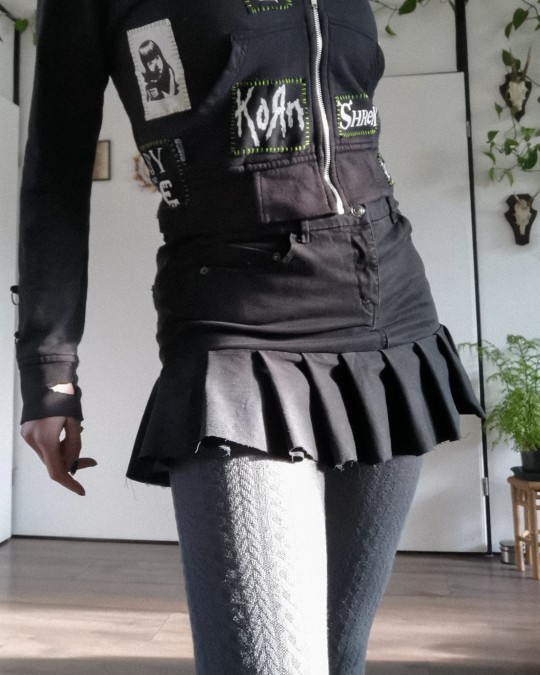
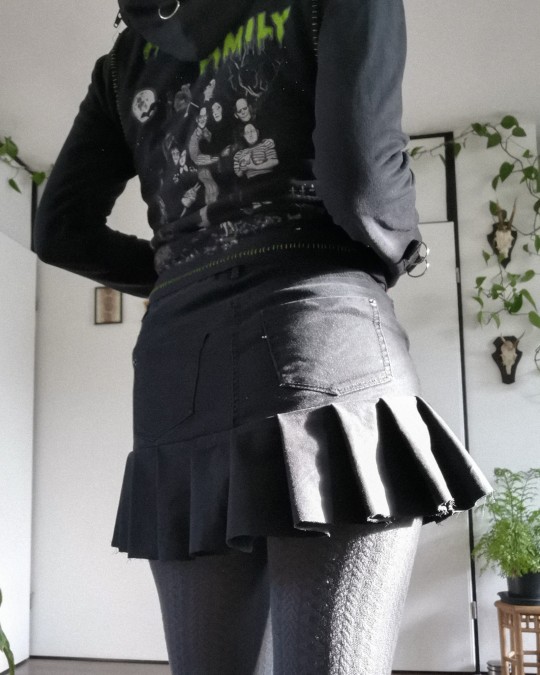
jeans to y2k/tripp inspired skirt ݁ ˖ִ ࣪✩₊ ⊹˚
I thrifted some jeans recently, not knowing if they would fit me, but buying it anyway bc 1) it was €1 and 2) if it didn't fit I could surely make something with it.
turns out it was wayyy too small 😂 so I decided it would be perfect to make one of those tripp/y2k skirts with!
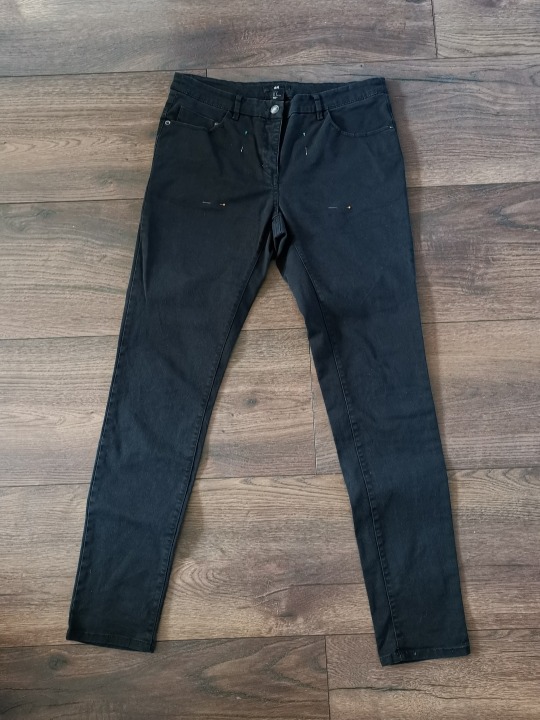
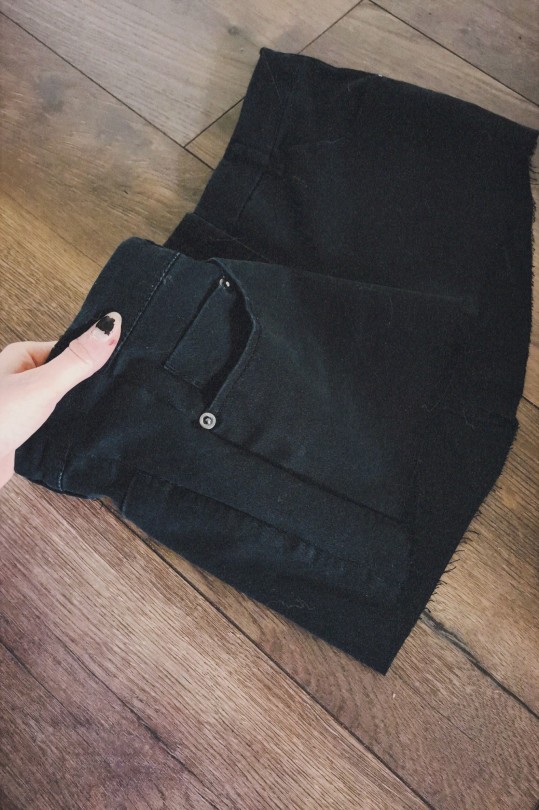
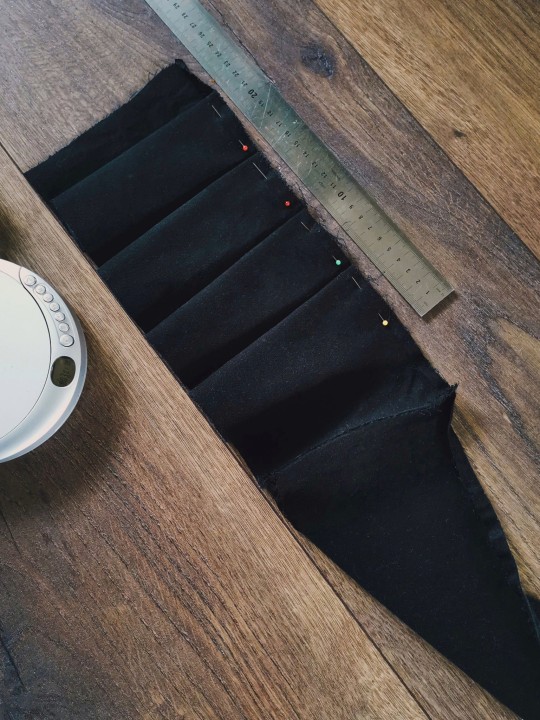
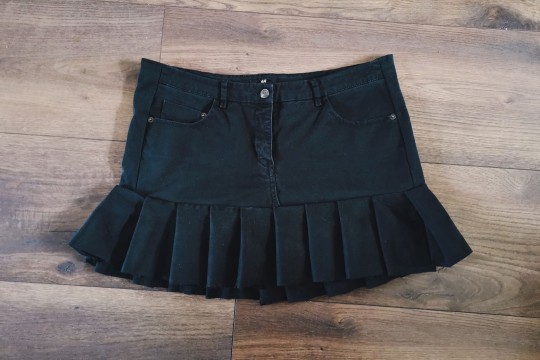
firstly I cut off the legs just above the crotch. I then tried it on, found it was too tight still, and added two strips of leftover fabric on either side. it fits perfectly now!
then I cut the remaining pant legs in even strips and connected them all to make one long strip. I folded ruffles of 5cm along the length, and sewed it in place before I sewed it onto the bottom of the skirt!
and just like that, I have a new skirt 𓆩♡𓆪 I might add some strips with d rings on it once I figure out the placement ^_^ but for now it's done
#mine#i showed it to my partner who immediately was like YOU HAVE SO MUCH TALENT#which was rly cool to hear actually#goth#alternative#diy#crafts#handmade#tripp#skirt#y2k#selfmade#tutorial? kinda???
333 notes
·
View notes
Text
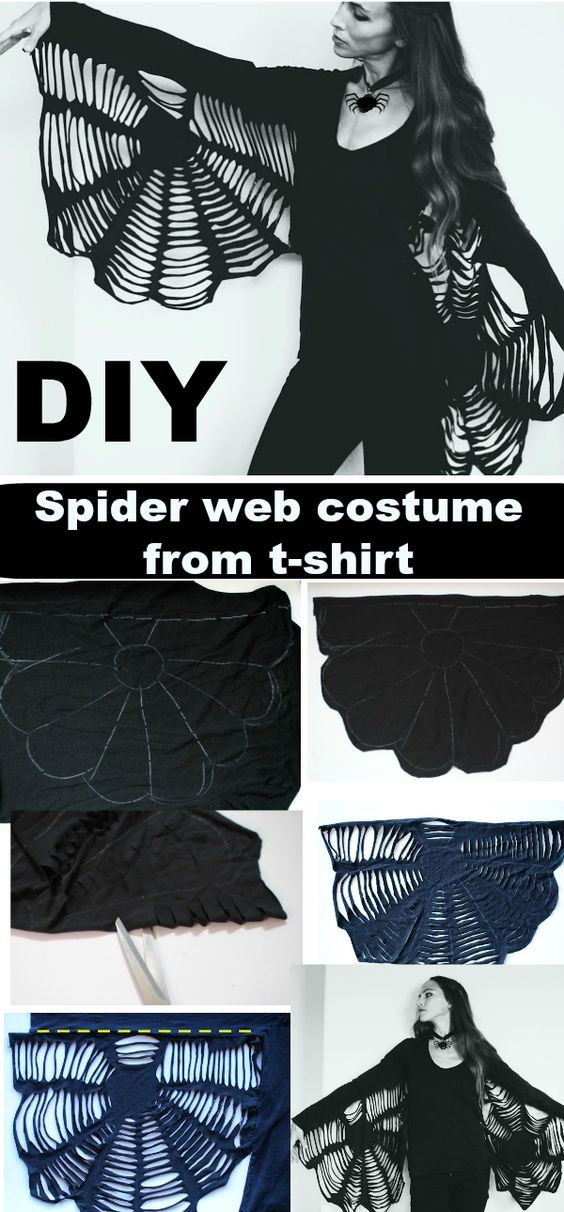
Source: Pinterest, TrashToCouture
(Sidenote: her blog also has some interesting tutorials for goth/alt-adjacent clothes, like this lace choker or a lace slip dress)
#darkcomforts#gothic#goth aesthetic#goth#romantic goth#aesthetic#diy#diy clothing#thrift flip#alt diy#alt clothing#spider web#halloween#spooky season#diy inspiration#diy tutorial#sewing#handmade#crafting#crafts#arts and crafts#goth diy#gothic diy
521 notes
·
View notes
Text
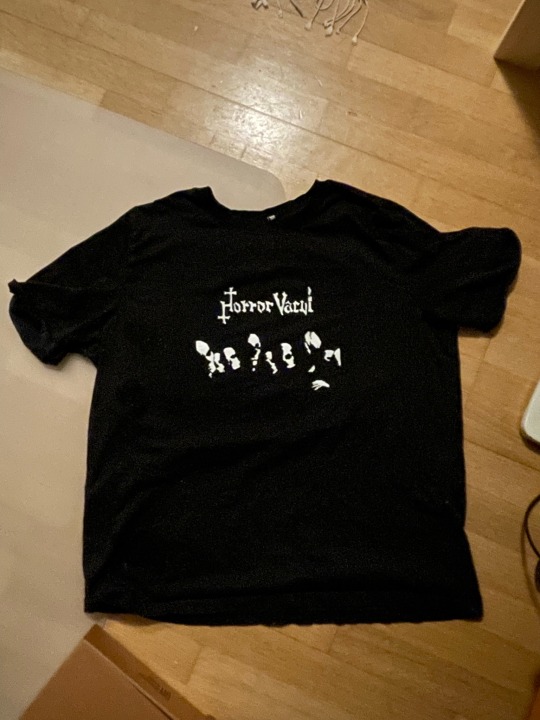
Real proud of this T-shirt print I just made! It’s the band horror vacui which are one of my favorites right now
For anyone interested: I printed out a picture of the picture and then put tape on both sides to make the paper stencil not as fragile when cutting, then I cut out the stencil and glued/taped it on the T shirt with a piece of cardboard underneath so it doesn’t bleed thru, then I just used a little sponge to press on about 3 layers of white fabric paint!
#diy projects#diy#diy punk#diy craft#diy or die#diy fashion#diy tutorial#diy patches#goth#art#gothic#goth music#horror vacui#horror vacui band#deathrock#gothic rock#diy ideas#crafts
31 notes
·
View notes
Text
Made a spooky necklace last night so thought I'd make a tutorial of it, it took about 20 minutes:
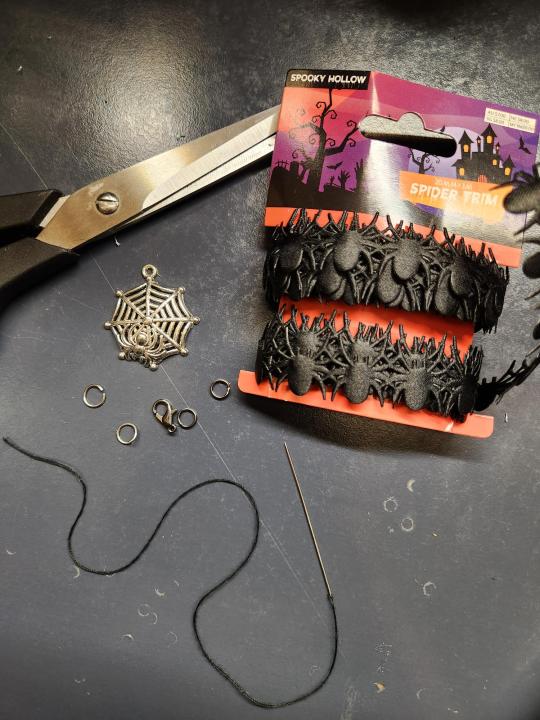

1: To make this I used 1 spider pendant, 2 jump rings, 2 split rings, 1 lobster clasp, scissors, needle and black thread, and spider trim I got last halloween.
2: First, cut the ribbon to about the right length. You want it to go around your neck with maybe a 1.5cm gap for the clasp and attachments.
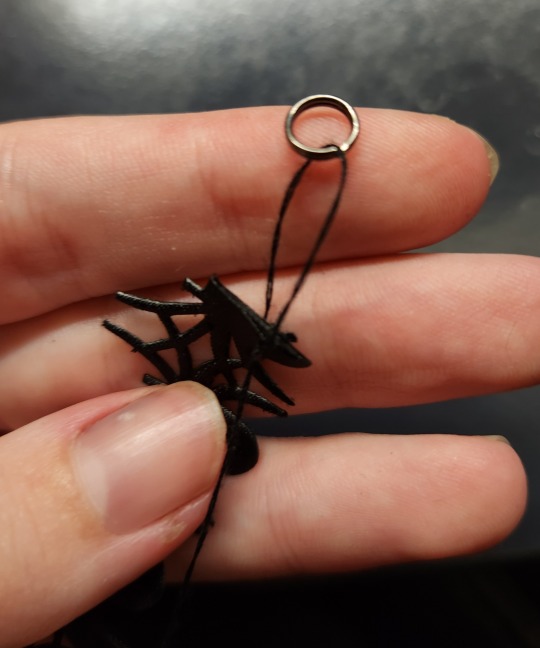
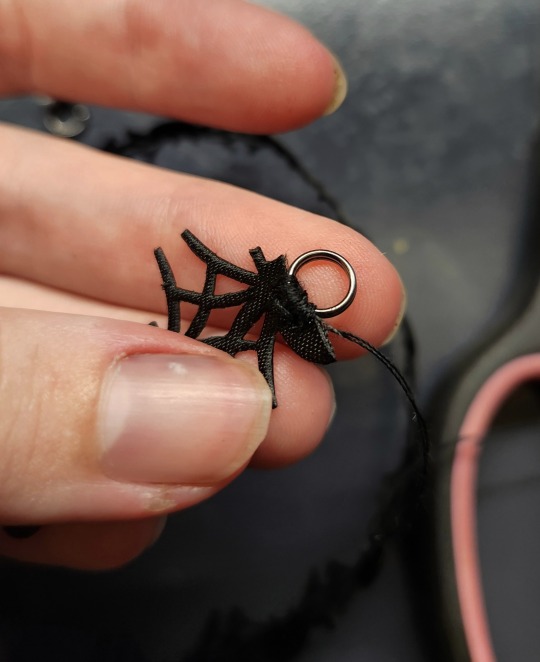
3: get one of the split rings. The ribbon I'm using is uhhh not great quality to say the least (the eternal problem of trying to make a thing that will last years from halloween items designed to be used once) so instead of looping it through the gaps in the ribbon I'm sewing it in place in the thickest bit of the material I can find. To do this, I'm just looping circles of thread between the centre of the spider and the split ring.
4: Continue this about 20 times until it's steadily held in place then tie the thread off.
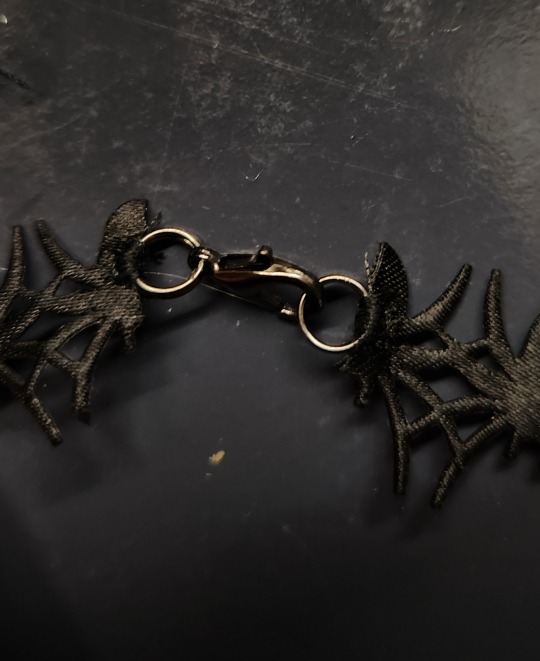
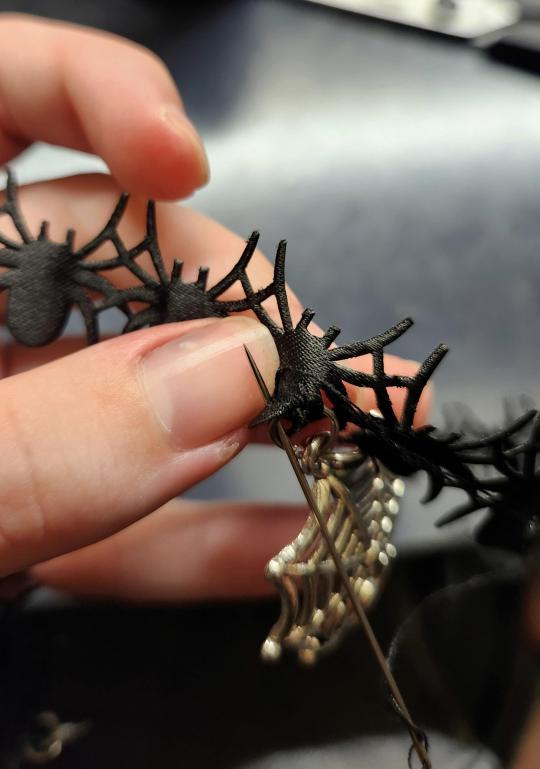
5: Attach the lobster clasp/whatever other clasp you're using to the second split ring, then do step 3/4 again to attach the second split ring to the other side of the ribbon. Now, the overall structure is complete.
6: Add the pendant: I did this quite differently to how I usually do this (more discussion at the end) as the halloween spiders ribbon is so fragile and loves to tear apart. So I attached 2 split rings to the pendant, then used the same method as step 3/4 to sew the ends of the split rings onto the two spiders on each side of the pendant to distribute the weight. And that's it!
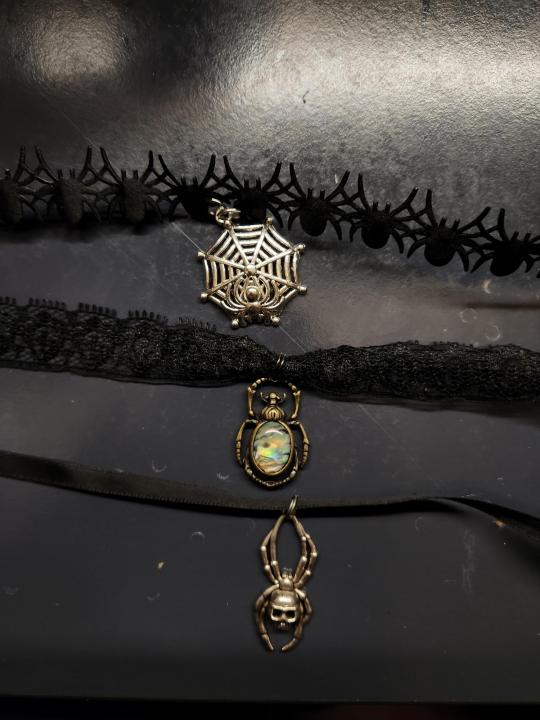
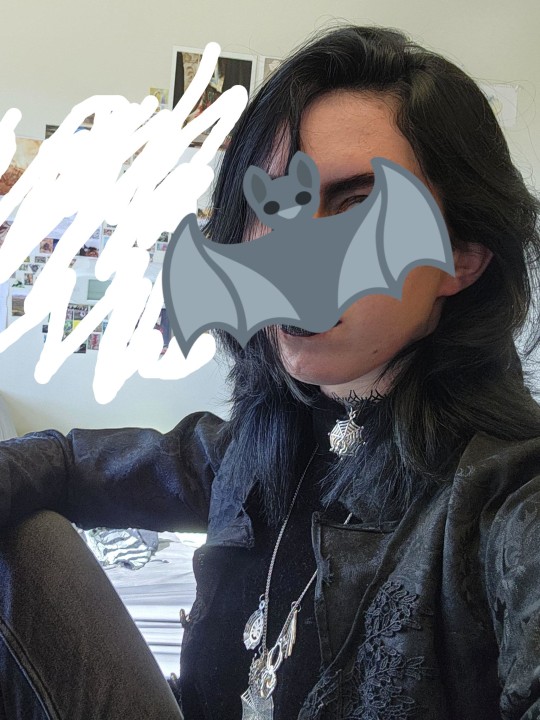
Here are 2 other necklaces I made with basically the same method. The other two are just hung on with split rings because 1: the ribbons are much sturdier, so I wasn't as worried about wear from movement 2: split rings are probably better for this because they'll scratch the ribbon less at the opening (currently having to redo an old project because I made some bad jump ring and ribbon decisions) and are less likely to fall off, but I had spent the afternoon hitting my thumb with a hammer so really could not be bothered opening split rings lol. Also, the spider with the skull on the thin ribbon is held closed with a safety pin because I was out of lobster clasps when I made it, so that's also an option. Then the last picture is me today with the necklace
#tell me if anything about the tutorial is weird and unclear I am going to try and run a workshop session for making these for our#entomology society stall and was thinking of basically using this tutorial#this is my first time writing a tutorial or anything... so not 100% sure how to do it#goth fashion#goth diy#goth goth#spider#jewelry
7 notes
·
View notes
Text
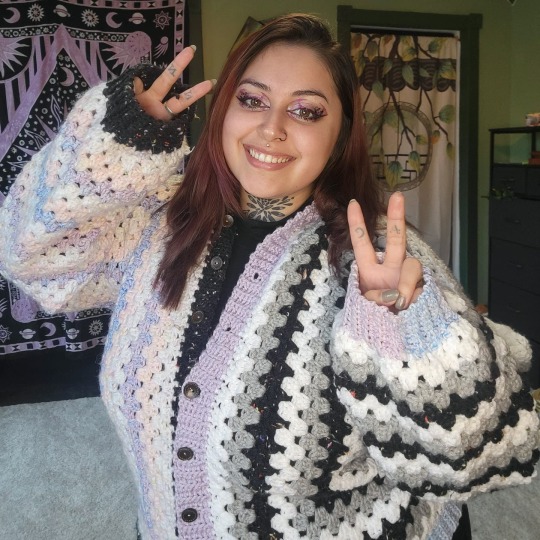
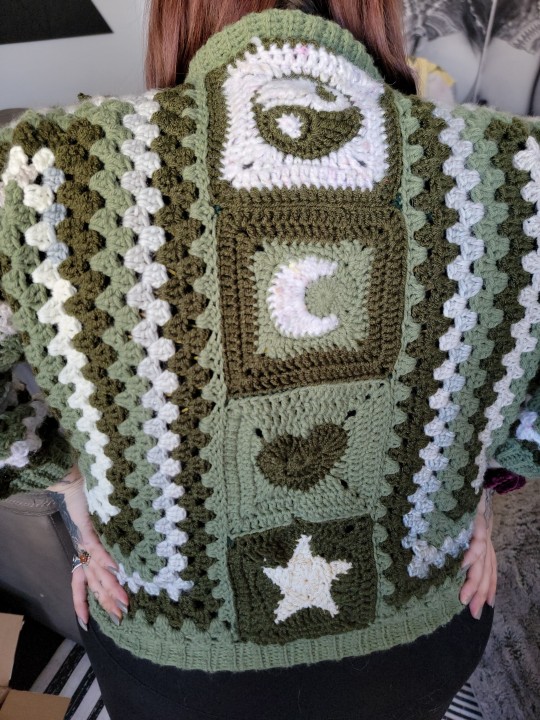
Happy Valentines day everyone! I've recently made this tutorial if you'd like to make these sweaters 💝 I hope you all enjoy it and crochet your hearts out 💓
youtube
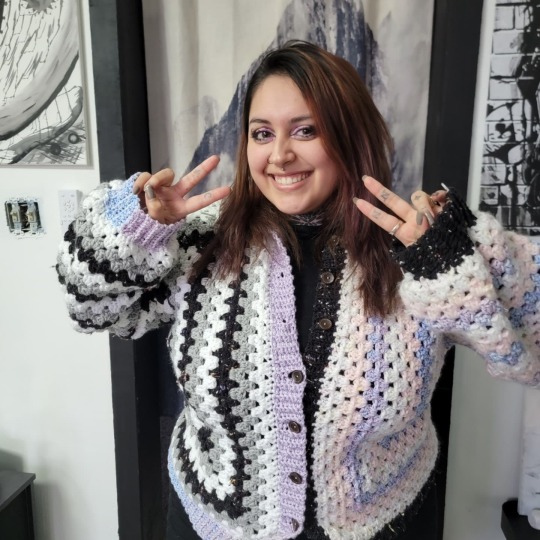
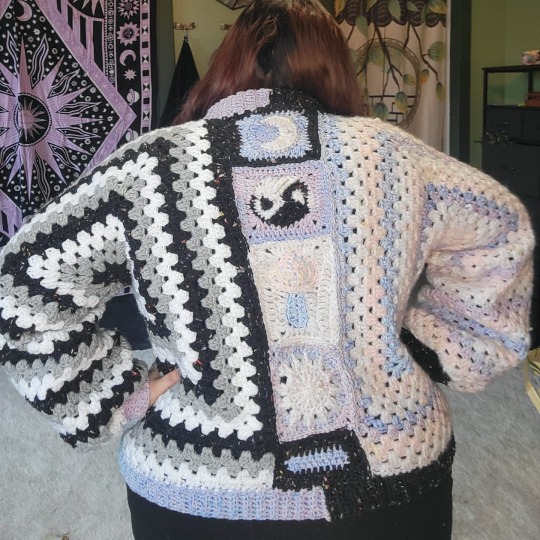
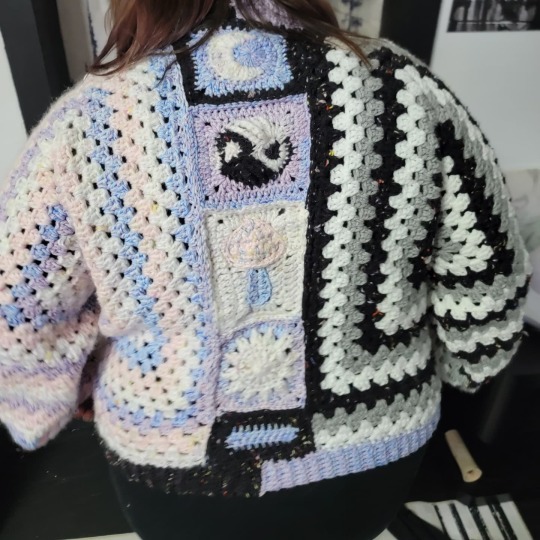
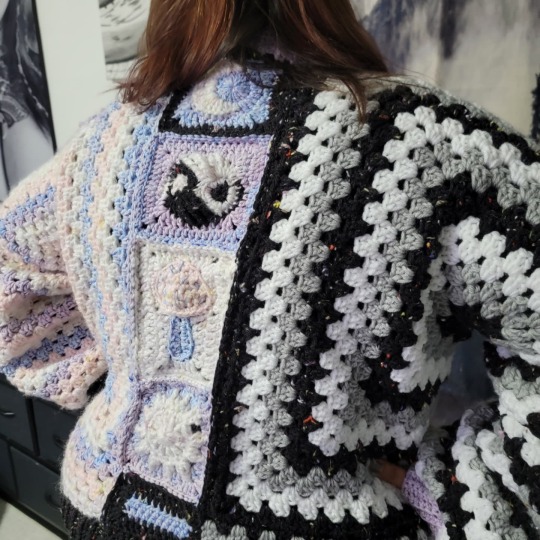
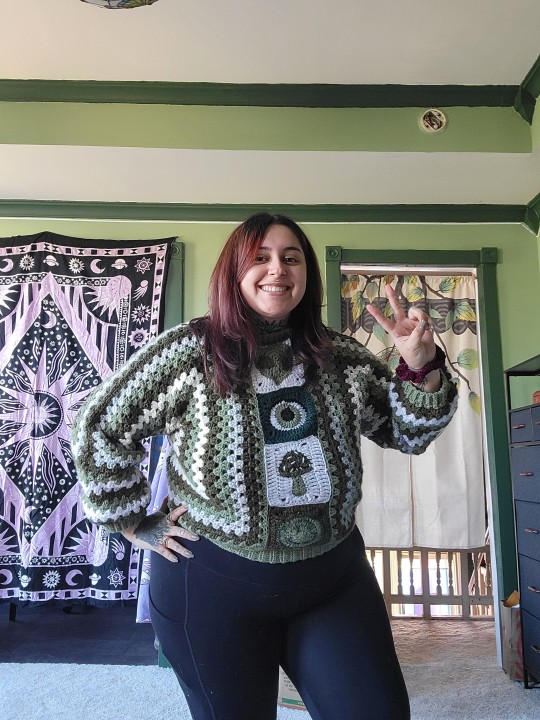
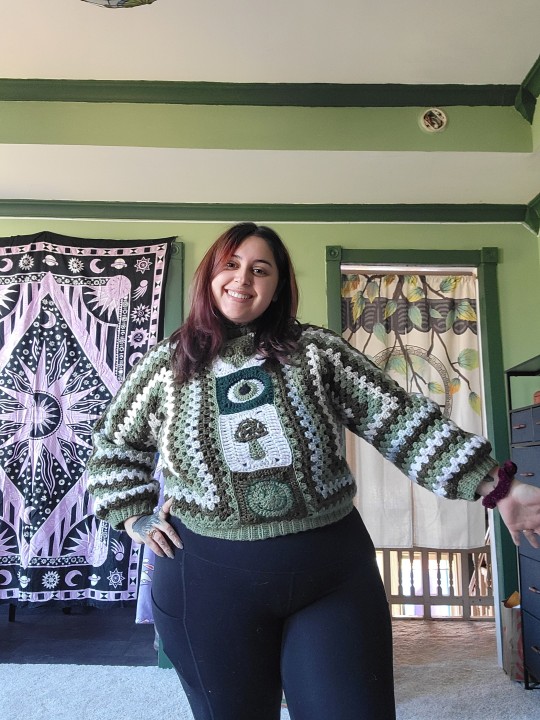
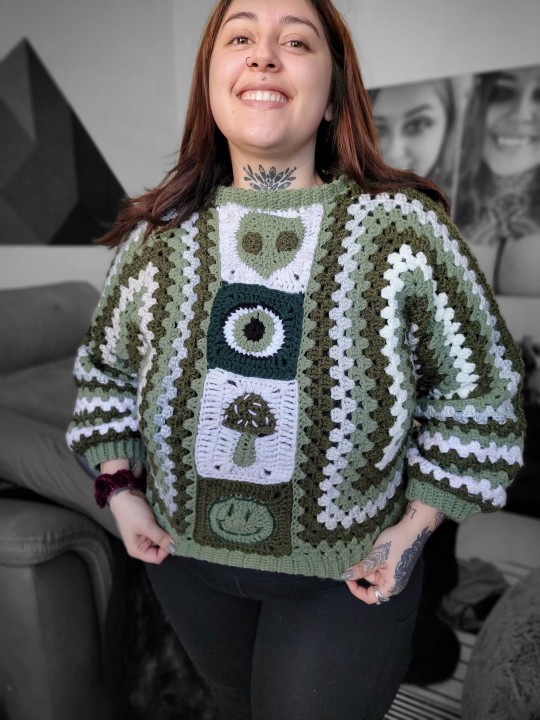
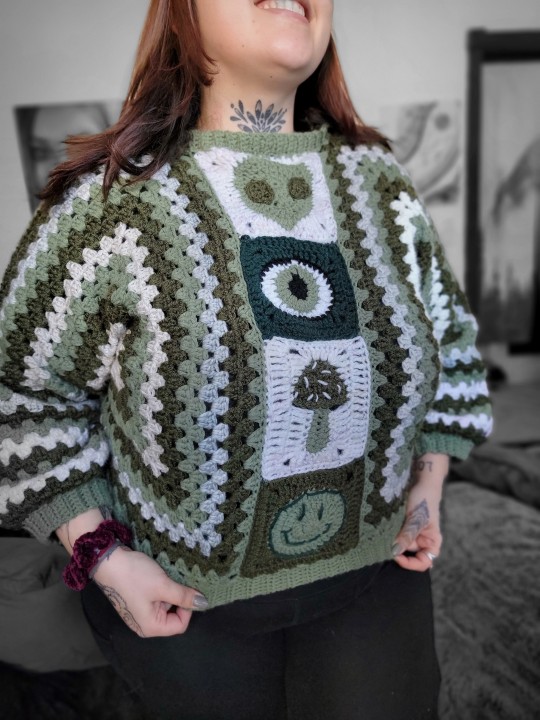
#diy clothes#diy fashion#diy tutorial#crochet diy#crochet#goth#gothic#goth aesthetic#goth girl#pastel#kawaii#cute#sweater#crochet clothes#Youtube#hippie#hippie fashion#hippie clothes
10 notes
·
View notes
Text
Hey, don't cry. Gather some fabric scraps, matte Mod Podge, a paintbrush, a hot glue gun, some cool trim, and a lampshade that needs a makeover. Cut the scraps and iron them, then paint Mod Podge on the lamp and stick the scraps onto it in sections until it's completely covered, tucking edges under the lampshade rim. Carefully paint Mod Podge overtop of all the fabric and let it dry. Hot glue any edges that still need tucked or didn't stick as well, and then hot glue the trim around the edges of the lampshade, finishing with a folded edge on the trim for a clean look, okay?
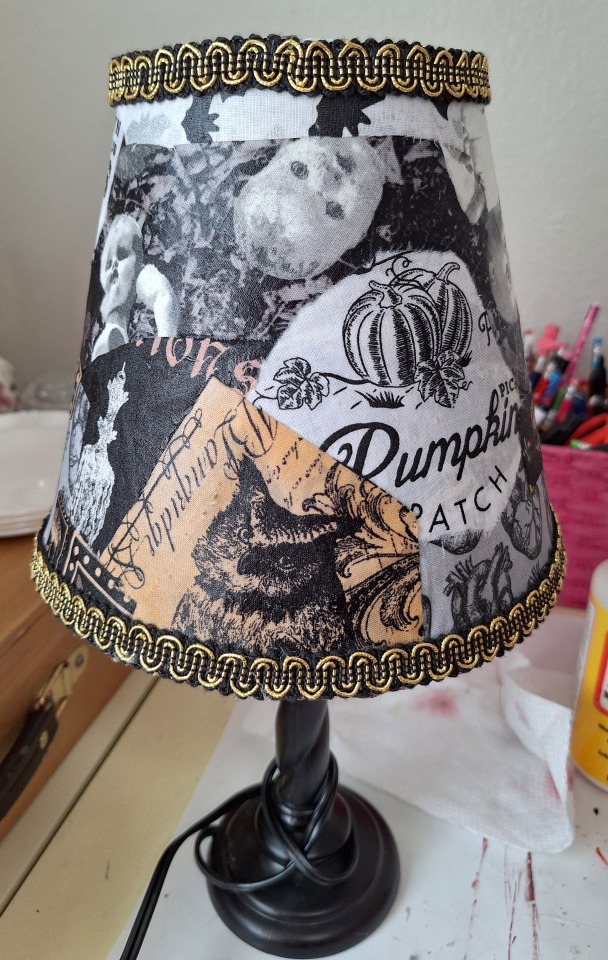
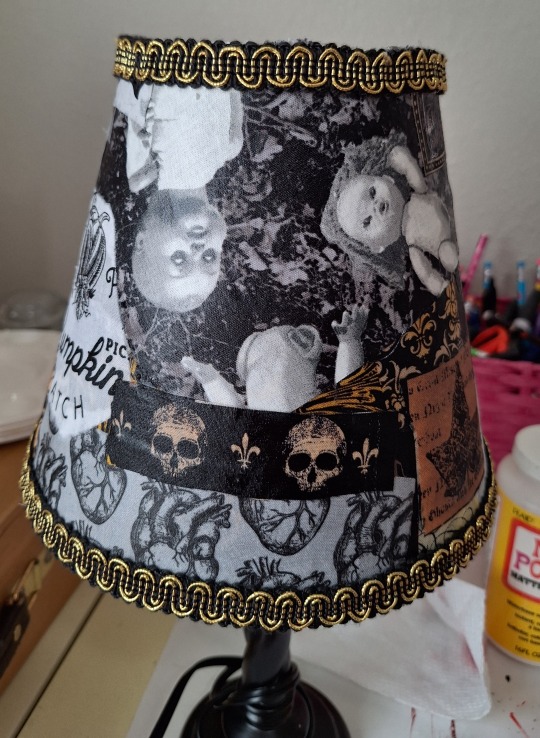
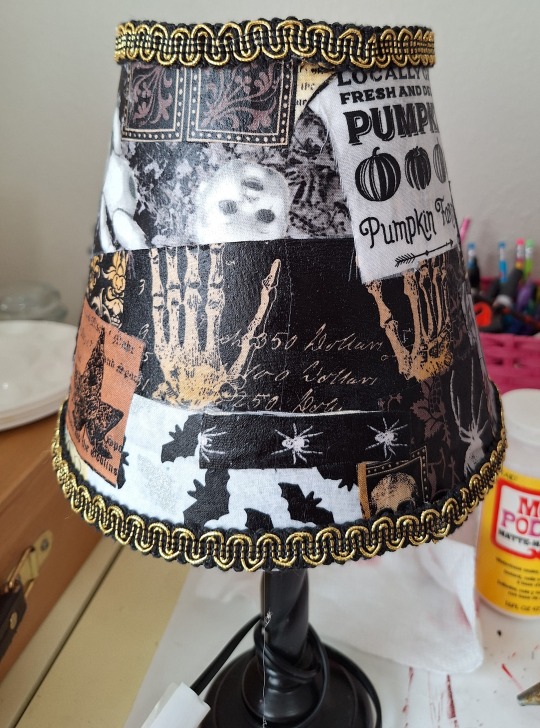
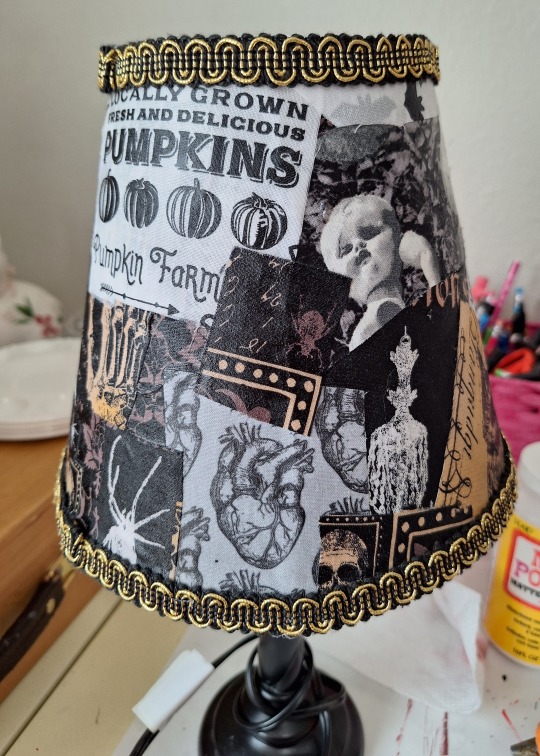
(This only took about an hour and a half and was super fun! My victim was a thrift store lamp.)
#goth diy#diy advice from your local goth#gothgoth#goth subculture#goth#diy tutorial#goth diy tutorial#lampshade diy#goth home decor#mine#decoupage#halloween decor
41 notes
·
View notes
Text
🕯️New video is up!!🕯️
I go over almost step by step on how I’m making my first candles for my shop!!
youtube
#art#artist#candles#candle making#shop small#small business#youtube#gothcore#goth aesthetic#gothic#goth#occult#spirituality#diy craft#diy projects#diy#tutorial
1 note
·
View note
Text
WHERE DO I GET MY CLOTHES/ACCESSORIES FROM ?? :3

ppl have asked me this so here ya go!!! tried to go in depth but if there’s anything else u wanna know i totally gotchu !! :3 (go further down for where i shop online)
-thrifting
-hand me downs
-diy
When thrifting alternative clothes ppl always complain that there’s nothing for them cuz most of the time they’re just not looking right. don’t just look for things you’ve seen online, band shirts, or things with specific design like stripes, cheetah, or zebra print. look for anything literally ANYTHING and if it’s boring and plain just diy it. you want animal print? paint it. you want band shirts? paint it. don’t have the skills? trace it onto paper, cut it out, boom u got a stencil now u can use that to paint onto a shirt.
simple things like cheap blank tshirts, old hand me downs, blank tank tops, spaghetti straps would work perfectly.
i’ve made shirts from an old shirts i find in my house. i cut out a stencil and used cheap fabric paint for the logo’s and cut the shirt if it doesn’t fit right
i’ve also made shorts by cutting a pair of old jeans and distressing them at the bottoms. if i don’t wanna distress shorts i cut them a little longer and then fold the ends up and glue or sew them down (I CAN TOTALLY MAKE TUTORIALS!!)
i ALSO make my own accessories (bracelets, necklaces) from either older accessories, old clothes or whatever i find :b
Things you SHOULD NOT DO!!!
-Don’t but from shein or any fast fashion places/websites!! don’t support that kind of thing especially for some bad quality clothes..
-Don’t buy from thrift stores and resell them online for higher prices !! ur taking from ppl who actually need them and raising the prices of thrift stores. they exist for ppl who can’t afford much and you’re pricing items for more than they ever were.. if ur gna resell then sell them for the price you got them at least ..
some places i shop online for my clothes are:
-ebay
-poshmark
-mercari
-depop (be careful with prices or scammers pls! look right and don’t buy anything from resellers overpricing thrifted or “vintage” items !!)
-vinted
some places i get my accesories or stuff to make my accesories like studs, spikes, patches, belts, ect- (the last three are more for punk diy)
-etsy
-headline records
-angry young and poor
-studs and spikes
If there’s anything else you’d like to know or any tutorials you’d like me to do PLSS LET ME KNOW AND I WILL !!
I can do goth, punk, metal, and emo/scene diy !
#emo#emo boy#2000s emo#myspace#scene boy#scene fashion#scene kid#scenemo#2000s scene#2010s#emo art#emo fashion#emo scene#emo kid#emo music#emo hair#emocore#emo aesthetic#emo 2000s#indie scene#scene emo#scene hair#scene#scene music#myspace aesthetic#myspacecore#diy#alt diy#diy or die
84 notes
·
View notes
Text
DIY Basics
-Goth DIY Tutorials Number 1 (Part 1)- Hi there, I decided to start a little DIY series! I’m not the most professional at anything lol but I’ve been doing DIY and crafts my entire life and been part of the goth subculture for 10+ years. I’ve seen a lot of baby bats and people inexperienced in crafts online saying they don’t know how to DIY thrift store clothing to be goth so I’m here to help! I believe DIY is super important to the goth subculture and should be easy and accessible, and if I can stop anyone from buying big fast fashion brands I’ve done my job.
For the first post of this series I thought I’d link some sources for people new to DIY or looking for some easy projects to do yourself (projects will be in part 2)🖤This will help you find a starting point if the idea of DIY is overwhelming.
None of these links are mine! I will be posting my own tutorials as part of this series though:)

Some of the most basic starting points for goth DIY are using fishnet tights as a top (just cut a hole in the crotch and cut off the feet), putting safety pins in everything, adding holes to clothes, and adding pins and patches. I like to make my own patches, either by free handing or stenciling, which I linked a tutorial for in this post.
Helpful tools to have:
(I don’t agree with buying from aliexpress but their other sources are great!)
Sewing Tips for Beginners:
T-Shirt Design Methods:
This is just s few ways to weave t-shirts, there are a ton of different ways to do it and YouTube has some great tutorials, especially on Angela Benedict's channel
RIT Dye Tutorial:
Patches:
Sewing them:
Stenciling them:
youtube
#DIY series#goth diy#diy clothing#clothing diy#diy fashion#thrifting#thrift flip#upcycle#goth goth#90s goth#goth#mall goth#y2k goth#goth girl#goth fashion#goth subculture#goth culture#goth scene#punk diy#Youtube#goth clothing#goth sewing#goth crafts#goth thrifting
218 notes
·
View notes
Text

Source: GothItYourself, Pinterest
#darkcomforts#gothic#goth aesthetic#goth#alt diy#diy tutorial#diy craft#diy#diy or die#goth diy#gothic diy#diy projects#diy ideas#crafting#arts and crafts#craft#handmade
7 notes
·
View notes
Note
I have a 16 almost 17 year old who wants to start dressing goth/punk, and I'm all for it, I just don't...know...how...to help? I'm not a fashion person, my fashion is funny tee shirts and jeans, and I want to help but I don't know HOW. Do you have sort of a ...starter list of shops or types of clothes or anything? TL;dr -- tee shirt Mom needs help pls
Firstly, you are an AWESOME mom.
Ask your kid what style of goth they're interested in; ask them for images, links, anything. Goth/punk fashion is a vast umbrella for all sorts of different things. No matter what they show you, remember that goth/punk fashion doesn't have to be from "subculture" stores - avoid places like Killstar, Dolls Kill (ESPECIALLY AVOID THEM), Shein, etc. A lot of the basics are things you can find at any big-box mainstream store (or Amazon); for speciality items, shops like Foxblood, Lively Ghosts, and Die With Your Boots On are great. And don't forget resale sites! eBay, Poshmark, Depop, etc. However, some recommendations for goth/punk basics:
Oversized black shirts - tshirts, button ups, tunics, whatever. All of these can be customized by cutting off collars, sleeves, adding slashes, adding safety pins, adding lace or ribbons ... you get the idea.
Black leggings.
A black duster. Lace, satin, velvet, cotton, rayon, whatever. You can find some amazing ones by searching for "black beach cover up" on Amazon.
Fishnet tights - cut off the feet, cut out the crotch, and boom! Instant fishnet shirt to wear under other things.
Belts. No matter the gender presentation, wearing an interesting belt will make the outfit more striking. There are all sorts of faux corset belts out there (which are my personal preference), but layering a bunch of different belts is also a great look.
Boots! While there are a LOT of specialty gothy boots out there, black boots in a style like the original Dr. Marten's boots are a classic for a reason.
With those things as a foundation, your teen can start enhancing and customizing their look with accessories - necklaces, bracelets, pins, (this is where thrift stores and mainstream mall stores can be helpful - layer on all the necklaces you can find from Ross or TJ Maxx!), or shawls, scarves, plain blazers they customize, etc. Antimony and Lace has great project tutorials. This Gothic Charm School articles that may also be useful:
Gothy DIY Tools - the Essentials
500 notes
·
View notes
Text
Guide to Goth Clothing


Here is a general guide for those who are interested in dressing goth. Obviously none of these things are required to be goth since it’s a music based subculture, however I hope this can be helpful to anyone trying to put together a goth wardrobe.

The Basics
♰ Patterned tights/fishnets
♰ Black slip dress
↳ Layer w/ fishnet top (can be made from tights)
♰ Costume jewelry
♰ Plaid pants or skirt
♰ Leather jacket
♰ Vests & corsets
♰ Belt chains
♰ Flowy blouses, skirts, & dresses
Iconic Brands
♰ Hot Topic
♰ Vivienne Westwood
♰ Betsy Johnson
♰ Disturbia
♰ Tripp NYC
♰ Scarlet Darkness
Thrift Tips
♰ Make a list of specific pieces you’re looking for (ex: vest, flannel, ect)
↳ Use Pinterest as a reference
♰ Some stores sell bags of costume jewelry
♰ Look for patterns and textures like lace and velvet
♰ Don’t judge a piece at face value — clothes can be altered!!
↳ Consider the DIY potential
Misc. Advice
♰ Black Dye is your best friend!!!
♰ Sewing is a lot easier than it looks
↳ Take advantage of free online tutorials
♰ Accessories can take an outfit from basic to gothic
♰ Go to antique stores for vintage pieces
Don’t hesitate to ask if you have any questions!


#goth#gothic fashion#goth subculture#goth fashion#alternative#alternative fashion#baby bat#goth clothes#gothic#thrifting#alt diy#alt fashion#mall goth#trad goth#whimsigoth#romantic goth#goth tips
46 notes
·
View notes
Note
What's your biggest piece of advice for baby emos??
get ready for a huge text block
1. music is THE MOST important part of the subculture. there's a lot of debate about what is or is not emo, specifically bands like mcr, ptv, fall out boy, ect are considered "poser" emo and "overrated" but I don't agree. emo or not those bands are extremely influential to the subculture. that being said other bands are also just as in need of recognition! my favorite emo bands are: alesana, silverstein, story of the year, black veil brides, a day to remember, a skylit drive, blessthefall, of mice and men, taking back sunday, and senses fail!!
2. clothes aren't what makes you emo, but it's definitely a huge part of the subculture. back in the 2000s emo kids were said to be "obsessed with how they look." band shirts are a staple, studded belts too (though they can get expensive if you shop at hot topic so I recommend hitting a thrift store or a second hand place like Facebook marketplace, making your own is also always an option!!) skinny jeans, beaten up converse or vans (bonus points if they have song lyrics on them) gloves, zip up jackets, messy eyeliner, other band merch, and spikey bracelets are all staple pieces.
3. DIY!!! emo was dead the second people thought a $25 tshirt from shein made you emo. emo is rooted in shitty sharpie tshirts and stitch work. YouTube is a wonderful place to find diy tutorials if you're just starting out
4. moral standpoints. emo is short for emotional, we're whiney little shits lolol. being open about the fact that you're sad or mentally ill and embracing it is what emo is about, we're a subculture made for losers who feel like they don't belong because we're not mentally sound. we made our own place to belong. lots of emo lyrics are about trauma and how we overcome it and giving hope to teenagers everywhere. because we're a subculture full of misfits, we welcome all types. gays, trans people, poc, poor people, ect. there's absolutely zero room for bigotry.
5. yt channels! a really great way to get involved almost immediately. some of these are modern and some from 16-17 years ago, go check out these channels! baileyheintzelman, TheLosersFromNowhere, AmberKatelynBeale, emoworldtv, The Punk Rock MBA, acidmilk, and KERRANG podcast (they have a lot of good band interviews)
6. what is NOT emo. emo has been watered down so incredibly that anyone can claim to be emo if they put on a little eyeliner and some fishnets. bands like rebzyxxx, 6arelyhuman, odetari, and other "scenecore" artists aren't emo or scene. egirls/boys aren't emo. goths and punks aren't emo. and for the love of god tiktok is not the place to learn everything about us
Jesus what a yap sesh.. (¬_¬)
I hope this helped in some capacity!! and welcome to the subculture<33

37 notes
·
View notes