#cmds edit
Explore tagged Tumblr posts
Text
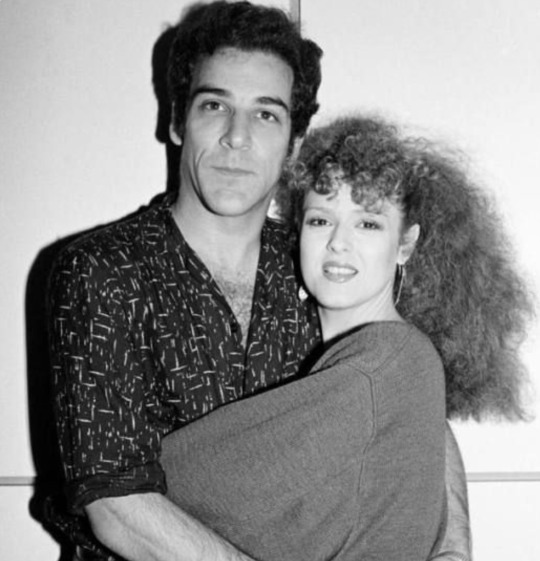

George & Dot! Mandy Patinkin visits Bernadette Peters backstage at Sondheim's Old Friends in London. (November 2023)
#bernadette peters#mandy patinkin#sunday in the park with george#sitpwg#stephen sondheim#their chemistry is so in tune their vibratos are synced#george seurat#that's my george and dot#broadway#cmds edit
139 notes
·
View notes
Text

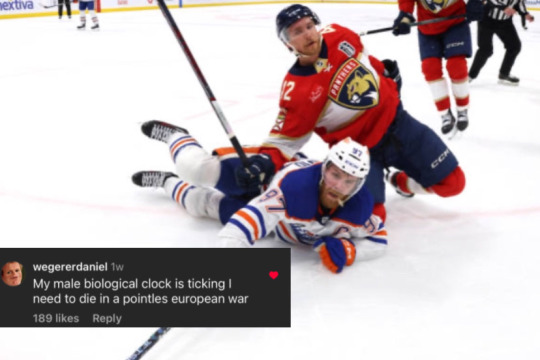
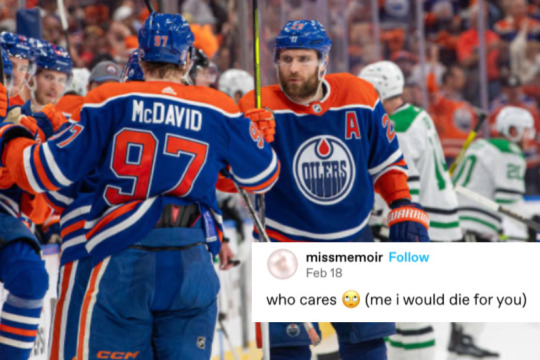
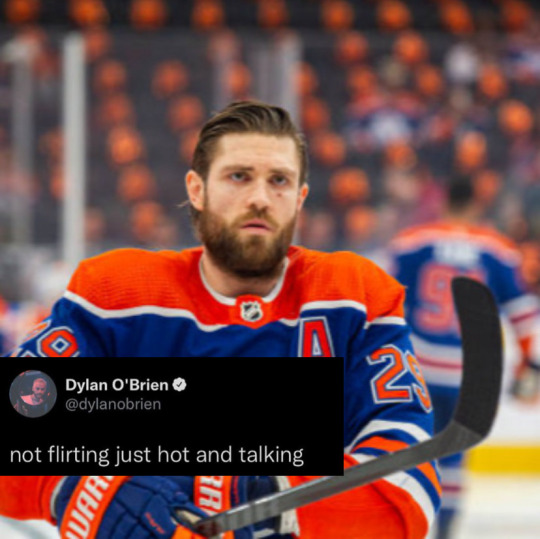
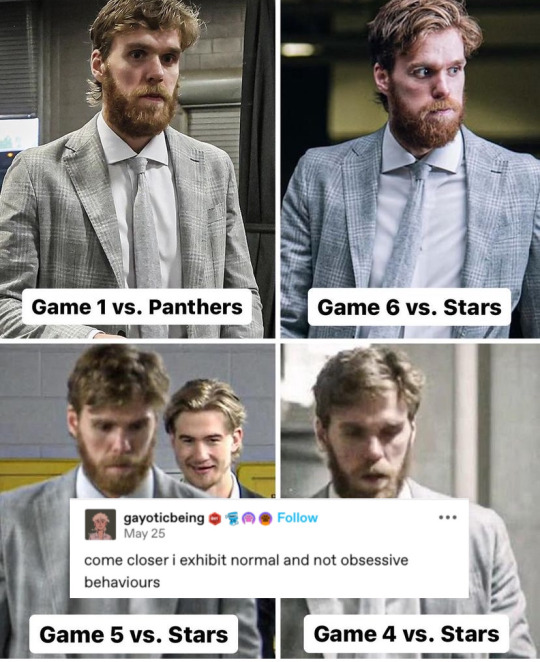
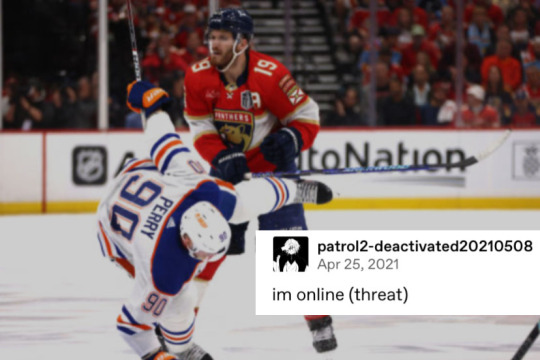
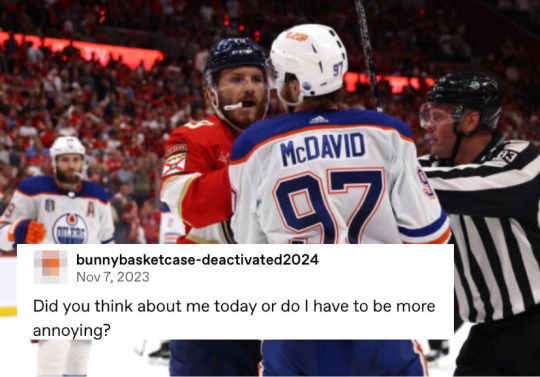



NHL x Internet (Special Edition: McMattDrai Stanley Cup Final)
#nhl x internet#X internet#annies edits#connor mcdavid#Cmd#cm97#cmd97#ld29#mt19#matthew tkachuk#leon draisaitl#florida panthers#edmonton oilers#stanley cup playoffs#Stanley cup finals#stanley cup 2024#panthers#oilers#Drai#drat#chucky#Davo#mcjesus#mcmattdrai#mcmatt#mcdrai#mattdrai#annie.edits
553 notes
·
View notes
Text
I need to get back on my Jess interview grind and finish before Silverborn press starts up because tell me why I'm skimming one trying to find something and then realize she's talking about Ages. ACK! This is vital to my theorizing.....
#I need to make transcripts because 1. I like being able to cmd + F stuff and read it all at once and 2. I'm deaf lol#it's just hard half bc it takes awhile to properly transcribe and edit And bc I get distracted by anything new I learn lol...#anyways if anyone knows the q&a where jess talks abt how mog won't be like as old as 18 by the episode please LMK. I am at a loss somehow.#I'm off my game. eep!#I've also got to finish reviving my quote bot (random quote generator) but it requires reformatting all of the 1000+ quotes and its. A Lot.#fun fact was curious so I checked and apparently as of tomorrow morning its been a year since I started my spreadsheet archiving interviews#I really feel like I need to stress how unfortunately insane about nevermoor I am. like I want to know everything behind the scenes.#and I love learning new things discovering new fun facts etc etc etc#I am just unfortunately hard of hearing and so many of them are podcasts and videos! 😭 I want textttt so I must transcribe 💪#shoutout if you ever read my rambling tags. I ❤️ talking in tumblr tags.
20 notes
·
View notes
Text
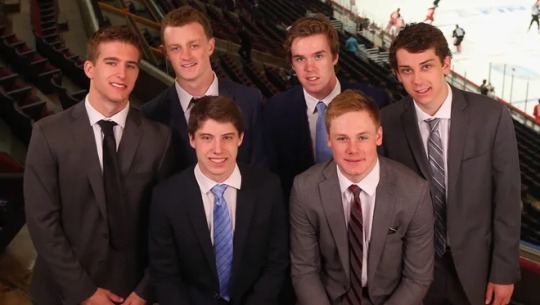
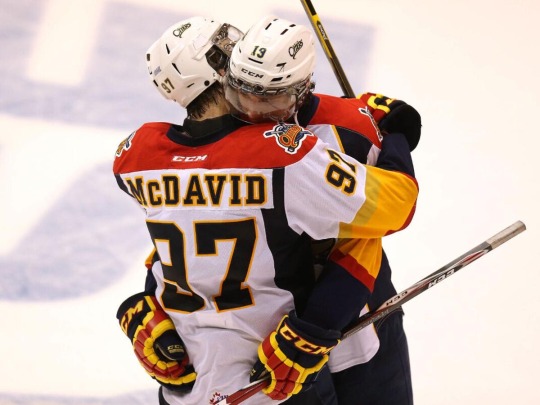
so high school but make it WJC 2015
#connor mcdavid#hockey#world juniors hockey#WJC 2015#davo#cmd#connor mcdavid edit#2015 draft#erie otters#edmonton oilers#i miss hockey#hockey canada
22 notes
·
View notes
Text




44 notes
·
View notes
Text

connor brown (#28) addresses the media after his team's win against the florida panthers in game four of the 2024 stanley cup final at rogers place on june 15, 2024
[x]
#connor brown#edmonton oilers#we all have the cmd ginger debate but neglect THE most ginger connor#spreading love to my niche oilers#<3#scf 2024#*my pics#*my edits
3 notes
·
View notes
Text
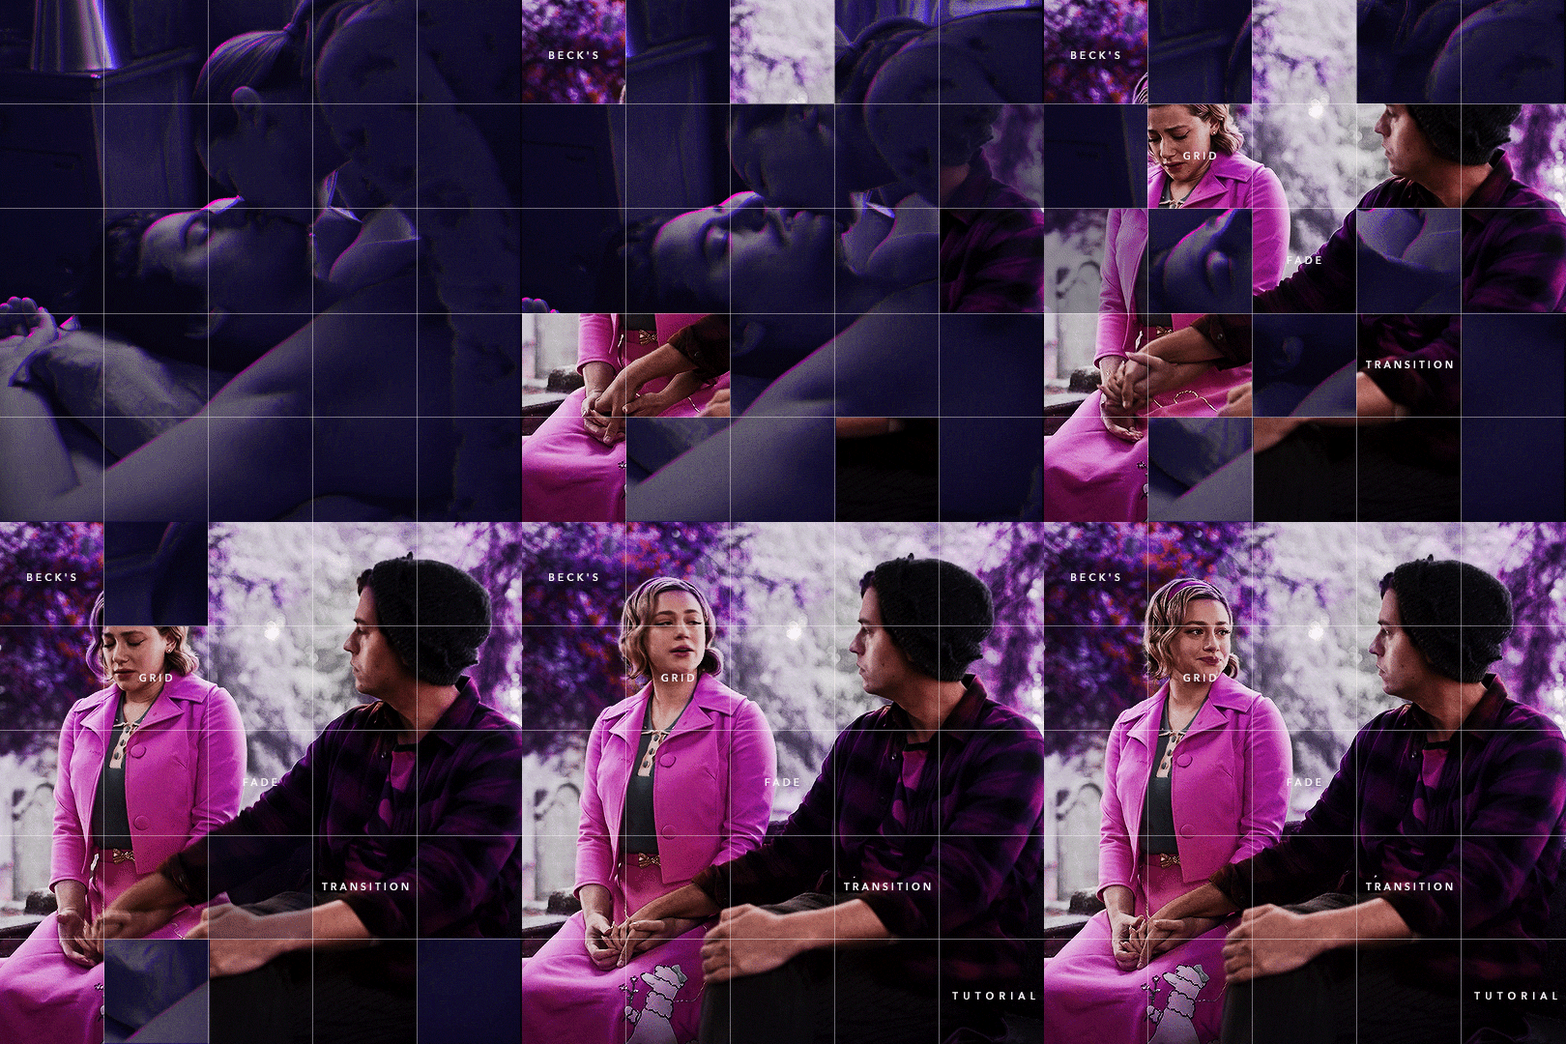
Someone asked me how I created the fade transition in this gifset which I’ll try to explain in the most comprehensive way that I can. If you've never done something like this before, I suggest reading through the full tutorial before attempting it so you know what you'll need to plan for.
To follow, you should have:
basic knowledge of how to make gifs in photoshop
some familiarity with the concept of how keyframes work
patience
Difficulty level: Moderate/advanced
Prep + overview
First and foremost, make the two gifs you'll be using. Both will need to have about the same amount of frames.
For ref the gif in my example is 540x540.
I recommend around 60-70 frames max total for a big gif, which can be pushing it if both are in color, then I would aim for 50-60. My gif has a total of 74 frames which I finessed using lossy and this will be explained in Part 4.
⚠️ IMPORTANT: when overlaying two or more gifs and when using key frames, you MUST set your frame delay to 0.03 fps for each gif, which can be changed to 0.05 fps or anything else that you want after converting the combined canvas back into frames. But both gifs have to be set to 0.03 before you convert them to timeline to avoid duplicated frames that don't match up, resulting in an unpleasantly choppy finish.
Part 1: Getting Started
Drag one of your gifs onto the other so they're both on the same canvas.
The gif that your canvas is fading FROM (Gif 1) should be on top of the gif it is fading INTO (Gif 2).
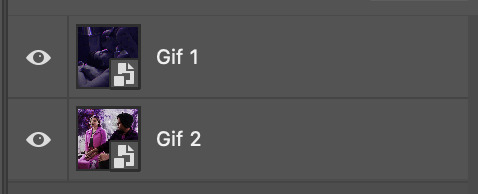
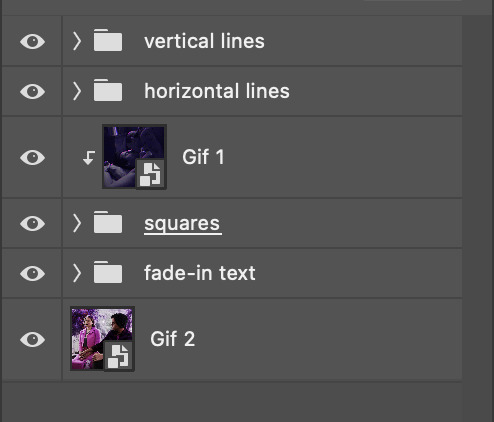
And here's a visual of the order in which your layers should appear by the end of this tutorial, so you know what you're working toward achieving:
Part 2: Creating the grid
Go to: View > Guides > New guide layout
I chose 5 columns and 5 rows to get the result of 25 squares.
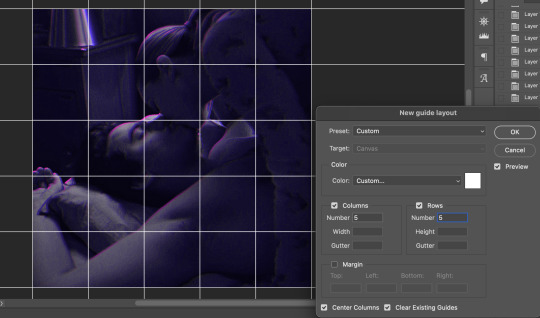
The more rows and columns you choose, the more work you'll have to do, and the faster your squares will have to fade out so keep that in mind. I wouldn't recommend any more than 25 squares for this type of transition.

To save time, duplicate the line you've created 3 more times, or as many times as needed (key shortcut: CMD +J) and move each one to align with the guides both horizontally and vertically. You won't need to recreate the lines on the edges of the canvas, only the ones that will show.
After you complete this step, you will no longer need the guides so you can go back in and clear them.

Follow the same duplicating process for the squares with the rectangle tool using the lines you've created.
Align the squares inside the grid lines. The squares should not overlap the lines but fit precisely inside them.
This might take a few tries for each because although to the eye, the squares look all exactly the same size, you'll notice that if you try to use the same duplicated square for every single one without alterations, many of them will be a few pixels off and you'll have to transform the paths to fit.
To do this go to edit > transform path and hold down the command key with the control key as you move one edge to fill the space.
Once you're done, put all the squares in their separate group, which needs to be sandwiched between Gif 1 and Gif 2.

Right click Gif 1 and choose "create clipping mask" from the drop down to mask it to the squares group. This step is super important.
After this point, I also took the opacity of the line groups down to about 40% so the lines wouldn't be so bold. Doing this revealed some squares that needed fixing so even if you aren't going dim the lines, I recommend clicking off the visibility of the lines for a moment to make sure everything is covered properly.

Part 3A: Prep For Key framing
I wanted my squares to fade out in a random-like fashion and if you want the same effect, you will have to decide which squares you want to fade out first, or reversely, which parts of Gif 2 you want to be revealed first.
In order to see what's going on underneath, I made Gif 1 invisible and turned down the opacity of the squares group.

If you want text underneath to be revealed when the squares fade away, I would add that now, and place the text group above Gif 2, but under the squares group.

Make a mental note that where your text is placed and the order in which it will be revealed is also something you will have to plan for.
With the move tool, click on the first square you want to fade out. Every time you click on a square, it will reveal itself in your layers.
I chose A3 to be the first square to fade and I'm gonna move this one to the very top of all the other square layers.
So if I click on D2 next, that layer would need to be moved under the A3 layer and so on. You'll go back and forth between doing this and adding key frames to each one. As you go along, it's crucial that you put them in order from top to bottom and highly suggested that you rename the layers (numerically for example) which will make it easier to see where you've left off as your dragging the layers into place.

Part 3B: Adding the Keyframes
This is where we enter the gates of hell things become tedious.
Open up the squares group in the timeline panel so you can see all the clips.
Here is my example of the general pattern that's followed and its corresponding layers of what you want to achieve when you're finished:
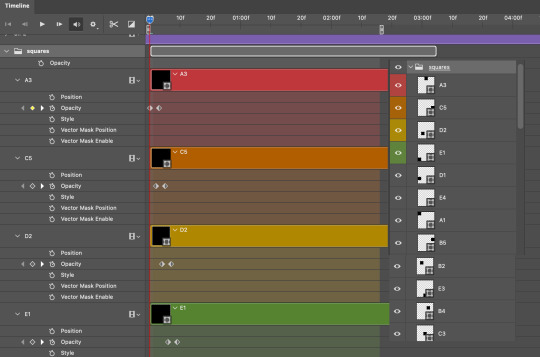
So let’s try it!
Expand the control time magnification all the way to the right so you can see every frame per second.

As shown in Part 3A, select your first chosen square.
Where you place the time-indicator on the panel will indicate the placement of the keyframe. Click on the clock next to opacity to place your first keyframe.

Move the time-indicator over 3 frames and place the next key frame.

Things to consider before moving forward:
Where you place your very first keyframe will be detrimental. If you're using a lot of squares like I did, you may have to start the transition sooner than preferred.
If you're doing 25 squares, the key frames will have to be more condensed which means more overlapping because more frames are required to finish the transition, verses if you're only using a 9-squared grid. See Part 4 for more detailed examples of this.
The opacity will remain at 100% for every initial key frame, and the second one will be at 0%.
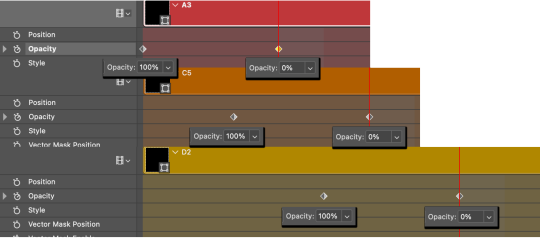
Instead of creating two keyframes like this and changing the opacities for every single clip, you can copy the keyframes and paste them onto the other clips by click-dragging your mouse over both of them and they'll both turn yellow. Then right click one of the keyframes and hit copy.
Now drop down to your next clip, move your time-indicator if necessary to the spot where the first keyframe will start and click the clock to create one. Then right click it and hit "paste".
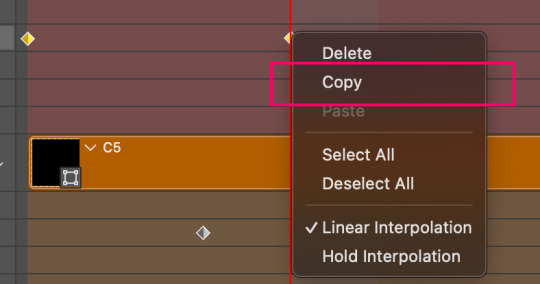
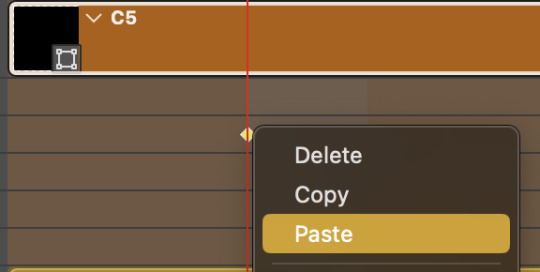
Tip: When you have both keyframes selected, you can also move them side to side by click-dragging one of them while both are highlighted.
Your full repetitive process in steps will go as follows:
click on square of choice on the canvas
drag that square layer to the top under the last renamed
in timeline panel: drop down to next clip, move time-indicator tick to your chosen spot for the next keyframe
create new keyframe
right click new keyframe & paste copied keyframes
repeat until you've done this with every square in the group
Now you can change the opacity of your squares layer group back to 100% and turn on the visibility of Gif 1. Then hit play to see the magic happen.
PART 4: Finished examples
Example 1
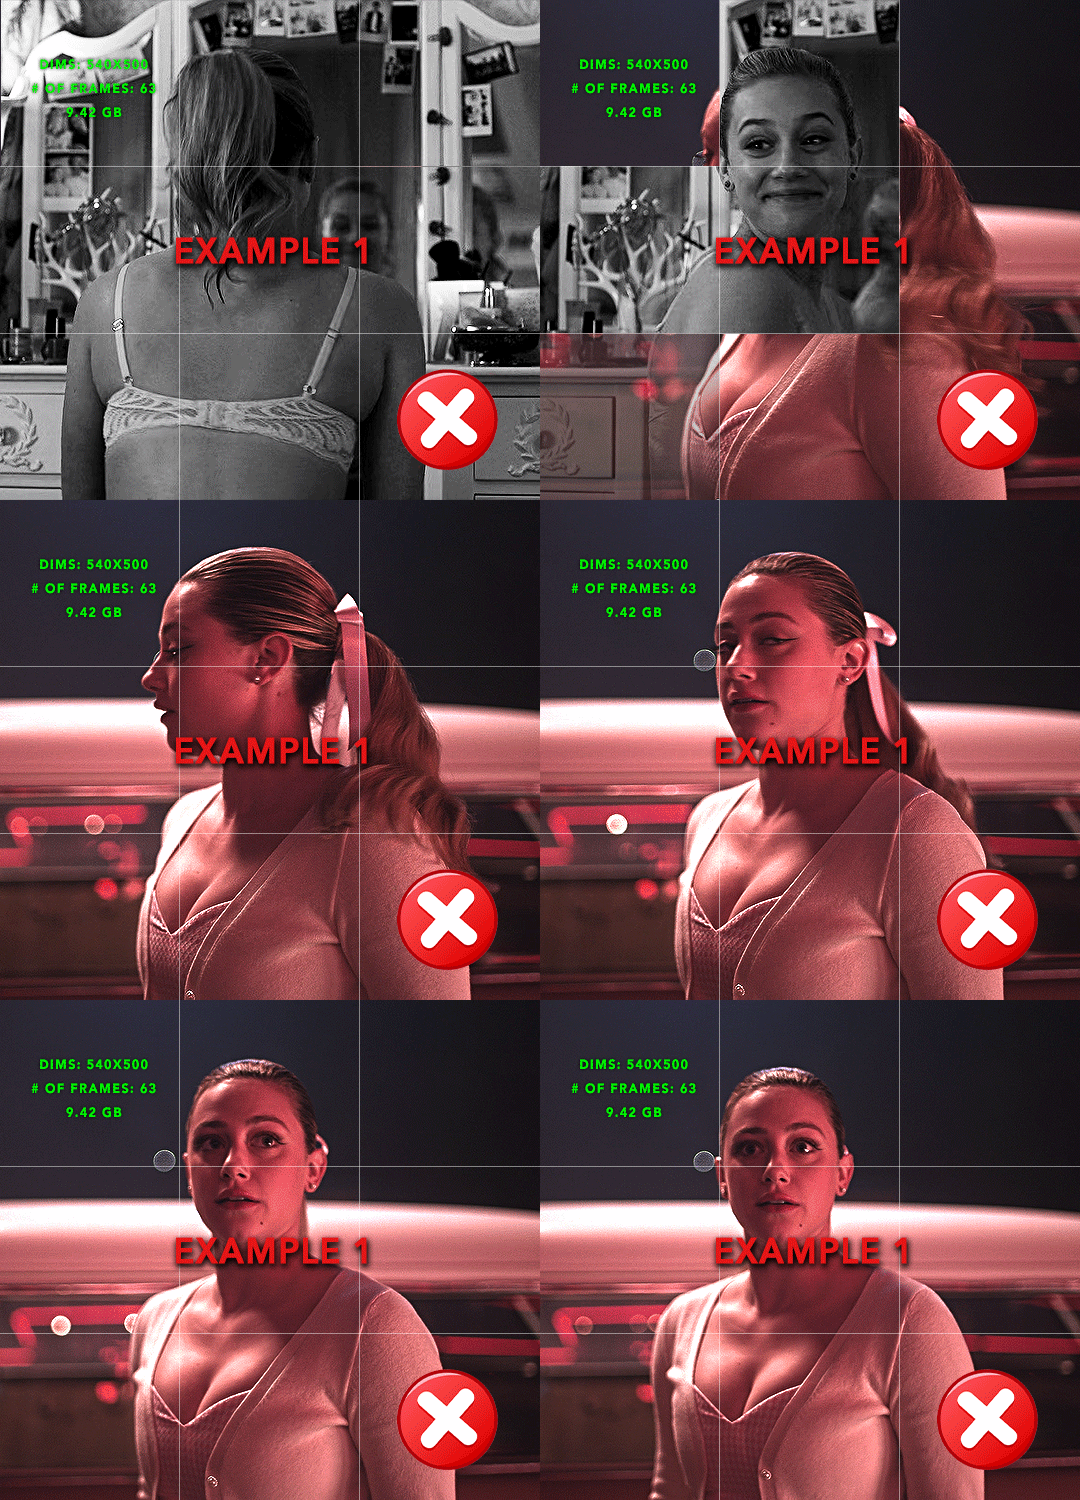
the transition starts too soon Cause: initial keyframe was placed at frame 0
the squares fade away too quickly Cause: overlapping keyframes, seen below. (this may be the ideal way to go with more squares, but for only 9, it's too fast)
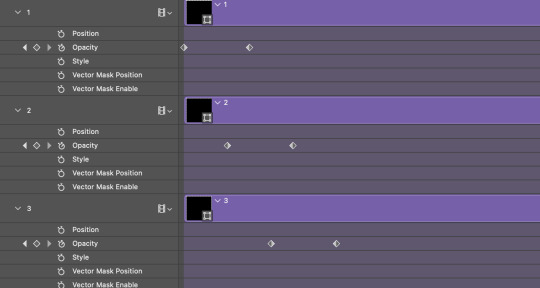
Example 2
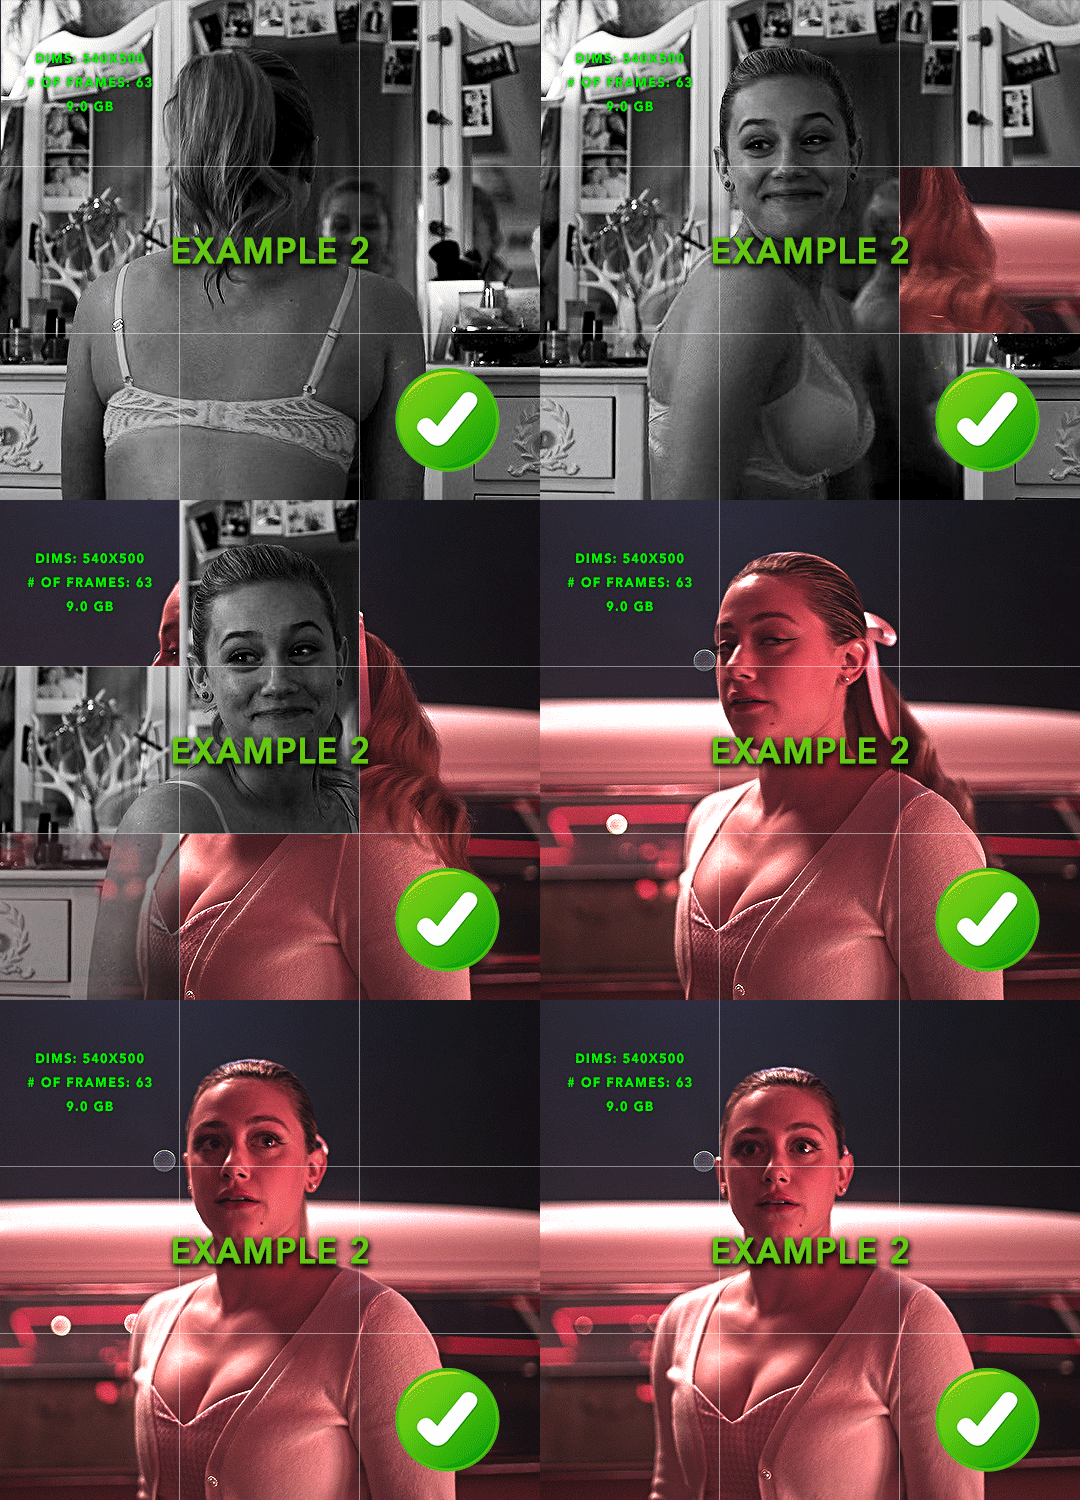
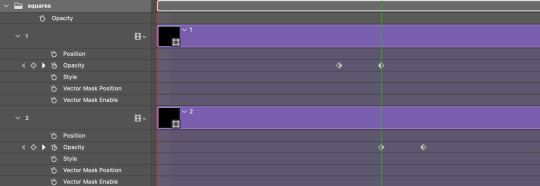
more frame time for first gif
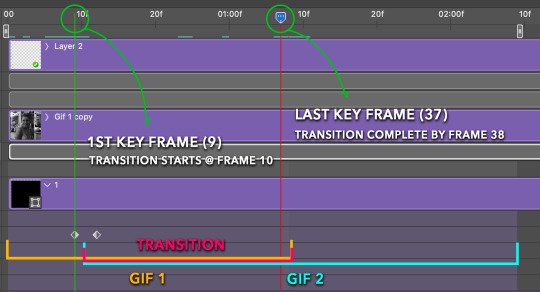
transition wraps up at a good point Cause: in this instance, the first keyframe was placed 9 frames in, and the keyframes are not overlapping. The sequential pair starts where the last pair ended, creating a slower fade of each square.
Part 5: Final Tips and Saving
You can dl my save action here which will convert everything back into frames, change the frame rate to 0.05 and open the export window so you can see the size of the gif immediately.
If it's over 10gb, one way to finesse this is by use of lossy. By definition, lossy “compresses by removing background data” and therefore quality can be lost when pushed too far. But for most gifs, I have not noticed a deterioration in quality at all when saving with lossy until you start getting into 15-20 or higher, then it will start eating away at your gif so keep it minimal.

If you've done this and your gif is losing a noticeable amount of quality and you still haven’t gotten it below 10mb, you will have no choice but to start deleting frames.
When it comes to transitions like this one, sometimes you can't spare a single frame and if this is the case, you will have to return to the timeline state in your history and condense the key frames to fade out quicker so you can shorten the gif. You should always save a history point before converting so you have a bookmark to go back to in case this happens.
That's pretty much it, free to shoot me an ask on here or on @jugheadjones with any questions.
#gif tutorial#photoshop tutorial#transition tutorial#grid tutorial#usergif#ps help#tutorials#tutorials*#resources*#requested
408 notes
·
View notes
Text
Tutorial: Manga Banners
Basic Manga Text Change/Coloring/GIF creation in PS
Hey, so as promised making a very basic tutorial for making banner gifs in photoshop for fics/drabbles/layouts, etc.
I'm going to keep things super simple here for beginners.
END RESULTS↴

(NOTE: This gif I made will be used for an unreleased story of mine so please don't use this exact gif/images but you are free to follow the tutorial to create your own).
All I ask is if you find this helpful to REBLOG! :) No need to credit me.
For this tutorial you will need ↴
Photoshop
At least 2 manga panel images (non-transparent*)
Optional: Manga fonts. I mostly use CC Wild words (speech bubbles) & Manga Temple (narrator boxes)
Basic knowledge of photoshop layout/where tools are.
*this tutorial is essentially the same if working with transparency but if you do work with transparency you will need to have knowledge of clipping masks which i do not cover here.
Tutorial ↴
(optional) Prepwork: so i didn't think to include this do this but you are going to need to crop and resize your image. make sure the width is either 540 or 1080px. This is the recommended width for pictures in tumblr. Height can be what you want it to be. This is done image > image size (make sure the link-chain is pressed for aspect ratio)
Step 1
This is what you want your setup to look similar to. Delete locked background layer.

Steps 2 & 3
Make a new layer. It might be helpful for beginners to re-name all their layers so instead of "Layer 2" you might name this ⇢ "White fill layer or Text cover up". (doubletap layer name to change it).
Use rectangular marquee to select text you want to change. If you are just replacing a word or two you dont need to white out everything. But you could choose to cover up all if you wish. I just wanted to remove "senpai".

Steps 4 & 5
Use Paint Bucket Tool to fill in selection area with white (make sure the new layer you made is selected when you do this).
Select Text Tool. There is no need to make a new layer as once you are done typing it will become a text layer. I used CC Wild Words bold font for this for emphasis. If you do multiple lines of text use a new text layer for each line.

Step 6 - Optional Step - Highly recommended if you did multiple lines of text.
Rasterize Type by right clicking the layer. This is an optional step. I tend to do it out of habit and rasterizing lets you use the move tool to give you exact px distances between other rasterized elements but nothing we are doing requires this tbh and if you do decide to do it you can't go back and edit text.
If you did multiple text layers you cause space them out evenly using the move tool (zoom into 200%-400% if necessary to get exact pixel distances). Tip: Manga text is centered in the bubble and leaves a good distance away from the edge.
When you are done ctrl/cmd to select all text layers then right click and merge the layers. This is so incase you have to move the text layer for whatever reason they are all on one layer now, evenly spaced and you won't accidentally mess that up.

Step 7
Create an exposure layer (half filled in circle in layer bar for menu). This is important as it can lighten/darken image to make the colors we will add later pop by playing with the sliders for each setting.

Step 8
Apply exposure settings. On the right-hand side there will be 3 slider bars. The screenshot shows my settings but your settings will vary depending on the image. The one that gives the biggest benefit for manga is Gamma Correction which affects the midtones to make them lighter/darker and adds better contrast to the image so it doesn't look as muddy, often in black and white images it is easy for midtones to look muddy. Offset affects mid to dark tones of an image. Exposure affects midtones to highlights to make brighter or darker, overall use this the least. TIP: If you want to make an image brighter or darker you usually want this to apply equally to the overall image so then you would create a brightness/contrast layer instead. most manga images skew muddy and need a midtone and dark adjustment rather than highlights. the better the manga scan images the less adjustments you will need.

Step 9 - Optional
Apply a gradient map (half filled in circle in layer bar for menu). This is optional. a Gradient map adds gradient but preserves the shading in the image so essentially adds a gradient to the shading. I do this in black and white. But if you are happy with how it came out in the exposure phase you don't need to.

Step 10 & 11 -
Apply a gradient (half filled in circle in layer bar for menu). So when you add a gradient there are a ton of preset color combos you can use or you can create your own. I think this one is a preset but can't remember. I like a diagonal gradient from light to dark depending on where the light source on the image is but it is completely up to you. I tend to set the gradient angles near these 4 settings: -145, -45, 45, 145 depending on what corner I want the lighter part in.
One thing to note is brighter colors work better with a darker background. Lighter backgrounds can get washed out. One you add this as you can see it will be solid color.
*note* once this layer is applied any edits such as moving text, etc. around you want to do to the lower layers beneath it click the "eye" button to hide the gradient (same for the map) or there's a good chance it will move the gradient layers around and not the layer you want.
Change layer blending mode. By default it's set to "normal". You can play around with these. Depending on the effect you want and whether the image has darker or lighter colors will decide the blending mode. My typical blending modes are screen, overlay, hard light, vivid light or pin light. You can duplicate this gradient layer and play around with multiple settings and opacities to create something you like.

Step 12 - Optional
Add a Brightness/Contrast layer (half filled in circle in layer bar for menu). Brightness/Contrast on this step will look wildly different than if you added it right after the exposure step. It's not necessary but if you want more overall contrast or brightness then you can add it.
You can see my settings below on the sliders on the right-hand side.

Step 13
Create new layer for highlights. (also good check point to see how your layers are organized).

Step 14
Select the brush tool and ensure brush settings are a soft round brush with a hardness of 0% for the highlight effect. (if you click the brush image you can see my settings better)


Step 15
Select the dropper tool and pick a color from the gradient image. I usually pick the darkest colors available as it will have the best dodge effect for highlights. Since this is pink/redish I only have one highlight color but if you were doing a green/blue gradient you would pick the darkest from both. (ignore the purple here its not being used)


Step 16
Create highlights with brush tool. Do a few tests placements randomly around the image for positioning and then swap the blend mode to either color dodge or linear dodge. I usually do color dodge. You will get awesome highlights like below. You can play with the sizing of the brushes and opacity to decrease the effect.

Step 17 & 18
Export as PNG. Do this even if you want to make a gif as I always recommend a clean canvas for gif making. If you want to be done here and don't want a gif thats fine too. File > Export > Quick Export as PNG (do not save as jpeg/gif you will lose image quality).
Repeat for second image. You don't need to open a new file unless it helps you to not get confused. You can just make a new layer and paste your new image into that layer (if you just right click copy the file in the window/finder folder you can directly paste it into a layer in PS) and use the transform tool to resize. However you can totally just open the image in PS. The benefit of same canvas is you save yourself some time as you can just duplicate gradient layers/adjustment layers and move them. But this is kinda more advanced so if you aren't comfortable with photoshop just make a new image.

Step 18-19
Create new file/open one of the PNG in PS (more advanced can just create new layer, select image, then copy > copy merged and paste on new file for each. Otherwise open one file, create a new layer then copy the other file. The bottom later will be the first image in the gif.
Create Frame Animation on the timeline window. (if the timeline window does not appear then window > timeline) *note* if this is your first time working with the window it may be set to "create video timeline", if that's the case create it then from the frame menu (in step 23 theres an example of where this is) select "convert to frame animation".
If done correctly your setup should look like the below with two images. One for each layer and one for each frame.
MAKE SURE PROPAGATE FRAME ONE BOX IS CHECKED IN THE LAYERS WINDOW.
lmao, not to be dramatic but this ensures most effects you would add to frame 1 (which corresponds to layer 1) is applied to all frames. I'm not too sure its super vital for this super basic gif I'm showing you but its better to get in the habit of always having it checked. otherwise it will fuck you over later down the line in my next tutorial where I show how to add frames to gifs.

Step 20
Select both layers, then select both frames (ctrl/cmd) and finally select tween from the timeline window. It is the multi-faded dot option on the bar below.

Step 21
Add Frames to Tween. Tween is the fading effect adding more frames is the longer the fading effect is. I added 20 for this step, you can play around and add more or less.
Once you do that you can see 20 new frames being added onto the timeline. This will not automatically add new layers, this is fine. Frames and layers don't need to be a 1-to-1. (Another reason why propagate frame 1 needs to be checked as you can still adjust those layerless frames by adjusting frame 1's layer)

Step 22
Adding delays. Automatically the delay on every frame is at zero. But especially if you have text you want people to be able to read that so you need to add in a delay. Your delays can be in increments of 1/10th of a second. I add a 1 second delay to the first frame only.

Step 23
Select and Copy the first frame and then select the last frame and Paste. A paste window will appear in this case we want to paste after selection. I circled where the menu for frames are. (sorry used a different gif as an example so ignore everything but the circled menu)


Step 24
Adding additional delays. I add a 1 second delay to the last two frames.

Step 25
Add more Tween I added 5 frames this time as we want the transition to be much quicker to reset the image. You can see frame 23 in the previous step are now frame 28.
You can add more images in than 2 and follow these steps to add tweening.

DONE! Now to save.
Step 26
Export your gif. File > Export > Save for Web (Legacy) and the screen below should pop up. Here are the settings I use for gifs. You can play around with it but I really wouldn't lol. (again ignore image size, this is from a different gif) it will also tell you how big in file weight your gif is. This isn't something you have to worry about for something simple but the bigger the image size and the more transitions/images you use the more frames you will have. Reducing image size (make sure chain link is on like in the below) will take off more sizing then removing frames will and I would recommend that. But tumblr allows 10MB MAX per gif so just something to keep in mind.

Let me know how this was! If you have questions just drop me an ask. ❤
#✩𝓀𝒾𝓏𝓏𝒶𝓉•𝔱𝔲𝔱𝔬𝔯𝔦𝔞𝔩𝔰#✩𝓀𝒾𝓏𝓏𝒶𝓉•𝕘𝕗𝕩#gfx#fic banners#tutorials#resources#photoshop tutorial#manga edit#edits#fan fic writing#fic writing#anime edits#manga edits
126 notes
·
View notes
Text
Say "NO" to Genocide - Call, email, mail your reps (Canada)
Me and my friend spent some time today writing letters to the House of Commons, plus we have been calling MPs daily. I haven't seen too many resources for this floating around on tumblr, so here's a lengthy guide on how to do this plus some sample scripts! Long post ahead since I think it will be most helpful to dump everything in one spot to reference. On desktop, use CTR F/CMD F to search for the topic -> Phone / Email / Letter Mail / Contacts / Demands / Scripts / Fax
Update 1 - Nov 23: Updated emails with "mailto" hyperlinks, edited demands, added fax section, added scotiabank pres fax number.
On the PHONE / General Tips
Introduce yourself and identify yourself as a constituent by providing your postal code or address.
Ask to speak to the MP directly, but do not be surprised if you must speak to the MP’s staff instead. Staff can help move your issue forward.
Give the reason for your call and explain your concern.
Focus on one or two main concerns per phone call. Do not unload on the MP or their staff with all of your political concerns at one time.
Ask clear and pointed questions that require some explanation.
Ask for a commitment to action.
KEEP IN MIND Tips for Calling MPs:
Tell the MP that this issue will matter to you in the next election.
Avoid revealing party affiliation or sympathies. If you show that your vote is already cast for a certain party, the MP may not have the incentive to respond to your requests.
Be as brief as possible while outlining concerns. Show that you respect their time.
Remain calm and respectful in dialogue. Be willing to work with them.
Follow up: Find out what actions were taken as a result of your call, and respond appropriately.
(Source: CPJ.ca)
CJPME Call Tool - Fill in the form, there will be suggested talking point. The tool will call your phone and then patch you through to your MP. If voicemail, state your concerns in 30 seconds. No address input will default you to call Foreign Affairs Minister Melanie Joly.
EMAIL
Be sure you sign your email with your name and mailing address so they know you are a part of their riding.
You will most likely receive a PR-type response or no response at all, but please still send these. It disrupts operations, and it still contributes to pressuring your MP to act on behalf of your riding.
LETTER MAIL
Mail may be sent postage-free to any member of Parliament at the House of Commons address. You just need to use an MP's full title if they are Cabinet members. Cabinet mebers have "The Honourable" attached to their names.
Postcards are efficient in that they are small pieces of card stock and can be a short message plus demands, no need to get use envelopes.
The Right Honourable Justin Trudeau House of Commons Ottawa, Ontario, Canada K1A 0A6
CONTACTS
Find your MP - ourcommons.ca - Contact the MP of your riding, any of the contacts below, as well as any cabinet members in your city or province.
Prime Minister (613) 992-4211 / [email protected] *FAX: 613-941-6900 /*If faxes are closed at the House of Commons line, try their local offices! (See below under "FAX" for fax guide!)
Deputy Prime Minister - Chrystia Freeland (613) 992-5254 / [email protected] FAX: 416-928-2377
Minister of Foreign Affairs - Mélanie Joly (613) 992-0983 / [email protected] FAX: 613-992-1932
Minister of International Development - Ahmed Hussein (613) 995-0777 / [email protected] FAX: 613-995-0777
Minister of National Defence - Bill Blair (416) 261-8613 / [email protected] FAX: 416-261-5286
Canada-Israel Interparliamentary Group (CAIL) Stéphane Bergeron (*he's not a chair or vice chair of this group, but i want to warn that stephane WILL argue with you, so call after hours if you are scared of confrontation 😭☠️) (450) 922-2562 / [email protected] Anthony House-father (Chair) (514) 283-0171 / [email protected] Randall Garrison (VC) (250) 405-6550 / [email protected] Marty Morantz (VC) (204) 984-6432 / [email protected] The Honourable Ya’ara Saks (VC) (416) 638-3700 / [email protected]
Embassy of Israel (613)567-6450 / FAX: 613-750-7555
DEMANDS
Summarized from resistance groups such as H/mas, H/zbollah, PFLP (Popular Front for the Liberation of Palestine), DFLP (Marxist Democratic Front got the Liberation of Palestine), CJPME (Canadians for justice and peace in the middle east), and other anti-war, anti-imperialist, IRL Palestinians.
Canada needs to...
Call an immediate PERMANENT ceasefire to end bloodshed
Send humanitarian aid to Gaza.
Institute embargo on all military exports to Israel
Close the embassies, and sanction Israel diplomatically and economically.
SCRIPTS
Use these as scripts for calling, emailing, and mailing. I suggest adding some of your own sentences and changing the subject lines (for email) so they don't end up in spam.
Example from Canada: Stop Arming Israel - World BEYOND War
As we mourn the thousands of people in Israel and Palestine who have been killed in the past few weeks we refuse to stand by and allow the only true winners in war — the weapons manufacturers — to continue to arm and profit off of it.
Canada exported over $21 million in military goods to Israel in 2022, including over $3 million in bombs, torpedoes, missiles, and other explosives. - 2022 Exports of Military Goods
Weapons companies across Canada are making a fortune off of the carnage in Gaza and the occupation of Palestine.
This is a call to action. It's time to stop letting these weapons companies profit off of the massacre of thousands of Palestinians. Find a location near you, get friends and allies together, and interrupt their business as usual to demand they stop selling arms and military technology to Israel.
Send an urgent message to demand Canada stop arming Israel and push for an immediate ceasefire to your Member of Parliament, the Prime Minister, and the Ministers of Foreign Affairs, International Trade, and Defense.
Dear [recipient's full name goes here], We are witnessing genocidal violence playing out in Gaza right now. Thousands of Palestinians have been killed, nearly half of them children. With a blockade on water, electricity, fuel and food, a quarter of all buildings razed to the ground, and over a million people displaced, UN experts have denounced Israel's actions as crimes against humanity. Meanwhile, weapons companies across Canada are arming -- and making a fortune off of -- the carnage in Gaza and the massacre of thousands of Palestinians by selling weapons and military technology to Israel. I am calling on you to do two things: to take immediate action to institute an arms embargo on Israel and to ensure Canada pushes for de-escalation and a ceasefire in Gaza. Sincerely,
Script Sample 2 from Palestinian Youth Movement
^This will open up a pre-written email in your chosen email app or site. Fill in the recipient line with the emails of MPs you wish to contact.
Script Sample 3 from CJPME's Email Campaign
^Complete the form to send an email to Prime Minister Trudeau, your local MP, and the leaders of the NDP, Convervatives and Greens. Canada must OPPOSE A SECOND NAKBA and dispossession of the Palestinians in Gaza by pushing for a ceasefire.
Script Sample 3 for mail:
(a mix of mine and a friend's)
I am writing to ask you to take immediate action to stop the genocide Israel is committing against Palestinians in Gaza as well as the onslaught of those in West Bank.
There is blockade on food, water, electricity, fuel, and the use of internationally banned white phosphorus to exterminate Palestinians. Aid is not able to enter Gaza because of this blockade. UN experts have named Israel’s actions as genocide citing numerous war crimes they continually commit.
While over 10k civilians have been martyr’d (4.2k of which are children), Canada has not even been able to NAME such crimes as genocide or call for an official ceasefire. This is not enough.
Canada needs to:
Call an immediate ceasefire to end bloodshed
Send humanitarian aid to Gaza.
Institute embargo on all military exports to Israel
Close the embassies, and sanction Israel diplomatically and economically.
FAX (NEW!)
Using faxzero.com is simple, just follow up the steps on the website. No fax machine required! Tell officials your demands and customize your letter by noting their complicity based on their role as a politician or gov official. Or keep it brief and simple, in large legible letters.
Demands could include:
That you are a “Canadian” constituent That you are demanding an IMMEDIATE AND PERMANENT CEASEFIRE IN GAZA; That you demand a total withdrawal of financial (taxpayer) and commercial support and arms for continued occupation in Israel’s 70+ year occupation in Palestine; That it is shameful that [X] is choosing not to speak up for the deaths of more than 11,000 Palestinians, half of whom are children and thousands of others displaced; That Palestinians like all people, deserve life, dignity and justice; That Israel is breaking multiple international laws daily and Canada MUST meet its international commitment to promote and defend human rights under the Geneva Convention; That not putting these actions in place will harm constituents and undo acts of reconciliation with Indigenous peoples and other marginalized communities in Canada by not protecting the Indigenous peoples of Palestine; That unless there is concrete and everlasting action taken place, that there will be no peace until Palestine is free, and subsequently that you will not be voting for them (if applicable) in the next election.
Sign off with your name, address and postal code (if applicable, furthering that you are a resident on the stolen Indigenous lands otherwise known as “Canada”) Extended fax list: Scott thomson (president of scotiabank) - 416-866-5929 joe biden / whitehouse - 202-456-2461
(source: @/harlo.gif on IG)
515 notes
·
View notes
Text
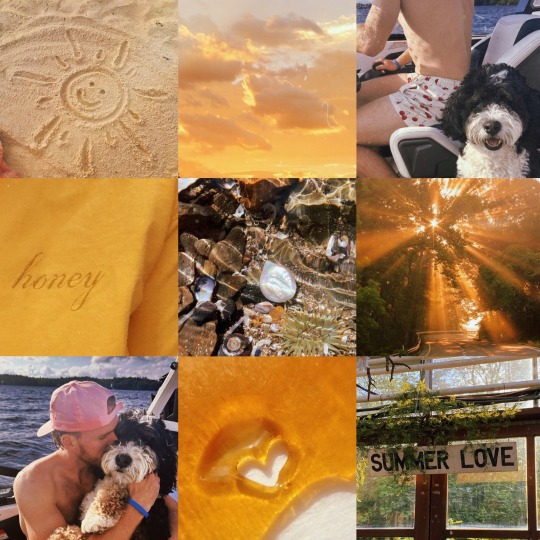
Connor McDavid ☀️ Aesthetic as requested by @knivesareout for emoji edits
#connor mcdavid#Cmd#cm#cm97#cmd97#oilers#emoji edit#edit requests#knivesareout#Ashley#annies edits#moodboard#mb#aesthetic#summer#sun#edmonton oilers#hockey edit#nhl edit#sunshine#davo
30 notes
·
View notes
Text
Bohf-bwam (Monster)

(Book of Hours, Flanders; kept in Baltimore, in the Walters Art Museum)
(This is a very old one, created years ago when I first saw this amazing piece of medieval art. I did some minor edits to their statblock, and completely redid their description- they were originally just "no one knows where they come from or what they're thinking, they just cause violence". Nowadays I try to ensure that every creature I make has some kind of story hook to it, rather than being a prepackaged Random Encounter. Enjoy!)
Bohf-bwam are chaotic, violent creatures that spawn in places with high magic potential and a particular veneration for weaponry and martial prowess- typically forming with a hand gripped tightly around a specific and well-adored weapon. Most often they form in the great halls of castles, wielding a displayed ancestral weapon, although more low-tech societies may accidentally create them in camps or villages. Indeed, the bohf-bwam pest problem is hypothesized to be a reason why so many "barbarian" cultures have an aversion to arcane magic, as their love of weaponry can easily produce large groups of these creatures when mixed with magic.
A bohf-bwam's violence is erratic, instinctual, and unplanned; these fits may come and go, and the subject of their violence is typically whatever or whoever is close to them. It is not unheard of for bohf-bwams to be tamed, somehow, by a particularly kind and affectionate person, and such creatures will focus their violent rage on defending the subject of their attention, becoming peaceful- even friendly- in other situations.
Particularly powerful magic weapons may spawn larger, more powerful bohf-bwam. Such creatures gain the Giant and Advanced simple template and lose the oversized weapon ability. Many gain additional spell-like abilities relevant to their weapon- a bohf-bwam wielding a +1 Flaming Sword may have the ability to cast Fireball 1/day, for example.
A small bipedal reptile-like creature scurries forward, a hand wielding an axe where its head would be. Misc- CR2 CN Small Aberration HD3 Init:+2 Senses: Blind, Blindsense 90ft Perception:+2 Aura: Aura of Martiality 30ft Stats- Str:15(+2) Dex:15(+2) Con:12(+1) Int:4(-3) Wis:6(-2) Cha:13(+1) BAB:+2 Space: 2.25ft Reach:5ft Defense- HP:16 (3d8+3) AC:15 (+1 Size, +2 Dex, +2 Natural) Fort:+3 Ref:+3 Will:+3 CMD:13 Immunity: Dazed, Dazzled, Stunned, Confused Special Defenses: Fast Healing 1 Offense- mwk Handaxe +6 (1d6+3) CMB:+2 Speed:20ft Special Attacks: Proficiency with All Martial Weapons Feats- Iron Will, Power Attack Skills- Intimidate +5, Knowledge (local) +1, Perception +2 Spell-like Abilities- Spiritual Weapon 3/day Special Qualities- Oversized Weapons, Spiritual Echo Ecology- Environment- Any Languages- Aklo (Cannot speak) Organization- Solitary Treasure- None (mwk handaxe) Special Abilities- Aura of Martiality (Su)- Creatures affected by a bohf-bwam’s aura must make a DC13 Will save or be compelled to use any available melee weapon, as opposed to spells and abilities, natural weapons, or ranged weapons, in combat. This is a compulsion effect and the save is hit die based. Aberrations and creatures with intelligence 2 or less are immune to this effect. Oversized Weapons (Ex)- A bohf-bwam wields weapons as though they were a size larger than they are. Spiritual Echo (Sp)- The weapon created by a bohf-bwam’s Spiritual Weapon spell-like ability takes the form of whatever weapon the bohf-bwam is currently wielding in its head-hand. If it is not weilding a weapon, it cannot use its spell-like ability.
#soylent original#monsters and races#medieval beafts#bestiary#really putting the medieval in bestiary huh#medieval beasts
164 notes
·
View notes
Note
Awesome edit for gravity falls!!
https://www.tumblr.com/bambigif/769725359108358144/gf-scifi-fantasy?source=share
I want to learn how to add that many gifs into the template you used, would you please make a tutorial?
hi, happy new year and thank you so much! ( ˶ˆᗜˆ˵ )
So here's a tutorial on how to add any gif in a template (I won't be using a gravity falls' gif cause I'm on vacation and I'm doing this in a hurry lol)
I'm doing this in Photoshop CC 2019 but this can be done in any version ⭑.ᐟ also mine is in spanish but I'll translate any option used, let's begin!
step 1: first of all, make you sure to be in timeline mode. once you do, open your template and "create a video timeline"


step 2: get the gif you wanna use ready: apply coloring, sharpening and make sure is also in timeline mode.
step 3: duplicate your gif into the template by right click on the layer and "duplicate layer"

now there are two ways you can do this and I'm going to explain both:
step 4: option a) make sure your gif is above the boxes of the template (or whichever shape you're using), right click and then "create clipping mask"

this will generate your gif being "boxed" on the shape...

and from here you can adjust it how you want!

to add multiple gifs, just repeat the process of duplicating and creating clipping masks, but pay attention that your gifs are all the same amount of frames
step 4: option b) another way to do this is creating a group of the box and your gif (selecting both layers and either ctrl/cmd + g or by clicking the little folder icon)

once you have this, right click on the shape but on its preview, not just the layer, like:

and then "select pixels"

once you have that, now select the group you previously made and creat a clipping mask clicking this icon:

as you can see, it's the same process but more organized:

all you have to do is adjust your gif (again) as you want and that's pretty much it!
the template psd I shared a couple days ago that I personally made for the gf edit already has the clipping masks separated by groups, so all you have to do is make some gifs and duplicate them into the canvas!
I hope I made sense and if you don't understand any of these steps, make sure to contact me! my inbox is always open (๑>◡<๑)
13 notes
·
View notes
Text
RECIPROCAL FOE
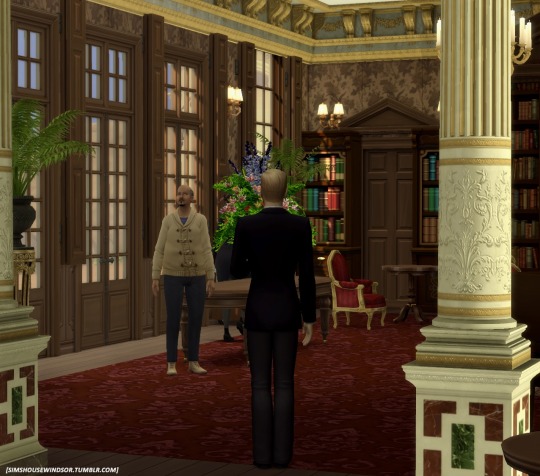

MONACO PALACE, OASIS SPRINGS • FEBRUARY 2025
[Aide]: Your Majesty, there are reports that the UK will be imposing sanctions on us after accusing us of helping North Marvania.
King Felipe: (angry) What! First, they go behind my back and help Glimmerbrook cede, now this? When will Windenburg learn they don't own the sims world?
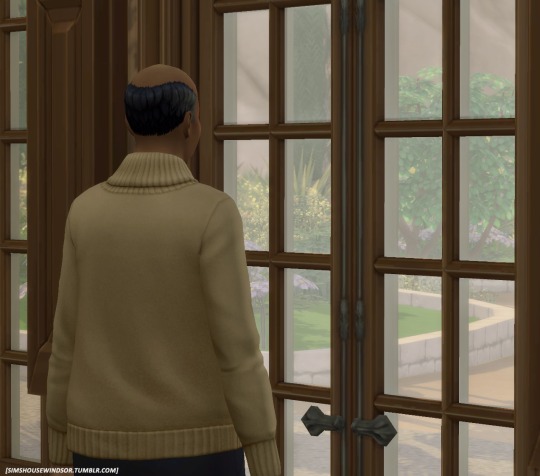
King Felipe: Schedule an audience with the Prime Minister. I need to know how we plan to retaliate.
[Aide]: Yes, Your Majesty.

- - - - - LATER - - - - -
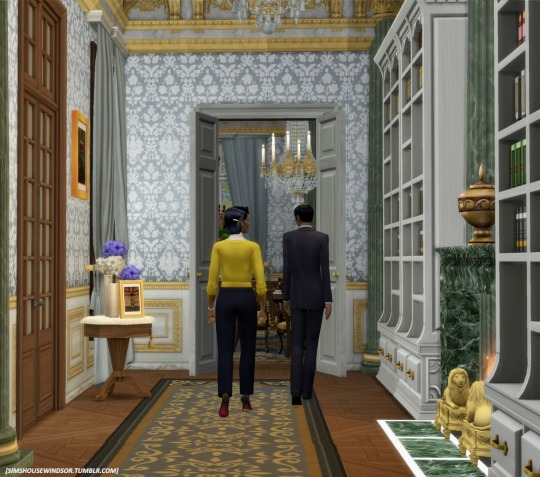
BUCKINGSIM PALACE, EASTON
Martin [P.S.]: Government will be announcing Oasis Springs sanctions today.
Queen Katherine: Oh?
Martin [P.S.]: I believe there is a memo in your box today, ma'am.
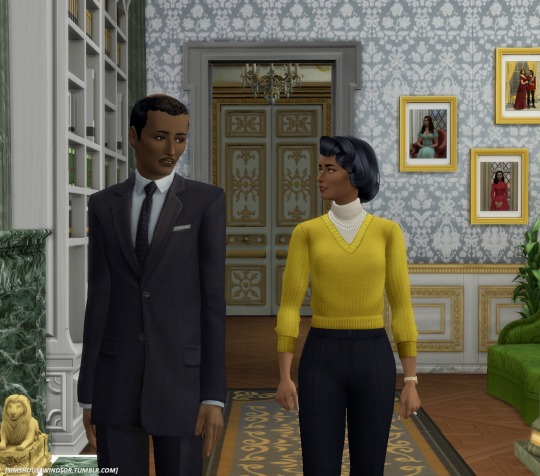
Queen Katherine: Tell my uncle I'd like to see him.
Martin [P.S.]: Today?
Queen Katherine: Today, Martin.
Martin [P.S.]: Yes, ma'am. I have also left your COP7 speech on your desk.
Queen Katherine: I will review and make edits today.
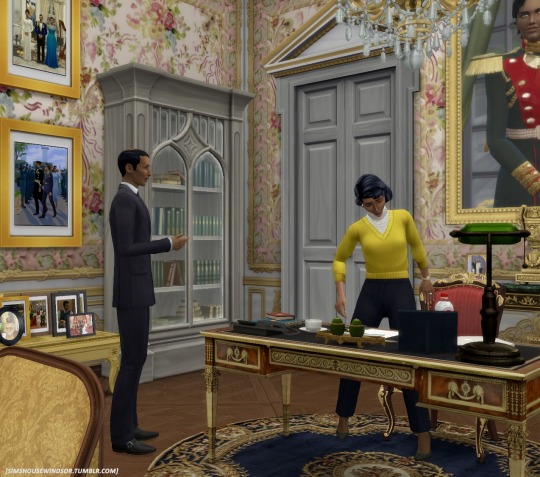
Martin [P.S.]: Oh, before I forget - Accession Day. Sumpterson will be closed for visitors beginning next week to prepare for your arrival. Have you decided on inviting the Duke and Duchess of Hastings?
Queen Katherine: Yes, extend an invite. The duke and duchess should, from here on out, be added to all communications and invitations. If the Kents and Boykins are included, the Hastings should be as well.
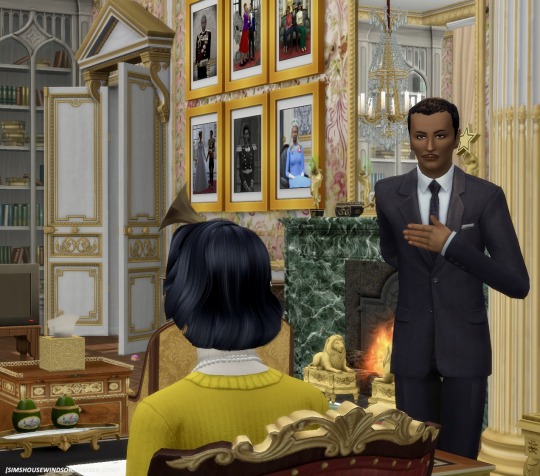
Martin [P.S.]: Anything else?
Queen Katherine: That will be all.
Martin [P.S.]: (bows) Your Majesty.

- - - - - LATER - - - - -
SOMEWHERE ABOVE WINDENBURG
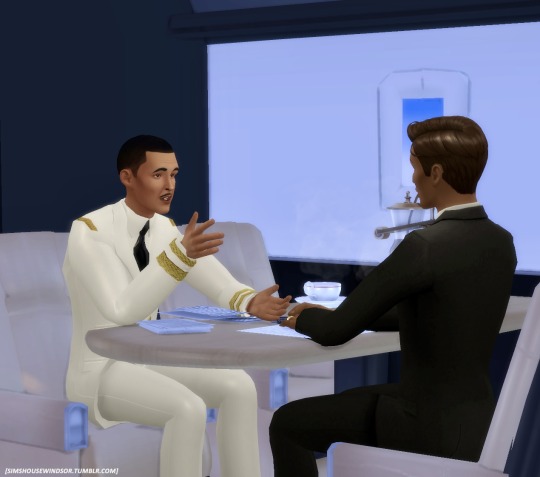
Cmd Parker [P.S.]: Unfortunately, your dowry does not allow for any extended down time until next month. You will be joining Her Majesty in Henford for Accession Day.
Prince Rainier: That is in two weeks!
Cmd Parker [P.S.]: Yes, Your Royal Highness. The queen leaves for Sulani tomorrow, for COP7, so there are quite a few engagements that the palace have transferred to you.
Prince Rainier: Can the Queen mother not take any of these?
Cmd Parker [P.S.]: We can ask.
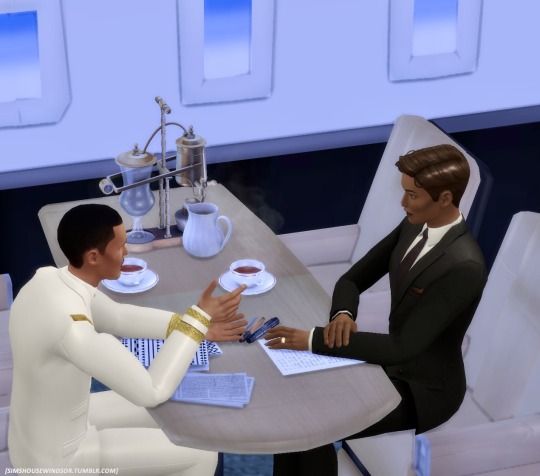
Cmd Parker [P.S.]: One final thing - a letter arrived at the hotel for you before we left.
Prince Rainier: A letter?
Cmd Parker [P.S.]: From your cousin. The Viscount St. Lester.
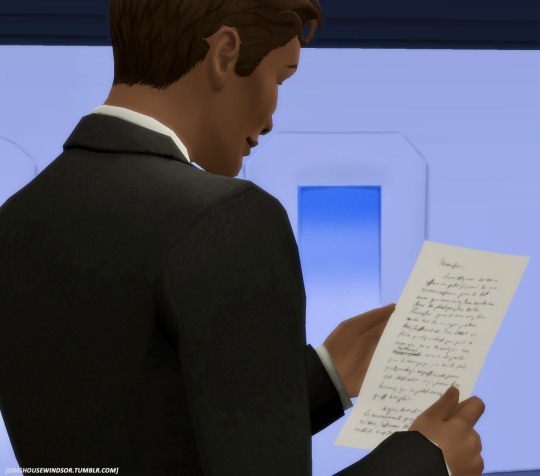
Dear Cousin, I hope this letter finds you well. I’m sure I am the last person you were expecting to hear from today. I wanted you to be the next to know, I am returning to Windenburg next month! I called mother last week and told her, she was beyond thrilled! Returning to Windenburg means I will be back at court, and that is where you come into play. Royal life has never been for me but if mother has her way, she’d control every aspect of my return. Help! - Harrison
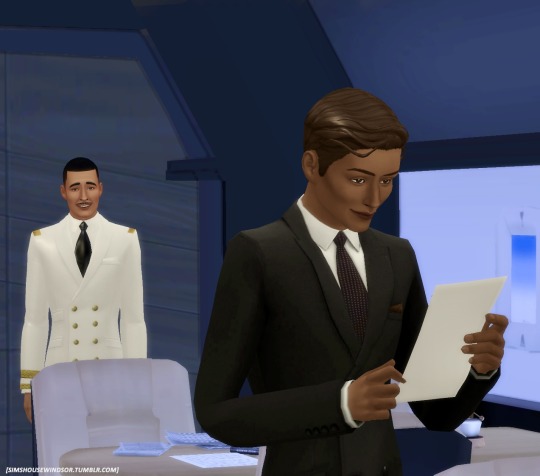
Cmd Parker [P.S.]: Is everything okay, Your Royal Highness?
Prince Rainier: He's coming back!
Cmd Parker [P.S.]: Is that a good thing?
Prince Rainier: It's the best thing!
Previous | Beginning | Next
#simshousewindsor#simshousewindsor ts4#ts4#ts4 royalty#simshousewindsor story#simshousewindsor monarchy#simblr#simshousewindsor simblr#sims 4 simblr#simshousewindsor royalty#sims 4 monarchy#ts4 monarchy#ts4 simblr#ts4 story#the sims 4#thesims4
8 notes
·
View notes
Text


Connor McDavid & the Edmonton Oilers x Hadestown Lyrics
8 notes
·
View notes
Text
Basilisk!
I based it off of the Cockatrice... which is a freaking CR 3 creature with a singular 1d4-3 attack for Lamashtu-knows-why. It's not really similar enough to be a variant like with other creatures I've done. But it is heavily based off of the creature. Still probably horrible CR estimations for these creatures. PF1e CRs are bullshit anyways.
CR 5 Basilisk (Dunmeshi) XP 800 N Large animal Init +3; Senses blindsight, Perception +10
DEFENSE
AC 13, touch 13, flat-footed 10 (+3 Dex, +1 dodge, -1 size) hp 22 (5d8) Fort +4, Ref +7, Will +2
OFFENSE
Speed 30 ft., fly 60 ft. (poor) Melee bite +7 (1d4 plus poison), peck +7 (1d4), spur +7 (1d4 plus poison) Space 10ft., Reach 5ft.
STATISTICS
Str 10, Dex 17, Con 11, Int 2, Wis 13, Cha 8 Base Atk +3; CMB +2; CMD 16 Feats Dodge, Skill Focus (Perception), Weapon Finesse Skills Fly +6, Perception +10
SPECIAL ATTACK
Poison (Ex)
Bite—injury; save Fort DC 12; frequency 1/round for 3 rounds; effect 1d4 Dex Damage; cure 1 save Unlike normal poisons that cause ability score damage, a basilisk's poison is potent enough to actually kill, provided it reduces the effective ability score to 0. It, however, causes effects that are as easy to clear with any means, natural or otherwise, to clear the ability damage. Note: this does not petrify the creature.
EDIT: @onehobgoblin again helped, was tired when I wrote this one up. Yeah this CR is definitely higher.
EDIT 2: FORGOT BLINDSIGHT! It also might need all-around vision? (i.e. can't be flanked). Add it if you wish, it has two heads, it makes sense to add it.
#pathfinder#d&d#dnd#dungeons and dragons#dungeon meshi#dunmeshi#delicious in dungeon#ttrpg#pf1e#fantasy worldbuilding#world building#worldbuilding
11 notes
·
View notes
Text
2E to 1E Conversion: Sahkil, Chakanaj
This creature comes from the adventure module titled "Night of the Grey Death", which mostly deals with the threat of the Grey Gardeners in Galt. Again, I tried to portray them as appropriate for their CR, and I mostly tried to use equivalent abilities to convert certain abilities that the Chakanaj have in 2E. However, I still think I'm a bit iffy on the spell-like abilities. Please feel free to criticize and offer alternatives, if you think there is room for improvement.
EDIT: Corrected the saving throw DCs for fear and horrific doubles, and corrected feats. Thanks to @thecreaturecodex for pointing out errata and giving suggestions.
SAHKIL, CHAKANAJ
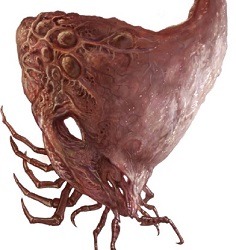
Image (c) Paizo, from "Night of the Grey Death", artist unknown.
This creature is a repulsive chunk of quivering flesh imitating the form of some small article of clothing. It is featureless except for an excessive number of scuttling insectile legs in the lower part of its body.
CHAKANAJ CR 14
XP 38’400
NE Tiny Outsider (evil, extraplanar, sahkil)
Init +9; Senses darkvision 60 ft., low-light vision, true seeing; Perception +24
DEFENSE
AC 29, touch 22, flat-footed 19 (+9 Dex, +1 dodge, +7 natural, +2 size)
hp 200 (16d10 + 112)
Fort +12, Ref +19, Will +16
Damage Reduction 10/good; Immune death effects, disease, fear, poison; Resist cold 10, electricity 10, sonic 10
Spell Resistance 25
OFFENSE
Speed 10 ft., fly 40 ft. (good)
Melee 2 leg slashes +27 (1d3+9 / x3 plus unholy strike)
Special Attacks augmented critical, look of fear (30 ft., DC 25), sneak attack +4d6, unholy strike
Spell-Like Abilities (CL 16th, concentration +23)
Constant – true seeing
At will – dancing lights, detect thoughts (DC 18), greater teleport (self plus 50 lbs. of objects only) magic circle against good, major image, speak with dead, suggestion (DC 19)
3 / day – blink, fear (DC 22), greater invisibility, wall of ectoplasm
1 / day – deeper darkness, horrific doubles (DC 22), summon (level 6, 1 chakanaj, 35%), veil
STATISTICS
Str 10, Dex 29, Con 24, Int 14, Wis 23, Cha 23
Base Atk +16; CMB +14; CMD 33 (cannot be tripped)
Feats Combat Expertise, Combat Reflexes, Dodge, Greater Feint, Improved Feint, Mobility, Slashing Grace (B), Weapon Finesse, Weapon Focus (leg slash)
Skills Acrobatics +26, Bluff +25, Disguise +24 (+32 when bonded), Fly +32, Intimidate +24, Knowledge (arcana) +12, Knowledge (planes) +16, Knowledge (religion) +20, Perception +24, Sense Motive +24, Stealth +30; Racial Modifiers +8 Disguise when bonded
Languages Abyssal, Celestial, Infernal, Necril; telepathy 100 ft.
Special Qualities bond with host, ear for secrets, easy to call, emotional focus, skip between, spirit touch
ECOLOGY
Environment any (Ethereal Plane)
Organization solitary, pair or plot (3-5)
Treasure standard
SPECIAL ABILITIES
Augmented Critical (Ex): A chakanaj’s legs are incredibly sharp and easily penetrate a victim’s vital organs. A chakanaj’s leg slash attack inflicts triple damage on a confirmed critical hit.
Bond With Host (Ex): A chakanaj can physically link itself with a willing host that must be at least one size category larger than itself. Bonding with a host is a full round action that provokes an attack of opportunity, and the chakanaj must physically enter the host’s space in order to use this ability. Once a chakanaj is bonded, it covers a suitable surface on the host, such as the face or back, and alters its own appearence in order to look like some harmless piece of vestiary or equipment, usually a hood, a mask or a scarf. The chakanaj occupies the same space as its host and moves with its host. Once bonded, a chakanaj gets a +8 racial bonus to all Disguise checks to appear as an article of clothing.
While bonded with a chakanaj, the host’s senses and movement are not impaired in any way. The host gains a +2 circumstance bonus to his AC as the sahkil moves to intercept and deflect enemy attacks. The sahkil also establishes a constant shield other effect with the bonded creature. Attacks that target the chakanaj target the host instead, but use the higher AC or saving throw values between the chakanaj and the host. Area effects apply to both the chakanaj and the host, as normal for an area of effect. A bonded chakanaj cannot attack or move on its own, but moves along with the host and can use its spell-like abilities as normal.
If the host is hit by a melee attack or grappled, the chakanaj can make a single leg slash attack against the attacker. This counts as the chakanaj’s attack of opportunity for that round, and automatically reveals the chakanaj’s true nature to the attacker.
A chakanaj can detach itself from a host as a move action. If it does so, it is placed in a square adjacent to the former host and can act independently right away.
Ear For Secrets (Ex): A chakanaj knows when a creature within 30 feet lies unless that creature succeeds on a Bluff check opposed by the chakanaj’s Sense Motive check. This ability does not allow the chakanaj to know the truth, only that a lie was told.
Look of Fear (Su): A creature affected by a chakanaj’s gaze is gripped by an irrational dread that his secrets are about to be revealed. The target becomes shaken and acts as if under the effects of a paranoia spell for 1d6 rounds.
Unholy Strike (Su): A chakanaj’s natural attacks are considered evil-aligned and inflict 2d6 points of extra damage to non-evil targets struck by them, like a magical weapon with the unholy quality.
Among the most subtle members of a fiendish race that pride themselves on their subtlety, a chakanaj’s diminutive size belies its power and cruelty. These sahkil represent the fear of secrets being revealed – an unfaithful spouse, a corrupt minister embezzling funds, a fugitive trying to conceal an heinous crime, chakanaj flock to these like flies upon honey and take advantage of their target’s shame to manipulate them. They are not interested in secrets that are merely embarassing or amusing. Only secrets that can potentially ruin lives and sow chaos are within a chakanaj’s purview.
A chakanaj takes a slow and torturous approach to its prey. It starts out ferreting out secrets and tormenting its prospective victim by leaving hints that someone knows the truth about them. They do so knowing that most victims will act on their fear of exposure, to the point of committing more despicable actions in order to avoid being found out. This gives the chakanaj more leverage against its victim, starting a vicious cycle that more often than not leaves a victim broken and insane, if it leaves them alive at all.
While they prefer manipulation to violence, chakanaj are fast and sneaky combatants. Despite their lack of physical power, they instinctively know where to aim to bypass physical protections and strike at an opponent’s vitals. Their greatest asset, however, is their ability to link themselves to a willing creature and disguise themselves as an article of clothing or similar harmless items. This not only lets them see and hear anything their host does, but it lets them rest their sharp legs against the host’s face or skin, a subtle threat of violence to keep a host in line.
A chakanaj is usually about 2 ft. wide and weighs about 5 lbs.
24 notes
·
View notes