#can it forward day
Explore tagged Tumblr posts
Visit Tumblr Blog
Explore Tumblr blogs with no restrictions, modern design and the best experience.
Last Seen Tumblr Blogs


Fun Fact
12.7% of mobile users access Tumblr.
Text
Happy International Can-It-Forward Day!
Well, technically International Can-It-Forward Day is August 1st, but we're getting started a day early. To celebrate, this week we're bringing to you some books on canning and food preserving from our foodways and cookery collections.
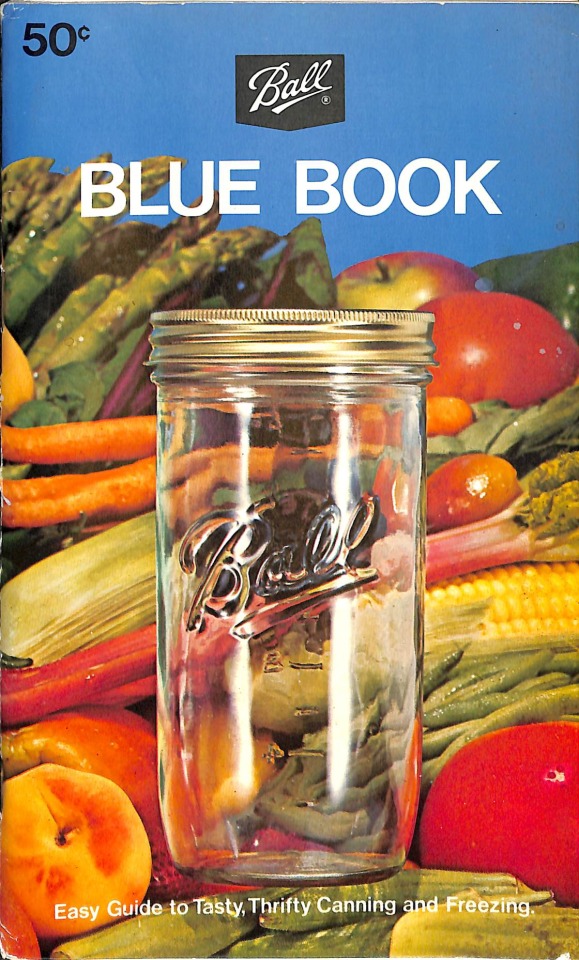
To start, we have the Ball Blue Book of Home Canning, Preserving & Freezing (1949) by the Ball Corporation, the patrons of Can-It-Forward Day and an early creator of mason jars and other home canning supplies.
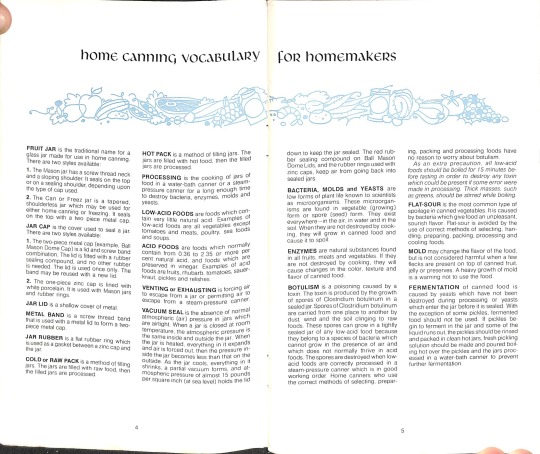
The book gets started with a vocabulary lesson of jar anatomy, food descriptions, and common hazards in food preserving chemistry:
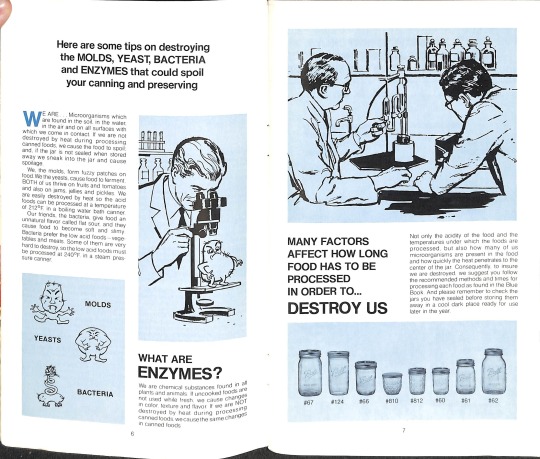
The next lesson gives more in depth information on molds, yeast, bacteria, and enzymes. We thought the little guys were cute!
Of course, can't make a book about canning and preserving without some product advertisement!

And, lastly, a sample recipe for canning peaches:
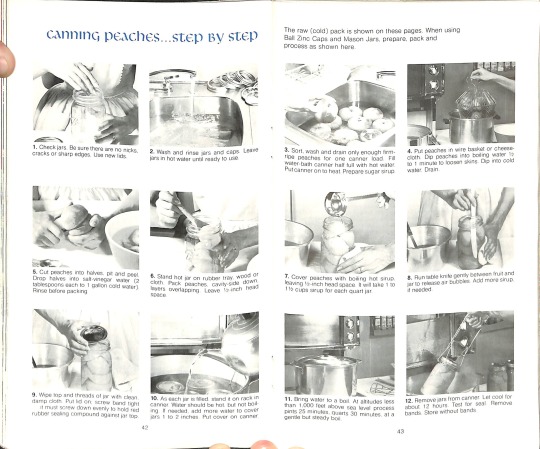
Image transcripts are below the cut.
The Browne Popular Culture Library (BPCL), founded in 1969, is the most comprehensive archive of its kind in the United States. Our focus and mission is to acquire and preserve research materials on American Popular Culture (post 1876) for curricular and research use. Visit our website at https://www.bgsu.edu/library/pcl.html.
Image 2: Home Canning Vocabulary for Homemakers
FRUIT JAR is the traditional name for a glass jar made for use in home canning. There are two styles available:
The Mason jar has a screw thread neck and a sloping shoulder. It seals on the top or on a sealing shoulder, depending upon the type of cap used.
The Can or Freez jar is a tapered, shoulderless jar which may be used for either home canning or freezing. It seals on the top with a two piece metal cap.
JAR CAP is the cover used to seal a jar. There are two styles available:
The two-piece metal cap (example, Ball Mason Dome Cap) is a lid and screw band combination. The lid is fitted with a rubber sealing compound, and no other rubber is needed. The lid is used once only. The band may be reused with a new lid.
The one-piece zinc cap is lined with white porcelain. It is used with Mason jars and rubber rings.
JAR LID is a shallow cover of metal.
METAL BAND is a screw thread band that is used with a metal lid to form a two-piece metal cap.
JAR RUBBER is a flat rubber ring which is used as a gasket between a zinc cap and the jar.
COLD or RAW PACK is a method of filling jars. The jars are filled with raw food, then the filled jars are processed.
HOT PACK is a method of filling jars. The jars are filled with hot food. then the filled jars are processed.
PROCESSING is the cooking of jars of food in a water-bath canner or a steam-pressure canner for a long enough time to destroy bacteria, enzymes, molds and yeasts.
LOW-ACID FOODS are foods which con-tain very little natural acid. Examples of low-acid foods are all vegetables except tomatoes and meats, poultry, sea foods and soups.
ACID FOODS are foods which normally contain from 0.36 to 2.35 or more per cent natural acid, and foods which are Preserved in vinegar. Examples of acid foods are fruits, rhubarb, tomatoes, sauer-kraut, pickles and relishes.
VENTING or EXHAUSTING is forcing air to escape from a jar or permitting air to escape from a steam-pressure canner.
VACUUM SEAL is the absence of normal atmospheric (air) pressure in jars which are airtight. When a jar is closed at room temperature, the atmospheric pressure is the same inside and outside the jar. When the jar is heated, everything in it expands and air is forced out, then the pressure in-side the jar becomes less than that on the outside. As the jar cools, everything in it shrinks. a partial vacuum forms, and atmospheric pressure of almost 15 pounds Per square inch (at sea level) holds the lid down to keep the jar sealed. The red rubber sealing compound on Ball Mason Dome Lids, and the rubber rings used with zinc caps. keep air from going back into sealed jars.
BACTERIA, MOLDS and YEASTS are low forms of plant life known to scientists as microorganisms. These microorganisms are found in vegetable (growing) form or spore (seed) form. They exist everywhere —in the air, in water and in the soil. When they are not destroyed by cooking. they will grow in canned food and cause it to spoil.
ENZYMES are natural substances found in all fruits. meats and vegetables. If they are not destroyed by cooking. they will cause changes in the color, texture and flavor of canned food.
BOTULISM is a poisoning caused by a toxin. The toxin is produced by the growth of spores of Clostridium botulinum in a sealed jar. Spores of Clostridium botulinum are carried from one place to another by dust, wind and the soil clinging to raw foods. These spores can grow in a tightly sealed jar of any low-acid food because they belong to a species of bacteria which cannot grow in the presence of air and which does not normally thrive in acid foods. The spores are destroyed when low-acid foods are correctly processed in a steam-pressure canner which is in good working order. Home canners who use the correct methods of selecting, preparing, packing and processing foods have no reason to worry about botulism. As an extra precaution, all low-acid foods should be boiled for 15 minutes be-fore tasting in order to destroy any toxin which could be present if some error were made in processing. Thick masses, such as greens, should be stirred while boiling.
FLAT-SOUR is the most common type of spoilage in canned vegetables. It is caused by bacteria which give food an unpleasant, sourish flavor. Flat-sour is avoided by the use of correct methods of selecting. handling, preparing, packing, processing and cooling foods.
MOLD may change the flavor of the food, but is not considered harmful when a few flecks are present on top of canned fruit, jelly or preserves. A heavy growth of mold is a warning not to use the food.
FERMENTATION of canned food is caused by yeasts which have not been destroyed during processing or yeasts which enter the jar before it is sealed. With the exception of some pickles, fermented food should not be used If pickles be-gin to ferment in the jar and some of the liquid runs out, the pickles should be rinsed and packed in clean hot jars, fresh pickling solution should be made and poured boiling hot over the pickles and the jars processed in a water-bath canner to prevent further fermentation.
Image 3: Here are some tips on destroying the MOLDS, YEAST, BACTERIA and ENZYMES that could spoil your canning and preserving
WE ARE . . . Microorganisms which are found in the soil, in the water, in the air and on all surfaces with which we come in contact. If we are not destroyed by heat during processing canned foods, we cause the food to spoil: and. if the jar is not sealed when stored away we sneak into the jar and cause spoilage.
We, the molds, form fuzzy patches on food. We the yeasts, cause food to ferment. BOTH of us thrive on fruits and tomatoes and also on jams. jellies and pickles. We are easily destroyed by heat so the acid foods can be processed at a temperature of 212°F in a boiling water bath canner.
Our friends, the bacteria, give food an unnatural flavor called flat sour, and they cause food to become soft and slimy. Bacteria prefer the low acid foods—vegetables and meats. Some of them are very hard to destroy, so the low acid foods must be processed at 240°F. in a steam pressure canner.
(Image: Drawing of molds, yeasts, and bacteria with angry faces)
(Image: Drawing of a man looking through a microscope at a large, scowling creature)
WHAT ARE ENZYMES?
We are chemical substances found in all plants and animals If uncooked foods are not used while fresh. We cause changes in color. texture and flavor If we are NOT destroyed by heat during processing, we cause the same changes in canned foods
(Image: Drawing of two men in a chemistry lab)
MANY FACTORS AFFECT HOW LONG FOOD HAS TO BE PROCESSED IN ORDER TO… DESTROY US
Not only the acidity of the food and the temperatures under which the foods are processed. but also how many of us microorganisms are present in the food and how quickly the heat penetrates to the center of the jai Consequently. to insure we are destroyed. we suggest you follow the recommended methods and times for processing each food as found in the Blue Book. And please remember to check the jars you have sealed before storing them away in a cool dark place ready for use later in the year.
(Image: eight Ball mason jars of various sizes)
Image 4: How to Use Ball Jars and Fittings
(Image: Drawing of two Ball mason jars of different heights with their lids off)
BALL MASON JARS
Examine jars with fingertips for nicks. chips and cracks in sealing surface.
Discard ones unsuitable for canning.
Wash jars in hot soapy water and rinse well.
Do not use wire brushes, steel wool or washing soda for cleaning jars; they are apt to damage glass.
Place in hot water until ready to fill. It is not necessary to boil jars in which food is to be processed.
Seal with Ball Mason Dome Caps or zinc caps and rubber rings. Follow directions for filling and sealing according to fittings being used.
A sudden change of temperature is apt to cause any jar to break. Never put a hot jar on a cold surface or in a draft. Never Pour boiling liquid into a cool jar.
BALL CAN OR FREEZ JARS
To use for canning following step-by-step instructions for Ball Mason Jars.
For jellies, jams, conserves, marma-lades, preserves, see instructions for each section. The sections are listed in table of contents and in the index.
Ball Can or Freez Jars may also be used for canning pick/es or relishes.
Information for use in freezing, read instructions on page 95 at the beginning of the Freezer Section.
BALL MASON DOME CAPS
Examine top and edges of jar: both must be smooth and even. Old jars were made for shoulder sealing: consequently, the top finish is usually unsuitable for top sealing with Ball Mason Dome Caps.
Wash and rinse lids and bands. Cover lids with water. Bring to simmer (180°F.). Remove from heat. Leave in water until ready to use (Image: drawing of water being poured into a mason jar)
Fill hot jar. Leave 1-inch head space for meats, corn, peas and other low-acid foods; 1/2-inch head space for fruits and acid vegetables. Add liquid to completely cover food solids. Leave 1A-inch head space for juices, preserves. pickles and relishes: Ya-inch head space for jellies.
Remove air bubbles from fruit and vegetable packs by running table knife between food and jar.
Wipe top and screw threads of jar with clean, damp cloth. Put lid on jar. compound next to glass. sealing
Screw band tight but do not use force. Band must screw down evenly all the way around.
Process immediately. using and method for product being canned.
Remove jars from canner. Do not tighten bands after processing Test for seal.
Store without bands. right time
BALL ZINC CAPS
Use new rubber rings. Wash caps and rubbers in hot soapy water Rinse. Keep rubbers wet until needed. If zinc caps have been used. boil them for 15 minutes.
Before filling jar. stretch wet rubber just enough to place flat on sealing shoulder.
See step 3 under Ball Mason Dome Caps for amount of head space to leave when filling jars.
Remove air bubbles from fruit and vegetable packs by running table knife be-tween food and jar.
Wipe top surface of rubber and threads of jar with clean. damp cloth.
Screw cap tight. then loosen about inch.
Process immediately. using right time and method for product being canned.
Remove jars from canner. Slowly screw caps tight . quick turns may cause the rubbers to slip.
Let jars cool about 12-24 hours. Check seal .. if top of cap is low in center, jar is sealed. Do not tighten cap after jar has cooled.
(Image: Drawing of three mason jars with a diamond pattern)
BALL QUILTED CRYSTAL JARS CANNING
Quilted Crystal Jars may be used for canning. Follow directions for using Ball Mason Jars. For preparation of caps follow instructions for Ball Mason Dome Caps.
BALL QUILTED CRYSTAL JARS FREEZING
Quilted Crystal Jars may be used for freezing. Follow directions for preparing Ball Can or Freez Jars on page 95. Excellent for Freezer Jams.
(Image: Drawing of two jelly glasses with a diamond pattern)
BALL QUILTED CRYSTAL JELLY GLASSES
Follow instructions given for jelly glasses in Jelly Section. Sealing with Paraffin -use only for jelly. Do not try to process in canner Lid is only cover and does not seal airtight to obtain vacuum seal
(Image: Drawing of a person testing a mason jar lid according to the instructions below)
HOW TO TEST SEALS OF TWO-PIECE CAP
When jars of food are thoroughly cool. 12-24 hours:
Press center of lid; if lid is down and will not move. jar is sealed Remove band, wipe threads with damp cloth, store.
Or tap the center of the lid with a spoon. A clear ringing sound means a good seal Remove band. wipe threads with damp cloth Store in cool, dark, dry place
Check for airtight seal by tilting the jar slightly. If there is no leakage. remove band. wipe jar clean and store in cool, dark, dry place.
Image 5: Canning Peaches...Step by Step
The raw (cold) pack is shown on these pages. When using Ball Zinc Caps and Mason Jars, prepare, pack and process as shown here.
(Note: each step has an image showing what is described.)
Check jars. Be sure there are no nicks, cracks or sharp edges.
Wash and rinse jars and caps. Leave jars in hot water until ready to use.
Sort, wash and drain only enough firm-ripe peaches for one canner load. Fill water-bath canner handful with hot water. Put canner on to heat. Prepare sugar sirup.
Put peaches in wire basket or cheese cloth. Dip peaches into boiling water 1/2 to 1 minute to loosen skins. Dip into cold water. Drain.
Cut peaches into halves, put and peel. Drop halves into salt-vinegar water (2 tablespoons each to 1 gallon of cold water). Rinse before packing.
Stand hot jar on rubber tray, wood or cloth. Pack peaches, cavity side down, layers overlapping. Leave 1/2-inch head space.
Cover peaches with boiling hot sirup, leaving 1/2-inch head space. It will take 1 to 1 1/2 cups sirup for each quart jar.
Run table knife gently between fruit jar to release air bubbles. Add more sirup if needed.
Wipe top and threads of jar with clean, damp cloth. Put lid on, screw band tight...it must screw down evenly to hold red rubber seal compound against jar top.
As each jar is filled, stand it on rack in canner. Water should be hot, but not boiling. If needed, add more water to cover jars 1 to 2 inches. Put cover on canner.
Bring water to a boil. At altitudes less than 1,000 feet above sea level process pints 25 minutes, quarts 30 minutes, at a gentle but steady boil.
Remove jars from canner. Let cool for about 12 hours. Test for seal. Remove bands. Store without bands.
13 notes
·
View notes
Text
The squad of all time has arrived on scene.
#dungeon meshi#mithrun#Cithis Ofri#Pattadol#Fleki#Lycion#Otta#Happy Canary Debut Day! These guys wont really get to be very present until the next season of Dungeon Meshi#But I can still be excited to see them animated!!!#Shout out to Pattadol - I also tend to occupy 'The Punchline' niche of the friendgroup.#The punchline differs from 'The Jester' who willingly absorbs the jokes. The punchline is often unwillingly the joke.#You are either the one no one likes or the well beloved little-sibiling-esque friend. Good luck figuring out which!#Yes it is canon that Otta is into Women. YES she dates younger women and dumps them when they age.#This isn't a fan made bit. It's real.#Dungeon Meshi has no romance but it does have canonically queer characters.#Shipping is fine and all but it is a running theme in the series than *everyone* who expresses romantic interest in someone -#-finds that love unrequited. Just something to be mindful of to measure your expectations of this series!#Ah! In other housekeeping notes; I'm going to *try* and add Alt Text to my dungeon meshi thurday posts going forwards.#I might not be able to do it day of but I will try to get it done within a week.
10K notes
·
View notes
Text

out of the frying pan and into the fire and into another frying pan that's also on fire
[id in alt text]
#dungeon meshi#dungeon meshi spoilers#dunmeshi#this past year i decided to get into some of the manga i hear people really rave about#and dunmeshi was the first one i read and i adore it so much i don't have the words#gosh ryoko kui is such a huge inspiration.. i hope i can save up and get physical copies of the manga some day#ohh and daydream hour if it ever releases in english...#and sorry toshiro doesn't have his armor. i always remember him in his disheveled casual arc#fan art#my art#i think i've just completely stopped trying to do a clean flat style... i've just started painting over my sketches now#it looks a little messy but it's so much more fun#this was the first time in awhile i looked forward to continuing a drawing
6K notes
·
View notes
Text

I've had this pose ref saved for a while and the Superman set photos just gave off the same energy 👉🏻👈🏻
The reference is this photo of Katharine Hepburn as Antiope and Colin Keith-Johnston as Theseus in the 1932 play 'The Warrior's Husband' (and I'd love for people to turn into a draw your otp meme pls pls pls this pose is so good)

And also, of course, the Superman (2025) set photos


#superfamilyweek#superman#dcu#clois#lois lane#clark kent#i was actually gonna post this a few days ago but then i found out about the superfamily week#it wasn't made for it but i hope you can accept this humble offering even if it doesn't really fit the prompts#art#digital#fanart#live-action#dc#regular#final#colour#this actually from june when the set photos came out and i just got completely obsessed and went into a clois haze#it all looks so good though!! the whole thing!!!! i'm vibrating with excitement just thinking about it!!!!!!!#if this film isn't good i'm gonna be sooo disappointed you guys have no idea how much i'm looking forward to it#but anyway. ART RAMBLES: as i mentioned on the tags of my last drawing this piece gave me SUCH a headache#i think it's probably cos it was just supposed to be a quick sketch so i used a more stable pencil brush#but then i really liked it so i decided to properly colour it instead of just doing the watercolour thing i usually do for sketches#but with finished pieces i like the lineart to be kinda messy and the sketch to even show through bit#and since i used the more stable brush for the sketch it ended up looking WAY too clean. not like my stuff at all.#so i just started throwing stuff at the wall to see what could make it more interesting. full background! actual lineart! texture layers!#and this here is what i was the happiest with. i don't... love it though. it should be looking way more interesting given the pose#and then i also did the purge girl halfway through this and it looked SO good right out of the bat (pun intended)#so i went a bit into a spiral. did some realistic stuff i'll post soon. and now am trying out a thick black lineart style.#(i'll definitely still use the coloured lines for the sketchy watercolour stuff though. it just looks way too cute)
466 notes
·
View notes
Text
back at it again with more transfem arthur bennett. Have a good day

also happy suckening saturday
#jrwi fanart#jrwi#the suckening#arthur bennett#pseudokart#my art#spreading my propoganda#we can make her a gorgeous woman together#looking forward to the day we get more transfem pc/npcs#had a lot of fun drawing these doodle pages kind of. might do more#also good fullbody practice!!#the eyeliner drawing was funny to me because i was gonna give her a mirror then i remembered
2K notes
·
View notes
Text


Countdown to October 19th (1/19)
Phil Is Not On Fire 1
#the first video#dun dun#I was going to post a different thing then at the last minute I made a completely new gif set#hardest part of this?#deciphering dan's handwritting#I’m starting with this and kinda moving forward through time#lets see if I can remember to post one every day woop#I have been thinking about doing something like this for a while#and phan month seemed like a great time#and I had holiday to fuck around and do this#so its really just gonna be like gif sets or something a rather#it will probably mainly be gif sets#lets see how this goes#dan and phil#dnp#danandphil#phan#amazingphil#my gifs#dnp gifs#danandphilgames#dan and phil games#daniel howell#phan countdown
386 notes
·
View notes
Note
every time i see you reblog shitposts on my dash im like yayyy sergle didnt kill herself <3 and then i laugh bc the posts r usually funny

#thank you for caring lmao#i am very much like... i move a step forward and three steps back these days#i still don't wanna be here but i'm not as bad as i was back right after the recent meltdown#i can at least kind of exist outside of bullet time now.
160 notes
·
View notes
Text
I feel like I’m in some bizarre limbo right now. This week was absolutely brutal in terms of energy expenditure, because retail over Black Friday. I talked so much my throat went raw. By yesterday I felt kinda icky and today I slept til 10 and still woke up exhausted.
I can’t tell if I’m just supremely overspent or actually sick somehow. My beloved is still recovering from a TBI and is worried about catching whatever funk I have and I just don’t even know if my body has given up or I’ve actually got a bug.
#ramblies#this means I lose my precious day with them since I can’t run errands at the moment#and they need allergy shot and acupuncture#might be able to clear out some commissions though well see#also at least I did great in sales and can look forward to a good paycheck coming up
231 notes
·
View notes
Text


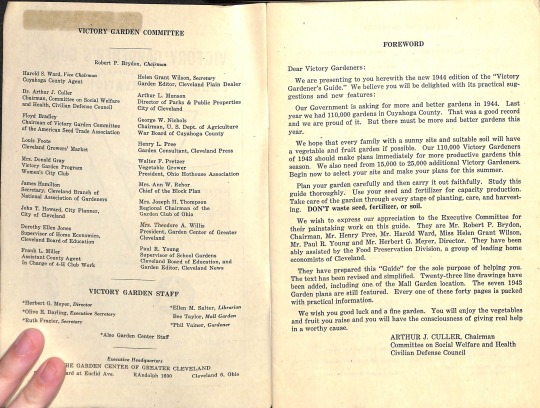
Victory gardens were popular during World War I and II as a way for families on the "home front" to produce their own food and boost morale during food rationing war efforts. This Victory Gardener's Guide, Including Food Preservation Guide (1944), came from the Victory Garden Committee of the Cuyahoga County Council for Civilian Defense and the Garden Center of Greater Cleveland, in Ohio, as a practical guide to making victory gardens at home. Read below for more information on victory gardens and a sample garden plot.
The Browne Popular Culture Library (BPCL), founded in 1969, is the most comprehensive archive of its kind in the United States. Our focus and mission is to acquire and preserve research materials on American Popular Culture (post 1876) for curricular and research use. Visit our website at https://www.bgsu.edu/library/pcl.html.
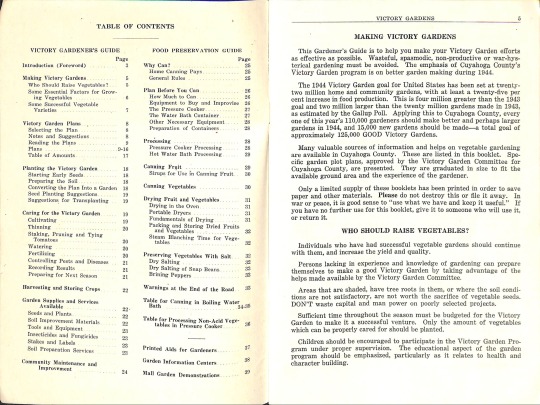


Image transcripts:
Foreword
Dear Victory Gardeners:
We are presenting to you herewith the new 1944 edition of the "Victory Gardener's Guide." We believe you will be delighted with its practical sug-gestions and new features:
Our Government is asking for more and better gardens in 1944. Last year we had 110,000 gardens in Cuyahoga County. That was a good record and we are proud of it. But there must be more and better gardens this year.
We hope that every family with a sunny site and suitable soil will have a vegetable and fruit garden if possible. Our 110,000 Victory Gardeners of 1943 should make plans immediately for more productive gardens this season. We also need from 15,000 to 25,000 additional Victory Gardeners. Begin now to select your site and make your plans for this summer.
Plan your garden carefully and then carry it out faithfully. Study this guide thoroughly. Use your seed and fertilizer for capacity production. Take care of the garden through every stage of planting, care, and harvesting. DON'T waste seed, fertilizer, or soil.
We wish to express our appreciation to the Executive Committee for their painstaking work on this guide. They are Mr. Robert P. Brydon, Chairman, Mr. Henry Pree, Mr. Harold Ward, Miss Helen Grant Wilson, Mr. Paul R. Young and Mr. Herbert G. Meyer, Director. They have been ably assisted by the Food Preservation Division, a group of leading home economists of Cleveland.
They have prepared this "Guide" for the sole purpose of helping you. The text has been revised and simplified. Twenty-three line drawings have been added, including one of the Mall Garden location. The seven 1943 Garden plans are still featured. Every one of these forty pages is packed with practical information.
We wish you good luck and a fine garden. You will enjoy the vegetables and fruit you raise and you will have the consciousness of giving real help in a worthy cause.
ARTHUR J. CULLER, Chairman Committee on Social Welfare and Health Civilian Defense Council
Making Victory Gardens
This Gardener's Guide is to help you make your Victory Garden efforts as effective as possible. Wasteful, spasmodic, non-productive or war-hysterical gardening must be avoided. The emphasis of Cuyahoga County's Victory Garden program is on better garden making during 1944.
The 1944 Victory Garden goal for United States has been set at twenty-two million home and community gardens, with at least a twenty-five per cent increase in food production. This is four million greater than the 1943 goal and two million larger than the twenty million gardens made in 1943, as estimated by the Gallup Poll. Applying this to Cuyahoga County, every one of this year's 110,000 gardeners should make better and perhaps larger gardens in 1944, and 15,000 new gardens should be made—a total goal of approximately 125,000 GOOD Victory Gardens.
Many valuable sources of information and helps on vegetable gardening are available in Cuyahoga County. These are listed in this booklet. Spe-cific garden plot plans, approved by the Victory Garden Committee for Cuyahoga County, are presented. They are graduated in size to fit the available ground area and the experience of the gardener.
Only a limited supply of these booklets has been printed in order to save paper and other materials. Please do not destroy this or file it away. In war or peace, it is good sense to "use what we have and keep it useful." If you have no further use for this booklet, give it to someone who will use it, or return it.
Who Should Raise Vegetables?
Individuals who have had successful vegetable gardens should continue with them, and increase the yield and quality.
Persons lacking in experience and knowledge of gardening can prepare themselves to make a good Victory Garden by taking advantage of the helps made available by the Victory Garden Committee.
Areas that are shaded, have tree roots in them, or where the soil conditions are not satisfactory, are not worth the sacrifice of vegetable seeds. DON'T waste capital and man power on poorly selected projects.
Sufficient time throughout the season must be budgeted for the Victory Garden to make it a successful venture. Only the amount of vegetables which can be properly cared for should be planted.
Children should be encouraged to participate in the Victory Garden Program under proper supervision. The educational aspect of the garden program should be emphasized, particularly as it relates to health and character building.
Community Maintenance and Improvement
The care of your Victory Garden will lead you into the care of your :lot and house. This is no time for disorder; we must have efficiency. This is no time for waste we must conserve. This is no time to let things run down; we must maintain what we have. War time is clean-up, fix-up time. We must use what we have, and keep it useful ; we will not get new tools, or furniture, or houses, for a long time. If you practice conservation on your own house and yard, you will contribute to the war effort as well as to the values of your home and your community.
You and your neighbors can use your work on Victory Gardens as a spring-board into an effective consciousness of other community problems. By working together on conserving your whole neighborhood as well as your own houses, you will build civic assets for this emergency and for long after. You will be doing real city planning, and building the better communities for which we fight.
As you work in your Victory Garden, you will realize more and more how much time and effort go into all gardening and building. We cannot afford to waste any of our assets. You will want to join in the movement to protect the parks, playgrounds, schools and public buildings that were built with your money for your use. You will feel the need for conservation and wise use of all resources—manpower, food, gardens; homes, neighborhoods, public properties—to win the war, and to enjoy the benefits of pace. And you will do your part.
Why Can?
WHY CAN? Home canning helps to supplement commercial supplies and saves transportation. It provides greater variety in meals by helping to equalize the seasonal food supply, and if properly done, home canning helps to supply food elements which are essential to health. It provides a means of pre-serving the surplus of your Victory Garden.
Home Canning Pays
If you grow supplies in sufficient quantities for your daily use and pro-vide an inexpensive surplus for canning—
If you can as quickly as possible when produce is sound, ripe, and fresh —two hours from plant to can is a good rule—
If you buy direct from a farmer or home gardener at a low cost to justify home canning—
If you have suitable equipment and suitable storage space.
If you will can products efficiently and according to the best canning techniques—
If you can proper amounts of the various food products—not too much nor too little, but just enough to last the family through the coming year
General Rules
There is no such thing as luck in canning. It is a science requiring Care and Precision. The sooner the food is canned after picking, the better the result. The product will be no better than the material that goes into the can. Select foods with care, using only sound perfect produce in prime condition. Canning does not improve the product, it only preserves it.
Use the right method for the food to be preserved. Tomatoes are the easiest vegetable to can. All other vegetables are non-acid and should be canned in a pressure cooker, dried, or put down in salt. The safer method is to sterilize the food packed in the can. The two recommended methods of sterilizing in the can are processing by hot water bath—or by pressure cooker.
Victory Garden Plans
Seven plans for adult Victory Gardens are presented on pages 9 to 15. They range in size from 150 square feet to 5,000 square feet. Two additional plans designed especially for children are shown on page 16. These gardens have all been carefully planned to make full use of soil area for the entire season. The Victory Gardener should select the plan which best fits his conditions.
The smaller sized plots are limited to vegetables economic of space and with high food value. Crops such as corn, pumpkins, squash, cucumbers and perennial crops such as asparagus and rhubarb are included in the larger plots.
The four major vegetables--judged on ease of culture, maximum yield, high vitamin content, general use, and facility of canning or storing—are tomatoes, carrots, beans and vegetable greens. These have been included in the largest amounts consistent with a well balanced vegetable garden plan. All other crops are secondary, yet worthy of inclusion to vary the wartime menu.
Selecting the Plan
The size of the garden should be determined by the site, space and time available, and the needs of the family. Approximately 1,000 square feet of land will produce enough vegetables for a family of four during the summer. A larger plot will be needed to provide for canning and storage. Even the smaller gardens, 1 to 3, yield surprising quantities of vegetables. You can expect to spend at least one hour a day in the 1,000 square foot garden. It is better to take good care of a small garden than to have one so large it is neglected.
These suggested plans may be used for individual home garden plots or as units of a community garden.
Notes and Suggestions
The tomato plants, as shown in the plans, are spaced for staking and tying. If grown on the ground, space 3 to 4 feet apart.
As noted earlier the major crops are tomatoes, beans, carrots and such greens as lettuce, spinach, Swiss chard, endive, beets for tops, mustard and others. If more of these major crops are wanted, substitutions may be made, as for example, carrots in the parsnip row, tomatoes where asparagus and rhubarb are shown. It is better, however, to follow the plans.
Potatoes should only be grown in garden areas larger than 5,000 square feet, and only where the soil is suitable. A fairly acid soil is recommended for this crop. Check other cultural information on potato raising before attempting to grow them.
Harvesting of vegetables from the garden is greatly increased by succession planting. As soon as one crop is harvested, fertilize and plant with a crop which will mature before the end of the season. The harvesting period for many vegetables may be extended considerably by planting at one time varieties having different maturity dates. Succession planting is provided for in the plans given in this booklet.
In Plan Number 7, the area on the right side may be planted with early, quick-maturing crops such as lettuce, peas, spinach, onion sets, radishes, etc. This may be done also in Plans 5 and 6 where early crops are not indicated in the areas devoted to late crops. This will result in a still more intensive utilization of the soil area.
READING THE PLANS
The following guide serves for plans 1 to 7.
The rectangles represent the outlines of the plots. The letters A, B, C and D mark the corner stakes.
Lines across the plots mark the vegetable crop rows. Solid lines are for full season rows and broken lines - - - - are for partial season rows. The latter, except where succession crops are marked, indicate "companion" crops.
Names of the crops are shown in the rows. Parentheses ( ) around a crop name indicate a succession crop to be planted after the first crop is harvested.
The small circles indicate transplanted plants; the large circles indicate hills of squash and cucumbers. Short perpendicular lines divide rows between various crops shown.
The inch measure (6", 12", etc.) indicates distances between the rows. These are shown at the left of the plans. The foot measure (2', 4', etc.) indicates distances in the rows, as for example, the spacing distances between transplanted plants, or sections of crop rows.
The asterisks * on the left mark the rows which can be planted as early as soil conditions and season will permit after April 1. Broken lines so marked should be planted first. All rows not so marked should be planted after May 25. Succession crops ( ) are planted immediately after the crops which they follow are harvested. Pepper plants are usually transplanted on or after June 1.
12 notes
·
View notes
Text


-Julio Cortázar, from "Bolero" (trans. John Joseph Lyons)
Loki S2 Anniversary x Episode 2 - “Breaking Brad”
#mobius#loki#lokius#mcuedit#lokiedit#marveledit#taking a deep breath. clenching my fists. I WAS FOLLOWING YOU NO I WAS FOLLOWING YOU 🥺💖#had the most successful day in recent memory so treated myself to the official anniversary rewatch of episode two forever beloved#or episode(s) two that is 😅#and will never be over the emphasis of how their lives have reflected in such a way they can see right through each other#to the point where they're actively willing to challenge everything they know and have boxed themselves into#it's about moving forward where you used to stand still and choosing to stay when it's easier to run away!!#owen wilson#tom hiddleston#marvel#owenwilsonedit#dianagifs#flashing cw
325 notes
·
View notes
Text

I hope no one has done this before
#destiny 2#destiny#destiny the game#d2#destiny oryx#oryx the taken king#destiny hive#ignore my awful picsart edits#i miss him… my kring (krill king)#oryx please come back I need you#everyday forward is a day closer to heresy#oryx coming back copium#this is how oryx can still win#destiny meme
221 notes
·
View notes
Text


look at how cute 🥺 also look at the hand size difference look at how tiny jimin's hands are compared to seokjinnie's its making me bawl 😭 (cr. namuspromised)
#btsgif#seokjin#jimin#jinmin#bts#userbangtan#btsedit#kim seokjin#park jimin#*#*sj#*jm#*jinmin#soowoozoo dvd#hello happy new year<3.#i finally decided to clean my drafts bless<3 made these last year and never posted them so im gonna post them over the next few days<3.#damn i miss my bts so much:((((.#5 months until seokjin comes back tho!!!!!!!!! can we fast forward time pls the past month felt excruciatingly long 😭😭😭😭😭😭.#scheduled.
840 notes
·
View notes
Text


doodles and stuff. struggled with painting until i gave up
#lobotomy corporation#lobcorp#lobotomy corp spoilers#i GUESS? carmen and ayins face is a whole thing and stuff.#oh wait hello silly first life stuff. yeah that counts. tee hee?#angela and benjamin are technically there but theyre kinda small compaired to the rest of the drawings in inclusion so im not sure..#ill do angela since she isnt covered#angela lobcorp#carmen lobcorp#ayin lobcorp#netzach lobcorp#it mustve been so prominent. the feelings of affection. those memories of ayin smiling so gently and warmly to her. to Carmen. than angela.#for it to be the very first thing brought up. the very first thing to actually recall from the copy of Her brain. a warmth she would never#be able to see upon that face. a warmth she knows and can recall but never for Her. a man who adored carmen to have such a face shown to he#that now cannot even bare to look at what isnt her what could never be her yet depending on a creation he loathes#for its similarities. for being close to him. for not Being Carmen enough. for being a bastardization of what once was. holding#justifications and trying to convince the self in order to continue forward. its just a machine. a machine must behave as a machine#how miserable. how trapping. how stuck and desperate. ever inflicting cycle of pain. anyways PLATONIC GIOCARMEN!! 🔥🔥#i canot speak upon ayin for there isnt enough room. GIOVANNI!! wanted to draw some interactions w them.#there was a scrapped doodle of carmen talking abt pain levels for beaking bones with a smile on her face while pointing to his body#bc day 48 and decidedly factually stating things with a smile as if it wasnt even personal. even if it is distressing#women in stem 🔥 have her bring over diagrams for him to have as reference. gio helping skim and find pages for specific quotes or a section#to bookmark. just happy at her glee and determination. carmen is holding up a clipboard w a diagram from the red book by carl jung but its#really small and hard to tell what it is. tee hee. there is more rambles but nay. i shant. twas for fun in between stuff#ever constant fear of misconstrued words. prithee. accept my offerings.....#spoke abt them before. i think? so content inside her warmth and joy. alive at her pride. feeling a part of him ripped away at her listless#expression. erased vanished faded from the world back to the murky color of gray further when she left the world. its so. ahngbh.#ill make a rb after this comes out and i wake up on the side blog nieranddear of just more rambles on it all that couldnt fit here#lor spoilers#... maybe. maybe on the rambles. if i dont get embarrassed and dip out of fear. whatever. go my queued post
112 notes
·
View notes
Text


Coronation Street | Carla Connor
Carla Connor: consistently gobby
Bonus:

#Coronation Street#Carla Connor#Swarla#Lisa Swain#Carla x Lisa#Corrie#Maria Connor#Corrieedit#TVedit#TVgifs#wlwedit#wlwsource#wlwgif#lgbtqia+#opposite sides of the Rovers' bar#opposite ends of her tenure on the street#people on opposite ends of the gender spectrum got her spilling her secrets#i'm sure along the way there are other instances of her being like this and i look forward to finding them#oh Carla i wouldn't have you any other way. just look at her with her DRAMA QUEEN novelty mask#which one could easily misread momentarily as DRAMA QUEER i say from a split second of experience#and it would not be inaccurate!#I saw those 2007 scenes just a couple nights before the NYE episode aired & laughed so hard because omg she just can't help herself can she#it was 23rd December 2007 for anyone wondering. Carla's so entertaining in that episode. the way she delivers that “he's not that good” lin#is chef's kiss#those reaction shots are DELICIOUS#one day we will have better quality clips of these scenes available i beg#also shout out to Lisa's teensiest lil smile for just a moment when Carla first blurts out the depth of her feelings#also Carla's still just got her hand on her shoulder the whole time lol#Cake Watches Corrie
118 notes
·
View notes
Text

They’re out of time (cancelled)
<prev [5/7] next>
#rottmnt#out of touch turts day#leonardo hamato#donatello hamato#raphael hamato#michaelangelo hamato#april o'neil#casey jones#cassandra jones#hamato yoshi#master splinter#Lou jitsu#oh no the anime process! no body stopped it they’re evolved even more into anime creachers#PLEASE SOMEONE HELP THEM BEFORE IT IS TOO LATE#I started this back when I was doing the 2007 one and I’m so glad I got up to the line art finished because I had no time for art this week#but my friend said this has been the one she was most looking forward too and she deserves a win this week so I got up early HERE THEY BE#she hasn’t seen the movie yet and asked who was infront of Leo and I said a surprise xxx#we’re halfway through season 2 we’ll finish rise soon im sure cx#I didn’t study the style for colouring as much on this so I hope it is okay#BUT I have learnt that less shading with angular lines can be fun and just as effective#ralh isn’t as tall and I remembered him being but I’m pretty sure I got the proportions right? hmm#…..just got deja vu when uploading this….
1K notes
·
View notes
Text


Up next from the National Pressure Cooker Company is the Modern Guide to Pressure Canning and Cooking: A Complete Manual on the Science of Canning and Cooking Under Steam Pressure from the 1950s. Image transcriptions below the cut.
The Browne Popular Culture Library (BPCL), founded in 1969, is the most comprehensive archive of its kind in the United States. Our focus and mission is to acquire and preserve research materials on American Popular Culture (post 1876) for curricular and research use. Visit our website at https://www.bgsu.edu/library/pcl.html.
Title Page
Modern Guide to Pressure Canning and Cooking: A complete manual on the science of canning and cooking under steam pressure.
Directions - Time Tables - Recipes
Pressure Cookers are recommended by leading food authorities everywhere and are used as part of the standard equipment in Home Economic classes in colleges and universities throughout the United States. The United States Department of Agriculture, Washington, D. C., recommends the Pressure Cooker as being the only safe method for canning non-acid foods—vegetables, meat, fowl and fish.
NATIONAL Pressure Cookers are recommended by the more than one million housewives who use them throughout the United States.
National Pressure Cooker Company
Eau Claire, Wisconsin
Canning Directions, Fruits
PEACHES
SeIcct sound, fully. ripe but not soft fruit. Sometimes peaches seem to be firm on the out-side, yet show decay around the pits. Such fruit will not produce satisfactory canned products. Sort poaches according to size whorl canning an amount to make it worth while. Plunge them into boiling water for about 1/2 minute to loosen the skins. It may take a few seconds longer for some peaches. Dip into cold water and remove the skins—Clingstone peaches may be loft whole. Cut free stone peaches into halves or slice as desired. Discard the pits. It is well to put them into a weak brine until toady to use tablespoon salt to each quart of water to prevent them from darkening. Drain and simmer for approximately five or ten minutes in syrup. Varieties differ—some may require loss cooking and others more than the stated times. Do not lot the fruit become soft. Pack the hot fruit into clean hot containers. Place cut side of halves down to make a well filled jar. Cover with the boiling syrup. Adjust lids on the containers. Place at once into the Pressure Cooker. Process, according to table on page 31.
PEARS
Wash and pare. (Small pears may be canned whole if desired.) Cut large pears in half and core. Put into a weak brine to prevent the fruit from darkening tablespoon of salt to each quart of neater). Drain and boil for 5 or 6 minutes in syrup. The length of cooking time will depend on the firmness of the fruit. Pack into jars. Put cut side down when pears are cut in halves. If left whole, pack lowest layer with stems up and next layer with sterns down. Repeat until jar is filled. Cover fruit with boiling hot syrup. Adjust the lid. Place at once in Pressure Cooker. Process, according to table on page 31.
PINEAPPLE
Select sound but ripe, juicy fruit. Wash, remove the stem and slice off the base. Slice the pineapple into rounds about 1/2 to 3/4 inches thick. Remove the peel, the eyes and the core from each slice. The round maybe canned whole, cut in halves or sliced as desired. Boil in syrup for 5 to 8 minutes. Pack the hot fruit into clean hot containers and cover with the boiling syrup. Adjust the lid. Place at once in Pressure Cooker. Process, according to table on page 31.
PLUMS OR PRUNES
Select firm, ripe fruit. Be sure they are not overripe. Wash and stem. The skins may be removed if desired and fruit canned whole or cut in halves and the seeds removed. Usually prunes and plums are canned with the skins on. In this case, prick each piece of fruit. Boil gently in syrup, for 2 or 3 minutes. Pack hot into the hot, clean jars. Adjust lids and place in Pressure Cooker and process according to table on page 31.
PERSIMMONS
Select ripe persimmons, wash carefully and dip into boiling water for several minutes or until the skins crack. Remove the skins. Bring persimmons to the boil in syrup. Pack the hot persimmons into clean hot jars, cover with the boiling syrup. Adjust the lid. Place at once into Pressure Cooker and process according to table on page 31.
QUINCES
Select ripe quinces. Remove the fuzz by wiping. Wash thoroughly. Peel and core. Cut into halves or quarters and boil two or three minutes in hot syrup. Pack into hot, clean jars and cover with boiling syrup. Adjust the lids. Place at once into Pressure Cooker and process according to table on page 31.
RHUBARB
Select young, tender rhubarb—the pink variety if possible. Wash thoroughly. Cut off the roots and tip and cut into one-Inch lengths. Add from 1/4 to 1/2 as much sugar as rhubarb. Bring slowly to the boiling point. Pack hot rhubarb into hot, clean jars and place at once in Pressure Cooker and process according to table on page 31.
Canning Time Table: Fruits
Times given are for "Pressure Cooker 5 pounds, Time in minutes*"
Apples: 10
Applesauce: 8
Crabapples: 10
Apricots: 10
Berries (except cranberries): 9
Cherries: 10
Cranberries: 10
Figs: 10
Grapes: 8
Peaches: 10
Pears: 10
Pineapple: 10
Plums or prunes: 10
Persimmons: 10
Quinces: 15
Rhubarb: 5
Use two quarts of water in Cooker for all processing.
The time and pressure given in this chart apply only to altitudes 2,000 feet or less. If the altitude is over 2,000 feet, add 1 pound of pressure for each additional 2,000 feet. Do not increase processing time.
*Follow same time for both jars and tin cans.
Pitfalls to Avoid
Do your canning as directed... and you need not worry about the "don'ts" listed here. But to help you acquire a greater knowledge of correct canning practices - and know just what to avoid... these are the "never-never" rules of canning.
NEVER let the Cooker boil dry. Be sure to use sufficient water.
NEVER set jars on the bottom of the Cooker - use the basket.
NEVER crowd more jars in than recommended.
NEVER try to raise pressure until cover is securely locked in place according to directions on page 20.
NEVER try to raise the pressure until all the air has been driven out of the Cooker by the steam escaping through the petcock.
NEVER let pressure fluctuate during processing of food any more than can possibly be avoided. Abrupt changes in temperature may drain some of the liquid out of jars.
NEVER open petcock during the processing period when canning food in glass jars.
NEVER when canning in glass jars open the petcock before the pressure falls to zero - at that point, petcock must be opened slowly. (When canning in tin cans, petcock should be opened at the end of processing time.)
NEVER lay wet cloths on cover nor place Cooker in water to attempt to speed cooling of the Cooker. This reduces pressure in Cooker more rapidly than pressure in jars and will cause jars to burst.
NEVER open jars to fill them if partially empty after processing. The loss of liquid will not interfere with the keeping qualities of the food, and opening of jars will cause food to spoil.
NEVER force cover off Cooker... be sure petcock is open and there is no pressure in Cooker.
NEVER process food that has stood too long. The shortest period from garden to Cooker is advisable.
NEVER count processing time until required pressure is reached.
NEVER forget to read and follow directions closely.
NEVER use jars that have not been sterilized after food has spoiled in them.
NEVER pack food too tightly in containers... particularly peas, corn, spinach, and meats.
NEVER fill jars too full. There should be at least one-half inch heat space after liquid is poured in. Some foods require more heat space as expansion is greater.
NEVER use defective jars nor jar closures.
Questions and Answers
Q. When processing food, is it necessary to have the Pressure Cooker filled with jars?
A. It is economical to process at one time as many jars as the Cooker will hold, for it saves time and fuel, but if you do not have a sufficient number of jars to fill the Cooker, a smaller number may be successfully processed.
Q. If liquid is lost from a jar during processing, should the jar be opened when processing in complete to add more liquid?
A. No, this should never be done. The loss of liquid will not interfere with keeping qualities and to open the jar at the end of the processing will result in later spoilage of the food.
Q. Does soil affect the keeping qualities of food?
A. Since most bacteria found on products comes from the soul, and during some seasons there are occasional outbreaks where fields are infested with an unusual type or a larger number of bacteria than ordinarily exists, it is inevitable that more bacteria would be present on the product than in normal seasons and would make the product harder to sterilize.
Q. What is the effect of heat and cold on keeping qualities of canned foods?
A. Excessive heat may destroy the seal of the jars through causing expansion of the contents. Warm storage encourages rapid growth of microorganisms causing spoilage. Freezing and thawing injures the flavor and texture of canned products.
Q. What causes liquid to boil out of jars during processing?
A. (A) Packing jars too solidly with food when processing. (B) having jars too full. If using water, fill jar to within 1/2 inch of top; if using syrup, fill to within 1 1/2 inches of top of jar; or 1/2 inch for hot pack fruits. (C) Too high a temperature or too rapid boiling. (D) Too high a pressure. Variation or sudden lowering of temperature in using Pressure Cooker. When processing foods in glass jars, petcock should not be opened and cover removed until indicator hand returns to zero of its own accord.
Q. Are the keeping qualities of food affected when liquid has boiled out during processing?
A. No.
Q. When should one start to figure time of processing.
A. From minute the hand on the pressure gauge reaches required pressure.
Q. Should chemicals or preserving powders be used in canning?
A. Artificial preservatives should not be used.
Q. Where should hot jars be set when removed from Cooker?
A. Set hot jars on a folded cloth or board. DO NOT set hot jars in a draft as this may cause them to burst.
Q. What products should be packed loosely and what products should be packed firmly? Why?
A. Such products as corn, peas, lima beans, greens and meats should be packed loosely because heat penetration in these products is difficult. Fruits, berries and tomatoes should be firmly and solidly packed because of shrinkage which takes place during processing and their texture does not retard heat penetration. A solid but not a tight pack should be made of all other products.
Q. Should bubbles appear in the jar after it is taken out of the Cooker to cool?
A. Bubbles often appear in the jar after it is removes from Cooker because food is still boiling in jar. Ordinarily bubbles do not appear once the product has been allowed to thoroughly cool, unless the jar is broken. A very tight pack of food may show air bubbles.
Q. If a jar does not seal and must be reprocessed does it have to be processed the full length of time?
A. Just what shall be done with the unsealed jar will depend upon the cause. If cap or lid is at fault and product is a fruit, simply replace cap or lid with new one and process until product reaches boiling point. If it is a vegetable or meat it should be re- [page ends]
4 notes
·
View notes