#40k terrain
Explore tagged Tumblr posts
Text
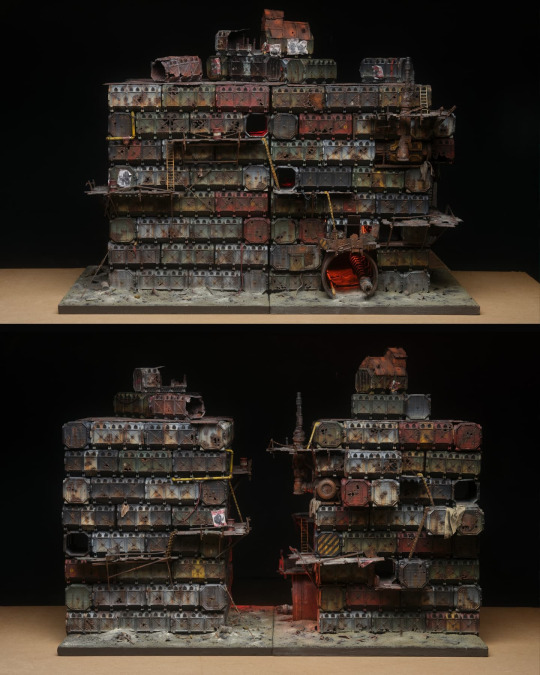
"Sectors Mechanicus are filled with a variety of industrial structures, including manufactorums, forges, foundries, refineries, reactors, and more. Many of these machines are so complex that even the Adeptus Mechanicus priests who maintain them do not fully understand their function. Some structures rise for miles, accessed by rusted gantries and staffed by servitors and low-level workers. The infrastructure is heavy and intricate, with a network of power conduits, promethium relays, and pipes connecting massive plants. The air is thick with pollution from smokestacks and chimneys, while heavy machinery like servo-haulers, magtrain lines, and servo-lifters are scattered throughout the sector."
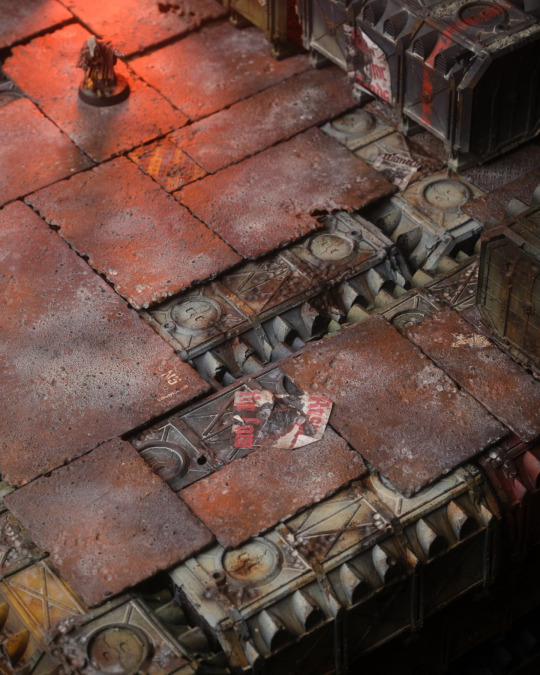
Some terrain that'll likely never get used, but looks cool. Got it from the Made To Order run a whiles back along with the Void-Shield Generator (which is up next). Terrain takes me a while to get through, so dont hold your breath.
Top down view and boy for scale under the cut.


3 notes
·
View notes
Text


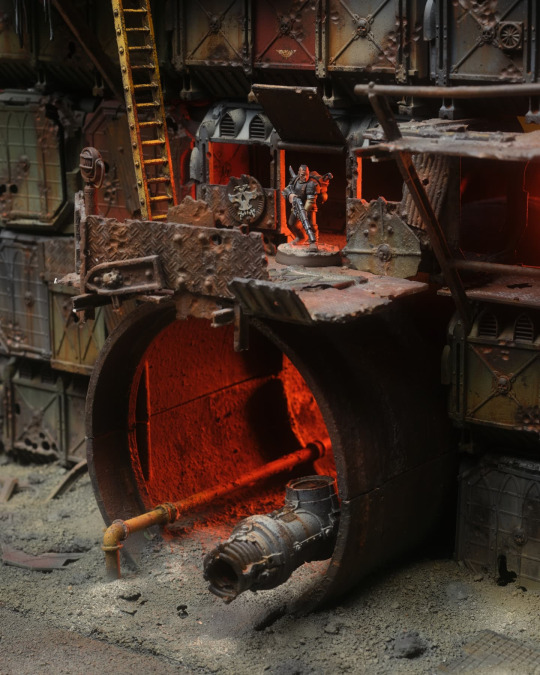
The algorithm is fickle, but sometimes Insta serves up some quality content.
#games workshop#citadel miniatures#warhammer 40k#necromunda#ash wastes#terrain#munitorum armoured container#corius#instagram
417 notes
·
View notes
Text


How To Make Wargames Terrain by Nigel Stillman, Games Workshop, 1996. This is a compilation of some of the simplest methods for building the type of terrain seen in 1990s White Dwarf. Stillman uses an effective teaching style, keeping the basic projects very simple then showing variations that can add more complexity. This volume was inspirational for a generation of terrain builders who were able to reproduce the classic green wargaming table with inexpensive supplies -- lots of recycled cardboard and masking tape -- then go on to develop their own ideas. The book's main downside is what I call the "English Heritage site" design style, with ruins surrounded by perfectly manicured lawns and no rubble.
Warhammer and 40K are referenced in the table of contents, but not on the book's covers. I wonder if this is one of the last products GW made for "wargames" instead of for "the Warhammer hobby (TM)."
MS_Paints recently pulled this book off the shelf and built his way through a table full of 90s-inspired projects straight from its pages:
youtube
#wargaming#wargame#Warhammer#Warhammer 40K#40K#How To Make Wargames Terrain#Nigel Stillman#wargames terrain#wargame terrain#MS_Paints#youtube#video#crafting#Games Workshop#GW#1990s#Youtube
232 notes
·
View notes
Text

Cocktail Stick Cactus
Before I attempt to sculpt some bits to bring my vision of a hatching cactus to life. I needed to channel my inner 1996 and make some normal ones.
Witness them in their spiky foam ball glory!!
67 notes
·
View notes
Text


Fortified Manor of the Empire. I am so proud of this, not just because it looks good but because large portions of this were done with an airbrush without any masking of colours (the roofs, the stone and the walls were all done purely with an airbrush, plus some drybrushing), and I'm very proud of my precision there
#warhammer#miniatures#warhammer 40k#40k#art#minis#mini painting#tabletop#age of sigmar#warhammer fantasy#warhammer old world#terrain
88 notes
·
View notes
Text


A little wip of a desert planet hovel/workshop I'm working on!
66 notes
·
View notes
Text

ICYMI I just made my first crafting video!
youtube
#bionicle#bionicle fanart#bionicle memes#bionicles#lego bionicle#lego#transformers#crafts#dnd#ttrpg#warhammer 40k#speedpaint#crafting#miniature#diorama#lego star wars#lego ninjago#legos#gundam#dimension 20#critical role#brennan lee mulligan#hobby#fanart#legend of zelda#ttrpg terrain#book nook#nostalgia#kitbash
137 notes
·
View notes
Text

Bighole Ore Processing Facility, site of the first battle in the Ballad of Bighole.
#necromunda#warhammer#warhammer 40k#warhammer 40000#miniature terrain#miniature painting#The Ballad of Bighole#TBOBH#TBOBH0.5
55 notes
·
View notes
Text
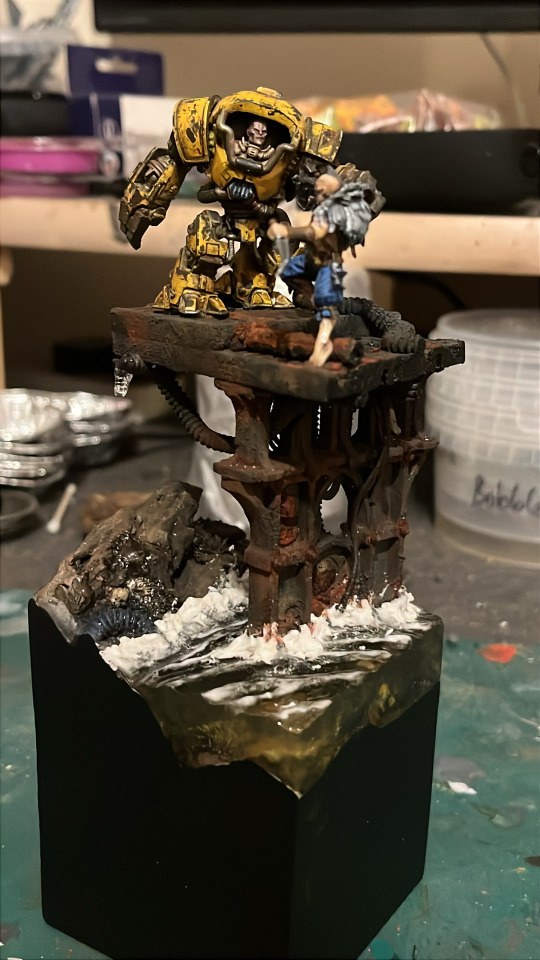
You. Shall. Not. Pass.
Had the spare ambot conversion sat around for what seems like forever and finally decided I wanted to do something with it. Since I seem to be on a terrain/display base kick at the moment I decided I wanted to do something abit atmospheric, that also let me play around with different materials, textures and weathering.
So guarding a rusty bridge over the hive sump from some upstart juve. But who knows what it’s guarding?


#miniature#warhammer 40000#warhammer 40k#painting#warhammer community#painting warhammer#conversion#kitbash#necromunda#terrain
29 notes
·
View notes
Text

An old project, I should finish. 😅
#warhammer40k#killteam#Necromunda#mechanicus#mechanicum#scenery#scifi#28mmminiatures#spacemarines#40k#grimdark#terrain#Underhive#xenoplanetarum#Pipes#gothic#mine
37 notes
·
View notes
Text


Primed a terrain piece using a can of citadel rough coat I've had for awhile and never used. I learned it won't devour pink foam, so that's a game changer for my homemade terrain.
But my biggest take away is that rough coat doesn't do anything drastic. It provided a uniform sprue grey finish and a fine grit texture. I'd hate it if I was just doing regular brush strokes, however a lot of my terrain painting tends to lean into drybrushing and I think this grit will really benefit that technique. We will see.
My next step is to do something like a slap chop layer with a cherry red 🍒 spray paint I have, as well as a black and a grey. I want to get a base coat of colours down so that my drybrushing to make the terrain look rough and rusted has something to build off of.
I've done that before with other pieces and hope it'll really pop here. I want the tanks to look like they used to be bright red and the rest of it to look like it was originally a gun metal finish.
I'll share pics of the next step as soon as I do it. And let me say that the positive feedback from the community as I start posting about my work again has really helped me out.
Quarter century and I still love this hobby
22 notes
·
View notes
Text
“An Imperial Bastion is an imposing edifice built from foot-thick ferrocrete and the remains of faithful servants of the Imperium. As they are relatively easy to construct, some planets boast networks of Bastions that span entire continents.”
Imperial Bastion from the last big Made To Order run done and dusted. Took forever due to the size of it and my need to keep things somewhat clean. Will mostly be using it for Narrative Missions since it’s rules and points cost are very much terrible
Picture with the Defense Line under the cut.

10 notes
·
View notes
Text


Somehow, they've done it. After seven years, they've improved on the otherwise unimprovable Citadel Skulls.
108 notes
·
View notes
Text

Mors Dictares Joint Task Force Forward Operating Base “Hostile Architecture” [WIP 1]
I wanted a thematic terrain piece for my kill team, so I’m building their base of operations. I plan for it to be fairly spartan starting out, but I’ll add more details to it as the campaign progresses and I upgrade the base.


#warhammer 40000#warhammer#warhammer 40k#wargaming#warhammer chaos#warhammer 30k#chaos space marines#space marines#warhammer miniatures#tabletop wargaming#chaos#kitbash#terrain
33 notes
·
View notes
Text

Finished Killzone Volkus terrain
#warhammer#40k#warhammer40k#warhammer 40000#paintingwarhammer#terrain#killteamterrain#kill team#Volkus
28 notes
·
View notes
Text


Not as exciting as the manor itself, but. I painted up the walls and fences which came with the Fortified Manor!
#warhammer#miniatures#warhammer 40k#40k#art#minis#mini painting#tabletop#age of sigmar#terrain#games workshop
35 notes
·
View notes