#tutorial sims 4
Text
Since the new eyelash update is here, I'm gonna teach you how to convert old eyelash cc into the new eyelash option!
First of all, we will need the Sims 4 Studio. The download link can be found here: https://sims4studio.com/board/6/download-sims-studio-open-version
Now, head into the app and click the "My Projects" button on the main menu.

Open the eyelash file (.package file) you want to convert. I'll just pick a random one for reference. Once you picked the one you want, hit open.
You will be directed into the studio, which will look like this:

Now on the right side of the screen, find the CATEGORIES button and click on it.

Once there, change the OUTFIT TYPE to MASK DETAIL EYELASHES and APPLY TO ALL SWATCHES. Save the file, and the .package file will be updated in your game. Also, make sure to double check in-game before continuing with your other custom content.

As you can see in my game, It worked! Hopefully it works for all of you, too.

And that's about it. Thanks for reading all the way.
And by the way, If you're going to distribute these publicly without the original creators consent, just don't do it. This is meant for private use only or for content creators who want to convert their eyelashes into the new eyelash section.
EDIT: As trillyke has said, This does not work with eyelashes in the glasses section as they will collide with rings and most of the accessories
#sims-4-custom-content#ts4#thesims4#customcontent#ts4cc#the sims 4 cc#the sims 4 custom content#tutorial#the sims 4#the sims community#the sims cc#sims#sims 4#simblr
3K notes
·
View notes
Text

IF YOU CAN'T ENABLE CC 🌸
Sul sul ^^
After today updates, I wasn't able to enable CC again. It doesn't matter how many times I closed and launched the game.
So I remembered that this had already happened to me before.
If you're going through the same problem, this is how you can fix it:
🌸🌸🌸🌸🌸🌸🌸🌸
HOW TO ENABLE CC AGAIN:
1- On the game home page, in the bottom right corner of the screen, you can see what the current game version is. After today's update, mine was: 1.108.318.1020. Launch the game and check the number that appears for you.
2- In your game folder (Documents>Electronic Arts> The Sims 4) you'll find a file called "GameVersion". There will be a number.
The number in that file has to match the current game version number.
When I opened mine, it was "1.107.151.1020". So I just updated it to "1.108.318.1020" and saved. Then when I launched the game I could enable CC again.
Note 1: There's a "space" before the number in "GameVersion" (as if it were a paragraph). Keep that space. Change the numbers exactly where they are.
Note 2: If you prefer, before changing the number, make a backup copy of "GameVersion" just in case. It won't harm your game, but it's better, just to prevent and make it safer.
💎 If you want a tutorial video, I made one about it some time ago. You can watch it here :)
🌸🌸🌸🌸🌸🌸🌸🌸
ALSO IMPORTANT AFTER UPDATES:
Remember to delete "localthumbcache". You can find the tutorial here.
🌸🌸🌸🌸🌸🌸🌸🌸
I'm currently checking my CC to see if they're still working.
If anything, I'll let you know :)
I hope it helps you if you're having any problems :)
Happy Simming ^^
3K notes
·
View notes
Text
downloading a bunch of files from sfs folder a bit more comfortably (on PC)
you know this feeling when you see a sfs folder with many separate files and no full set archive, so you just sigh, click on a file, download it, go back, repeat with the next one, go back, try to recall which one you already downloaded and which you didn't... so i've come up with a little workaround that'll make it faster and a bit more comfortable! it's pretty 101, but my friend found my explanation useful, so maybe someone else needs it too.
there's this thing about SFS, that if you open the same page again in a certain period of time, i think it's a day or maybe a few hours, it won't open the page again, but instead it'll just automatically download its file. that's exactly the thing we'll be utilizing here. when you left click on a link with pressed ctrl, this link will be open in another (inactive) tab. so to "automatically" download files from this folder, just hold ctlr and click on each file you need twice.

on the first click, it'll open the inactive tab with it, on the second click, it'll just straight up download the file without you having to go away from the page you're on. when you're done downloading everything you need, just close all tabs it opened. not ideal, yes, but much faster and less annoying than having to manually open each page and click on the button. happy simming!
1K notes
·
View notes
Text
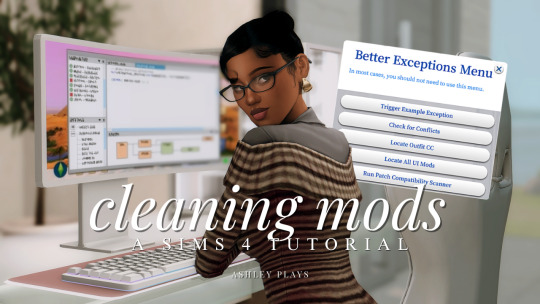
how to clean & organize your mods folder + update broken/outdated mods
by ashley plays
this video goes over the following:
how to organize your mods folder
how to update your mods folder after a patch update
how to find broken/outdated mods
how to clean out custom content & find duplicate files
↓ mods, programs & helpful websites mentioned below
mods:
better exceptions
mc command center
programs:
sims 4 tray importer
sims 4 mod manager
helpful websites:
sims 4 news & updates
scarlet's realm: the mod list
bienchen's mods
littlemssam's mods
kiarasims4mods's spreadsheet
mizoreyukii's spreadsheet
2K notes
·
View notes
Text
TUTORIAL
How to FIX CUSTOM EYELASHES after update 1.108.349.1020 The Sims 4
YOU NEED:
Sims 4 Studio @sims4studioofficial
Blender (I use Blender 2.79)
Instruction manual:
Opening the eyelashes that need to be repaired in Sims 4 Studio

2. Go to the "Categories" section - Item "Outfit Type" - "Eyelashes"

3. Click "Apply to All Swatches" - Click "Yes"

4. Now we need to assign the correct color to the Vertex in Blender. Go to the "Mesh" category and export the eyelash mesh

5. Open the Mesh in Blender and switch to the "Vertex Paint" mode

6. Select the display mode "Wireframe" or press the "Z" key

7. If the eyelashes are broken, they will have the wrong color. Now we need to assign the correct color

8. Click on the palette icon

9. Go to the HEX item and enter the color code. Color Number: 007F3F

10. After you entered the color code. Click "Paint" - "Set Vertex Color"

11. After that, the color of the eyelashes will change. Save the file and close the Blender

12. Go back to SIms 4 Studio and import the mesh

13. Saving the package file

14. Checking the result in the game
417 notes
·
View notes
Text

~hide build/buy lot outlines with reshade~
do I need to explain more? 😁
⚠️ this is not a mod to put inside your mods folder ⚠️
Instead, this utilizes a Reshade/Gshade add-on to remove the lot outlines and being able to do so whenever you want with just a shortcut. Requires Reshade/Gshade and the Shader Toggler add-on. Works on both DX9 and DX11.

Download the latest update on the main tumblr post below:
Patreon post here
#sims 4#ts4 resources#ts4 reshade#t: shader toggler#t: reshade add-ons#hide cas ui#vyx.resources#reshade tutorial#1 hour later... in a true me fashion 😂#just had to double triple check everything works fine
370 notes
·
View notes
Text
How To Override Apartment Hall Walls and Floors
If you, like everyone else I know, hate the apartment hallways and want to give them the face lift they deserve, here's how!
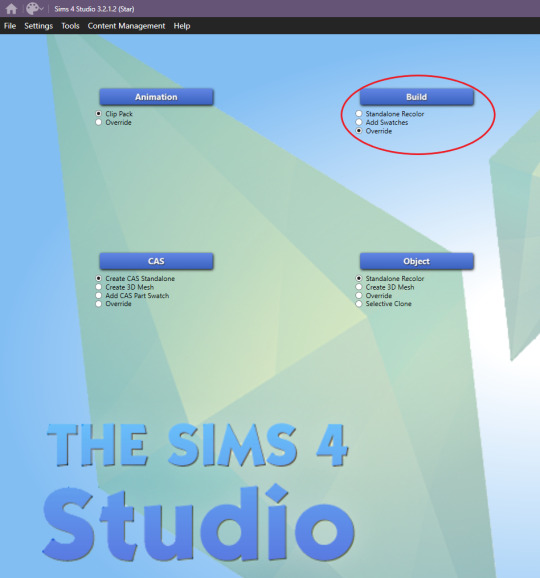
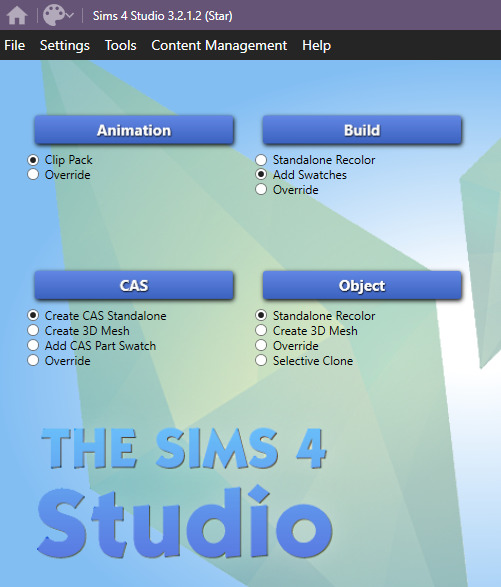
An override is actually super simple. You just need S4S for this. Step one is to choose override under Build, and then click Build.
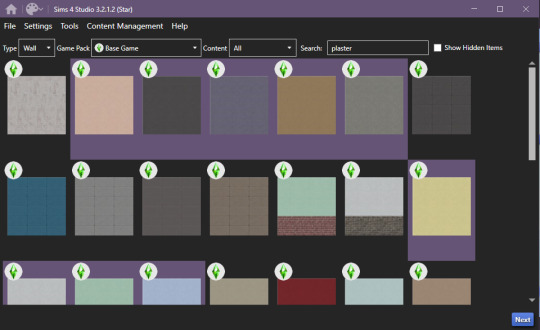
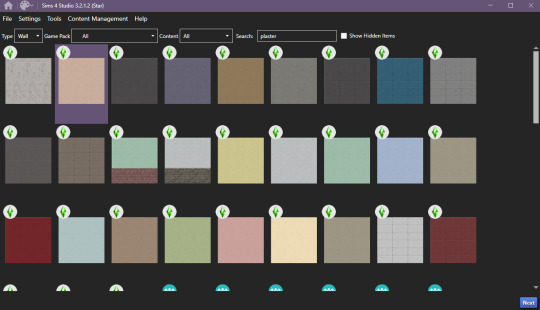
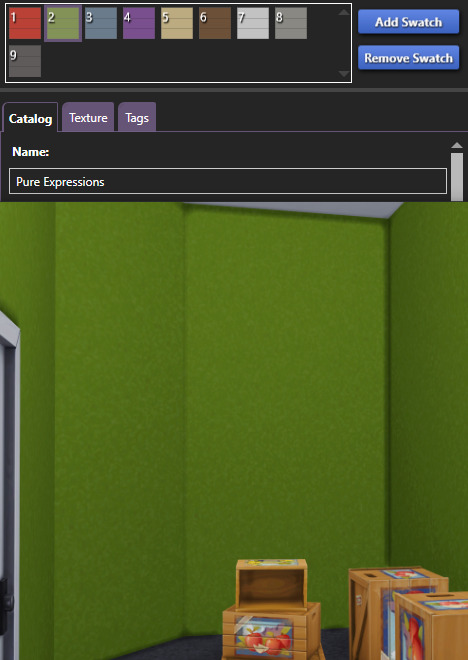
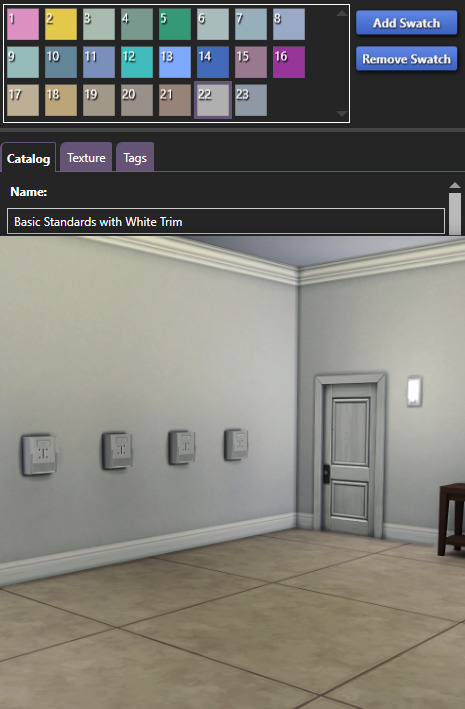
Now you need to find the wall you want to override. For this example, I'm making an override for the apartment in the Hakim House building. That wallpaper is called "Plaster Makes Perfect." (I figured this out by just going into build mode and searching and painting a nearby wall inside the apartment until I found the right one.) I have it set to Wall, Base Game, and I'm searching the word "plaster" to find it more quickly. Just click one swatch of the wall and S4S will pick all swatches, and then click "Next." Also, all of these instructions are exactly the same for floors, you'll just choose floors instead of walls.
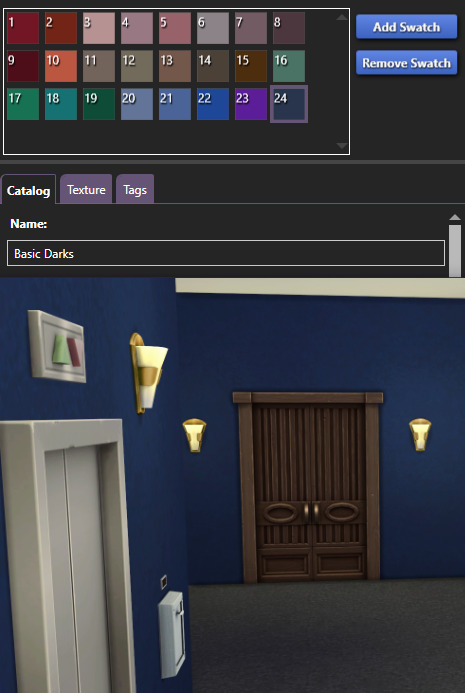
Name your file whatever you want. To be consistent I name all mine to follow the naming convention: username_description. We only want to override one swatch so you'll just click "Remove Swatch" on all of the swatches except for the one you want to override.
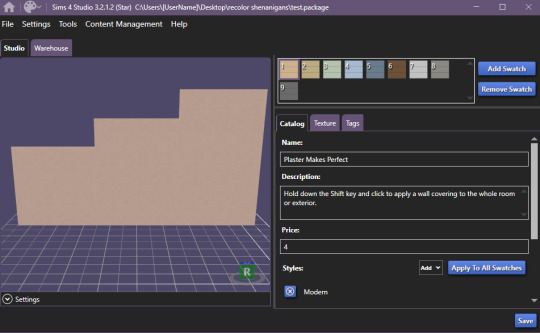

Once you're done, go ahead and hit "Save" and then head back to the main menu. Now we need to get the wall we want to replace it with. This time, pick "add swatches" and then click Build. This will only pick one swatch instead of all.
Again, just find the wall you want to use. Only select the actual swatch you want and then click "Next." You'll have to create a file here again, I just have a package called "test" that I save over for these instances where I don't actually need a new .package file, I just need to grab textures.
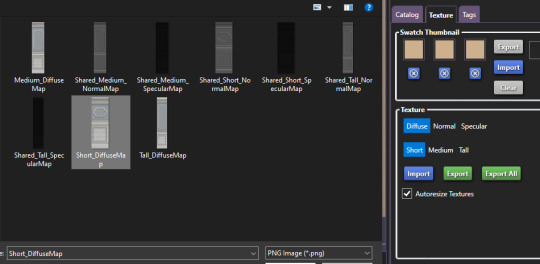
Now you'll go to the "Texture" tab and click "Export All."

On this save screen, create a folder for these texture files and then click "Select folder" to finish exporting.

Now, go back to the main menu and open up your original file. On the texture tab, you now just need to import all of your texture files. You'll import a Diffuse, Normal, and Specular for each wall height. So 9 files total, these are what you just exported. Just click Diffuse, Normal, or Specular, and then click the wall height, and then click Import. Go to that folder of textures you just created and then choose the correct file. S4S named each one exactly what they are so it's easy to pick the right ones.
Keep doing that until you've replaced all 9 files, change your swatch colors, and then hit save. Congrats, you just made an override of that wall!

Hold up, you still want access to that swatch you just made an override of? There's a quick and easy solution. Go back to your main menu and choose "Add Swatch" and then click "Build." Find the exact swatch you made an override of, select it and click "Next." Give your new package file a good name.
Hit save and call it a day. That's it. Now, every wall in the game that is that brown plaster will be the wall with paneling BUT since I added that plaster swatch back, anywhere else that I wanted to use that brown plaster, I can just go and paint it right back!
For all the apartment wall and floor overrides I've created, go here!
Below is the walls and floors for a lot of the apartments:
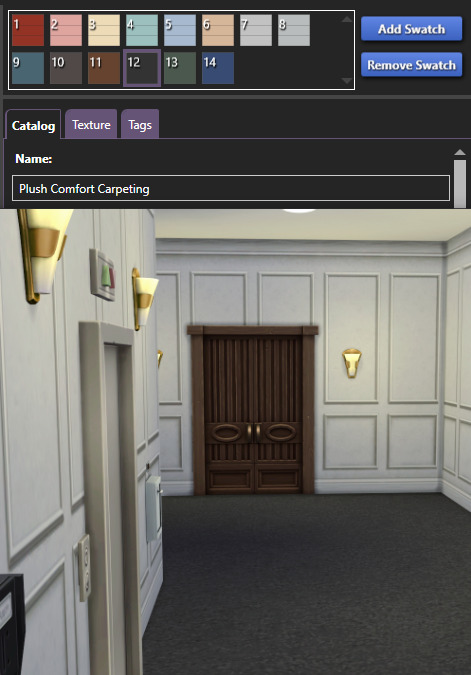
Alto Towers
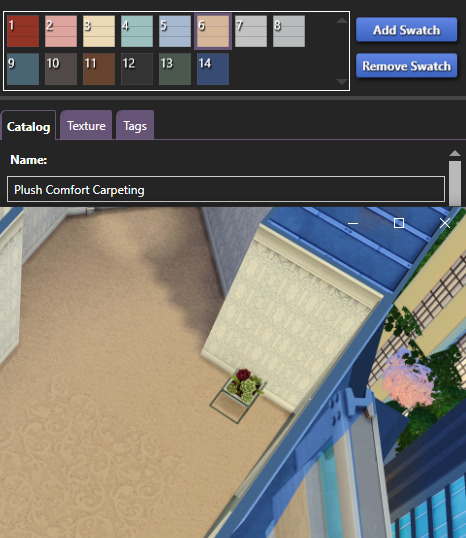
I ended up not making an override of this carpet so the swatch could be 10 or 12 but, as dark as it is, I'm pretty sure it's 12, plus I think 10 appears a bit too brown toned to be the right one:
Chic Street:
Culpepper House:
Jasmine Suites:

Landgraab Tower:
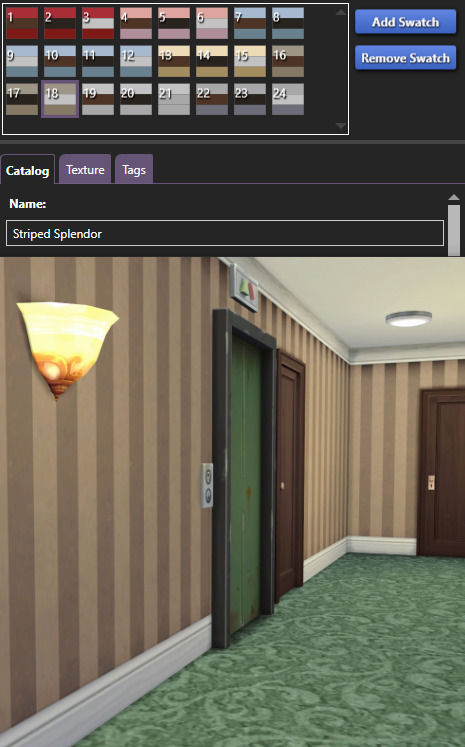
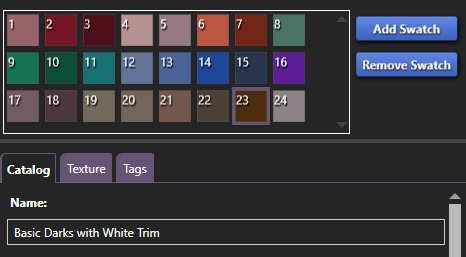
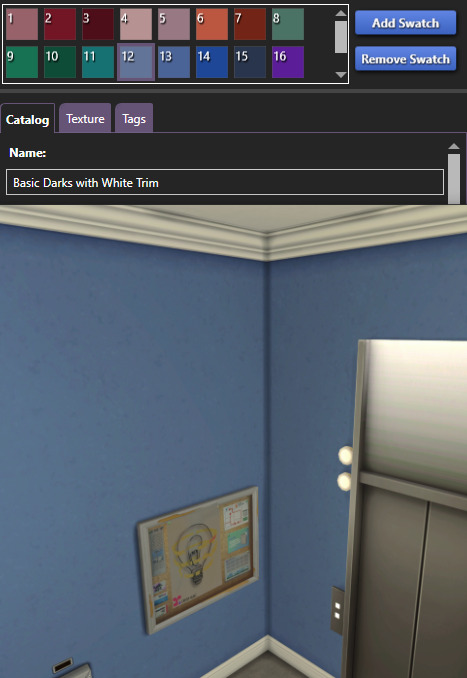
I missed getting a proper pic before placing my overrides but the original brown walls is the 23rd swatch of Basic Darks with White Trim.
The non-patterned carpet:
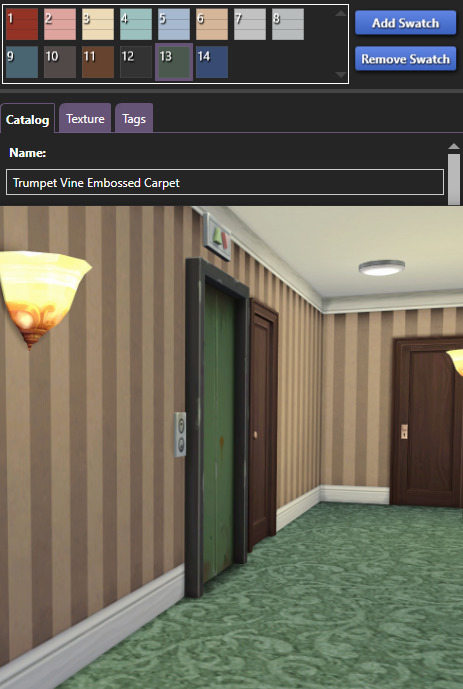
The Patterned carpet:

Spire Tower:
689 notes
·
View notes
Text
Photoshop Tutorial #1 - Change Background & Add Reflections
Before & After


You will need
Photoshop
Internet Access
I was inspired to make this tutorial after facing a dilemma in my game. I wanted my sims to swim in Brindleton Bay, but, shock horror, the water there is not swimmable. Luckily, I know how to change the background of my screenshots to make it appear as though it is - and I'm going to bring you through the process of how!
Starting off, in game, I brought my sims to Tartosa and got my desired shot. Then, heading over to Brindleton Bay, I got some shots of the horizon that I wanted as a backdrop.
Here's a picture I took:

Okay! Let's open up Photoshop!
For reference, I have Photoshop 2024, but most if not all of the features I've used should be included in older versions too.

Here's our image! Now I'm selecting the Background layer in the layers panel and press CTRL J twice to create two duplicates.
I'll turn off the bottom two layers for now, (by clicking the eye button, for newbies) and go to the properties panel. this should be on the right hand side, above the layers panel, but if it isn't, simply go into window > properties to switch it on.
With the layer selected, I click remove background and voila! Photoshop has... er... done her best to remove the background (she sometimes gets it wrong, but at least it's a help)
You'll see that a layer mask has been created. (circled in image).

If you haven't used layer masks before, the only important thing to know is that black will erase and white will add.
So with my brush tool (shortcut B) selected and set to black, I can go around the image and erase all of the parts I don't want.
If you have a steady hand and a tablet/cintiq you can do the same job a little quicker with the lasso tool (shortcut L) by selecting any unwanted area and simply pressing delete
Once I've removed all that needs to be removed, I see that there's a little slice of her hair that needs to be added. I can change the brush colour to white and paint it in.
Done! Easy!

Okay, let's switch off this layer for now, and switch on the one beneath it.
This is the layer I want to make look like the Brindleton Bay sea. So I'll make sure to pull an image of the water up as reference for colour.
This time I'm going to create a layer mask using the polygonal lasso tool
It's easy.
Find the lasso tool in the tool panel on the left of screen (the third icon from the top - or by pressing L on your keyboard)
Left click & hold, and a menu will pop up. Select the polygonal lasso tool.
Click around the area you'd like to mask, in my case, the sea. Tip: if you hold down the shift key while clicking, you will be able to create perfectly straight lines.
Click on the layer mask button at the bottom of the layers panel (pictured)
Everything except the selected area should disappear!

A small thing here, but I don't want the reflection of the rock in the water in my picture. I'll select the layer (not mask), take the eyedropper tool (shortcut i) with the sample set to all layers, and use a soft brush (B) to paint it away.

Next I'm using adjustment layers to edit the colour of the water, to try and make the blue turquoise paradise look more like the horrible green bog water of the bay.
You'll find these next to the mask button in the layers panel.
For my picture, I'm using hue/saturation for the colour and levels for the light. you can fiddle around with any of the adjustment layers to find what works for you.
I've shown the adjustments I've made for my specific scene below, just for reference.
When I'm happy with the colours/lighting, I select all adjustment layers (shift + L click to select multiple), then right click and choose create clipping mask. This is to ensure that the adj layers don't affect any other parts of the image, just the area I want it to.
And there! My water is looking sludgy, just like I wanted.

Okay! I've decided that I'd like some texture in the water. It always annoys me that sims water looks so flat. So here's where Pinterest enters the story.
I like Pinterest because unlike Google, the majority of the images are not watermarked. You're also slightly less likely to find AI slop.
I wanted some water ripples, so I searched for something like Water Texture, found one I liked, and dragged and dropped it into my photoshop file.
From here, I transformed it (CTRL + T) by resizing & rotating the bounding box, then grabbing the corners while holding CTRL to create some kind of perspective that works for the image.
I didn't bother bringing it all the way to the horizon, because I intend to fade that out with a gradient anyway. I had to sacrifice the bottom of the image for the sake of correct perspective, but that's fine. I will crop that out later.
With the texture layer selected, set the blending mode to soft light. It blends nicely!

Now! Another layer mask! These are our friends
With the texture layer still selected, I create a layer mask.
This time, because I had nothing in the image selected first, the layer mask will appear white. That just means nothing has been masked yet.
With it selected, I find the gradient tool (shortcut G) if you press G and the paint bucket tool is activated, simply navigate to the tool panel on the left of the file, hold the paint bucket tool down and select gradient.
I'll change the colour to black, and make sure I have the foreground to transparent gradient selected.
Other settings are pictured.

I'll drag the gradient over the area I want to mask. In this case, the top of the water texture to make it appear as though it's fading away towards the horizon.
(Doubly make sure you've selected the mask, not the layer while performing this action.)
Looking good!
Time to drag the layer above your adjustment layers and create a clipping mask again.

Alright! Let's do the background.
I'll drag that image of Brindleton Bay that I took earlier into the file.
I want to place it below my sea layer, and above that original background layer (I am going to leave that untouched for insurance reasons)
Then, using the move tool (shortcut V) I'm simply going to move it to the correct place. Basically I just want the horizon lines to match up.
Tip: hold the shift key to drag an image in a straight line.
Enter to confirm.
You can see that the sky is now unfinished, but it's such an easy fix. I'll just select the sky colour with the eyedropper tool, then use the paint bucket tool & brush tool to fill in the sky.
Done!

Now - note that the sea doesn't quite blend in with the background. To fix this, I'm going to take my eyedropper tool (shortcut i) and select some of that dark green colour beneath the mountains.
I will create a layer (+ button on the base of the layer panel) and drag it above that sea texture layer I created earlier.
Then I'll create a layer mask to clip it to the sea.
I'm grabbing that gradient tool again (G) and creating a nice gradient on the horizon.
The horizon line is a little sharp, in my opinion, I want it more faded. So, using a soft brush (B) and that same green colour, I'm going to create a new layer & place it above that green gradient, this time I'm not clipping it.
Holding down the shift key, I'm going to draw a straight line right across the horizon. This helps to blend it all together a bit better.

Now! for Reflections!
Firstly, I'm going back to that sky layer with the Brindleton Bay mountains, and I'm going to duplicated by pressing CTRL + J
I'm dragging it above the sea layer, but below all of the other clipping masks. This will automatically create a clipping mask for the new layer.
Next, I'm going to edit > transform > flip vertical
With the move tool (V) I'm moving the image upwards so that the horizon lines meet and it looks like the lighthouse and mountains are reflecting in the sea.
Note: make sure auto select is off while using the move tool on a layer that lies beneath several others.

This leaves a little bit of a mess on the bottom on the canvas, which can be fixed by creating a layer mask & the gradient tool set to black, and dragging a gradient over the bottom of the image until it blends nicely into the sea.

With the mountains reflection done, I'm going to move onto the people.
I'll turn that top layer that I worked on earlier back on.
Then I'll duplicate it (CTRL + J)
Right click on the layer mask of the duplicate and select Apply Layer Mask from the dropdown. This simply bakes the layer mask into the image. Usually I try to edit non-destructively as much as possible, but in this case it's fine to destroy.
I'm going to rename this layer Reflection
With that new, reflection layer selected, I'll go to Edit > Transform > Flip Vertical, just like before.

I want to add a little water/shimmer effect to their faces, so I'm going to Filter > Distort > ZigZag
I'll just mess around with the settings here until I find something I like.
This is optional, obviously, I've done reflections in edits without doing any of this, but it just adds something a little extra to water scenes, I think.
Here's a time I didn't do that.

anyway, my sims are looking a bit crazy now, but it's fine, because I'm going to, you guessed it, add a layer mask and gradient.
But first, using the lasso tool (L) I'm going to draw around one of the characters and drag her into place. I can move the bounding box around a bit to make her shoulders meet in the right place.
Then I'll do the same for the other character.
Tip: Hold CTRL while moving, warping or resizing something for a smoother, more precise experience.

Now, I'm doing what I said I would, and I'm creating that layer mask. We know how to do it by now, right?
Make sure everything is deselected first by pressing CTRL + D
Create layer mask
Select Gradient (G) set to black
Drag gradient over bottom of reflection (If you ever need more precise gradients, you can select the round gradient at the top of the file. I needed it to blend the reflection on the right more, because the characters are not at an even height.)
In the Layer panel, change opacity to 20% (or whatever you like) and hit Enter to confirm

Using Crop (shortcut C) I'm going to crop my image, cut off that pesky strip at the bottom and just basically make the framing of the picture a little bit nicer.
And viola!

I could edit this image more, throw in bounced light, splashes etc etc but I'll leave it like this.
The only thing I will add in is a little lens flare to indicate sun, so again, I'm taking to Pinterest and searching for one that works.
Tip: make sure the background of a lens flare image is completely black. Otherwise it will be harder to use.
Below is the one I have chosen.
I'm simply changing the blending mode to screen, moving it and resizing it with the transform tool (T), and fiddling with the opacity until I'm happy.

That's it!
I made a video running through this whole process, with all of my shortcuts in the bottom right hand corner so that you can see exactly what is happening.
youtube
If there are other tutorials you'd like to see in future, please let me know!
And I'm more than happy to answer any questions!
Good luck <3
#sims 4 tutorial#editing tutorial#sims editing tutorial#sims 4 edit#photoshop editing#photoshop tutorial#sims 4 community#simblr#Youtube#sims 4 photoshop tutorial
158 notes
·
View notes
Text
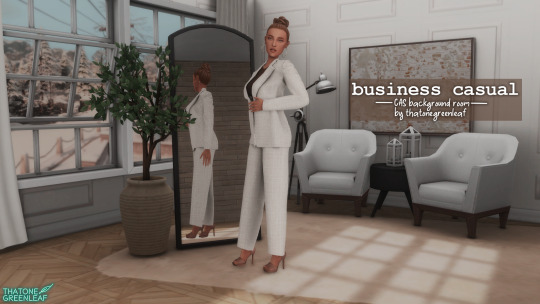
~business casual CAS background room~ (with mirror!) + tutorial!
-
A bunch of you have asked, so here it is! You can watch my tutorial on how to make your very own CAS background room with a mirror right here!
(and you can also download the room I made while filming this tutorial below!)
♥ Download the package file and put it right in your Mods folder! (up to 5 folders deep)
♥ You can only have one CAS background/room in your game at once, remove any other before putting this one in!
♥ Reflections need to be set to low, medium, or high but not OFF in your game's graphics settings for the mirror to be functional.
♥ Base Game Compatible!
♥ DX11 and DX9 compatible!
-
Follow me on twitch!
Support me on patreon!
DOWNLOAD "BUSINESS CASUAL" CAS BACKROUND ROOM ON SIM FILE SHARE!
WATCH THE TUTORIAL ON HOW TO MAKE YOUR OWN HERE!
-
TOU: do not redistribute, reupload, or claim my cc/CAS rooms/presets as your own! recolour/convert/otherwise alter for personal use OR upload with credit. (no paywalls)
♥ built using littledica's original CAS room files ♥
stuff I'm using here: reshade | cas lighting | (send an wcif if you want anything on the sim!)
#sims 4#ts4#sims4#thesims4#maxis match#maxis mix#s4cc#sims 4 cc#sims 4 custom content#cas background#sims 4 cas#cas room#ts4 cas background#sims 4 cc tutorial#cas background tutorial#cas background with mirror
325 notes
·
View notes
Text
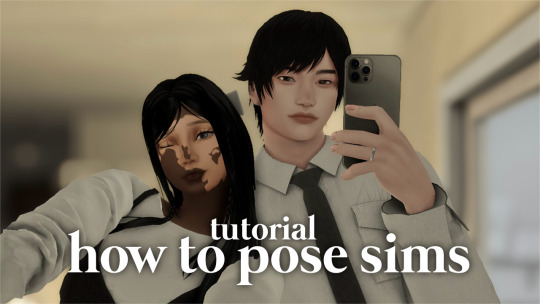
how to pose sims for photoshoots - tutorial
MODS & CC USED:
teleport any sims
pose player
mc command center
iso love photos – full control camera (optional)
photographic memory (optional)
wicked whims | wonderful whims (optional)
backdrops 1 & 2
@ts4-poses
some of my favorite pose creators: ssiat | acha | dearkim
367 notes
·
View notes
Text
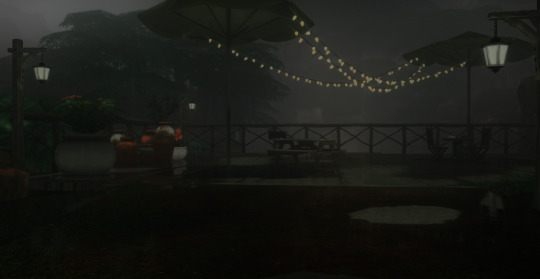
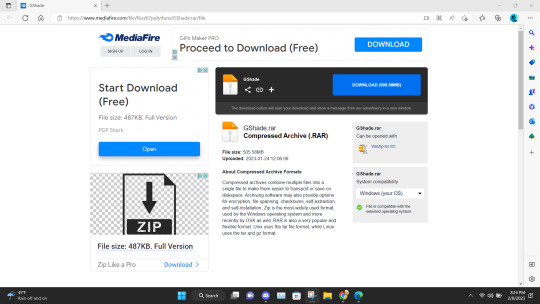
GSHADE 3.5.0 Cracked Tutorial Feb.2023
‼️Update:3/2023‼️ Due to gshade somehow being online again! You can still install the program with this tutorial but to avoid the update to version 4.2 notification keeping you from proceeding-Download the program from mediafire and then turn your pc to airplane mode and continue the process below! Note that when you turn your internet back on that your going to get the notification still ignore it. That what I’m doing.
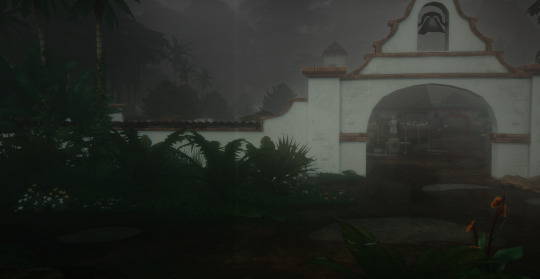
Alright with the recent events regarding the development team of GShade figuratively going under and the current version of this program available being far from perfect. It would be lovely to back to a version of GShade that doesn't have malware, the changes that disabled the depth of field effects, and the removal of some older shaders. So here's a tutorial on how to install 3.5.0 of GShade. It's the version that we as a collective switched to all those months back, when GShade popped off in the community. Also the version I used to take this picture and got from @toskasimz who sent me the files. She's the reason why I have my pretty pictures back. It took a long time to get my preset to look like this and the modern versions of Gshade and Reshade don't have the shaders for this anymore. The suggested skill level for this is basic knowledge of how to install Reshade/Gshade and knowledge of where to find the game Bin file and Program Files on your pc.
Note: This version is before the code that shut down your PC, if you manipulated the code of the program, was introduced. Use at your own risk. I personally have no issue with using it. I'm using my laptop I do school work on and I have no money to buy a new one so that's my assessment on how safe it is.
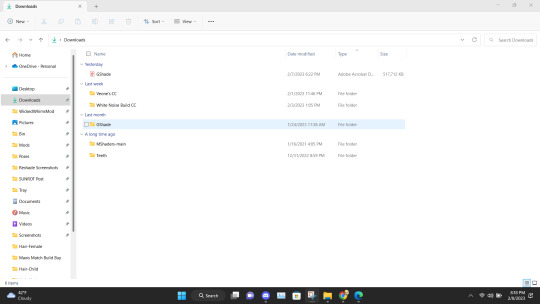
To start download this media fire file. It's a Rar file. Unzip it.
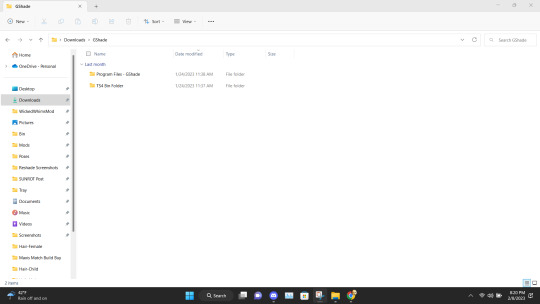
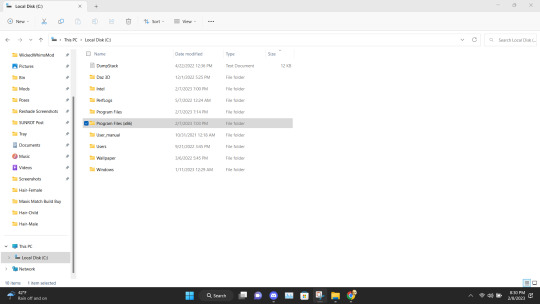
In the unzipped version of this file, you should have a folder that's highlighted below called GShade.
Inside that file are two folders. Program Files-G-Shade and TS4 Bin Folder. These folder names correspond with where the contents of these will go on your pc.
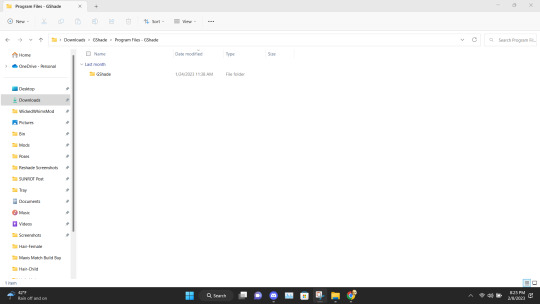
Alright inside the folders you should have the following content in the Program Files-G-Shade
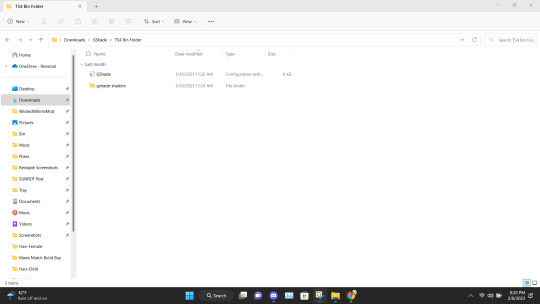
Inside the TS4 Bin Folder, you should have the following contents inside it.
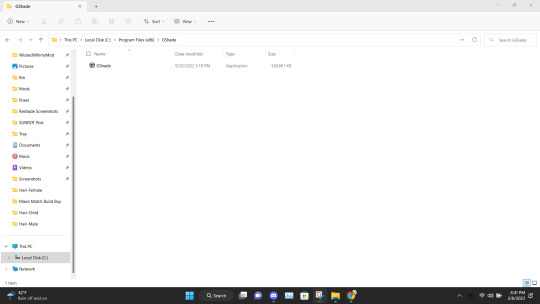
Place the GShade folder from the Program Files-G-Shade into your computer's Program(x86) file. This may have a different name based on your computer.
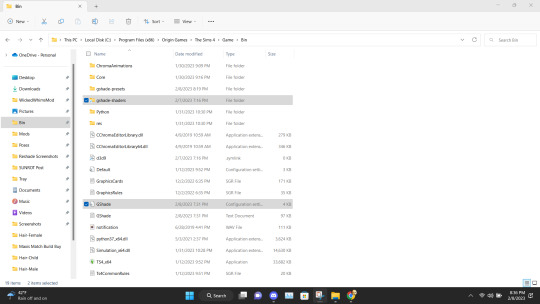
Next Place the contents of the TS4 Bin Folder which should be the G-Shade configuration file and the folder of GShade-Shaders into your Bin folder. (note I have gshade installed already so you won't have the extra files before installation.)
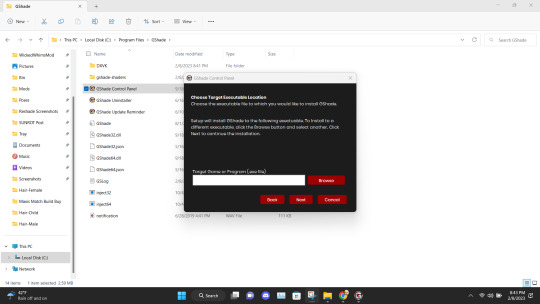
Now go back to the Program(x86) file on your PC and go into the G-shade folder.
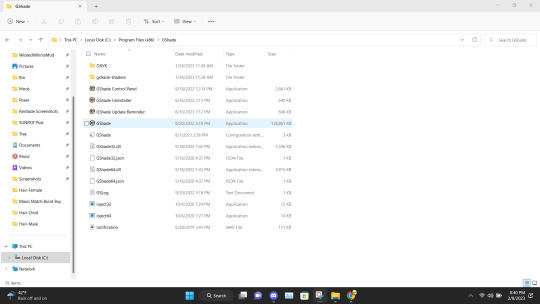
Double Click to run the program.
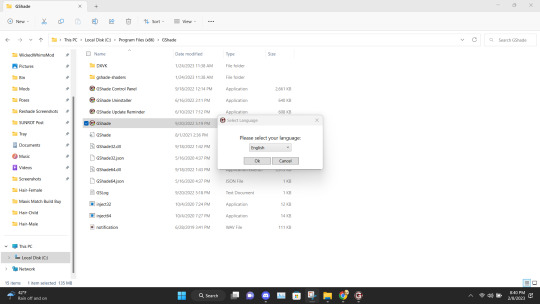
This is where you gonna need to pull your Reshade/Gshade knowledge. You just install the program as normal to the game. I will say I don't know if this will work with other games.
Alright, this is what you should be left with after installing G-Shade. Everything transferred to the Program Files with the exception of this folder. Leave it be and go to the Program Files file on your pc.
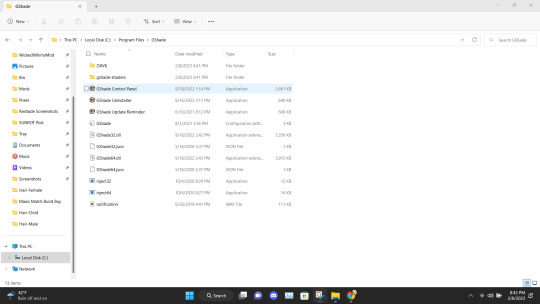
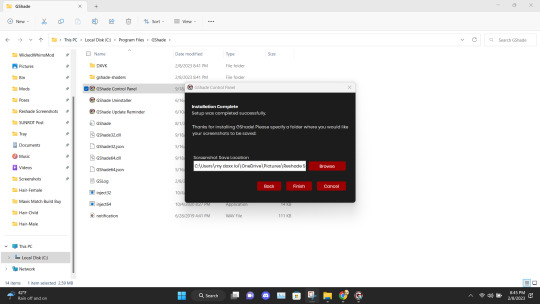
Once in the Program Files folder double click the GShade Control Panel.
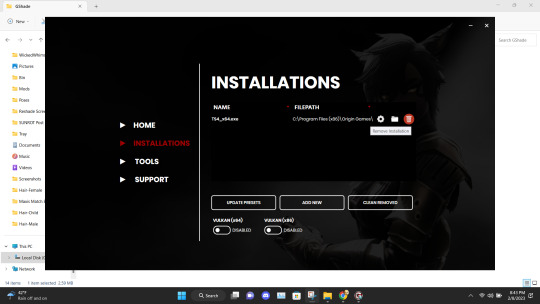
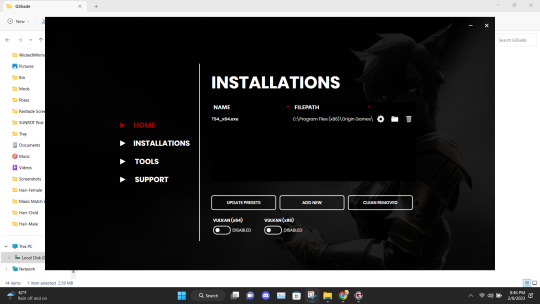
You should get the following screen Go to the Installations tab. Delete this file path. This is a very important step. It's not gonna work if you don't reinstall the program. Delete it and click Add New.
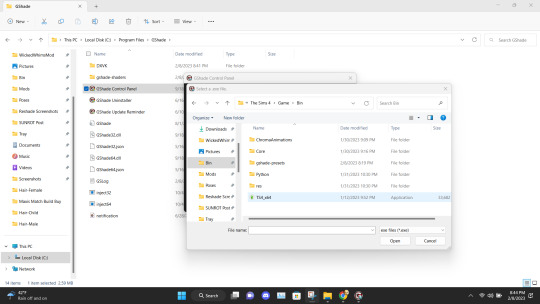
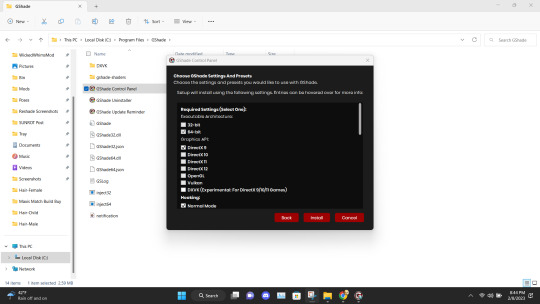
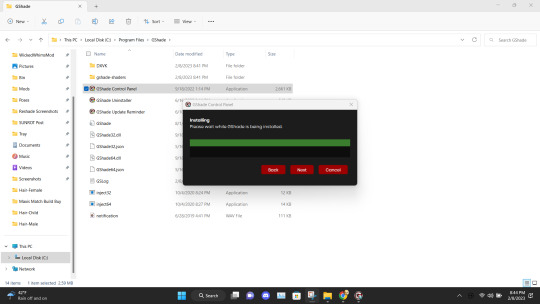
Install the program as viewed above. Click Next and set up your screenshot folder.
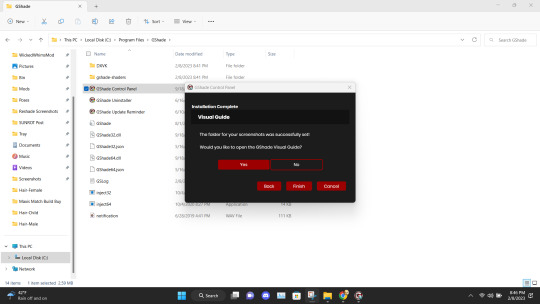
Click No on viewing the guild. You should have a control panel on your desktop. You can go in a convert you reshade presets if needed.
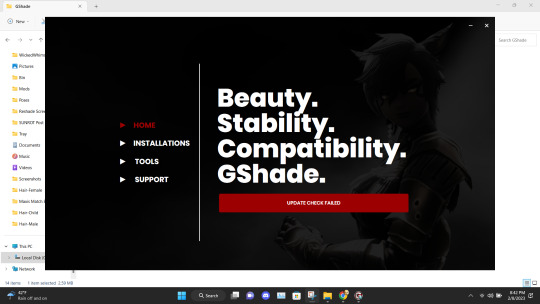
Alright if everything was done correctly open your game. It'll take a moment to load and when it does you greeted with the following screen on start-up.
Ignore the yellow text on the top. It says that your effects are disabled because it's not online. It works I could be misinterpreting what "effect" means but my shader work so I'm not complaining.
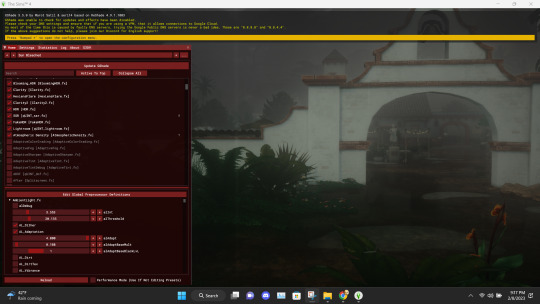
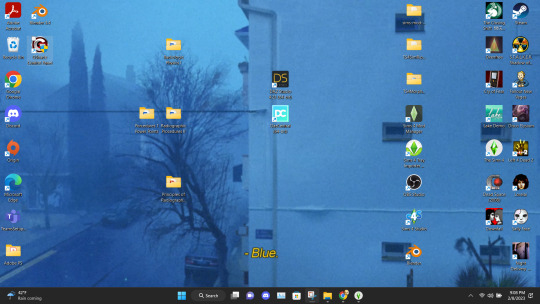
And there you go. Installed, and works perfectly. Don't update it. I don't know what it'll do. I have not tried. I will upload an edited version of my preset later this week or tonight. I have to tweak the color of the fog and make a decent post. Enjoy! I am open to helping under this post and in dms!
#if something you download thats for cosmetic reasons can shut down your PC that's not a normal function the program is free and basically#reshade it one of the same developers#gshade#sims 4#gshade help#ts4#simblr#tutorials
2K notes
·
View notes
Text
How To: Auto Height for Shoes
Haiii! As promised, here is the tutorial to make it so your custom shoes no longer require a shoe slider!
Thank you to the bestie who took the time to pick through Madlen's package file to figure out how it worked. And of course, thank you to Madlen who did the majority of the work figuring out how to make this possible in the first place!
♥ Tut below cut ♥
~~~
Set Up Your Blend File:
We're going to add a plane that will act as the mesh for the SlotRay which will allow for you to adjust the height of your shoes!
Open your blend file that contains the shoes your wish to adjust.
In the 3D View, press Shift + S and in the menu, select “Cursor to Center” In the 3D View, press Shift + A and in the menu, hover over “Mesh” then add a plane.
Now size this plane down as small as you can get it. You don’t want this plane visible in game.
Double check to make sure the plane has not moved from the center!! Your sim won't be centered in game if it has! If you see that it's moved:
Press "Shift + S" and click "Cursor to Center".
Then Select your plane and press "Ctrl + Shift + Alt + C", click "Origin to 3D Cursor".
Press "Ctrl + Shift + Alt + C" again and click "Geometry to Origin".
Navigate to the “Object data” tab and under “UV Maps” add a new one then name it “uv_0”.
Next, navigate to the “Scene” tab and under “S4Studio CAS Tools” set the cut number.
Depending on how many cuts your shoes have, you’ll want to adjust this number. For example, if your shoe has 3 cuts (0000, 0001, 0002) then this plane would have a cut number of 0003.
Since my boots only have one cut, I will put the number as 0001.
Now select your shoes and enter Edit mode. Select a face/vertice/edge on the very bottom of your shoes. Look to the panel on the left side of the screen (if it’s not open, press “N”). Under “Transform”, note down the number next to “Z”
After that, save your blend file under another name so you can distinguish which is which. I’ll name mine “Boots_3_Height Cut”
youtube
~~~
Add a New Cut to your Package File:
We're going to add an additional cut in your package file for the new plane!
Open Sims 4 Studio, make a new package file for your shoes and import them.
Go to the Warehouse tab and select your LOD 0, it will be the geometry with the largest file size. Sometimes you have to close then reopen the package to see the geometry.
Duplicate this geometry and in the box that pops up, change the last character of the “Group”. It can be any number or letter as long as it’s not the same as the duplicated geometry. On the duplicated geometry, note down the Group, Instance & Type values.
Find the “Region Map” and next to “Entries” click “Edit Items”. Add a new entry and in the “Layer” box, type the number you used for your cut. Since I used the cut number 0001, I will type 1.
Keep the “Region Type” as “Base” and move to “Models” then click “Edit Items”. Add a new Model entry and paste the Group, Instance & Type values you noted down before. Save and close each box.
Find your “CAS Part”, this is your swatch.
If you have additional swatches, it is a good idea to remove them and add them back once you are finished with this process.
Scroll down until you find the “Lods”.
Click “Level: 0” and next to "LOD Models", click “Edit Items”. Add a new entry and paste the Group, Instance & Type values again.
Save & close each window and return to the Warehouse.
youtube
~~~
Adjusting SlotRays:
We are now going to edit the SlotRays for the new cut which will adjust the height of the sim for your shoes!
Return to the new duplicated Geometry and in the “Data” tab, find the “SlotRay Intersections” and click “Edit Items”. Add a new entry and find the “OffsetFromIntersectionsOs” box.
You'll want to change ONLY the middle coordinate number. That will be the height of the sim.
You want to take the “Z” coordinate that you noted down from blender and replace middle coordinate number. If the number you wrote down is negative (i.e -0.01234) make it positive (i.e 0.01234).
In the “SlotHash” box, change the value from “00000000” to “FEAE6981”. This is the hash for the b__ROOT__ bone in the Sim's Rig.
Save and close the dialogs then return to the warehouse. Next, reimport your mesh and save your package file. You can now test your shoes in game!
youtube
Please keep in mind:
You have to do this for every LOD of your mesh
You can freely replace the mesh of your shoes and adjust the height since the cut with the plane has the SlotRay data
Animations may be off since EA hasn't made the game to support taller sims
CAS windows may move slightly if your sim is using poses/animations where they are leaning to the side. This won't affect gameplay
I recommend using Helgatisha's Stand Still in CAS mod to make sure your sim is absolutely centered
Hope this helped :)
1K notes
·
View notes
Text
youtube
♡ How to move Eyelash CC to new Eyelash category in 30 seconds ♡
It's super simple to move all of your existing eyelash CC to the new category in CAS using Sims 4 Studio ♡ྀི ₊
#sims 4#ts4#ts4cc#the sims community#ts4ccfinds#ts4 lookbook#sims lookbook#ts4 hair#ts4 maxis match#the sims 4#ts4 cas#ts4 simblr#ts4 gameplay#ts4 legacy#ts4 screenshots#simblr#ts4 tutorial#ts4 eyelashes#Youtube
143 notes
·
View notes
Text
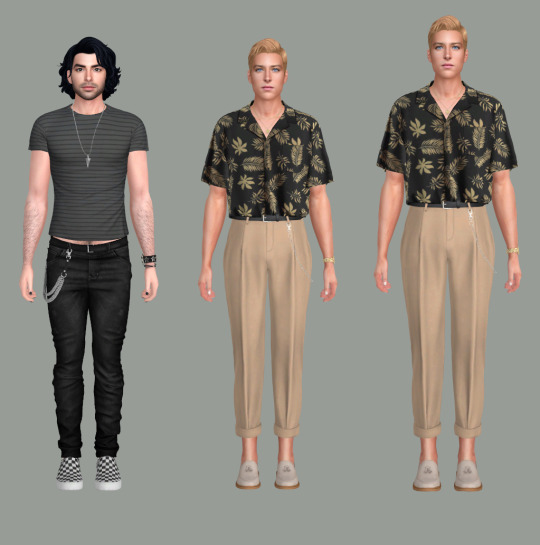
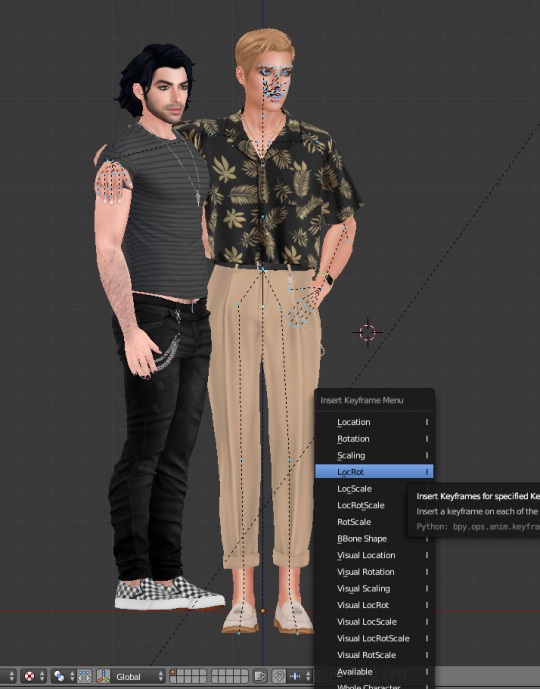
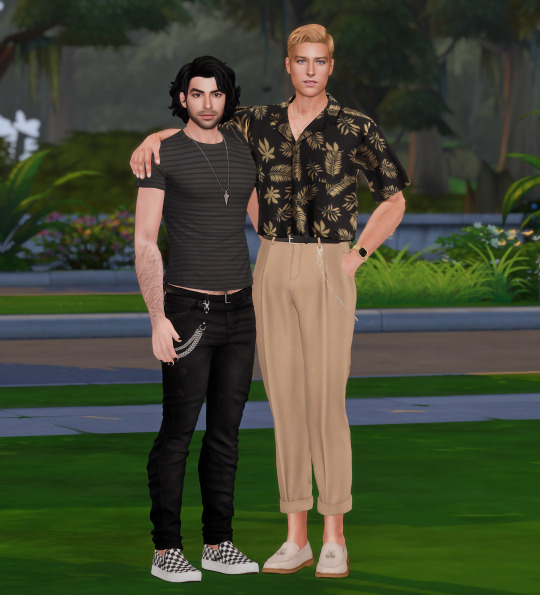
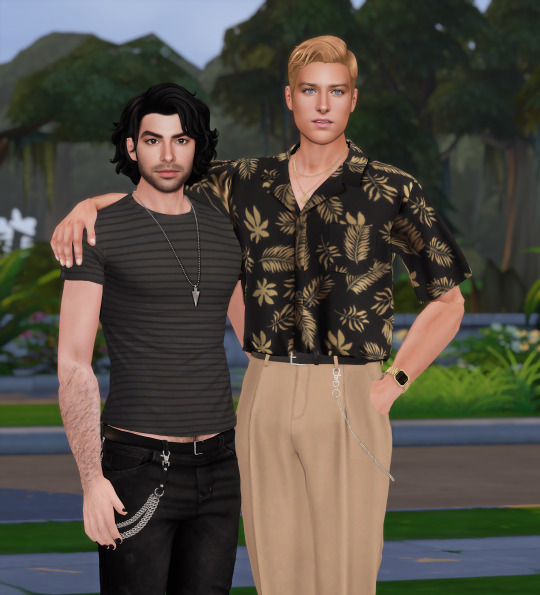
How to make poses for Luumia Height Slider! (Tall Sim)
I promised this tutorial to @aniraklova, so here you go, sunshine! (I also meant this tutorial to pose makers, so they would created more poses for me:D)
You'll need:
+ Base knowledge in making poses for Sims 4 (this isn't a tutorial about how to make poses for Sims 4, so it will be perfect for someone who already created/creates poses for the Sims 4)
+ Base knowledge in Sim Ripper (Again this isn't a tutorial about how to Rip the Sim, but we will use Sims 4 Ripper)
+ Sims 4 Ripper
+ Sims 4 Studio
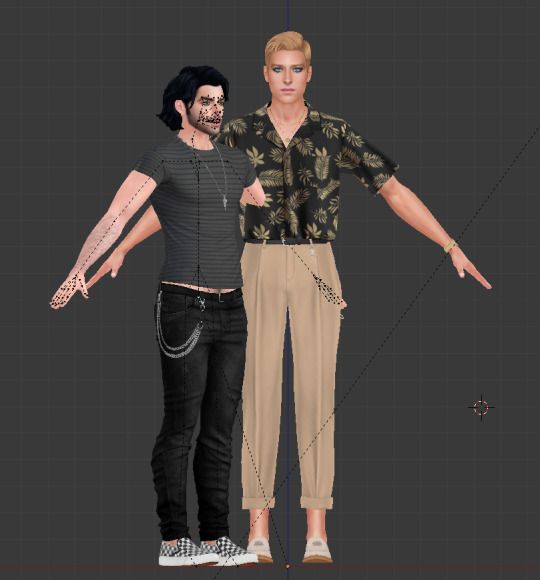
+ 3 sims. Sim with average height, sim with tall height (Arwin here has the max height) and his double with average height.
1. Rip 3 these sims and import them into Blender where you already prepared 2 rigs for your couple poses.
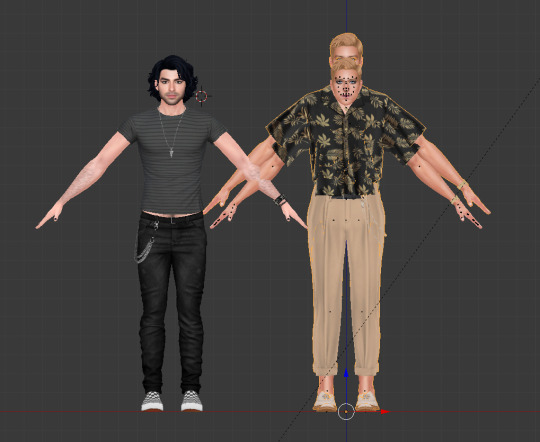
2. Select b__ROOT_bind__ bone on the average height clone of your tall sim, then scale it and move it up to fit the size of the tall sim.
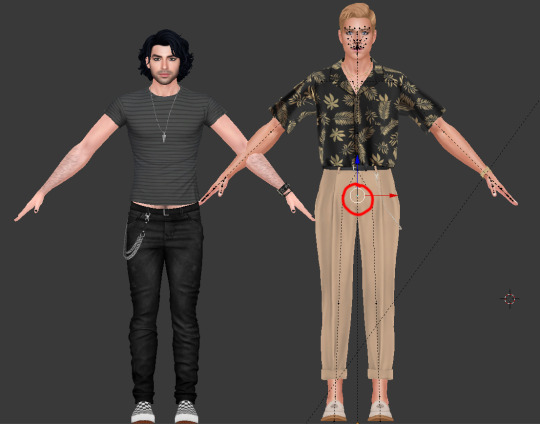
3. Fit it the best you can (up or down), but DON'T move it back or forward. Yeah, there will be a weird gap (tall version of your sim will be more moved back) that may cause some problems in the future, but... just don't think about it for now.
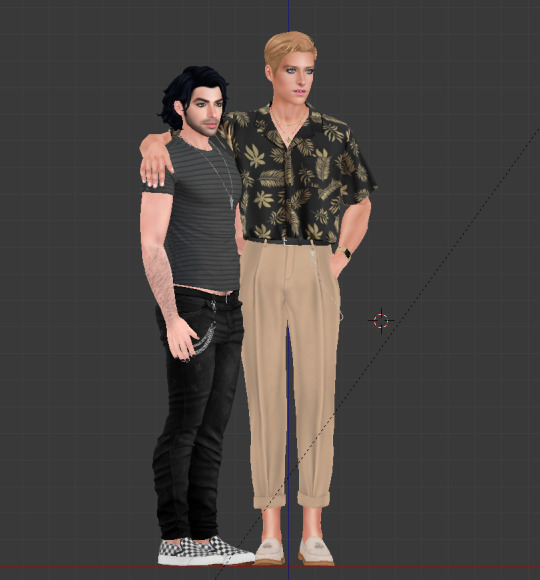
4. Now you're ready to make poses! NOTE THAT ONLY AVERAGE HEIGHT SIM CAN MOVE AROUND. It's imortant for b__ROOT_bind__ bone of the tall sim stay as it is. You can only rotate it, but once you fit it up into your tall sim, don't move it anymore up or down.
5. Ok. The pose is done!
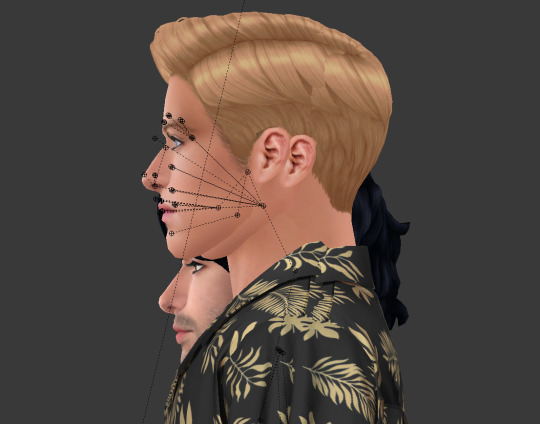
6. Before you saved it, select b__ROOT_bind__ bone of your tall sim, click Pose, choose Clear Transform, click Location.
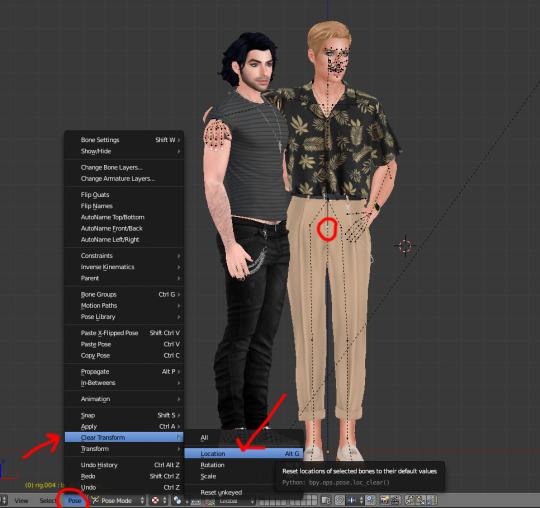
7. Now your tall sim will be slightly sinking down to the ground. It's important to let him to!:D
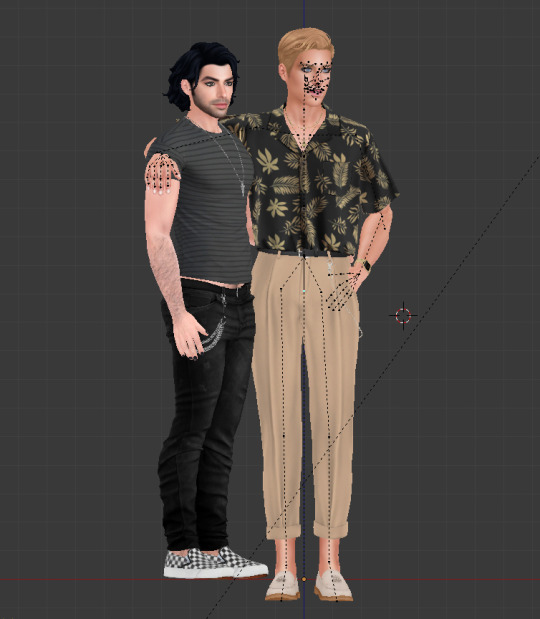
8. Then Select all bones and LocRot it. LOCROT.
9. Now you can save your poses and import it to the game!
Not bad, huh? It's still a tricky little poo, I know. Mb someone knows or will find better way - that would be awesome! But so far it's the only way I know.
It's not necessarily to be one tall sim, you can pick lots of Sims with different height, just remember to move down (or up if they're small) their b__ROOT_bind__ bones once you've done posing.
Hope it was helpful!
Have fun!
#WistfulTutorialSims4#sims 4 tutorials#sims 4 poses tutorial#sims 4 pose tutorial#sims 4 height poses tutorial#sims 4 height slider#sims 4 height slider poses#sims 4 height poses#the sims 4#sims 4#sims 4 poses
235 notes
·
View notes
Text

how to use wicked whims: installation tutorial, realistic gameplay settings & more
by ashley plays
this video goes over the following:
how to install wicked whims & animations
adjusting the settings for realistic & age-appropriate gameplay
how to use custom animations & poses
my favorite wicked whims gameplay features
mods mentioned:
wicked whims (18+)
ui cheats extension
mc command center
streamer mode/censorship mode add-on
smaller mosaic
body hair v5+ redux
height slider
missing plumbob
teleport any sim
favorite animators:
error404phillips
greynaya
kiki chain
favorite pose creators (masterpost):
afrosimtric sims
mel bennett
katverse
sciophobis
simsulani
1K notes
·
View notes
Text
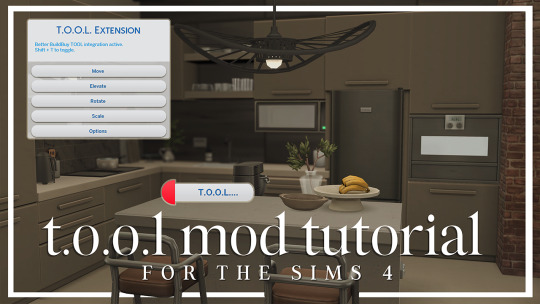
T.O.O.L Mod + Better Build/Buy Tutorial
by LargeTayterTots
download links
better build/buy mod by twistedmexi
t.o.ol. mod by twistedmexi
7zip file extractor
andrew's pose player
teleport any sim mod

youtube / tiktok / twitch / patreon / gallery id: largetaytertots
261 notes
·
View notes
Last Seen Blogs

floatingbunnyhead
Floating BunnyHead
floatingbunnyhead
Floating BunnyHead
shengycg
toxxkk

redretreiver-blog
Red Retreiver Blog

swordshq
𝒄𝒉𝒂𝒐𝒔 𝒊𝒔 𝒂 𝒍𝒂𝒅𝒅𝒆𝒓 ...