#tutorial 3d
Explore tagged Tumblr posts
Visit Tumblr Blog
Explore Tumblr blogs with no restrictions, modern design and the best experience.
Last Seen Tumblr Blogs


Fun Fact
In Q3 of 2020, 31% of US users access the Tumblr app daily.
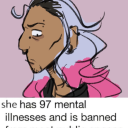
Text
Bea timelapse 💙 🎬
#night in the woods#animal crossing#animal crosing new horizons#nintendo#nintendo switch#3ds#retro#lowpoly#3dmodel#b3d#3dart#animation#art#blender#artwork#gamecube#pixelart#pixel art#pixel aesthetic#video games#nitw gregg#gregg lee#angus delaney#3d#3d art#3d modelling#low poly#tutorial#timelapse#art process
2K notes
·
View notes
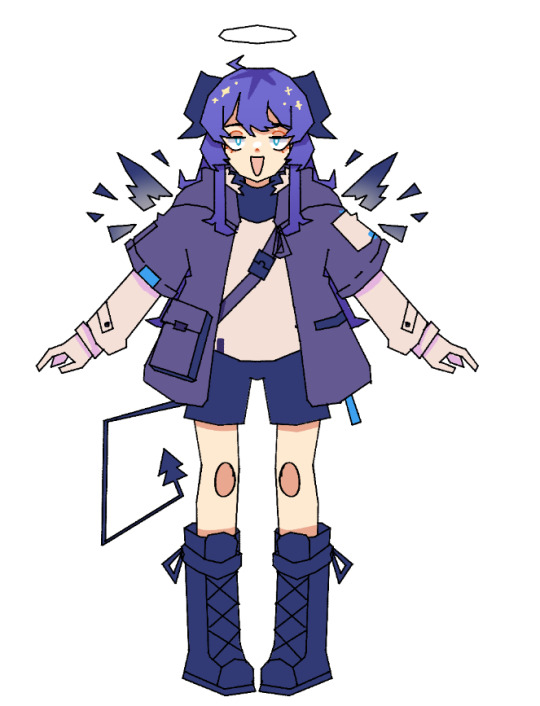
Text
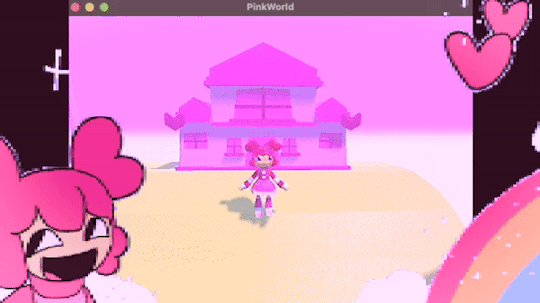
programmed my oc into a game for the aesthetic
#i hope this gives off the vibe of an old game#2 days of modeling#1 day of following a coding tutorial#i felt so happy to draw the little gifs on the screen again#im so sick of 3d (i will do it again)#oc#oc animation#oc art
692 notes
·
View notes
Text


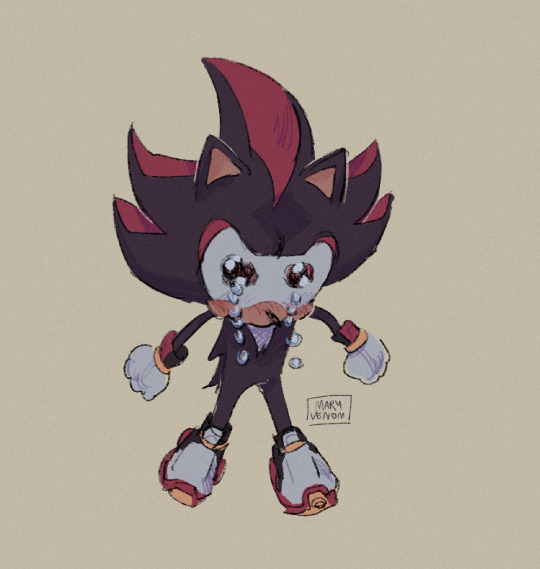
extremely happy to have enough blender skill now to make this shit
#shadow the hedgehog#blender#3d model#sonic the hedgehog#3d#3d art#his extremely fucked up anatomy i love him#btw this isnt the thing i was doing retopology on this is so poorly made i wouldnt know where to fucking begin#i just got sick of that other thing and decided to make something for myself for once#i am very sick of tutorials
3K notes
·
View notes
Text
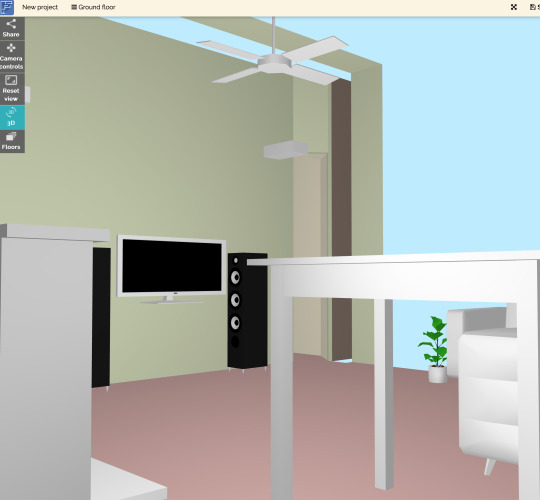
3D Room Builder
Faster and easier in my opinion than sketchup!
Can easily pan the camera and practice perspective and all of that :)
https://floorplancreator.net/plan/demo

More useful articles and resources / support Art-Res | my art tumblr | Idea Generator
Check out the Art-Res Anatomy Ebook!
2K notes
·
View notes
Text
RESOURCES FOR BOARD ORGANIZATION AND SEARCHING IMAGES & REFERENCES
Pinterest (Saves every image in different Boards)

Milanote (Able to search your own board and organize notes and sections. For every Project you have in mind.) Literally, you can do a crime board.

UNSPLASH

PIXABAY

Public Work by Cosmos

SAME.ENERGY

Designspiration

#reference#tutorial#art reference#art#poses#artist#art resources#resources#web#pages#help#guide#action#line#figure#animation#photography#3d model#boards#pinterest#milanote#organization
168 notes
·
View notes
Text

Terrible news: I got back on Blockbench and now poor Forneus, here, has been trapped in the spin cycle.
#had a few seam issues in this as you can probably see but the tutorial I watched gave 0 explanation on how to fix it#and I could not be bothered trying to figure out fixing them myself#so alas poor forneus is stuck with the improper seams forever#blockbench#3d art#3d fanart#low poly#cult of the lamb#cotl forneus#cotl#cotl fanart
138 notes
·
View notes
Text
💧✨based off of this illustration by @passionpeachy!✨💧
video compression muted the colors, so here are a few stills under the cut


tiny bonus: happy pride!

#3d#blender#npr#video#passionpeachy#i actually finished and rendered this out at 2 am but i will schedule this for the morning 😴#thank you azul for letting me use your art!! it made me feel very smart figuring out how to replicate the black shading of the bubble#it's not perfect but it's my first model that wasn't made following a tutorial! so that is to be expected. very fun very charming :]
510 notes
·
View notes
Text
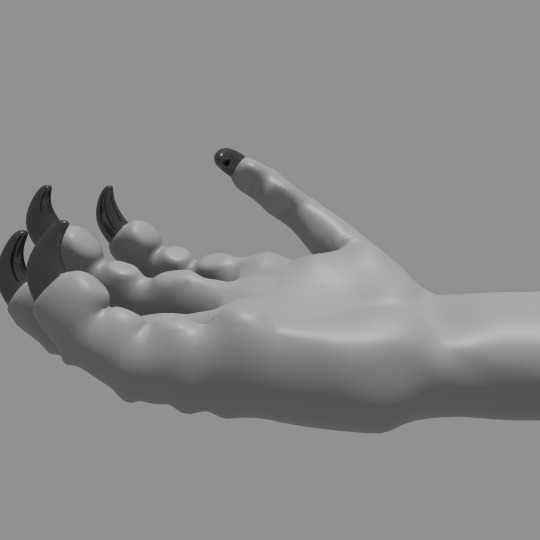
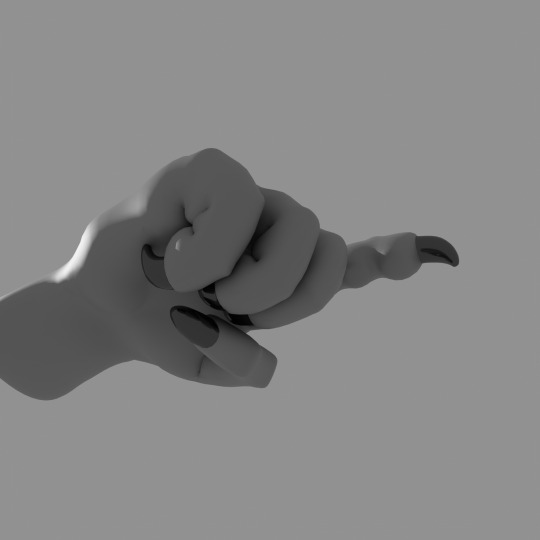
Dragon paw drawing reference!
And so, I finally made a reference paw!
Link here: https://skfb.ly/ptKFy
This is a hand-like dragon paw, and I created it so that artists who have trouble drawing dragon paws and claws in different poses can use it as a reference. You just start the animation on sketchfab, and then stop it at the desired point. The paw can be rotated and viewed from any angle, even from a phone.
You can also download the model and set the pose yourself in the appropriate programs.
Yes, it was made in my own way, it’s plump, but I still think almost anyone can find a use for the reference.

#wings of fire#dragon#wings of fire art#wof#wof art#3d model#animation#3d animation#paw#hand#reference#drawing#claws#how to draw#tutorial
163 notes
·
View notes
Text
Just released a little rigging tutorial specifically for lowpoly characters!
youtube
235 notes
·
View notes
Text
Angus timelapse 🎬
#night in the woods#animal crossing#nintendo#nintendo switch#3ds#retro#lowpoly#3dmodel#b3d#3dart#animation#art#blender#artwork#gamecube#pixelart#pixel art#pixel aesthetic#video games#angus delaney#animal crosing new horizons#blender3d#3d modeling#tutorial#art tutorial#timelapse
467 notes
·
View notes
Text
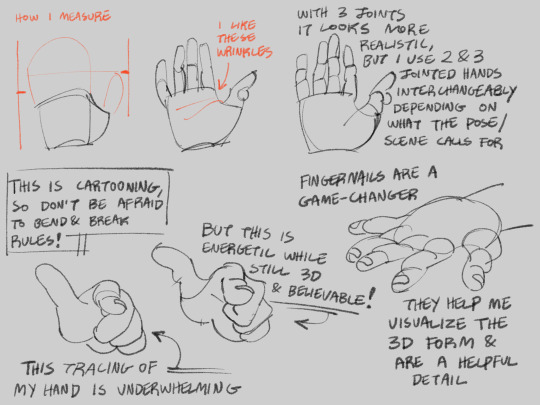
idk if i ever posted this? quick notes on my thought process while drawing cartoon hands.
#no id#giddly’s art#i learned a LOT from drawing wallace and gromit / arrdman fanart#because the claymation hands are chunky and 3d so i could easily study their forms while watching#just add fingernails and bing bang boom. believable cartoon hands!#art tutorial
266 notes
·
View notes
Text


tried to animate a book
#random#my animation#my 3D#blender#i swear there's a tutorial for everythign for blender#god bless the 3D community OTL
78 notes
·
View notes
Text
alrighty thats enough ( low polys your mostima )
#moka rambles#not tagging as a doodle but guess whos trying to get better at 3d modeling#ive followed enough tutorials to feel somewhat comfortable with the interface so now its.. gulp...#time to make my own#go my mostima!!!!!
84 notes
·
View notes
Text
🧱 Ottto


In the 3-D 🧱
#ottto#ok but again I will say who is willing doing this as a hobby?? (me unfortunately)#blockbench#3d model#3d art#Istg I will quit at least five times#but tomorrow back to the grind mayhaps I will try figuring out how to animate???#or maybe I’ll just move the model around idfk#sfw furry#snow leopard#furry art#I dunno man but I did have fun creating this#though probably because xe are my oc and I love xem#xe look so stupid…so unbelievably and unnecessarily stupid#followed no tutorials for this and I used solely my wizard powers for this#artists on tumblr#art#my art#illustration#low poly#digital art#finished piece#my oc art#2025 art#guys maybe I will become evil and contuine to 3-d model#this didn’t take me too long? but I also probably made the worst model ever seen tbh
96 notes
·
View notes
Text
RESOURCES FOR ANIMATION
Book Disney Animation: The Illusion of Life by Frank Thomas & Ollie Johnston

Book The Animator's Survival Kit by Richard Williams

Book Drawing Lessons from the Great Masters by Robert Beverly Hale

Book Character Animation Crash Course! by Eric Goldberg

TUTORIAL VIDEOS:
youtube
youtube
youtube
youtube
#reference#tutorial#art reference#art#poses#artist#art resources#resources#web#pages#help#guide#action#line#figure#animation#2d animation#3d animation#courses#12 principles of animation#youtube#video#pdf#book
258 notes
·
View notes
Text
Low Polys your Mystery
#I wanted to do more with this but I can not for the life of me figure out shader and setting up a good animating rig#Im following tutorials and nothing it working#I might say screw it and just do the shading and animating in unity cause at least I can just use poiyomi#Shader nodes make me want to eat glass#Mystery skulls#Mystery skulls animated#3d model
201 notes
·
View notes