#the beginner's guide screenshots
Explore tagged Tumblr posts
Visit Tumblr Blog
Explore Tumblr blogs with no restrictions, modern design and the best experience.
Last Seen Tumblr Blogs


Fun Fact
Users from the US are the majority of Tumblr visitors.
Text

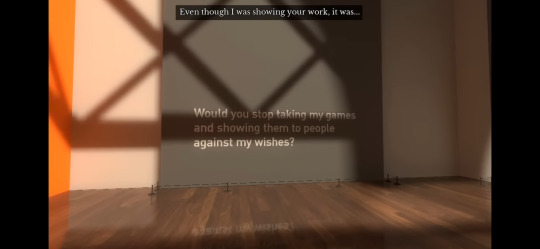


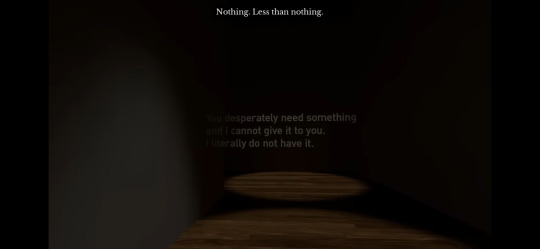

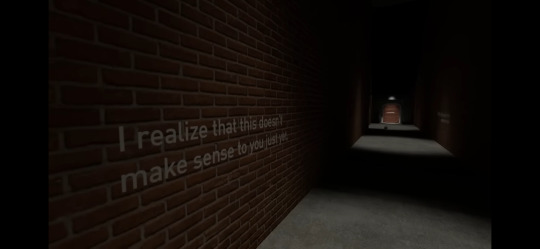
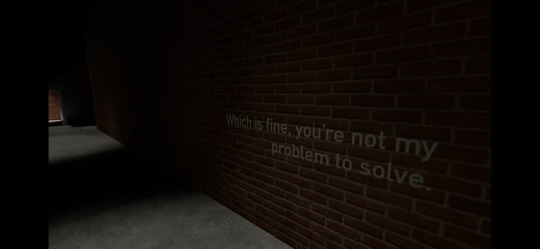
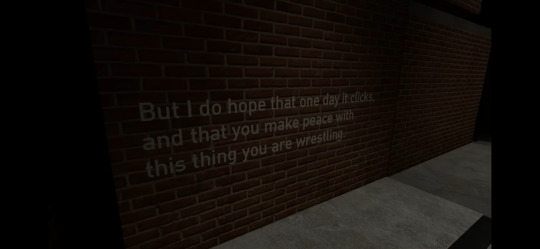


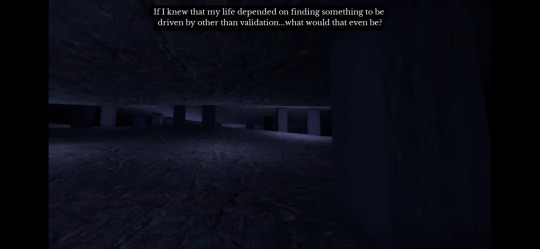

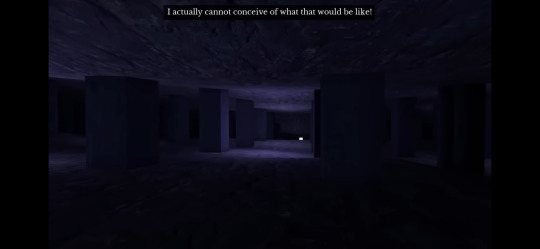


“…Okay.”
selected dialogue from the ending of The Beginner's Guide, a game released in 2015. screenshots taken from NiZZULiVE's no commentary walkthrough of the game on YouTube. Would highly recommend playing through it yourself if you're at all intrigued by this.
#for my ex who i swear to god better not be fucking reading this right now#you're davey by the way#the dialogue in the top of the screenshots#to be completely clear#get off my damn blog#anyways sorry about all that guys lol#the beginner's guide#gaming#the beginner's guide screenshots#the beginner's guide ending#the beginner's guide spoilers#indie games#experimental games#one of my favorite games ever. like of all time#coda core#the beginners guide
9 notes
·
View notes
Text


36 notes
·
View notes
Text
The uh

The first play session went rather well
#The Stanley Parable Ultra Deluxe#WPTSP#Yes I played for five hours at one stint and got almost half the achievements what of it#I wanted to - even though I had just - replay all of the endings from the HD Remix - not counting the Real Person Ending#Because I see it as the perfect bookend - Freedom to start Real Person to finish and that's that for the play session#I didn't even get that far I got all the way through the 14ish endings from the HD Remix and then went to check out the new stuff and#It's so much more than I could've guessed. I'm so glad I stayed away from spoilers#Yes of course there were the things I couldn't avoid and momentarily had a ''Ah yes'' or ''Of course'' but the rest#I had to take a break to eat and stretch and not be Stanley for a bit but I still fully intend to jump back in after a short rest#Also some things from the new content I think I'm gonna need to Talk about later lol - not in a bad way!! Just some Realization™ things#Not entirely divorced from Davey's other work The Beginner's Guide - I can tell already this might be an emotional reset piece someday#It's been very interesting and endearing :) I 've found myself smiling so hard my cheeks hurt and then it falls and I feel it#I've also been taking a lot of excited screenshots lol ♪ But not in Certain areas >:3c If you've played I'm sure you know#Very Respectful lol#The Stanley Parable#WPVG
15 notes
·
View notes
Text
The Beginner's Guide


Well, that happened.
#gaming#PC gaming#The Beginner's Guide#screenshots#no spoilers#walking simulator#that was an experience#89 minutes of my life I'll never get back#feels bad man
0 notes
Note
possibly weird question; do you have any advice on how to emulate a shows art style? the way you're able to capture the cartoons for your comic is really inspiring; im just not sure where to start aside from maybe screenshot redraws? or breaking things down to see where they land on the face/body/etc, but i just wanna pick your brain on it
thank you! hmm let me think
if there are drawing guides or reference sheets available, you can follow those. they do the breaking down for you. beetlejuice for example:


you could try screenshot redraws, or you could try tracing them too. this is perfectly valid when you're trying to practice and learn how to draw anything. i've done it with simpsons characters because believe it or not the style was difficult for me to do (it's too perfectly round) lol
all in all i don't really know what else to say. just draw them...a LOT. the difference between my toonjuices from, say, the beetleverse comics vs how i draw him now is noticeable i think, because i've already drawn him dozens of times by now HAHA
some styles will be easier to emulate than others. you're gonna have a hard time with some and others might come naturally to you. and if you're a beginner, you'll inevitably have that style influence your art forever in some way or another. choose wisely............................
95 notes
·
View notes
Text
FINAL DEPTH XIV: FATHOMDOWN
~An Absolute Complete Beginner's Guide To FFXIV Submersibles~
So, you've heard of submarines in Final Fantasy XIV and you want to get started on a fleet of your own, but have no idea what to do where to go or even how to start. Well don't worry there sailor, we'll get you from landlubber to salty sea-goer. This is an -absolute- beginner's guide, so we won't go into deep details, we just want to get your first submarine out the dock. It's not particularly difficult to get started, but there are a lot of steps, so take your time.

Actual guide beneath the cut
So, to get started, you will want to be part of an Free Company, and that Free Company will need to have a house. If this is not true, then submarines are not yet for you. I won't cover how to fix that, but you're all lovely people who can undoubtedly find a group of fellow maniacs willing to pal around with you.
If you are part of a Free Company, you will want to have a Rank in it that has pretty much full Company Workshop access. If your FC does not yet have a Company Workshop, go into the house, and find the door which allows you to buy rooms.

Company Workshop will be the first option. If your Free Company does not have one, an officer with the correct rank can buy one for some amount of gil. Once you have a Company Workshop, you will want to get 6 Mahogany lumber (gather Mahogany and turn logs into lumber, or buy it off the marketboard, just trust me on this we'll get to that in a moment). Go ahead and head inside, look around, get familiar with the place.

This is one of the first things you will want to take a look at, the Schematic Board. The Schematic Board is used to create recipes that the fabrication station will be able to use. Those 6 mahogany lumber will be useful now. I highly recommend using the schematic board, and going through the menu to find the Submersible Prototype I recipe, and go ahead and complete it. This will unlock the first submarine parts to be able to be constructed.

Right, so you hopefully have submarines unlocked. Our next destination is this, the fabrication station. This is what is used to actually make submarine parts. We will want a full Shark build.


This is going to be a LONG step, and I consider it the most complex logistically. To make a submarine, you will need a Submarine Hull, a Submarine Stern, a Submarine Bow, and a Submarine Bridge. If you put the 6 Mahogany Lumbar into the Schematic Board earlier, you should have access to the Shark parts for each of those subsystems (I have a lot more on my screenshot because I have been at this for a while). Go ahead and start building the Shark-class Pressure Hull.
This is a very long step. The fabricator will switch modes to construction, and submarine parts take a LOT of material. For the Pressure Hull, you will notice it takes 18 Walnut Lumber, 18 Spruce Lumber, 18 Iron Nails, and 18 Cobalt Ingots. That is just for the first phase. Each material has to be put in in chunks that are equal to 1/3 of the final desired size. So, for example, the Walnut Lumber will need 6 Walnut Lumber put in 3 times just for phase one.
When you finish a phase with all of its materials, the fabricator will ask if you want to advance to the next phase. Do so, and it will give you a new list of materials you will need to put in. At the end of the last phase, you can collect the submarine part.
This is an activity meant to keep an entire Free Company's worth of people busy, and will probably not be fast! If you do not want to deal with it, you can try your hand at just buying submarine components from the market board, but be warned. They're expensive!
You can gain some minor XP from doing this for your crafting jobs. I wouldn't bother. Also, you can put in HQ materials. Whether or not you do will not affect the final product in any way, shape, or form. The only thing it affects is that you might get a discount on later phases if you use HQ materials for earlier phases.
This is generally not worth the effort.
So, build or buy your submarine parts! Once you have a Shark Hull, Shark Stern, Shark Bow, and Shark Bridge, you're ready for the next step.
But first.

Somewhere in your FC housing area will be this guy, the Resident Caretaker. You will want to visit him to purchase some Ceruleum Tank (these an also be purchased from the mammet in the Company Workshop). Just buy a whole lot, you'll be going through them quickly. You will also want to buy a Dive Credit (possibly up to 3 Dive Credits for the first submarines, I actually am not sure).
Okay, back to the company workshop. We are now ready to make the magic happen.

Go ahead. Click it. You know you want to. You will see two options, Airship Management and Submersible Management. We want Submersible Management. Open that, and use your Dive Credits to purchase your first submarine slot.
If you have all four submarine subsystems in your inventory already, congratulations! Go ahead and equip them on that first submarine slot. If you already have ceruleum tanks, you can even send it out. All my submarines were out at the time I made this guide, so I have no screenshots of this step for you, but go ahead and mess around with it a bit. You won't be able to go very many places, so you can just make a route and send the submarine out.
And that's it. You are now a salty undersea going sea dog! Your submarine will take about a day for every trip it makes. Longer trips take longer. There is a lot to say about submarine stats and whatnot, but that's for more advanced guides. When the submarine comes back, it will probably bring back some loot. Take the loot, and send the submarine back out. Rinse, wash, repeat.
One final word - never ever disassemble a submarine. As your submarine increases in rank, it will have more capacity for more, better, and different parts. You can research those parts at the schematic board (more advanced schematics will require the stuff your submarine brings back from voyagers), and then build those parts in the fabricator, same as the first time. While a submarine is not deployed, you can reassign parts. But again, even if you are going to replace every single subcomponent, DO NOT DISASSEMBLE YOUR SUBMARINE! You will lose its rank and all of its bonus stats, and there is no reason to do so, ever.
Hopefully this guide is useful to someone! There are more advanced guides elsewhere that I will link if anyone is interested, but for now, this should be enough to get you off the ground. If you have questions, reblog them, put the questions in the body not in the tags so everyone can see, and I will reply with a reblog, and hopefully this will be a fruitful chain of launching many a naval career.
Happy submarining!
62 notes
·
View notes
Text
HTML Fic Event Week
Prompt Sheet Generator | AO3 Collection | html tryhard on AO3

HTML is a markup language used to tell a web browser how to display content. You might be aware of simple uses of HTML, such as bold and italics but HTML can be used to do so much more! Do you like r/AITA stories? Have you ever been interested in including realistic text messages into your fics? Did you like choose-your-own-adventure books as a kid? HTML can be used for all of these things and more!
Join us for HTML Tryhards 2025, where we bully our friends (and you? 👀) into making fanfiction super extra shiny using the power of HTML.
AO3, a fanfiction hosting platform, supports the use of HTML, and that's where submissions for this event should be posted. We have a collection for you to post to, but please use the tag #HTML Tryhard on your work as well!
On Tumblr, @ this blog or use the tag #htmltryhard2025, and we'll reblog your posts.
Prompts
There are two (optional) prompts per day, one to influence the format and one to influence the story. You can generate your own custom prompt list here. Use as many or as few of the prompts as you like.
Rules
All fandoms welcome.
Submissions must include a significant portion of HTML. We'd prefer the entire work be HTML, but mixed prose and HTML is also acceptable.
Submissions MUST be HTML and not images or screenshots of text logs/tweets/etc.
There is no required minimum word count, but the suggested minimum word count is 500 words.
The prompts are OPTIONAL, use as many or as few as you'd like.
HTML/CSS guides are accepted (and encouraged!) as submissions.
Submissions should include the #HTML Tryhard tag on AO3.
Submissions should be added to the collection on AO3.
You can start posting submissions January 13th. The last date of the event is January 17th, though if you're running behind you can still post to the collection after that date.
Follow us!
If you don't know how to use HTML but it's something you're interested in, give us a follow! In the days leading up to the event, we'll be sharing works that have utilized HTML, as well as helpful tutorials. The difficulty of these tutorials will vary, and we'll post things we hope will be helpful for tryhard veterans and beginners alike.
You can also send us your HTML questions and we'll do our best to help you out!
#html#AO3#fandom event#fic event#fanfiction event#writing event#html tryhard#htmltryhard2025#fanfiction#fanfic prompt
46 notes
·
View notes
Text
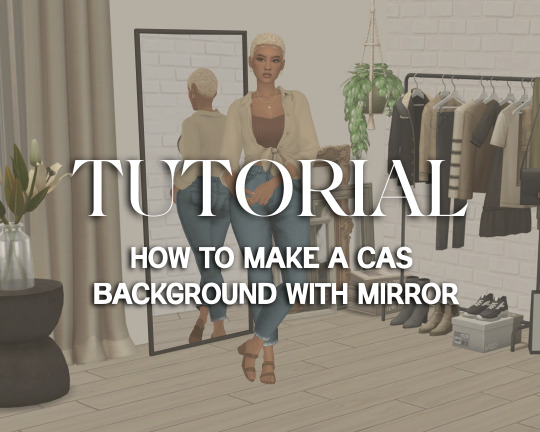
Tutorial: How to Make a CAS Background With Functional Mirror
Overview
This is something that has been highly requested so I hope this tutorial will be helpful for the sims 4 cc community!
This tutorial will have 2 parts for creating 2 different types of CAS "room" backgrounds. Part 1 (The Easy Way) uses a template I created for you to use your own 2D images/screenshots with a simple rectangular mirror. Part 2 (The 3D Room) will result in a better quality background, but it’s not a beginner friendly project so I don’t recommend trying it if you’ve never made any cc before. I will not cover the basics of cc making here, only what’s relevant to making a CAS bg using my template specifically. The Sims 4 Studio forum has a ton of great tutorials for everything else.
In my own research & experimentation, I noticed that (as far as I can tell) EVERY other CAS room with a functional mirror seems to be derived originally from LittleDica's CAS room [link] I want to acknowledge credit to LittleDica for their CAS background which I studied as a reference. But to be clear this tutorial and my templates are NOT derived from another creators' work; I created mine from scratch and it took a lot of time and effort. My version is much more simple and more compatible with Sims 4 Studio because there are no extra mesh groups or diffuse maps. I also made a great effort to make the reflection in the mirror more realistic for the size of the room. I hope you will be able to use this resource to create your own beautiful CAS backgrounds! ♥
Also in case you missed it, you can download my CAS background used in the preview [here] (it is slightly different from the template package.)
Requirements:
Sims 4 studio
Image editor (Ideally photoshop)
my templates (attached below)
—————
Part 01: The Easy Way
The easiest way to create a CAS background with mirror is to use my attached templates.
The PSD template is the best option, but for those of you that don’t have Photoshop, there is a PNG version as well.
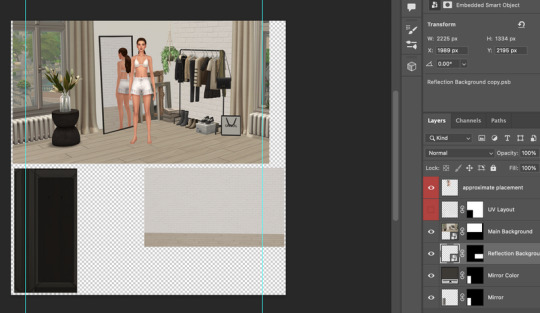
You will need 2 images; one for the main background, and one that will be reflected in the mirror. The large top area is the main background, and the smaller rectangle at the bottom is what will be reflected in the mirror behind your sim.
In the image editor, paste your images and resize them to fit into the outlined areas.
For framing your screenshots, it’s important to understand that the mirror is actually just floating in space in front of a flat background. That means you’ll have to fake the perspective a bit and that may require some trial and error to get right. I recommend taking multiple screenshots at a variety of angles so you have options to work with. Use the model sim as a guide to help you with placing your background image. (Don’t forget to hide the model sim and UV layout when you’re done!)
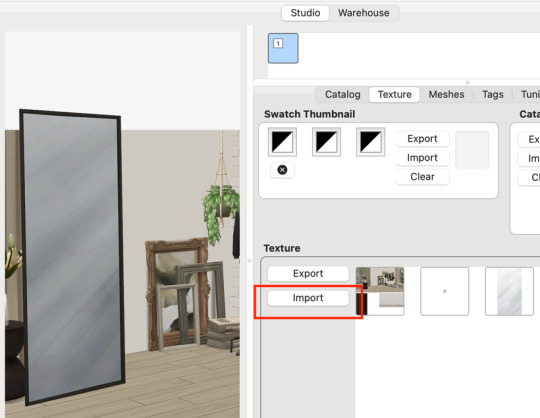
Save as .PNG or .DDS and import it into the template package in Sims 4 Studio.
That’s it! My goal was to make it super easy for you. Remember to only use one CAS background in your mods folder at a time since it's an override. Also note that it is not compatible with 'cas blob remover' since the instance for the dropshadow is now used as the mirror.
TOU — PLEASE READ:
I give permission to the Sims community to use my template files and modify them as needed to create your own CAS backgrounds. This took months of work, researching and experimenting, so please respect the effort I put into creating this resource by agreeing to these simple terms:
Don’t re-upload my files. Don’t claim my work as your own. If you use my templates for your cc, please share credit with my username (Lijoue) and link to my Patreon page. If you make any money from cc created with my templates, please consider making a donation via my Patreon. It is greatly appreciated.
download template files here
Part 02: The 3D Room
to be continued…
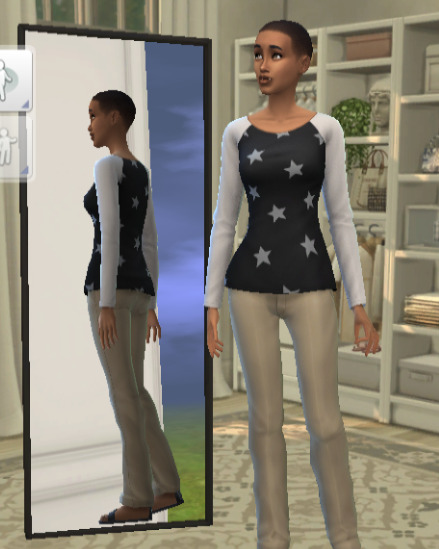
This part will take more time to finish because there’s a lot more steps involved in creating a 3D CAS room. In the meantime, the template should be enough of a starting point for those of you that already know how to make cc objects, since I already handled the hardest parts. Just understand that the mirror reflection is not automatically calculated, meaning that if you move the mirror in the mesh, you will need to change the Mirror Plane Normal and Mirror Plane Offset in S4Studio Warehouse to match the new angle or position. Otherwise it may look unrealistic or worse, it could reflect the eerie wasteland world that the CAS room is set in. (pictured below)
#sims 4 creator#sims 4 tutorial#the sims cc#ts4 maxis cc#maxis match cc#sims 4 maxis match#ts4 tutorial#sims 4 studio#ts4 custom content#ts4 cc#cas backgrounds#sims 4 cas
191 notes
·
View notes
Text
Annapurna Interactive and Ivy Road announce narrative-centric cozy game Wanderstop for PS5, PC - Gematsu

Publisher Annapurna Interactive and developer Ivy Road have announced Wanderstop, a narrative-centric cozy game about change and tea. It will launch for PlayStation 5 and PC via Steam in 2024.
Here is an overview of the game, via its Steam page:
Wanderstop is a narrative-centric cozy game about change and tea. Playing as a fallen fighter named Alta, you’ll manage a tea shop within a magical forest and tend to the customers who pass through. But Alta does not want to be here. And if she gets her way, the tea shop will be nothing but a brief and painful memory. Wanderstop is a tea shop management ritual. Grow and harvest the ingredients needed for tea, and then mix them together in an unusual tea-making contraption. Along the way, speak with the many travelers who pass through the shop, learn their stories and make tea that’s just right for them. In your downtime, you might tidy up around the clearing, decorate the shop in your style, or just sit on a bench with a cup of tea and listen to your own thoughts. Maybe doing nothing at all is okay. The shop demands patience, it rejects those who have come only in the pursuit of growth unchecked. And that’s why Alta can’t be here. It’s why she’ll never make it. This isn’t who she is. No, she’s a fighter! Why would anyone insist on turning the world’s greatest championship warrior into a docile shopkeeper?! With everything she’s capable of?? No no no, she won’t, she won’t do it… she can’t… Wanderstop is a game from the team at Ivy Road, including Davey Wreden (creator of The Stanley Parable and The Beginner’s Guide), Karla Zimonja (co-creator of Gone Home and Tacoma) and Daniel “C418” Rosenfeld (the music of Minecraft).
Watch the announcement trailer below. View the first screenshots at the gallery.
Announce Trailer
youtube
87 notes
·
View notes
Text
Time for me to make my own pinned post, I do believe! First of all, screenshot of my pinned post for the past year

About me: Christian, lesbian, ace, some flavor of genderqueer idk, any pronouns are fine but I mainly use she/they/it
Onto the most important part, my AUs! Please please please do not hesitate to send any questions at all about them
FNaF AUs
Charlizabeth (AUs featuring Charlie Emily x Elizabeth Afton)
Someone New: A work in progress chaptered fic on Ao3, the Aftons are vampires and Henry and Charlie just moved into Hurricane. It is known by the citizens that the Aftons are vampires and Elizabeth is the youngest, though she’s 16 in this one
Slay the Princess AU: a work in progress series of one shots on Ao3 that follows the storyline of the video game Slay the Princess
Heathers AU: Loose concept based on the musical Heathers
Wicked AU: Another concept AU, based on the movie Wicked
General everyone lives AU: Primarily domestic charlizabeth fluff, but I definitely have loads of headcanons for if everyone got to grow up. Most of the time William is dead in these
Other FNaF AUs
Of Aftons and Emilys: After failing to murder Charlie Emily, William flees Hurricane and comes back years later to reclaim his children, but he’s adopted another as well. Unfinished series of works on Ao3 (Cassidy, Jeremy, Gregory, and Vanessa are also in this one!)
Puppet Girl: Lots of platonic Michael Afton and Charlie Emily! After Elizabeth’s death, Michael runs away from home (aided by the fact he’s transmasc and doesn’t transition until after running away), and ends up staying with Charlie (who survived due to him stopping her from going out into the alley the night she was supposed to die) and not much later they move into an apartment with Jeremy Fitzgerald and Charlie ends up getting scooped instead of Michael (unfinished chapter fic on Ao3)
A Beginners’s Guide to Surviving the Average Apocalypse: Vanessa rescues Cassie from the Pizzaplex, but it’s not long before the two of them start acting strange… after Cassie attacks Gregory, he flees to the Pizzaplex. In the basement, he discovers what remains of Michael Afton. Unfinished chapter fic on Ao3
Into the Pit: Elizabeth falls into the time travel ball pit right before the Bite of 83, ends up around Fazbear Frights and meets up with Michael. Unfinished chapter fic on Ao3
Crossovers
The Owl Behind the Slaughter: The Aftons have been kidnapped by Duolingo, their capture aided by Henry Emily, Cassidy, and Gregory. Crack fic. Unfinished chapter fic on Ao3
Ink and Animatronics: Vanessa Afton x Audrey Drew (from Bendy and the Dark Revival) that also includes Ness as Audrey’s brother. Unfinished and loosely connected series of one shots on Ao3
Elizabeth and Asriel: Elizabeth fell into the Underground (Undertale), after making it through a pacifist route, she convinced Asriel to join her on the surface, sneaking him past the other monsters. Technically I have a single one shot on Ao3 but it’s more of a concept
So, Your Parents Fucked You Up To?: Platonic Azula and Michael Afton! A portal appears in Azula’s cell, naturally she climbs through and finds pre-scooped Michael who’s living by himself. They end up rooming together and perhaps even healing together. Unfinished series of one shots on Ao3
The Time Lord of Hurricane: William Afton is a time lord that crashes into Hurricane and then the TARDIS he was using leaves without him. Same boat as Elizabeth and Asriel so basically concept
Well, that’d be all of them for now. Once again please send questions. If you want to roleplay with any of the characters from these fics I would be happy to do so!
Link to Ao3 works
15 notes
·
View notes
Note
so hey, question! i've been wanting to start learning how torrent(ing?) works so i can take screenshots and make gifs easier (i miss making precure gifs so bad), but i have genuinely no idea how any of that kinda stuff works. would you maybe have a guide or explanation thingy that i could check out? i think i maybe remember seeing you post one a while ago but i can not find it for the life of me. i'm planning on getting stuff from nyaa.si if that helps?
sorry if this is a weird question and dont feel obligated to answer if you don't wanna! <3
Hello @wazzuppy!
Here is my guide on piracy in general. It includes links on guides on how to torrent, VPNs to use, sites to use, etc, so I think you're set!
I will narrow things down and make it more specific for you though:
Here is the guide on torrenting (the act of torrenting itself is easy btw, literally all you have to do is click a button and it pretty much does the work itself lol. It's getting the right VPN, finding torrent sites, avoiding bad torrents [which won't be an problem on Nyaa or other legit sites] that's the issue)
For VPNs, if you plan on using a VPN exclusively for torrenting I recommend going with Mullvad. Mullvad is not going to let you stream from other countries on Netflix or whatever, and it's so strong that I can't even use Airdrop on my Mac when it's active. However, it's by far the most secure VPN for torrenting you can use. DO NOT use highly advertised VPNs like NordVPN; I used Nord and I got busted by my ISP multiple times even though I had it active. Stuff like NordVPN and SurfShark is fine for doing stuff like streaming Netflix, but for torrenting, you really need a VPN that's exclusively dedicated to protecting you from your ISP finding out what you're doing. Another VPN that is recommended is AirVPN, which still uses port-forwarding (I don't really know what that means but a lot of heavy-duty torrent users find it important).
For the torrent client itself, I recommend qBittorrent. It's an excellent torrent client, especially for beginners thanks to its user-friendly interface.
Also, just a note, Mullvad will be $5 a month (AirVPN has multiple price points depending on how long you want to sign up for) while everything else is free. But you definitely don't want to skimp on a VPN, trust me.
Let me know if you have any other questions! :)
167 notes
·
View notes
Text
Road to 3D- Sam Manson (Part 1):
Model sheet
Part 2: Character Modeling
Hi! On my recent posts of my 3d models I got many asking questions about how I made them. I'm currently working on a 3d Sam model from scratch and so I thought I can document my process here and add some thoughts through my process.
Before I can model anything in 3d I need a reference and a plan. For characters this means I need to create a model sheet, so here we are.
Some disclaimer first before I continue:
I'm just a self-taught hobby artist not a professional or proper art student. The infos I write here down are just the things I do and can be completly wrong or different in a professional setting.
This is not a tutorial or a step-by-step-guide for character design or how to make character sheets in general. Just additional things that I pay attention to when I make a model sheet for my 3d models.
As someone who just does 3d modeling in my freetime for 2 1/2 years I see myself still as a beginner. I'm still in a experimenting with different techniques and artstyle. This and the following posts describes just stuff I do for this model, it could be some other method next if I feel this didn't work out that well. Nothing is set in stone.
I do the 3d models just for myself for practice and for fun, you cannot download them anywhere. I just post screenshots and do sometime animations to archive my progress.
Under the cut are my thoughts of how I approach a model sheet for a 3d character:
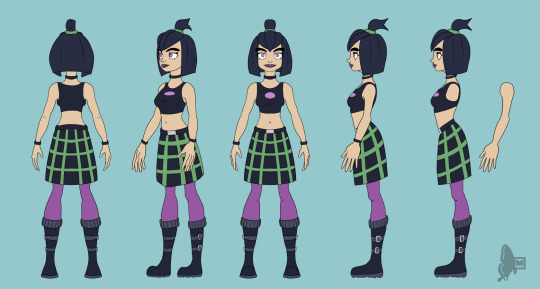
First things first I search for references and make some rough sketches to decide how I want the character to look like. I found this image of a character on pinterest ( anyone knows who the artist is? I cannot find the original source) and use this as a reference for my Sam model.
After the inital phase I first draw the front side of the character. For a 3d model I need a symmetrical neutral character in a T-pose, an A-pose or a standing pose in which the arms doesn't obscure the body. This makes it easier to model and rig them late on.
Speaking of obscuring the body it's also better to have a character without their clothes on and in multiple angles. It is easier to model the character's full body first and then model the clothes around it as an anchor point.
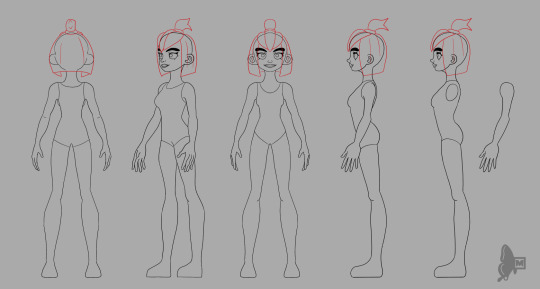
The most import angles for me are the front and side view. The other angles are more for the details to get the likeness right. I try to model the front view most accurately and the sideview is more for the proportions. I don't often see people only from the side view so whatever I draw from the side cannot 100% be accurately be modeled like that. I also made a different side view on the right with the arm seperated from the body, this makes it easier block in the form of the body and it's easier to model the arm and hand seperatly because hands are not only difficult to draw but also difficult to model.
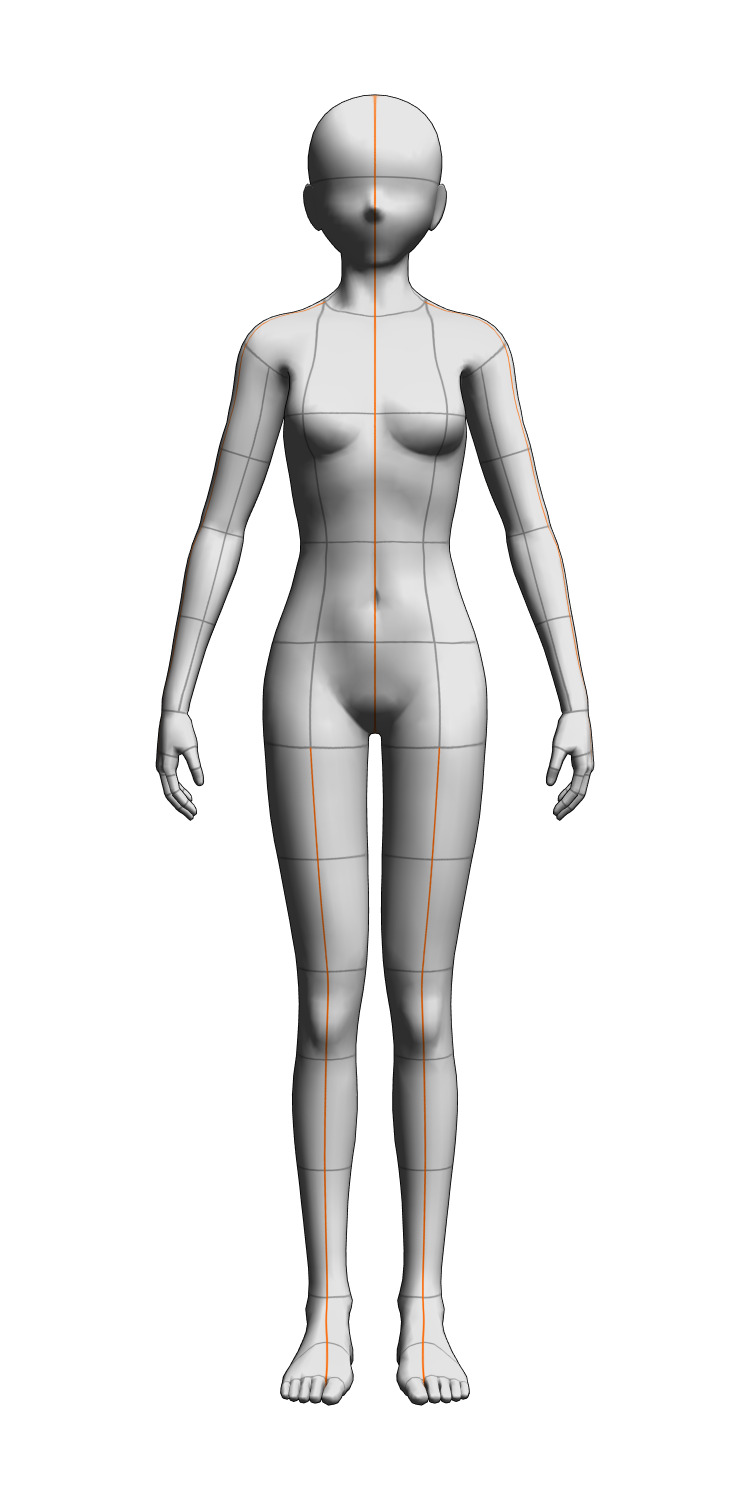
For the different angles I use a mannequin model in blender as a guide and reference. Clip studio paint (the painting program I use) has also 3d mannequins but I personally find them difficult to move around so I prefer to use blender for this.
When I'm finished with the model sheet I also make a quick turnaround animation to see if anything looks consistent enough.
Yeah that's it. Now onto the modelling process!
41 notes
·
View notes
Text


We need more The Beginner's Guide screenshots out here. This game has my favorite liminal spaces tbh
60 notes
·
View notes
Note
hiii ! all your tarot stuff seems cool and I was wondering if you have any tips for beginners? I have a deck and I don’t know where to start wth interpreting the cards and it’s a little overwhelming, so any tips? :)
here are some links and screenshots that have helped me xx (I’ve also gotten a similar ask to make a more in-depth guide that I’m working on so I’ll tag you in that x)
screenshots: (all from pintrest)


Links:
It’s important to just trust your gut and don’t worry if you don’t understand it at first, tarot reading is a journey and it’s different for everyone
#shifting blog#shifting community#reality shifting#shifting antis dni#shifting#shifting diary#shifting consciousness#shifting motivation#shifting stories#shifting script#shifter#shiftblr#quantum jumping#shifters#desired reality#shifting reality#tarot witch#tarot#tarot deck#tarot cards#tarotcommunity#tarot reading#tarotblr#divination#loa tumblr#loa#loassumption#loa blog#loablr#law of assumption
10 notes
·
View notes
Text
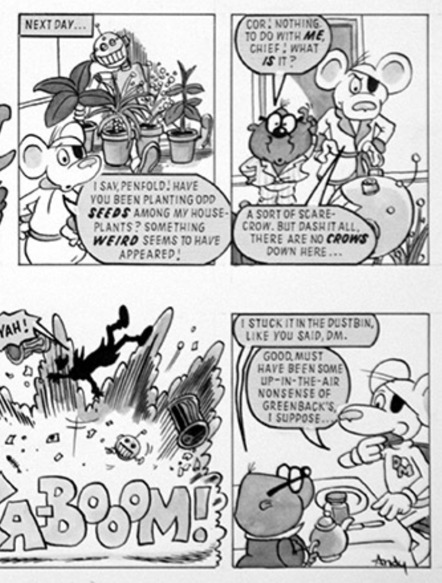
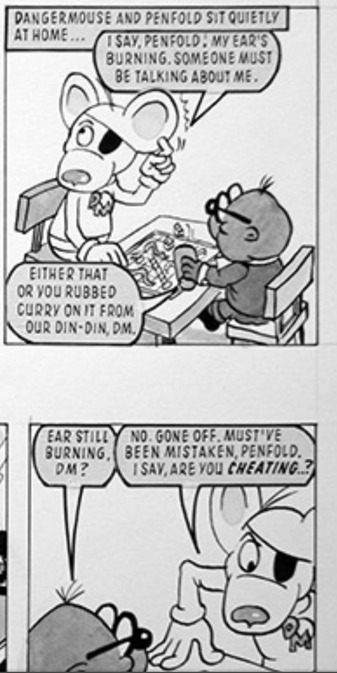
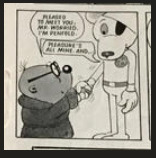
The Beginners Guide To Random Danger Mouse Content
DM things throughout the internet which are rather radical
•Some comics....
Danger Mouse (Ranson) at the Illustration Art Gallery (bookpalace.com) -LINK NO LONGER WORKS-
Unfortunately I didn't screenshot everything on there, but here's some of the panels.. (sorry for poor quality)


•Storyboarding for 2015 series, scroll through account to see..
oriolvidal - Storyboard Artist (vimeo.com)
•News article about DM..
How we made Danger Mouse – by David Jason and Brian Cosgrove | Children's TV | The Guardian
•This account has every DM comic strip known to mankind
WorldJumpingFangirl - Hobbyist, General Artist | DeviantArt
•'Melted' colourscript- probably more stuff on his account too, havent checked
Antonio Terlizzi - Danger Mouse: Melted ColourScript (artstation.com)
•Apparently Danger Mouse is briefly mentioned in this Pointless episode, dont know when (and i cant be bothered to look for it lol)
Pointless Celebrities S10E34 Kids' TV (youtube.com)
there was another episode containing Kevin where the pair talked about DM aswell, but the link i had to it says the videos been deleted aswell as its creator's account. perhaps lost media for now, unsure.
•BBC- I love 1981 documentary contains DM segment at 30:31
BBC - I Love 1981 (HQ) (youtube.com)
•DM's Secret Agents Secrets
(4) DM'S Secret Agent's Secrets - YouTube
•A horrific DM liveshow
Danger Mouse (youtube.com)
•A very talented pianist plays the DM theme tune on the piano at the end of the video
Derek Answers Your Questions and Plays Danger Mouse 🐁 (youtube.com)
•A man does some DM voices (which i found rather funny at the time)
Danger Mouse Voices (youtube.com)
•Idk man just watch it
(1992) Inspector Gadget and Danger Mouse on Nickelodeon with Commercials (youtube.com)
And thats all for now folks! Tell me if i missed any hidden gems!!
10 notes
·
View notes
Text
Chapter 2. High Society
A beginner’s guide to tumblr etiquette
— How the algorithm works —
Ok so maybe that’s a misnomer. Tumblr doesn’t actually have an algorithm, and so the way all things circulate is reblogs. If you see a post that you like give it a reblog so that more people will see it.
This doesn’t mean liking the post is useless! If you like the post the op gets a notification that somebody liked their post and that would understandably make them happy. Give the post a like! It’s like giving the op a pat and going ‘Nice post!’
If you see somebody post a poem or a fanfiction or a sketch or a drawing and you think it’s nice like and reblog it! Artists struggle to circulate on here and it’s SO helpful to creators of all types!
Don’t try and get famous, you won’t. If you’re not already a content creator on another site you won’t get far with trying for fame. If you post something it will either blow up or not, it’s up to the people.
Brands don’t make it far here and neither do celebrities so the odds are we’ll push them out if they get here.
— Discorse —
Maybe you don’t like something somebody posted, maybe it’s problematic, whatever the case you don’t interact. Don’t reblog it with your opinion or even comment on the post. Block the person that posted it and move on. If they said something truly problematic (Something illegal or against the guidelines) then report them and block them.
So now let’s say you have a pet peeve about a fandom and you want to post about it. In this case let’s use a ship you hate as an example. Don’t use the main tags of the ship use a discorse tag. (they exist you just need to look a bit more.) If you don’t use a discourse tag then expect to be blocked.
— Friends? —
You reblog a post with a funny comment and somebody adds to that. You lead into a back and forth of commenting and laughing, you fallow them back, they fallow you back. This is a mutual!
When you fallow somebody and they fallow you back their your mutual. Mutuals tend to exchange dms and reblog each other’s posts. Their a generally nice thing to have and it’s like having friends that actually texts you back- *begins crying*
— What else you can do with tags —
When you reblog something and you want to comment but don’t care if more people see the what you said then put it in the tags. When somebody reblogs the post your tags will not appear under their post.
If you see somebody posted tags you like you can screenshot the tags and reblog the post with the tags you screenshoted. This is called peer review.
— If you do this I’ll maul you. —
If you repost art credit the artist but generally don’t repost art. Reblog don’t repost. If I add a funny caption though… NO! Credit the artist even if it’s a meme!
— tw ₩h@t d03$ th@t $@¥?? —
If you for whatever reason need to use a trigger warning for a post don’t censor yourself when you tag it.
When you need to use a trigger warning you should tag it with the triggering topic without censoring. Example:
Correct: #tw Suicide
Incorrect: #tw $u!¢!d3
If when you tag a trigger warning censoring the tag will prevent the people who need the trigger warning from being protected.
If you’re posting something with flashing lights don’t tag it as “#Photosensitive, #Photosensitivity, #Epilepsy” these are where photosensitive people talk about their experiences. Tag it as “#tw flashing lights” or “#flashing lights”
— Sorry, I’m cringe! —
Don’t worry about seeming cringe when you post! Tumblr is the reason cringe culture is dead, post about your empty or hated fandom! Do whatever you want! These are free lands!
More advice here!
#twitter migrants#tumblr guide#twitter migration#twitter refugees#twitter exodus#twitter#reddit migration#reddit exodus#reddit#reddit refugee#reddit blackout#169#169 blackout#Chapter 2 High Society
114 notes
·
View notes