#take out dough 15 min before cooking to let it soften a bit
Explore tagged Tumblr posts
Text
@cokoweee
You are off the list 😌


I fear I hyped it up too much coz it’s literally just my old lady hobbies. I just stared at ur drawings for way too long and made ‘em needlepoint/ embroidery
THERES DETAILS AND SHADING I SWEAR!!!Tumblr just stole the quality>:( it looks cool in person you’ll just have to use your imagination
Yes I was gonna fill Cali in but I stabbed my finger threading the green and took it as a sign
Uh I forgot you’re some weird freaked up raccoon thing so I made your little sona guy normal raccoon colors. He has jorts because my little brother insisted that he couldn’t run around with a shirt and leave his balls hanging out. His words not mine 🫠
Sorry
Anyways if I had given this to you in person I would have also given you cookies from the bakery, but I can’t do that so the recipe is in the tags :)
(Look up how to make brown butter if you haven’t made it before)
Ok bye I’m sprinting away coz I’m mad embarrassed
🧍♀️🚙💨💨
#one cup butter#place it in a sauce pan and heat on medium till it gets all yummy smelling#it’ll turn brown too!#stir it constantly as it heats to ensure it won’t burn#LET IT COOL#once it’s cooled add 1 cup brown sugar and 2/3 cup white sugar#stir stir stir#once it’s combined add in 2 eggs and then 1 1/2 teaspoons vanilla#I usually measure with my heart tho#In a diff bowl add your 2 3/4 cups flour and 1 teaspoon cornstarch and 1 teaspoon baking powder#one teaspoon baking soda and 3/4 teaspoon salt#it’s better to sift this before you mix it all together but I only ever do that when I’m working at the bakery#just adding everything for the homies#gradually add the flour mixture to the butter and sugar mixture and mix until almost combined#add as many chocolate chips as you desire#cover that dough and let it sit in the fridge for at least 30 minutes but an hour or more is best#this allows the butter flavor to incorporate itself#trust when I say it makes a difference#heat oven to 350#take out dough 15 min before cooking to let it soften a bit#shape into cookie balls and bake for#10-12 minutes till golden brown#let ‘em sit on the pan for like 10ish minutes before you try to move them#sprinkle with sea salt for extra yum but this is optional#EAT LIKE TWELVE 👹#whine about a tummy ache and then lay in bed and contemplate why you ate so many#the end 🪱
55 notes
·
View notes
Text
Onion soup:
A firend of mine asked me for my Onion soup recipe. I was just gana send it to her plain simple and boring. But then I thought of a better way to waist my time that I should probably be spending doing work or researching for projects and thing. But I decided this was a lot more fun!
My idea was to be one of those annoying food blogs that tell their whole life story in an absolutely overly exaggerated fashion! One to make fun of blogs that do this, and tow because it's fun and why the hell not?!
So the idea for this started back when I was first starting out cooking and every single blog I found had a 1000 word essay about the origin of sed food. I found it extremely irritating because why do I did to know that this person's great uncle's best friends grandma's dog died in a fire in order to make this recipe?! So I would scroll down all the way to get to the actual recipe but the story just kept on going! Like about how her great great great grandfather's colleague from work had spills tea on his novel, a passion project that he had worked so hard for. I still had no idea how this was relevant at all to the spring rolls I was planning on making? And after an eternity of scrolling fingers tired and eyes full of tears I finally got to the recipe.
You'd think after all that back story and the amount I had learned about the person writing this like the fact that her great grandmother's favorite color was tangerine but specifically tangerine, and not orange because her childhood best friend had lent her a sweater that exact color and the next day she had never returned. That sweater has become a family heirloom that has been passed down ever since. Or the fact that she had avocado toast on Tuesday three years ago on may 18th at exactly 3:26 pm. Needless to say I knew a lot about this person and their family tree. It really helped me get the care and feeling I needed for my spring rolls. So that is why I'm going to be overly pretentious and do the same thing to you so have fun.
I was born at a very young age, in the evening on a hot August day. I don't remember much from this time in my life but my parents told me that I was miserable until I could do things for myself. After that I was a force to be reckoned with, nothing could stop me! There was one time when I was about 6 months old my parents had left me on the table thinking I couldn't get far, keeping an eye on me every once in a while but not paying much attention. The second I was put down I saw something gleaming in the corner of my eye, it was a delicious looking chocolate brownie. Nothing could stop me I was going to get that brownie no matter what! so I slowly started scooching my tiny baby body to the delicious looking dessert moving as fast as my little arms could take me. It had been 10 minutes of struggling from one end of the table to the other. I had finally made it! I was so close my hand was mere centimeters away from the prize. It was gonna be mine all mine! But then suddenly out of nowhere my dad's arms came and picked me up taking me away from my long awaited dessert. needless to say I was furious but I still never got that specific brownie (I've had other brownies don't get me wrong, it's just I never had that one. And at this point I don't think I'd want to since it's several years past it's expansion date).
That was my first experience with real food which might have been a core memory if I actually remembered it. Sadly this happened before i could remember it, but i'd like to think that it was the beginning of my love for food.
Over the years I started cooking it started off as learning how to make eggs and mac and cheese but then over the years I started to make more complex dishes, some worked and some didn't. Now I know that most people would rather be informed about the times that somebody failed rather than the time someone succeeded, they stand out more I guess and if you're actually sitting down to read this then I will reward you with some of my biggest cooking fails.
First off anything that involves baking, for instance there was one time I was going to bake a chocolate cake for a bake sale and well... so what happened was, I learned that I can't follow a recipe for the life of me! You may ask why I'm writing this recipe if I probably won't follow it anyway, but it's more a list of ingredients than a actual recipe. Anyway back to the story so my first mistake was I ended up putting in a tablespoon of salt instead of a teaspoon so normally this would be fine it would have just been a little bit salty, but problem was I had another mistake, I ended up putting in a tablespoon of mint extract instead of a teaspoon of vanilla extract as well, so the resulting cake was less cake tasting and more of the toothpaste variety. ( For some reason my brother loved it. He took about a handfuls. I would not recommend it with a glass of orange juice).
Another baking story, I was trying to make chicken pot pie, and filling itself is cooking. I can do that, throwing things in a pot, easy! It works! But do not, I repeat do not! leave me alone with a pie crust. my dad and I frantically tried to roll out said pie crust and not rip it, we were flailing around confused as to how dough worked. It took us about half an hour to roll out the pie crust so it would rip adds little as possible. After that day we came to a conclusion never to leave us with the job of baking ever again!
The next cooking fail I have is finally about the soup recipe. You see the first time I tried making onion soup it didn't go very well... Let me explain what happened. I was really in the mood for a nice warm onion soup and I figured you just throw some onions in a pot with some white wine and water and let it sit. Problem was we didn't have any wine, and I was too young to go to the grocery store to buy some, so instead I decided to use grape juice. Never but I mean never cook an absurd amount of grape juice, the heated aroma smelt excruciatingly unappetizing and I would not recommend it on anyone. So the resulting soup was watered down hot grape juice and stir-fried onions. needless to say it did not taste good and smelled even worse. I told myself that would be the last time I'd ever make onion soup! Years have past and and I was really in the mood for onion soup again even after that disaster, so I decided to try once again. this time with no grape juice! I looked through multiple recipes some had more ingredients than others and ended up combining a lot of them together to make my own onion soup recipe the one you see before you. And though I was scared that I'd mess it up I decided that I just really wanted some onion soup so I made it and it turned out delicious. Look at that a happy ending isn't that just great?!
I'd be surprised if you actually read through all of this if you did a good job,if you didn't then you're probably not going to read this sentence but I don't blame you it's all good who actually reads these backstories to recipes anyway?
Anyway I think I've mumbled on long enough here is the actual recipe for this soup:
5-6 onions
7-8 cups of chicken/ onion stock ( cold be parve from show mixes)
3 cloves of garlic (probably more)
1/4 cups of soy sauce
1/3 cups of white wine (optional)
4 tablespoons of oil (2-3 at the beginning and then 1-2 in middle of caramelization)
4 tablespoons of flower
1 teaspoon sugar (helps with caramelization)
Salt (to taste)
Pepper ( to taste but approx 1/8-1/4 of a teaspoon)
Instructions:
1) caramelize onions:
On medium heat Cook the onions, stirring often, until they have softened, about 15 to 20 minutes.
Increase the heat to medium high. Add the remaining tablespoon of oil (or butter depending on) and cook, stirring often, until the onions start to brown, about 15 more minutes.
Then sprinkle with sugar (to help with the caramelization) and 1 teaspoon of salt and continue to cook until the onions are well browned, about 10 to 15 more minutes.
Add garlic
2) Add Flour until mixed and quickly ( so it doesn't burn) add Add wine and soy sauce and once mixed well and incorporated
3)Add stock slowly, then add bay leaves and black pepper and salt (if needed, you can always add it later).
Bring to a summer and leve on low heat for 30 mins.
And now you officially scrolled too far, this is the point in a recipe blog where they add a bunch of links to all the recipes made by their friends families and anything else that comes to mind. Most people looking for the recipe would scroll all the way to the end trying to find it in this mess of words and unnecessary backstory told in an excruciatingly painful amount of detail. Then realize they've scrolled too far, sigh and start scrolling up again, this time a little slower.
It normally also has recommendations of foods that would go well with it, in the case of this onion soup I would recommend eating it with some garlic bread or grilled cheese sandwiches, basically all comfort foods that would spark Joy anytime you eat them.
If you're looking for aesthetic you can try making a bread bowl, cover it with cheese and broil it, which would have a whole other recipe linked in somewhere, with more details about how their great uncle's best firends associate made this same recipe for the pince of some country. But as I mentioned beforehand, I for one am not a baker and bread is most definitely a baking job. Not only is bread one of the more complex foods to bake, even if you put every ingredient precisely as the recipe mentions them, it still won't turn out right! Because ether the atmospheric pressure has changed very slightly, or the wind isn't blowing in the correct direction. Bread making is hard and I have a lot of respect for people who can do it correctly.
If you've read through all of this, damn that's dedication thank you and I applaud thee. I hope you enjoyed, and were amused.
#food#food blog#funny#onion soup#lol#exaggeration#please dont take me seriously#please dont come for me#stupid stuff#over the top#recipes#this is rediculous#im just procrastinating
29 notes
·
View notes
Photo
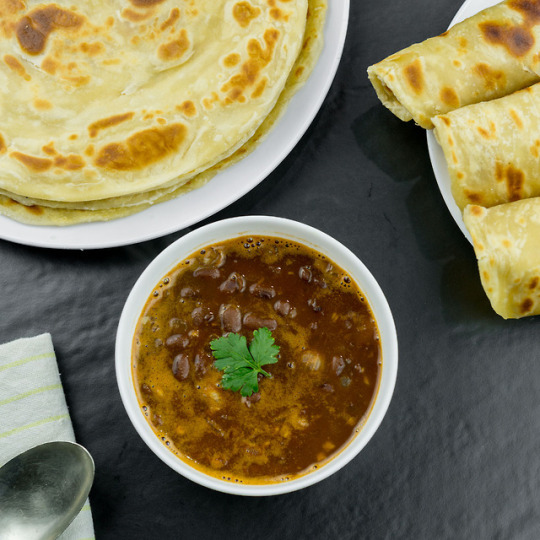

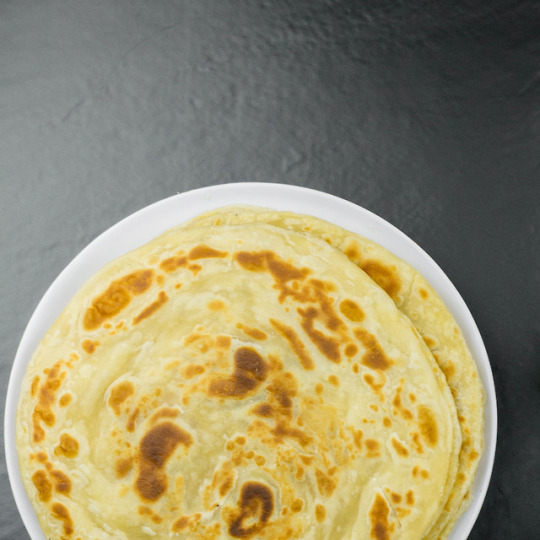
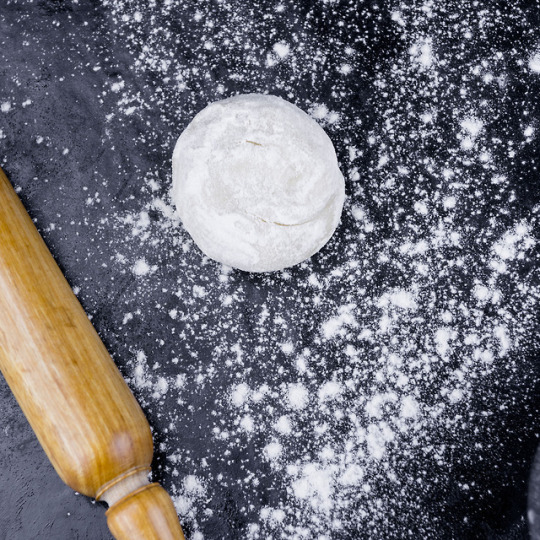
KENYAN FOOD: SOFT LAYERED CHAPATI
Chapati is one of those meals that grace almost every Kenyan ceremony. Over the years I have developed a recipe that produces soft and flavourful results.
Produces 8-12 chapatis in 1 - 2 hrs including the 15 minutes of prep 45mins of resting the dough and around 1/2 an hour of cooking.
Tools & Ingredients
Ingredients
For the dough
4 cups (560g) of All purpose / Chapati / Pastry Flour
1 teaspoon (6g) of fine salt
1/2 - 1 teaspoon (2g - 4g) of sugar (optional)
You can use more or less sugar if you like. There are times I like a bit of sugar and times I prefer none. Try both ways and see what you prefer.
1/4 cup (56g) of cooking oil/cooking fat -> Butter/margarine or ghee will produce very flavourful results
Cooking fat produces much better results - softer, flakier chapatis with more defined layers. The type of fat you use depends on your taste. I like ghee, I love the nutty and buttery flavour it gives the chapatis. You may also use butter. Leaf lard is a natural, mildly flavoured alternative to vegetable fat. I used vegetable oil to show that you can get stellar results even with cooking oil.
11/2 - 2 cups (360ml - 480ml) of hot water -> Straight off the boil
For making the layers + rolling the dough
Around 1/4 cup (56g) of cooking oil/cooking fat
Just like with the dough, cooking fat, lard, butter or margarine with produce more defined layers. But I have used vegetable oil to show how you can get the same results with just the oil and a bit of flour.
Around 1/2 cup (70g) of All purpose/Chapati/Pastry Flour
For cooking the chapati
Around 1/2 cup (112g) of cooking oil/cooking fat
Apart from the flavour, the type of cooking oil/fat does not matter. Do not use butter/margarine as they may burn and the moisture they contain may produce a tough result
Special Tools
Rolling Pin -> Preferable one without ball bearings
Tawa / griddle -> Any chapati pan you prefer
Procedure
Making the Dough
Put the dry ingredients (flour, salt and sugar, if using) in a mixing bowl. You can sift the flour first if you like but it is not mandatory.
Mix the dry ingredients until they are well mixed and combined.
Add the oil or cooking fat into the dry ingredients. Blend the fat or oil into the flour with a fork or pastry blender until the roughly mixed.
With your fingers tips, rub in the fat or oil into the flour until you end up with a mixture that looks like coarse crumbs.
Add the very hot water into the flour mixture a little bit at a time, the water should be straight of the boil. Every time you add the water, the flour that is in contact with the hot water will sort of clump together. Break and mix the clumps with a fork or wooden spoon. Working fast continue adding the water while mixing until you have added the whole11/2 cups of hot water. Ensure the water you add in is very hot, if it cools reheat it till it boils before mixing it in. Be very careful during this step, do not use your hands to mix the dough yet, a fork or wooden spoon(mwiko) will work well.
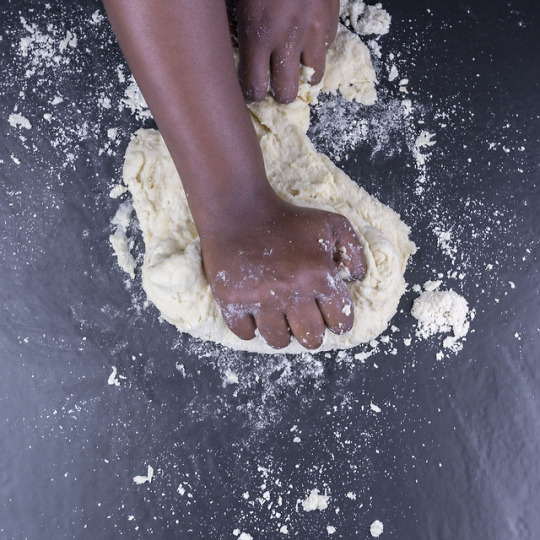
Once the whole 11/2 cups of hot water are added, work the dough with a wooden spoon (mwiko) to incorporate the flour into the dough until the dough is slightly cooler to the touch. Once slightly cooled, start kneading. The dough will at first seem dry and not as soft as expected but do not be tempted to add more water yet. Continue kneading until all the flour is incorporated. At this point, if the dough still seems dry and not pliable, you may add water a tablespoon at a time. Since the dough will soften when it rests, I find I rarely need more water and if I do a tablespoon or two is usually adequate. Ps: How firm or pliable you make the dough - depending on the amount of water you add, depends on your preference during handling. I like a somewhat firm but pliable dough. Firm enough so it does not stretch out of proportion when transferring the rolled out chapati to the pan and pliable enough so I do not use too much effort to roll it out. I find adding too much water makes a soft and pliable dough that is a nightmare to handle leading to excessive use of flour; over flouring will beat the purpose anyway.
Continue kneading the dough until you get a fairly smooth dough. With this hot water dough, there is no need to knead until your tired. Since our aim is not to develop a lot of gluten, just knead till you get a smooth dough. The hot water also denatures the proteins in the flour so you won't be able to develop much gluten either.
Cover the dough with cling film, a plastic bag or with the mixing bowl turned over the dough then let it rest for 30 minutes up to overnight. It is important to keep the dough covered and airtight so it does not dry out and develop a crust. You can also refrigerate the dough for 2-3 days, then let it come to room temp (around an hour) before the next step. After resting, the dough should be smooth, soft and pliable. Diving the dough
Divide the dough into 8-12 pieces. Roll the pieces of dough into smooth tight balls. I usually tuck the dough into itself making a sort of ball with a small seam on the side where you tucked in the dough. I then put the dough seam side down on a clean un-floured and un-oiled surface and roll it in a circular motion, gradually cupping it in my hand till it forms a smooth and tight dough ball. You can use whichever method you like. The rounder the balls the better the circles you will roll out later.
Let the dough balls rest covered for another 5-10 mins. I like using plastic wrap or a plastic bag here, just like before, this keeps the dough from drying out and developing a crust. Creating Layers
Once rested you can proceed the create the layers, starting with the dough ball you formed first. This can be done several ways but I am going to show you the way that works best for me developing nice thin distinct layers. Apply a little oil or fat on your work surface then roll out the dough balls as thin as you can. The shape does not matter much here just aim for an even thin layer being careful not to tear the fragile dough.
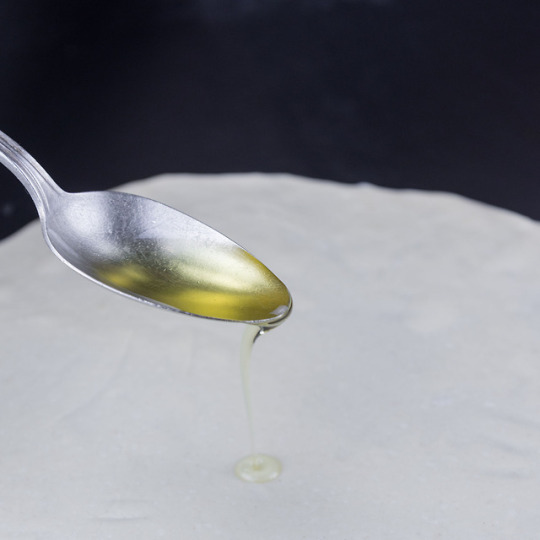
Apply a thin coat of fat or oil on the dough, around a tablespoon. The if you like or if you are using oil – I highly recommend this – sprinkle a little flour on the rolled out dough, this helps the layers stay separate.
Roll the dough into itself to create a sort of rope then start coiling the ‘rope’ into a disk. Do not coil it all the way just yet. Halfway, continue coiling the ‘rope’ on top of the already coiled disk. Tuck the end in the middle to give a clean finished look. The coil will end up looking like a double layered disk. With the tucked end down, flatten the disk slightly with your fingers then put aside. Do this with all the remaining dough balls then let them rest for 10-15 minutes, covered. Rolling The chapati
Flour your work surface and pat the top and bottom of the first dough you coiled in some flour then start rolling out your chapati. To create nice circles keep giving your dough quarter turns after a few rolls. Keep flipping the dough and lightly flouring your surface (where necessary) as you roll out the dough to ensure nothing sticks. The chapati should be around 20 centimetres (8 inches) wide and 1/2 a centimetre (1/5 of an inch) thick. You can make them thinner, thicker, wider or smaller depending on how you like them. You can either roll as you cook or roll them all out, then cook. Cooking the chapati
Place a tawa or griddle on medium-low heat and let it preheat. You will know it is hot enough when a drop of water sizzles and dances on the pan for a few seconds before evaporating. Place your chapati dough on the hot un-oiled tawa or griddle.
Let the chapati cook till the top looks opaque and should start puffing up and forming bubbles. When the bubbles are around the size of your thumbprint, flip the chapati, the cooked side should be cooked but not browned, this should take no more than a minute. If it has browned too much or takes longer than one minute, reduce or increase your heat respectively.
As the other side of the chapati is cooking apply a bit of oil around a teaspoon to the cooked side. Spread the oil or fat around the cooked side of the chapati not forgetting the sides then flip the chapati again for the oiled side to brown. You may use a spoon, butter knife, spatula, pastry brush or whichever tool you like to spread the oil or fat onto the chapati.
Check if the oiled side has browned to your liking, if not let it cook a little further. I like mine golden with deep brown spots. Once browned flip the chapati and repeat this process with the other side. Monitor the heat as you cook, if the chapati gets huge black spots, reduce the heat. If it takes a long time to brown increase your heat.
If you want soft chapati but are not so keen on crispiness, place the cooked chapati between a kitchen towel, stacking the cooked chapatis in the towel as you go along. They will stay warm till ready to serve. I however like the crispiness of the chapati so I place the chapatis on a cooling rack till ready to serve. I usually do not stack them up as this makes them steam: steam is the enemy of crispiness. If you like them to stay warm place them in a warm oven as you cook the rest.
Serve the chapatis with your favourite beef stew, soup, beans, lentils or simply serve with tea.
Notes
-Always use very hot water, straight off the boil to make your dough. The water denatures the proteins in the flour resulting in a very soft almost melt in your mouth chapati. The hot water dough is also very easy to work with, it does not spring back and can stretch pretty thin.
-Try not to use melted butter if you can help it. It may produce a tougher result.
-If the bubbles that form while cooking the chapati keep the chapati from staying in contact with the pan, gently press the chapati with a clean dish cloth or spatula to ensure even brownness and cooking.
-Do not use a lot of oil to brown the chapati, this makes the chapati too oily and not that great to eat.
-Limit condensation on your chapatis as much as possible. Place the cooked chapati in a dishcloth or cooling rack. Keeping them in a non-absorbent dish will make them soggy.
-Store the leftover chapatis in an airtight container, ziplock bag or wrap them in plastic wrap. They can stay on the counter for 2-3 days or be frozen for months.
-To warm leftover chapatis, place on a dry hot pan over medium heat then let it warm on both sides for around 10-15 seconds per side
8 notes
·
View notes
Text
Recipe Remix: Fathead Pizza
If you’re alive in the US of A, you’ve likely heard something or other about the “Keto Diet” in the last 6-12 months. I’ll save the bulk of the science, nutrition, and varying philosophies of eating Keto for another blog post, and keep this to a brief discussion of this easy, awesome recipe.
The Fathead Pizza is an internet phenomenon and well-known #lifehack to those who “eat Keto,” but I feel like everyone should know that you can make an entire personal pizza with only 6 carbs in it...regardless of what diet they follow. Especially when it only takes 25 minutes to make! Of course, I altered the original recipe a bit – and so can you! The recipe below is my modified version, and here is a link to the original recipe, should you be so inclined as to compare them.
Just to get it out of the way: Keto is short for Ketosis, which for the purposes of this post, is really just a re-vamped/re-branded Atkins diet or way to say “low carb.” Keto is like, extremely low carb. The (very) general idea is that your body burns carbs for energy before it burns fat. So, if you limit or reduce the amount of carbs, your metabolism switches to burning fat more quickly. That’s the basic concept.
I personally follow a low-carb diet that I wouldn’t go so far as to call Keto, and I do intermittent fasting along with “cheat days” and working out– my diet is sort of a hodge podge of different techniques that have worked for me. I regularly allow actual pizza on my cheat days, and I was raised on my Sicilian grandma’s homemade pizzas...so I really wasn’t in a hurry to try some weirdo, low-carb, diet pizza dough. Which is why I did not try this recipe for so long.
Well my friends, the regret is mine to bear. This was a very simple to make and filling recipe that was a savory, cheesy treat with zero guilt. However, as a Sicilian-American, I feel the need to caution that this DOES NOT TASTE OR FEEL LIKE REGULAR PIZZA. Don’t think of it as a pizza, think of it as a Fathead. It’s totally its own “thing.” If you go into this recipe expecting to come out with pizza dough that resembles bread, you will be sorely disappointed. But if you accept now that this is not pizza, it’s a delicious pizza substitute called a Fathead, you will be exponentially happier with the result. Have you ever had sauce and mozzarella on a base other than dough? Like putting it on Ritz crackers or matzo or toast? No, just me? Well, think of the Fathead dough as thin, soft, cheesy pita instead of regular dough.
OK, enough lead-up. Here is my recipe, tweaked from the original:
Ingredients:
1/2 Cup Shredded Mozzarella
1 Tablespoon Almond Flour
1 Teaspoon Cream Cheese (plain/regular or low-fat) *let it sit out to soften before use
1 Teaspoon Ricotta Cheese (not in original recipe, added by moi)
1 Whole Egg
Salt & Pepper to taste
Sauce + Any other ingredients you want for toppings! (I just used the standard parmesan & romano flavored marinara sauce I buy in the store from a jar for the sauce. If you want to be ambitious and make your own, it will dramatically increase the prep time. Use whatever sauce you normally use and whatever toppings you normally use.)
Materials:
Microwave-safe bowl
Metal fork (not plastic/disposable)
Baking pan/sheet (any flat, oven-safe tray or pan will work)
Parchment paper (NOT wax paper, PARCHMENT)
Instructions:
1. Preheat oven to 400 degrees
2. Get all your ingredients out on the counter and ready to go with your measuring spoons, cups, and materials.
3. Put the 1/2 Cup Mozzarella in a microwave-safe bowl, and heat it in 15-second increments until it is stir-able with the fork.
4. Add in the other two cheeses – cream cheese and ricotta – and stir well with the fork, combining them together. If the cream cheese was left out to soften, this should go pretty smoothly. If it gets hard to stir or the cheese starts to re-solidify, just place back in microwave for short, 5 second intervals until it can be stirred smoothly together. ONCE YOU ADD THE EGG & FLOUR, YOU CAN NO LONGER NUKE IT! This is why you have to get the cheese right before putting the egg in.
5. Once the three cheeses are melted and stirred together, and while the mixture is still a little warm and malleable, mix in the Egg and Almond Flour. Quickly stir together with the fork.
6. Add some salt, pepper, and any other seasonings you want in the dough without going overboard. (I threw in a little garlic powder.) Thoroughly stir and mix together.
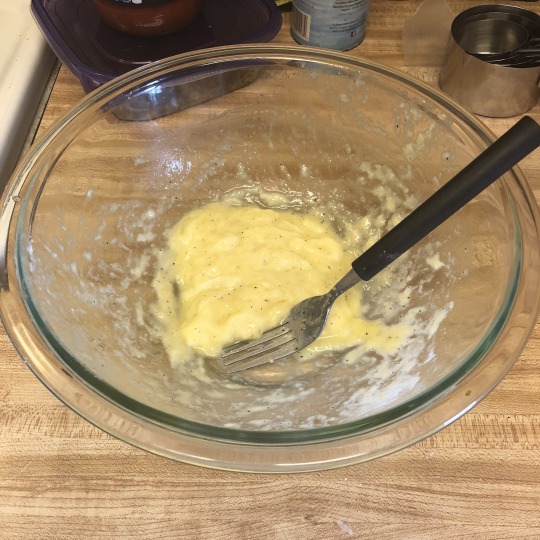
At this point, your dough should be a greasy/wet looking glob that looks like this:
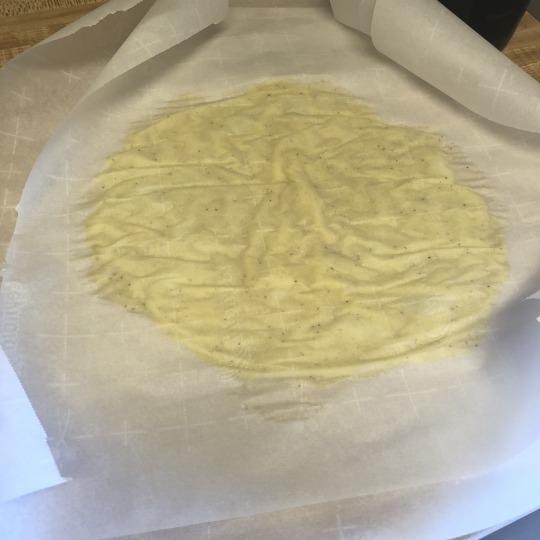
7. Now, dump that whole glob of cheese dough onto a sheet of parchment paper! Cover it with a second sheet on top, and just roll that sucker into a circle. (I do not own a rolling pin, I used a metal water bottle. You can use anything cylindrical and smooth - a plastic water bottle that has ridges will screw it up. Remember this dough is not really dough, it’s mostly cheese with a tiny bit of almond flour and some spices, so its going to move around very easily. I rolled it into a general shape that wasn’t a very good circle at first, but then just used my fingers on the edges to round and even it out.) Here is how this step looks:
8. Peel the top piece of parchment paper off and put the bottom one directly onto your baking pan/sheet. Put in the oven for 7-10 minutes. Keep an eye on it and don’t exceed 10 mins on the first heating. (There’s a second one in store!) It should still feel pretty soft, but be solid enough to put sauce and toppings onto. Like this:
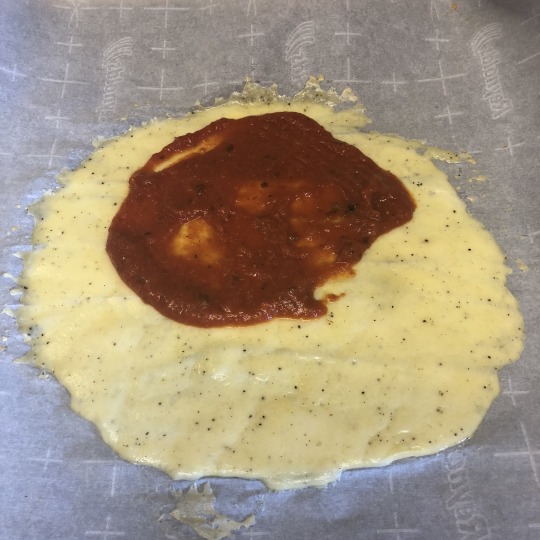
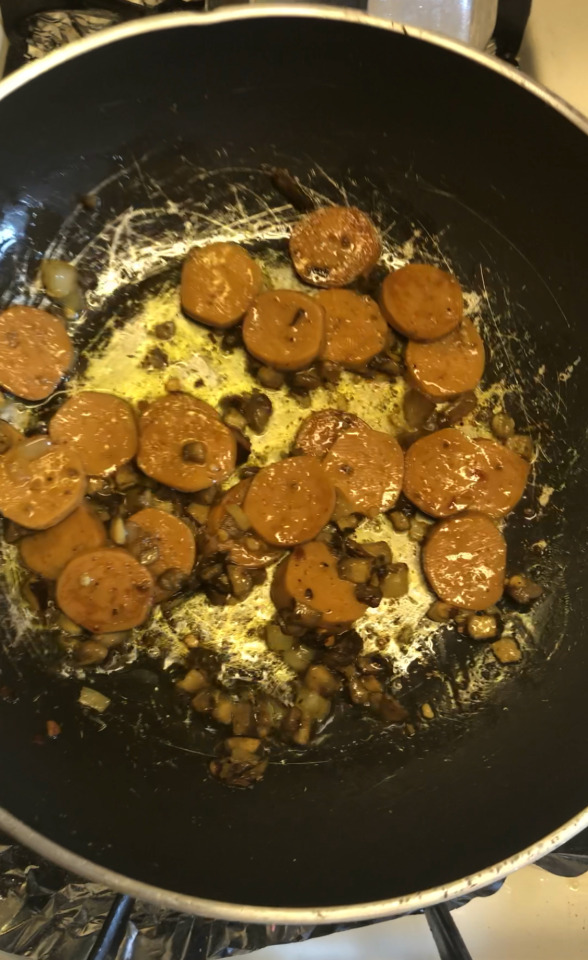
9. Put on your sauce, toppings, and extra shredded cheese. If you want to keep this at ~500 cal, don’t go too nuts with the cheese on top. Remember, the base is already made of cheese. But of course it IS supposed to resemble a PIZZA, so just use a reasonable amount on top. I like to put my toppings on the sauce first, then the extra cheese on top. I personally used sliced veggie-hotdogs as pepperoni substitute, along with sautéed mushrooms, onion, and garlic. I cooked them all in a pan on the stove while the base was doing its first round in the oven. See:
10. Put that mofo back in the oven for another 7-10 minutes, monitoring and taking out when it smells crispy and the edges of the “dough” are golden-brown. Add parmesan and seasonings to taste.
If you used PARCHMENT paper and not wax paper, it will be completely non-stick. You should be able to just slide the Fathead from the parchment paper onto a plate pretty easily using a spatula to assist. If you used wax paper even though I explicitly told you not to, you already know you F-ed up because your kitchen smells like burnt candles and is filled with smoke. (I’ve learned from experience.)
Finished Product:
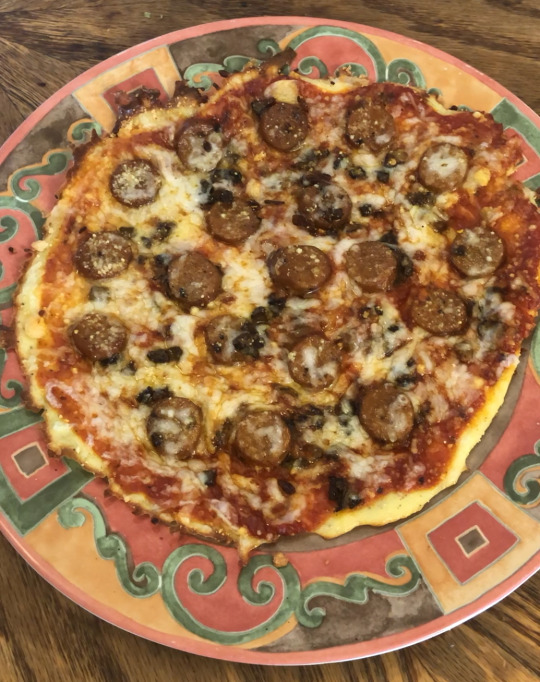
Enjoy this entire Fathead all to yourself! At just over 500 cals for the entire serving, you can GO FOR GOLD. For not being real pizza, this Fathead will satisfy any savory cravings. Plus, it takes much less time than actual dough!
Let me know if you try my spin on Fathead Pizza out and what you think of it! Full process with videos will be added to my YouTube channel shortly =)
And as always, remember these words of wisdom from Dennis Reynolds: “Don’t be a dumb, hungry bitch.”
1 note
·
View note
Link
Sausage Bread. Sausage bread is an American food made of sausage and other ingredients rolled or enclosed in dough and cooked in an oven. Sausage bread is typically made from pizza dough and includes Italian sausage, mozzarella cheese (or a similar substitute cheese). Butter, canned corn, dry yeast, egg, flour, green bell pepper, hot dogs, ketchup, mayonnaise, milk, mozzarella cheese, onion, salt, soseji bbang, sugar, water.

This recipe of sausage bread connects me to my childhood, I remember my mom use to make this for special holidays and There are any different variations of this sausage bread but this is my favorite. Refrigerated dough is the secret to whipping up this quick and easy bread recipe that's filled with hearty sausage and gooey cheese. Sausage bread is one of the more typical Chinese bakery bread, and they come in many different How to Shape Sausage Bread into Braid Form.
Hey everyone, it is Drew, welcome to our recipe page. Today, I will show you a way to prepare a special dish, sausage bread. It is one of my favorites food recipes. For mine, I'm gonna make it a bit tasty. This will be really delicious.
Sausage Bread is one of the most favored of current trending foods on earth. It is easy, it's fast, it tastes delicious. It is appreciated by millions every day. They are fine and they look wonderful. Sausage Bread is something which I've loved my entire life.
Sausage bread is an American food made of sausage and other ingredients rolled or enclosed in dough and cooked in an oven. Sausage bread is typically made from pizza dough and includes Italian sausage, mozzarella cheese (or a similar substitute cheese). Butter, canned corn, dry yeast, egg, flour, green bell pepper, hot dogs, ketchup, mayonnaise, milk, mozzarella cheese, onion, salt, soseji bbang, sugar, water.
To begin with this particular recipe, we must first prepare a few ingredients. You can cook sausage bread using 18 ingredients and 8 steps. Here is how you cook that.
The ingredients needed to make Sausage Bread:
{Make ready of Ingredients A.
{Get 175 gr of bread flour.
{Make ready 50 gr of all-purpose flour.
{Get 10 gr of milk powder.
{Make ready 5 gr of instant yeast.
{Prepare 55 gr of castor sugar.
{Get of Ingredients B.
{Prepare 30 ml of fresh milk.
{Take 100 ml of cold water (pour slowly, up to 100 ml).
{Get 1 of egg yolk.
{Get of Ingredients C.
{Make ready 5 gr of salt.
{Prepare 50 gr of softened butter.
{Prepare of Egg wash.
{Take 1 of egg yolk.
{Make ready 1 tbsp of fresh milk.
{Get of Toppings.
{Get of Sausage, yellow onion, spring onion, ketchup, mayonnaise, shredded cheddar cheese, sesame seeds etc.
Once your bread dough is finished proofing for the. Spring Onion Sausage Cheese Bread Loaf 青葱香肠起司面包, Sausage French Bread Pizza Recipe, Cheesy Sausage Bread. These sausage bread rolls put an elegant spin on my bread rolls recipe. They are light, soft, and The first time I came across sausage Bread rolls was at the Aiport on my last trip outside the United.
Instructions to make Sausage Bread:
Mix ingredients A in big bowl. Add ingredients B, egg yolk, milk and slowly pour the cold water. You can use less than 100 ml cold water depending on the flour that you use. Using stand mixer, hook attachment, knead the dough until it doesn’t stick to the side of the bowl..
Add butter and salt and keep kneading until the dough becomes more elastic and won’t stick to your hand. The dough is still a bit sticky, because of high hydration. After first proofing, the dough will become more elastic. Let it proofs until double the size, about 1 hour..
After 1 hour proofing time. Looks shiny and smoother.
Divide into 10 portions, about 50 grams. Let it rest for 15 mins before shaping.
Shape each portion into a long shape. You can see how to shape in this video: https://youtu.be/S1iZzH-an3Q. Let it rise for another one hour until double in size.
Meanwhile prepare the filling and egg wash. Cut the spring onion, onion. Shred the cheese. This time I used dried parsley..
Put one sausage in each bun. Towards the end of the 2nd proofing, spread the egg wash evenly and add other filling/toppings: spring onion, yellow onions, ketchup, mayonnaise, chilli sauce, cheese etc.
Preheat the oven to 180 degree celcius and bake for 20 mins. Let them cool in cool rack.
We ate this for lunch two days in a row! It starts with frozen bread dough and is filled with breakfast sausage, cheese, and jalapenos. Sausage Bread: This recipe shows how to make Sausage Bread - a unique bread with sauteed hot Italian sausage that makes a great meal or snack for just about any occasion. Sausage Bread was always something brought out for special occasions on my father's (very Italian) side of the family. While the recipe floats around throughout the year with my East Coast family, we.
So that's going to wrap this up with this special food sausage bread recipe. Thank you very much for your time. I'm sure you will make this at home. There is gonna be more interesting food at home recipes coming up. Don't forget to bookmark this page in your browser, and share it to your loved ones, friends and colleague. Thank you for reading. Go on get cooking!
0 notes
Text
I mostly bake, but I've got some tips.
You can always add, you can't take away. Example being, if you oversalt a dish, it's gross. But undersalted? Just add salt. Boom. Yummy. Goes for most ingredients, but usually spices.
Learn differences between things that sound the same at first. For example, bread flour vs all purpose flour, or instant yeast vs active yeast. They're different! Read ingredients and think about them. Don't just see the word "flour" and ignore the rest of the words around it.
An important one is butter. Good ol' butter. It's in so many things. We couldn't live without butter. But some recipes call for butter, softened butter, or melted butter. It's important to know the difference! If it just asks for butter, then you should add it straight from the fridge. Softened? Let it sit at room temperature until you can squeeze it gently and it squishes. Melted? Put it in a microwave safe container, put it in for 15 seconds, check it, then 10 seconds each time after until it's melted. Melted butter and softened butter are very different in how they combine with other ingredients. It won't ruin most recipes if you use melted instead of softened, but if you want best results, trust the recipe.
If you're baking a cake and the surface ends up with fissure-like cracks, that means the oven was too hot. Bake for longer at a lower temperature to avoid cake cracks. (35 min @ 350F -> 45 min @ 325F)
Get out ALL your ingredients before you start. If you're lacking something, you'll know before you start and won't end up at the end of the recipe without the finals whatsit ingredient that you need. Or you might not have enough of the thing. It's good to do inventory before starting.
Read. The. Recipe. I can't tell you how many times I've seen people mess up a recipe because they didn't read the whole recipe before beginning. It's important to know what you're going to do! And you can do stuff ahead of time! Cooking fried chicken? Make the batter ahead of time. Need to let the dough for your bread rise? Prep the next steps while it rises. Clean up the kitchen a bit. Take a break and drink some water. Come back confident in your next step.
Clean as you go. Please. Especially if it's something that'll be harder to clean after it gets crusty and hard and gross. Please. At least rinse it. I beg you. It makes the cleaning you have to do at the end 80x easier.
Large grain salt is best for seasoning meats, small grain for other uses (especially baking!)
My friend asked how I learned to cook and the answer is I didn't. I know like 5 things about cooking and they are:
Always use more garlic than the recipe calls for
"Ehhh fuck it close enough" is a great measurement tool
Find like 5 recipes that you like, adjust them how you like them, make them until you hate them
Clean as you go
If a recipe is from a mommy blog, you will need more spices
If anyone wants to add, please do
135K notes
·
View notes
Text
quicker cinnamon buns
adapted from cook’s country (paywall)
yield: 8 buns
INGREDIENTS
filling
3/4 c packed (149g) light brown sugar
1/4 c (50g) granulated sugar
1 T ground cinnamon
1/8 t salt
2 T unsalted butter, melted
1 t vanilla extract
dough
1 1/4 c whole milk at room temp
4 t instant or rapid rise yeast
2 T granulated white sugar
2 3/4 c (400 g) all purpose flour (i like king arthur for its high protein content)
2 1/2 t baking powder
3/4 t table salt
6 T unsalted butter, melted
glaze
3 oz (85 g) cream cheese, softened at room temp
2 T melted unsalted butter
2 T whoel milk
1/2 t vanilla extract
1/8 t salt
1 c (113 g) confectioner’s sugar, sifted
INSTRUCTIONS
measure out 1 1/4 c of whole milk in a two cup measuring cup glass and 85 g cream cheese on a small plate or bowl and set aside to come to room temperature
in a one cup glass measuring cup melt 10 T unsalted (don’t use salted!) butter
NOTE: the filling, dough, and glaze all require melted butter so it’s easier to prepare in bulk in advance. stir before each use and re warm as needed to redistribute the milk solids. i find it easier to melt on the stove top but this is just preference. you can use a microwave at a lower power, or microwave it on high in like 15 second bursts to avoid the butter “popping”
clean and sanitize your countertop or an appropriate immovable surface, like a heavy cutting board. you will be kneading later on!
in medium bowl combine the following until resembles wet sand and set aside. this will be your filling
3/4 c packed (149 g - try to use weights for this recipe over volume. it will save you measuring cup dishes and is more exact)
1/4 c (50 g) white granulated sugar
1 T ground cinnamon (u can eyeball and adjust to your cinnamon preferences)
1/8 t (a pinch) of table salt
2 T unsalted butter from the measuring cup at the beginning
1 t vanilla extract
grab a 9 in round cake pan or springform pan (preferably dark to allow for better bun caramelization but no big if using a lighter colored pan) and measure out parchment paper to line the pan, then grease the paper with a solid stick of butter, then put it back in the pan
in small bowl combine 1 t white granulated sugar + 4 t instant or rapid rise yeast
NOTE this is a little less than two packets if you’re using packets. each packet is the equivalent of about 2 1/4 t of yeast so measure it out using measuring spoon
in large bowl, measure out and combine:
2 3/4 c (400 g) all purpose flour
2 1/2 t baking powder
3/4 t table salt
6 t granulated white sugar
in microwaveable vessel like glass measuring cup or bowl, microwave 1/4 c whole milk from the room temp milk set aside in step one until warm (110 F if you wanna get exact. if you don’t, if you dip your finger in it it should be as hot as your finger can take it for like a second) on high, about 15-20 seconds for a standard microwave
when milk is warm, stir in yeast and sugar combo. let sit until bubbly, about 5 mins
in a separate bowl stir together the following wet ingredients
2 T of melted unsalted butter from glass measuring cup in step two
yeast mixture when bubbly
remaining 1 cup of room temperature whole milk
combine the wet ingredients with the dry ingredients using silicone spatula or your hand until sticky dough forms and no dry bits remain
NOTE: you’ll want to do this in a separate bowl. if you dump them all in separately you run the risk of hard lumps from the flour absorbing the butter first
allow the dough to sit for about 10 mins to autolyse. it will make your life a little bit easier when kneading
use some extra all purpose flour to flour the countertop well then dump out the bowl on the counter and knead until smooth ball forms. use as much flour as you need without going over board so if it sticks to the counter as you knead then use a bit more flour. the dough will probably get really stuck up in your fingers. don’t worry this is fine
when possible, clean out the large bowl. you will be using it to make the glaze
roll dough into 12 by 9 in rectangle (optional--roll it out on a silicone baking mat to help make rolling easier) with the long side facing you so it’s landscape oriented
NOTE: don’t be afraid to use a bit of flour here underneath the dough and on top to make rolling out easier. you will be rolling this dough sheet up as well so good idea to re flour your surface a bit so it doesn’t stick as much
NOTE: when i did this, my dough was pretty thick at 9 in. if you’re fine with that go ahead but if you want a bit more of a swirl go ahead to 10 in even if you want
using 2 T of the melted unsalted butter, brush your dough all over, leaving 1/2 in border on far edge so that it can seal properly
sprinkle dough w wet sand cinnamon filling you mixed earlier, then use hand or spatula to press filling into dough
if your dough is sticking, use a bench scraper or spatula to loosen the dough from the counter. you will be rolling in the next step
roll dough away from you into tight log and pinch the seam to seal
roll the log until the seam side is down on the counter and cut into 8 equal pieces
if the buns kinda deformed while you cut them just gently reform them back into circular shapes as you place them in the pan
place one bun in the center of your greased and parchmented pan and the others surrounding it with the seams facing the centered bun queen
brush the tops of the buns with 2 T of unsalted melted butter
cover them loosely with a lid, plastic wrap, or a kitchen towel to keep drafts away and place in a warm area of your kitchen (i like to run my dryer empty for 10 mins or so and then put them in the warm empty dryer since my house runs cold! you can also put them on top of the fridge, covered)
let rise for 30 mins. meanwhile, pre heat the oven according to the following notes accounting for pan color. if making cream cheese glaze don’t sit down just yet....
if using dark pan adjust your oven rack to the middle and preheat your oven to 350F
if using light pan adjust your oven rack to the lowest position and preheat to 375F
meanwhile, whisk together the following to make the glaze
sifted 1 c (113 g) confectioner’s sugar
suggestion: this will mean more dishes but if you’re measuring by weight measure out the confectioner’s sugar first in a separate bowl then sift it into your large glaze bowl
the softened cream cheese you set out in step one
2 T unsalted melted butter
2 T whole milk
1/2 t vanilla extract
1/8 (a pinch) t of table salt
at the end of the rising period bake the buns until the edges are well browned
if using a dark pan bake for 23-25 mins
i took mine out precisely at 23 mins. they were great but i would have preferred for them to be in there a bit longer. my mom said the same thing so start checking at 23 mins to make sure nothing is burned and just let em go until you like the brown-osity of the buns
if using a lighter colored pan bake for 29-32 mins
using a butter or paring knife, loosen buns from the sides of the pan and let cool for 5 mins. if you’re using a springform just unhinge the wall
they’ll still be hot after 5 mins but invert a large plate or cutting board over the cake pan, then use potholders to flip the plate and the pan upside down to remove buns from the pan. remove pan and parchment
use another plate on top of the buns and flip the plate bun sandwich so the buns are finally upright and out of their pan. set aside and glaze when cool.
NOTE: if your glaze has solidified at this point it should re liquify when slathered on hot buns. if you want to be safe pop it in the microwave for 15 secs at a time and stir between nuking
#baked goods#buns#light brown sugar#sugar#cinnamon#unsalted butter#vanilla extract#whole milk#instant yeast#ap flour#baking powder#cream cheese#powdered sugar#cook's country#dessert#cinnamon buns
0 notes
Text
Goodbye Veganuary, Hello Prague
Veganuary came and went and I can’t say I mourned its passing. And for those trying to make Febru-dairy a Thing, leave it out and stop crying over spilt milk.
For someone who auto-smells barbecue whenever a cow walks past and has to start the day with two eggs, I do actually love eating plant-based dishes provided they taste delicious. And since watching Game Changers on Netflix, Adam and I have been trying to eat less meat and dairy during the week so we can improve our fitness. I’m not so fussed about the phallus-lengthening properties of celeriac, but each to their own. If you are bewildered by this reference, just watch the programme.
But I must admit, a surfeit of vegetables and a scarcity of sunlight in January did make me think alot about my trip to Prague last summer, with its abundance of sunshine and array of macho meat dishes. I went with my daughter Lara and best friend Sue, bucking the trend of the wave of stag weekends that spill over into the city when Amsterdam fills up. That said, we saw but a handful of stag-celebrants on segways sporting a mix of bravado and embarrassment, and that was about it.
First thing to say about this extraordinarily pretty city - and this may be a nod to its Men Behaving Badly heritage - is that it ain’t PC. A Picture-Post ‘buxom wench’, embonpoint spilling out of her dirndl top, cheers to you from a poster with two flagons in each fist as you walk through the arrivals lounge; two hours later and the first bar we went into was adorned with discarded bras, mounted on the wall in a possible imagined tribute to Carry on Camping.

More agreeably, the next thing to note is that everything in Prague comes ‘with a twist’. You may be happily surprised by the tourist-to-cocktail-bar ratio in the city. You will be even more happily surprised by the quality of cocktails on offer, just don’t expect business as usual. My Negroni came with a ‘twist’ of passion fruit at Bon Vivants, a cosy little bar with an attentive waiter who made you realise where Borat got the inspiration for his accent; the Winter is Coming cocktail in the legendary Hemingway Bar came in a flagon straight off the Games of Thrones ‘set’.

Perhaps the biggest twist of all is that Prague boasts a vineyard in the middle of the city. St Wenceslas Vineyard (Svatováclavská vinice) sits at the foot of Prague Castle, with its restaurant perched on a hillside at a slightly challenging gradient, a vine arboretum sheltering us from the scorching early September sun.

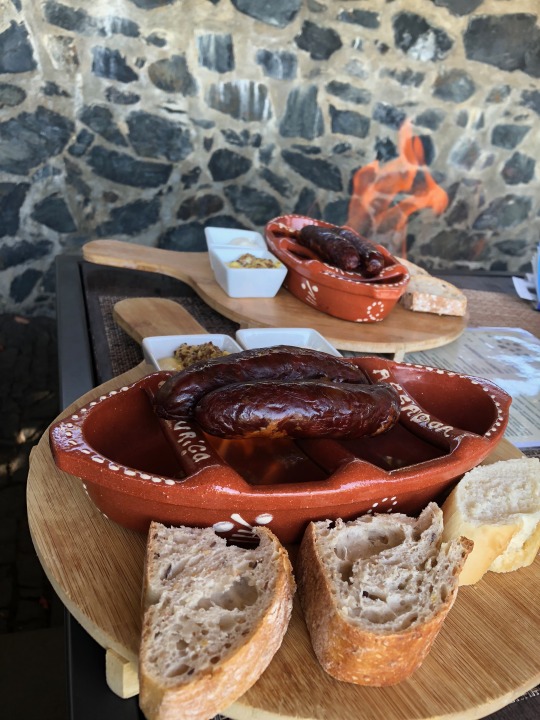
Wines - delicious. Service - offhand verging on the affronted. But as Flambeed Chorizo was featured on the menu, we took the dodgy service in our stride. Properly torched and served with french fries (of course) it was a meaty treat, and went well with the Estate’s highly alcoholic white varietal.
Lara had managed to seek out some intriguing things for us to do and places for us to eat. Pork Knee featured on the menu at Mlejnice, a classy little bistro on the verge of town - succulent as only a fall-of-the-bone, slow cooked cut can be. And if you craved something sweet, a tiny courtyard tucked off the main tourist trail to St Vitus’ Cathedral offered herbal teas and a toothsome slab of carrot cake, meltingly moist and jam-packed with nuts, raisins and spices in a ‘don’t even mention a light sponge’ kind of a way.
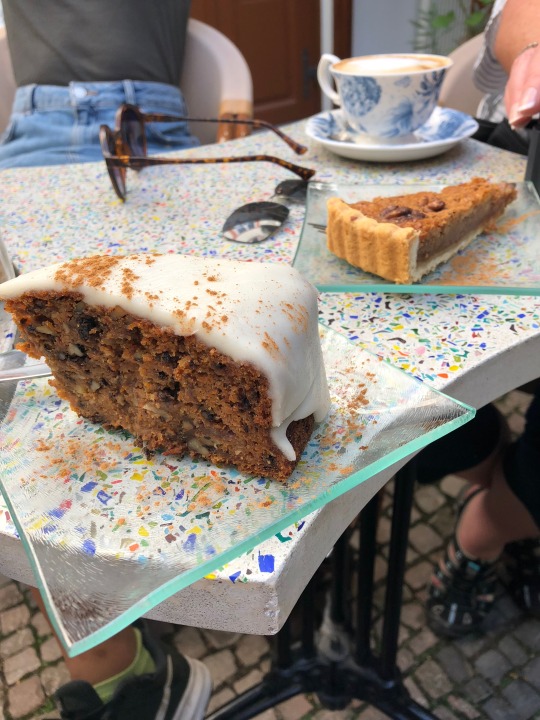
Did I say that the biggest twist of the trip was the St Wenceslas Vineyard? Well, I lied. Lara’s top find was, wait for it…. the Beer Spa. Literally a day spa where you sit in a barrel of beer while swigging pilsner straight from the tap, to the strains of a Czech cover of “Better Love Next Time Baby.” Take a look at their website and you are whip-lashed back into a 1970’s soft porn flick, the men all droopy moustaches and bright grins, the women looking like they are having the most fun you can have in a bath of Budvar while waiting for the ‘plumber’.

Here’s how it works: you book a room for two, three or four for an hour. You sit, alone or in pairs, in a barrel filled with warm beer and beer minerals. Two beer taps are only an arm’s reach away, together with two chilled pint glasses. And there you sit for 30 minutes, drinking and giggling. When the timer goes off (classy touch), you disembark, wrap yourself in a towel and recline on a bed of straw for another 30 mins (you’re barking with laughter by now), before dressing and departing. You’ve no reason to feel shamefaced, but somehow you do, and your punishment is that Dr Hook earworm for the rest of the evening. But the beer was damn good and our mood was upbeat.
We stepped out into an early evening bathed in sunlight and, with skin pleasantly smoothed by all those minerals, we headed for a kerb-side Italian restaurant in one of the achingly lovely cobble-stoned squares that make up the Old Town. This Italian trattoria specialised in gluten-free everything, and their bread basket could almost persuade me to leave gluten alone for the rest of my days. Or at least until I next walk past the sourdough counter at Ole and Steen.
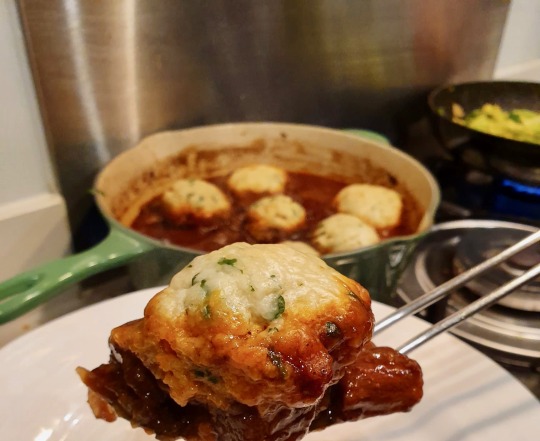
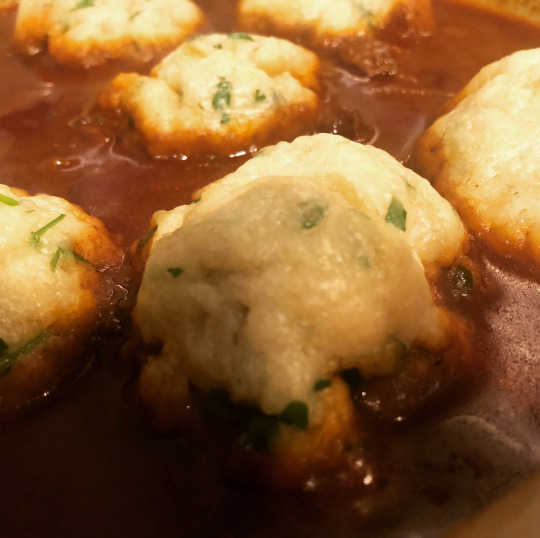
If meat and cocktails with a cakey pudding (or puddingly cake) are your thing, then try out my alternative Sex-in-the-city menu. An otherwise Hungarian Beef Gulyas with a now-legendary Prague twist: parsley dumplings and a helping of flavour-bomb smoked paprika ; mop up the juices with a spicy if gluten-full Turmeric and Shallot Soda Bread. Then let that all settle before you cut yourself a slice of a homage to the carrot cake - this time with Butternut Squash and Ginger.
And flame yourself a chorizo while you’re at it.
Beef Gulyas and Dumplings

This is the perfect Saturday night, curl-up- in-front-of-a-good-movie dinner. It cooks in a couple of hours, tastes even better the next day and freezes superbly. Serves 4-6
Ingredients
1 kilo stewing beef, cubed
2 tbsp. Plain flour
2 tbsp. Olive oil
2 tbsp. butter
2 red onions, sliced
2 garlic cloves, chopped finely
1 tbsp. Sweet paprika dn 1 tbsp. Smoked paprika
Handful of fresh lemon thyme leaves, stripped from their stalks
2 tbsp. Tomato paste
½ litre red wine or beer
½ litre beef stock
1 tsp caraway seeds
Kosher salt and freshly ground black pepper.
For the dumplings:
15g plain flour
1 tsp. Baking powder
30g salted butter
75 ml milk
Generous handful of flat-leafed parsley, roughly chopped
Kosher salt and freshly ground black pepper.
How to make:
Toss the beef cubes in a bowl with the flour and season generously.
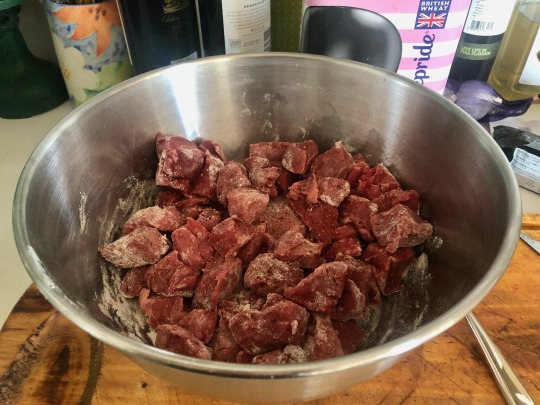
Heat the butter and oil in a large casserole, and when hot, shake the flour off the beef and add the cubes in small batches to the pot, turning them and letting them brown before removing transferring the meat to another bowl before adding the next batch.
When all the meat is browned. Add the onion and garlic to the casserole dish and saute for about 5 minutes, until softened and starting to brown. Add both paprikas, caraway seeds and lemon thyme, then stir before returning the beef to the pan and giving another stir.
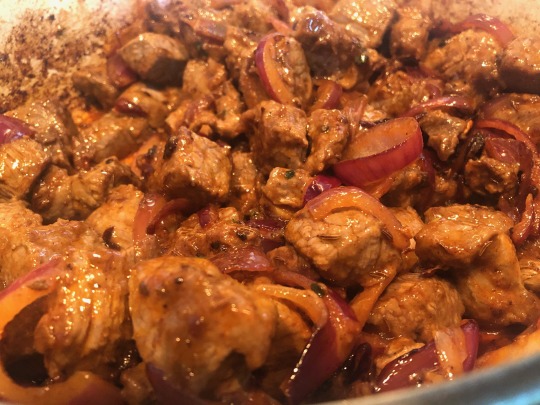
Add the wine or beer, the stock and the tomato paste, bring to the boil then reduce the heat to low. Season again then cover and simmer for 11/2 - 2 hours, or until the beef is tender. At this stage you can cool and leave the gulyas overnight, allowing the flavours to steep, or press on with the dumplings.
If you are going to eat this as soon as it is cooked, then start making the dumplings 10 or 15 minutes before the end of your cooking time.
Sift the flour and salt into a bowl and make a well in the centre. Melt the butter in a pan over a low heat, then add it into the well of flour, along with the milk and the chopped parsley. Stir everything together until a dough forms, then divide the dough into 7 or 8 portions and roll each portion into a ball.
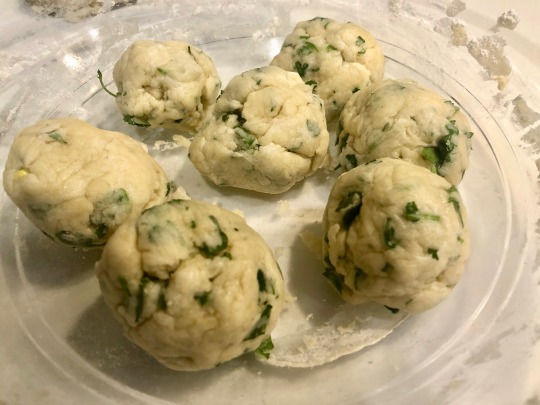
Remove the lid from the gulyas, pop the dumplings on top of the beef in a single layer, then cover and simmer for 15 minutes, until the dumplings are cooked through - wobbly yet firm.
Serve with some buttered, braised savoy cabbage and mop up the juices with a slab of Turmeric and shallot Soda Bread (see below)
Turmeric and Shallot Soda Bread
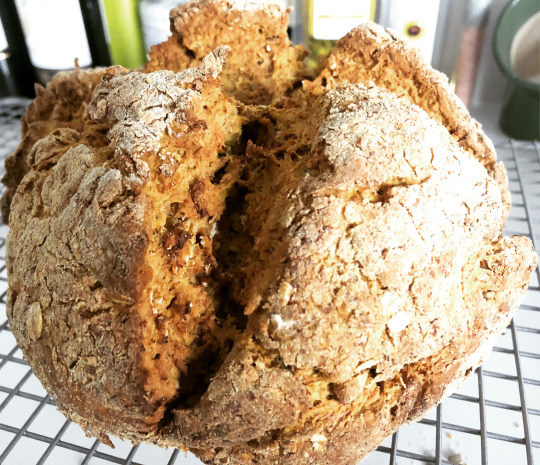
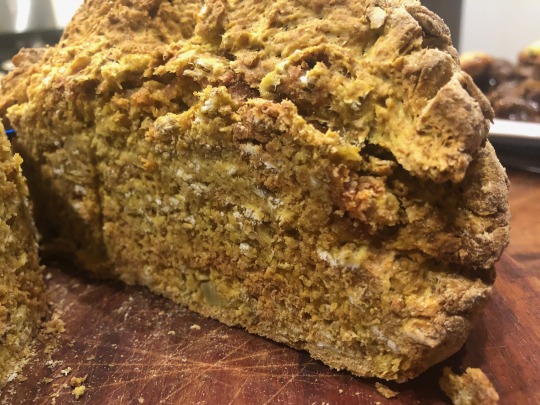
This loaf, based on a recipe by Sarah Cook, looks like a large yellow rock and tastes of crackling fires (almost like the one burning in our Beer Spa cabin). It has a fair bit of turmeric and that’s a good thing. Serves 6-8.
Ingredients:
225g plain flour
225g wholemeal flour
2 tsp. Coriander seeds
2 tsp. Ground turmeric
1 tsp. Bicarbonate of soda
1 tsp kosher salt
25g butter, diced and chilled
75g Jumbo oats
2 shallots, peeled and finely chopped
375ml kefir or buttermilk
How to Make:
Heat the oven to 200C fan or 180C/ Gas 6.
Toast the coriander seeds in a small pan for a couple of minutes until they start to smell aromatic, then crush in a pestle and mortar. Leave to one side.
Mix together all the dry ingredients except the jumbo oats, then rub in the butter until you have a crumbly texture. Add the oats, chopped shallots and coriander seeds.
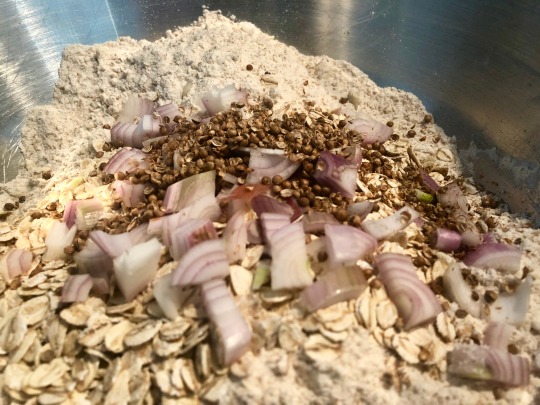
Pour over the kefir or buttermilk, then cut into the dry mixture with a metal spoon until just mixed, then get your hands in and knead gently until you have a relatively smooth dough (it will be a bit gnarly, but that’s the nature of soda bread).
Form into a ball and pop onto a baking sheet. Cut a wide cross quite deep into the loaf - almost all the way down. This will allow the loaf to fan out into the classic sourdough shape as it cooks.
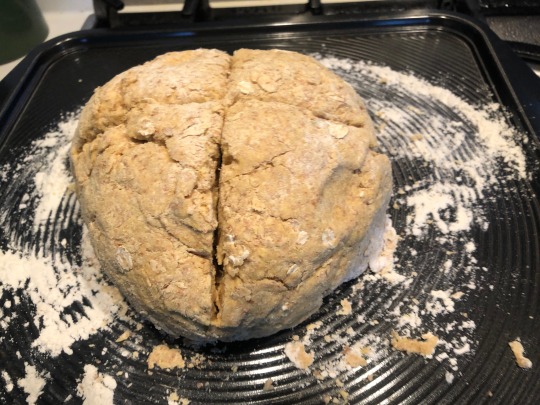
Pop into the oven and cook for 30-35 minutes, or until the base of the load sounds hollow when tapped. Cool and serve with your Gulyas and lashings of butter.
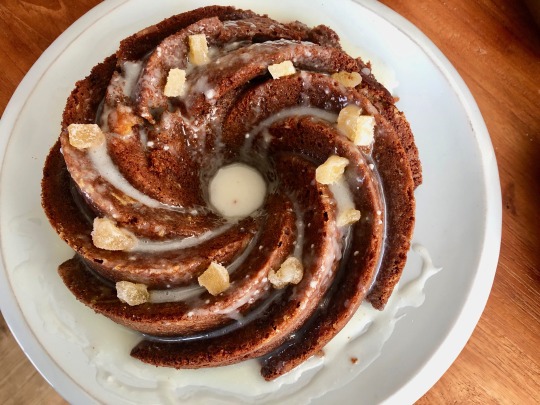
Butternut Squash and Ginger Bundt Cake
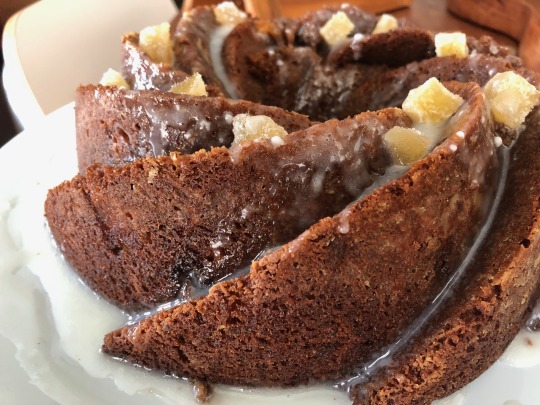
I slavishly subscribe to all known foodie magazines and am forever ripping pages of inspiration out of them. This recipe is based on one from Waitrose Magazine. I tried it out once and couldn’t believe the texture and depth of flavour. It’s now a household regular and to my mind, much more moreish than it’s carrot cousin. 8-10 slices.
Ingredients
200g unsalted butter, softened to room temperature
225g plain flour
300g butternut squash, peeled and diced
2 tsp fresh ginger, grated
50g golden syrup
1 tsp. bicarbonate of soda
11/2 tsp. baking powder
2 tsp. ground cinnamon
1 tsp. Ground ginger
½ tsp. Kosher salt
50g ground almonds
250g dark brown muscovado sugar
2 large eggs, beaten
150ml buttermilk
For the icing:
150g icing sugar
25 ml buttermilk
A generous squeeze lemon juice
Pieces of chopped, crystallized ginger
How to make:
Heat the oven to 170C/ Gas 3, and grease and flour a large bundt tin.
Steam the squash, or boil, for around 15-20 minutes, then mash with the grated fresh ginger and golden syrup.
Sift the flour, bicarbonate of soda, baking powder, spices and salt into a large bowl, then add the ground almonds and mix. In a separate bowl beat the butter and sugar for a few minutes until pale and fluffy.
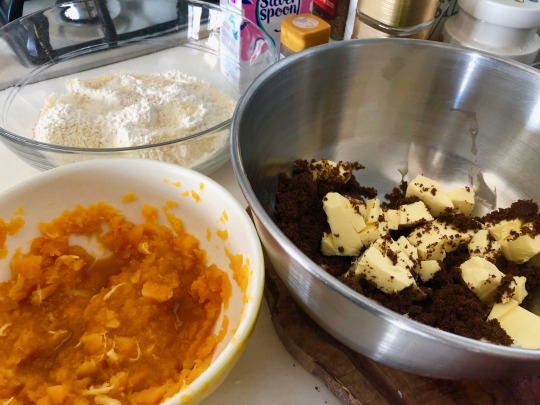
Add half the beaten egg, mix again, then add the second half of the egg and beat again. Fold in the flour and almond mixture, the mashed squash mixture and the buttermilk until you have a smooth-ish batter.
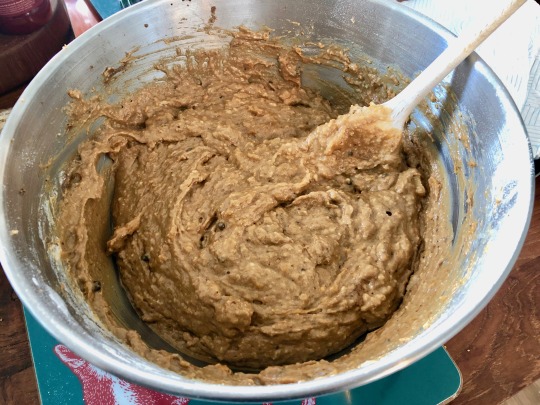
Pour the batter into the bundt tin, level out and then pop into the oven for 40-45 minutes.
Remove from the oven and allow to cool for 15-20 minutes in the tin, then turn out onto a cooling rack and leave until cool.
To make the icing, whisk the icing sugar, buttermilk and lemon juice (adding more lemon juice as necessary) until smooth. Pour over the cooled cake, and keep scooping up the pools of icing to re - drizzle over the top. Decorate with chopped crystallized ginger.
1 note
·
View note
Photo
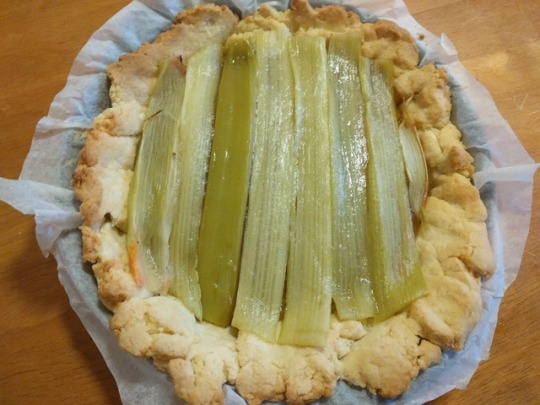
This is a delicious rhubarb pie with layers of frangipane, rhubarb jam and rhubarb slices. The recipe has a lot of steps but is not difficult and half of it can be made in advance.
I had to use gluten free flour for the shortcrust pastry, which made it extremely fragile. That’s why the pie is still inside the tin in the picture.
Rhubarb pie
Recipe by Philippe Conticini, found here
Takes
Shortcrust pastry: 30 min (can be made up to 2 days ahead)
Rhubarb jam: 10 min prep + 30 min cooking (can be made up to 2 days ahead)
Pastry cream: 20 min (can be made up to 24h in advance)
Almond cream: 10 min
Rhubarb slices: 30 min
Assembling and baking: 40 min + 30 min cooling
Ingredients for a medium tart (6 slices)
Shortcrust pastry
150g flour
90g butter, softened
60g powdered sugar
1 egg
25g ground almonds
1/2 vanilla pod
pinch of salt
Rhubarb jam
300g rhubarb
120g sugar
25g water
Pastry cream
60g milk
25g cream
1 egg yolk
10g sugar
5g corn starch
1/2 vanilla pod
Almond cream
55g butter, softened
55g ground almonds
55g powdered sugar
half an egg white (~15g)
almond extract to taste
Rhubarb slices
300g rhubarb
sugar
Recipe
Shortcrust pastry
Toast 80g almond meal (quantity for both the crust and the cream) in the oven at 180°C until golden (5-10 min). Let cool.
Cream the softened butter than add the sugar and the seeds scrapped out of the vanilla pod.
Add 25g ground almonds, then the egg. Finally, add the flour and a pinch of salt. Gather the dough into a ball (it will be very soft) then refrigerate until needed. The dough can be kept for 48h in the fridge.
Rhubarb jam
Peel and chop the rhubarb.
Put the rhubarb, sugar and water in a pan and bring to simmer. Cook for 20-30 min on low heat, stirring regularly. You should obtain a thick and rather dry jam.
Let cool then cover and refrigerate until needed. The jam can be kept for 48h in the fridge.
Pastry cream
In a bowl, mix the sugar, cornstarch, egg and seeds of the vanilla pod.
In a small pan, put the milk, cream and emptied vanilla pod. Bring to simmer then pour on the sugar mixture. Mix quickly.
Put everything back in the saucepan and cook on medium heat until the cream thicken. Stir constantly as the thickening will be quite fast and you want your cream to be homogeneous.
Let cool then cover and refrigerate until needed. Pastry cream can be kept for max 24h in the fridge. Remove the vanilla pod before using.
Rhubarb slices
Preheat the oven to 170°C.
Peel the rhubarb and cut into very thin (2-3 mm) slices lengthwise.
Place the slices on a baking sheet and sprinkle generously with sugar.
Bake for 10-20 min until the rhubarb is tender inside and caramelized outside. Set aside.
Almond cream
Cream the softened butter. Add the almond meal then the sugar. Fold in the egg white and add almond extract to taste.
Gently mix the pastry cream and almond meal to obtain frangipane. Taste this cream and adjust the amount of almond extract.
Assembling & baking
Roll out the cold shortcrust pastry and line your pie tin with it.
Blind bake the empty crust until golden (15-20 min) at 170°C.
Pour the frangipane inside, lower the oven temperature to 150°C and bake the crust and the cream for 10 more min. The cream should be cooked but still a bit wobbly.
Wait at least 30 min for the pie to cool then spread the jam on the frangipane.
Finally, cover the pie with caramelized rhubarb slices. Use a scissor to trim the rhubarb slices so they fit the size of your pie perfectly.
Enjoy immediately! You deserved it after all this hard work.
#recipe#cooking#french recipe#french cooking#dessert#pie#rhubarb#frangipane#source: philippe conticini
1 note
·
View note
Photo
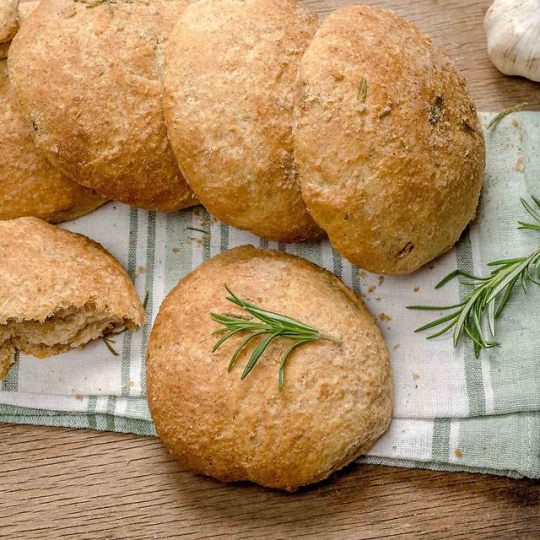
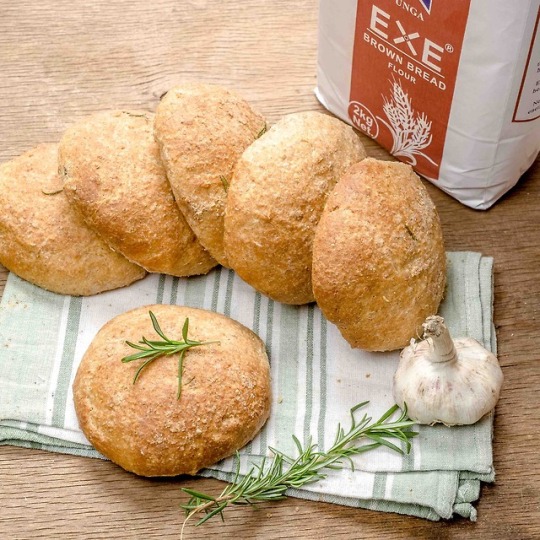
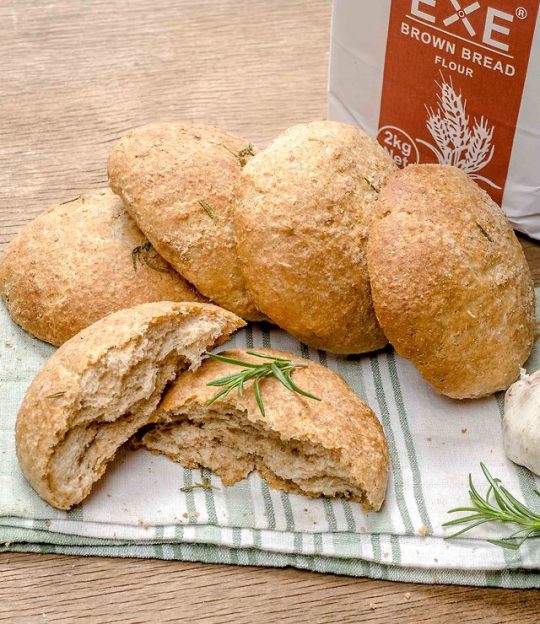
ROSEMARY & GARLIC WHOLE WHEAT BUNS
These buns are great served alongside saucy food, so you do not feel bad about wiping the plate clean or as an accompaniment to soup. They are incredibly soft, fluffy and healthy perfect for soaking up that saucy goodness. They have a subtle hint of garlic and rosemary, you just have to try them to know how good they are.
This buns can be ready in 2 - 4 hrs including 15 - 45 mins of roasting or toasting the garlic, 15 mins of prep 1 hr 30 mins - 2 hrs 45 mins of proofing and 15 - 20 mins of baking. This recipe makes 6 - 9 buns.
Tools & Ingredients
Ingredients
For the buns
3 cups (420g) of Whole Wheat Bread Flour
You can also use a 50/50 mix of All Purpose / Bread flour and White Flour.
3/4 teaspoon of salt
11/2 teaspoon of instant / active dry yeast -> You can use a full sachet.
1 tablespoon (21g) of honey
Honey, makes softer buns that rise better, However if you have none, sugar will work too.
1 - 11/4 cup of milk -> You can also use all water or a mix of water and milk
3 tablespoons (42g) of butter or olive oil (39g)
1 tablespoon of fresh rosemary, finely chopped / 1 teaspoon dried rosemary, minced
For roasting the garlic (optional step)
1 head of garlic -> Around 15 cloves
1 teaspoon of oil -> I love using olive oil
Tools
For the buns
Mixing bowl
Dry Measuring cups / Weighing scale
Measuring spoons
Liquid measuring cups
Small sauce pan (sufuria)
Wooden Spoon (mwiko)
Baking tray / sheet pan
For roasting the garlic (optional step)
Aluminium foil
For toasting the garlic (optional step)
A heavy bottom pan
Procedure
Roasting Garlic in the oven (option A)
Preheat your oven to Conventional (without fan) - 400ºF / 200ºC | Convection (with fan) - 375ºF / 190ºC.
Peel the loose papery skin off the head of garlic.
Trim the top step of the garlic and cut its rear end enough to expose the cloves on the rear end only.
Place on a piece of aluminium foil, the piece of aluminium foil should be big enough to wrap around the garlic easily.
Drizzle the garlic with 1 teaspoon of olive oil then wrap it with aluminium foil.
Place in the preheated oven for 30 - 45 minutes until the cloves are completely soft.
Remove from the oven once completely softened, remove from foil and let them cool slightly.
Toasting Garlic in a dry pan (option B)
Separate the garlic into cloves but don't peel them.
Place a dry heavy bottom pan on medium heat and place your garlic cloves on the pan.
Let the cloves cook, occasionally tossing them so all the sides can get toasted.
The garlic cloves with turn black but don't fret the flesh will say nice and mellow inside.
Once the garlic cloves become soft and mushy (you will have to press them to know since as they cook they sort of puff up), place them aside to slightly cool.
Making the buns
Place a saucepan on medium heat then squeeze the flesh of the roasted garlic or toasted garlic cloves into it alongside the milk and/or water (Use the lesser amount of milk/water first and if you need more you can add the rest later), butter or oil, honey or sugar and rosemary. If you are in a hurry and do not have time to roast/toast your garlic, mince 3 garlic cloves and add them to the milk.
Gently stir the milk, butter, garlic, honey and rosemary as they heat and the butter melts.
Once the mixture is barely warm (the butter does not necessarily have to be completely melted), put aside and add in the yeast. If you are using instant yeast you do not have to add in the yeast, you can skip this step and go straight to mixing the dry ingredients.
Put aside until the mixture is frothy.
In a mixing bowl, add the flour, salt and yeast (if using instant yeast). Mix until everything is well combined.
If using a stand mixer slowly stream the milk mixture into the dry ingredients as you slowly mix on low till everything is combined and you have a sort of shaggy dough. If working by hand, add the wet ingredients to the dry ingredients and mix with your hands or a wooden spoon until you get a shaggy dough.
Dump the shaggy mass onto your work surface and start kneading adding a little bit of milk/water at a time as needed until you get a soft and supple dough that is relatively smooth. This will take around 10 minutes by hand and 6 - 7 minutes on medium speed by a stand mixer.
Oil the dough and place in an airtight bowl at room temp for 1 - 2 hrs until doubled in size. Ensure the bowl is either covered tightly with plastic wrap or an airtight lid so the dough does not form a skin or dry out.
Once doubled in size, gently punch the dough down and divide into 6 portions.
Roll the portions into round balls by rolling the dough on your work surface. Do not push at the dough balls, gently move in a circular motion with your cupped hand until you get a very smooth ball. The traction between the dough and surface helps to get a smooth ball, so do not use any flour or oil on your surface.
Place the dough ball in an oiled and floured sheet pan (you can use baking parchment) to proof for around 30 - 45 minutes until doubled in size.
As the buns proof. Preheat your oven to Conventional (without fan) - 375ºC / 190ºC | Convection (with fan) - 350ºF / 180ºC.
Once proofed, place the buns in the middle rack of the oven and bake for 15 - 20 minutes rotating halfway until nicely browned and ready.
To tell if they are ready, tap the bottom of the biggest bun. If it sounds hollow, they are ready. If you want to be sure, an instant-read thermometer should read 85ºC (190ºF) - 95ºC (200ºF) in the centre of the buns.
You can optionally brush them with butter immediately they are out of the oven for a softer, buttery crust.
Move the buns onto a cooling rack as soon as possible to cool so they do not get soggy bottoms.
Notes
-Whole wheat flour does not develop gluten as well as white flour so you can opt to use only 30 - 60% whole wheat for a taller lighter loaf.
-Due to the aforementioned, ensure you knead the dough enough to develop enough gluten so your buns remain smooth and fluffy.
-Whole wheat flour absorbs more water than white flour but I found adding water a little at a time as you knead ensures you get a soft dough that is not only easier to work with but also one that has a better structure. Kneading in the water/milk helps build the gluten further.
-The timing is just a guideline, it can take longer or shorter for the dough to double in size depending on the temperature of your kitchen.
-If the buns get too dark before they are ready, tent some foil on them till they are done.
-Don't let the buns cool on the baking tray, move them to a cooling rack as soon as possible so they do not get soggy.
2 notes
·
View notes
Text
15 Keto Desserts – Yummy Low-Carb Desserts Recipes To Curb Sweet Cravings
New Post has been published on http://healingawerness.com/getting-healthy/getting-healthy-women/15-keto-desserts-yummy-low-carb-desserts-recipes-to-curb-sweet-cravings/
15 Keto Desserts – Yummy Low-Carb Desserts Recipes To Curb Sweet Cravings
Charushila Biswas August 30, 2018
Desserts rule hearts. But irony rules life. Keto diet – that delicious and non-restrictive diet – is quite uptight when it comes to desserts because sugar and flour are a big no-no for ketosis. That hurts (it really does!) if you have many sweet teeth, not just one. But, hey! I have got a dozen ketolicious desserts that are easy to make and will curb your sugar cravings.
From chewy cookies to delicious summery popsicles – we’ve got it all here. And guess what? We are using substitutes that will make the desserts taste 10 times better than the original recipes! (Take no offense, originals, the rest of the world still loves you.) So, put your chef’s cap on and get the party started!
1. No-Bake Low Carb Strawberry Lemon Cheesecake Treats
Shutterstock
Prep Time: 15 mins; Cooking Time: 15 mins; Serves: 2
Ingredients
2 large strawberries
3 oz cream cheese
¾ cup whipped cream
½ cup stevia
2 tablespoons lemon juice
2 tablespoons lemon zest
How To Prepare
Beat the cream cheese, whipped cream, and stevia together.
Add the lemon zest and lemon juice and fold them in with a spatula.
Slice the strawberries.
Scoop out the beaten cream and add it to a bowl or jar.
Add the strawberry slices.
Add another layer of the beaten cream.
Top it off with a few more strawberry slices and some lemon zest.
2. Keto Vanilla Pound Cake
Shutterstock
Prep Time: 15 mins; Cooking Time: 50 mins; Serves: 5
Ingredients
2 cups almond flour
4 large eggs
2 oz cream cheese
½ cup butter or ghee
1 teaspoon baking powder
1 teaspoon vanilla extract
1 cup sour cream
1 cup erythritol
A handful of blueberries
Mint leaves for garnish
Stevia for garnish
How To Prepare
Preheat the oven to 200°
Grease a cake mold with butter.
Microwave the butter and cream cheese in a bowl for about 10-20 seconds.
Add the vanilla extract, sour cream, and erythritol and mix well. This is a mixture of all the wet ingredients.
In another bowl, combine the almond flour and baking powder.
Crack open the eggs into the bowl containing the wet ingredients.
Mix well and pour it into the bowl containing the almond flour and baking powder.
Use a spatula and fold the mixture to bring everything together.
Pour the batter into the cake mold and bake for 50 minutes.
Let it cool. Remove from the baking tray.
Dust some stevia and top it off with blueberries.
Garnish with mint leaves.
3. Keto Sea Salt Chewy Chocolate Cookies
Shutterstock
Prep Time: 15 mins; Cooking Time: 15 mins; Serves: 3
Ingredients
2 eggs
¾ cup coconut oil
2 cups almond flour
2 tablespoons unsweetened cocoa powder
¾ cup stevia
½ teaspoon baking soda
¼ teaspoon cream of tartar
½ teaspoon salt
1 teaspoon vanilla extract
Sea salt
How To Prepare
Preheat the oven to 200°C.
Line two baking trays with butter paper.
In a bowl, add eggs, vanilla extract, and coconut oil. Use a blender to beat them together.
Add the cream of tartar, salt, baking soda, cocoa powder, and stevia. Mix well.
Add the almond flour and combine everything.
Scoop out a spoon of this dough and place it on the baking tray. Press it down gently. Space out your cookies because they will expand as they bake.
Sprinkle some sea salt on top and bake for about 15 minutes.
Take out the baking tray and let it cool completely.
Peel the butter paper off carefully and enjoy delicious, chewy, and soft chocolate cookies.
4. Keto Pancakes
Shutterstock
Prep Time: 15 mins; Cooking Time: 10 mins; Serves: 2
Ingredients
4 large eggs
2 oz butter
½ cup fresh mixed berries
1 cup heavy whipped cream
7 oz cottage cheese
1 tablespoon psyllium husk powder
How To Prepare
Mix the psyllium husk, cottage cheese, and eggs in a medium-sized bowl.
Let it sit for 15 minutes.
Pour a little bit of butter into a non-stick pan.
Pour a ladle of the batter and fry until bubbles start appearing on the edges of the pancake.
Flip the pancake and cook for 2 more minutes.
Stack the pancakes on a plate.
Add a dollop or two of whipped cream and top it with berries.
5. Keto Chocolate Mug Cake
Shutterstock
Prep Time: 5 mins; Cooking Time: 1 min; Serves: 1
Ingredients
1 large egg
2 tablespoons almond flour
2 tablespoons unsweetened cocoa powder
2 tablespoons salted butter
2 tablespoons coconut flour
¼ teaspoon vanilla extract
½ teaspoon baking powder
1 ½ tablespoons erythritol
2 raspberries
How To Prepare
Microwave the butter for 10-20 seconds in a mug.
Add the cocoa powder, almond flour, vanilla extract, and baking soda. Mix well.
Add the egg and combine everything.
Place the mug in the microwave.
Microwave for 50-60 seconds.
Take the mug out and let it cool for 5-10 minutes.
Top it off with the raspberries.
6. Keto Cookie Dough
Shutterstock
Prep Time: 5 mins; Cooking Time: 1 hour; Serves: 8
Ingredients
8 tablespoons softened butter
⅓ cup Swerve
2 cups almond flour
½ teaspoon Kosher salt
⅔ cups dark chocolate chips
½ teaspoon vanilla extract
How To Prepare
Beat the butter in a bowl until it is fluffy.
Add the sugar (Swerve), salt, and vanilla. Beat and combine everything well.
Mix the almond flour gradually into the butter.
Fold in the chocolate chips.
Cover the bowl with cling film and refrigerate for 15-20 minutes.
Use a small ice cream scoop to scoop out the dough and make small balls.
Refrigerate for at least an hour before eating.
You can store them in an airtight jar in the refrigerator for up to a month.
7. Crunchy Keto Bulletproof Coffee Mousse
Shutterstock
Prep Time: 5 mins; Cooking Time: 60 mins; Serves: 2
Ingredients
2 cups heavy cream
½ teaspoon instant coffee
15-20 pecan nuts
1 tablespoon butter
3 tablespoons edible grade coconut oil
¼ teaspoon vanilla extract
How To Prepare
Whisk the heavy cream until it starts forming soft peaks.
Blend the coconut oil, butter, and instant coffee.
Add this mixture to the heavy cream. Cover the bowl with cling film and refrigerate it for 45-60 minutes.
Take it out of the refrigerator, top it with pecan nuts, and enjoy the delicious and crunchy keto bulletproof coffee mousse.
8. Keto Carrot Cupcake With Cream Cheese Frosting
Shutterstock
Prep Time: 10 mins; Cooking Time: 2 mins; Serves: 2
Ingredients
1 large egg
½ carrot (finely grated)
2 tablespoons almond flour
½ teaspoon baking powder
1 tablespoon psyllium husk
1 tablespoon erythritol
½ teaspoon vanilla extract
1 tablespoon softened butter
A pinch of salt
A pinch of cinnamon
A pinch of dried ginger
A pinch of powdered clove
For Frosting:
1 tablespoon whipped cream
½ tablespoon erythritol
¼ cup cream cheese (whipped)
½ teaspoon vanilla extract
How To Prepare
Mix all the ingredients in a bowl thoroughly.
Scoop the batter into two separate cupcake molds.
Microwave them for 90 seconds.
Prepare the frosting by whisking all the frosting ingredients together in a bowl until it forms a smooth and frothy texture.
Put the frosting in a piping bag.
Decorate the cupcakes with a swirl of frosting.
Top off with some grated carrot.
9. Keto Avocado Brownies
Shutterstock
Prep Time: 5 mins; Cooking Time: 30 mins; Serves: 6
Ingredients
2 ripe avocados
4 large eggs
⅔ cup coconut sugar
2 teaspoons baking soda
½ cup butter or ghee
⅔ cup unsweetened cocoa powder
1 teaspoon Kosher salt
4 tablespoons unsweetened peanut butter
2 teaspoons vanilla extract
Almonds and mint leaves for garnish
How To Prepare
Preheat the oven to 200°
Line a baking tray with butter paper.
Blend all the ingredients into a smooth batter.
Use a spatula to transfer the batter into the baking tray and even out its surface.
Bake for 20-25 minutes.
Take the tray out and let it cool for 15-20 minutes.
Cut it into brownie squares and dust some unsweetened cocoa powder on top.
Garnish with almonds and a few mint leaves.
10. Low-Carb Chocolate Coconut Bars
Shutterstock
Prep Time: 5 mins; Cooking Time: 4 hours; Serves: 8
Ingredients
1 ½ cups shredded coconut (unsweetened)
1 ¼ cups chocolate chips (unsweetened)
1 cup chopped almonds
1 cup peanut butter
1 tablespoon Swerve
½ cup edible grade coconut oil
1 cup roasted and unsalted peanuts
1 teaspoon vanilla extract
How To Prepare
Mix the peanut butter, chocolate chips, coconut oil, and Swerve and microwave for 30-60 seconds.
Stir and microwave again until everything has melted.
Add the remaining ingredients and mix well.
Pour the batter into a pan and top it with some shredded coconut.
Refrigerate for about 4 hours to harden the chocolate.
Use a sharp knife to cut the bar into rectangles.
Enjoy it when you crave something sweet, crunchy, and yummy!
11. Pistachio Toffee Cups
Shutterstock
Prep Time: 10 mins; Cooking Time: 10 mins; Serves: 5
Ingredients
5 oz unsweetened chocolate
½ cup raw pistachios
3 tablespoons unsalted butter
3 tablespoons Swerve
A pinch of salt
½ teaspoon vanilla extract
How To Prepare
Microwave the chocolate for 30 seconds. Stir it every 10 seconds to ensure the chocolate does not scorch.
Take the bowl out and use a spoon to pour a dollop of chocolate into each candy mold.
Refrigerate it to help the chocolate solidify.
In another bowl, add half of the Swerve and butter. Microwave it until the butter has melted. Mix well.
Add the rest of the Swerve, vanilla extract, and half of the pistachios.
Microwave the mixture until the sugar starts bubbling.
Take it out and add a spoon of the sugar and pistachio mix into the chocolate cups.
Microwave the rest of the melted chocolate and add another dollop of chocolate on top of the sugar and pistachio mix.
Top them off with chopped pistachios.
Refrigerate for 10 minutes.
12. Keto Vanilla Ice Cream
Shutterstock
Prep Time: 1 hour; Cooking Time: 4-5 hours; Serves: 4
Ingredients
3 egg yolks
2 tablespoons vanilla extract
¼ teaspoon sea salt
4 cups heavy whipped cream
4 tablespoons beef gelatin
2 whole vanilla beans
½ cup Swerve
How To Prepare
Mix all the ingredients (except the vanilla beans) in a pan.
Heat the mixture. Keep stirring and make sure it doesn’t start to boil.
Allow it to cool down before transferring it to a container.
Seal it and refrigerate for 3-4 hours.
Scoop out the ice cream into a bowl. Garnish with the vanilla beans and serve.
13. Almond Joy Chia Seed Pudding
Shutterstock
Prep Time: 10 mins; Cooking Time: 1 hour; Serves: 4
Ingredients
2 cups almond milk
⅓ cup chia seeds
¼ cup unsweetened cocoa powder
¼ cup dark chocolate chips
½ cup unsweetened coconut flakes
½ cup Swerve
1 teaspoon vanilla extract
2 tablespoons crushed almonds
How To Prepare
Mix all the ingredients.
Transfer the mixture to small jars or glasses.
Refrigerate them for 4 hours.
Garnish with some almonds and chocolate chips.
14. Keto Peanut Butter Cookies
Shutterstock
Prep Time: 10 mins; Cooking Time: 15 mins; Serves: 15
Ingredients
1 large egg
1 cup peanut butter
½ cup Swerve
How To Prepare
Preheat the oven to 200°
Mix all the ingredients in a bowl.
Scooping out a spoonful of the dough at a time, roll them into balls.
Place them on a baking tray lined with butter paper.
Use the back of a fork to press down the cookie dough.
Bake for 15 minutes.
Let them cool for about 10 minutes.
15. Avocado Popsicle With Lime And Coconut
Shutterstock
Prep Time: 5 mins; Cooking Time: 3 mins; Serves: 6
Ingredients
2 avocados
½ cup Swerve
1 ⅓ cups coconut milk
2 tablespoons lime juice
How To Prepare
Scoop out the avocado and toss it in a blender.
Add the coconut milk, Swerve, and lime juice.
Blend well.
Pour the mixture into ice cream molds.
Tap the molds to get rid of air bubbles.
Freeze the molds overnight.
Enjoy rich and creamy keto popsicles the next afternoon!
There you have it – the best and most delicious keto-friendly desserts. Make them at home, and you will never think of buying any dessert, EVER again. Which dessert are you dying to try out? Let us know in the comments section below!
Feedback
×
How can we improve it?
This article contains incorrect information.
This article doesn’t have the information I’m looking for.
×
How helpful was it?
This article changed my life!
This article was informative.
The following two tabs change content below.
Latest posts by Charushila Biswas (see all)
Charushila Biswas
Charushila Biswas is a Senior Content Writer and an ISSA Certified Fitness Nutritionist. She is an alumni of VIT University, Vellore and has worked on transgenic wheat as a part of her Masters dissertation from NRCPB (IARI), New Delhi. After completing her Masters, she developed a passion for nutrition and fitness, which are closely related to human psychology. And that prompted her to author a review article in 2015. She has written over 200 articles on Fitness and Nutrition. In her leisure time, Charushila loves to cook and enjoys mobile photography.
RELATED ARTICLES
Source: https://www.stylecraze.com/articles/low-carb-keto-desserts-recipes/
0 notes
Text
White Chocolate Tart

Shortbread Crust
Ingredients
1 ½ cups flour
1/3 cup powdered sugar
¼ teaspoon salt
½ cup cold butter, cut into small cubes
1 large egg yolk
1 tbs whipping cream, more if it doesn’t come together
Directions
In a food process, mix flour, sugar, and salt for a few seconds until combined.
Add butter and pulse until mixture becomes crumbly and resembles oatmeal, about 15 pulses.
Add egg and mixed with cream and keep pulsing until the dough is no longer dry and starts to clump together, about 10-15 seconds. Do not process to the point that a large ball of dough is formed; rather the dough should be quite crumbly with large clumps. (Add additional drops of cream if dough seems too dry.) Another way to check if it’s done is to take a piece of dough and press it between your thumbs – the dough should stick without feeling dry or crumbly.
On a lightly floured surface and form the dough into thick rectangle. It should come together easily without being sticky. Flatten rectangle slightly with your hands. Wrap with plastic wrap and refrigerate for at least 1 hour. If you don’t want to use the dough right away, you can refrigerate it for up to 3 days, or freeze it for up to a month and then thaw overnight in the fridge.
Take dough out of the fridge and let it sit on the counter for a few minutes to soften slightly for easy rolling. On a lightly floured surface, roll the dough to a rectangle that is larger than the pan, then place gently into a 14 x 4 x 1.5″ tart pan with a removable bottom (roll the dough loosely around the rolling pin, then unroll it into the pan).
Foll the extra dough down and pinch to form the crust. Press into the pan.
Cover pan with plastic wrap and place in the freezer until firm, about 30 minutes. Frozen dough is less prone to shrinking while baking.
Preheat oven to 375F.
Press parchment paper or aluminum foil tightly against the crust. Fill with pie weights/dried beans/uncooked rice, making sure they’re fully distributed over the entire surface but not too thick as it will slow baking time.
Bake crust for 20 mins. Remove paper or foil and weights. Bake for 20 mins longer. You may need to add foil to the crust while waiting for the bottom of the crust to cook. If making in advance, cover with plastic wrap and freeze. Thaw before adding the filling.
White Chocolate Filling
Ingredients
16 oz white chocolate, cut into coarse pieces.
1/3 cup butter, cut into pieces (room temperate doesn’t need to be cut much, if cold, cut into small pieces)
1/2 cup whipping cream
1/2 tsp vanilla
Directions
In a large fry pan (i used my non stick one) over low heat (2), melt the chocolate and the butter. Stir gently to help it melt and combine. It will be pasty.
Remove from heat and add the whipping cream. Gently stir together with a spatula until it becomes smooth. Patience.
Immediately pour into the crust.
Put in fridge for about 20 mins to set a bit.
Add cranberries and chopped pistachios before the crust gets too hard to push the toppings in.
Put in fridge for 4-5 hours. Remove from fridge 30 mins before serving.
Candied Cranberries
Ingredients:
2 cups sugar
1 cups water
1/2 tsp vanilla
1 tsp triple sec (orange extract will do too)
6 oz bag of fresh cranberries
Directions:
In a saucepan, combine 1 1/4 cups sugar, water, vanilla and triple sec. Heat over medium until the sugar completely dissolves, but do not boil.
Pour in cranberries and stir.
Cover the cranberries in the pot with a plate to keep them submerged. Then cover the pan and place it in the fridge overnight.
Next day, place 3/4 cup sugar in a large bowl. Strain the berries and place them in the sugar. Shake until they are covered.
Careful, dump them onto a cookie sheet to dry for an hour.
Put in an air tight bag and put in the fridge for up to a week.


0 notes
Link
Tangzhong Milk Bread.
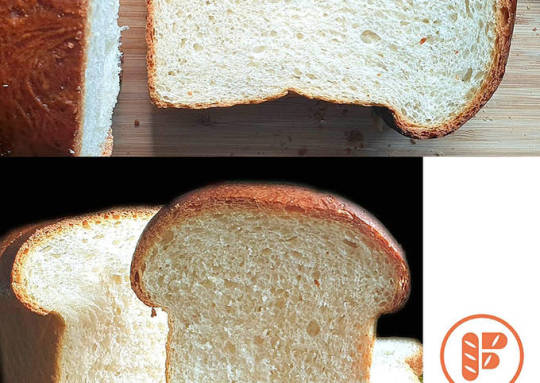
Hey everyone, it's Jim, welcome to my recipe site. Today, we're going to prepare a distinctive dish, tangzhong milk bread. It is one of my favorites. For mine, I will make it a little bit tasty. This will be really delicious.
Tangzhong Milk Bread is one of the most favored of recent trending meals in the world. It's appreciated by millions daily. It's simple, it's fast, it tastes yummy. They are nice and they look fantastic. Tangzhong Milk Bread is something that I've loved my entire life.
To get started with this particular recipe, we must prepare a few components. You can have tangzhong milk bread using 12 ingredients and 17 steps. Here is how you cook it.
The ingredients needed to make Tangzhong Milk Bread:
{Prepare of Tangzhong:.
{Get 35 g of Bread Flour,.
{Prepare 175 g of Water,.
{Prepare of Dough:.
{Take 5 g of Active Instant Dry Yeast,.
{Get 140 g of Whole Milk Lukewarm,.
{Make ready 340 g of Bread Flour,.
{Get 30 g of Demerara Sugar,.
{Get 3 g of Sea Salt,.
{Take 40 g of Eggs,.
{Get of Room Temperature Softened Unsalted Butter, 40g + More For Greasing.
{Get of Egg Wash, 1 Egg Yolk + 1 TBSP Whole Milk.
Steps to make Tangzhong Milk Bread:
Prepare the tangzhong. In a skillet over medium-low heat, add flour and water. Stir to combine well. *Make sure no large lumps.*.
Continue cooking until it thickens. The roux should stick to your spatula without falling. Transfer into a bowl. Cover with cling film and chill in the fridge overnight..
Prepare the dough. Take the roux out of the fridge and place it on a counter at room temperature at least 1 hr prior to making the dough. In a bowl, combine milk and yeast until the yeast has dissolved. *The milk has to be lukewarm.*.
Set aside. In a large bowl, combine flour, sugar and salt. Mix to combine well. Gradually pour in the milk mixture while mixing with a spatula. Fold to combine well. Add in egg. Fold to combine well..
Once it becomes a dough, knead the dough inside the bowl until all the nooks and crannies of flour are kneaded into the dough, about 5 mins. Add in the tangzhong. Knead for about 3 mins until the tangzhong is fully incorporated..
Add in the butter. Continue kneading for another 3 mins. Transfer onto a lightly floured surface and knead for 5 to 8 mins. *Do take note that the tangzhong and butter has to be at room temperature.*.
The dough should be tacky, but not sticky, and it should pass the "window-pane" test. If the dough is too dry, add in water, 1 TBSP at a time. If the dough is too sticky, add in flour, 1 TBSP at a time. Lightly grease the bowl with some butter. Transfer the dough back to the greased bowl. Cover with cling film and let rise for 30 mins..
It should slightly risen. Punch down the dough and fold the top, sides and bottom to the center. Flip, cover and let rise for 1 hr. This process is sorta to ensure that the yeast is activated..
The dough should be doubled in size. *You can do a test by poking a floured finger into the dough. If it doesn't spring back, the yeast is activated properly and the dough is ready.* Transfer the dough onto a lightly floured surface. Divide the dough into 3 equal pieces..
Form each piece into balls. Cover with cling film and let rest for 15 mins. This is called the bench rest which allows the gluten to relax. Grease bread pan with butter..
Roll a dough ball into an oblong disc. Fold the top 2/3 way to the bottom. Gently press to seal the sim. Fold the bottom 2/3 way to the top. Gently press to seal the sim..
Rotate 90 degrees. Roll with the rolling pin. Fold the top 2/3 way to the bottom. Gently press to seal the sim..
Fold down to meet the bottom. Gently pinch the sim. Roll the dough simmed side down to smoothen..
Transfer into the greased bread pan. Repeat the process for the remaining dough balls. You will have 3 dough balls, side by side in your loaf pan..
Cover with cling film and let rise for 45 mins. Preheat oven to 175 degree celsius or 350 fahrenheit. The dough balls should rise about 2 inches above the top of the loaf pan. Whisk egg wash until well combined..
Brush the egg wash onto the dough. Wack into the oven and bake for 45 mins or until the crust is golden brown. Remove from the oven. Immediately unmold onto a wire cooling rack..
Melt some butter in skillet over a stovetop. Immediately, brush the melted butter onto the top crust to give that extra shine. Set aside to cool down completely before slicing. Use this sandwich bread for your sandwich adventures, or simply make a toast. I just simply spread my nyonya kaya..
So that is going to wrap this up for this special food tangzhong milk bread recipe. Thank you very much for reading. I am confident that you can make this at home. There is gonna be interesting food at home recipes coming up. Remember to save this page on your browser, and share it to your family, friends and colleague. Thanks again for reading. Go on get cooking!
0 notes